this is a page for
Category: Entrees
I first made shashuka last year at New Year’s to provide a nice and cozy brunch for a cold and, well, let’s be honest, hungover day. I made it Italian-style, with a bunch of ads-ins, and it was delicious. The only caveat was that I realized, after adding some goat cheese, I forgot to mix in the spice! So the goat cheese got all mixed in too. Don’t get me wrong, it was delicious, but the food photography wasn’t blog-worthy.
Now I decided to try again, which a more standard take on the shashuka. As I was writing pita bread on the grocery list, I thought hey, why not make my own??
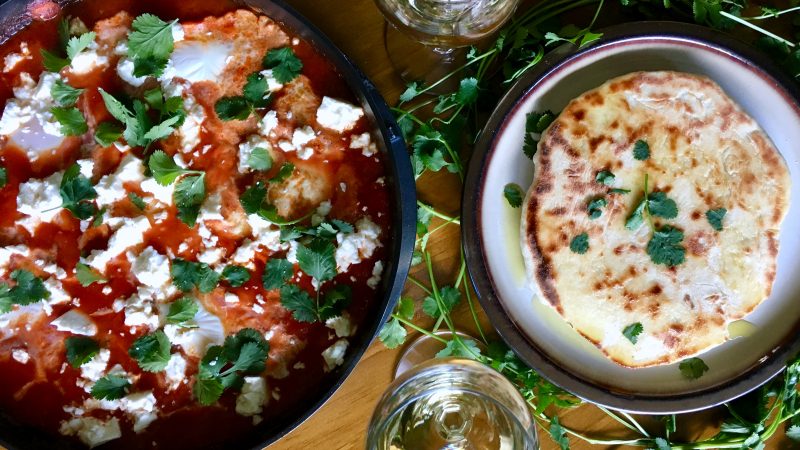
Whip up the aromatic and comforting shashuka with homemade pita for a delicious start to your weekend. Middle Eastern and North African flavors give it a warm quality, but it would be a good choice for any season!
~~~~~~~~~~
Step One.
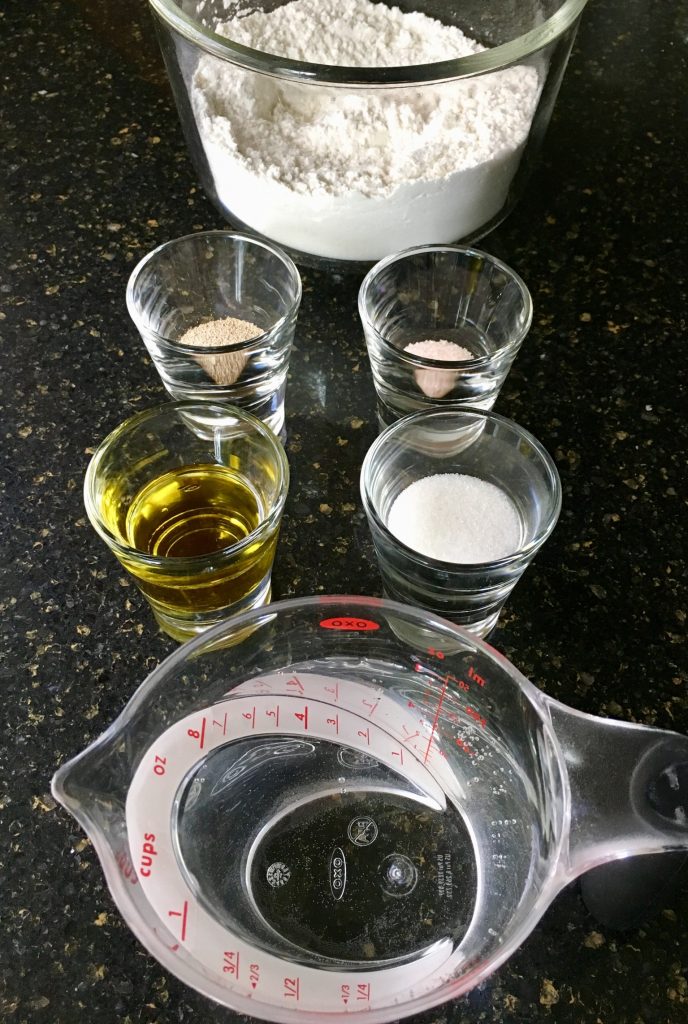
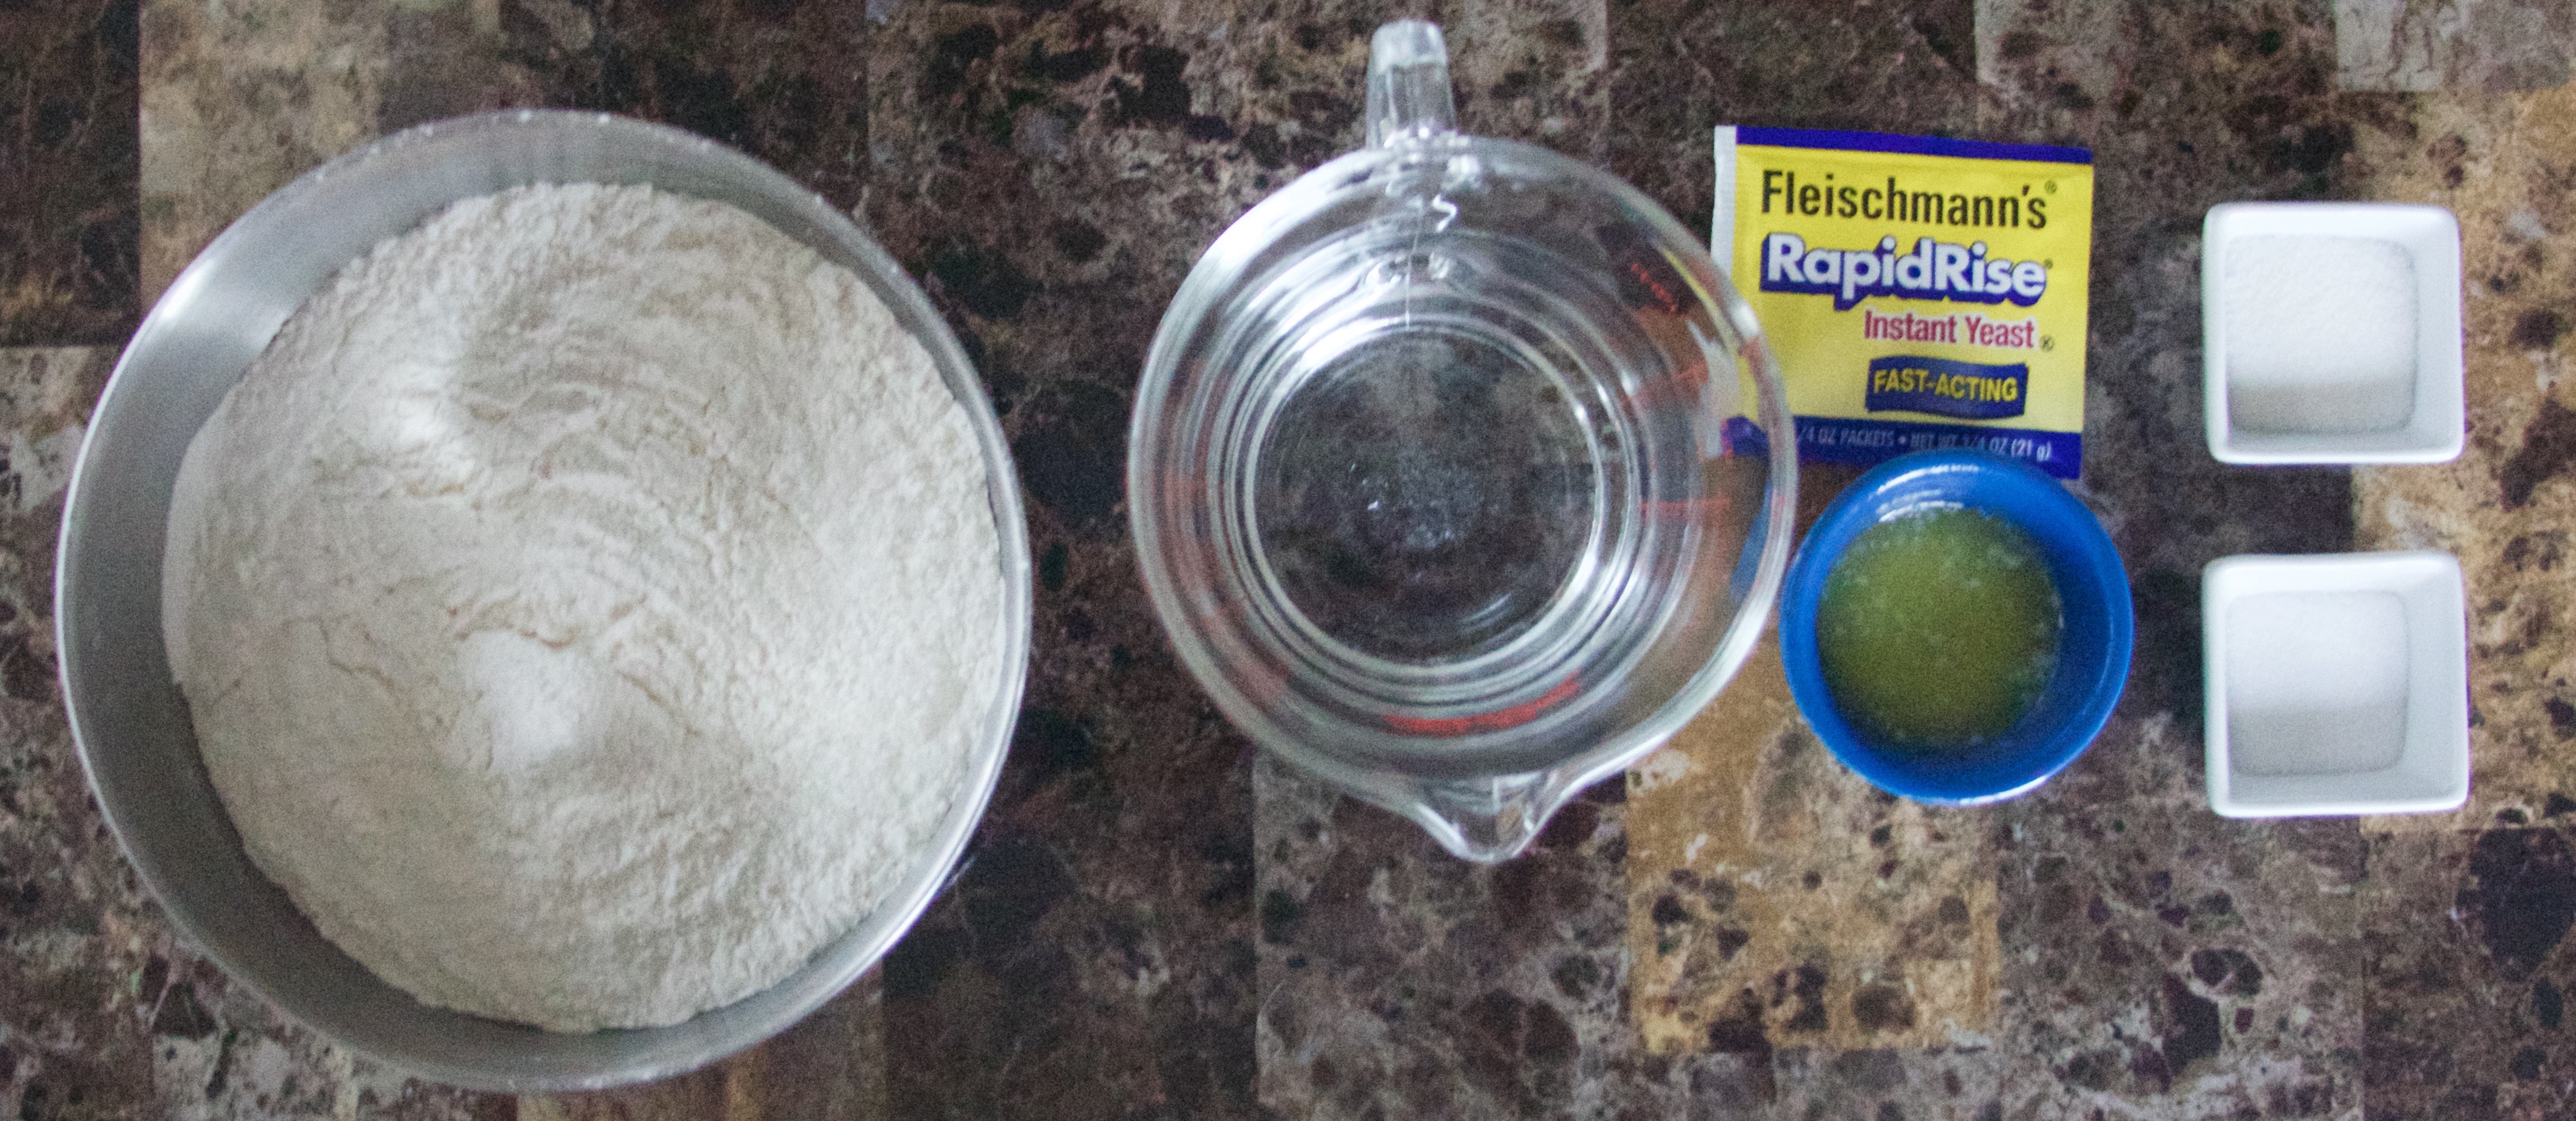
Prep the pita bread. It will need to rise for an hour, so get it started first! Measure out your ingredients.
Step Two.
Heat the water to about 110F. It should be warm but not hot. Bloom the yeast for 5 minutes
Step Three.
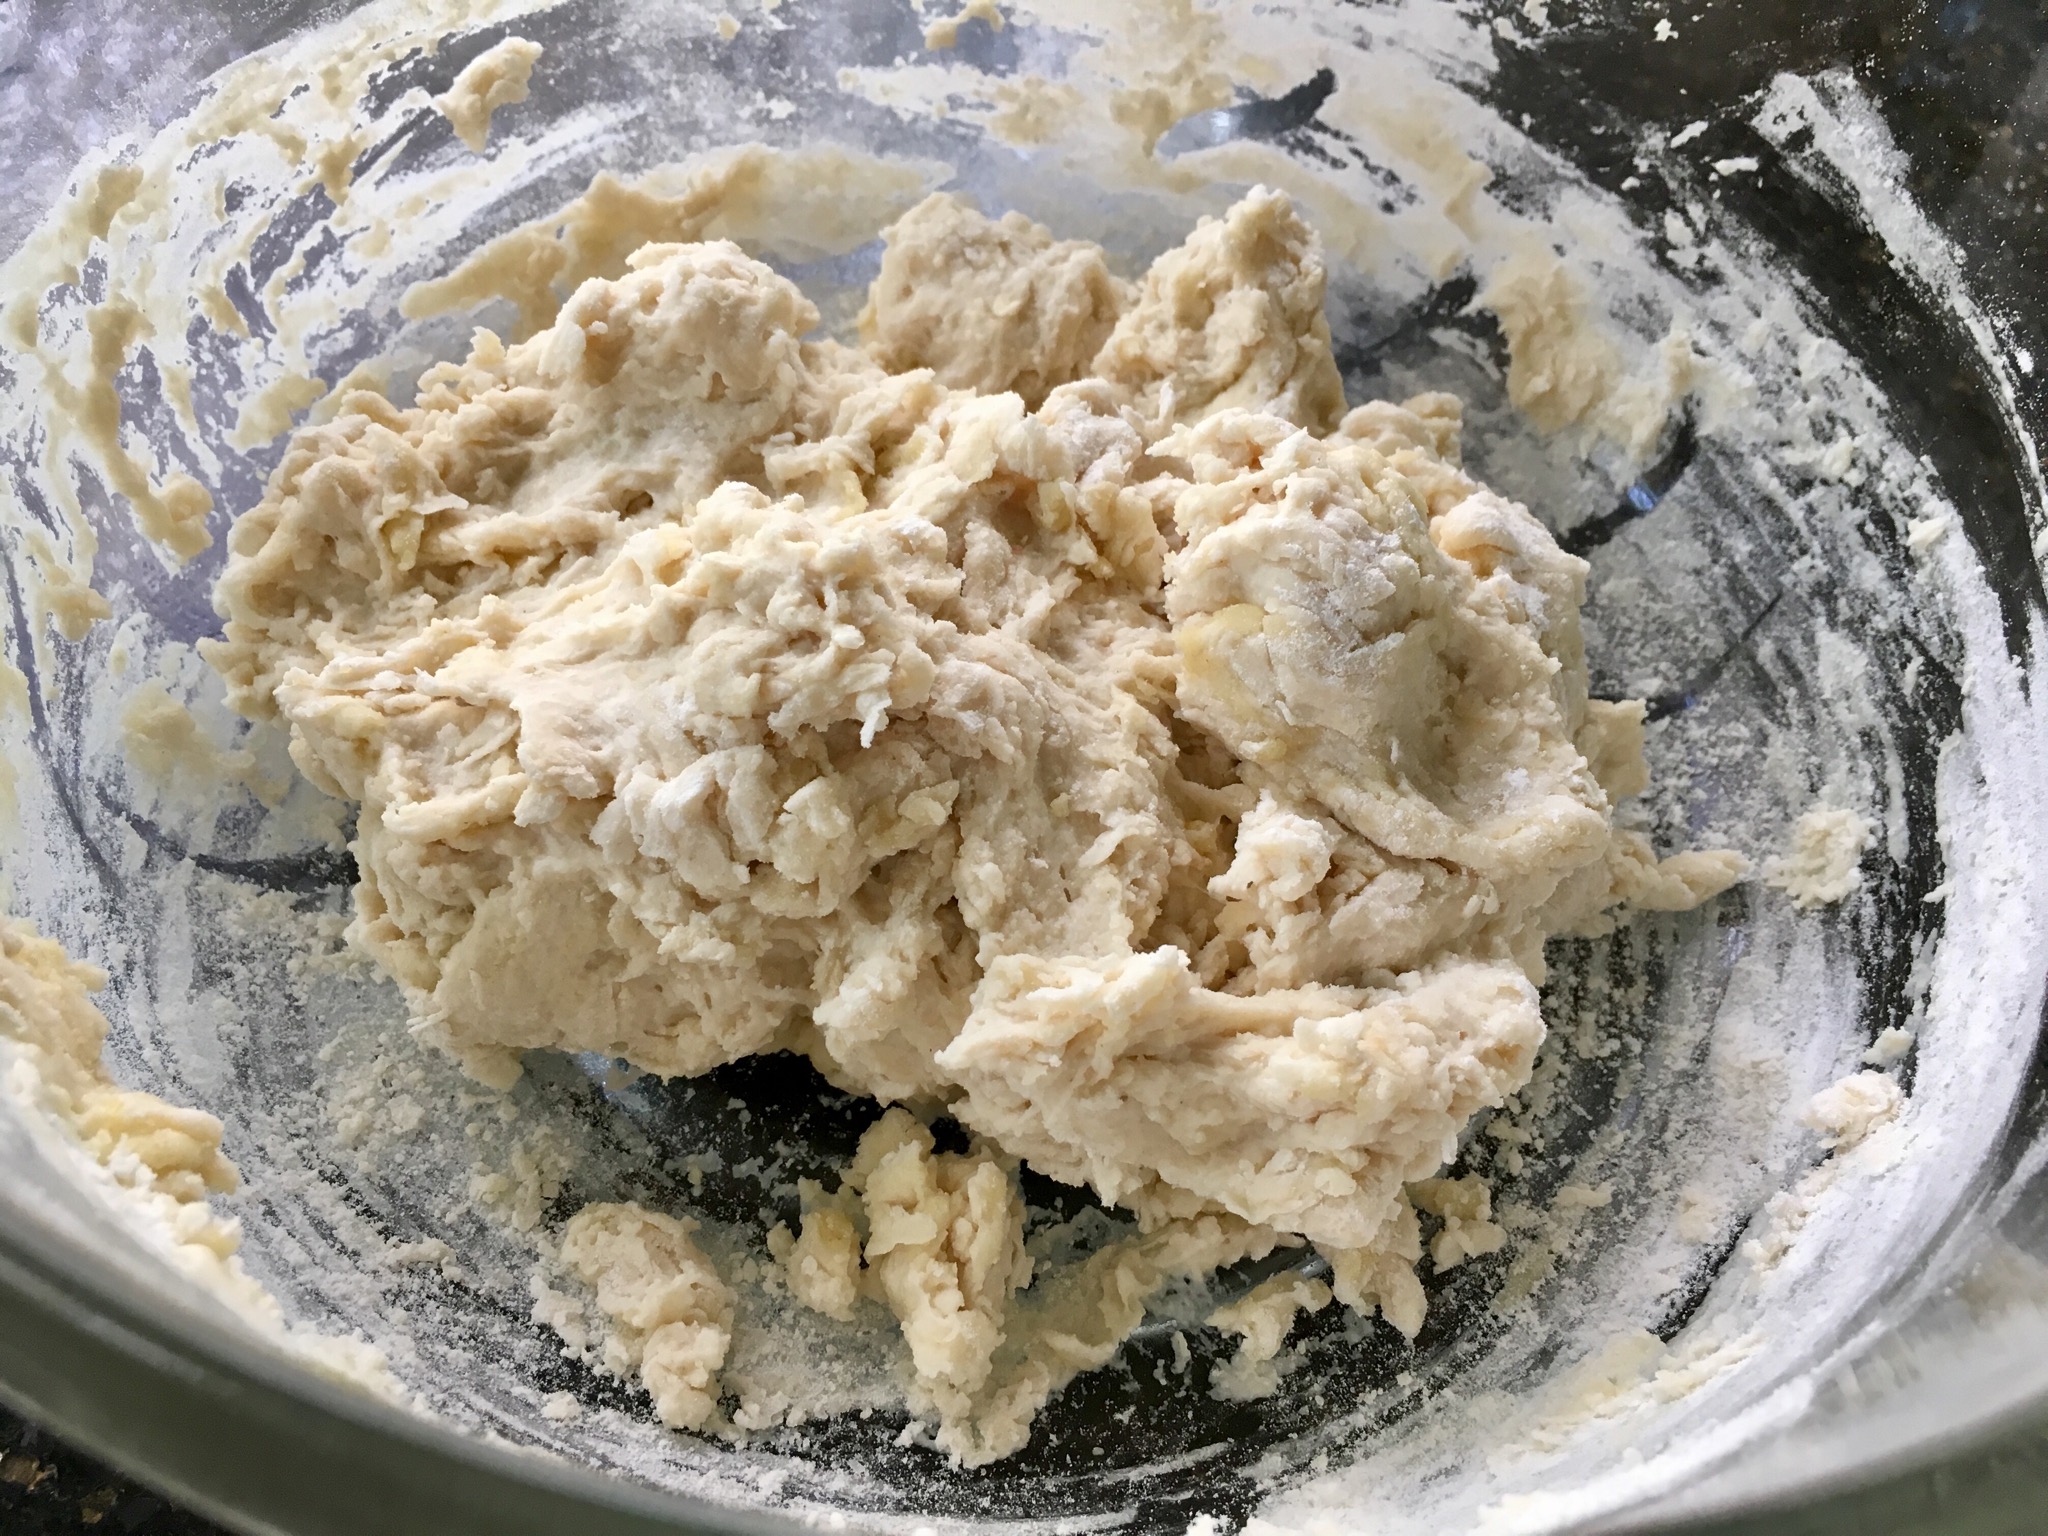
Mix together the dry ingredients; pour in the yeast mixture and olive oil. Mix together with a fork until a dough forms.
Step Four.
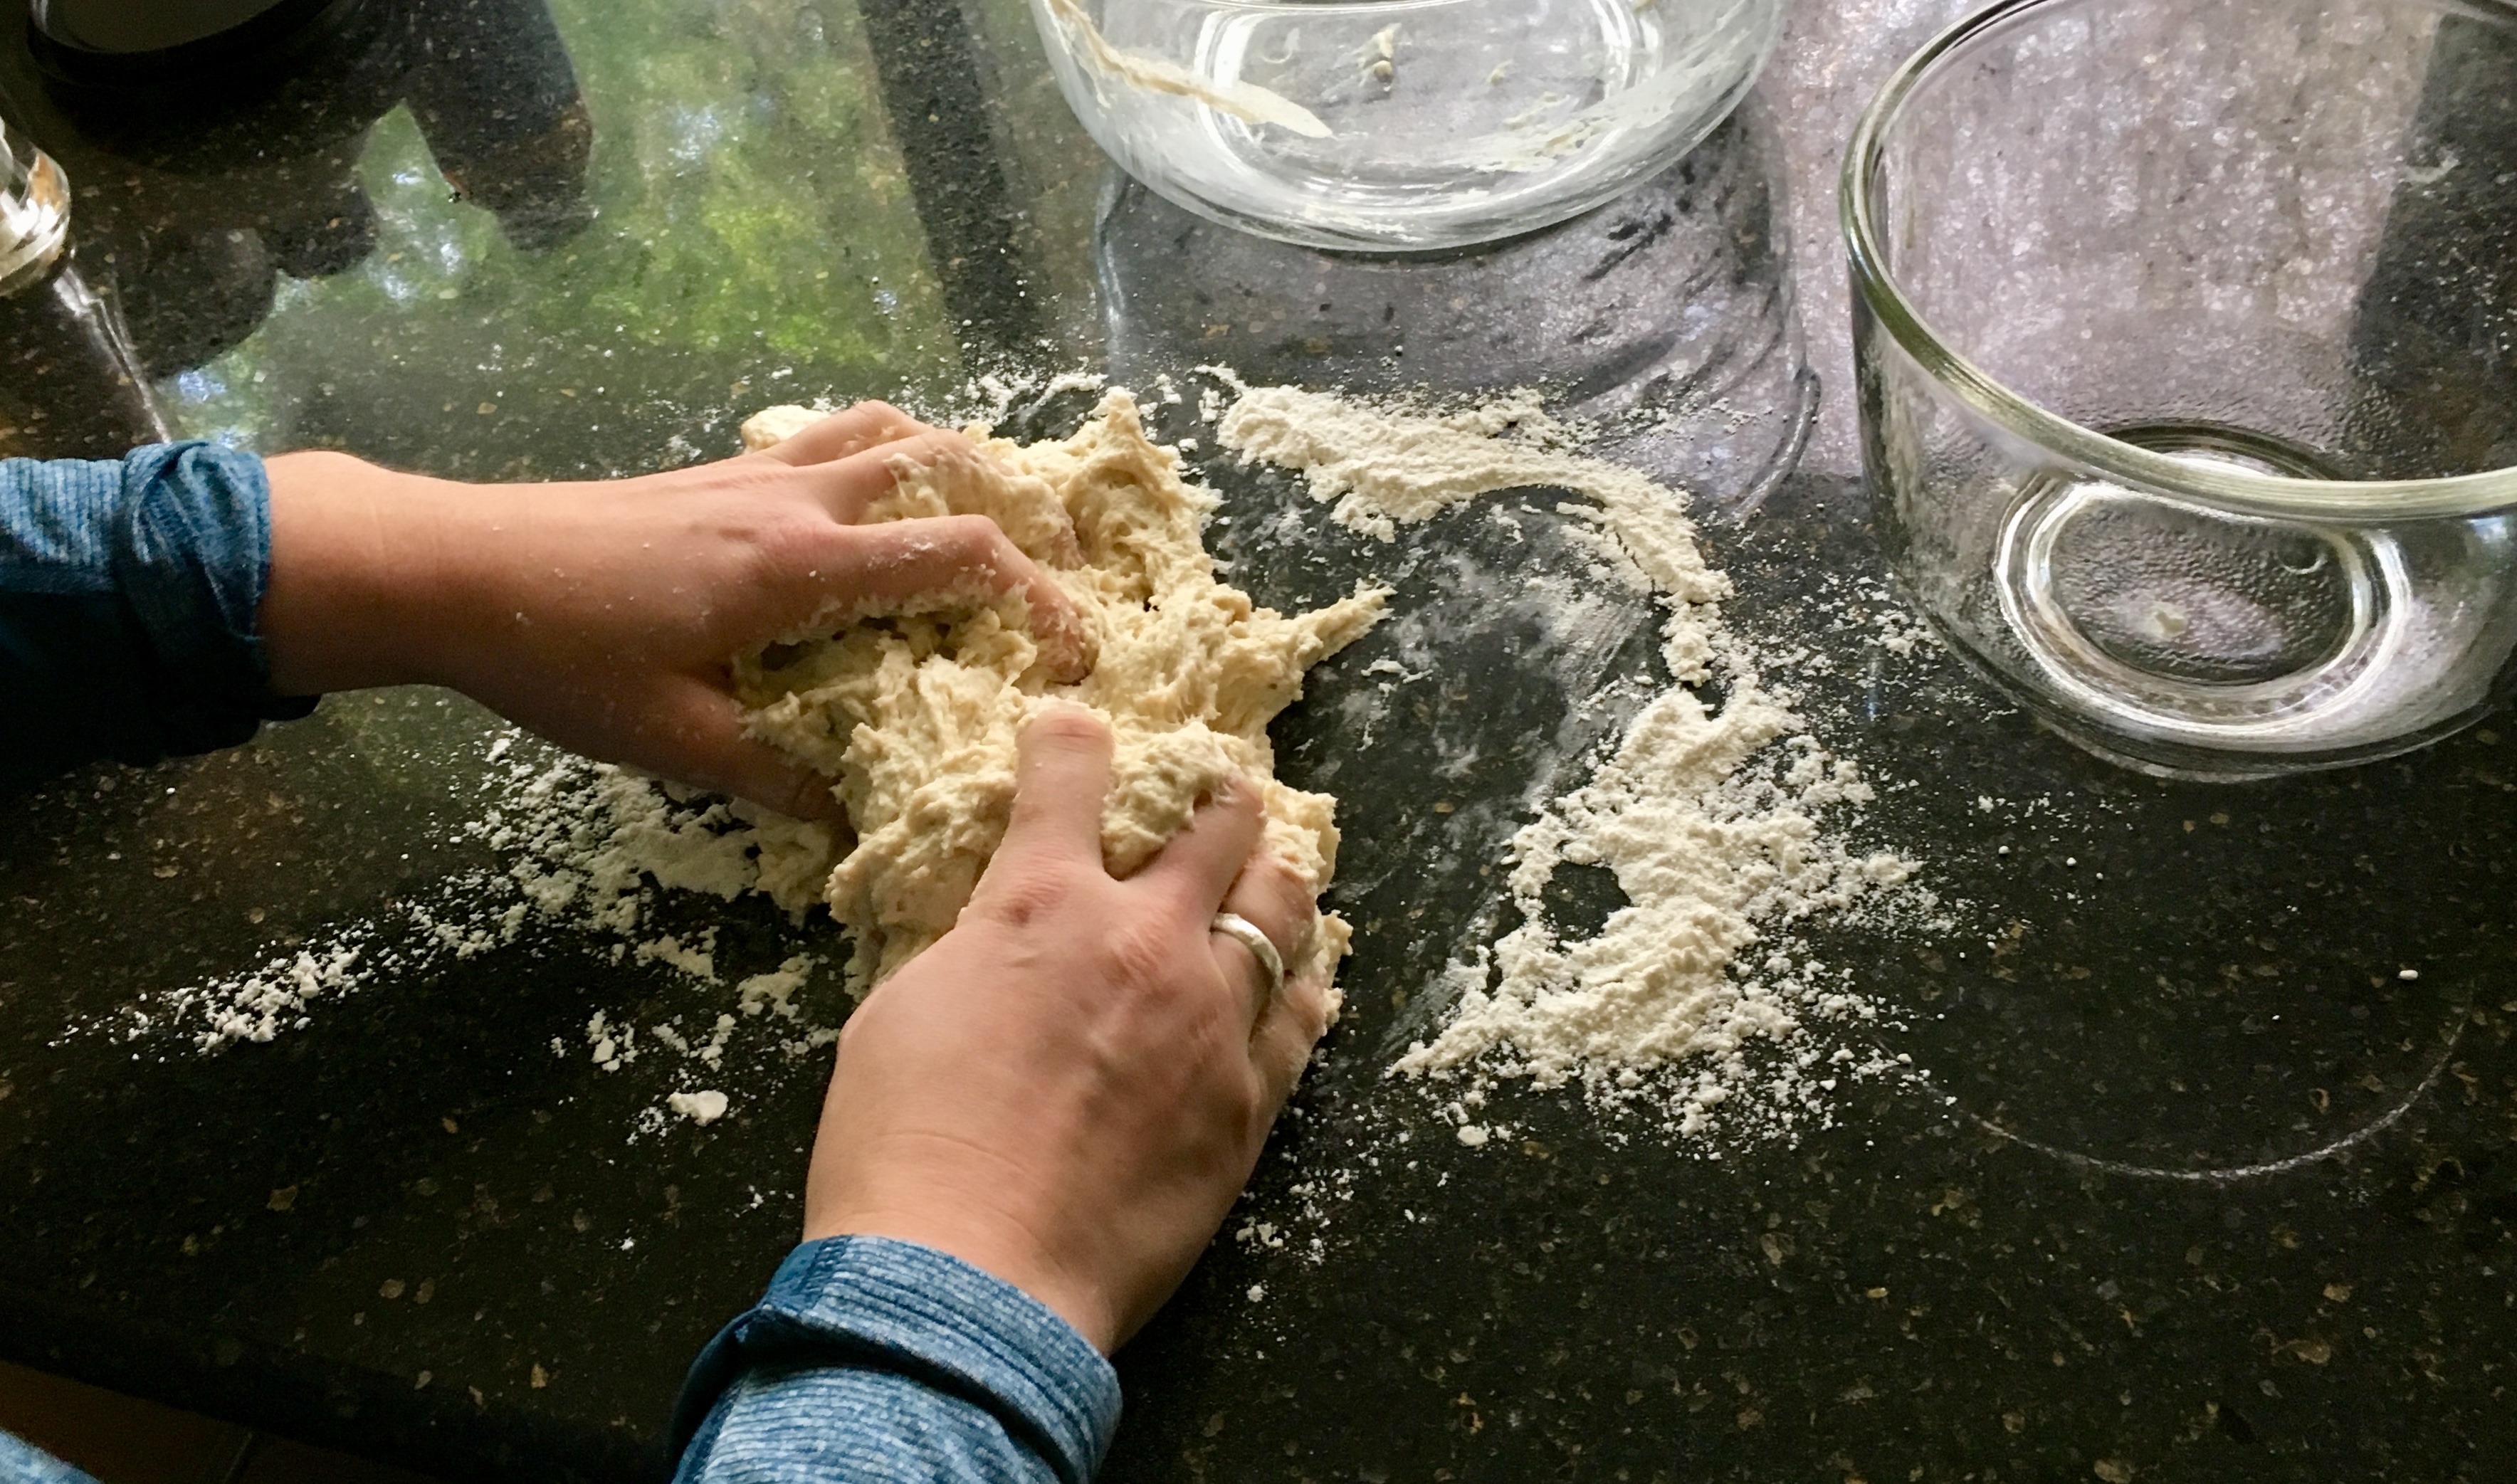
Turn the dough out into a floured surface. Knead the dough until it is stringy- this means that the gluten bonds are forming! This process should take about six minutes. Flour the bowl and put the dough back in it. Let the dough rise in a warm place for the total of an hour. Set a timer for 40 minutes. This is when you will start the shashuka. Measure out and chop your ingredients, then go make yourself busy for a bit.
Step Five.
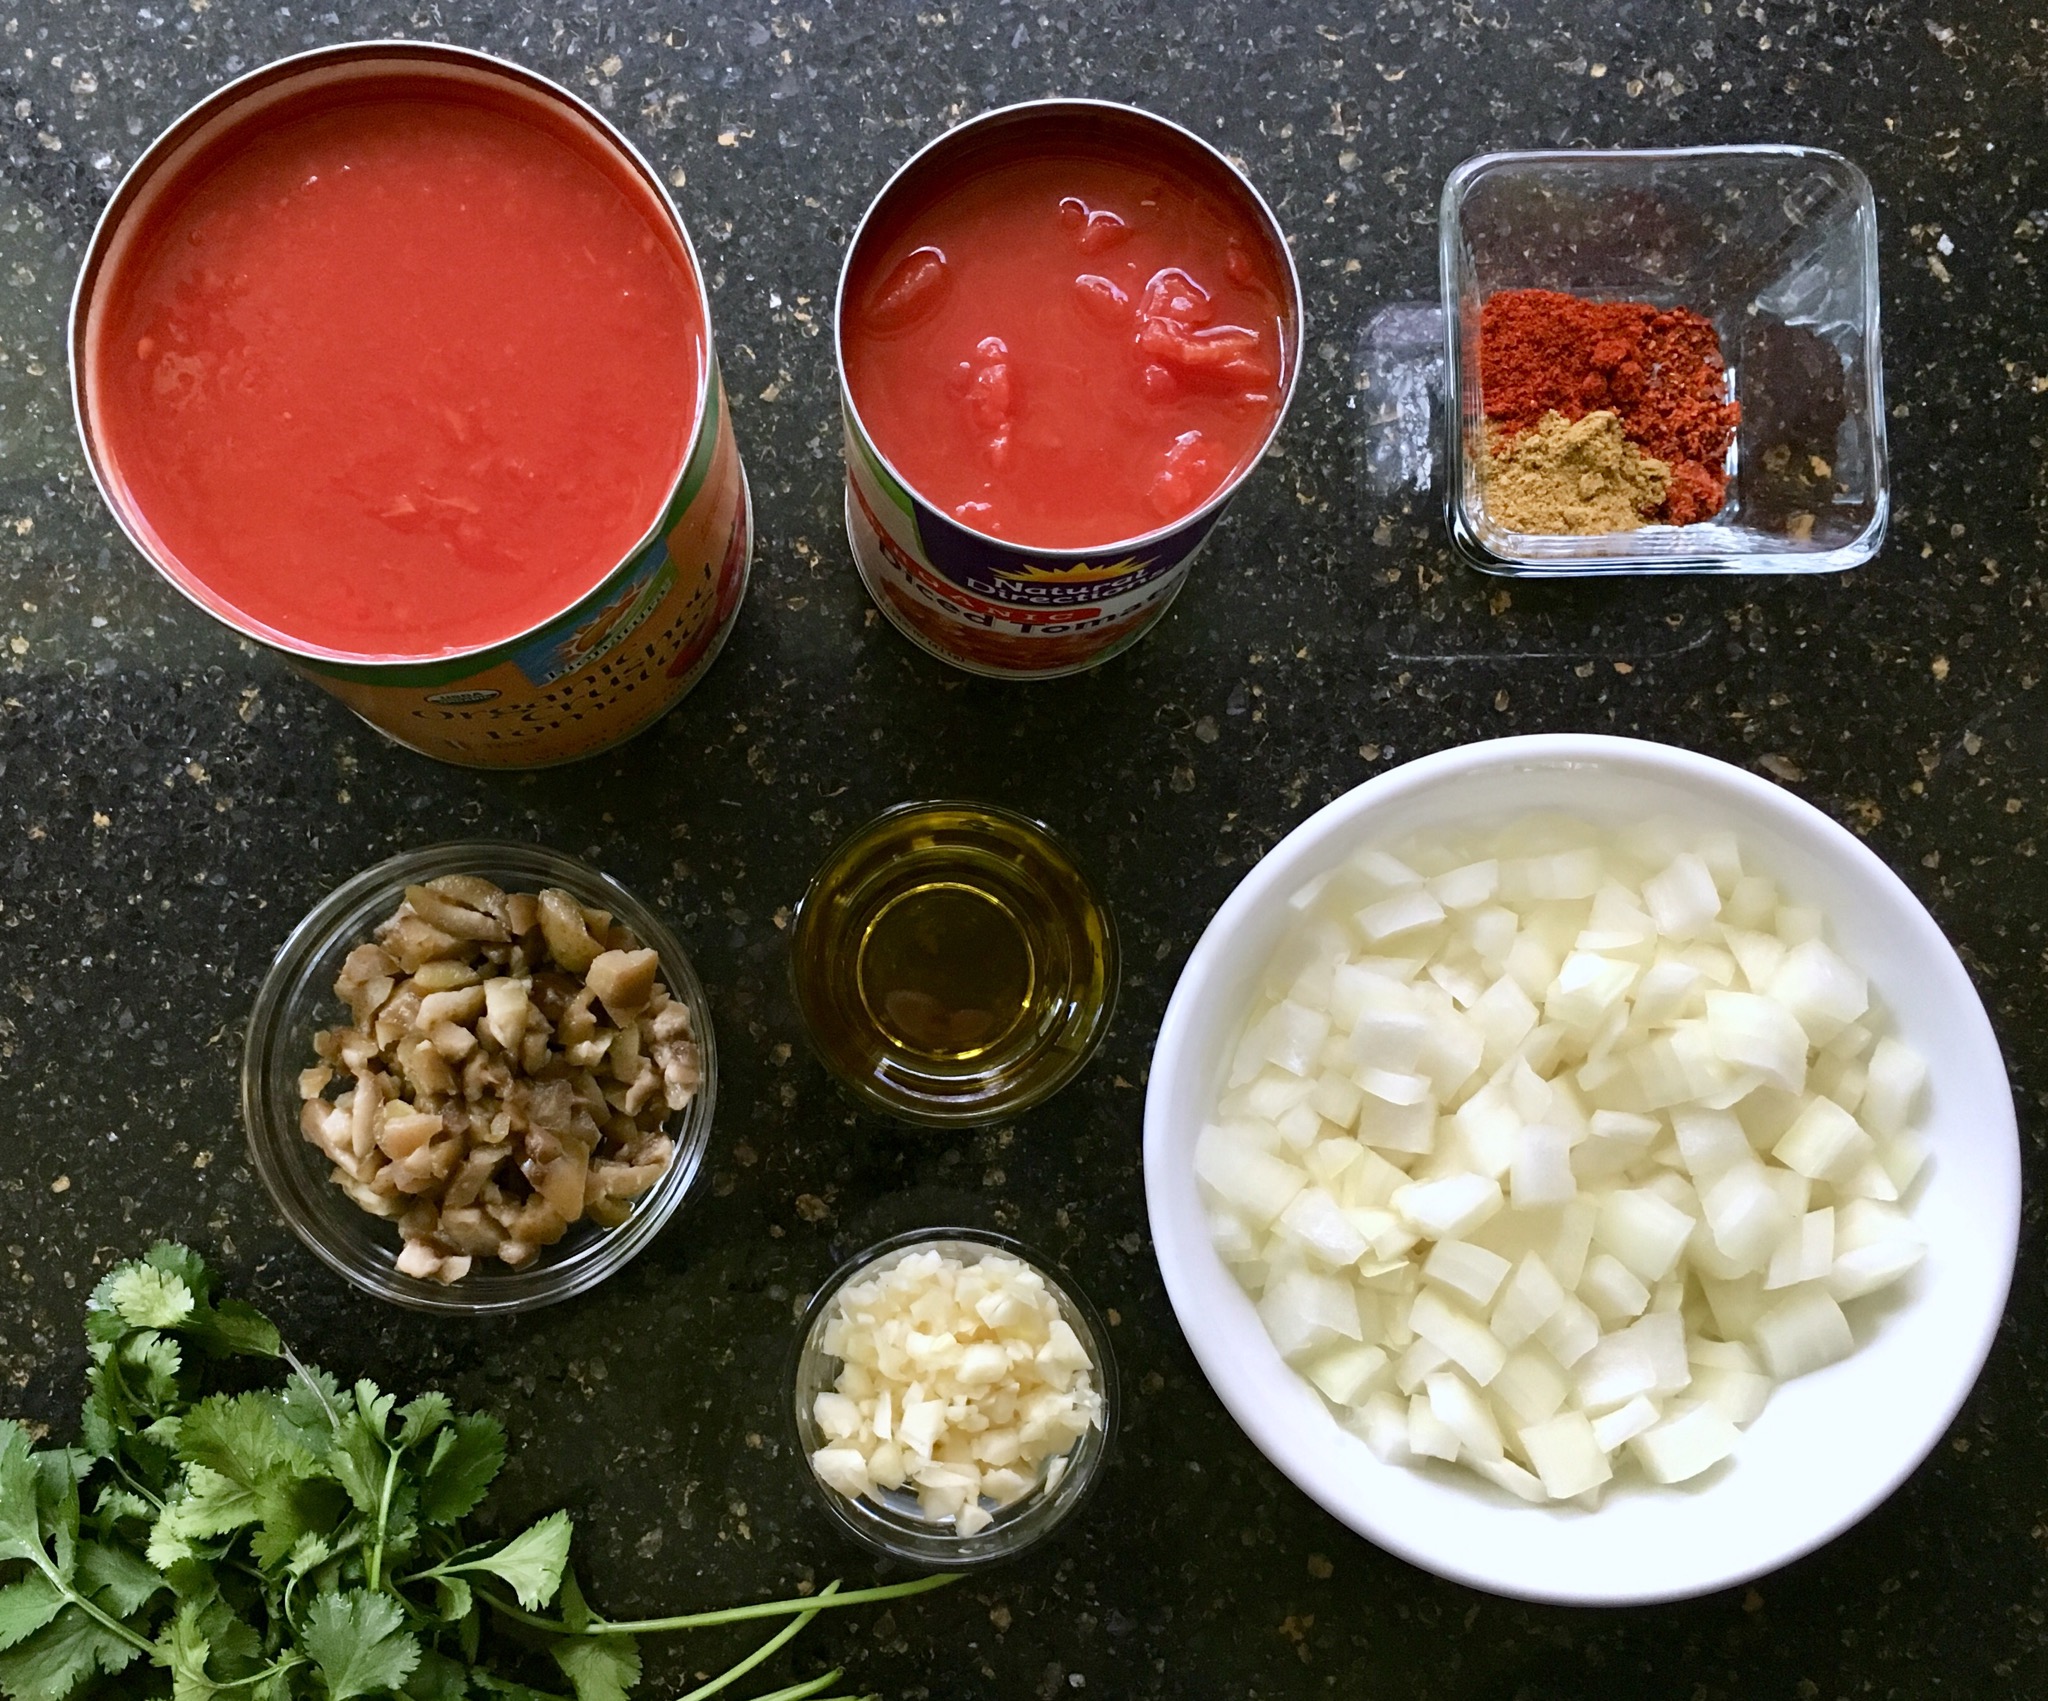
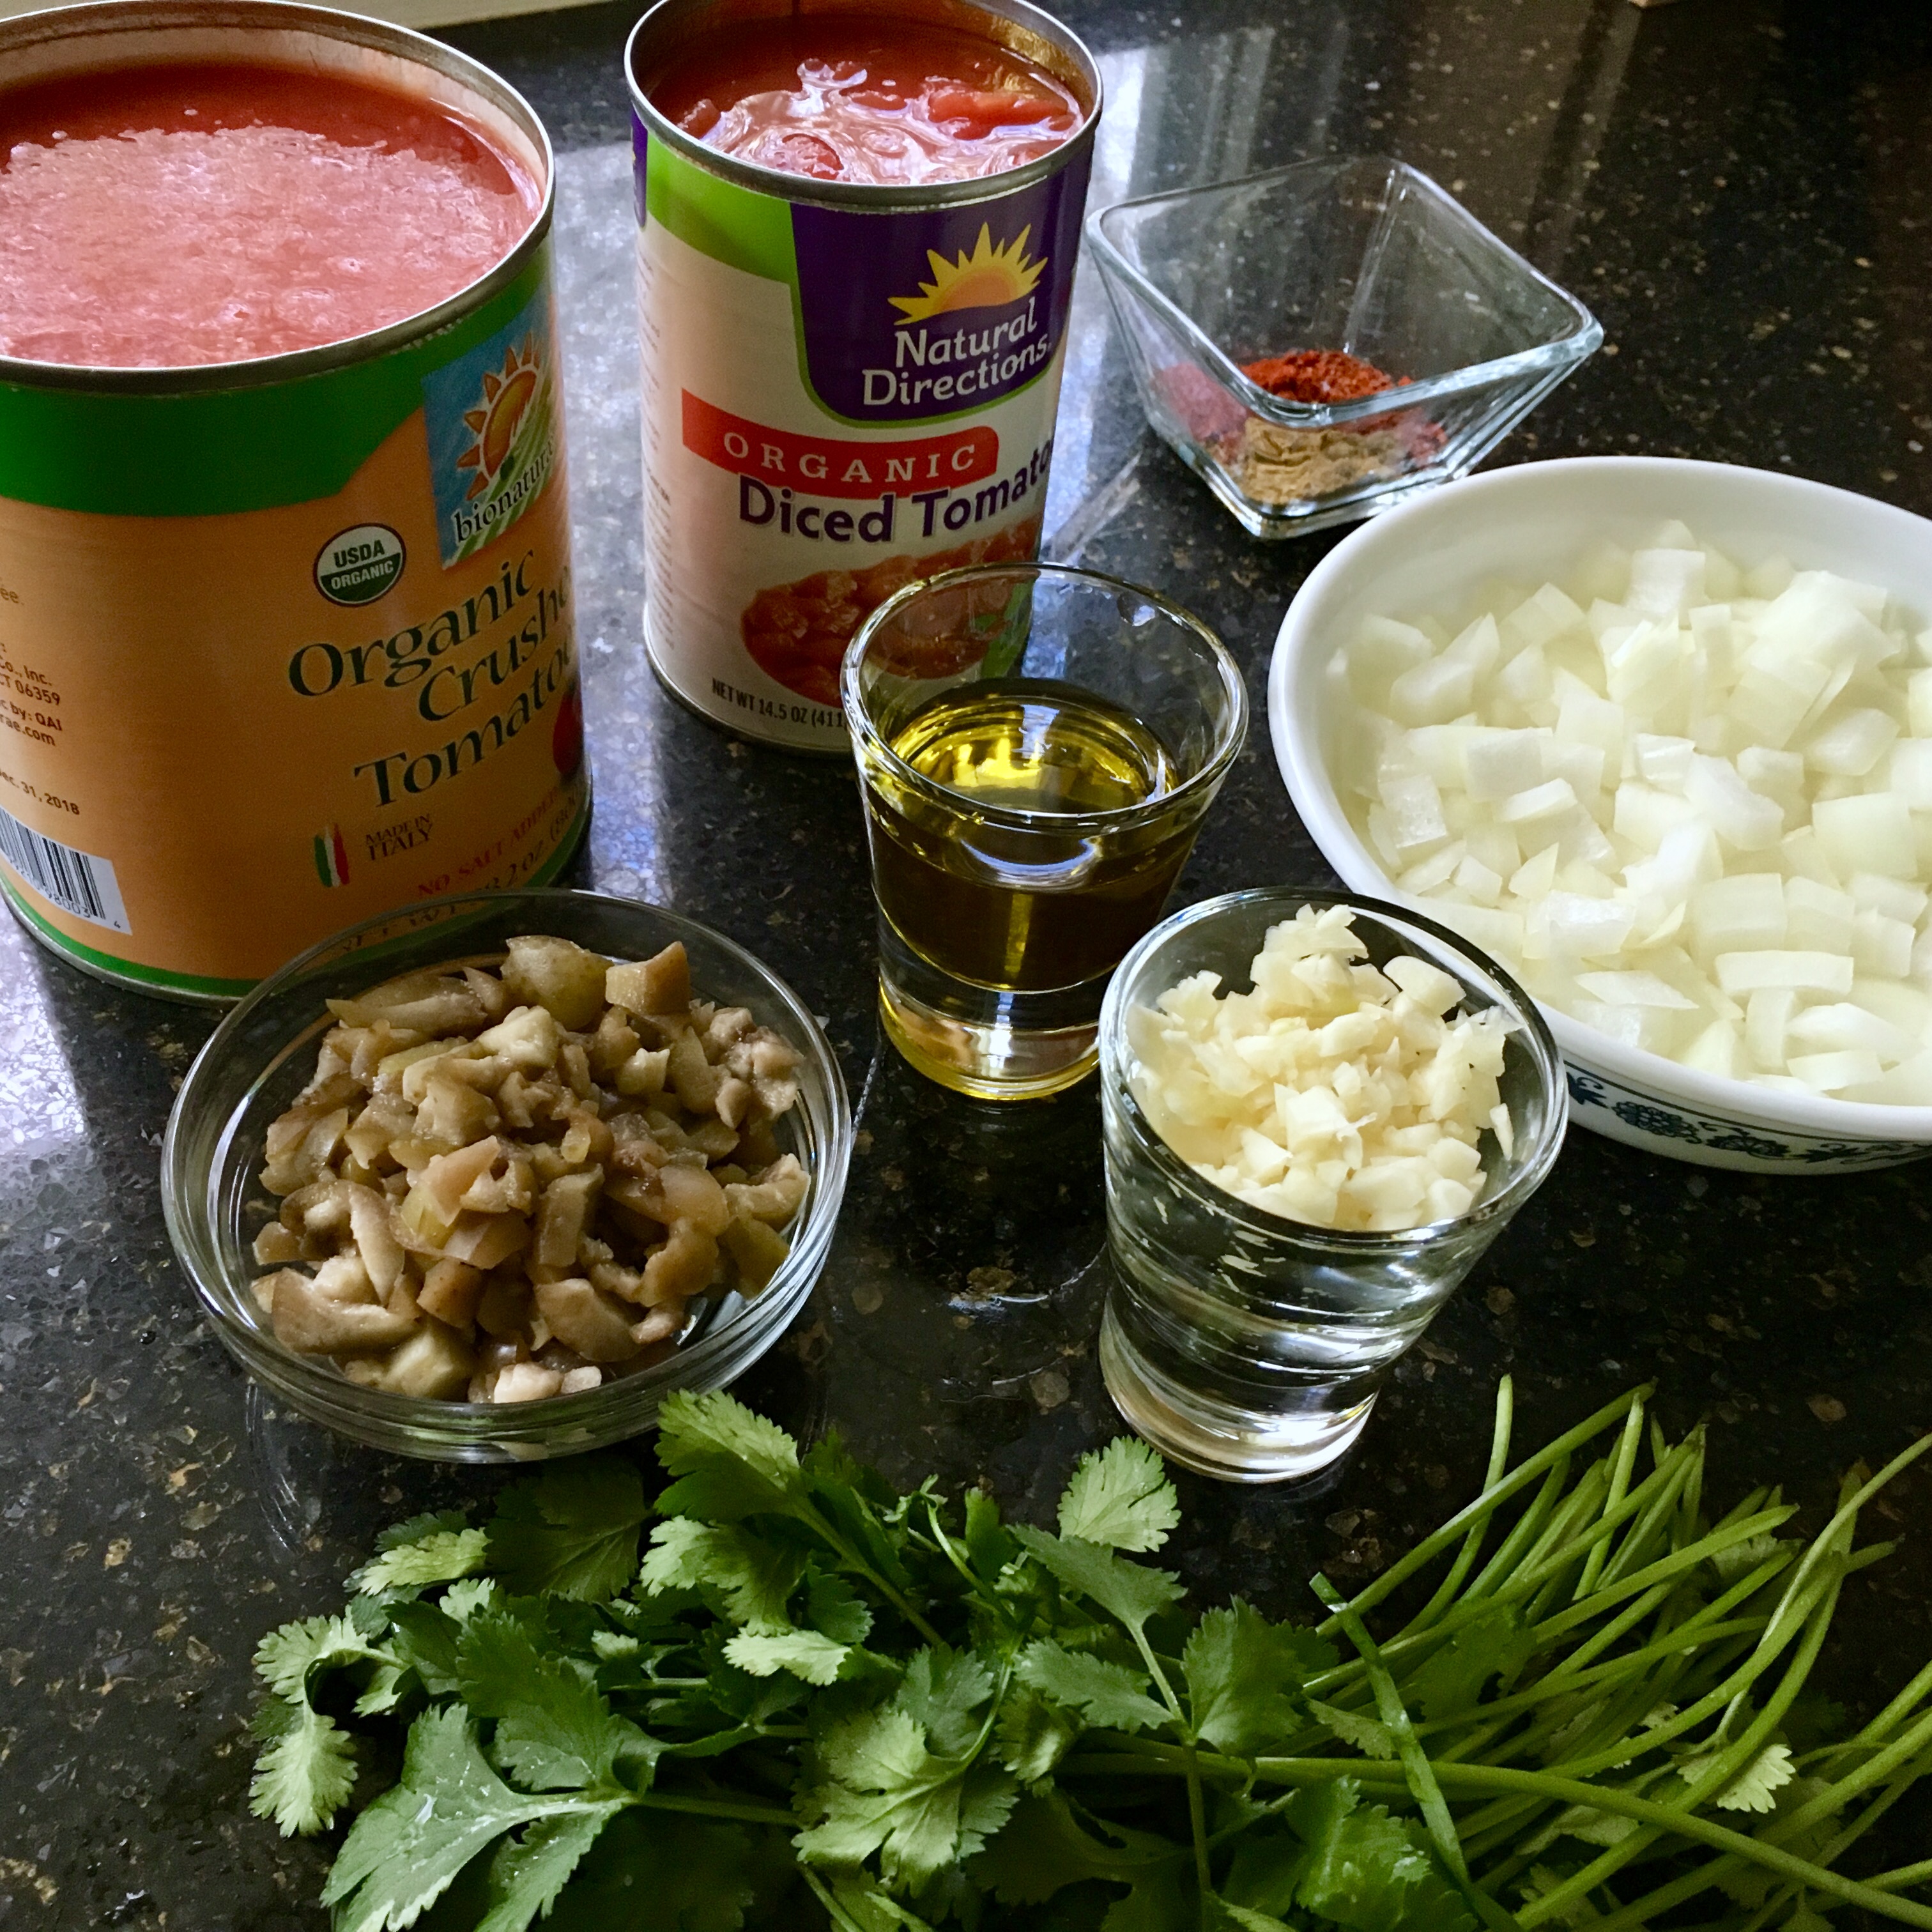
When your timer rings, set it for another 20 minutes for the dough. It’s time to start the shashuka! You need to make the shashuka in a skillet or other oven-safe pan. Add the olive oil to a skillet over medium heat. Cook the onion, garlic, olives, and pepper until the onions are translucent (about 5 minutes). Then, add the tomatoes. Cook until the mixture starts to simmer slightly. Mix in your spices and reduce the mixture for another 5 minutes. Preheat your broiler on high heat.

Step Six.
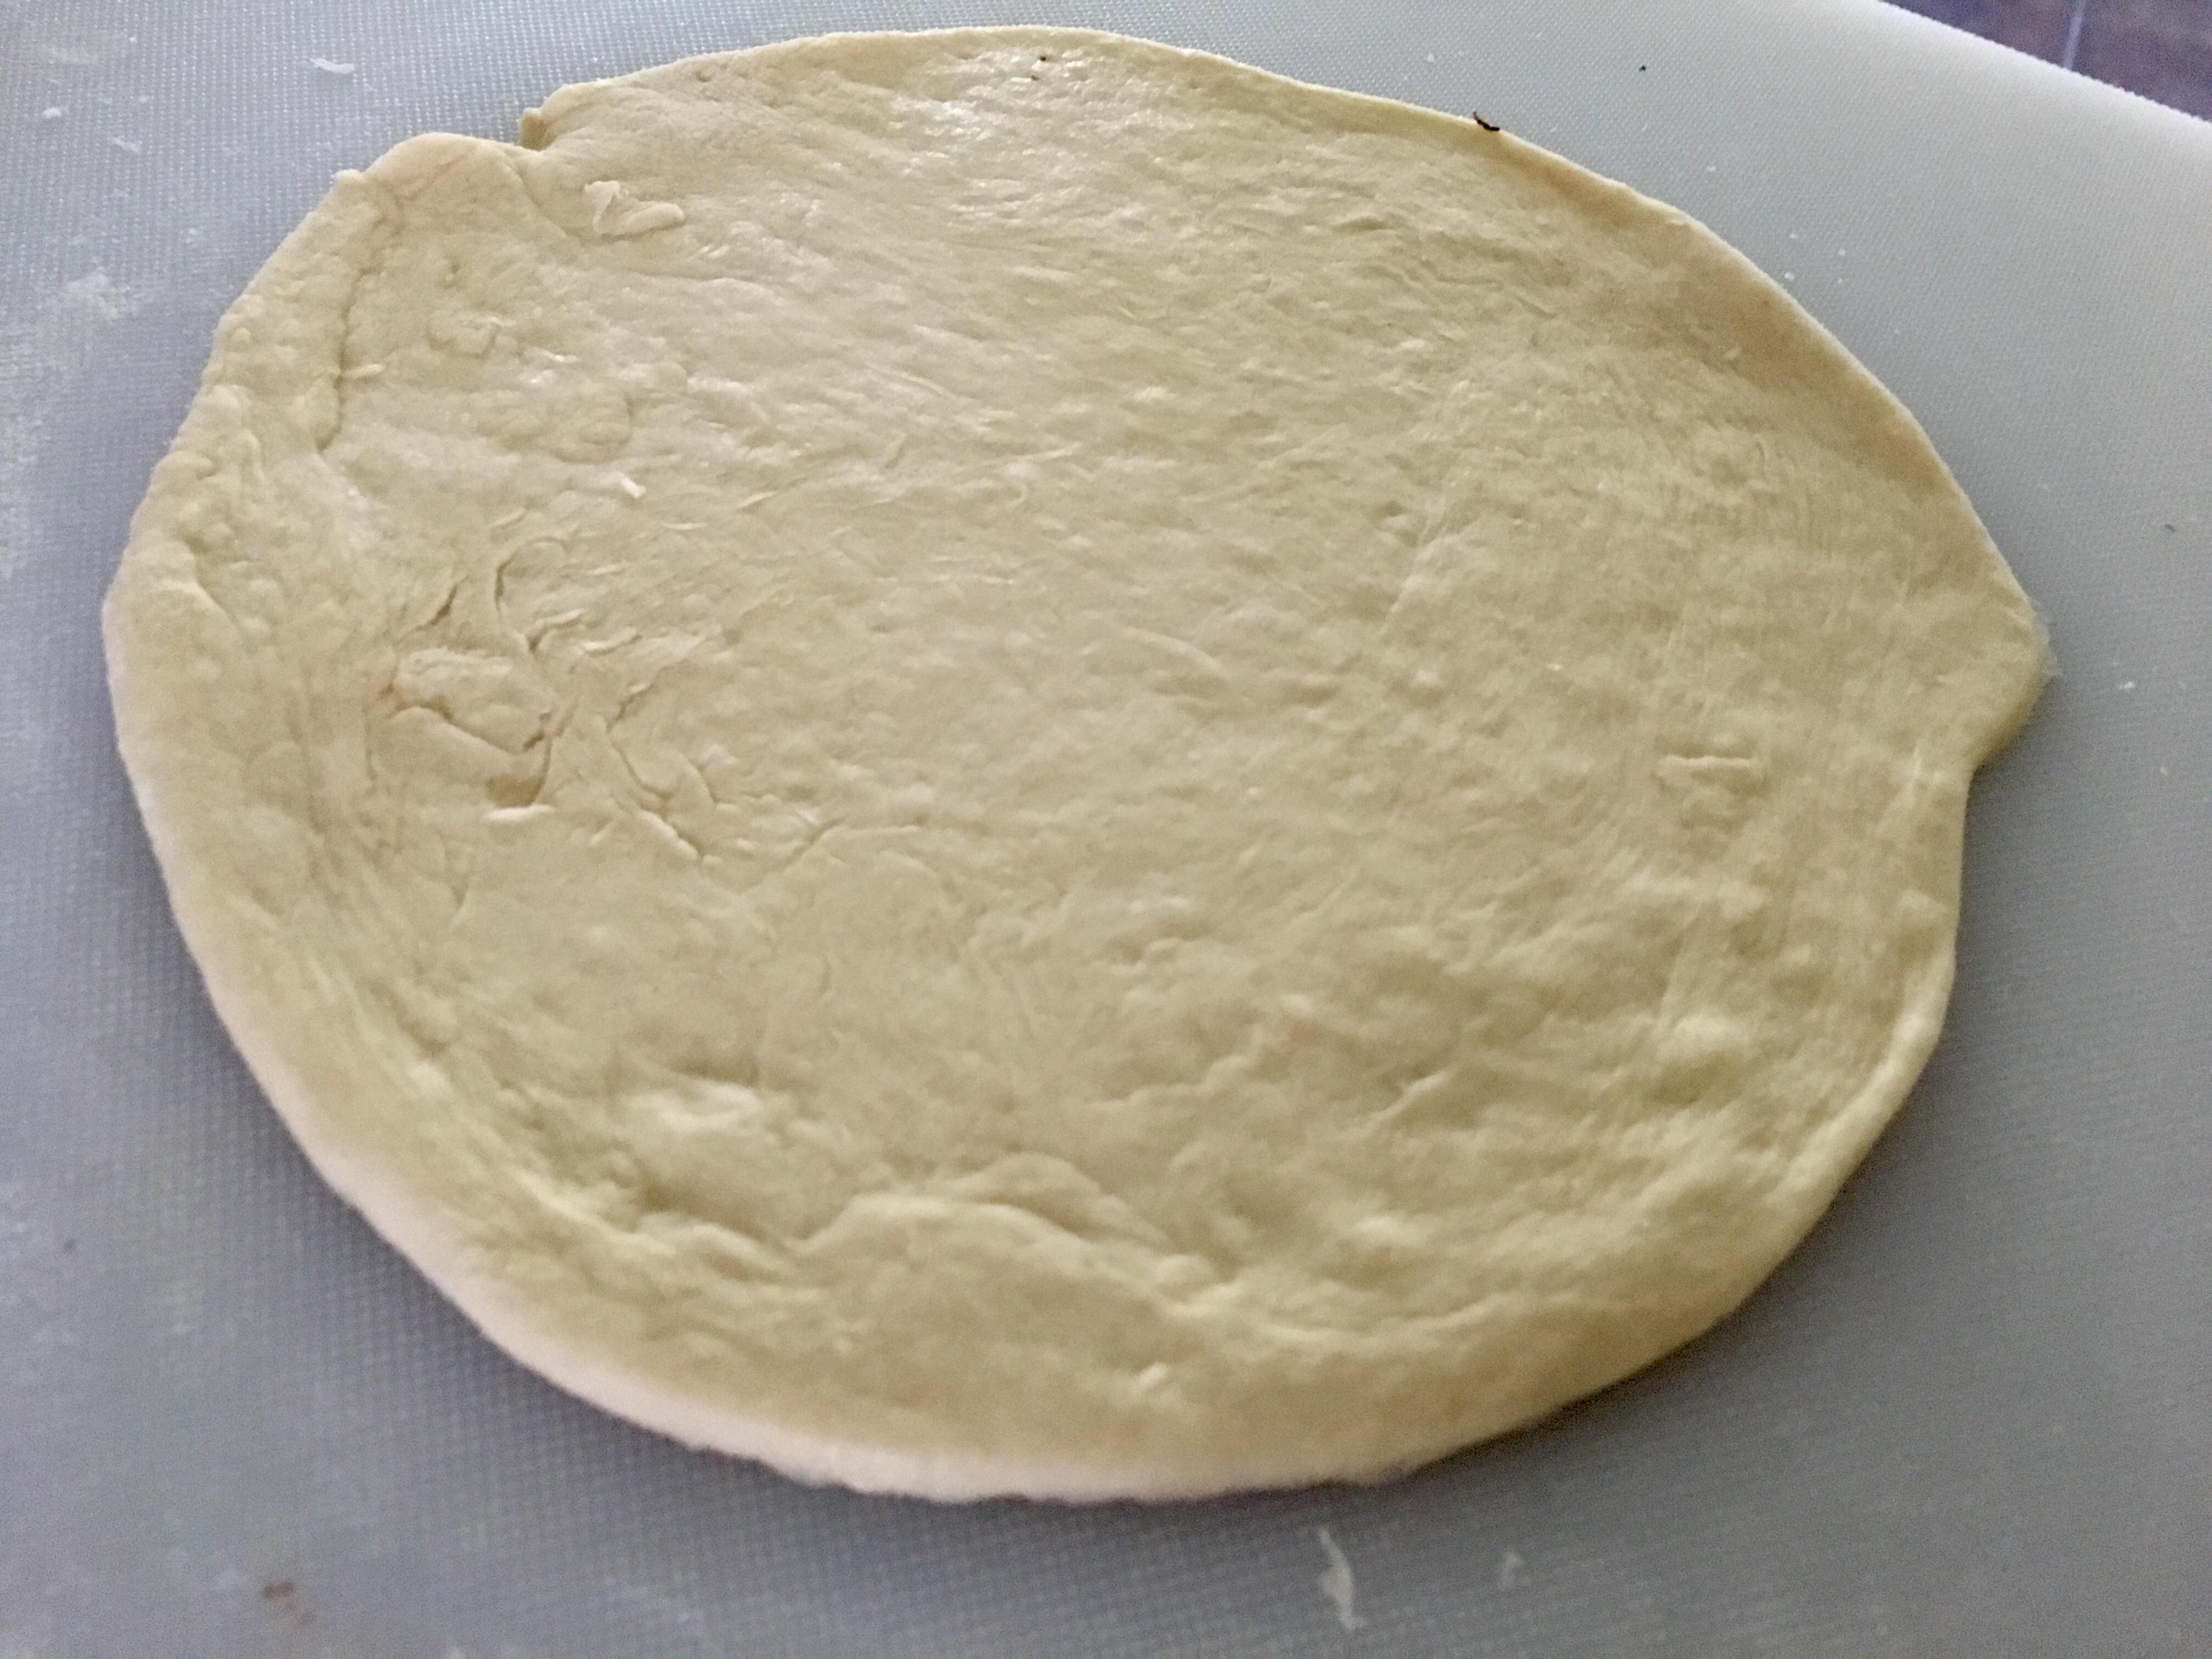
By now, your dough should be ready. Punch down the risen dough and divide it into six pieces. Roll each piece into a ball, and roll out the ball to 1/4 in thickness on a floured surface. Heat 1 teaspoon of oil over medium high heat.
Step Seven.
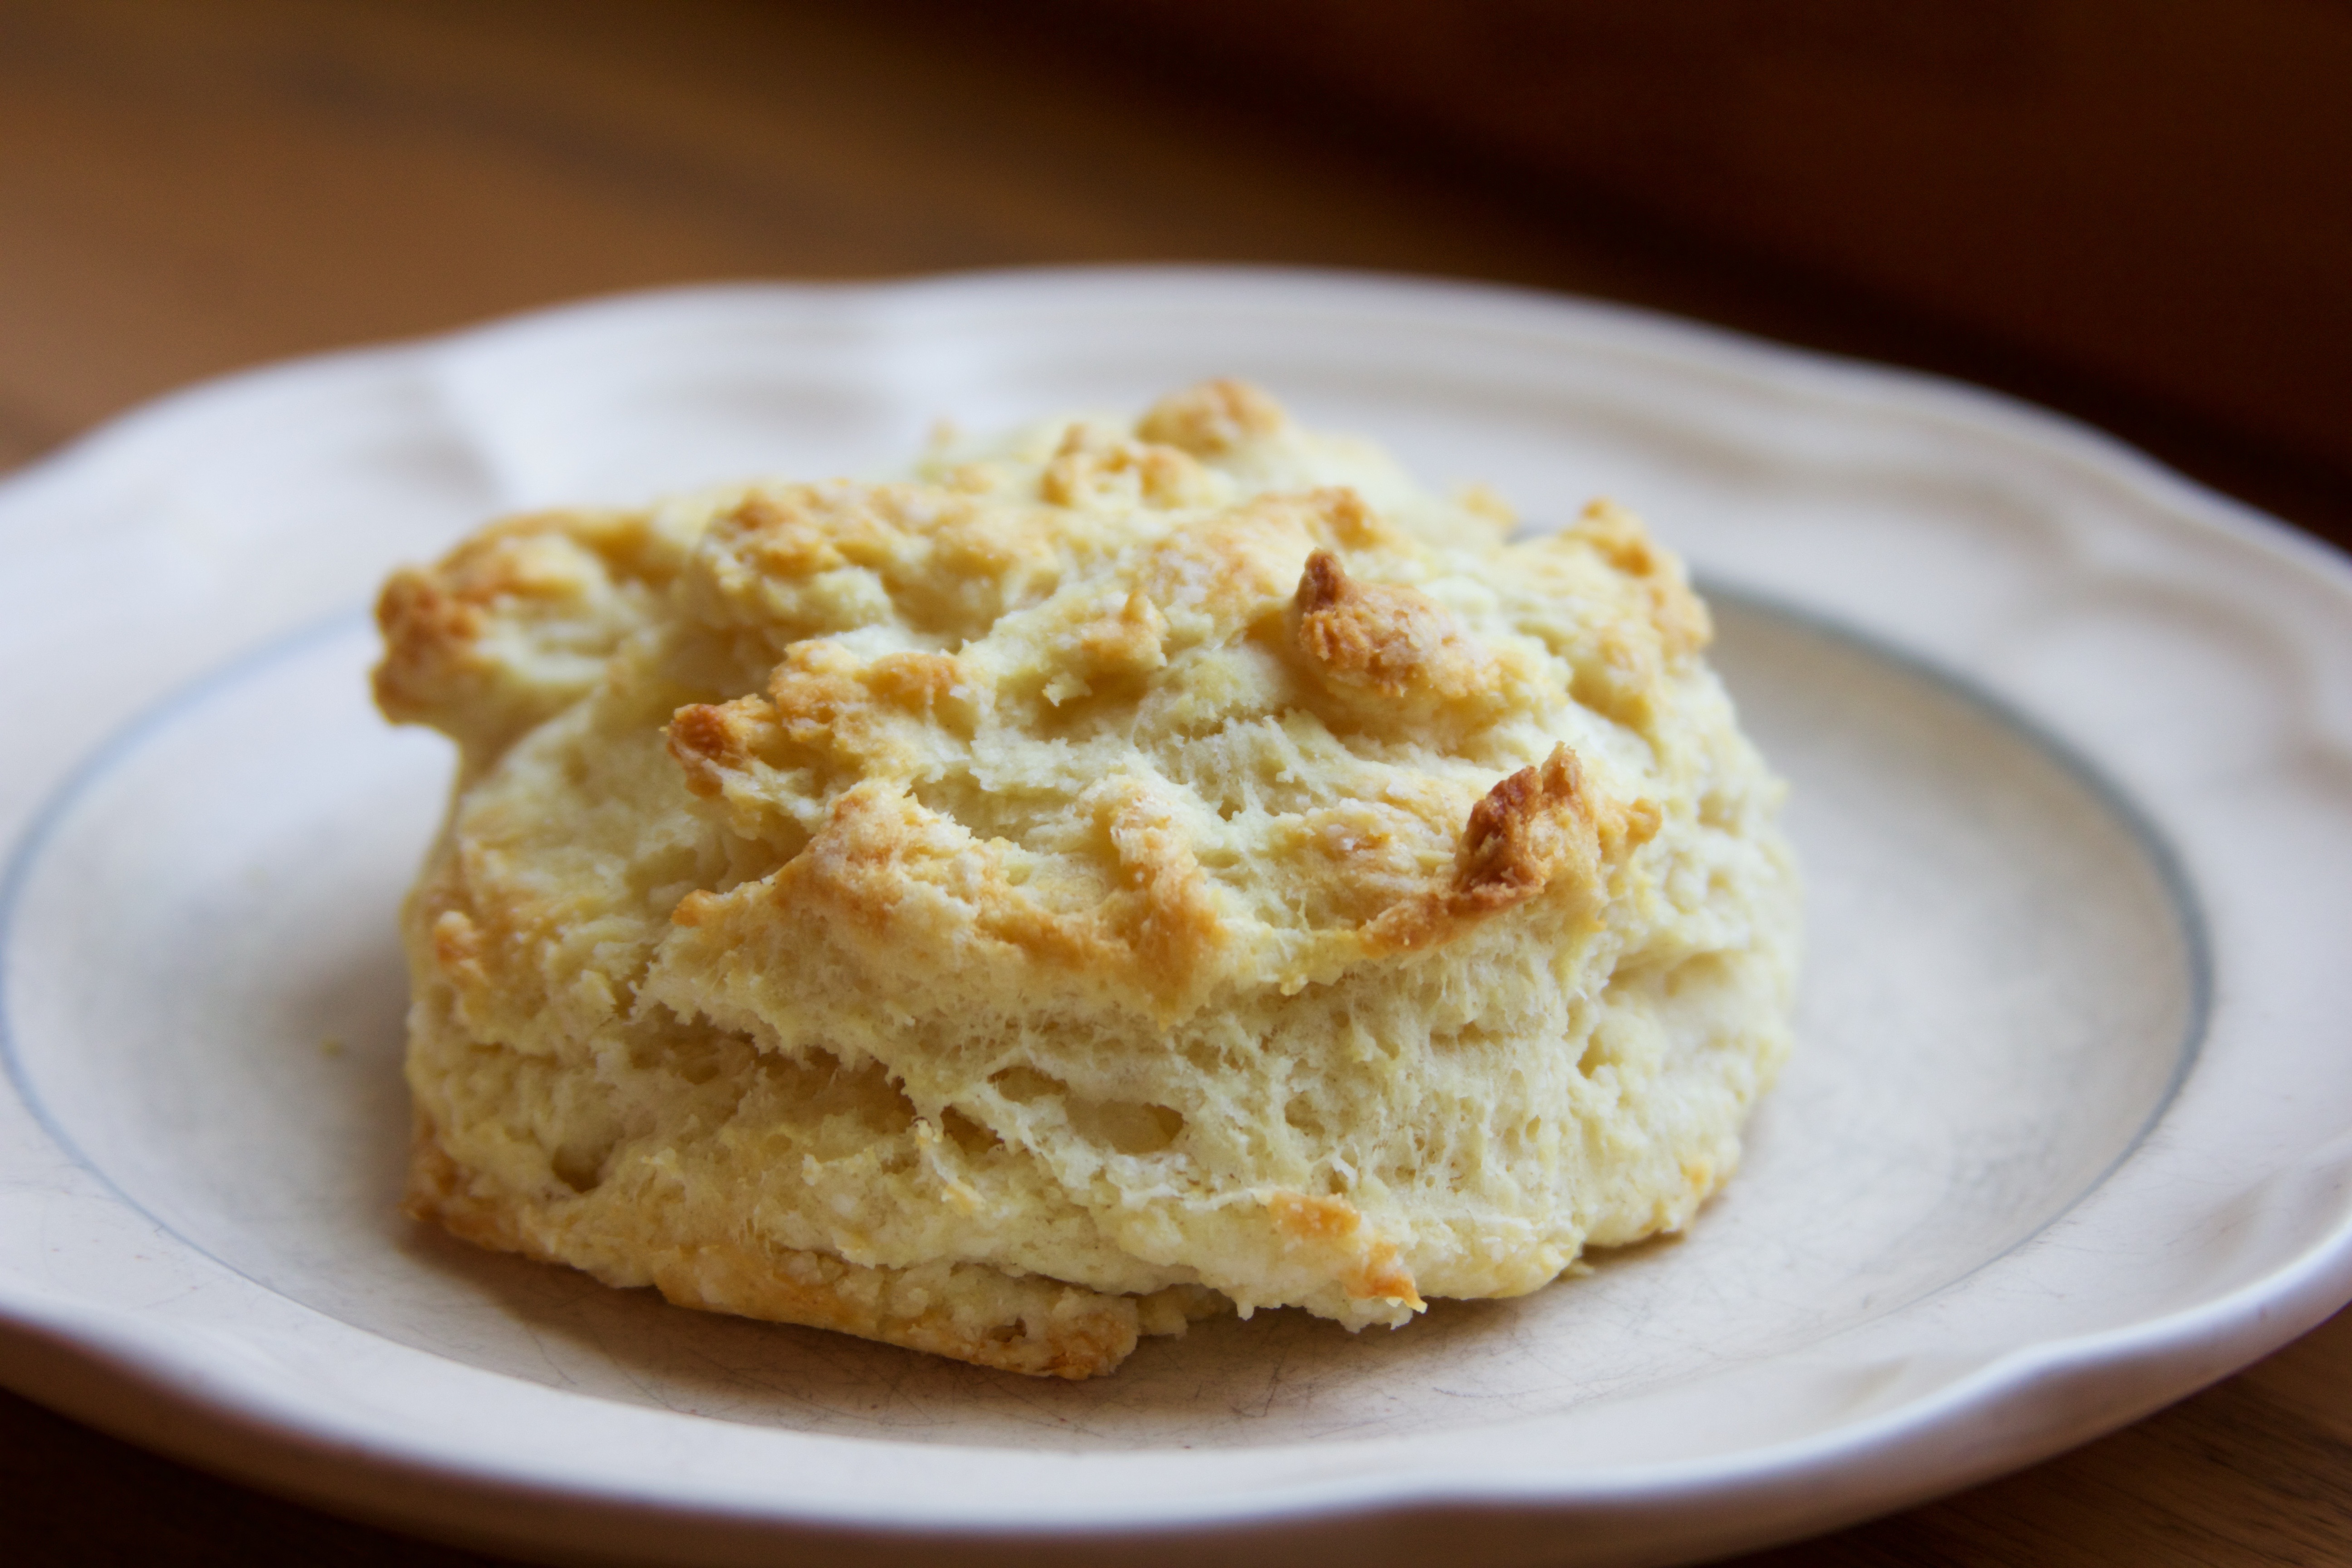
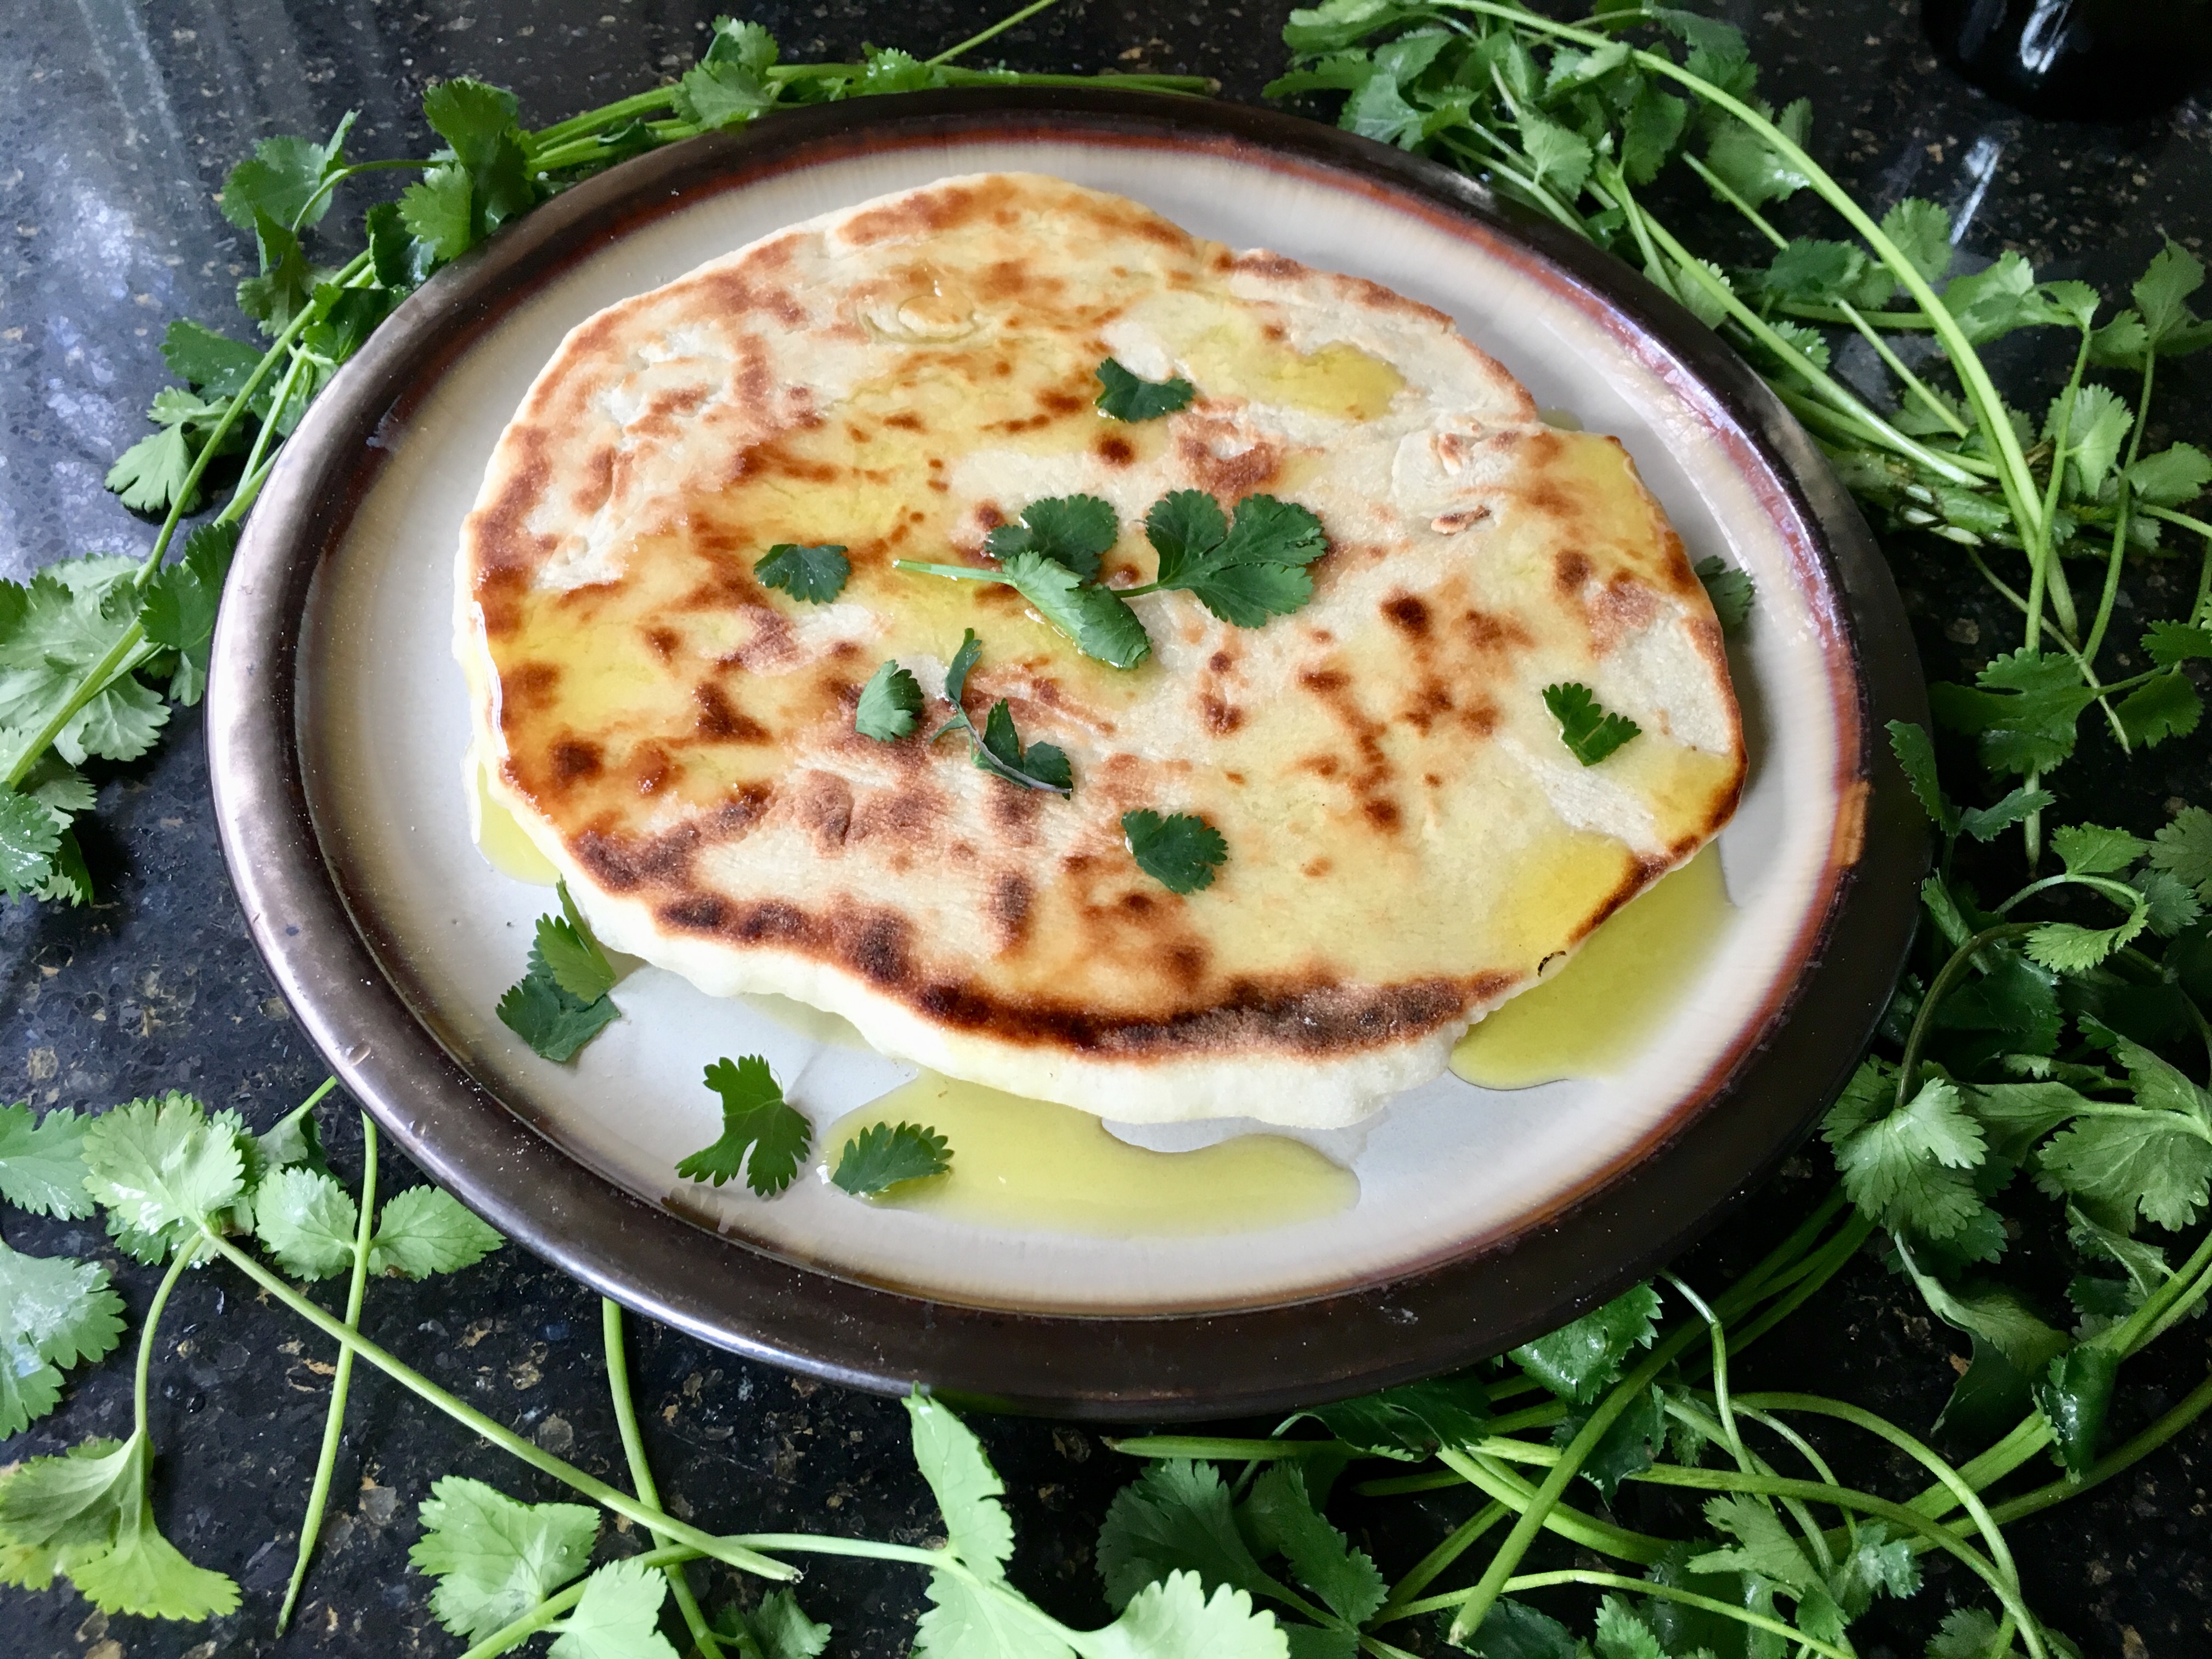
One at a time, cook the pitas. Cook the first side for 45 seconds, then flip and cook the other side for one minute. Flip one more time and cook an additional minute; store the finished pita in a basket with a towel so that they don’t cool before you’re ready to serve them! Repeat the process with the remaining dough, but you don’t need to add more oil in-between.
Step Eight.
Now it’s time to add the eggs. Crack five of the eggs into a star pattern near the rim of the pan. Crack the last egg into the middle. Continue to cook over medium heat for five minutes; next, broil the pan until the eggs are done but the yolks are still runny (about 3 minutes). Crumble feta and top with cilantro; serve with warm pita. Enjoy!


Ingredients
- PITA BREAD
- 1 cup water
- 1 package instant yeast
- 1 Tbsp olive oil
- 2 tsp sugar
- 2 tsp salt
- 3 cups all purpose flour
- 1 tsp olive oil, for cooking
- SHASHUKA
- 1/2 yellow onion, chopped
- 4 cloes garlic, minced
- 1 bell pepper (any color), chopped
- 1/2 cup green olives, chopped
- 28 oz crushed tomatoes
- 14.5 oz diced tomatoes
- 1/2 tsp chili powder
- 1/2 tsp chili flakes
- 1/2 tsp cayenne pepper
- 1/2 tsp cumin
- 6 eggs
- 1/4 cup torn cilantro
- 1/4 cup crumbled feta
Instructions
- Prep the pita bread. It will need to rise for an hour, so get it started first! Measure out your ingredients.
- Heat the water to about 110F. It should be warm but not hot. Bloom the yeast for 5 minutes
- Mix together the dry ingredients; pour in the yeast mixture and olive oil. Mix together with a fork until a dough forms.
- Turn the dough out into a floured surface. Knead the dough until it is stringy- this means that the gluten bonds are forming! This process should take about six minutes. Flour the bowl and put the dough back in it. Let the dough rise in a warm place for the total of an hour. Set a timer for 40 minutes. This is when you will start the shashuka. Measure out and chop your ingredients, then go make yourself busy for a bit.
- When your timer rings, set it for another 20 minutes for the dough. It’s time to start the shashuka! You need to make the shashuka in a skillet or other oven-safe pan. Add the olive oil to a skillet over medium heat. Cook the onion, garlic, olives, and pepper until the onions are translucent (about 5 minutes). Then, add the tomatoes. Cook until the mixture starts to simmer slightly. Mix in your spices and reduce the mixture for another 5 minutes. Preheat your broiler on high heat.
- By now, your dough should be ready. Punch down the risen dough and divide it into six pieces. Roll each piece into a ball, and roll out the ball to 1/4 in thickness on a floured surface. Heat 1 teaspoon of oil over medium high heat.
- One at a time, cook the pitas. Cook the first side for 45 seconds, then flip and cook the other side for one minute. Flip one more time and cook an additional minute; store the finished pita in a basket with a towel so that they don’t cool before you’re ready to serve them! Repeat the process with the remaining dough, but you don’t need to add more oil in-between.
- Now it’s time to add the eggs. Crack five of the eggs into a star pattern near the rim of the pan. Crack the last egg into the middle. Continue to cook over medium heat for five minutes; next, broil the pan until the eggs are done but the yolks are still runny (about 3 minutes). Crumble feta and top with cilantro; serve with warm pita. Enjoy!

Check out the Beer Brats with Onions (next recipe) that go so well with these pretzels!!
~~~~~~~~~~
First, make the pretzels…
Step One.
Prep Step! Measure out all of your ingredients, for both recipes. Preheat your oven to 400°F. Set your water and baking soda to boil over high heat. Line a baking sheet with silicone or parchment paper.
Step Two.
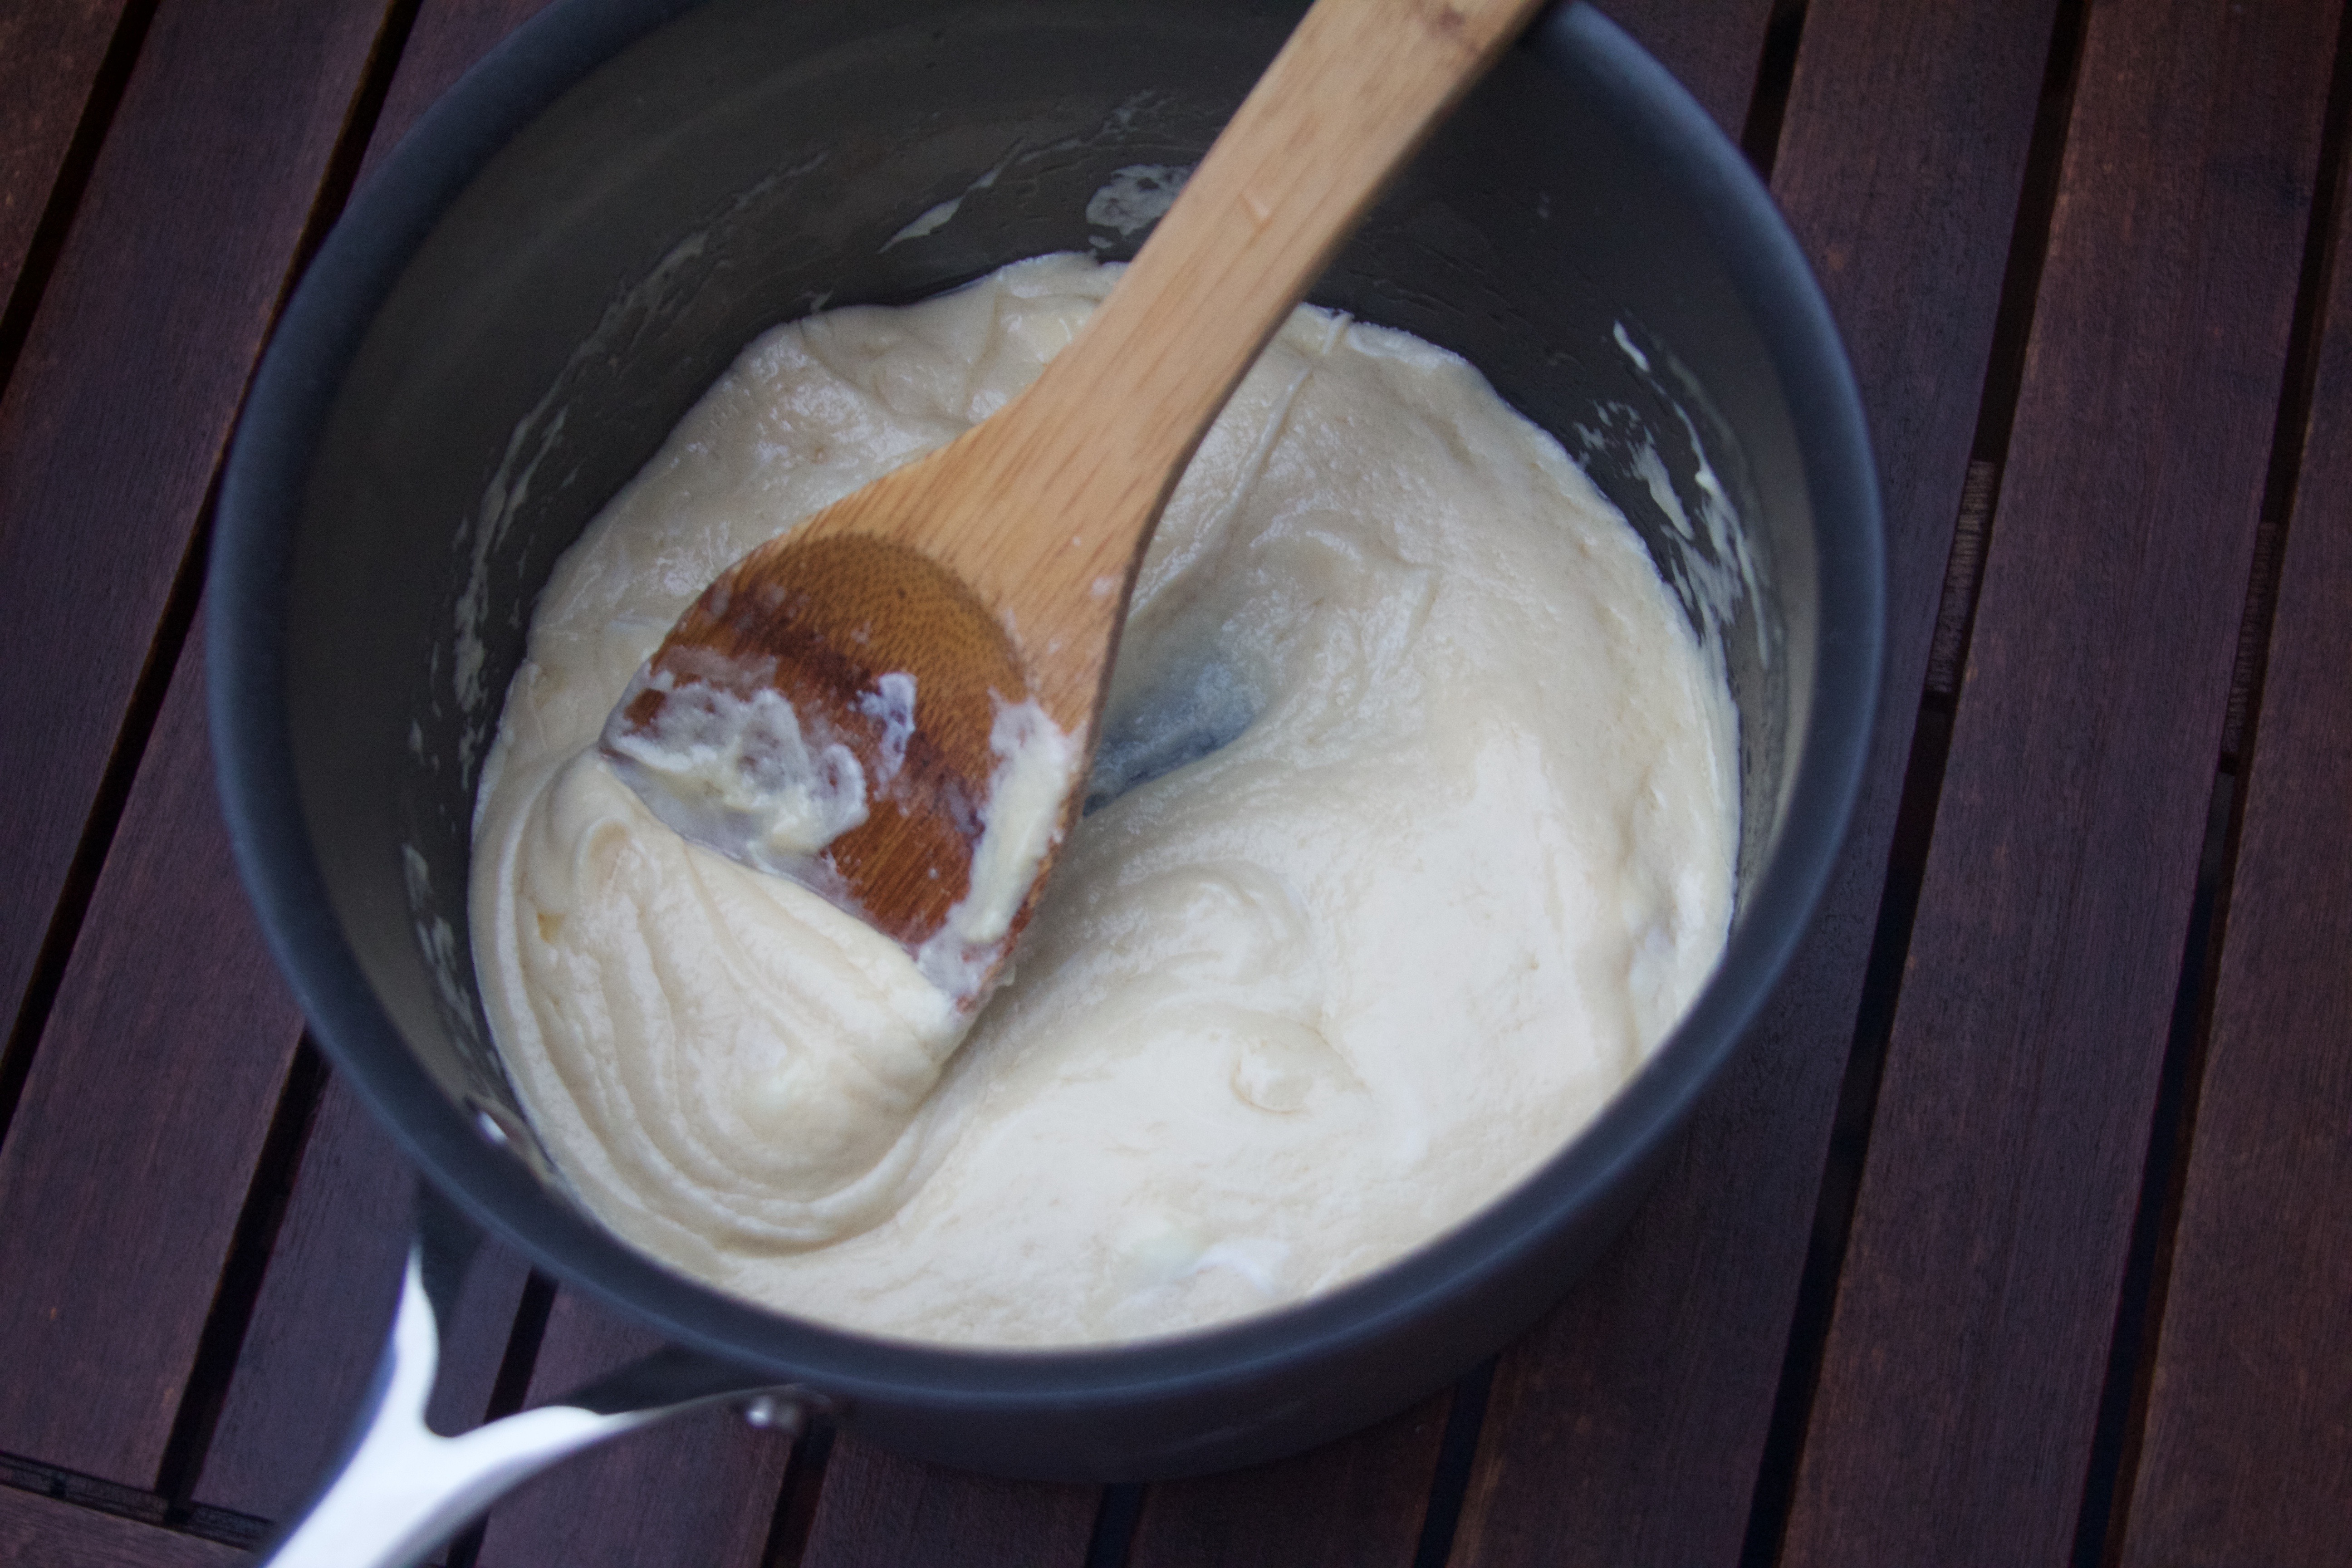
Make the pretzels. In a large bowl, mix the yeast into the warm water, and let it set for about 15 minutes. Whisk in the butter, sugar, and salt. Next, slowly add the flour as your stir the mixture.
Step Three.
On a surface dusted with flour, knead the dough for about 5 minutes, or until it is not sticky and is super stretchy. This means that the gluten bonds are forming appropriately. This is my favorite step – I definitely recommend whipping up a batch if you’re ever stressed out!
Step Four.
Put the kneaded dough back into the bowl, cover with a damp towel, and let set for another ten minutes.

Step Five.
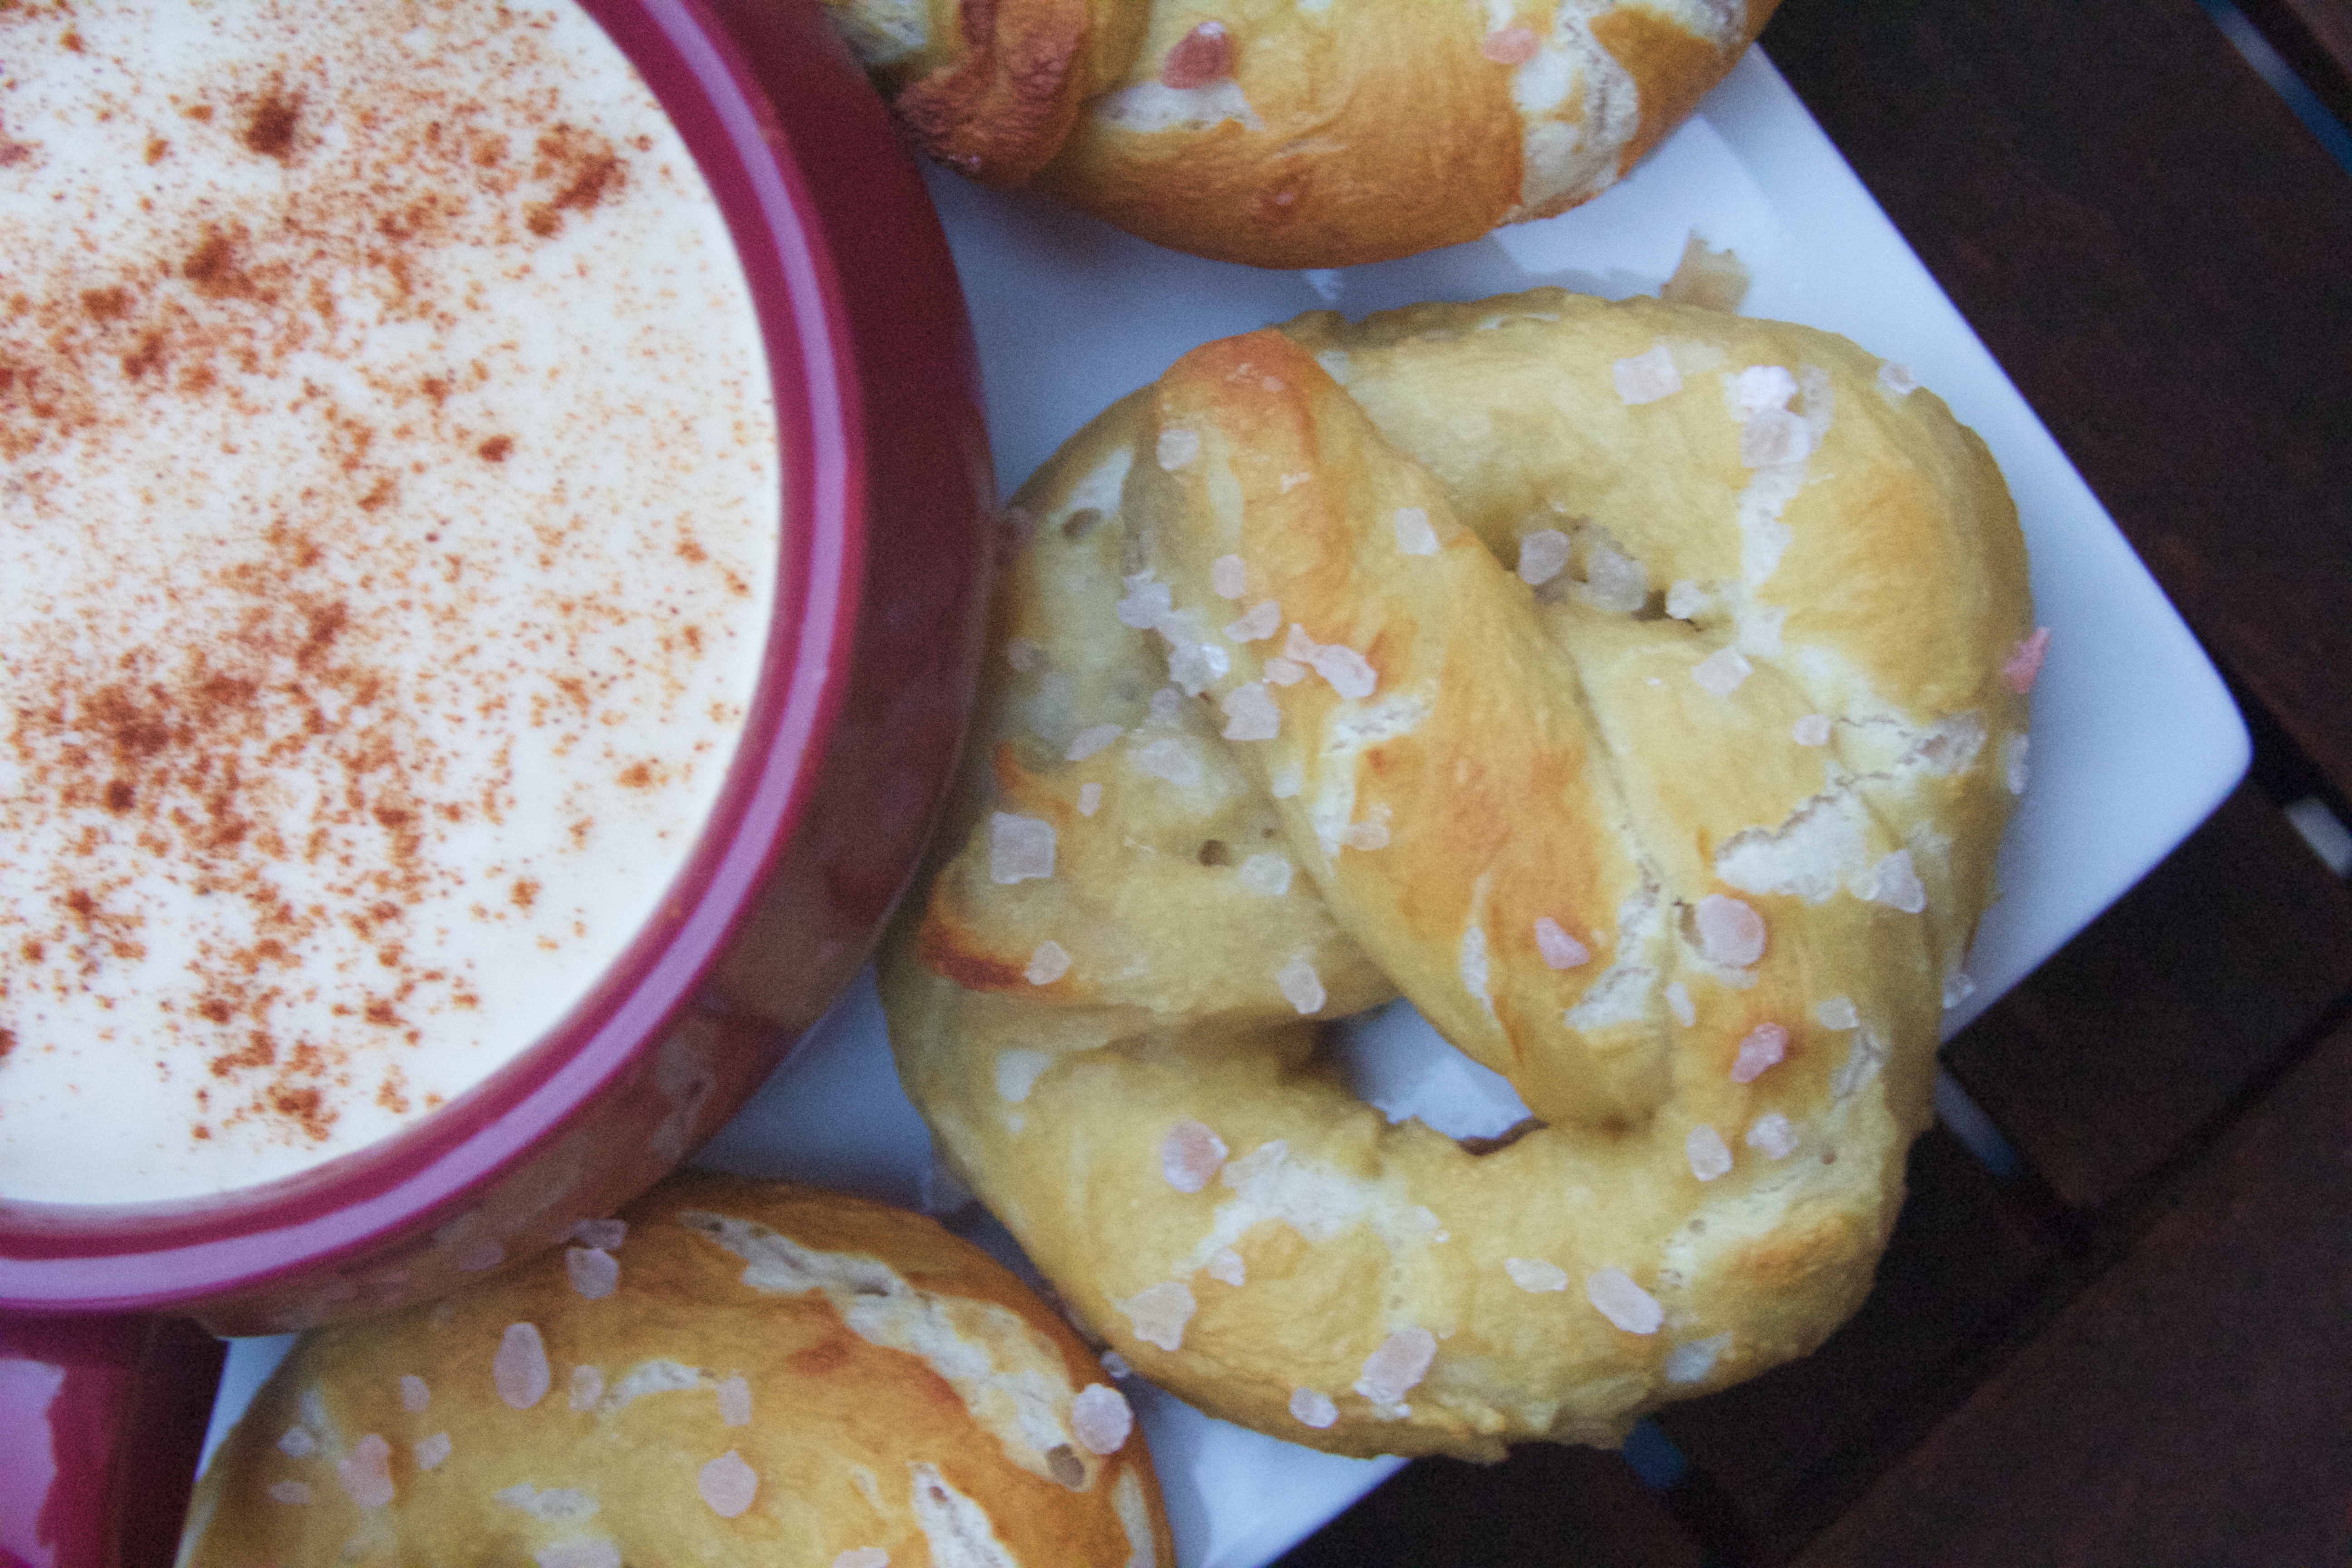
Now, pinch off a handful of dough. Roll and stretch it until it is a long tube, about 20 inches. Fold it into a “U” shape, then twist the end. Fold over the ends until it makes a recognizable pretzel shape.
Step Six.
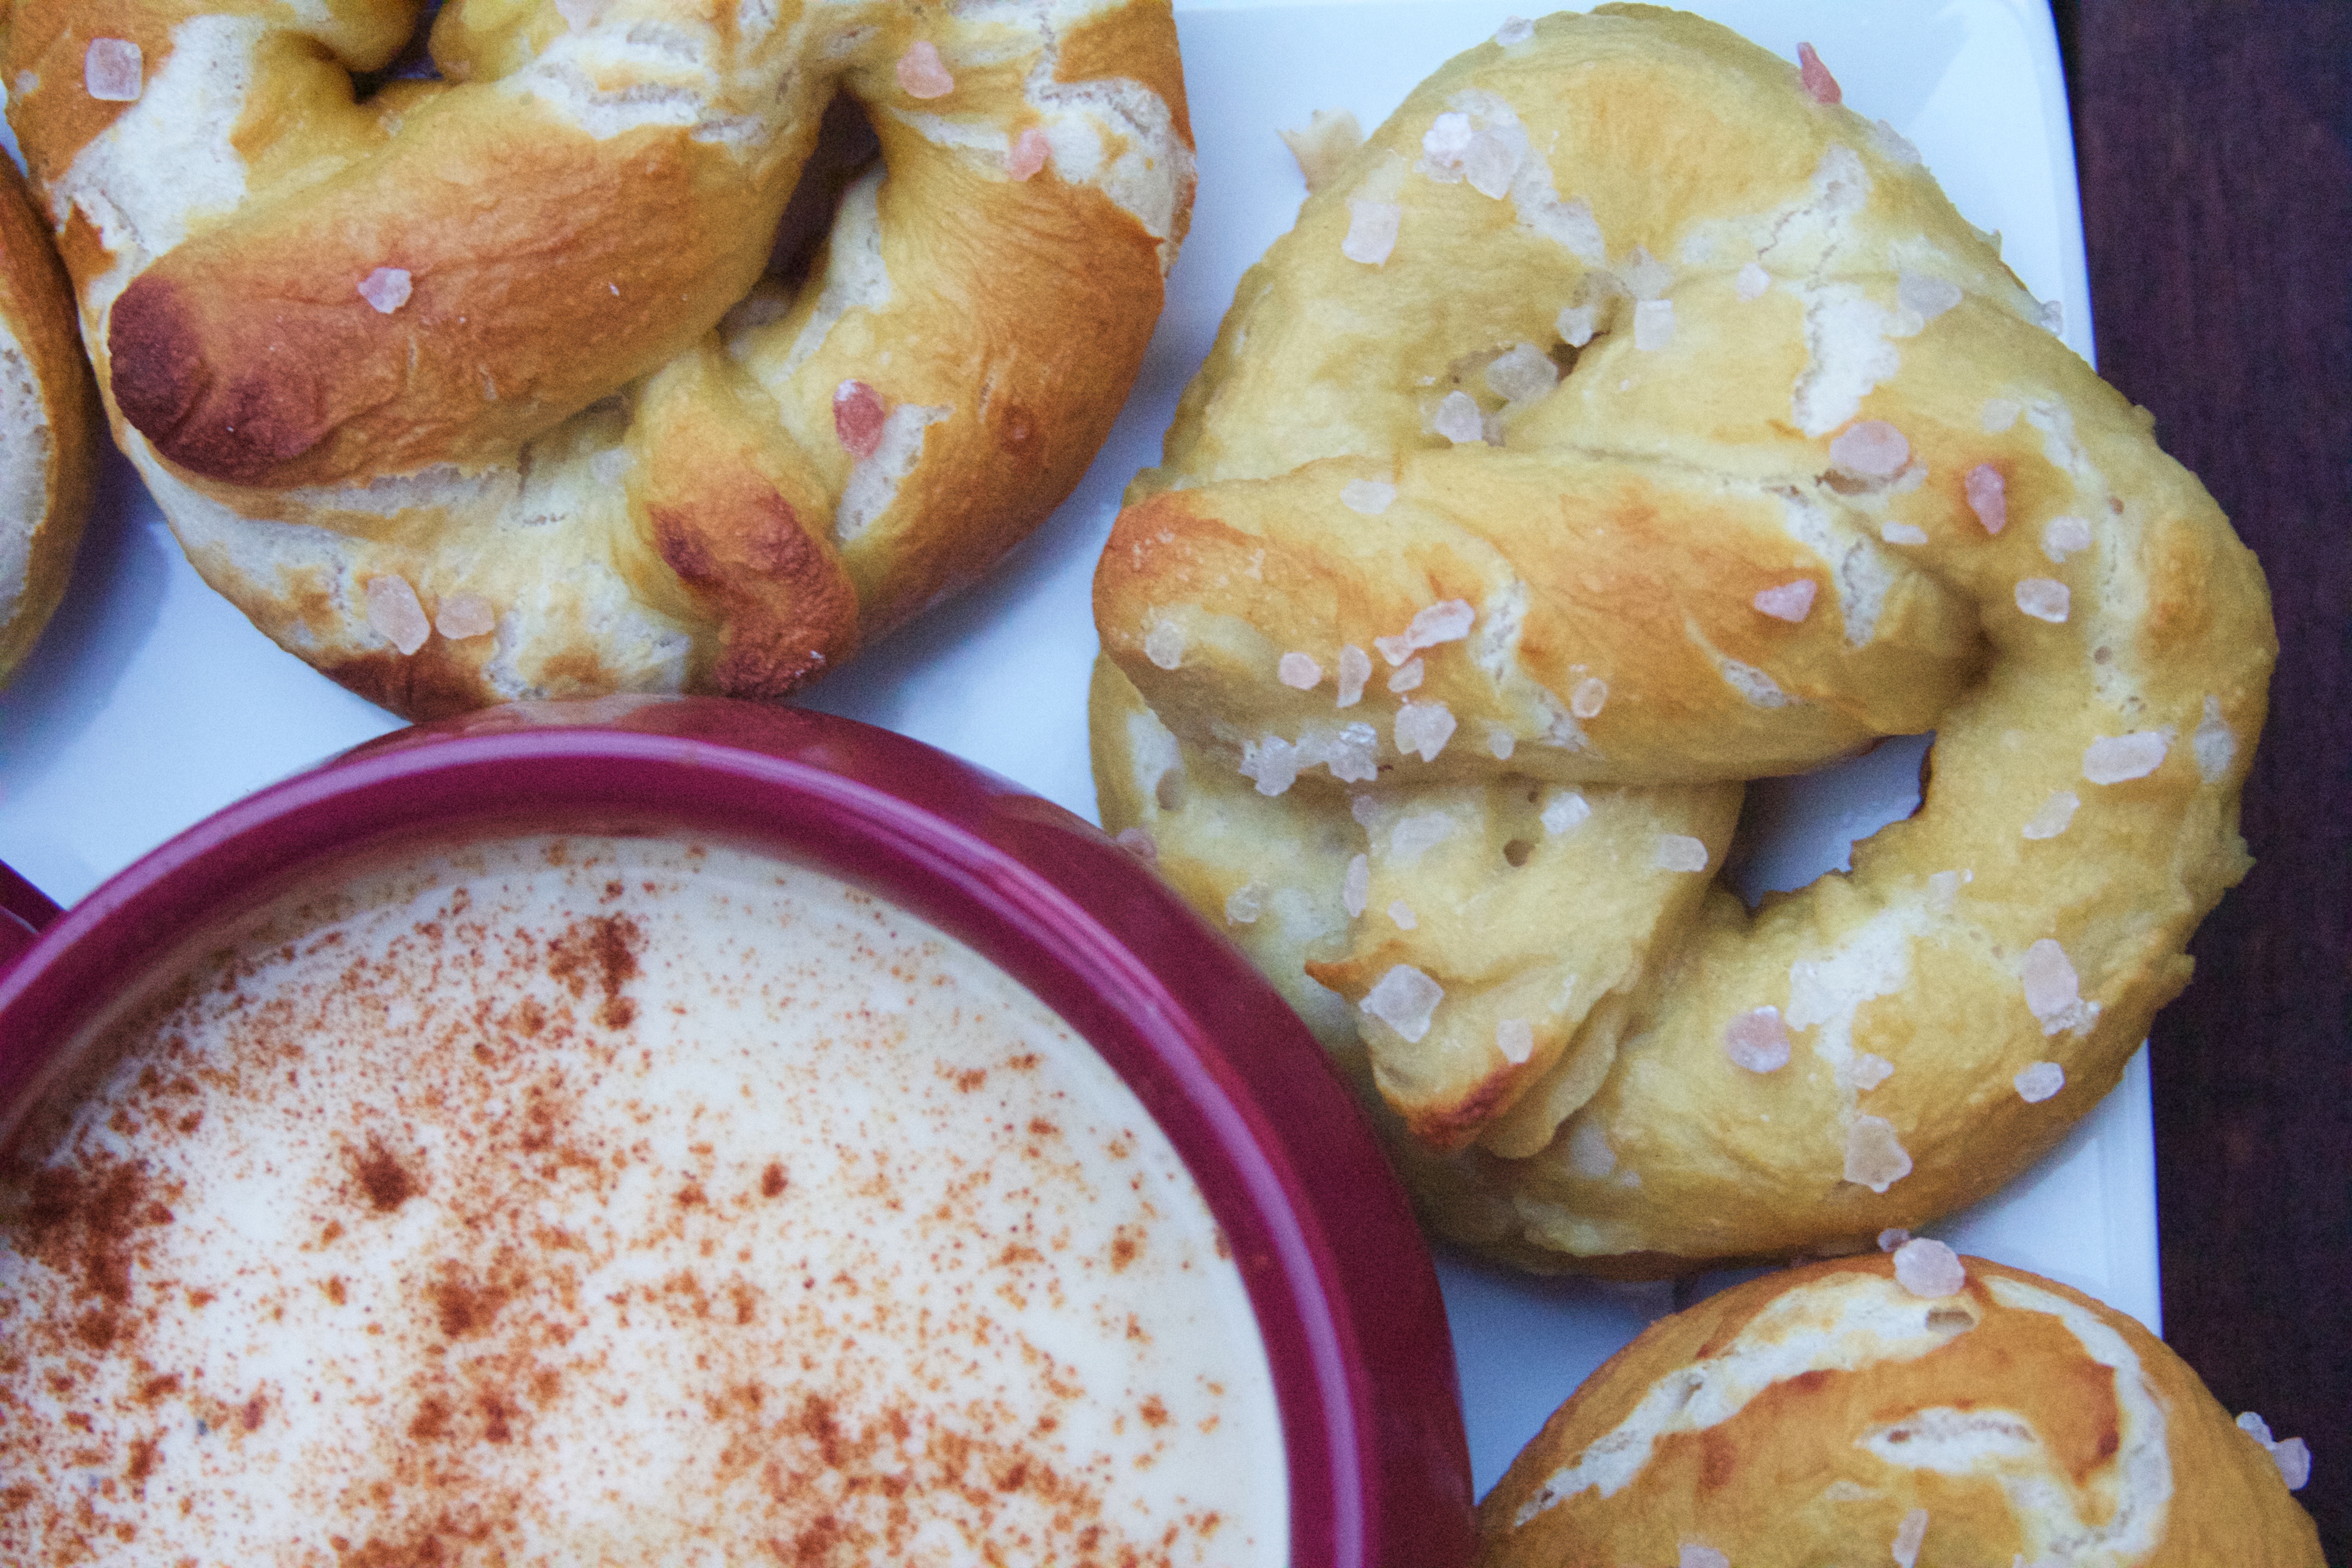
Make sure that the water is at a rolling boil. Have your baking sheet ready. Place the pretzels, one at a time, on a slotted spoon, and dip into the water for 30 seconds. Place the pretzels on the baking sheet, sprinkle with coarse sea salt, and bake for about15 minutes, until they are golden brown.
Next, make the cheese dip…
Step One.
Prep Step! Measure out your ingredients.
Step Two.
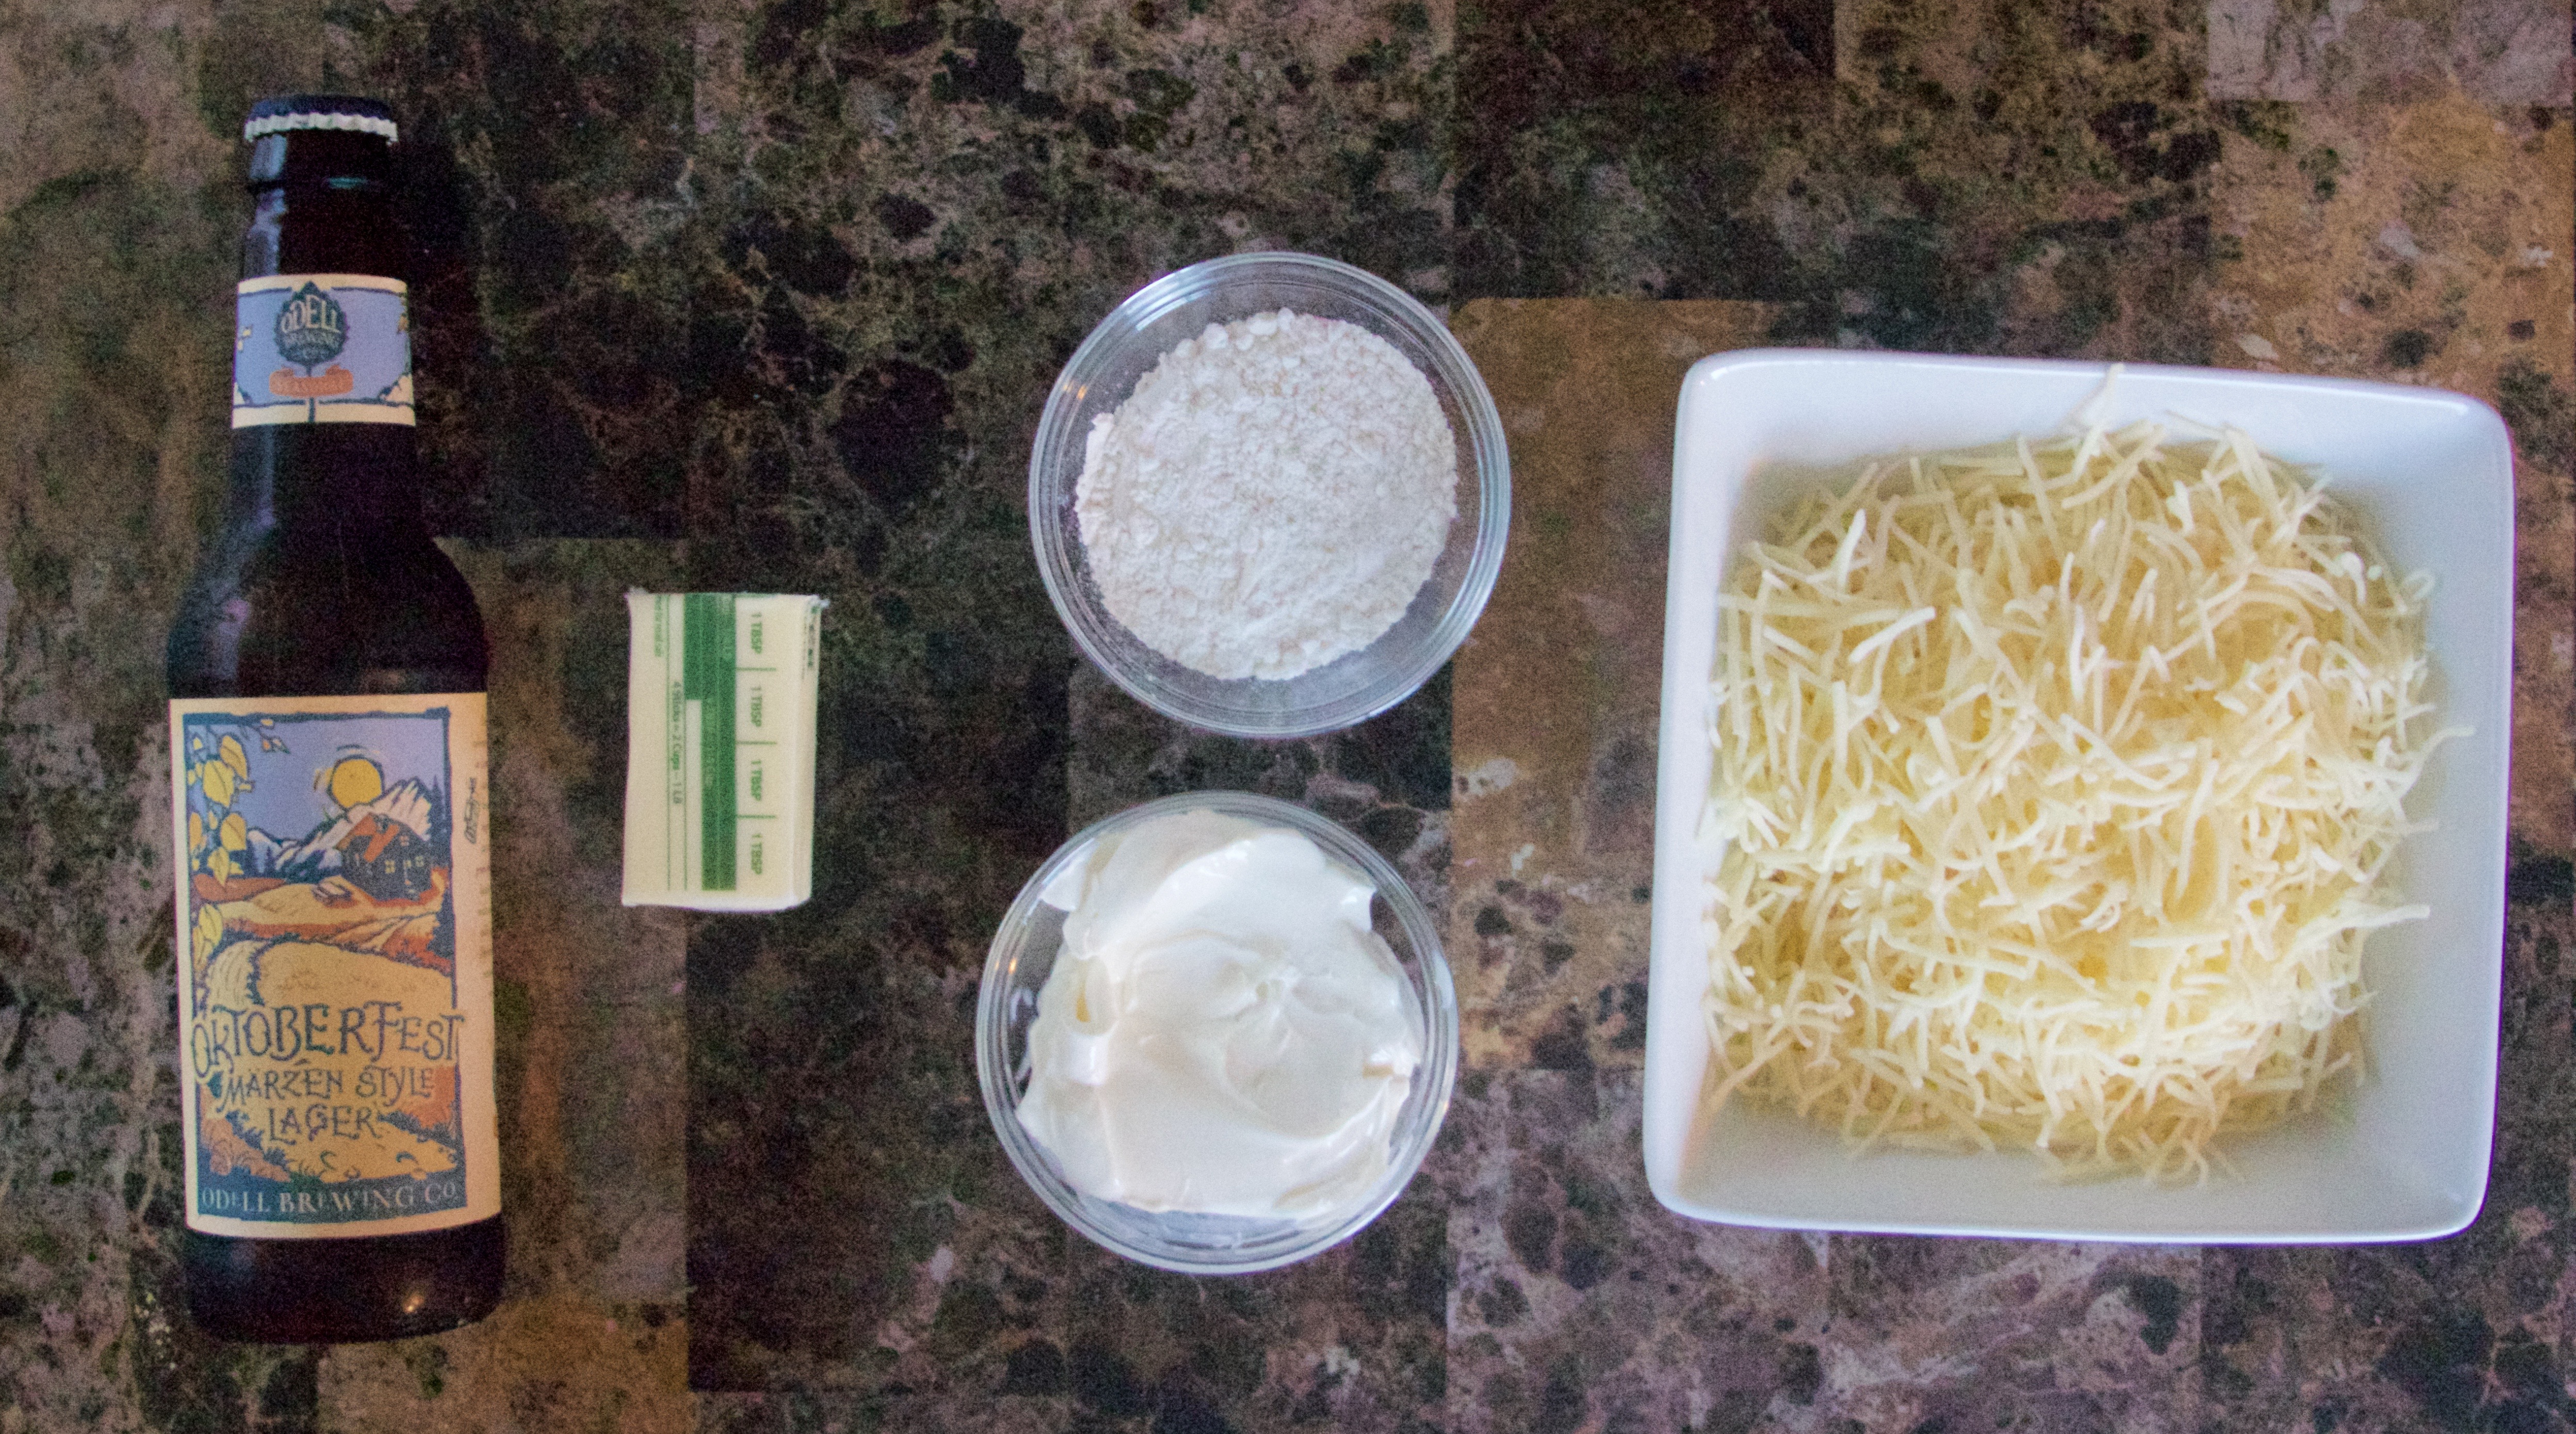
First, we make a roux! Melt the butter in a pot. Slowly whisk in the flour. Cook for 8-10 minutes, until the roux is a little brown; this means that the flour has cooked well. Whisk in the beer and cook until the mixture has become thicker. Add and stir in the cream cheese. When it is fully incorporated, mix in the cheese and stir until it is all melted.
Step Three.
Add the half and half until the cheese is the consistency you want for dipping. Now, this is usually where the recipe stops. But please add salt, pepper, mustard, paprika… whatever you want until the taste is just perfect for you! Serve warm with the hot pretzels!

Ingredients
- SOFT PRETZELS
- 1 1/2 cups warm water
- 1 packet yeast
- 1 Tbsp melted butter
- 1 Tbsp sugar
- 1 tsp salt
- 4 cups flour
- BEER CHEESE
- 4 Tbsp butter
- 1/8 cup flour
- 1 cup flavorful beer, such as an Oktoberfest brew
- 4 oz cream cheese
- 8 oz white cheddar cheese, shredded
- salt, pepper, mustard, paprika to taste
Instructions
- First, make the pretzels...
- Prep Step! Measure out all of your ingredients, for both recipes. Preheat your oven to 400°F. Set your water and baking soda to boil over high heat. Line a baking sheet with silicone or parchment paper.
- Make the pretzels. In a large bowl, mix the yeast into the warm water, and let it set for about 15 minutes. Whisk in the butter, sugar, and salt. Next, slowly add the flour as your stir the mixture.
- On a surface dusted with flour, knead the dough for about 5 minutes, or until it is not sticky and is super stretchy. This means that the gluten bonds are forming appropriately. This is my favorite step - I definitely recommend whipping up a batch if you're ever stressed out!
- Put the kneaded dough back into the bowl, cover with a damp towel, and let set for another ten minutes.
- Now, pinch off a handful of dough. Roll and stretch it until it is a long tube, about 20 inches. Fold it into a "U" shape, then twist the end. Fold over the ends until it makes a recognizable pretzel shape.
- Make sure that the water is at a rolling boil. Have your baking sheet ready. Place the pretzels, one at a time, on a slotted spoon, and dip into the water for 30 seconds. Place the pretzels on the baking sheet, sprinkle with coarse sea salt, and bake for about15 minutes, until they are golden brown.
- Next, make the cheese dip...
- Prep Step! Measure out your ingredients.
- First, we make a roux! Melt the butter in a pot. Slowly whisk in the flour. Cook for 8-10 minutes, until the roux is a little brown; this means that the flour has cooked well. Whisk in the beer and cook until the mixture has become thicker. Add and stir in the cream cheese. When it is fully incorporated, mix in the cheese and stir until it is all melted.
- Add the half and half until the cheese is the consistency you want for dipping. Now, this is usually where the recipe stops. But please add salt, pepper, mustard, paprika... whatever you want until the taste is just perfect for you! Serve warm with the hot pretzels!
Ein Prosit! I love Oktoberfest and German celebrations. Not just because it includes my favorite type of food, great beer, and a good time, but because of my memories. I cherish every moment I have spent with my grandparents, and some of my fondest memories involved polka dancing with my grandpa and grandma. They are the best dancers and the cutest couple I know, and I miss them so much (to clarify: they are very much alive, I just don’t live near them anymore, and out times together are rare).
So, here’s to you Pope-pope and Grandpa. I love you forever and miss you so much!
~~~~~~~~~~
Beer Brats, Just Like Mama Used to Make
Step One.
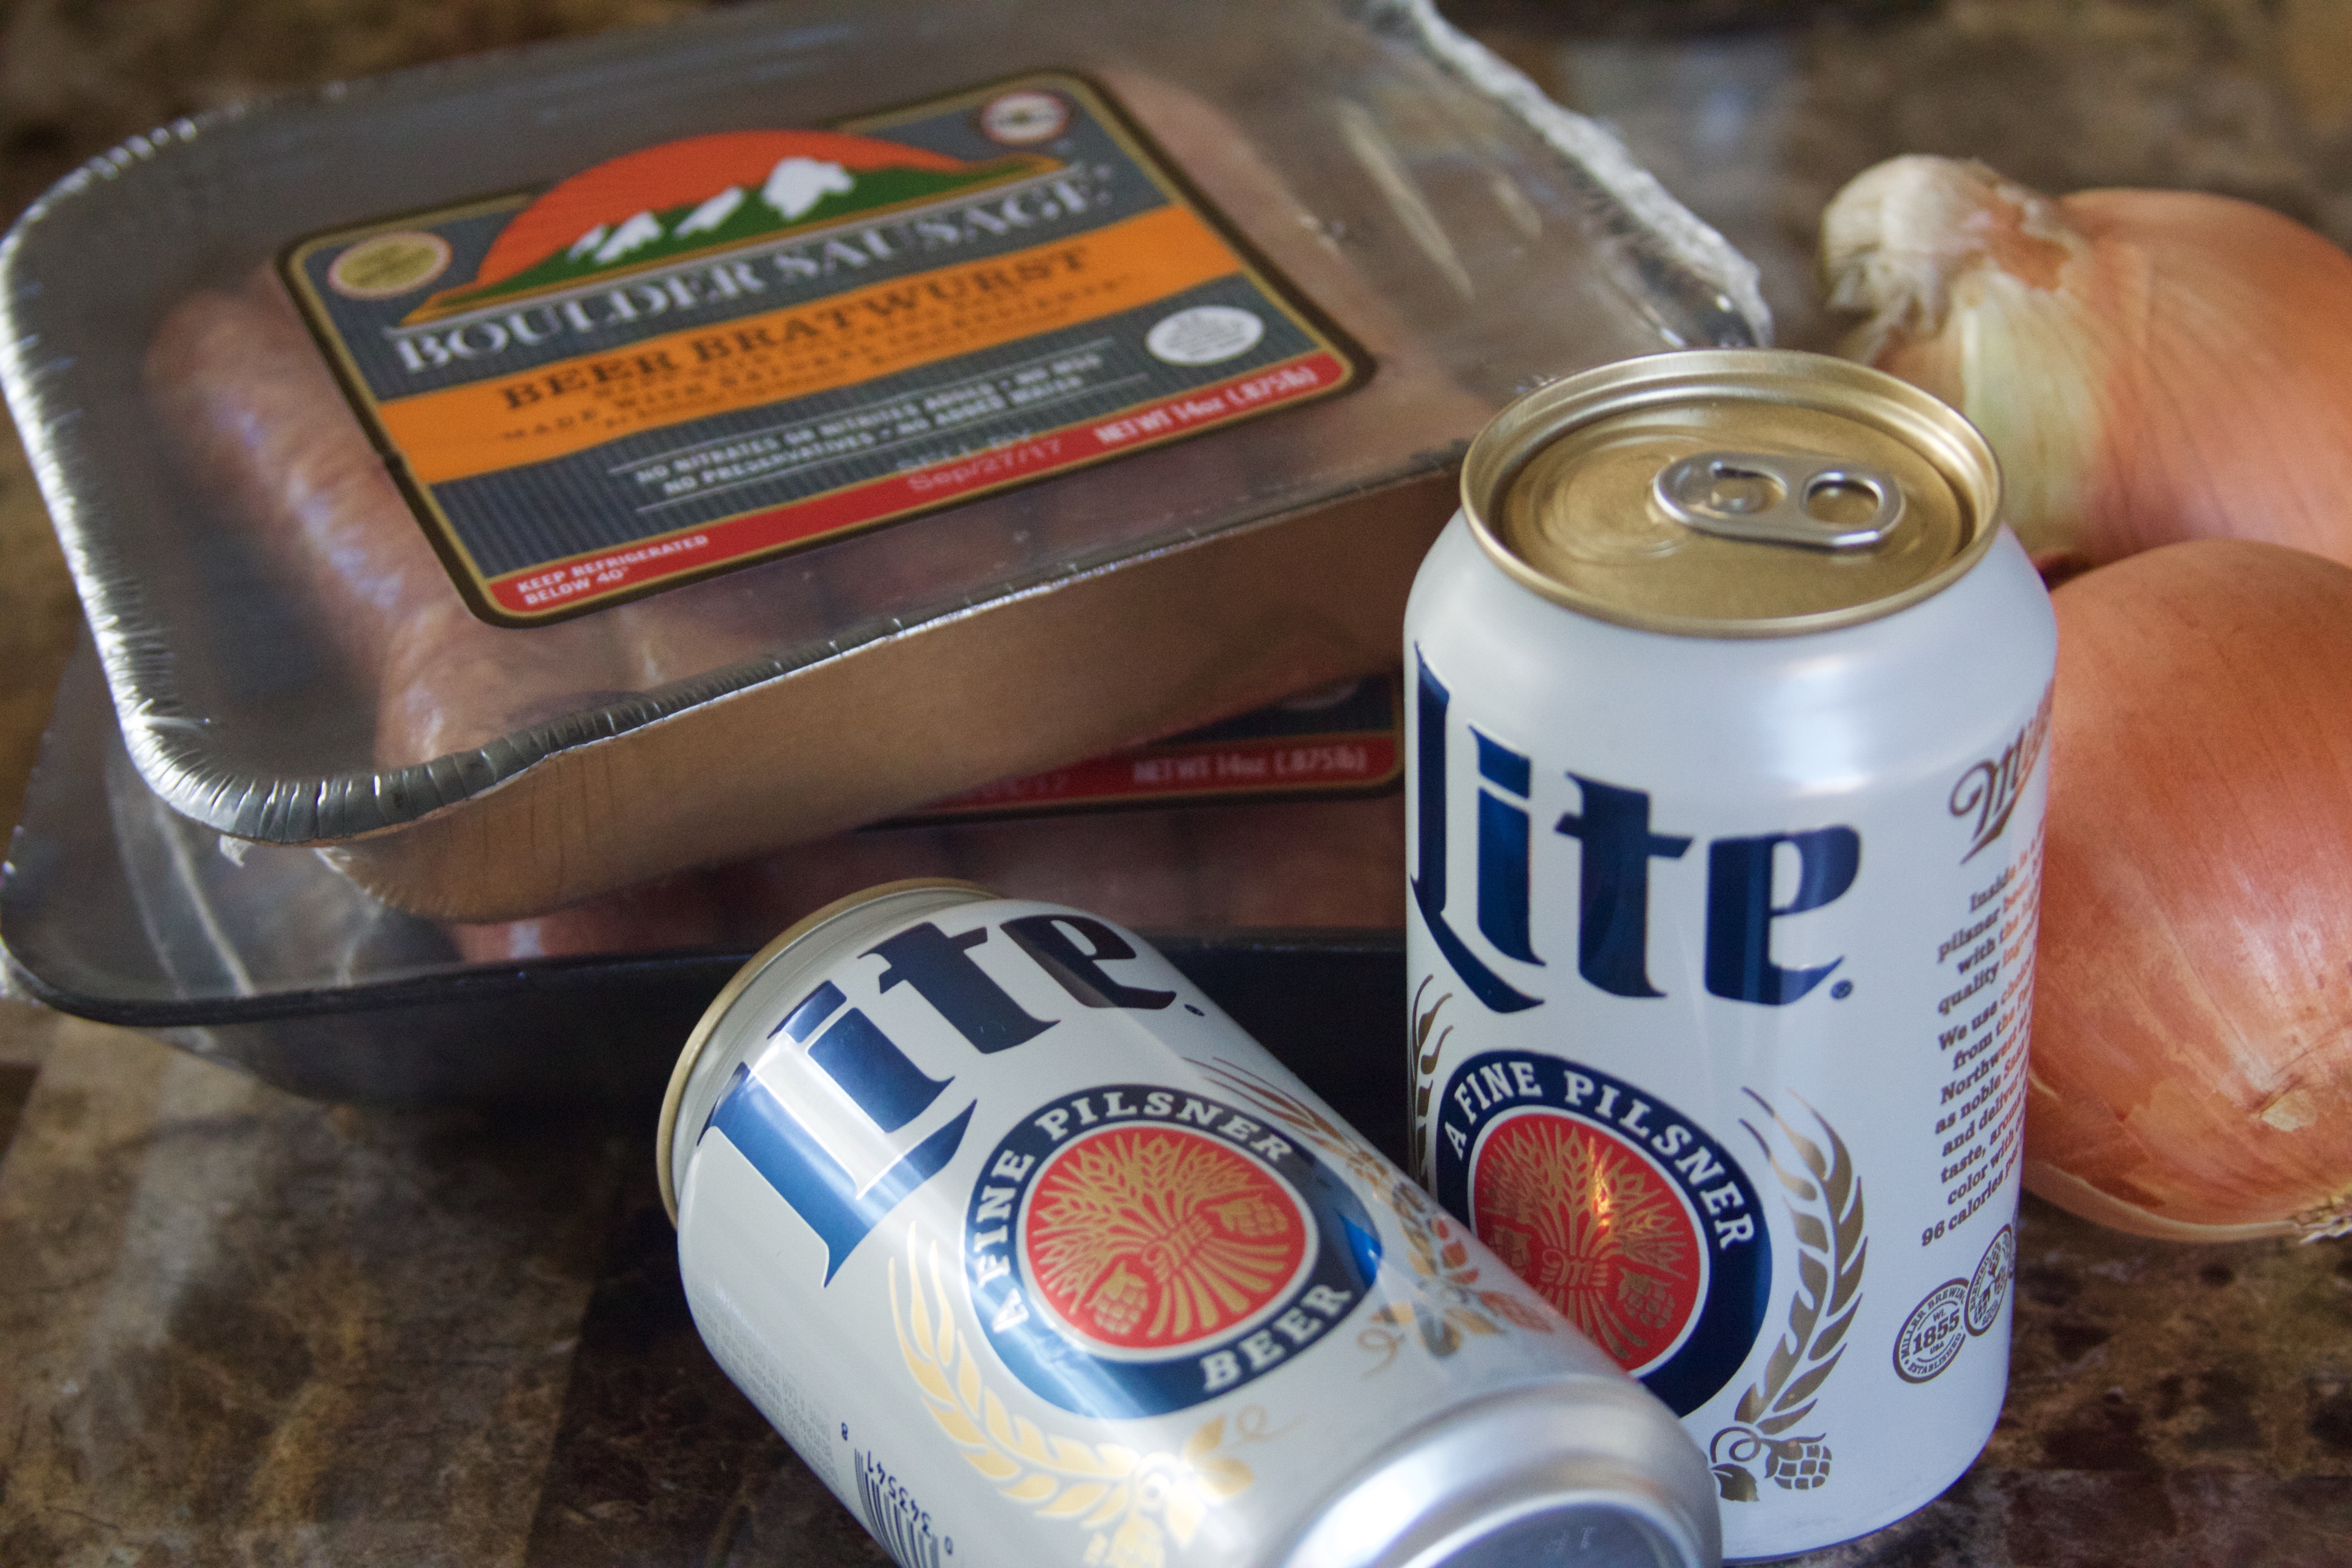
Prep Step! Set up your crockpot. Chop up the onions, nice and thin. Get your grill going (or a grill pan, pan, whatever you’ve got). Taste test your beer of choice 😉

Step Two.
Grill those brats, just until they are browned.

Step Three.
Add the onions and brats to the crockpot. Use a liner if you have it – it makes clean-up SO much easier! Add beer until the brats and onions are completely covered. Cook on low for 8 hours until those brats are nice and done. Low and slow – they will melt in your mouth!
Step Four.
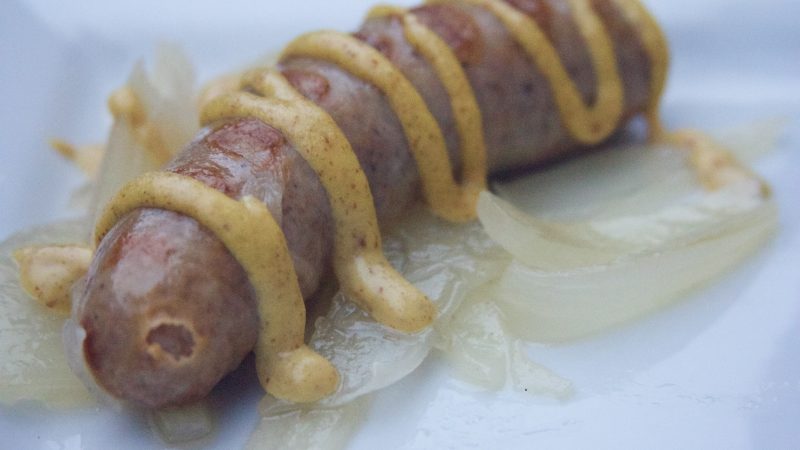
When they are done, serve it up with a healthy scoop of onions, a bun if you like, and some good, German mustard.
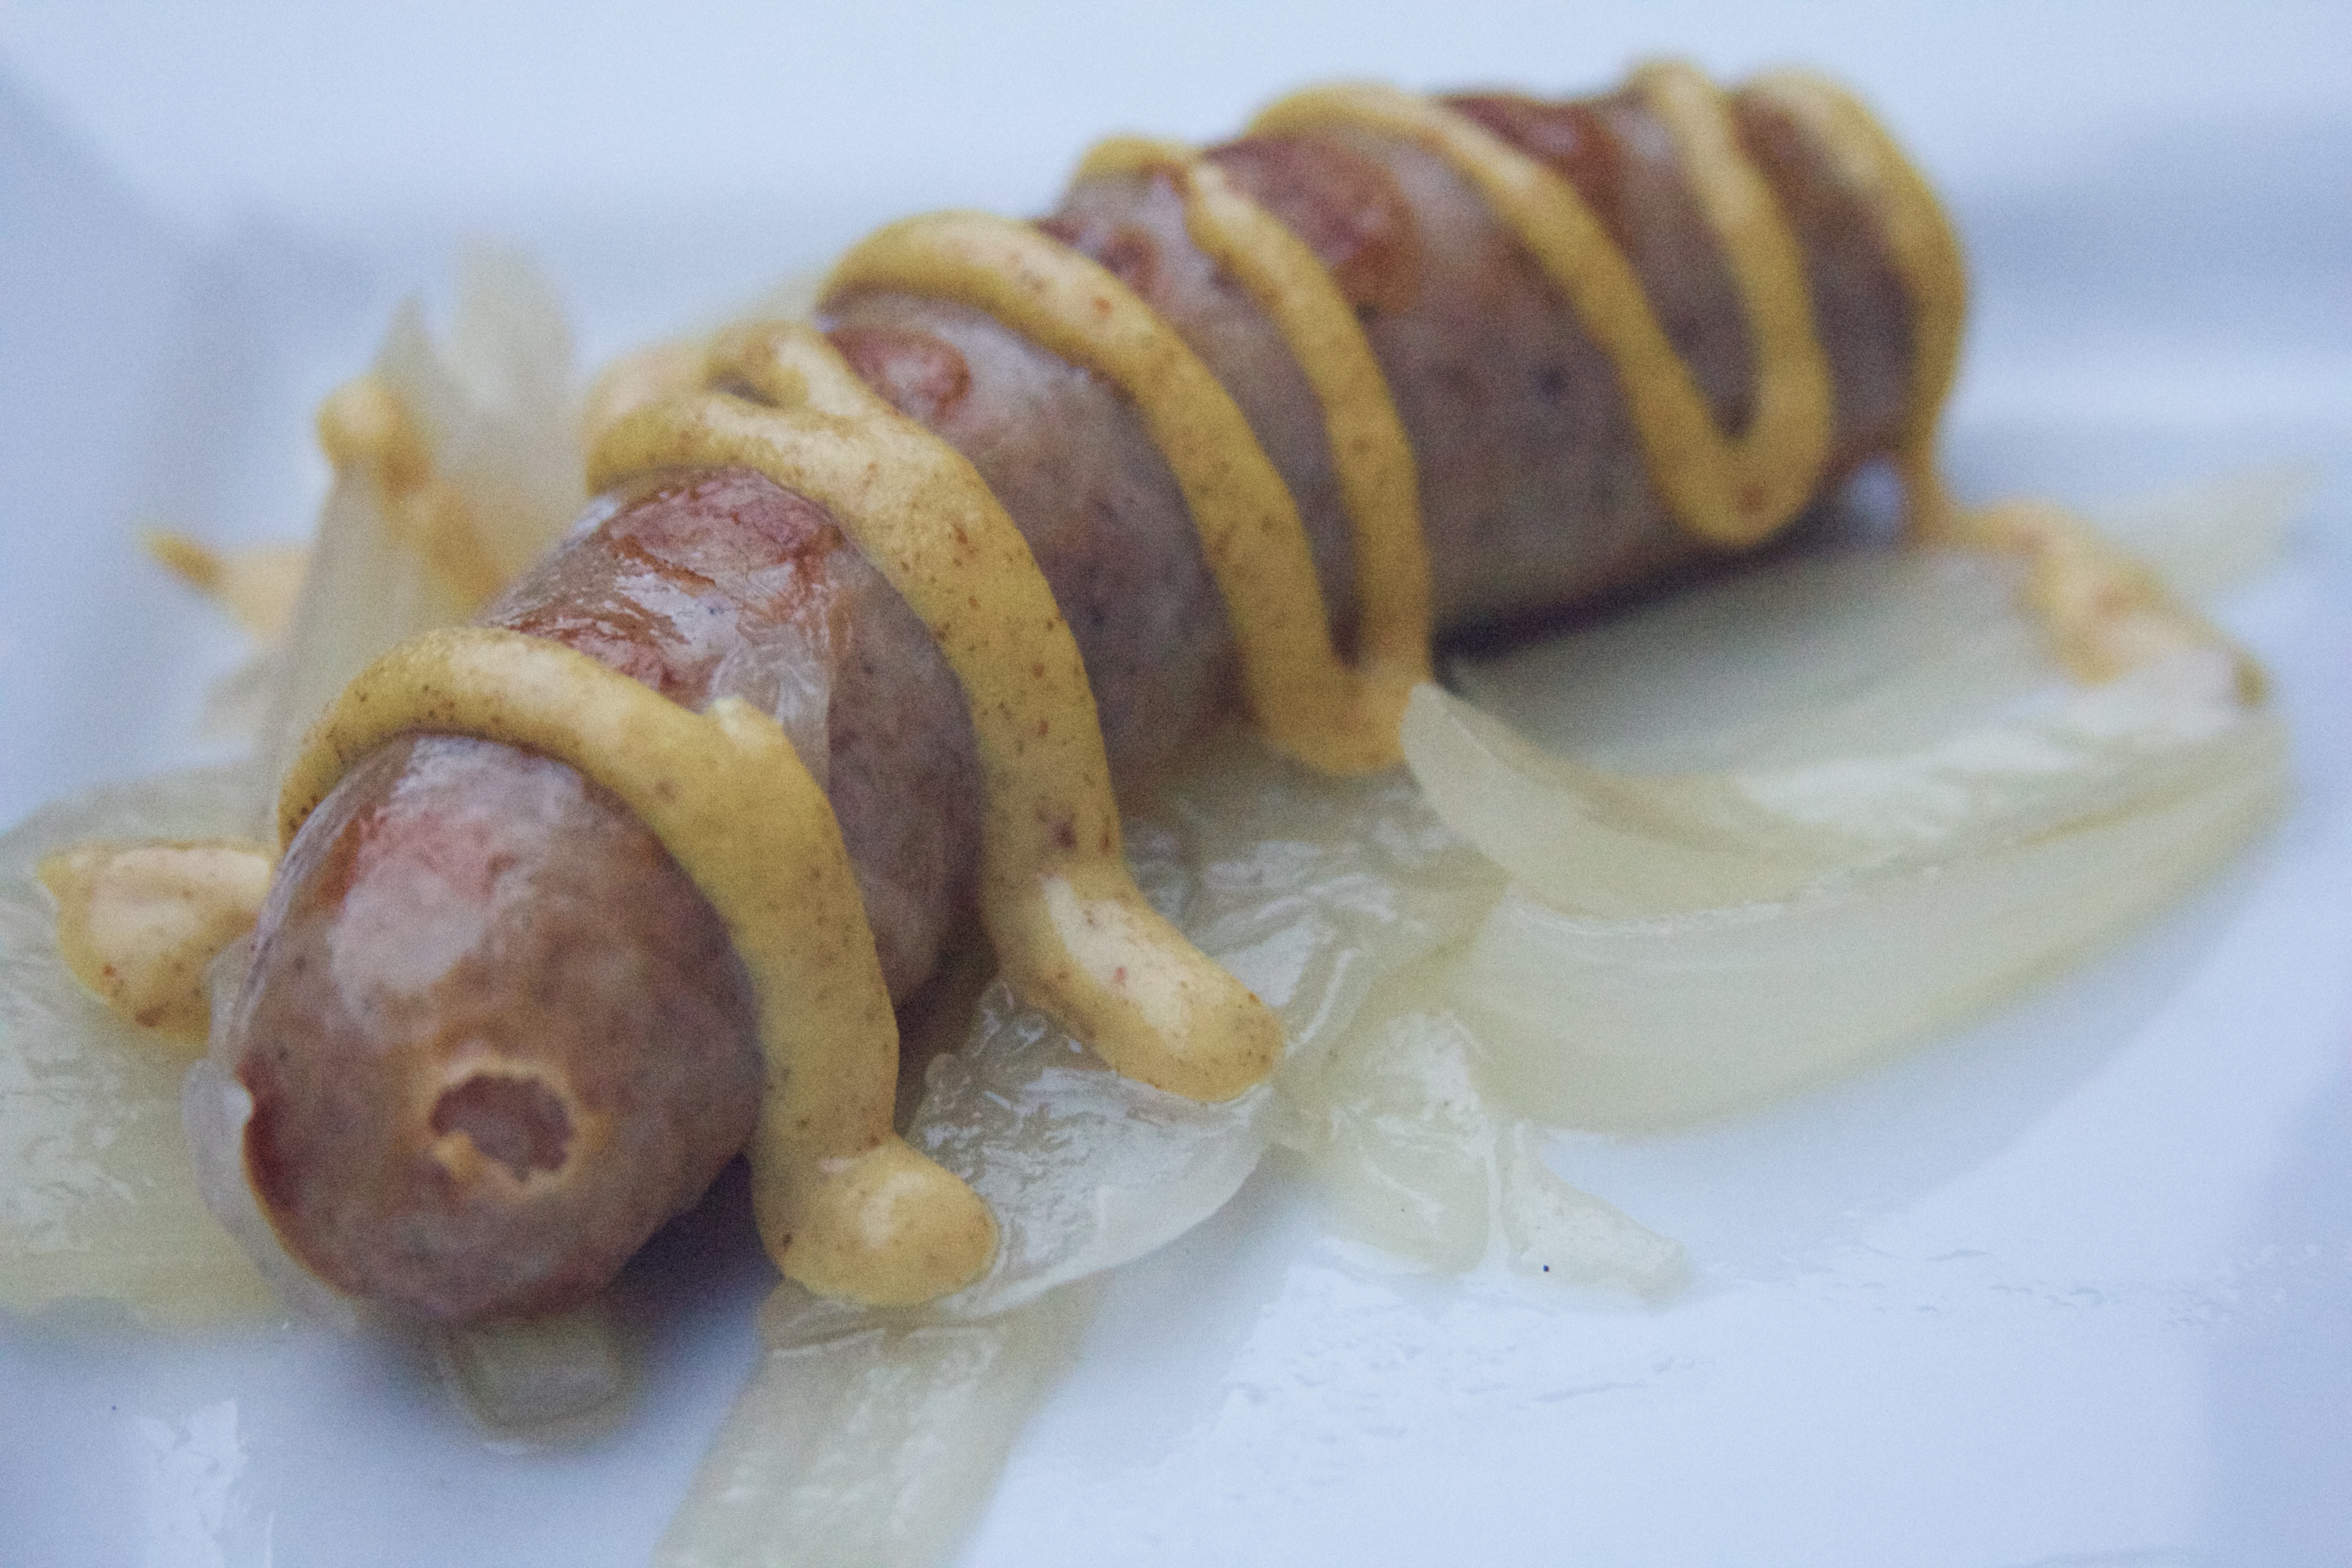

Delicious brats that melt in your mouth!
Ingredients
- a dozen brats
- 2 onions
- 4+ beers (quality doesn't matter too much)
- ...and that's it!
Instructions
- Prep Step! Set up your crockpot. Chop up the onions, nice and thin. Get your grill going (or a grill pan, pan, whatever you've got). Taste test your beer of choice 😉
- Grill those brats, just until they are browned.
- Add the onions and brats to the crockpot. Use a liner if you have it - it makes clean-up SO much easier! Add beer until the brats and onions are completely covered. Cook on low for 8 hours until those brats are nice and done. Low and slow - they will melt in your mouth!
- When they are done, serve it up with a healthy scoop of onions, a bun if you like, and some good, German mustard.
Enjoy your Oktoberfest fare with a stein of cold beer and some good music!
Who doesn’t love Taco Tuesday? In New Orleans, there was a whole restaurant just called “Tacos and Beer.” Perfect for the day! And straight to the point with the name.
But if you know me, you know I have an unfortunate amount of dietary restrictions (ugh). So usually tacos and other Tex-Mex fare are out of the question. These tacos fulfill the need for tasty Tex-Mex without breaking any rules AND while being healthy too!
~~~~~~~~~~
Step One.
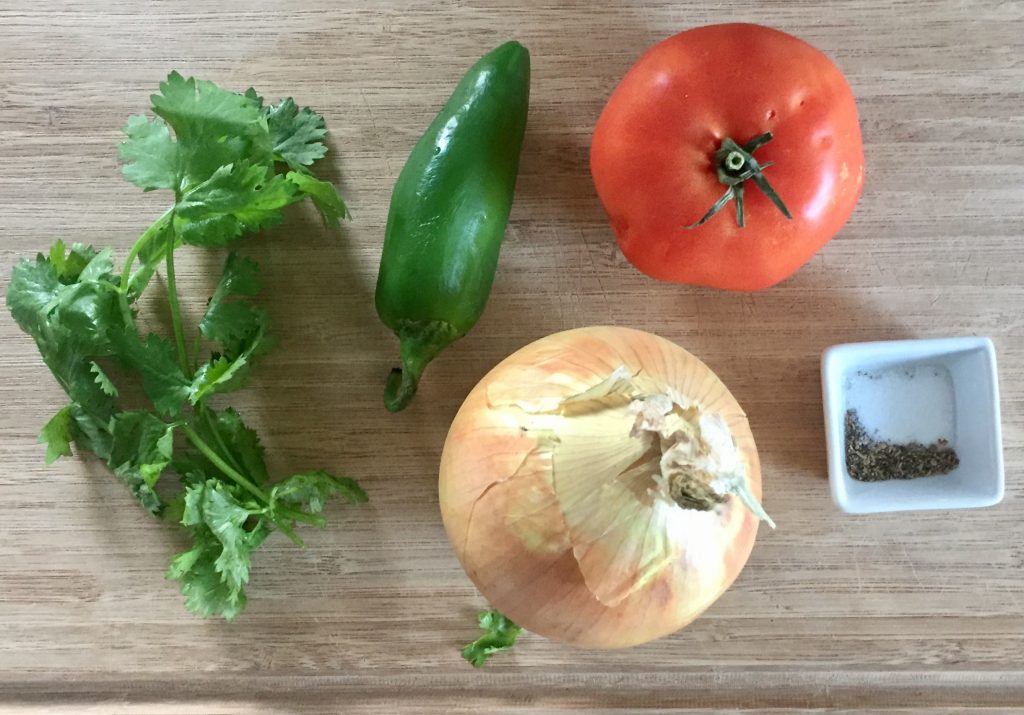
Prep Step! Set out and measure all of your ingredients. Wash your veggies and find a pair of rubber gloves if you’re sensitive to jalapeños.
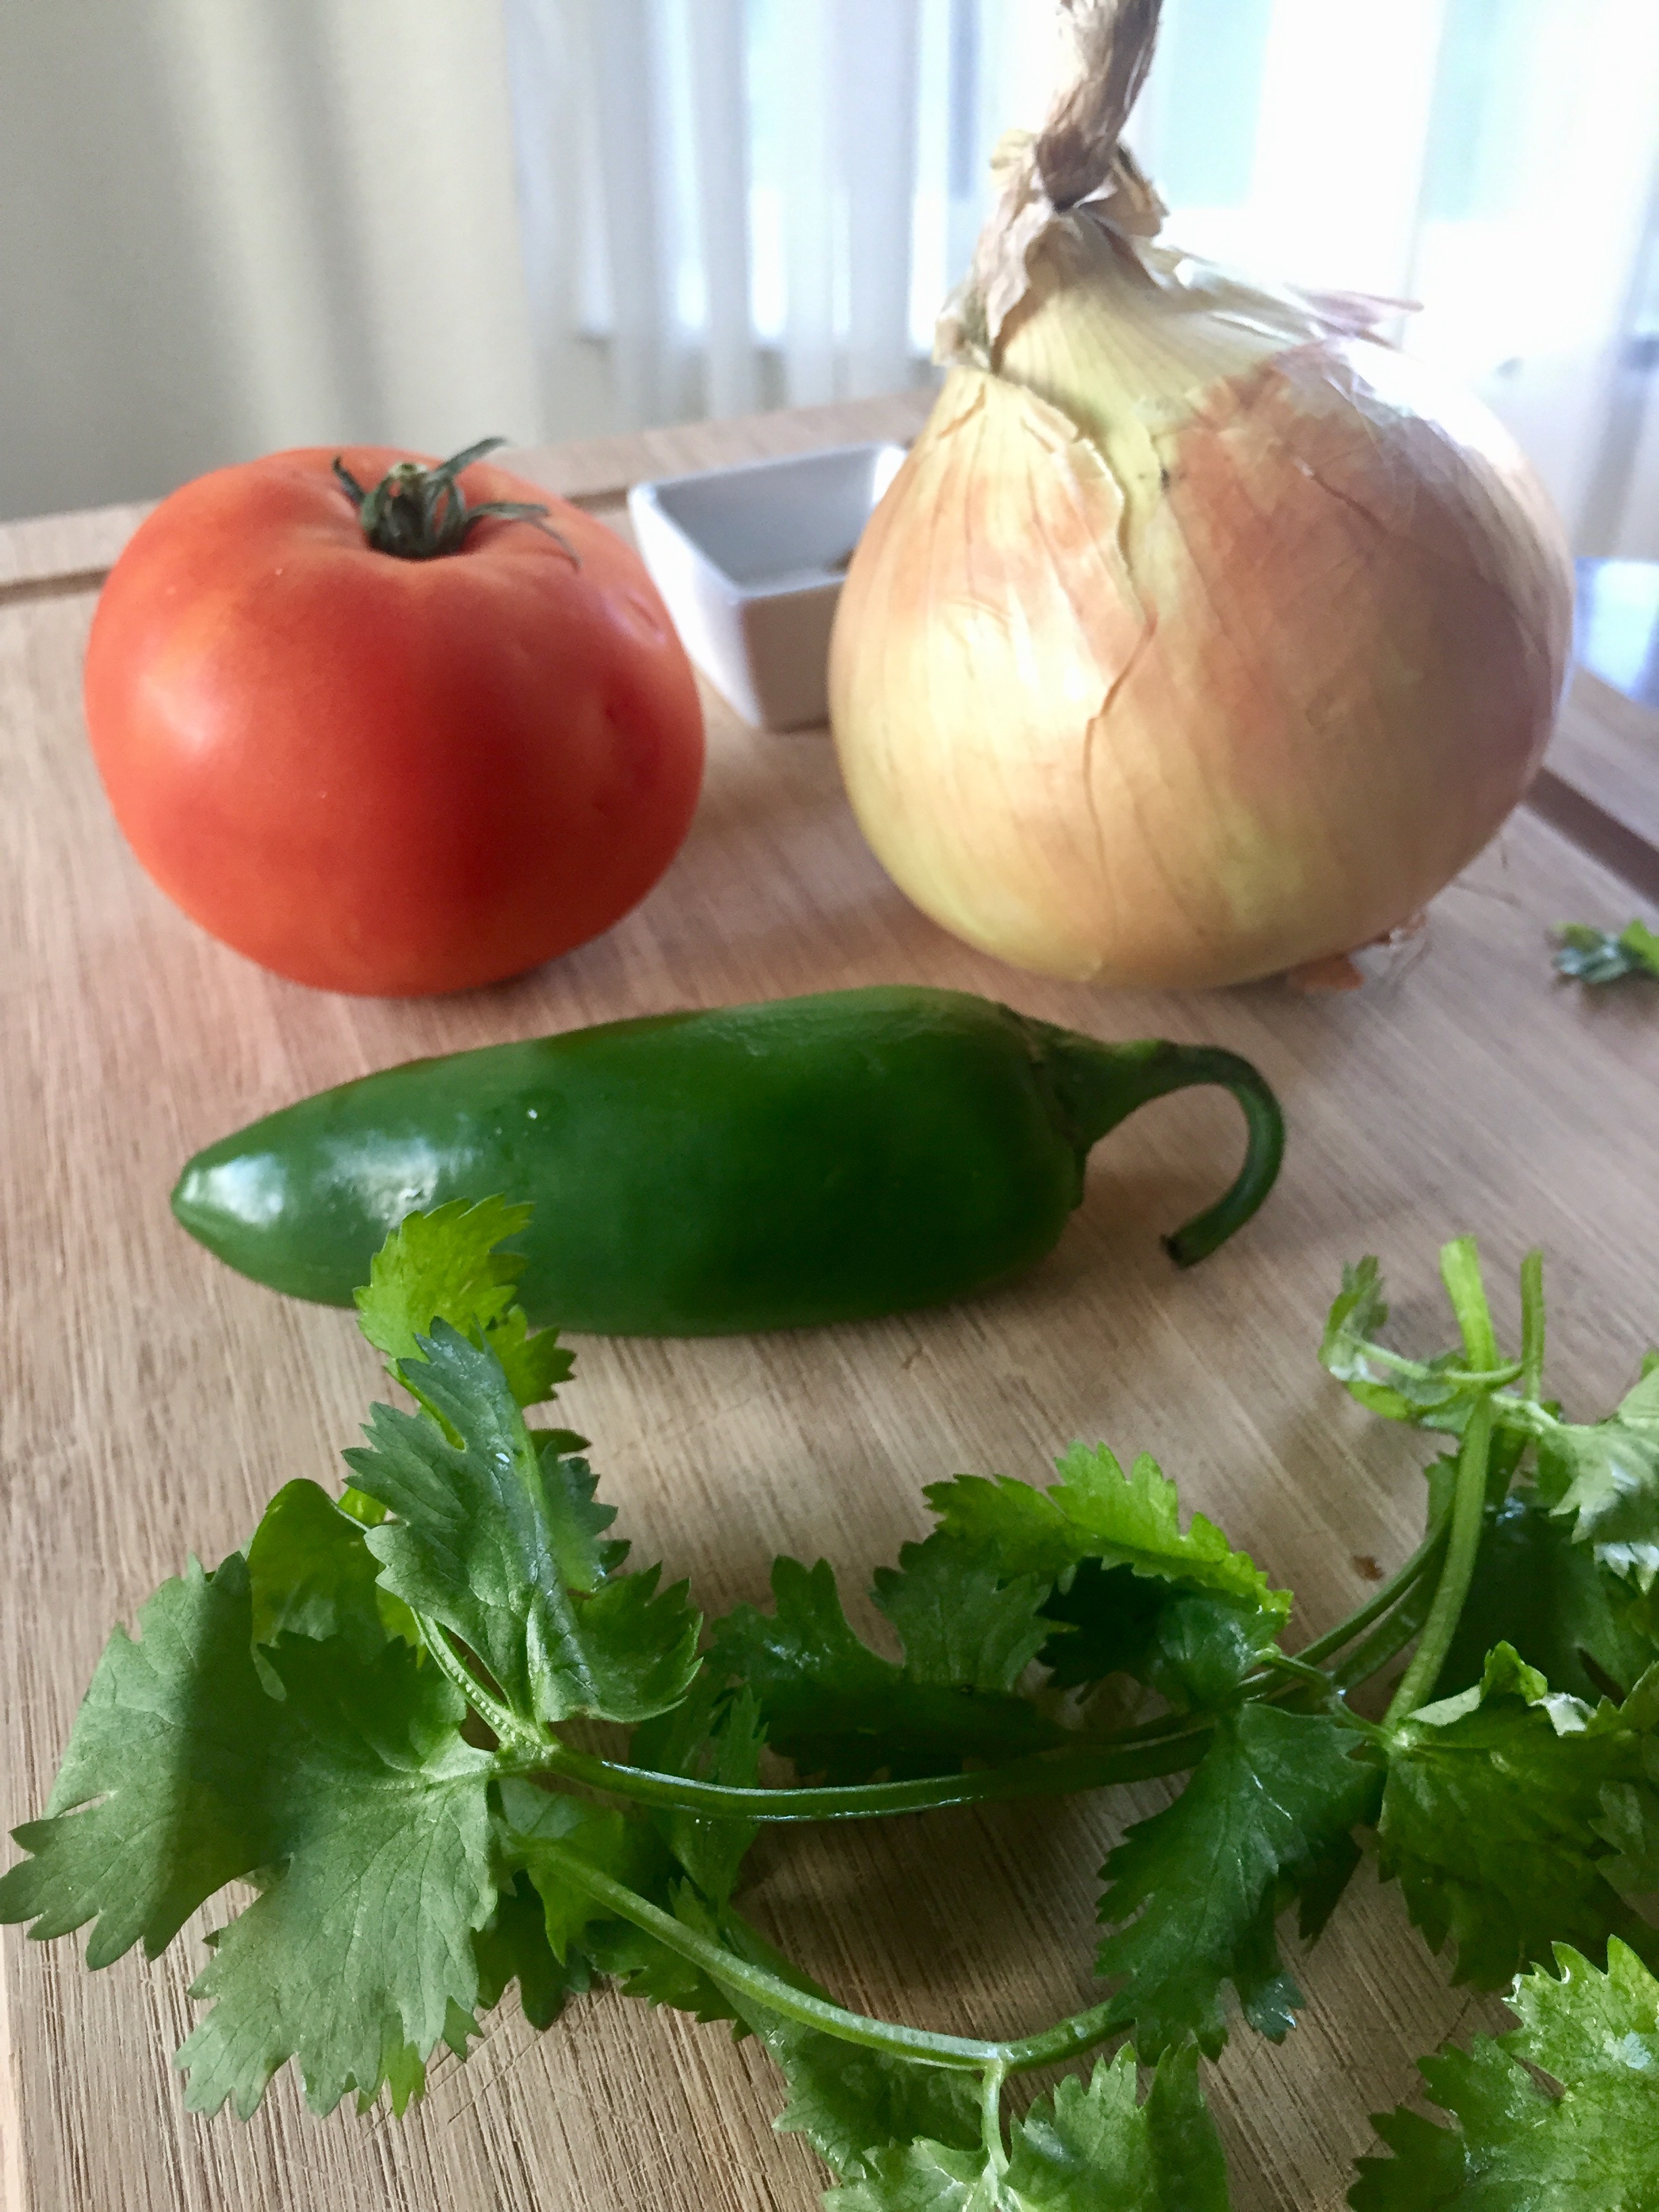
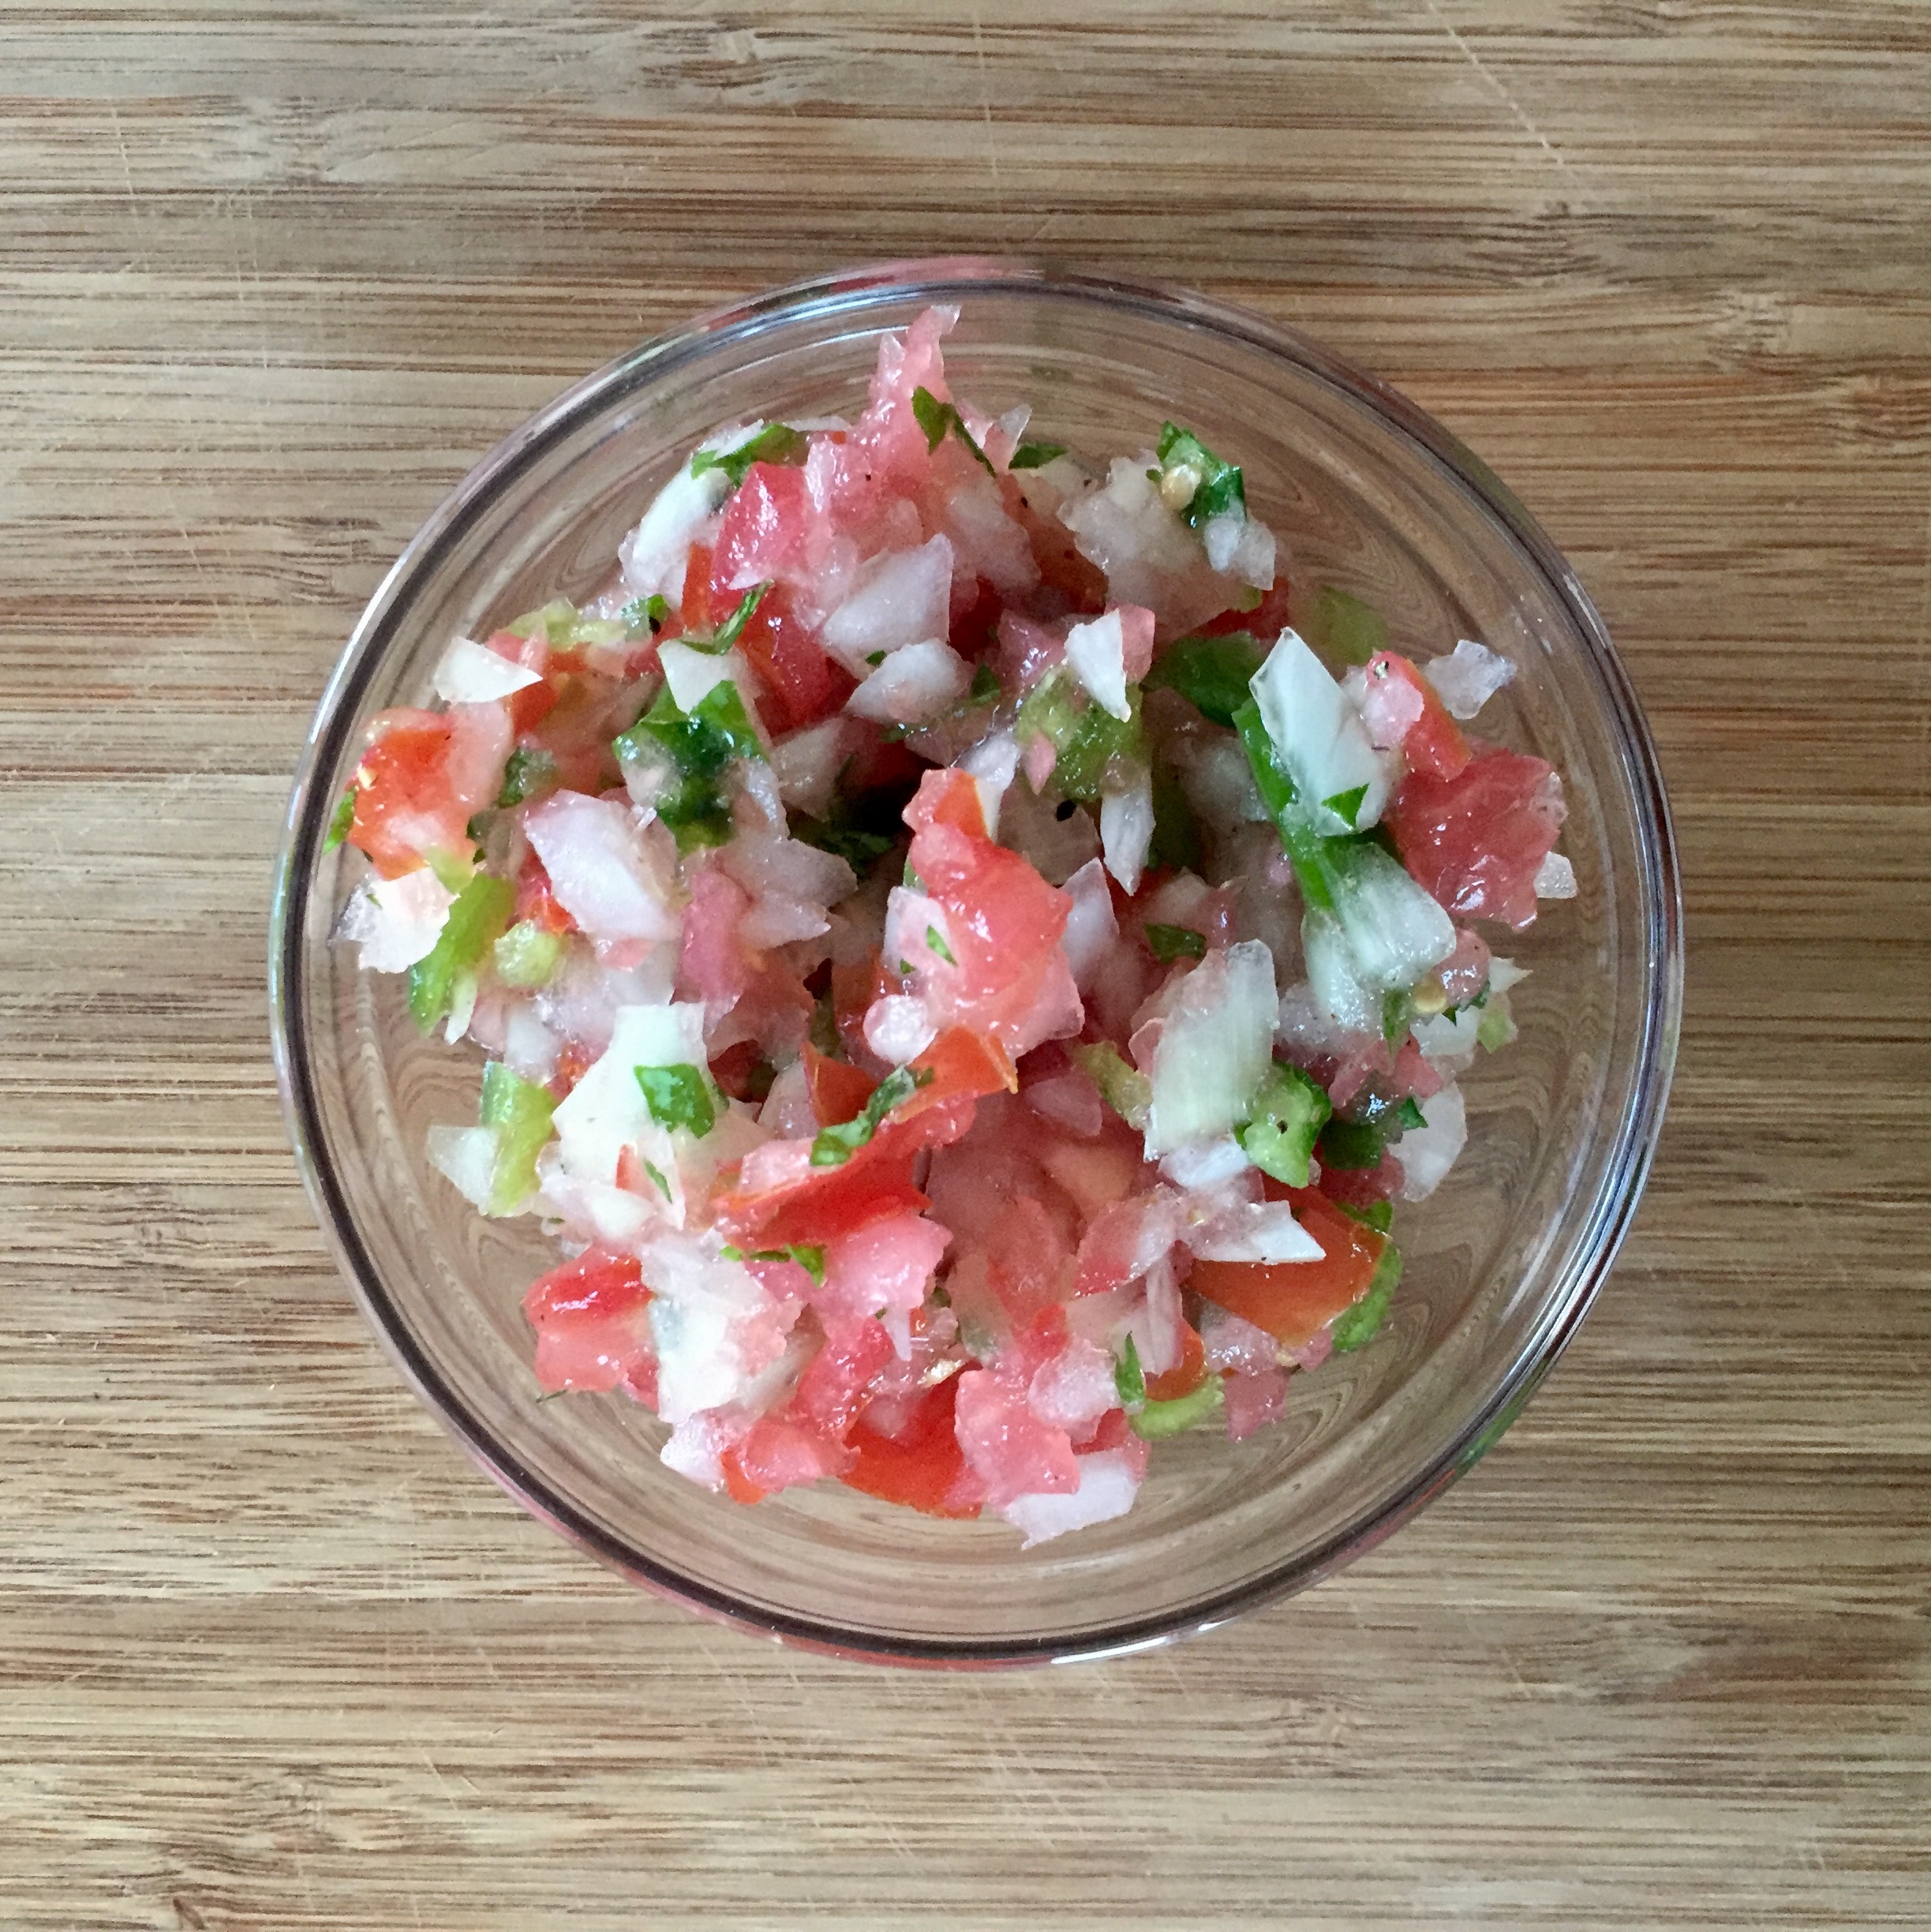
Step Two.
Make the pico de gallo. Cut up the onion, tomato, and jalapeño so that they will fit into a food processor. Add the cilantro and process until it is finely chopped. Mix in the salt and pepper. Set in a fine-mesh strainer over a bowl to release any excess liquid while the turkey cooks.
Step Three.
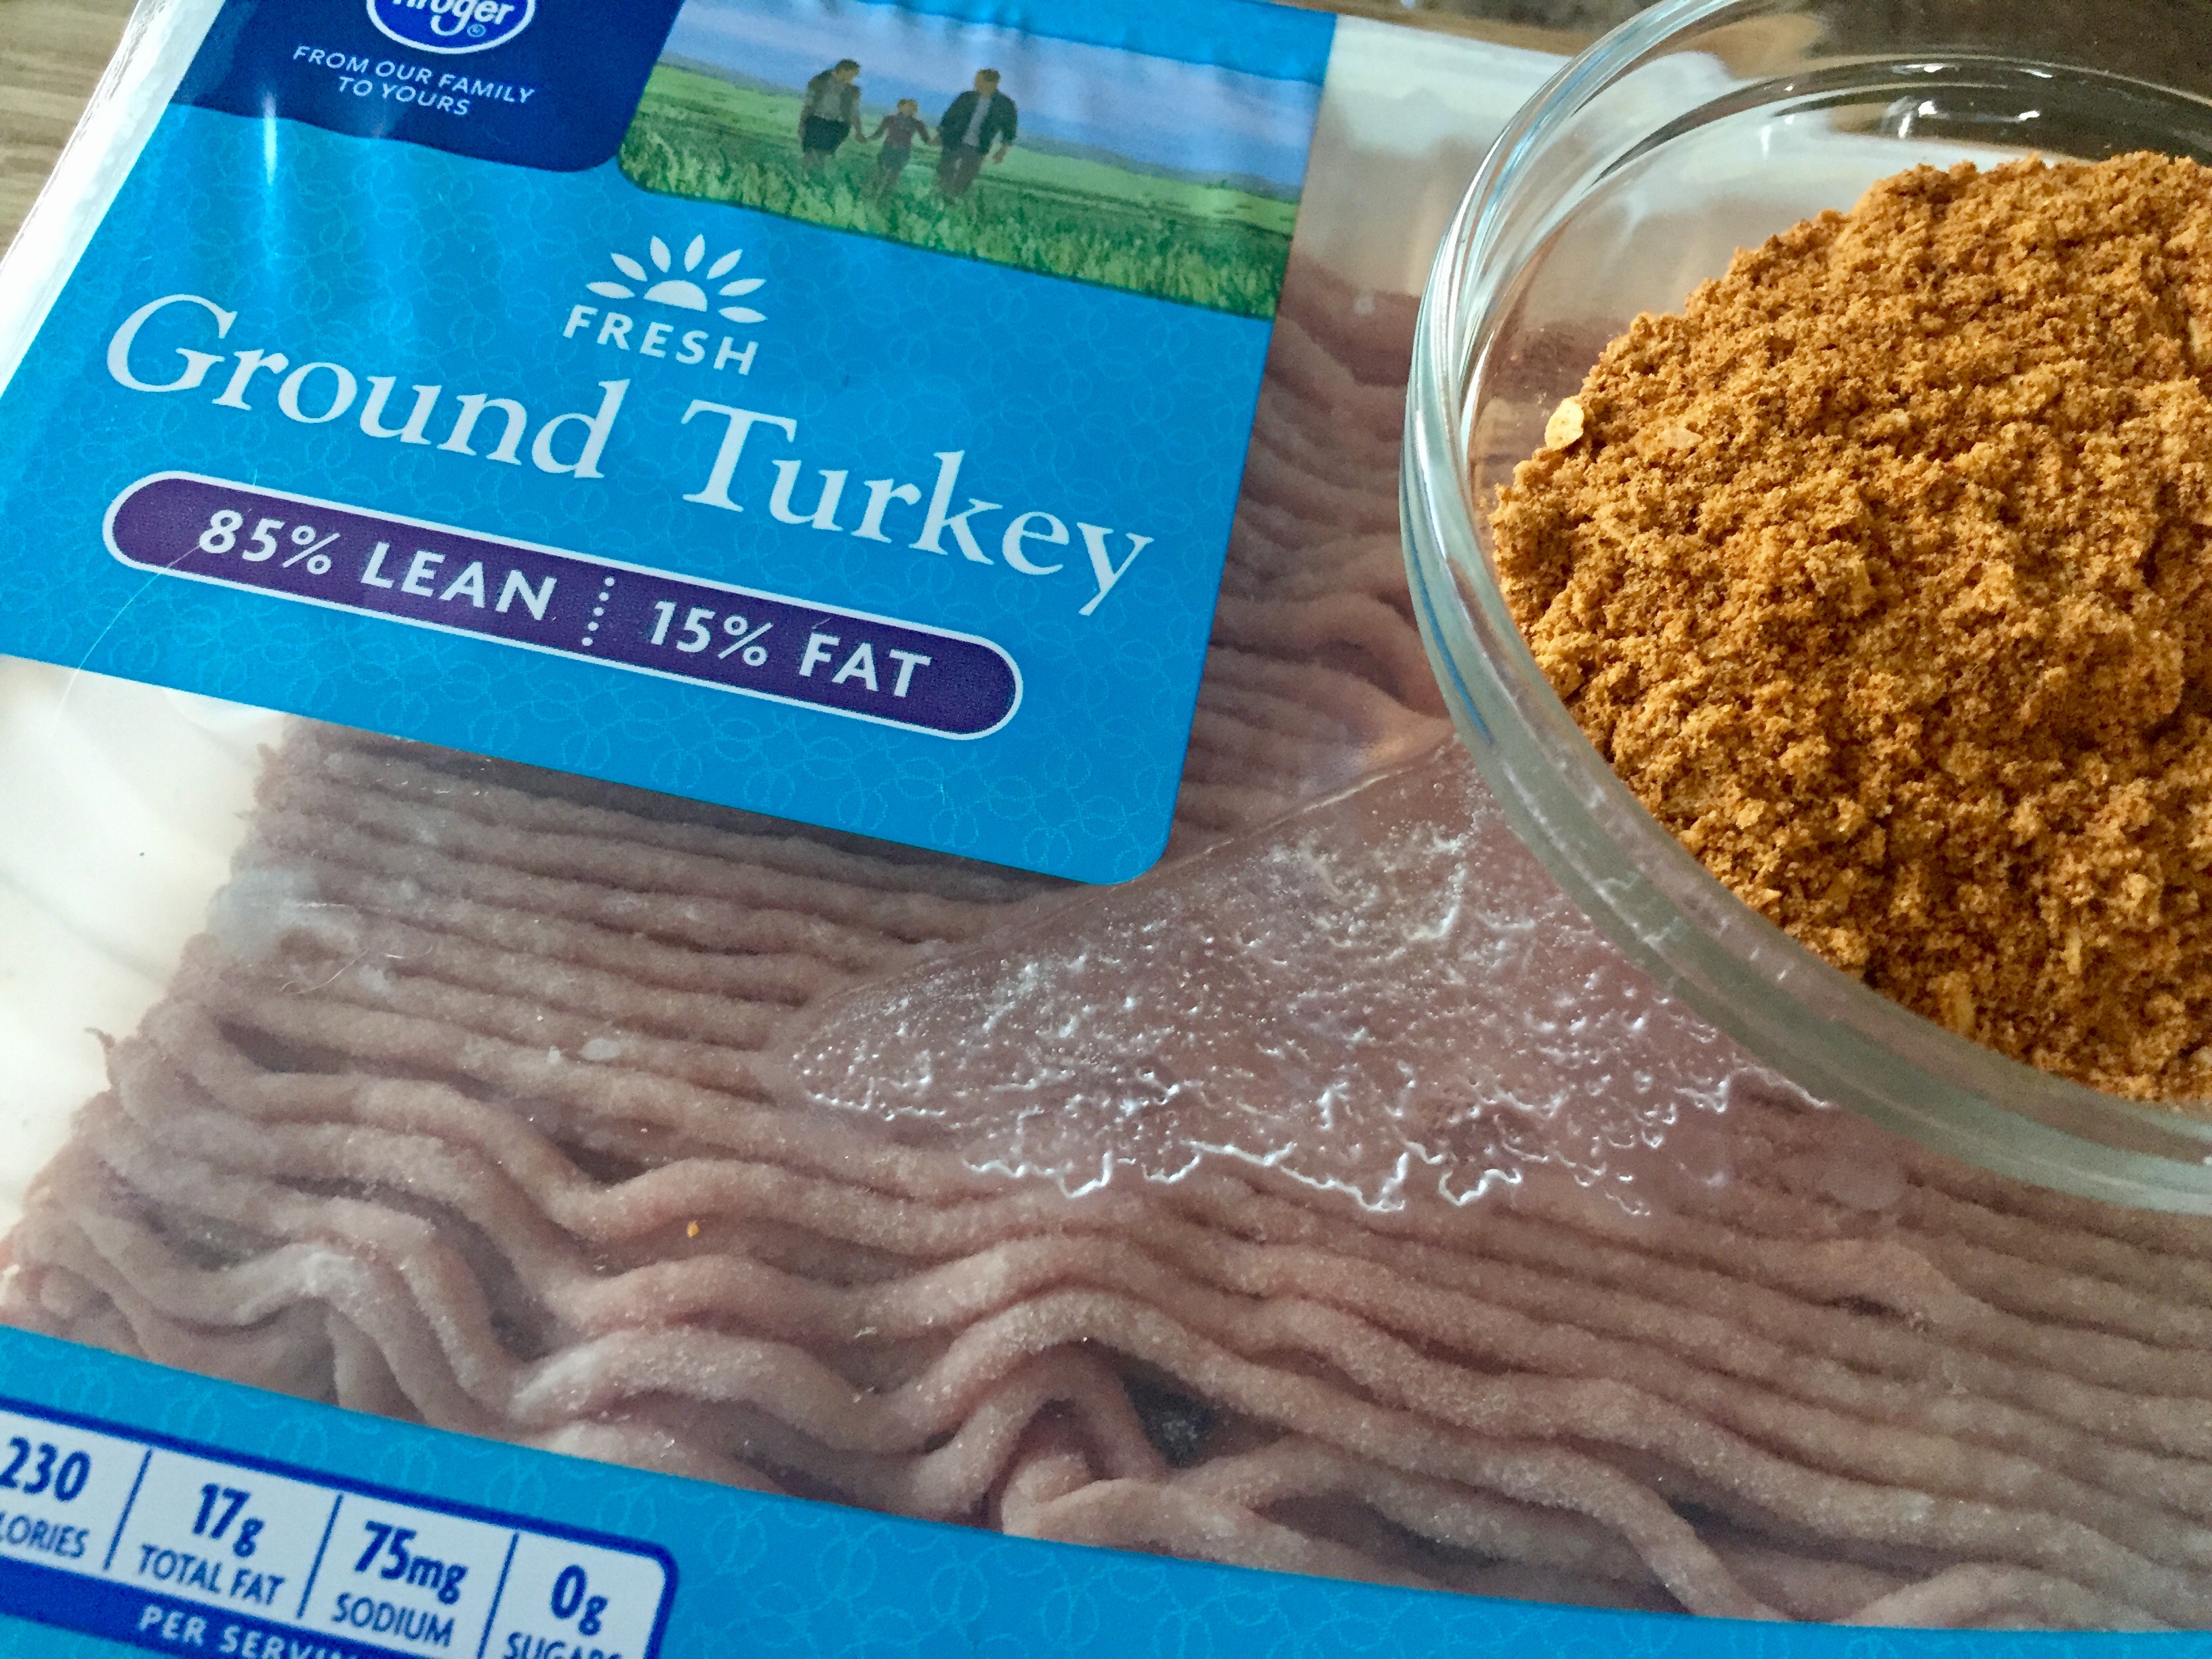
Heat a pan with a Tablespoon of olive oil over medium heat. Add the turkey and cook until it is done, about 10 minutes. When it is just about done and starting to brown, add the taco seasoning. Stir to coat the turkey evenly.
Step Four.
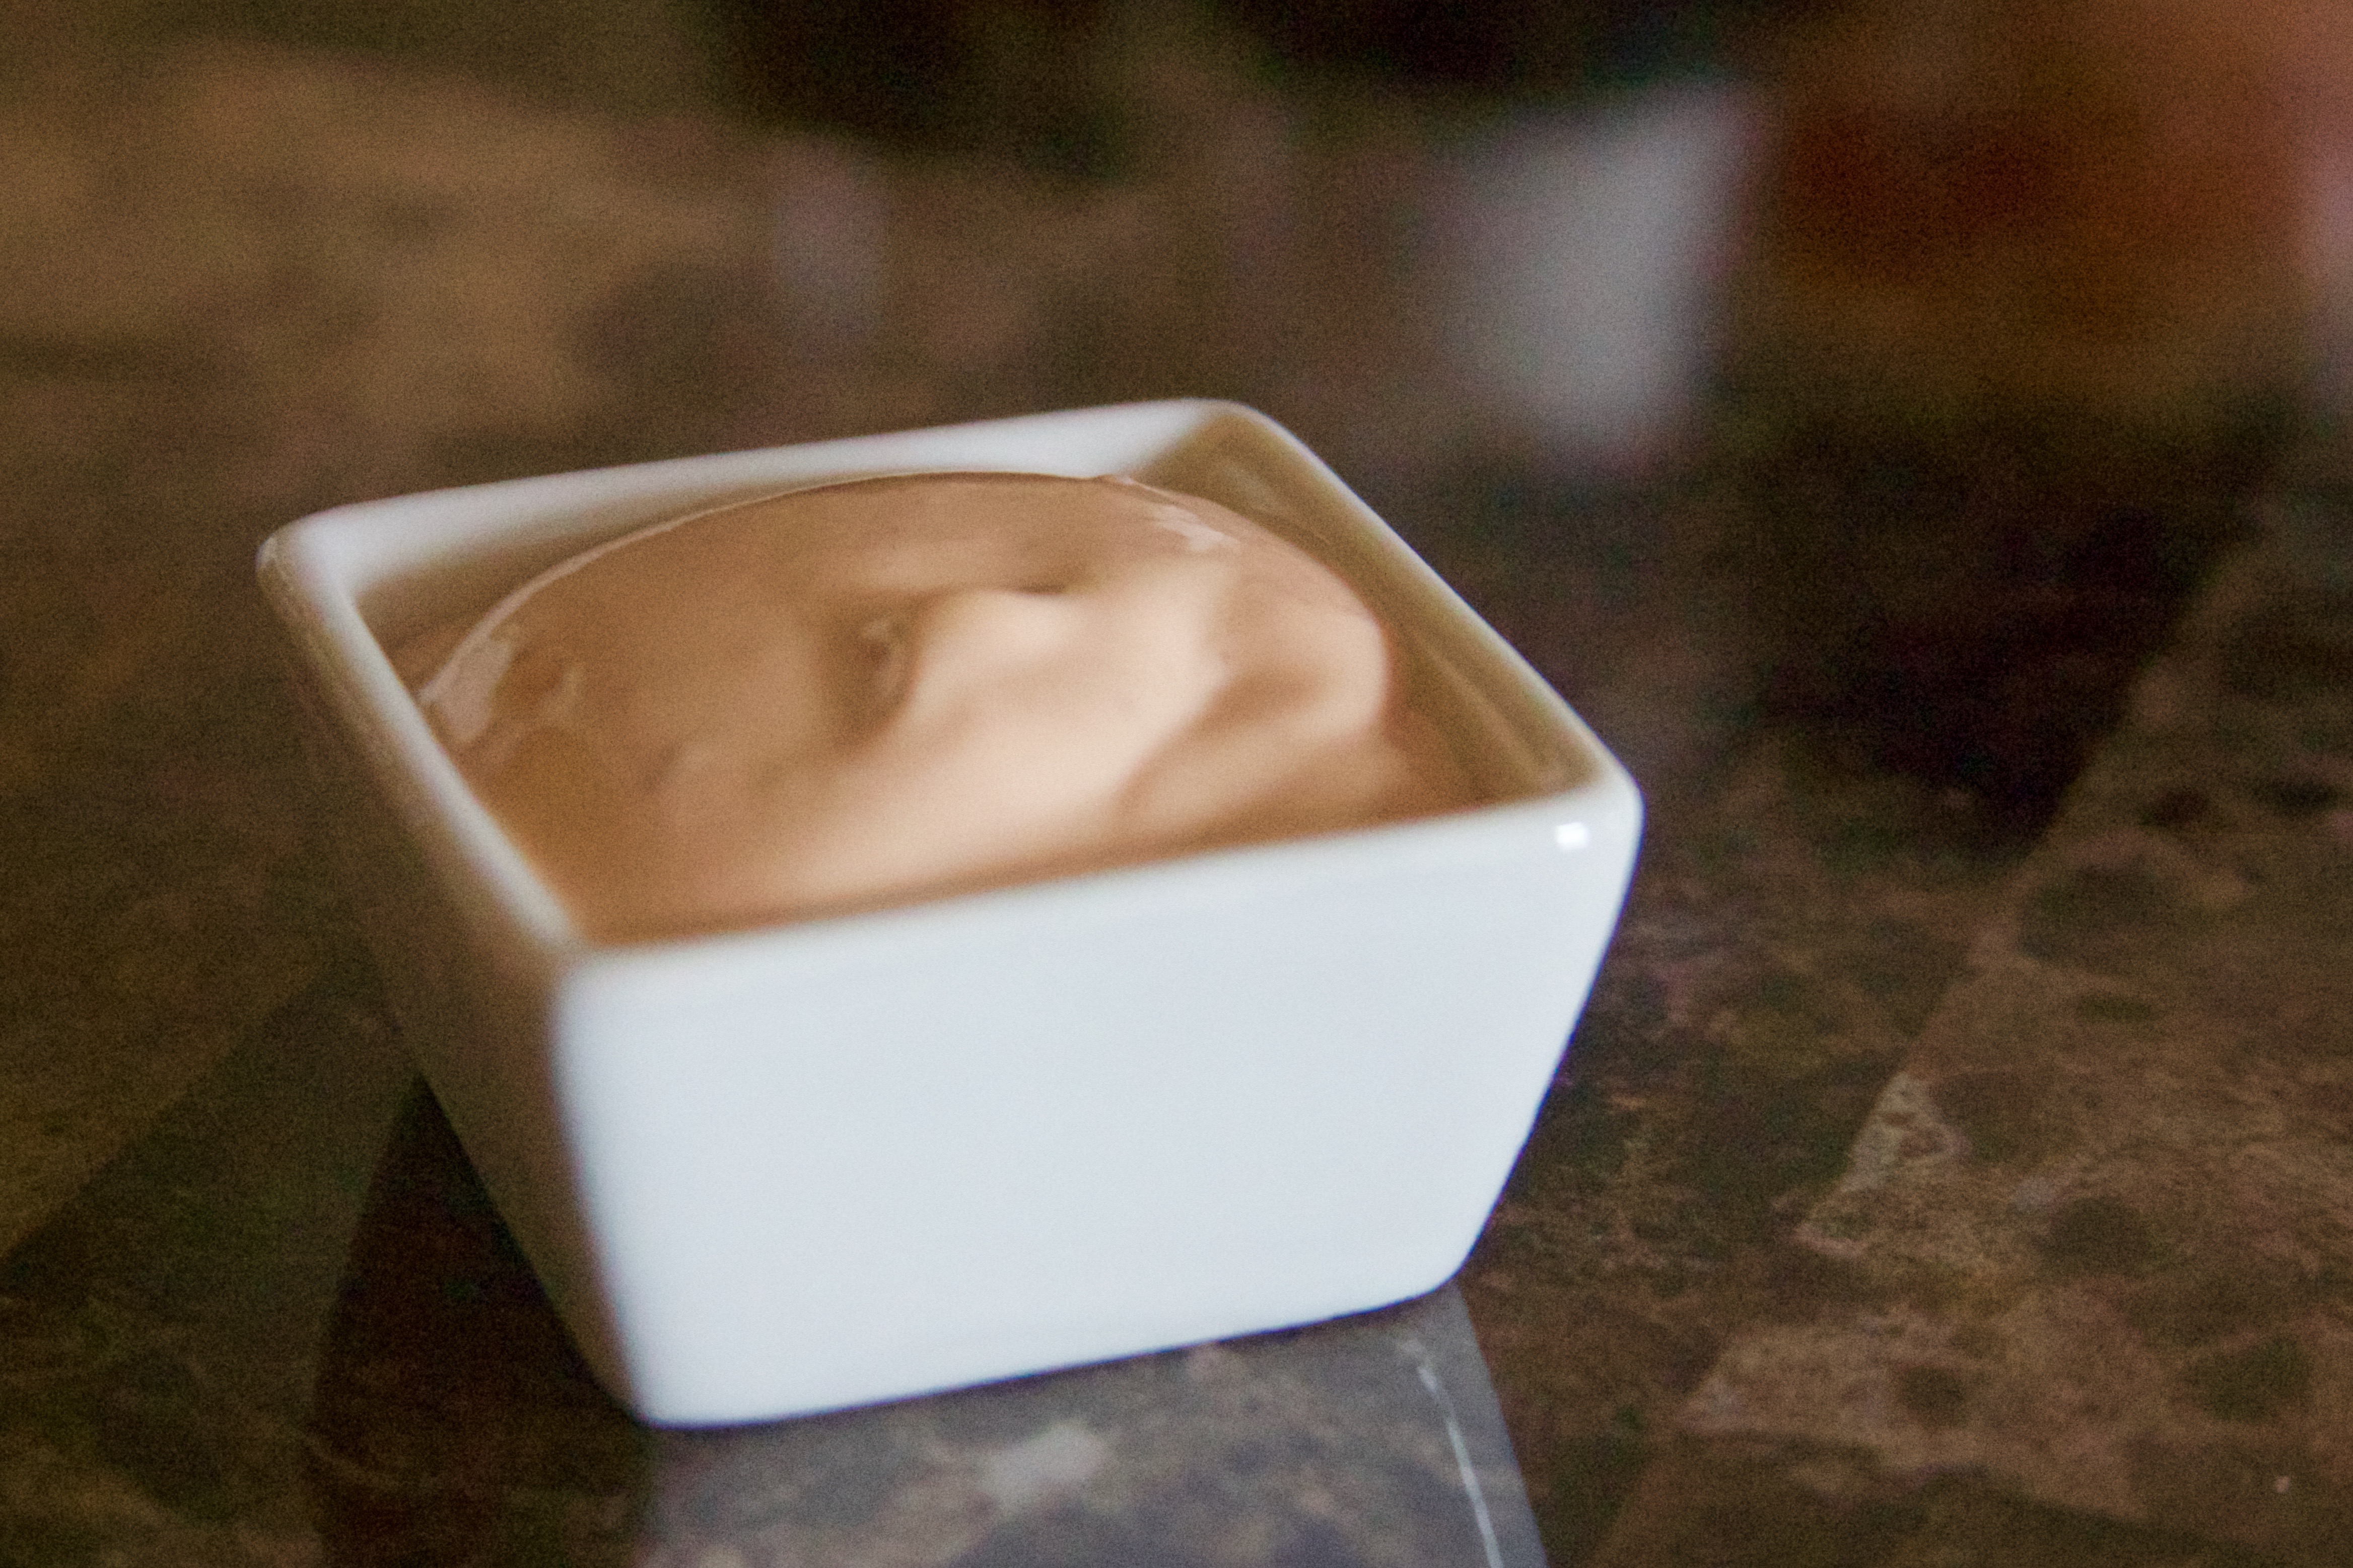
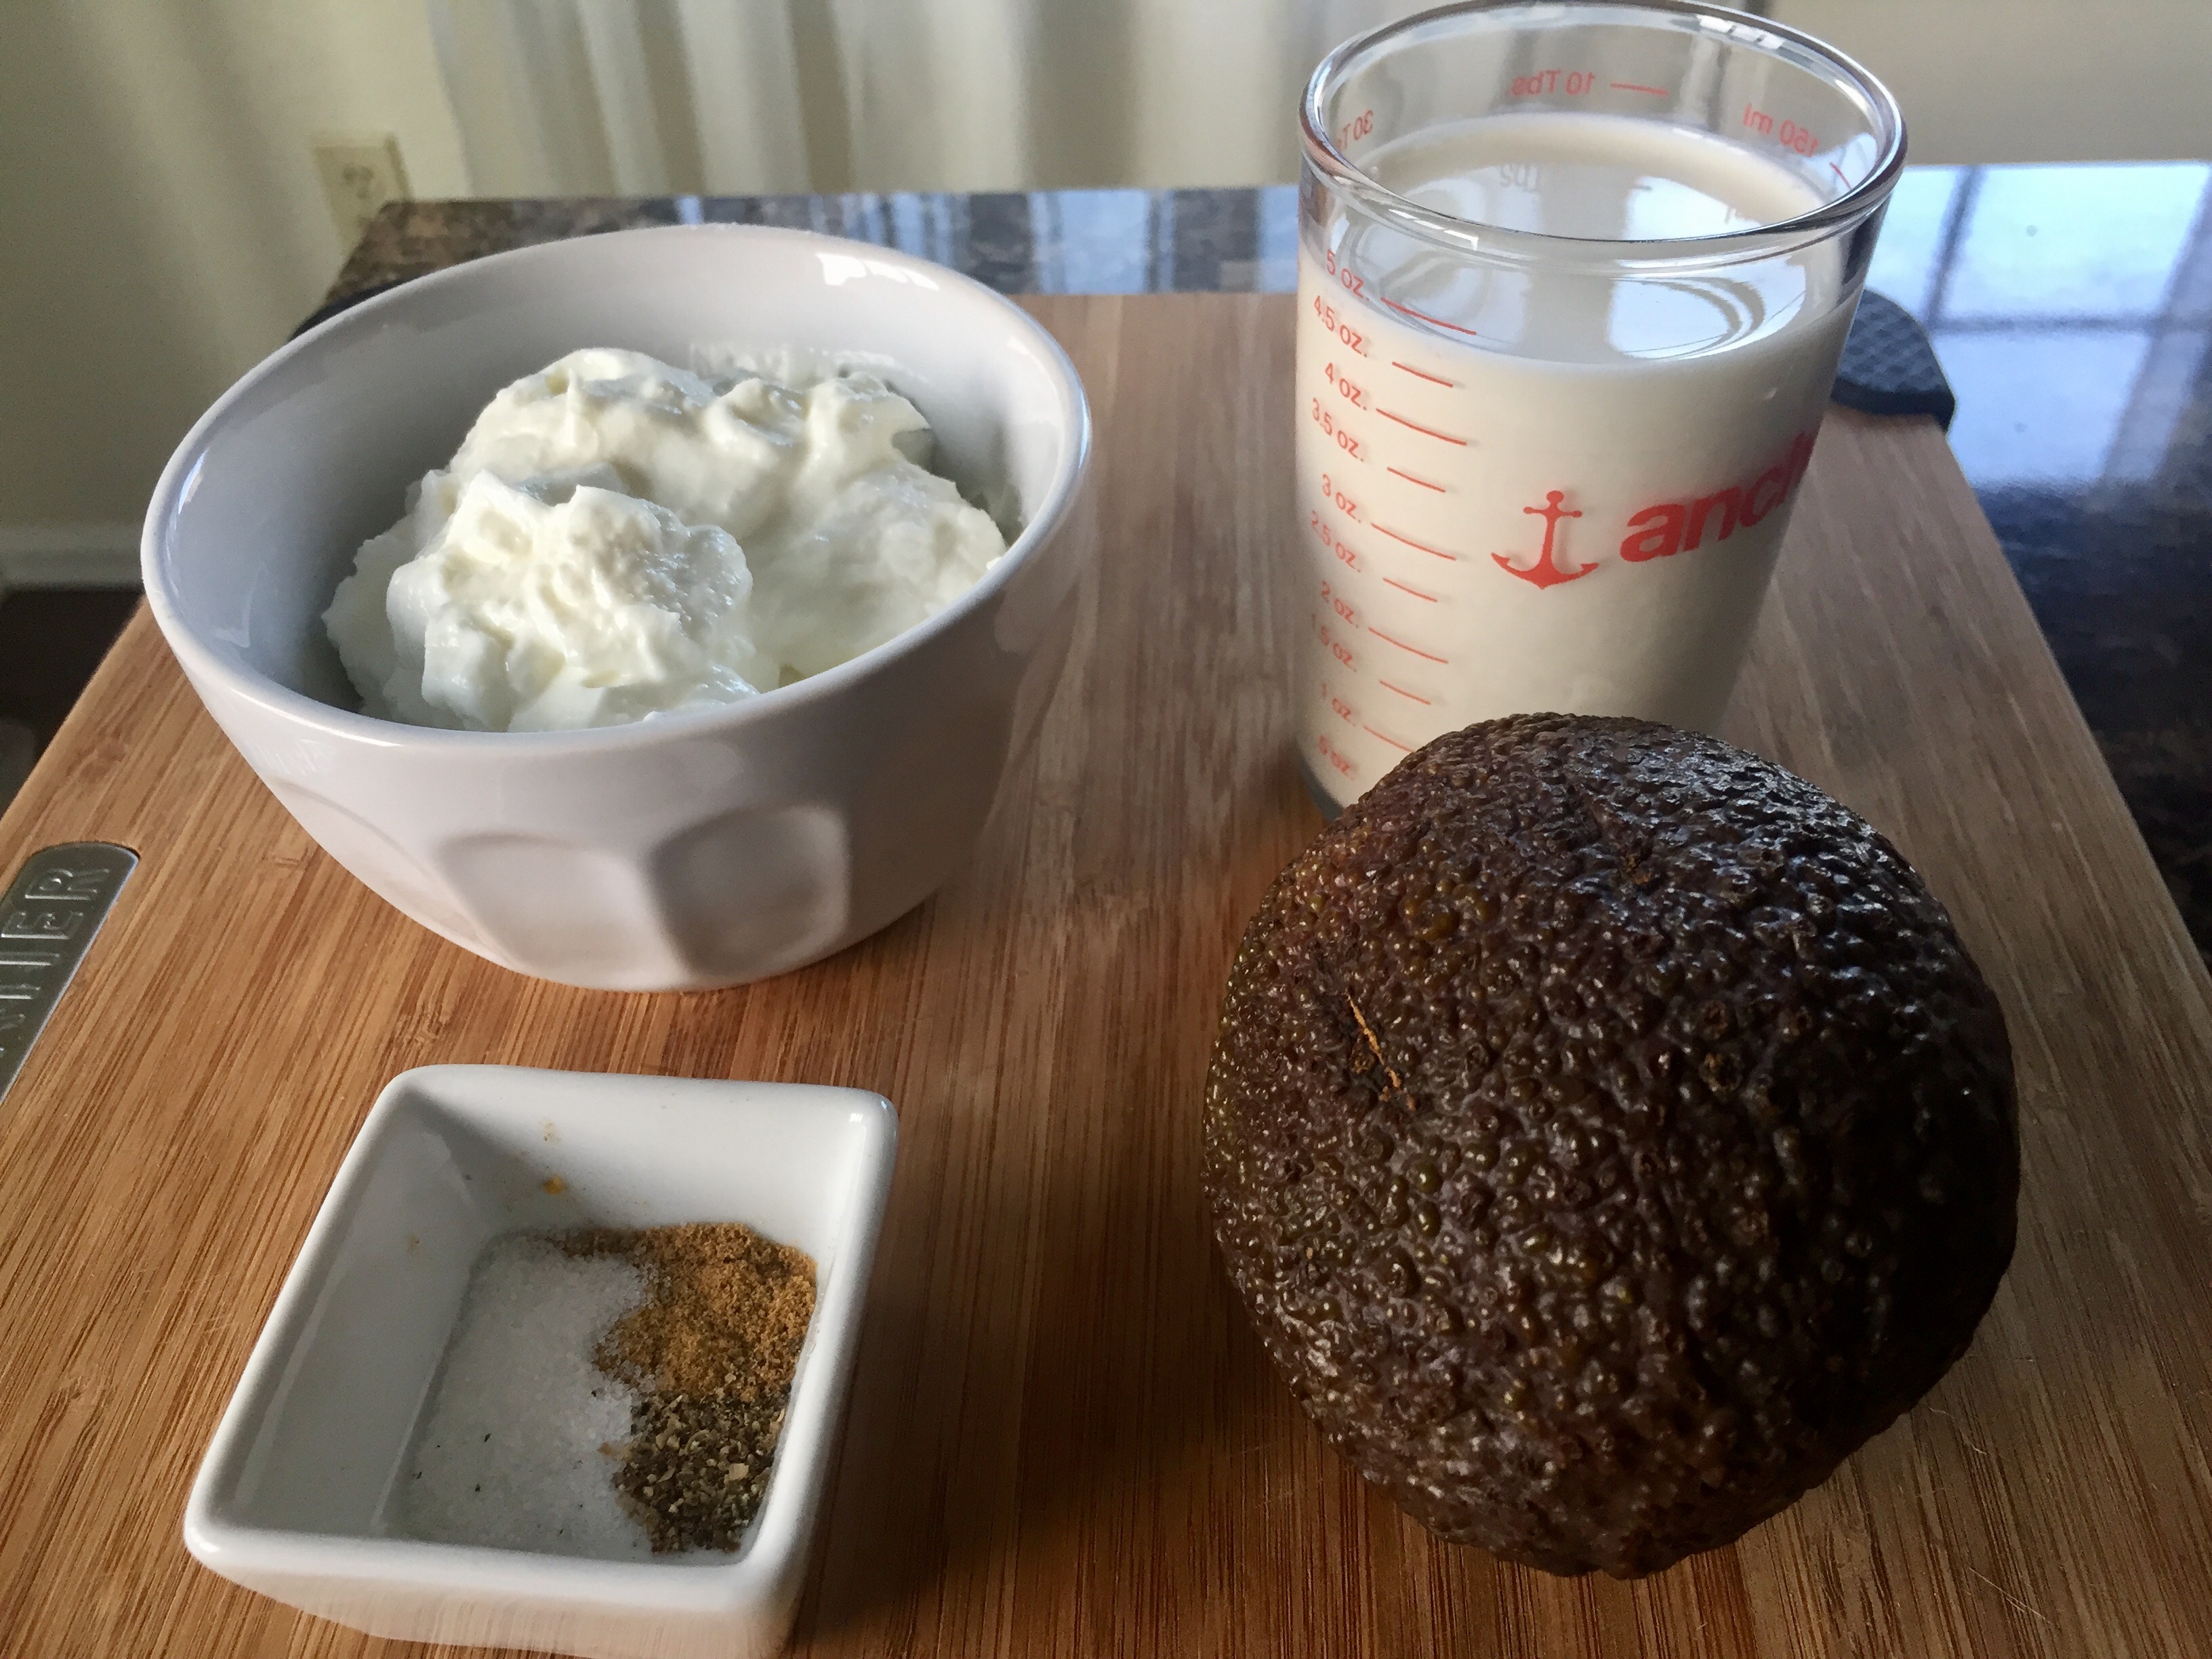
To a blender, add the avocado (peeled), the yogurt, and spices. Blend until combined. Add the half and half and blend until smooth.
Step Five.
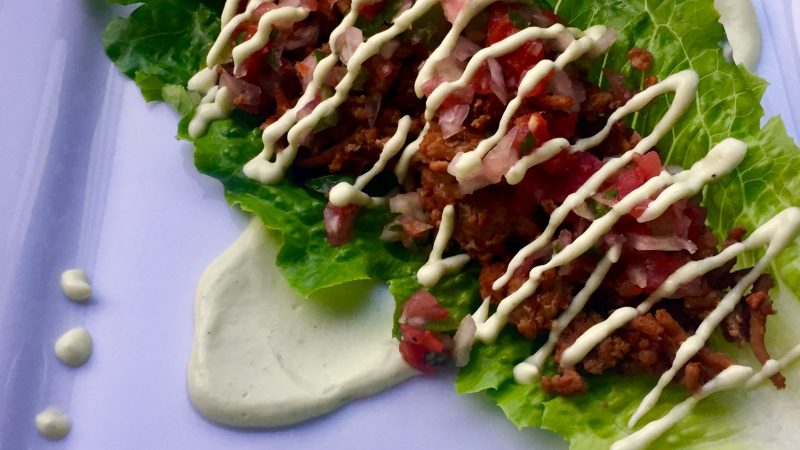
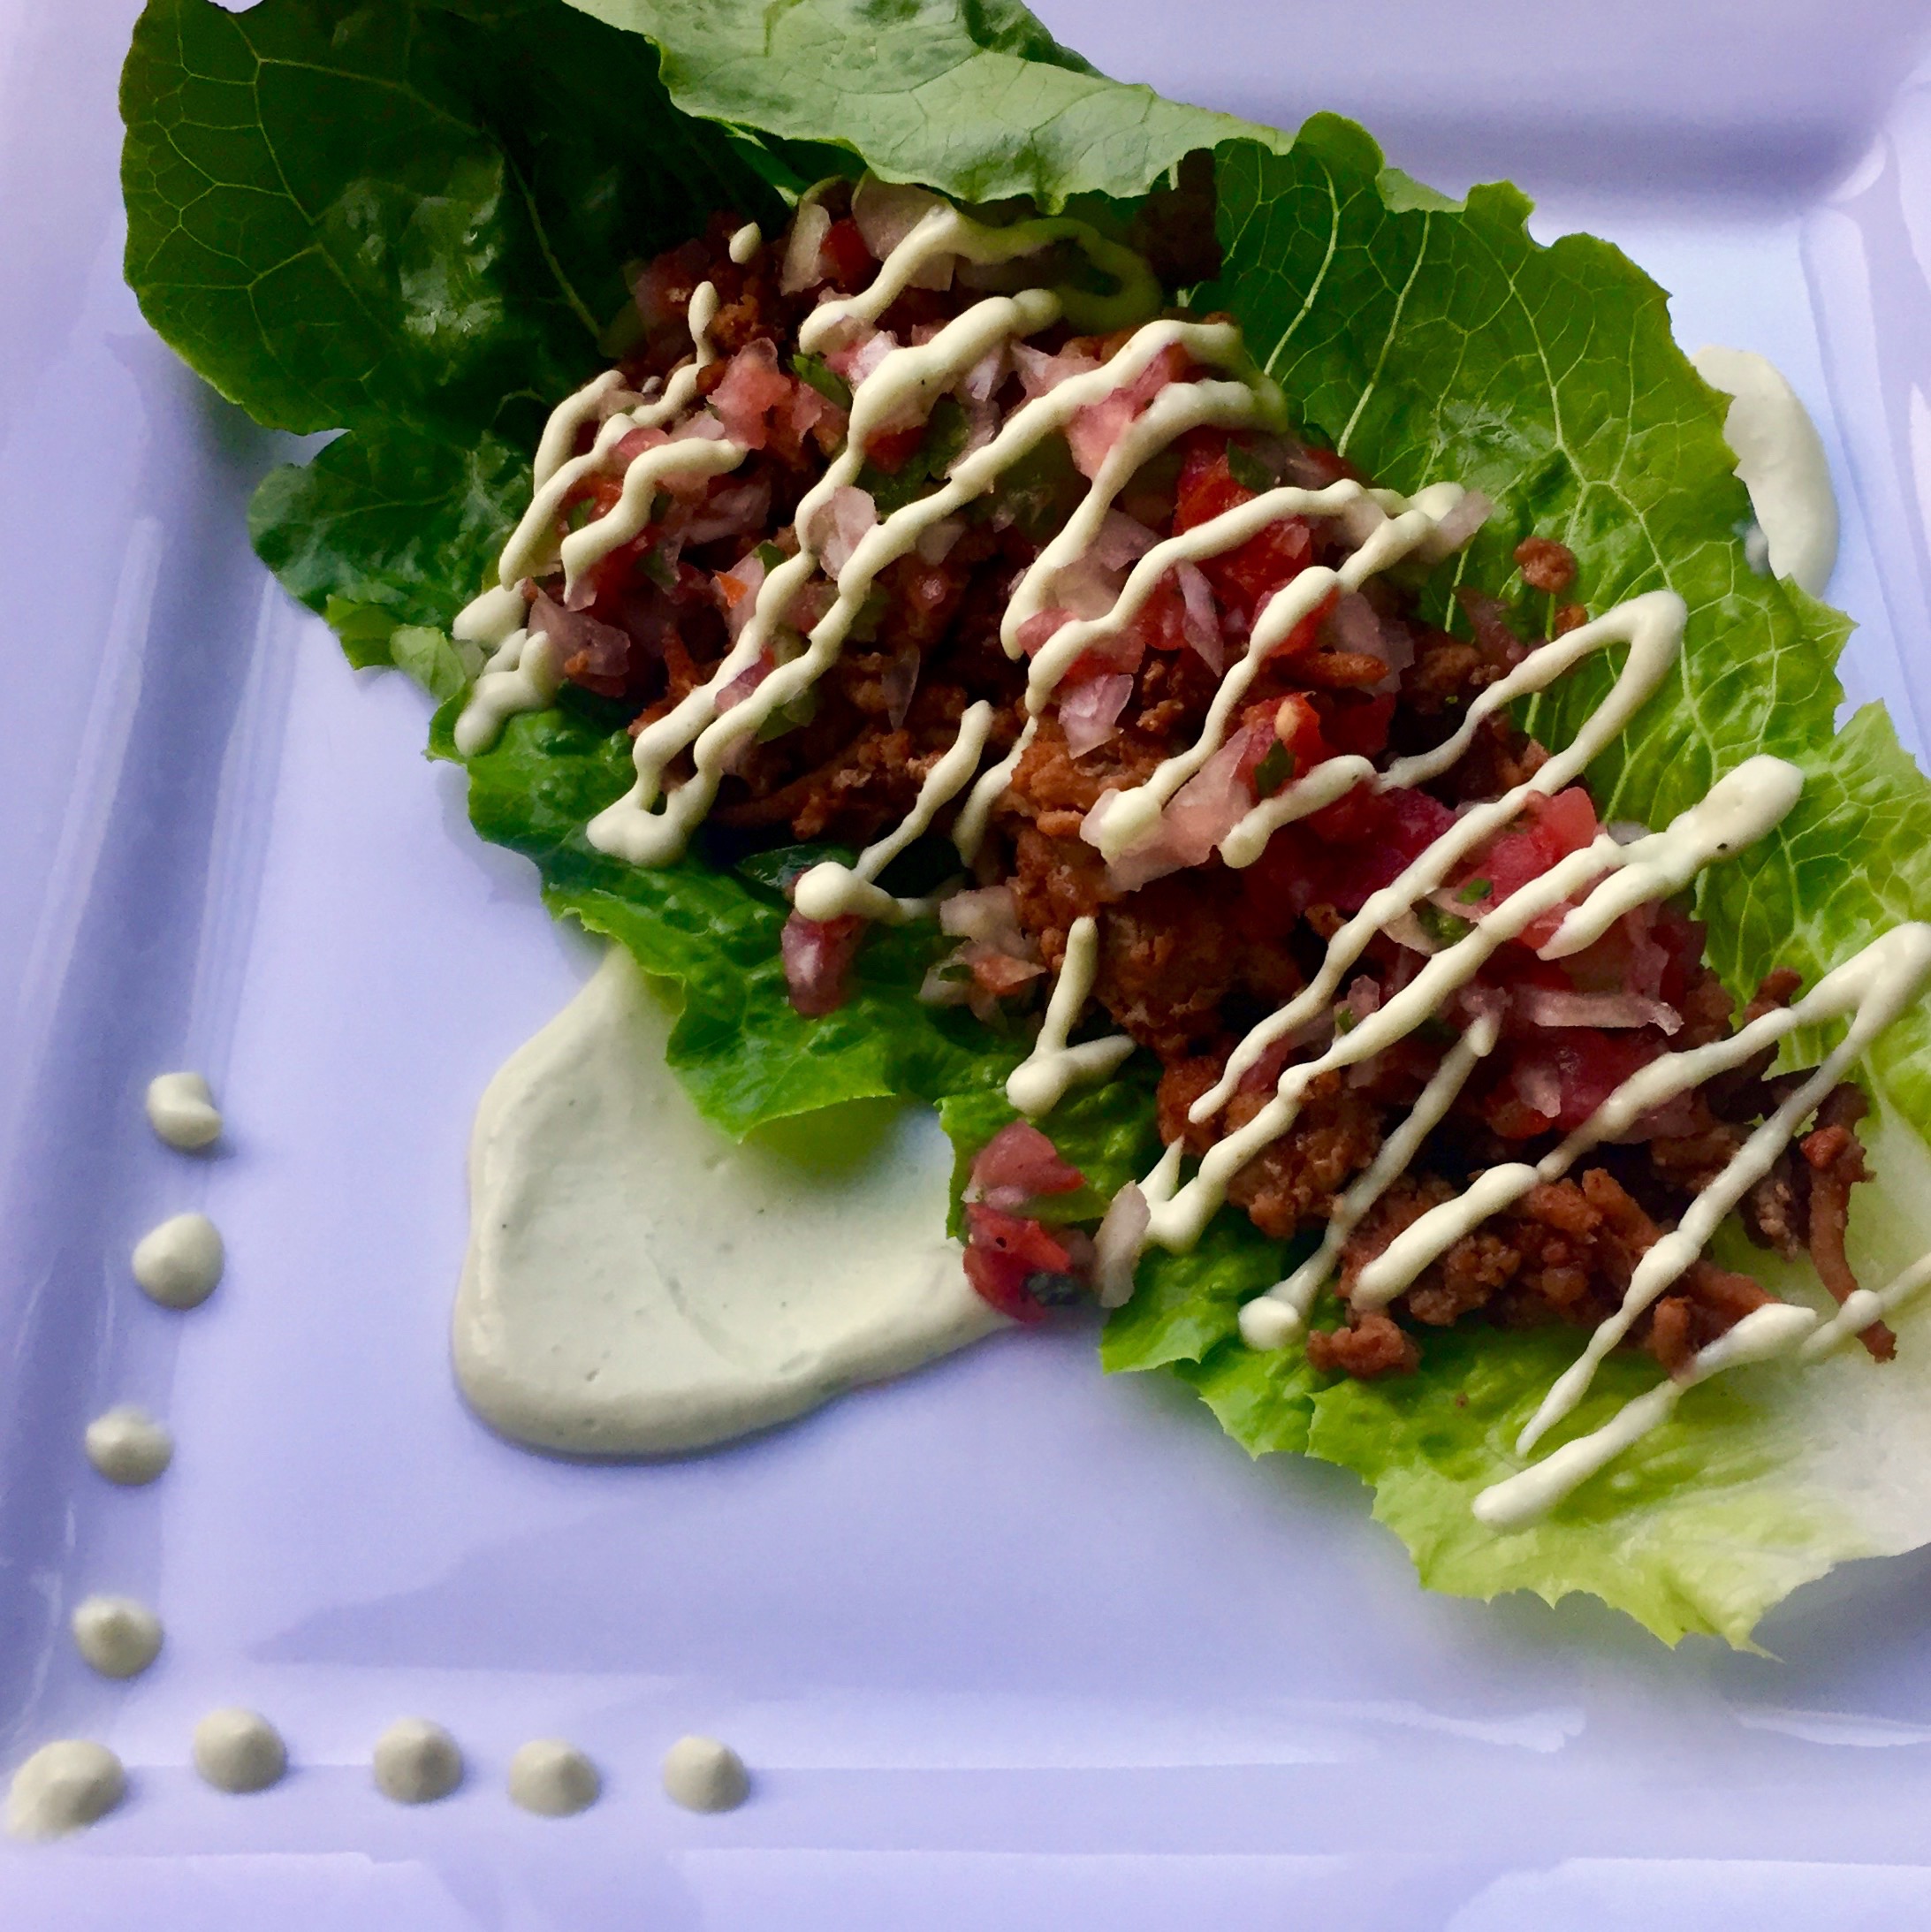
Already ready for assembly! So easy! Start with a lettuce leaf on the plates. Add a generous scoop of turkey, layer pico de gallo on top, and drizzle the avocado cream to finish. Happy Taco Tuesday!

Enjoy Taco Tuesday the healthy way with lettuce tacos brimming with flavorful, lean turkey and topped with fresh pico de gallo and avocado cream
Ingredients
- For the Pico de Gallo
- 1 tomato
- 1 onion
- 1 jalapeno
- 1/2 tsp salt
- 1/2 tsp pepper
- For the Turkey
- 1 lb ground turkey
- 1 package taco seasoning (or make your own!)
- For the Avocado Cream
- 1 avocado
- 1/2 cup plain Greek yogurt
- 1/2 cup half and half
- 1/2 tsp salt
- 1/2 tsp pepper
- 1/2 tsp cumin
Instructions
- Prep Step! Set out and measure all of your ingredients. Wash your veggies and find a pair of rubber gloves if you're sensitive to jalapeños.
- Make the pico de gallo. Cut up the onion, tomato, and jalapeño so that they will fit into a food processor. Add the cilantro and process until it is finely chopped. Mix in the salt and pepper. Set in a fine-mesh strainer over a bowl to release any excess liquid while the turkey cooks.
- Heat a pan with a Tablespoon of olive oil over medium heat. Add the turkey and cook until it is done, about 10 minutes. When it is just about done and starting to brown, add the taco seasoning. Stir to coat the turkey evenly.
- To a blender, add the avocado (peeled), the yogurt, and spices. Blend until combined. Add the half and half and blend until smooth.
- Time to assemble! Start with a lettuce leaf on the plates. Add a generous scoop of turkey, layer pico de gallo on top, and drizzle the avocado cream to finish. Happy Taco Tuesday!
Years ago, before the trend, I decided to go low carb. It was for a number of reasons, but it was incredibly difficult to find recipes and ingredients that worked with my new diet. I came across the idea of ricing cauliflower in place of regular rice. I decided to try it, and it was awesome. But it was a bit tedious to do. Now that they have riced cauliflower available at the store, I am making recipes with it left and right!

This recipe combines healthy protein with fresh spring flavors for a satisfying meal. Customize it however you want - your culinary imagination is the limit!
Ingredients
- The Fish
- 4 tilapia filets
- oil to coat
- salt
- pepper
- The Peppers & Onions
- 1 Tbsp olive oil
- 1 green bell pepper
- 1 red bell pepper
- 1 onion
- 1 Tbsp minced garlic
- 1 cube frozen basil
- salt and pepper to taste
- Lemon Cauliflower Rice
- 1 Tbsp olive oil
- 1 package riced cauliflower (Trader Joe's has a great one!)
- 1 cube frozen basil
- 1 Meyer lemon
- salt and pepper to taste
Instructions
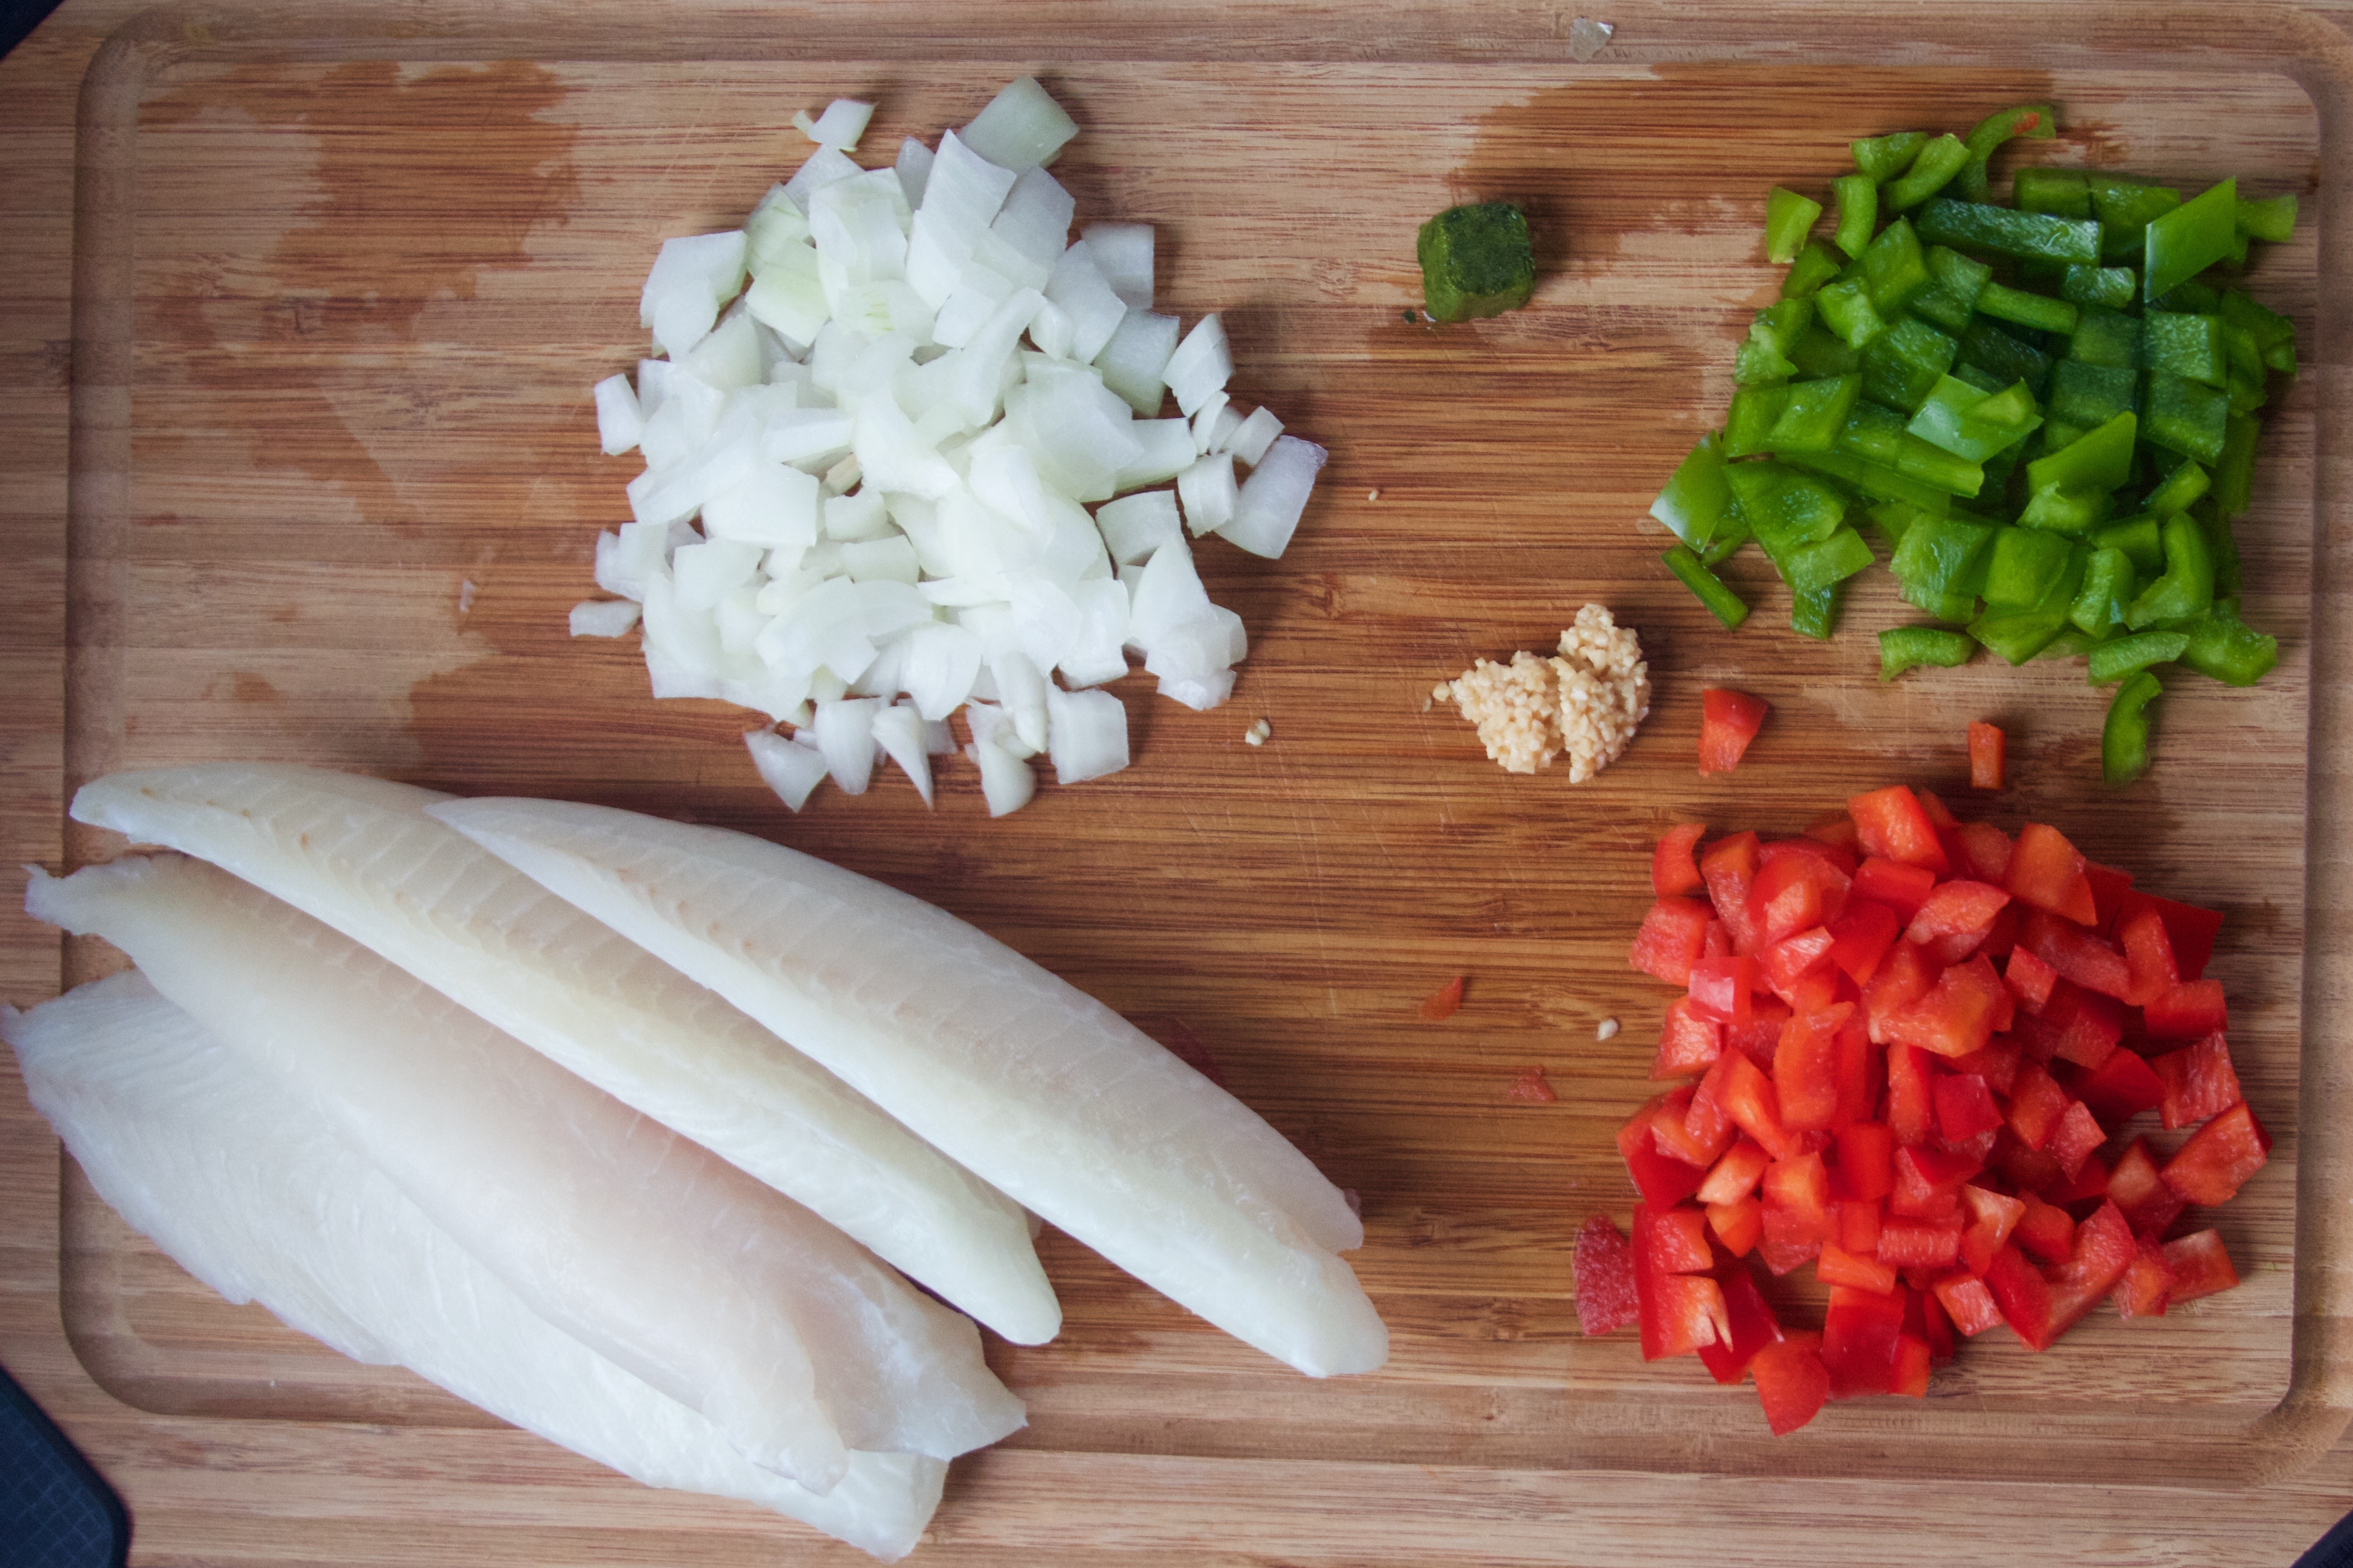
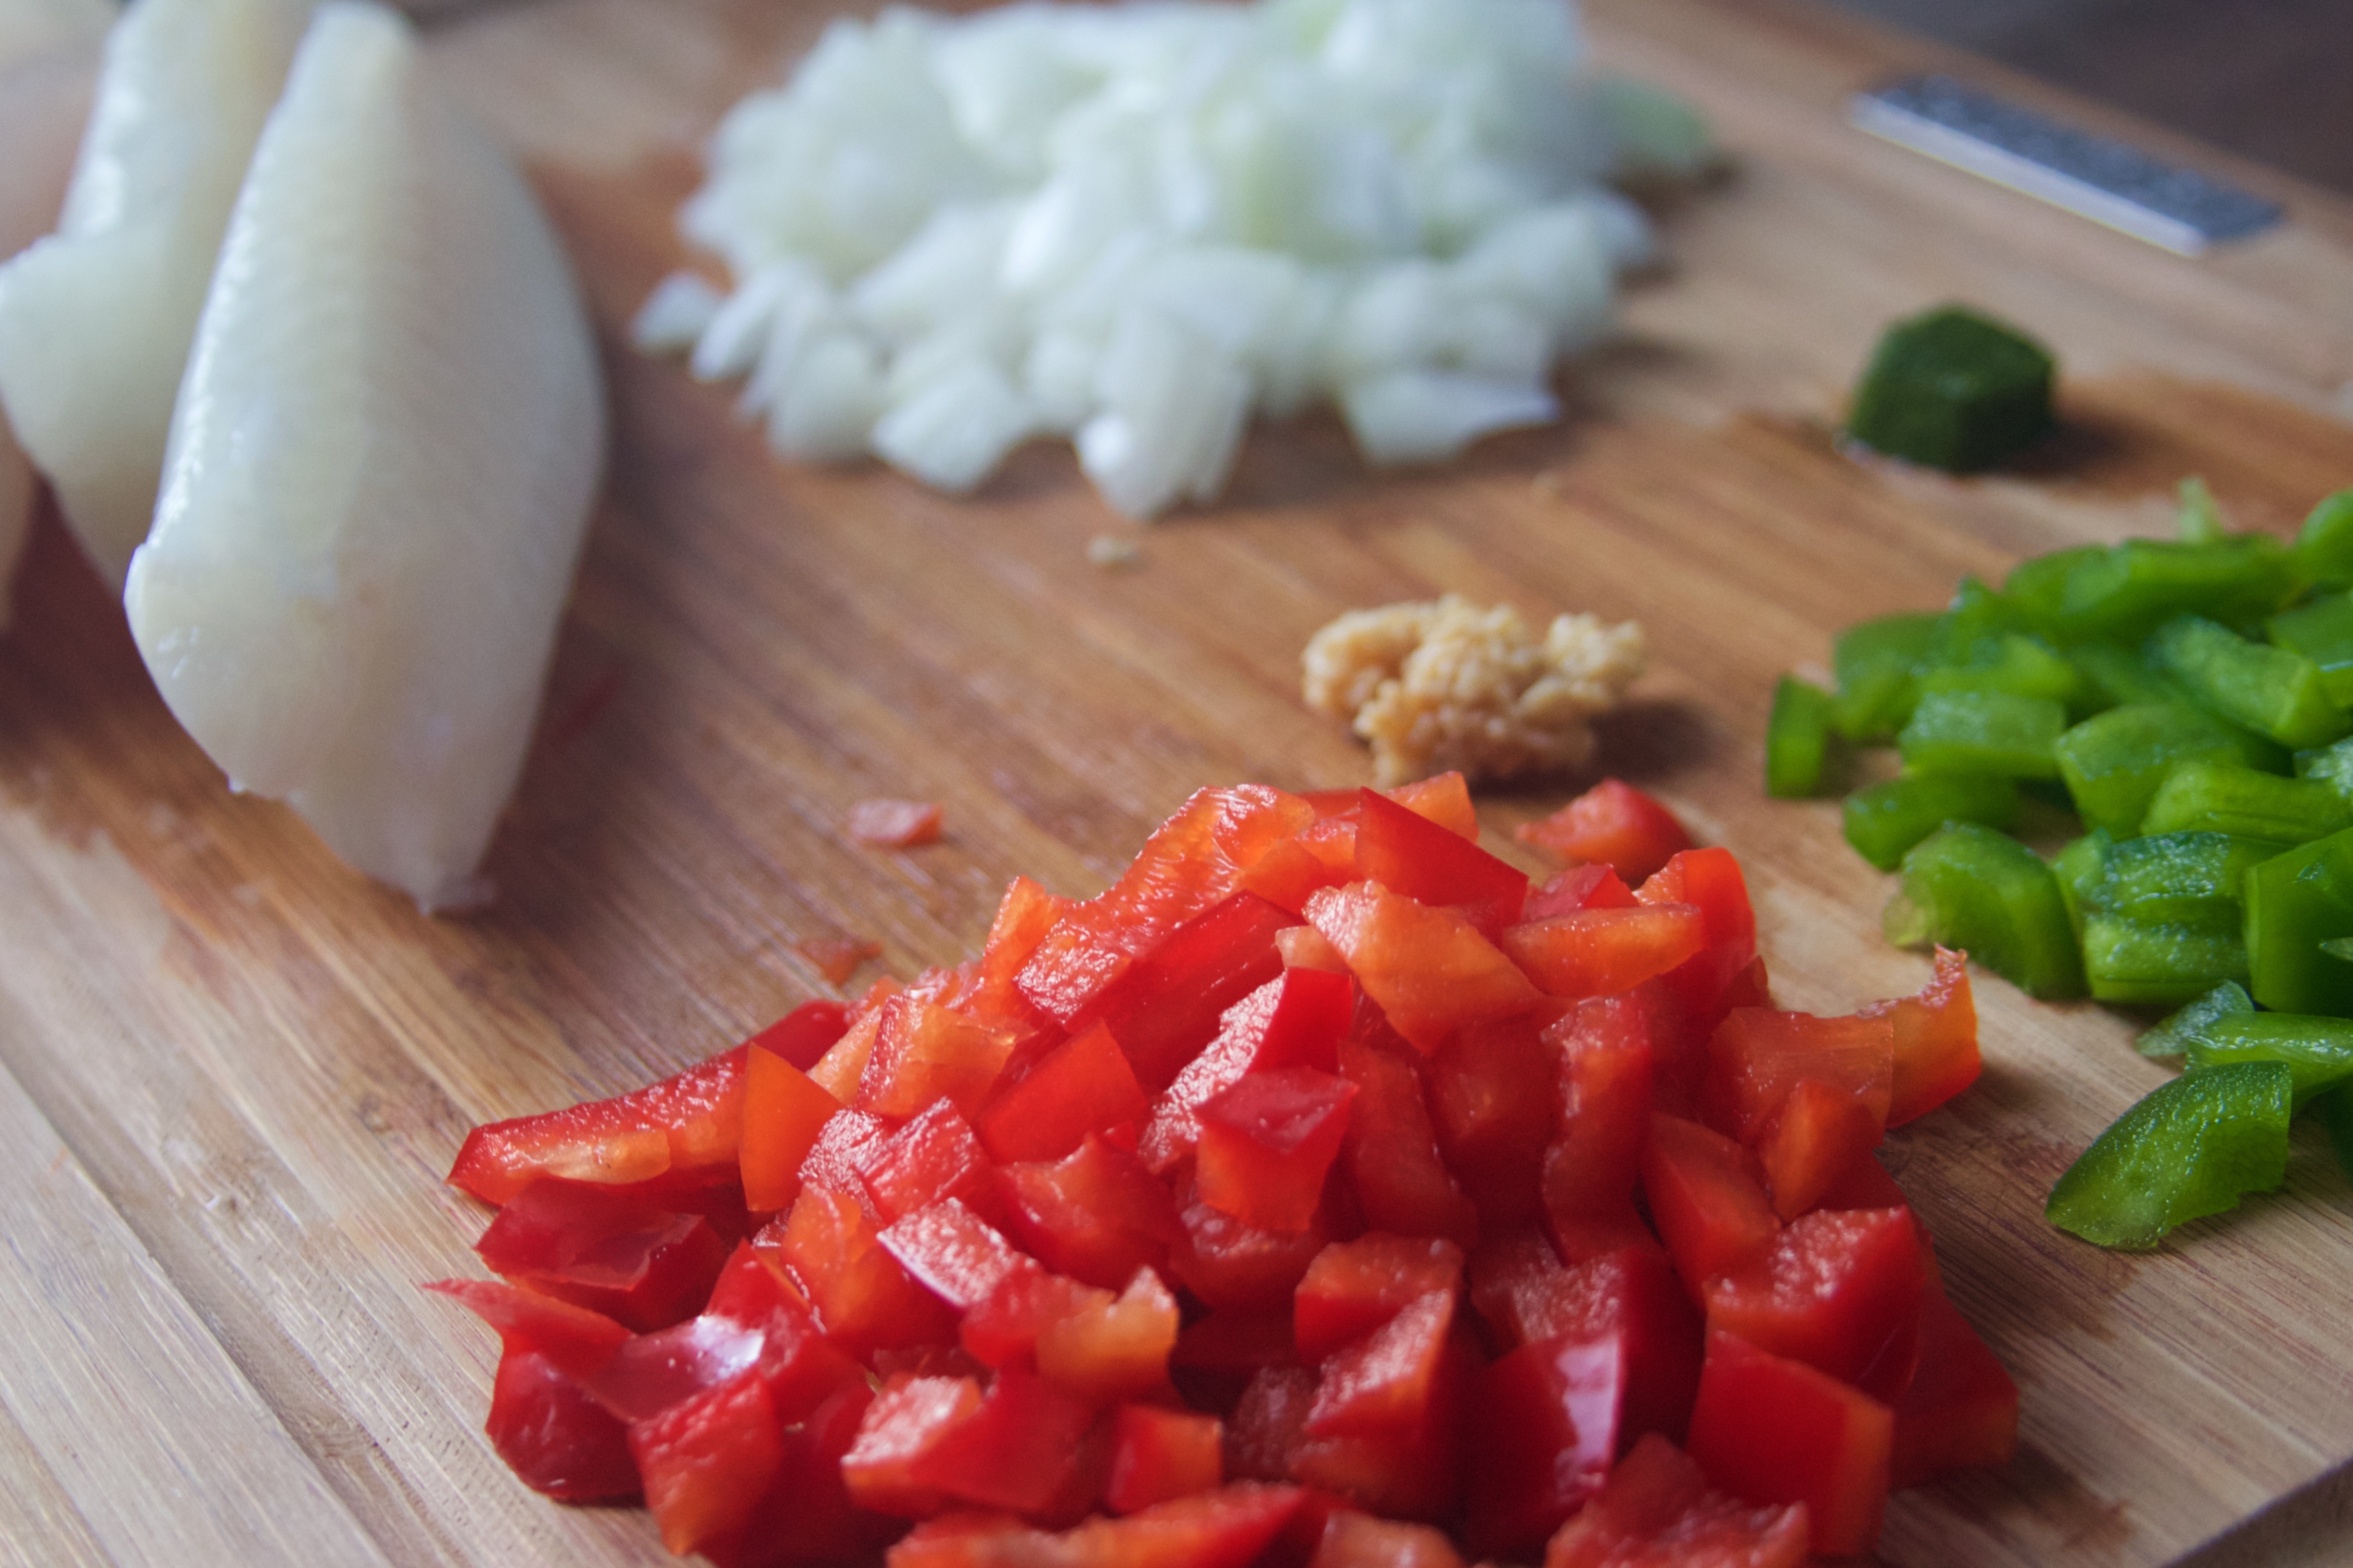
- Prep Step! Measure out and prepare all of your ingredients. Dice the peppers and onion - a diced size works nicely here since it is a topping for the fish. Preheat your oven to 425°F, and line a pan with parchment paper or foil.
- For The Fish: Lightly coat the fish with olive oil, salt, and pepper. Bake for about 15 minutes, or until done. While the fish bakes, prepare the topping and the cauliflower.
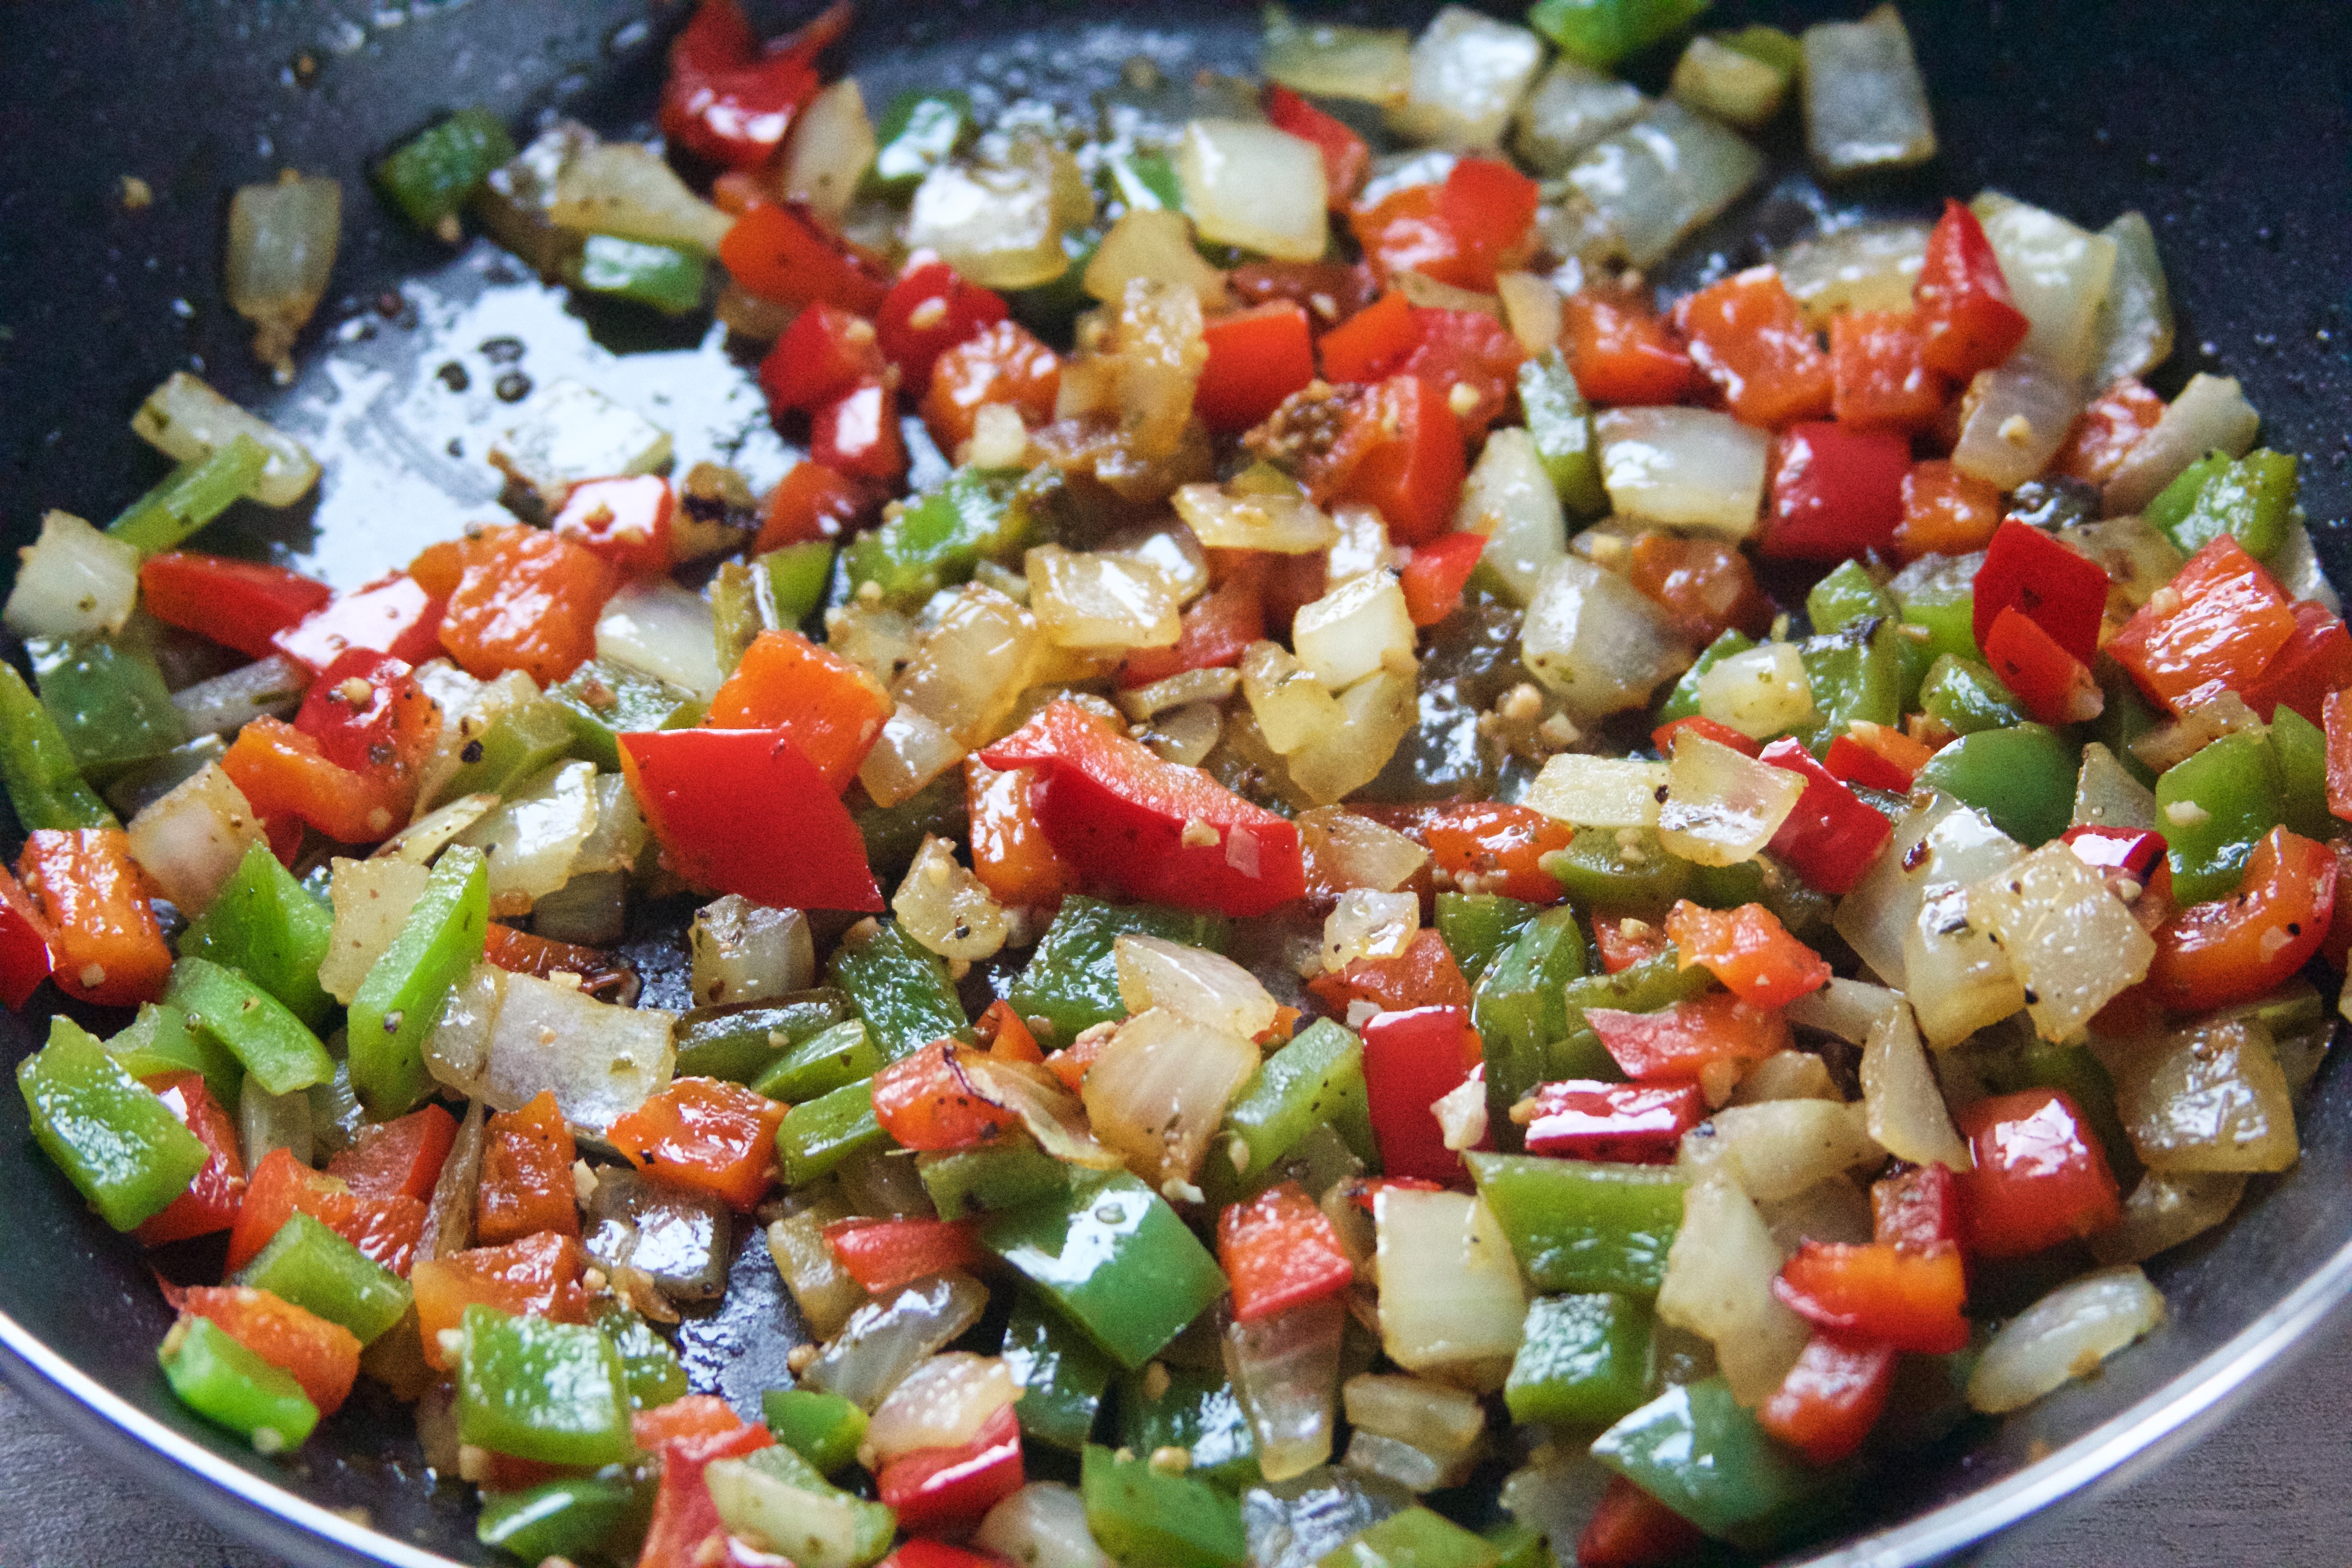
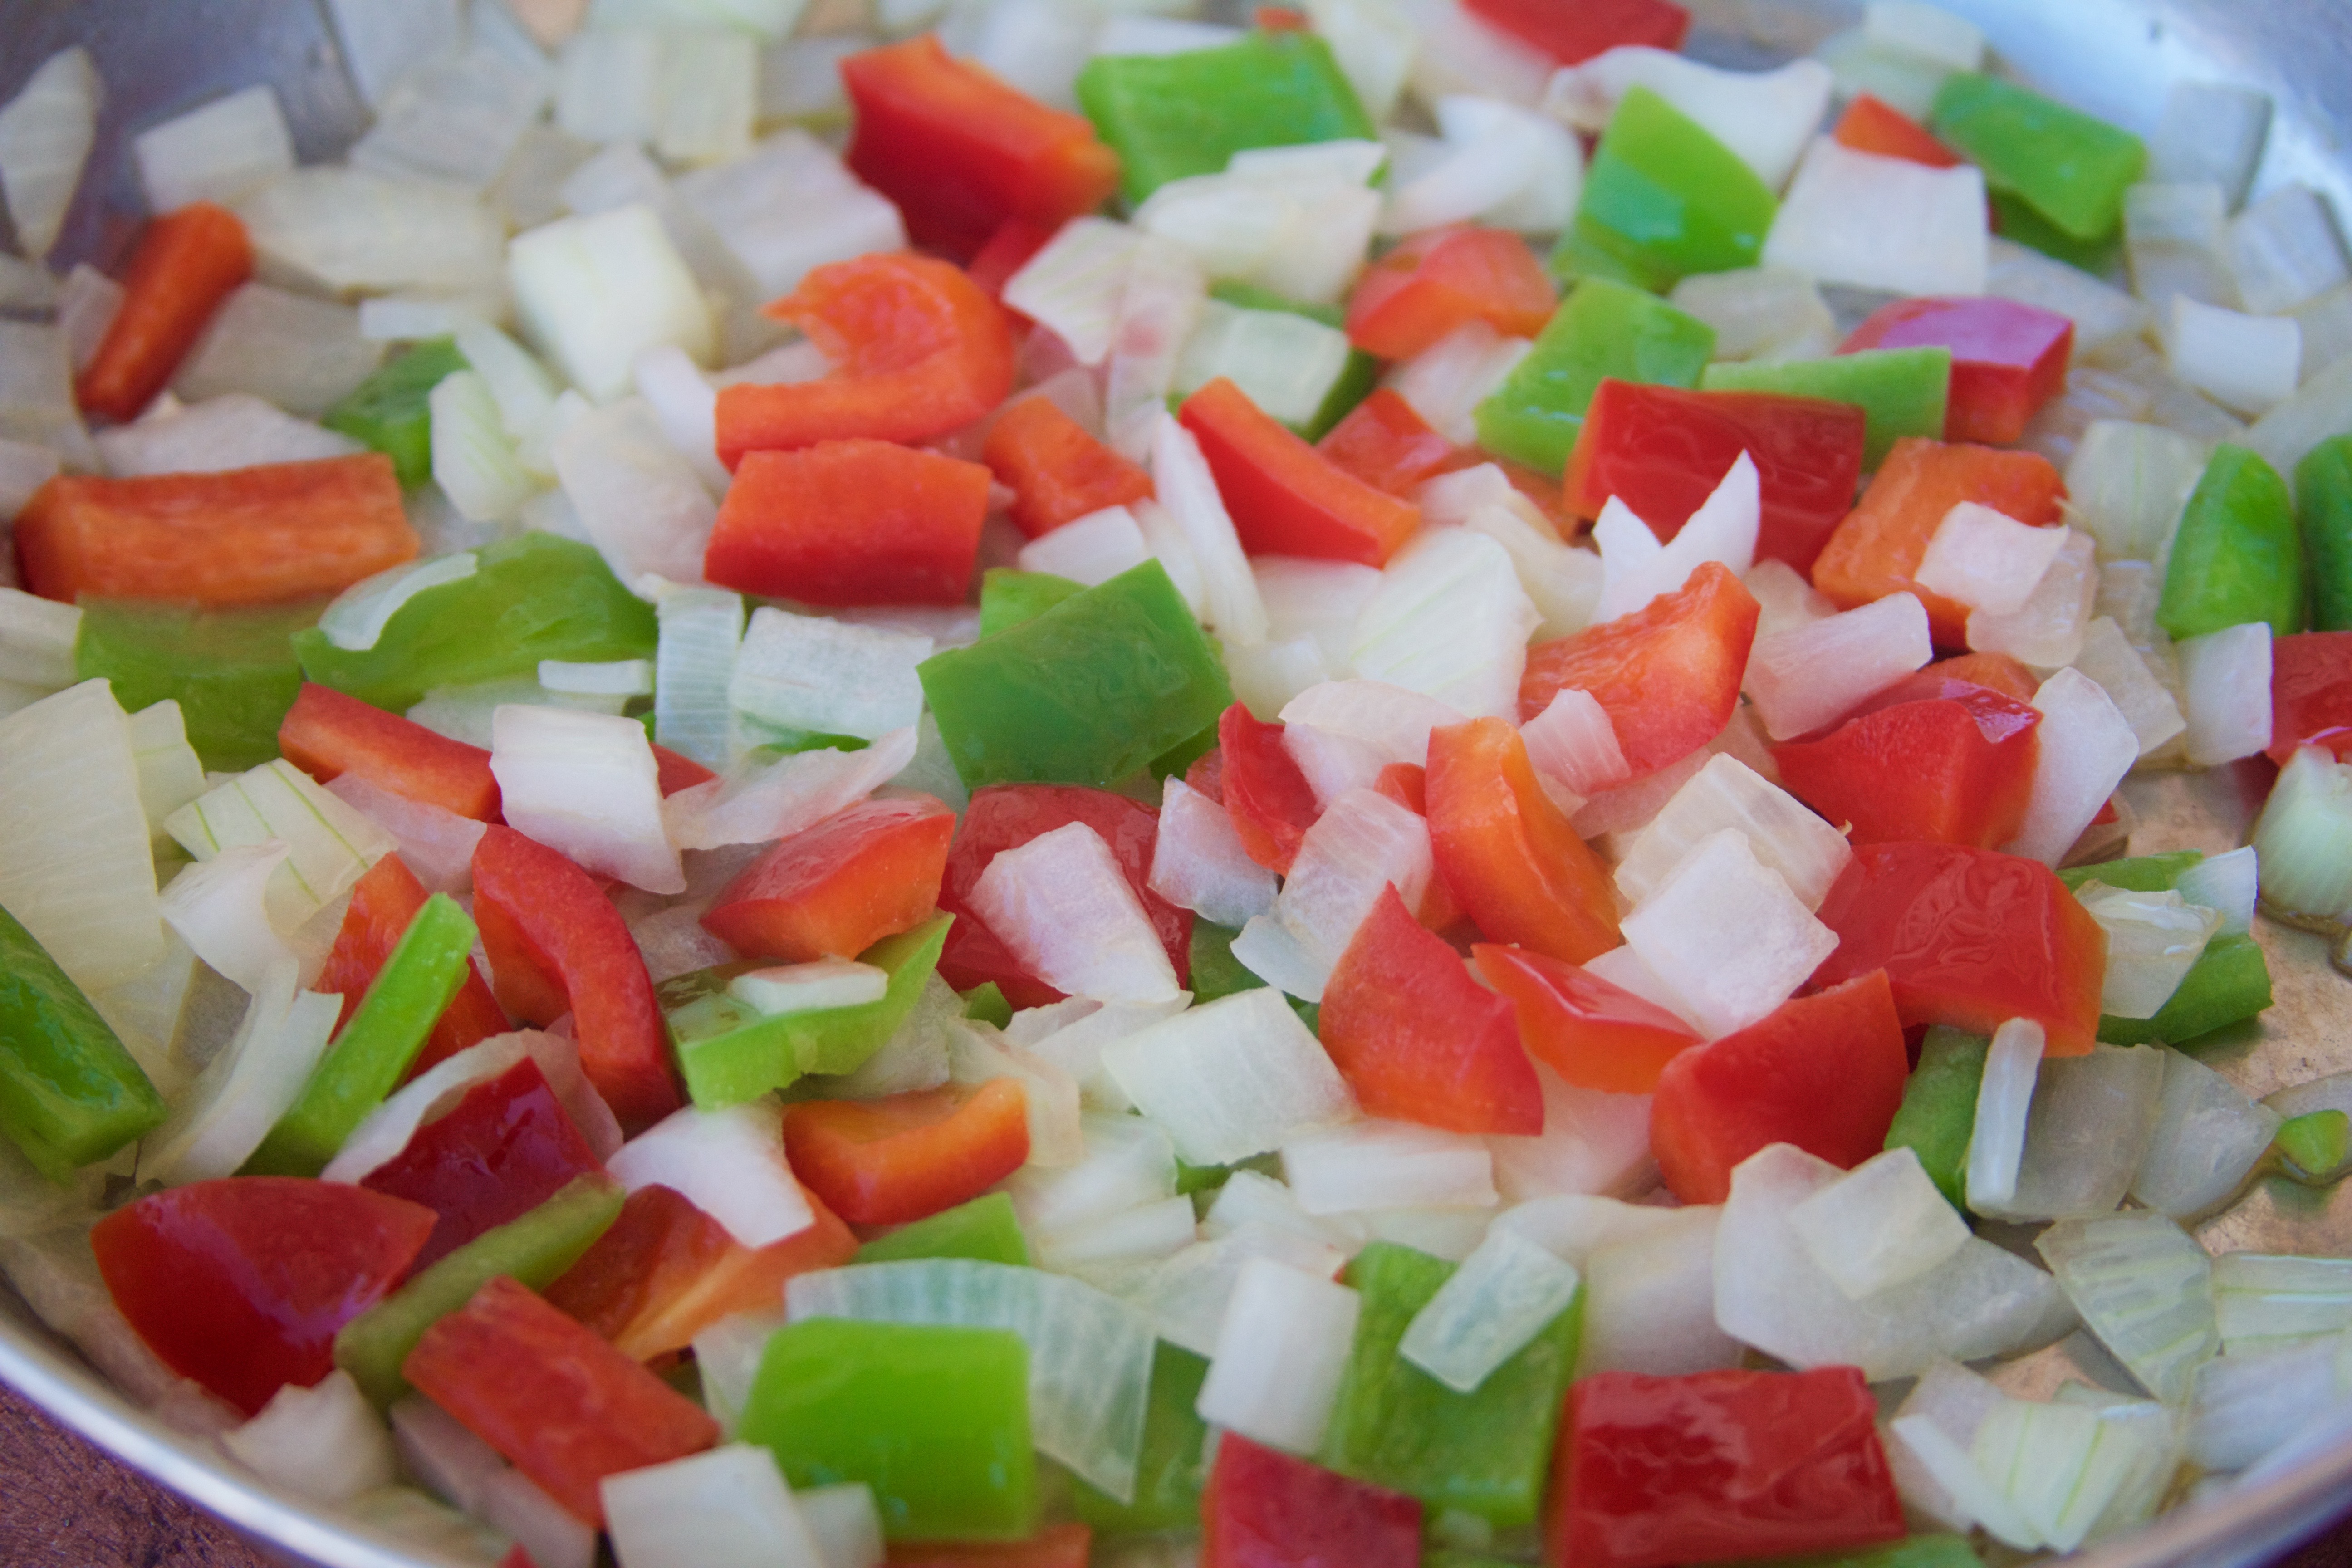
- For The Peppers Topping: Add 1 Tbsp of the oil into a pan set over medium heat. When the oil is warm, add the peppers, onion, garlic, and basil. Season with salt and pepper as you like. Stir occasionally over medium heat until onions are translucent and the peppers are cooked.
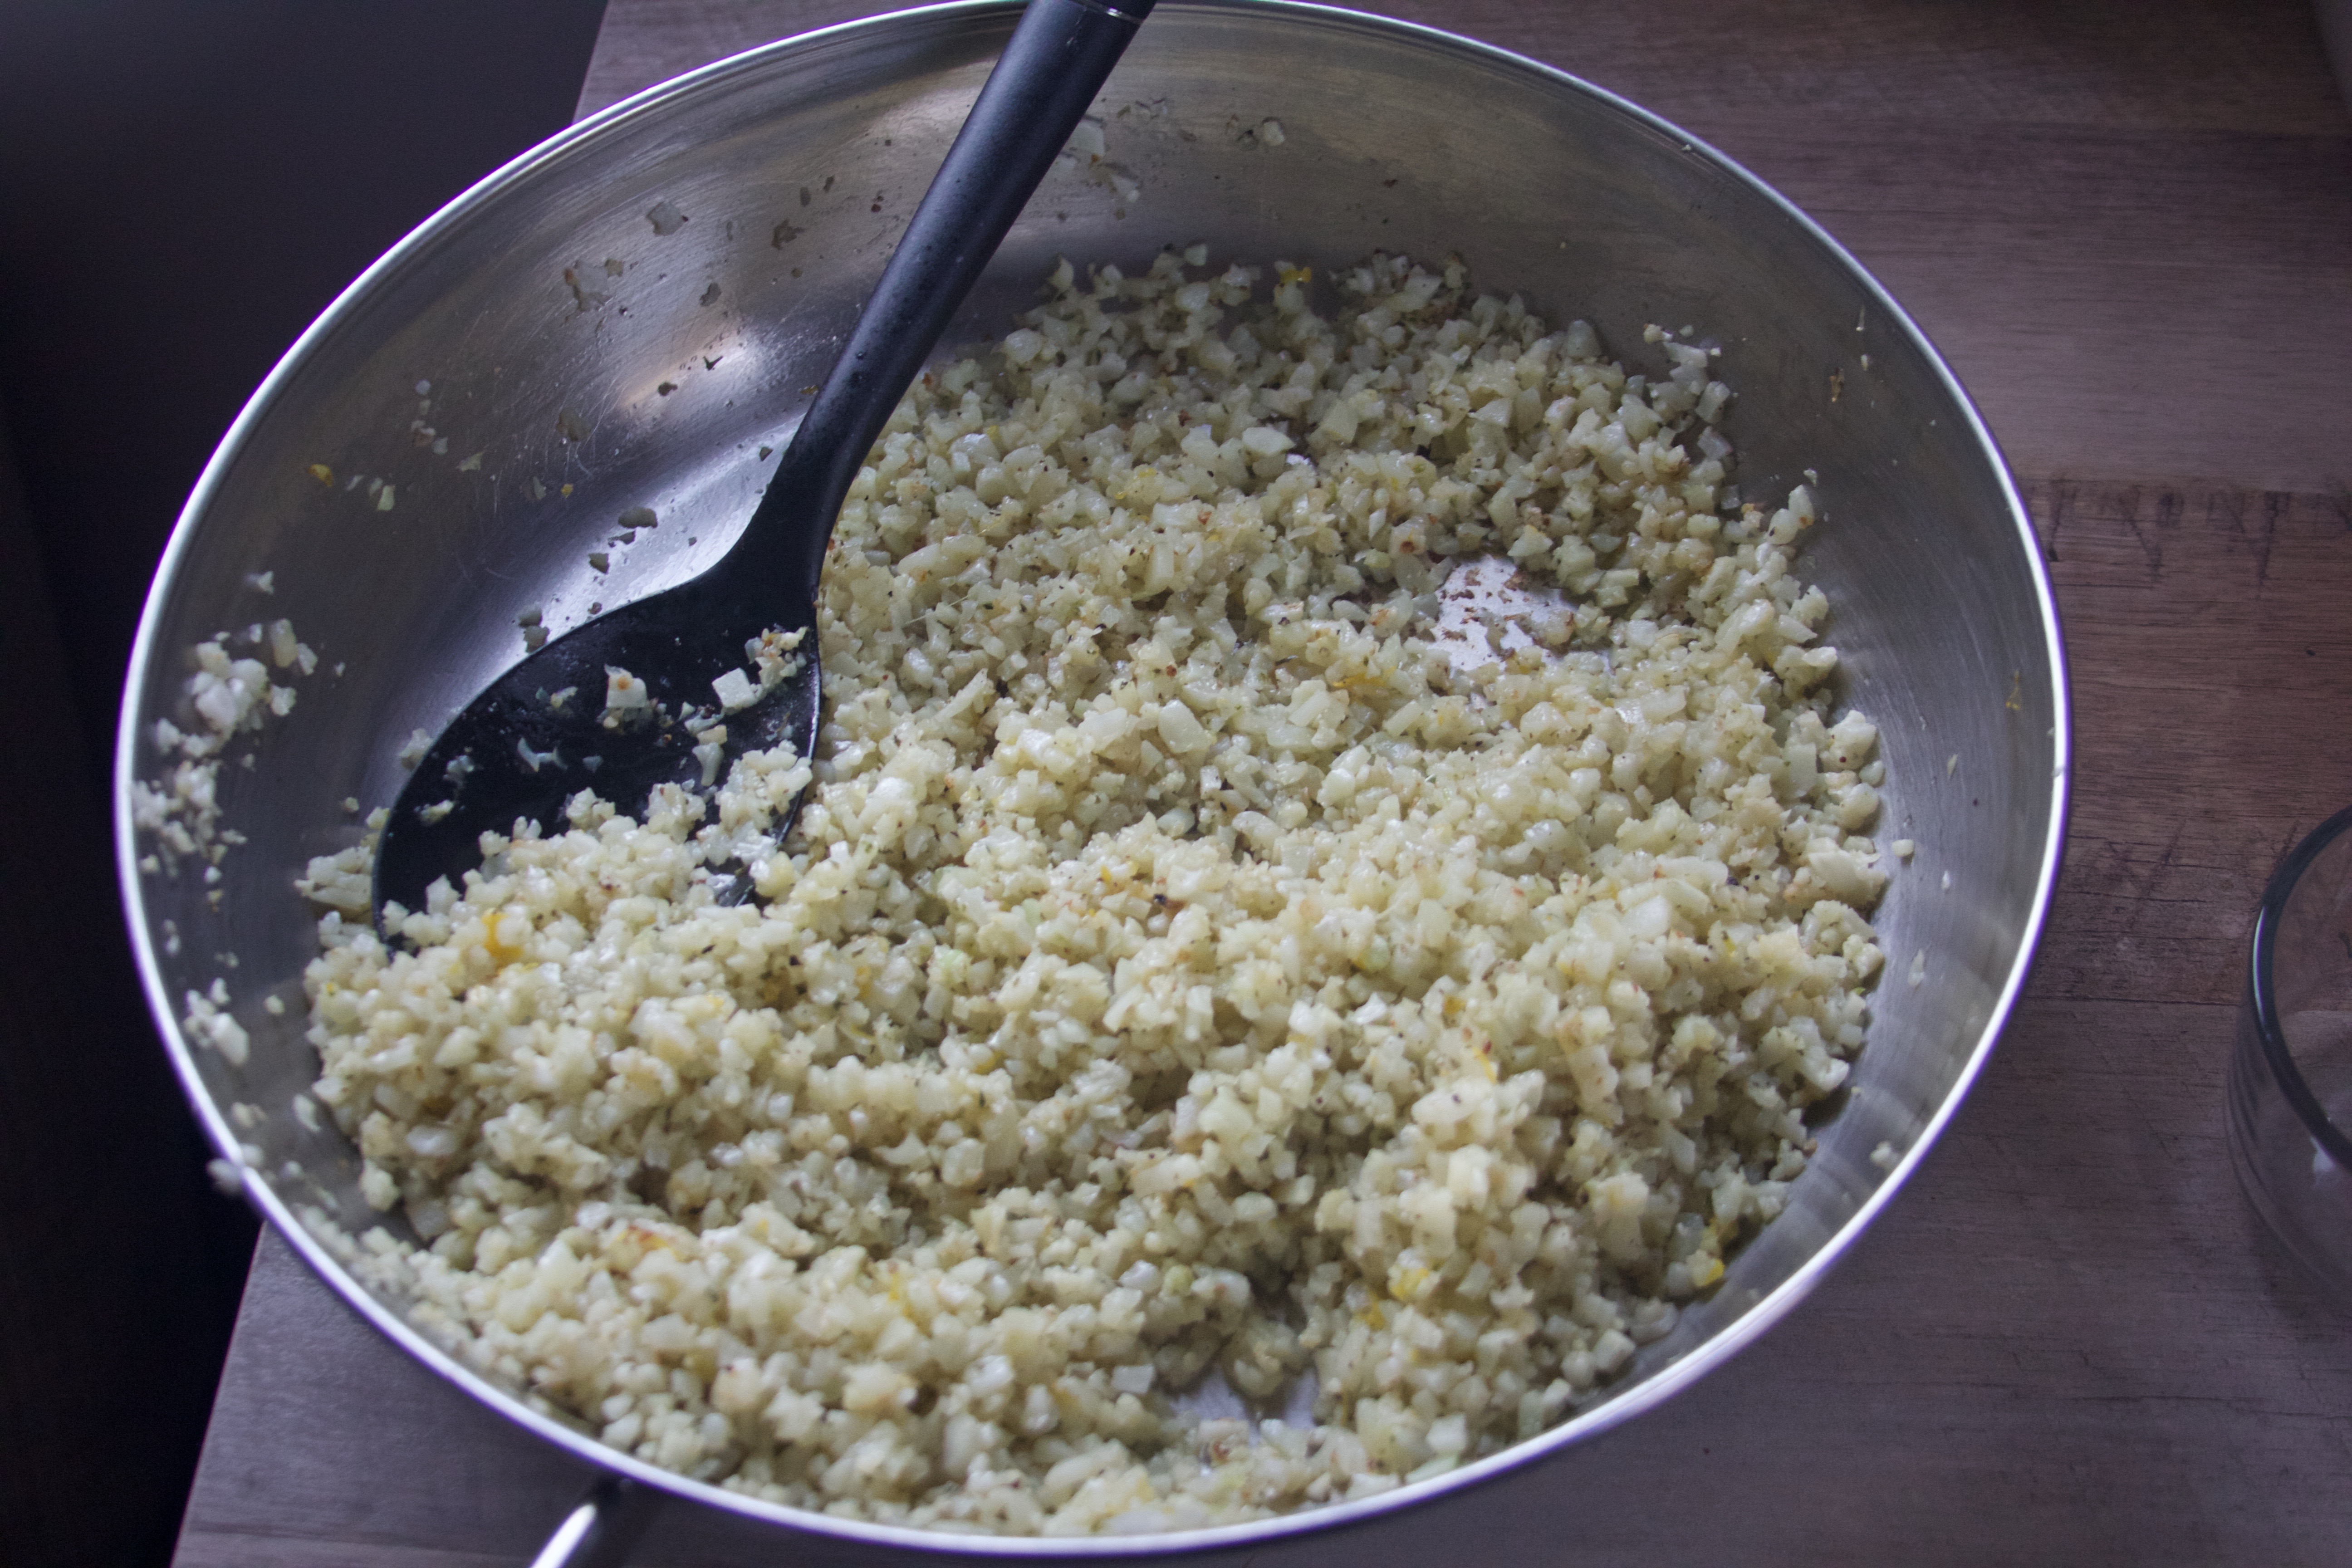
- For The Cauliflower Rice: Heat another 1 Tbsp of oil in a separate pan over medium heat. When the oil is warm, add the cauliflower rice. Stir to cook for about four minutes, then add the basil and zest the lemon into the pan. Cut the lemon in half, and squeeze the juice into the pan. Season as desired with salt and pepper.
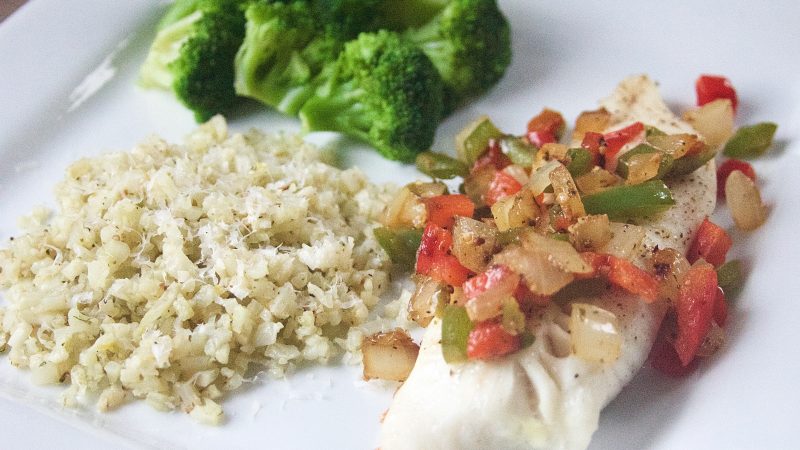
- To Assemble: Top the fish filets generously with peppers, and scoop the cauliflower rice on the side. If you have it on hand, sprinkle a littler parmesan on top! Pair with your favorite vegetable. Enjoy your healthy meal!
Earlier this spring, my mom visited me in NOLA while she was on Spring Break. We had so much fun running around and doing the best tourist-y things that New Orleans and the South has to offer! Oysters at Superior Seafood, Mint Juleps at Oak Alley, and pour-overs at Hi Volt coffee. Don’t tell me you’re surprised that all of the highlights involved food!
Though my vacations – and vacation plans for other people – are notoriously “Type A” and ridiculously packed, I did let mom take a night off for a chill day. We cooked together (less than a dozen angry words! A new record!) and recreated this recipe that my northerner mother makes frequently at home.So, yes, this is a total “cheater” recipe , and not authentically Cajun, but it is still seriously delicious and can be made in any place in the world!
I made a few modifications to up the healthiness and creaminess. Note of caution – I use “healthy” in the terms of low-carb dieting. There are very few carbs in here (cut out the bell pepper and onion if you’re keto or severely low-carb), but there is a lot of tasty fat in the cheese. If you’re not worried about carbs, pop these shrimps over pasta or rice for a filling meal!
~~~~~~~~~~
Step One.
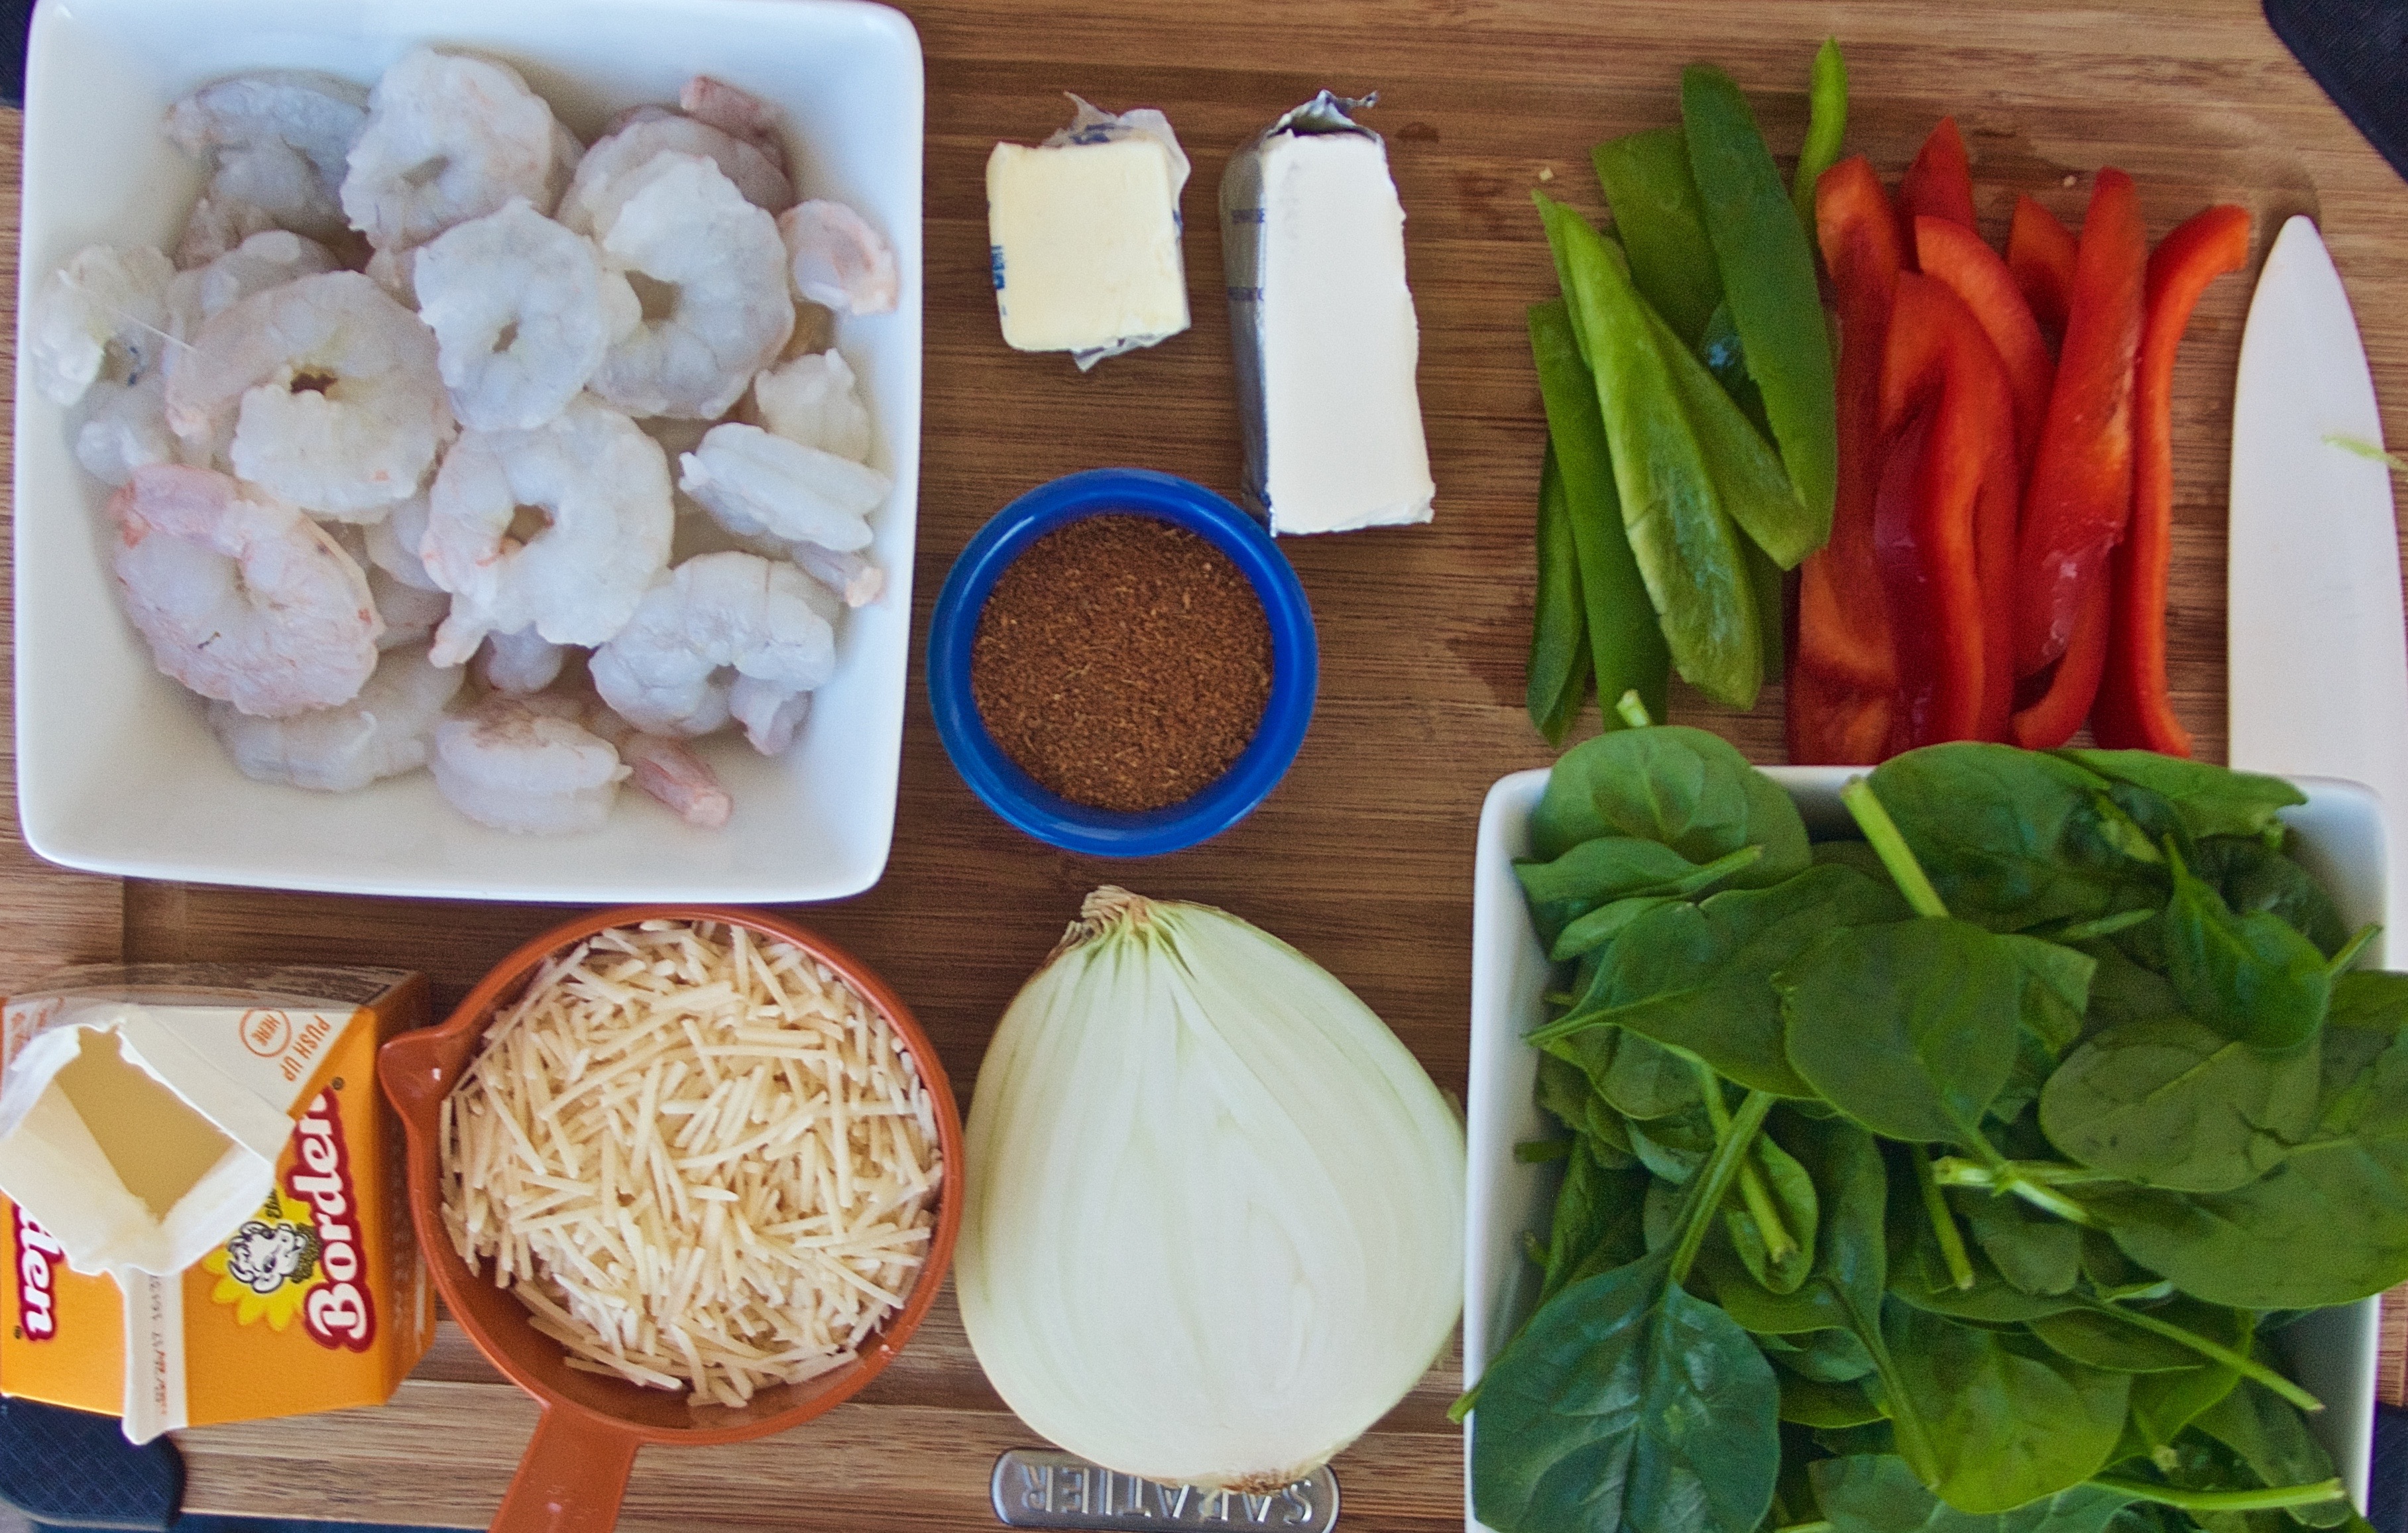
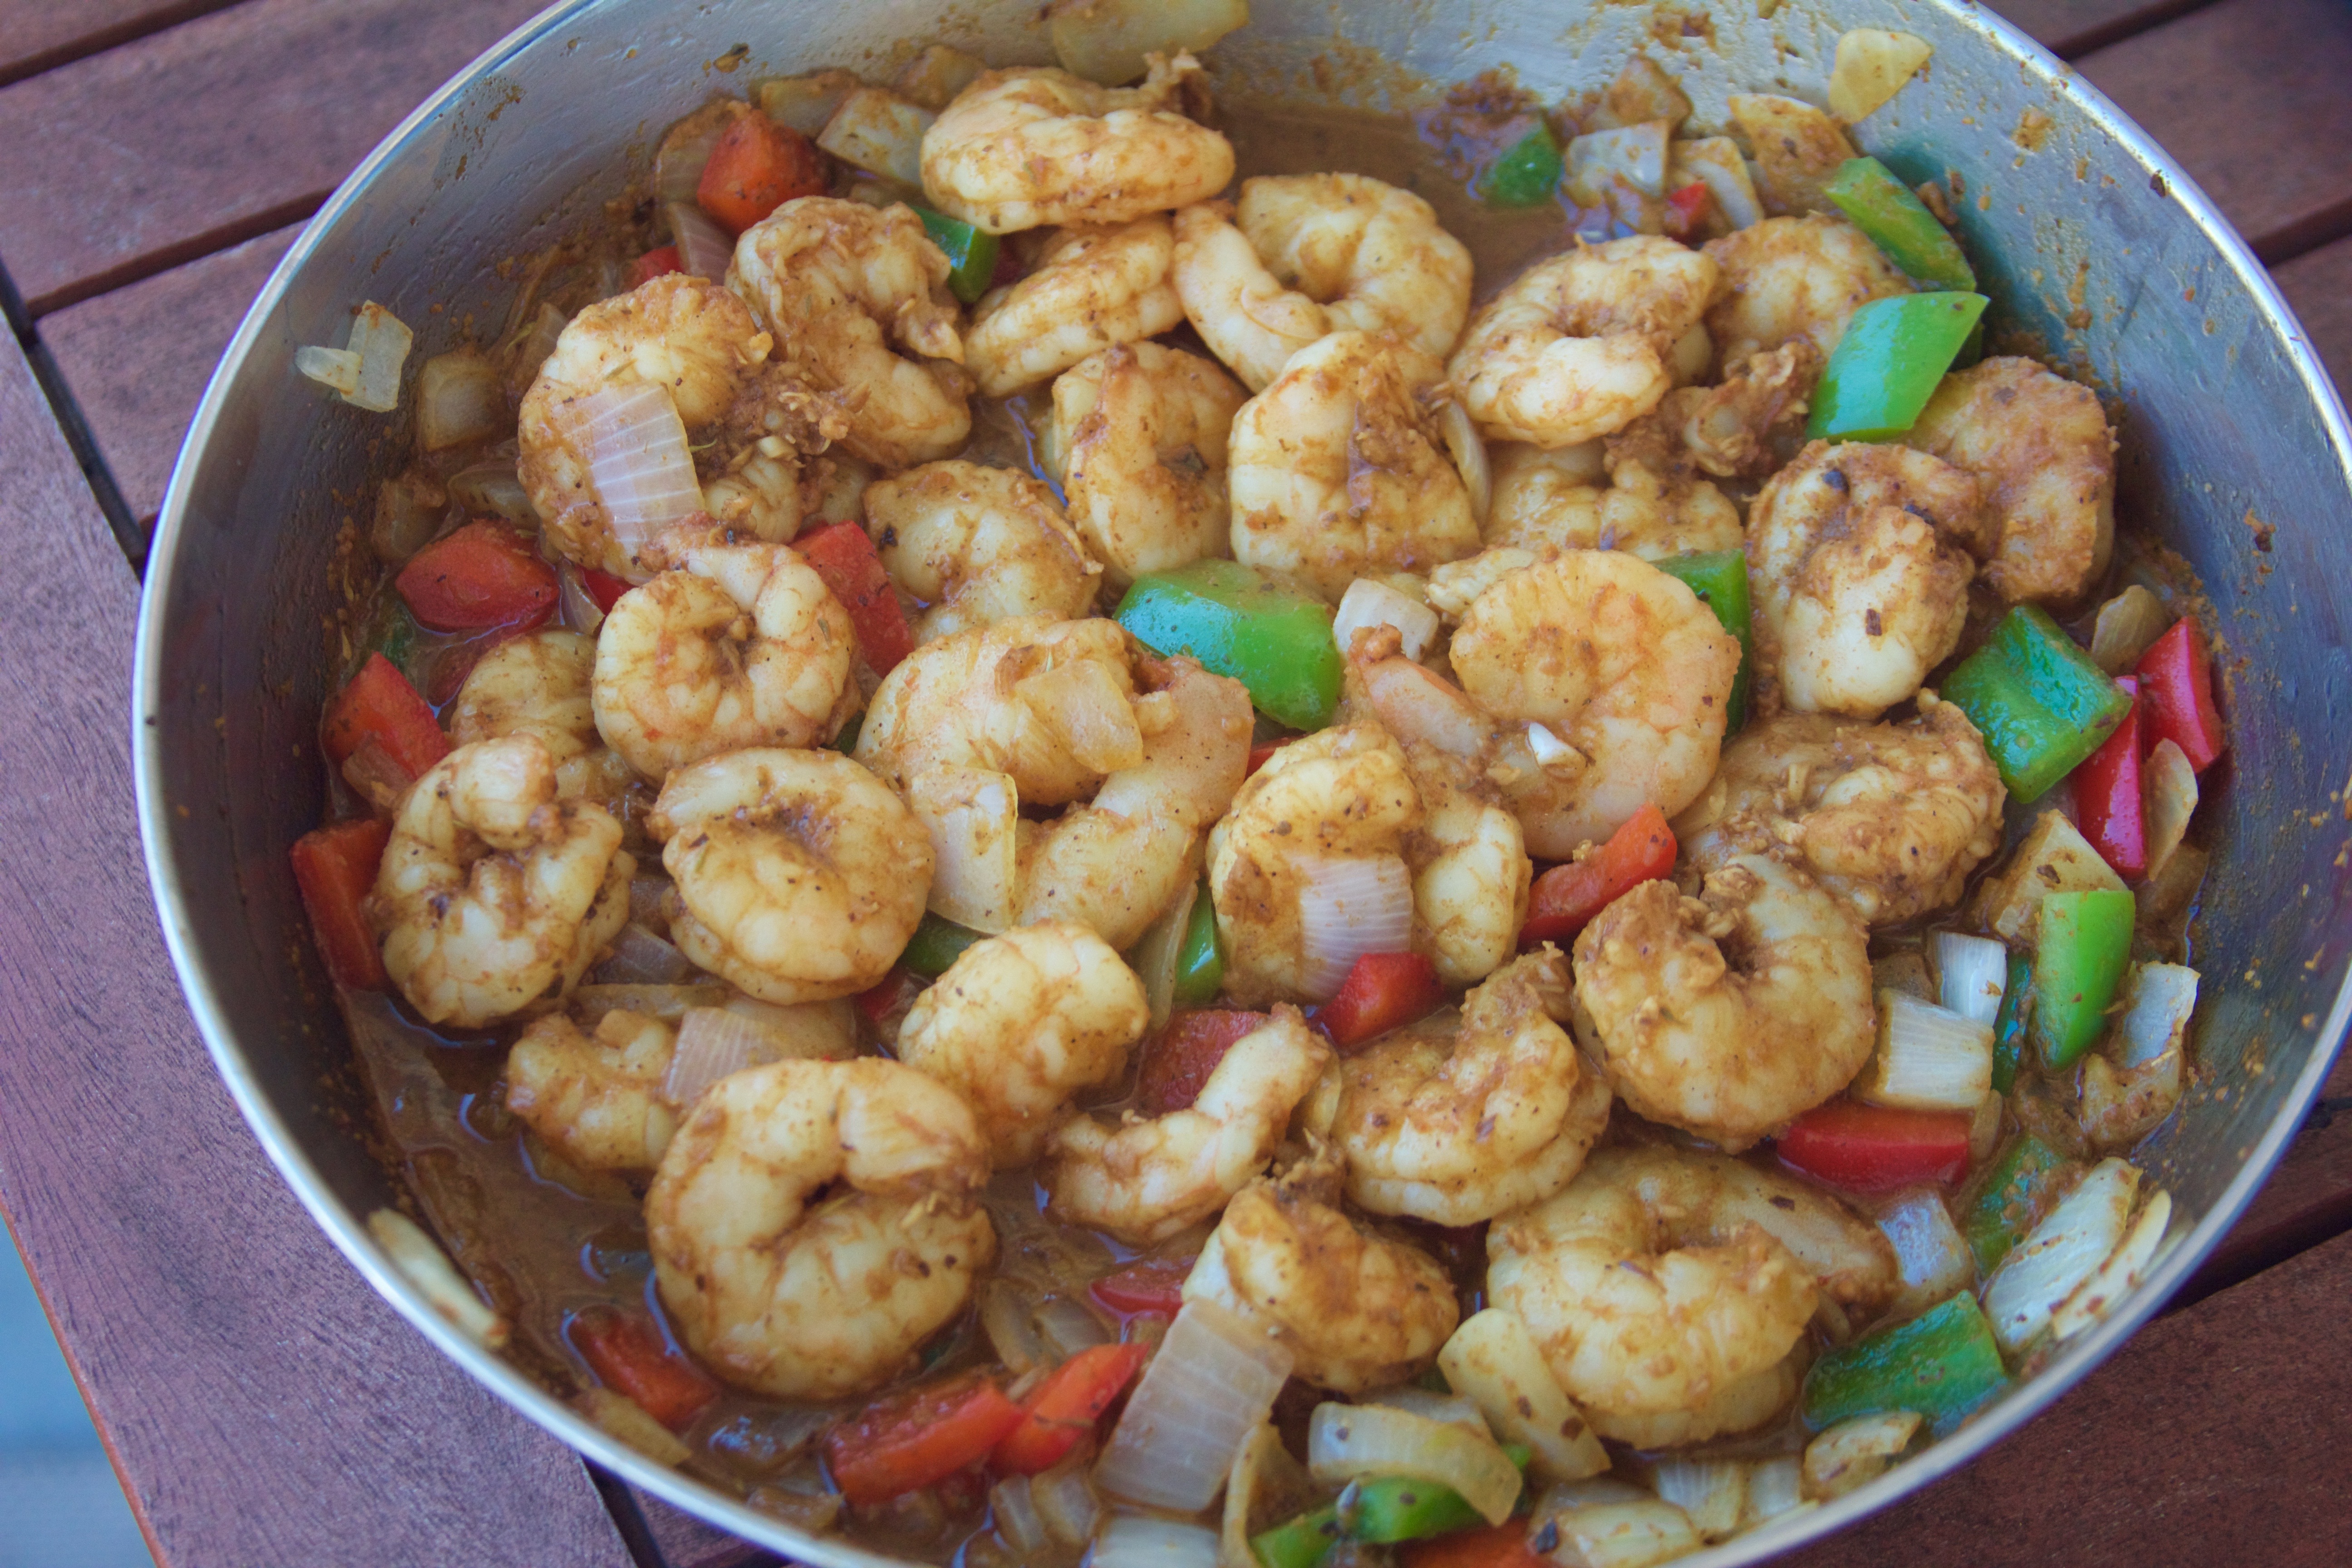
Measure out your ingredients. Prepare your shrimp (remove the tails and de-vein if necessary, depending on what you bought). Chop up the bell peppers to the desired size. I gave them a rough chop so that each bite would deliver a big burst of fresh flavor. Coat the shrimp with the Cajun seasoning. Cut the cream cheese into small cubes (about ten).
Step Two.
Melt the butter in a large pan over medium-low heat. Add the onions and bell peppers; saute for about ten minutes, until the onion is translucent.
Pro Tip: Saute the vegetables over medium-low heat so that they soak up the butter and cook evenly. Even though it takes longer, this will keep the butter and the vegetables from burning!
Step Three.
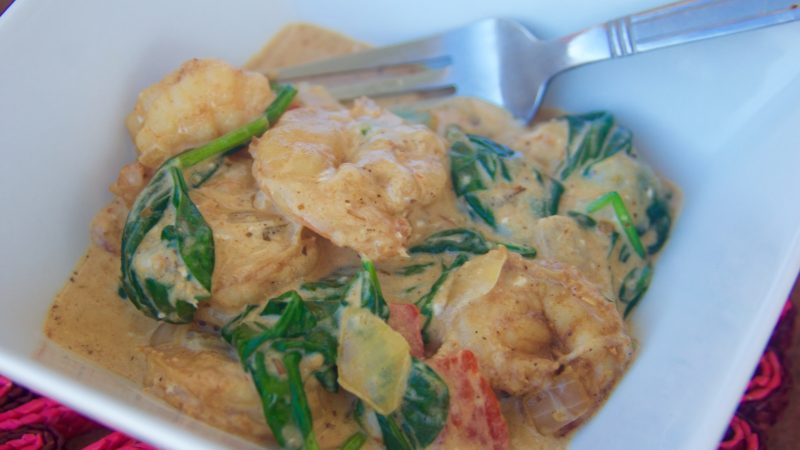
Toss in the shrimp, and cook them, stirring around, for about 8 minutes, or until cooked through. Add the spinach, and continue to stir until it is wilted.
Step Four.
Pour the cream into the pan; add the cream cheese. Let this mix heat up for about two minutes, then stir it together until it is mixed evenly. Finally, sprinkle the parmesan on top. Let it heat up again, and then carefully stir until it is melted and incorporated throughout. Serve and enjoy!

This easy shrimp recipe is a quick fix for a protein-filled weeknight dinner with the taste of Louisiana!
Ingredients
- 2 Tbsp butter
- 1/2 onion
- 1/2 red bell pepper
- 1/2 green bell pepper
- 1 lb Louisiana shrimp
- 3 Tbsp Cajun Seasoning
- 3 cups spinach
- 1/2 cup heavy whipping cream
- 2 oz cream cheese
- 1 cup shredded parmesan
Instructions
- Measure out your ingredients. Prepare your shrimp (remove the tails and de-vein if necessary, depending on what you bought). Chop up the bell peppers to the desired size. I gave them a rough chop so that each bite would deliver a big burst of fresh flavor. Coat the shrimp with the Cajun seasoning. Cut the cream cheese into small cubes (about ten).
- Melt the butter in a large pan over medium-low heat. Add the onions and bell peppers; saute for about ten minutes, until the onion is translucent.
- Toss in the shrimp, and cook them, stirring around, for about 8 minutes, or until cooked through. Add the spinach, and continue to stir until it is wilted.
- Pour the cream into the pan; add the cream cheese. Let this mix heat up for about two minutes, then stir it together until it is mixed evenly. Finally, sprinkle the parmesan on top. Let it heat up again, and then carefully stir until it is melted and incorporated throughout. Serve and enjoy!