this is a page for
Category: Little Bites
Whew! It’s been a minute since I’ve posted. The last month or so has been wrapped up in packing, moving, and unpacking. Though I tried to save the kitchen things for last – and then unpacked them first – I wouldn’t say that my apartment was exactly ready for photos 😉
But now I live in Colorado, I am thrilled by my new life adventure out here, and I am back in the kitchen!
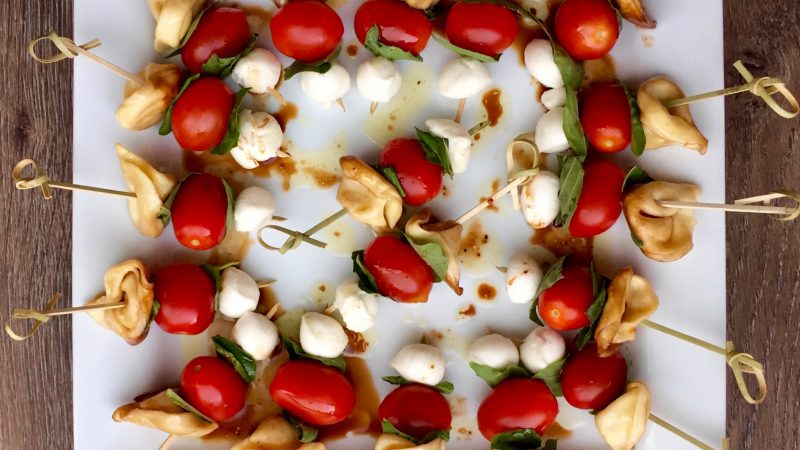
You’ve probably seen these around instagram – there’s a reason for the popularity! This is an amazingly simple and delicious summer appetizer. Whether you’re looking for a light snack, an appetizer, or a sharing dish for potluck, this recipe is a quick fix that is not only good for you, but tastes great too! And have I mentioned how easy it is? You can pick from a wide variety of pre-made tortellini to customize these to your preference. If you want even less steps, use a bottled balsamic vinaigrette to make it even easier!
~~~~~~~~~~
Step One.
Start with the tortellini so that they can cool before assembling the skewers. Cook the tortellini according to package directions. Drain them and put them in a heat-safe bowl. Pour some olive oil and balsamic vinegar over the top, stir, cover, and refrigerate them until they are cold.
Step Two.
Prep step! Measure out the oil, vinegar, and lemon pepper. Drain the mozzarella, wash the tomatoes, and cut the basil into strips about 1/2 inch thick.
Step Three.
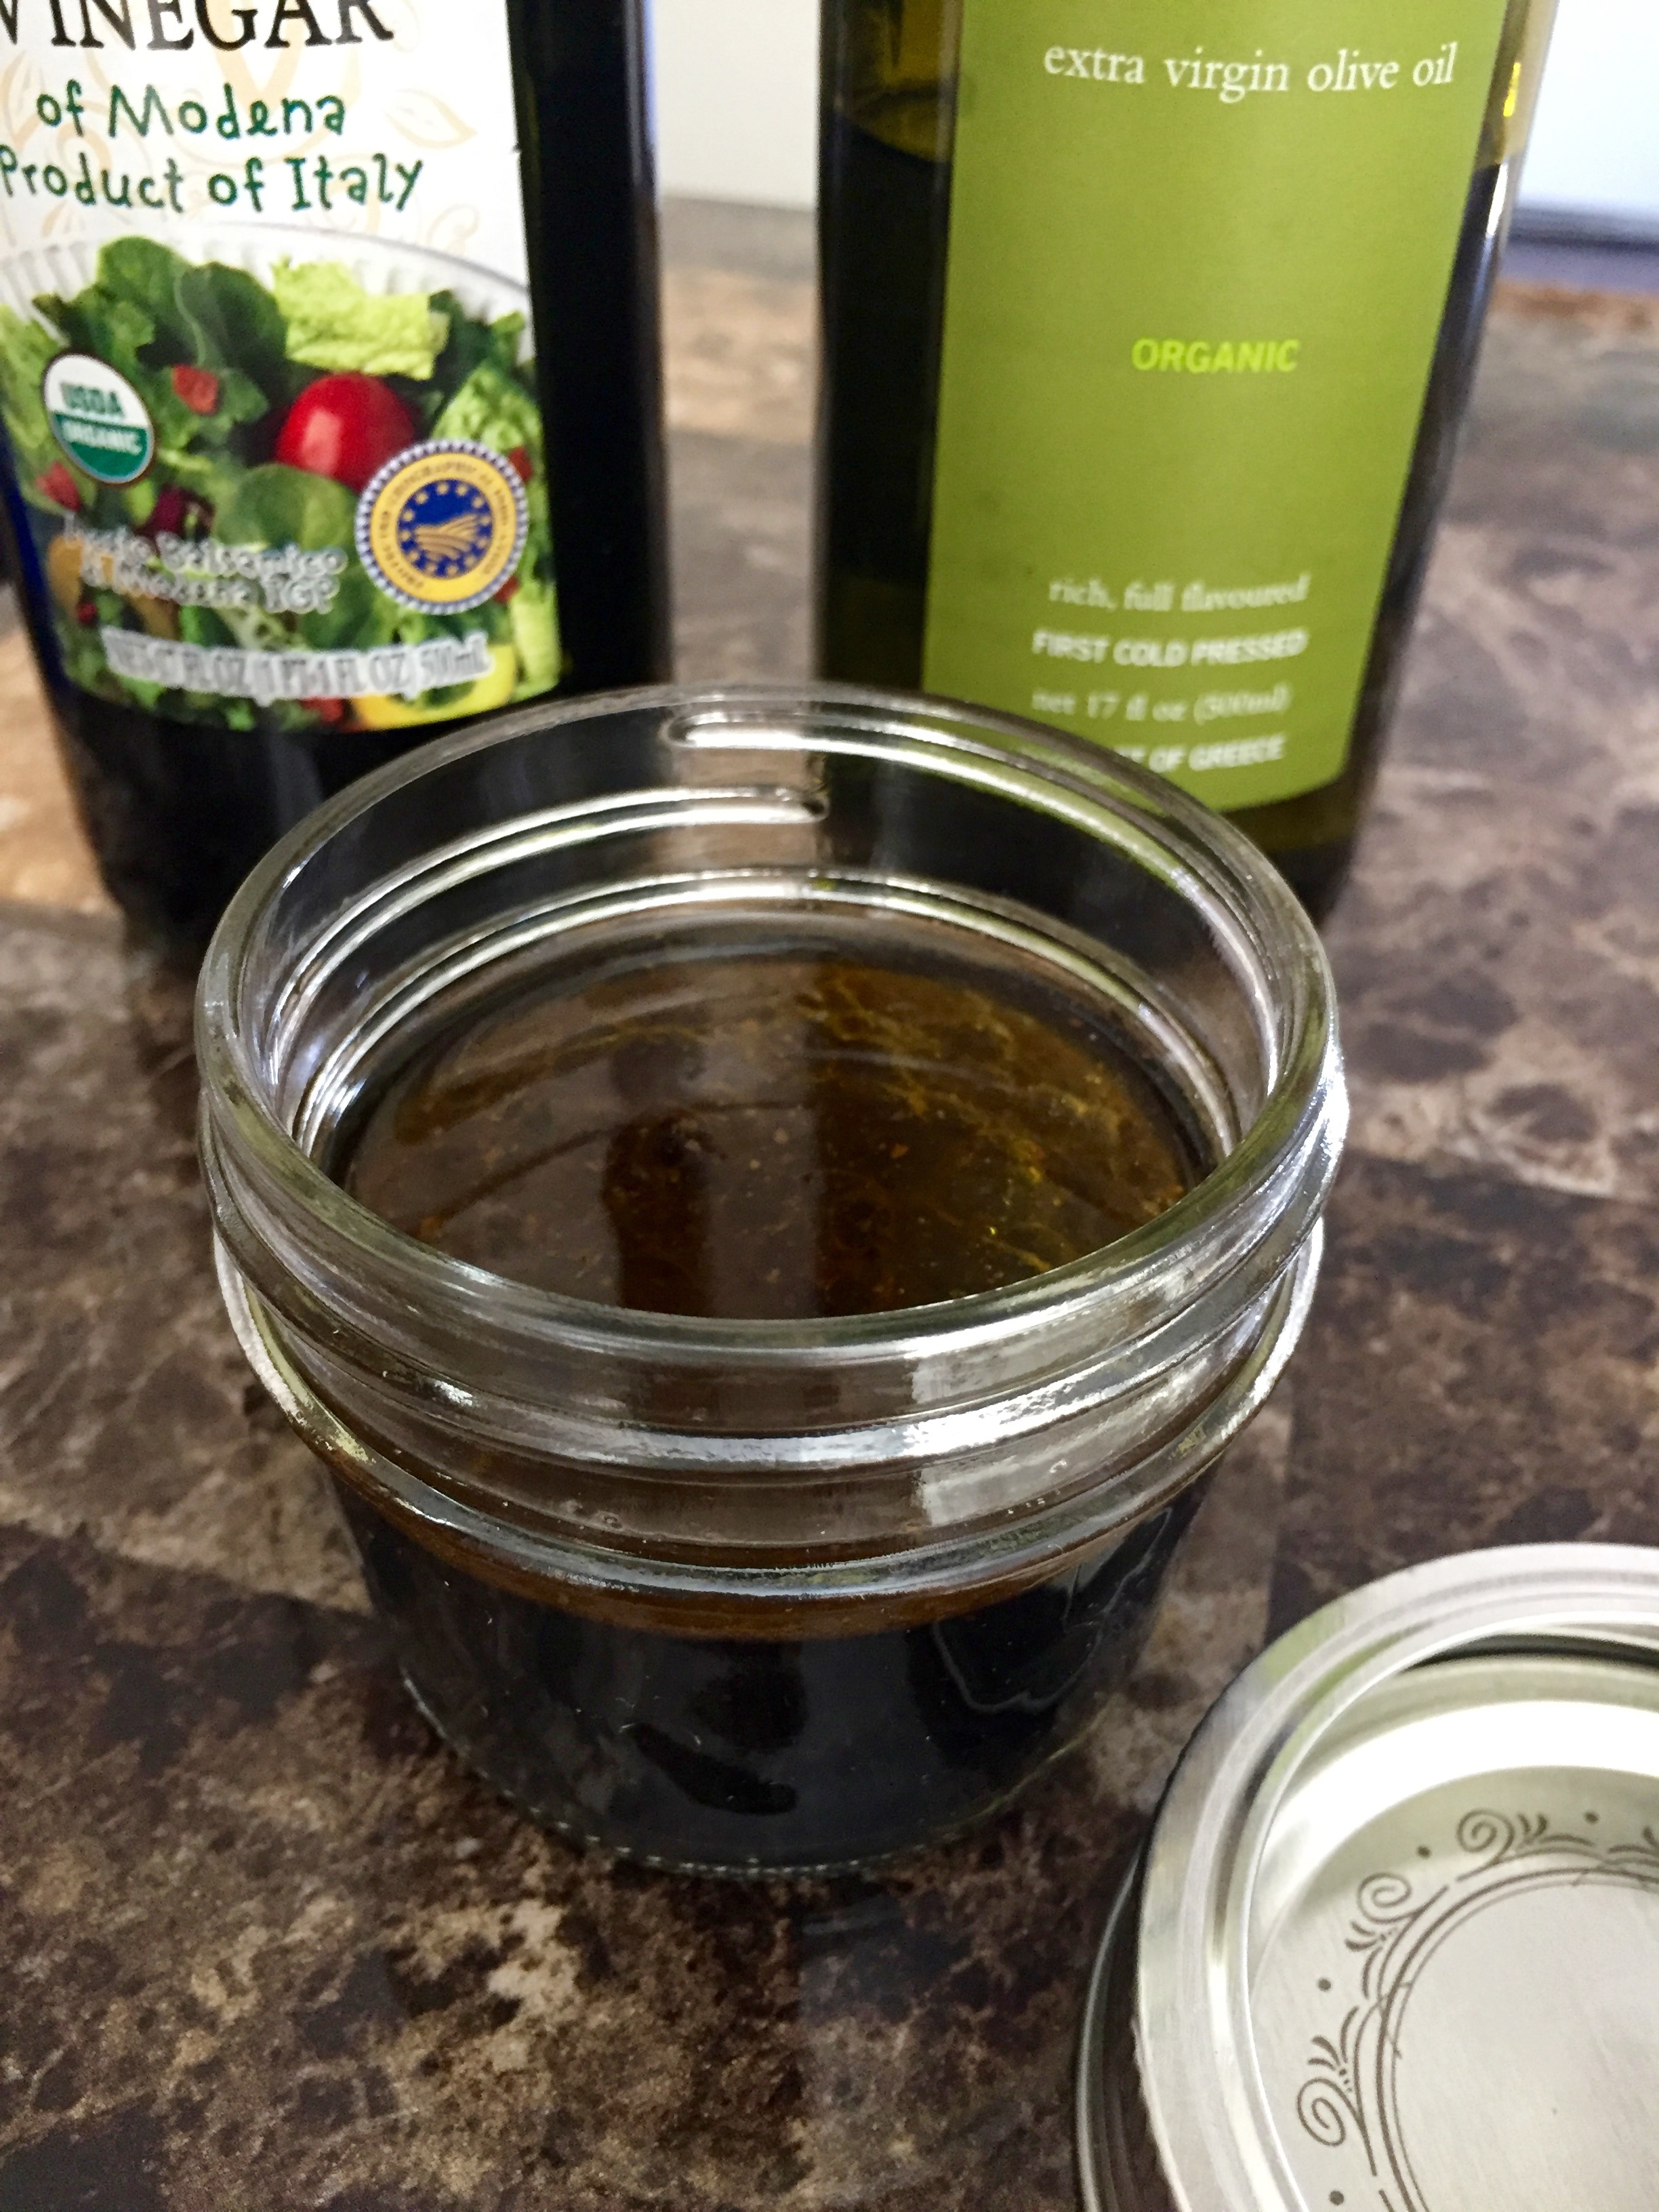
Prepare the vinaigrette. Pour the vinaigrette into a jar, and slowly add the oil while you stir it. Mix in the pepper. Seal the jar and shake the vinaigrette to complete the emulsion.
Pro Tip: If you want to make the emulsion even more perfectly, use a blender or a food processor to incorporate the oil.
 Step Four.
When the tortellini are cold, begin to assemble the skewers. I use this order, but pick whatever you like best: tortellini, basil, tomato, basil, mozzarella. When they are fully assembled, drizzle with the vinaigrette, and serve!
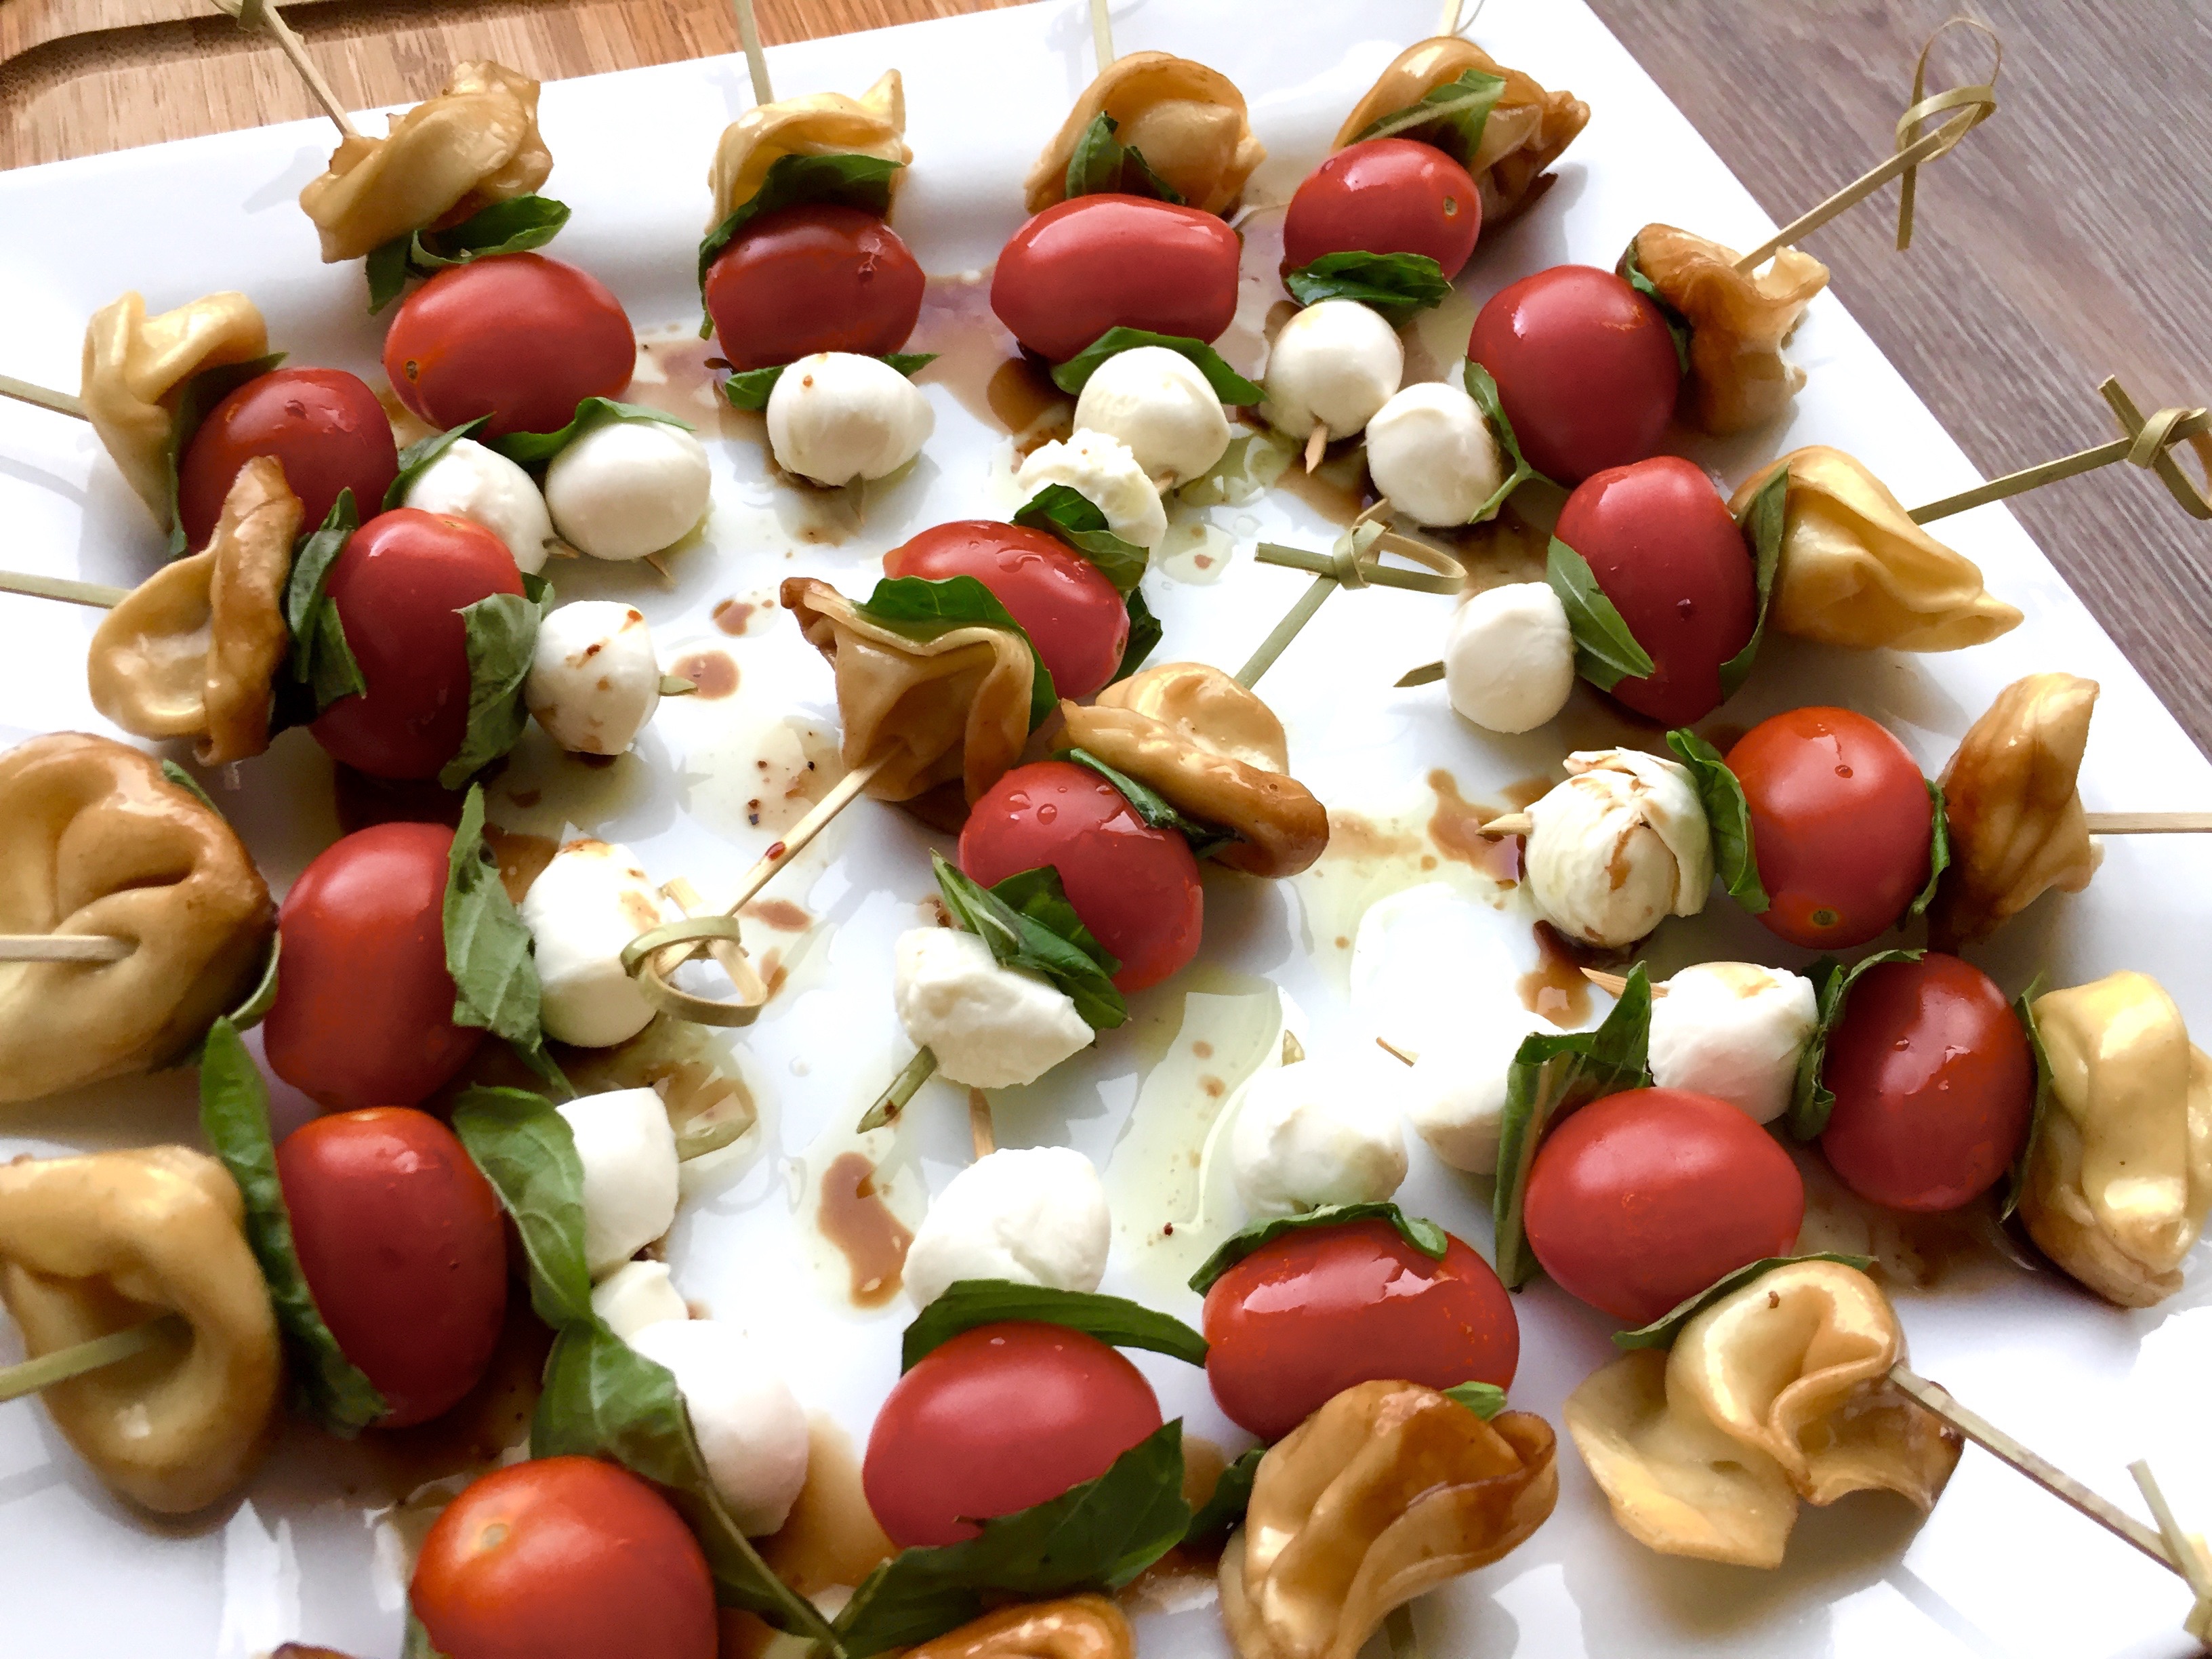

Whether you're looking for a light snack, an appetizer, or a sharing dish for potluck, this recipe is a quick fix that is not only good for you, but tastes great too!
Ingredients
- For the Vinaigrette
- 1/2 cup olive oil
- 1/4 cup balsamic vinegar
- 2 tsp lemon pepper
- For the Skewers
- 1 package prepared tortellini
- 1 cup basil
- 1 pint cherry tomatoes
- 1 tub of mini pearl mozzarella cheese
Instructions
- Start with the tortellini so that they can cool before assembling the skewers. Cook the tortellini according to package directions. Drain them and put them in a heat-safe bowl. Pour some olive oil and balsamic vinegar over the top, stir, cover, and refrigerate them until they are cold.
- Prep step! Measure out the oil, vinegar, and lemon pepper. Drain the mozzarella, wash the tomatoes, and cut the basil into strips about 1/2 inch thick.
- Prepare the vinaigrette. Pour the vinaigrette into a jar, and slowly add the oil while you stir it. Mix in the pepper. Seal the jar and shake the vinaigrette to complete the emulsion.
- Pro Tip: If you want to make the emulsion even more perfectly, use a blender or a food processor to incorporate the oil.
- When the tortellini are cold, begin to assemble the skewers. I use this order, but pick whatever you like best: tortellini, basil, tomato, basil, mozzarella. When they are fully assembled, drizzle with the vinaigrette, and serve!
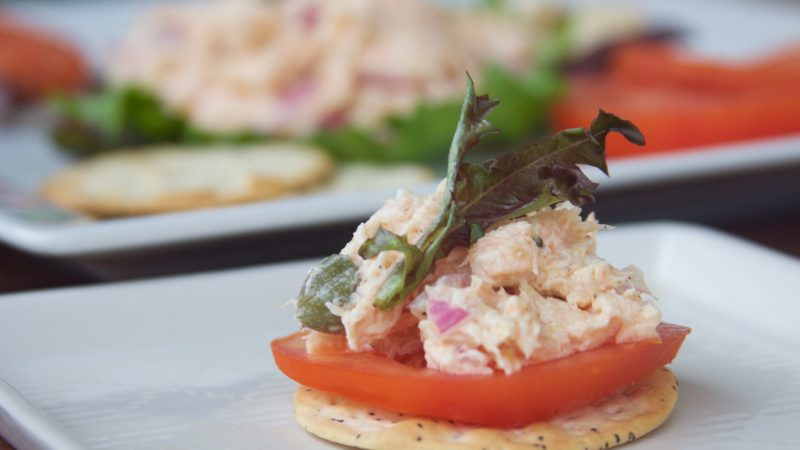
When it’s this hot outside, the last thing I want to do is eat something warm! This salmon salad is a cure for the summer heat blues. And it’s super easy to put together! Whether you enjoy the spread as a protein-packed snack after a summer workout or as an appetizer at a picnic or party, it’s light, crunchy flavors will remind you that summer is a great time to be outside!
~~~~~~~~~~
Step One.
Bake the salmon filets. I did this the night before I wanted to serve it, so that the fish was good and cold by the time I was ready to use it!
Preheat your oven to 425°F, and lightly coat the fish with olive oil. Sprinkle with salt and pepper, and then bake the fish for 15 – 18 minutes. Let them cool to room temperature, then seal them in a container and refrigerate until you’re ready to use them.
Step Two.
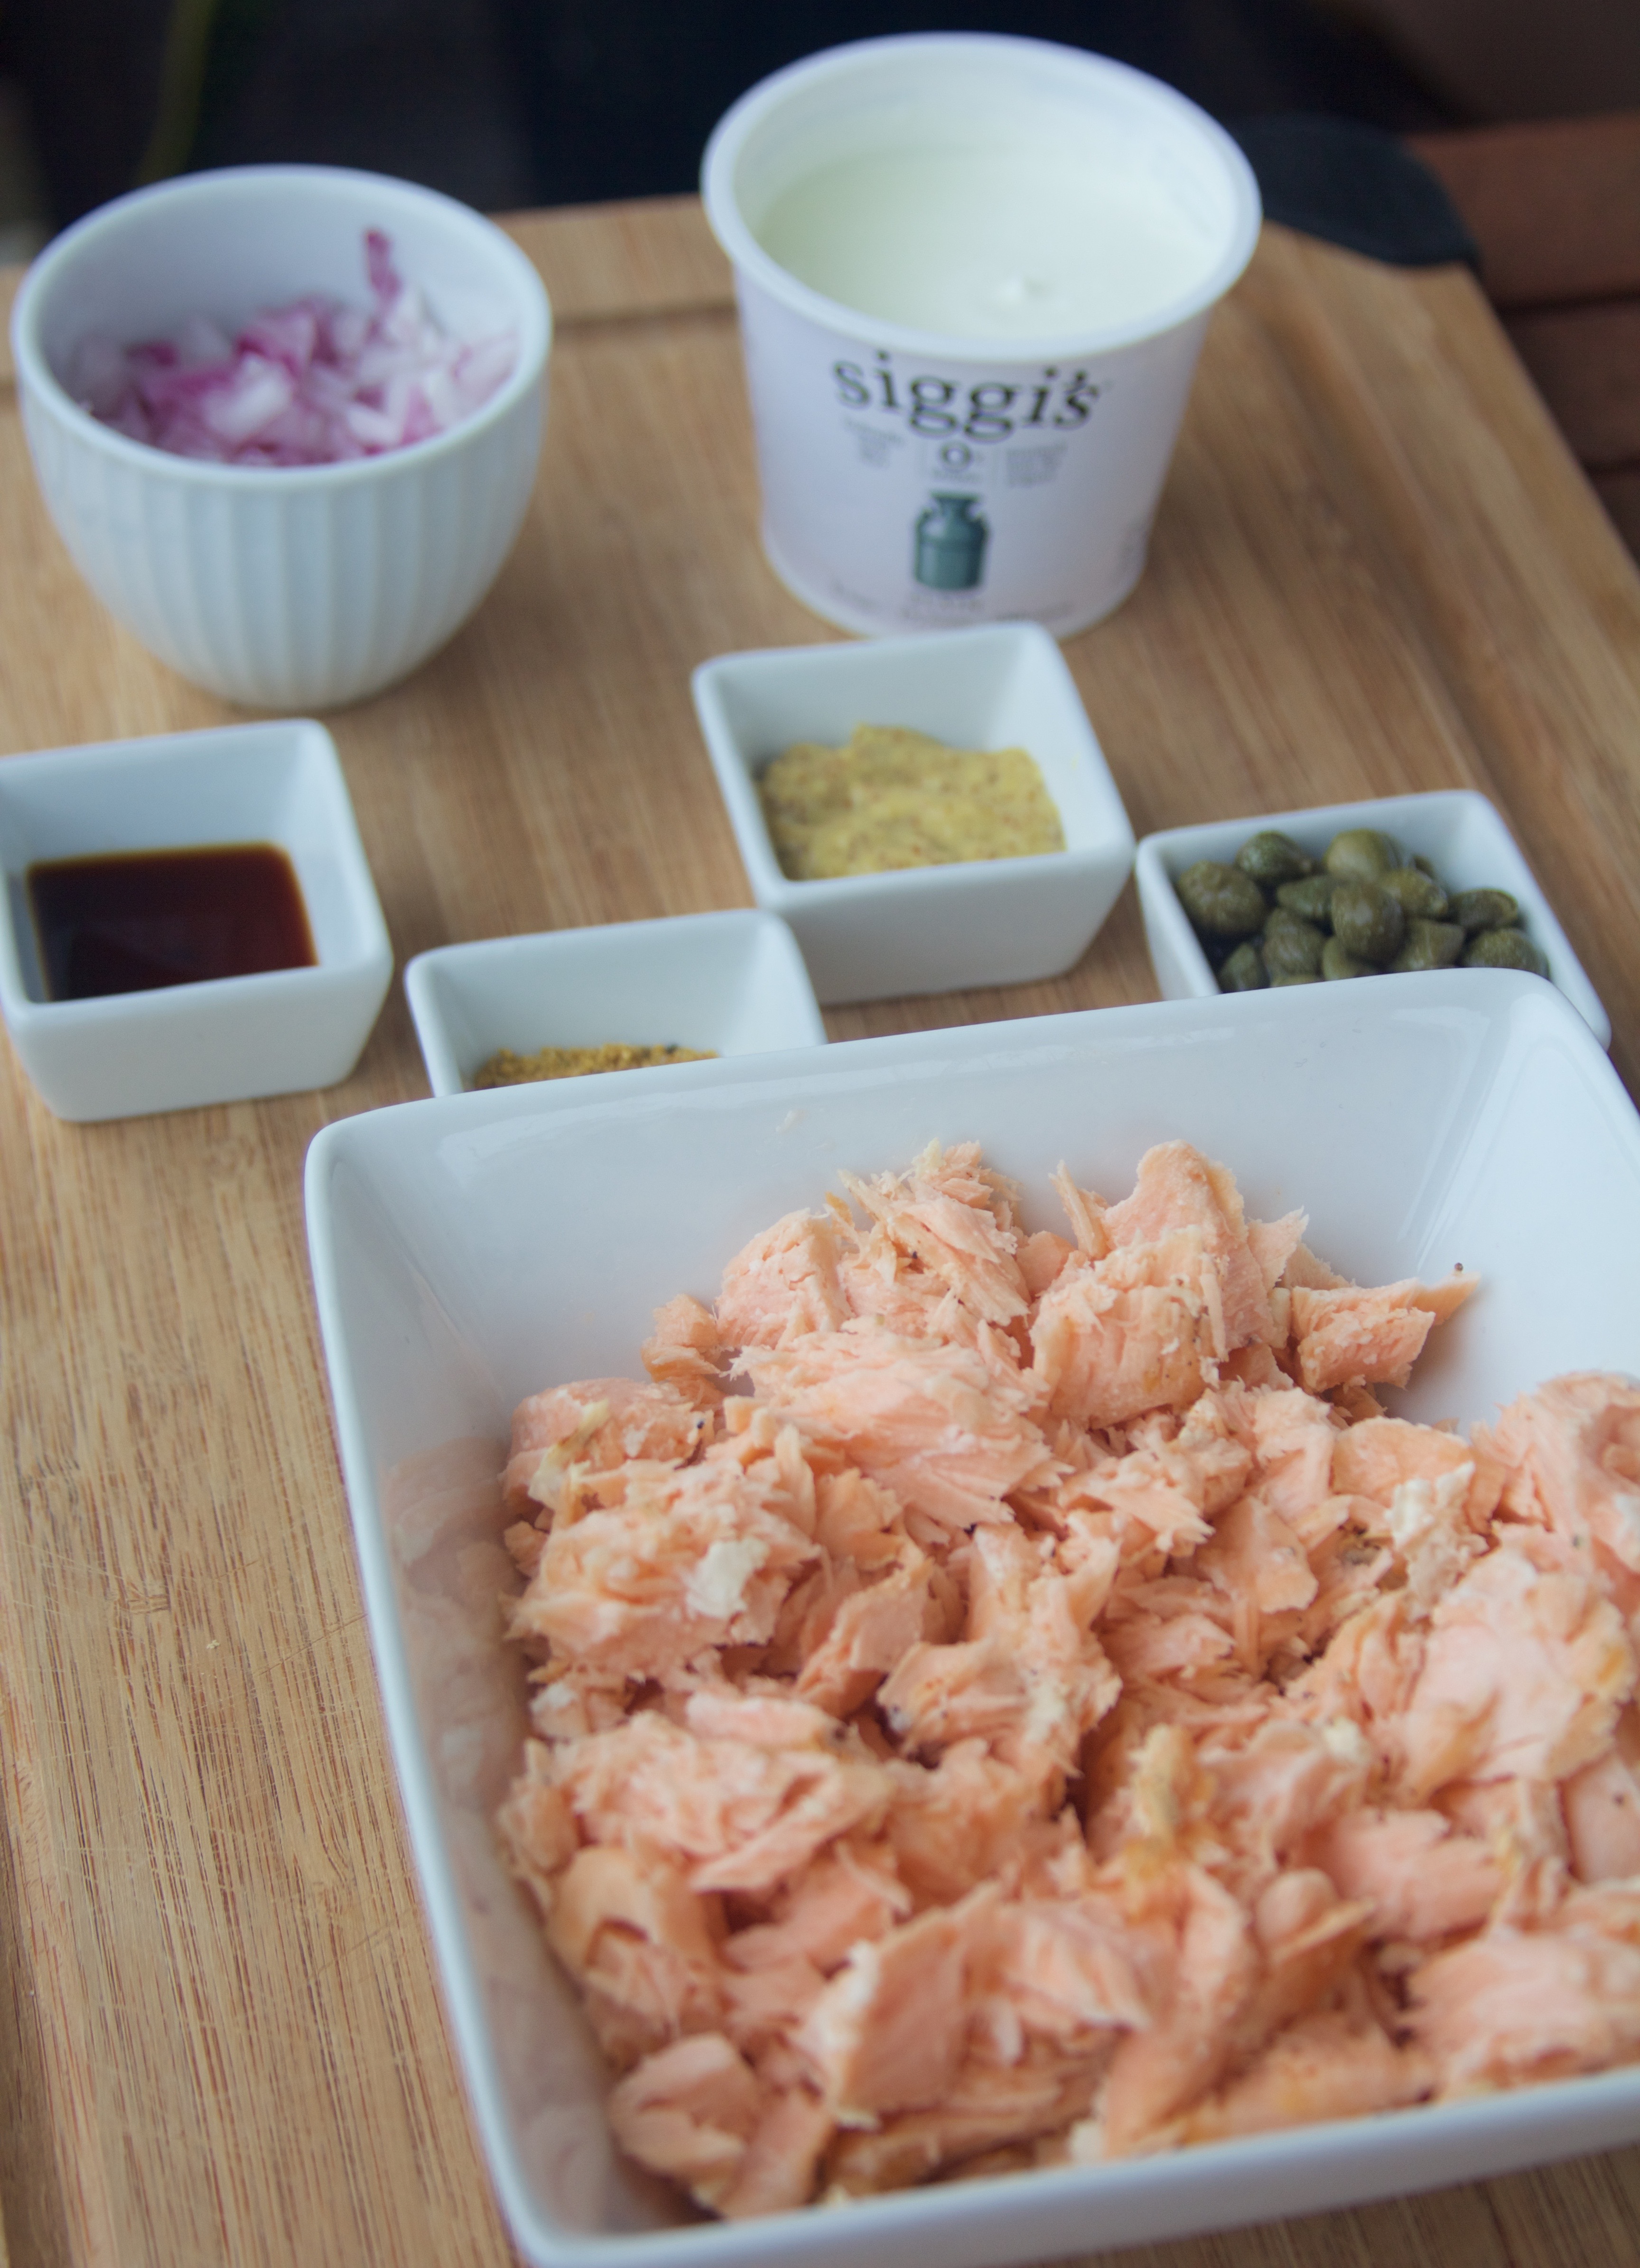
Prep Step! Measure out your ingredients. Dice the red onion – you don’t want any chunks that are too big!
Step Three.
Last big step! (See how easy this is?!?) In a mixing bowl, break up the baked salmon into big chunks with a fork. You don’t want to shred it yet, because it will further break down as you mix in the other ingredients. Mix in the onion and capers.
In the yogurt container, mix together the yogurt, Worcestershire sauce, mustard, and spices. Add the sauce to the salmon mixture, and stir until combined.
Step Three and a Half. =]
Ok, well, one more small step. The salad will be best if it has a chance for the flavors to blend in the fridge, but no biggie if you’re in a rush! Slice up some tomatoes, add a few crackers and greens, and you’re all set to enjoy this light snack!

Ingredients
- 2 salmon filets (about 4 oz each)
- 1 Tbsp olive oil
- Salt and Pepper
- 1 tub of Greek Yogurt
- 1 Tbsp capers
- 1/2 red onion
- 1 tsp Worcestershire sauce
- 1 tsp stone ground mustard
- 3/4 tsp lemon pepper
- Salt to taste
Instructions
- Preheat your oven to 425°F, and lightly coat the fish with olive oil. Sprinkle with salt and pepper, and then bake the fish for 15 - 18 minutes. Let them cool to room temperature, then seal them in a container and refrigerate until you're ready to use them.
- Prep Step! Measure out your ingredients. Dice the red onion - you don't want any chunks that are too big!
- In a mixing bowl, break up the baked salmon into big chunks with a fork. You don't want to shred it yet, because it will further break down as you mix in the other ingredients. Mix in the onion and capers.
- In the yogurt container, mix together the yogurt, Worcestershire sauce, mustard, and spices. Add the sauce to the salmon mixture, and stir until combined.
- The salad will be best if it has a chance for the flavors to blend in the fridge, but no biggie if you're in a rush! Slice up some tomatoes, add a few crackers and greens, and you're all set to enjoy this light snack!
3…2…1… HAPPY NEW YEAR! What does 2017 have in store for you? There is something enchanting about the new year, even though I don’t buy into the whole “new year, new you” mentality. If you want a resolution to stick, it needs to be an all-year, all the time resolution! But it’s never too late to start, so go for it if you’re ready for a life change this new year!
My new life resolution is to update this blog more! I can’t tell you how many photos of awesome, delicious meals I have that never made it to the posting stage. Laziness, maybe. I attribute it to my internet, which takes about 9 minutes to upload each picture. Ugh.
But I am especially exited this for this New Year’s Eve because I am going to a fancy swing dancing party! We have always had a chill night in with our best family friends – which is very nice! – but I’ve always wanted to experience New Year’s Eve at home in New Orleans and out on the town. The anticipation might just be better than the event!
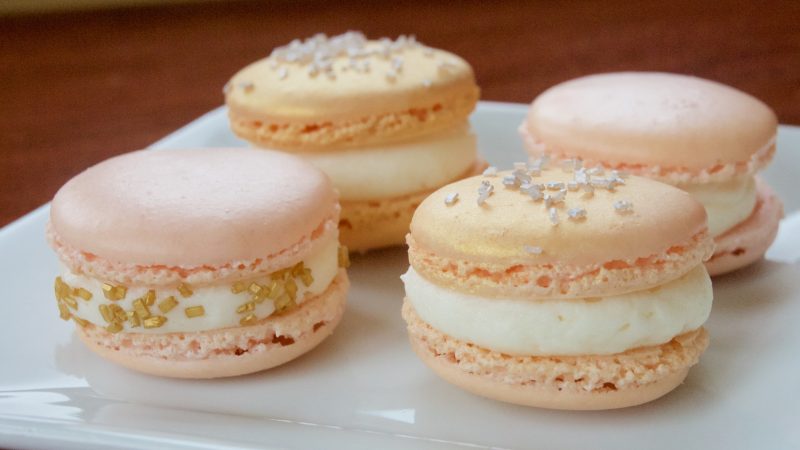
With visions of champagne bubbles dancing in my head, I dreamt up these delicate macaroons. They combine the drink of the evening with the class of the most sophisticated party. Here’s a toast to Auld Lang Syne!
~~~~~~~~~~

Step One.
Prep step! Measure out your ingredients. Have a stand mixer, large bowl, sifter, and spatula ready. Line two or three baking sheets with parchment paper.

Step Two.
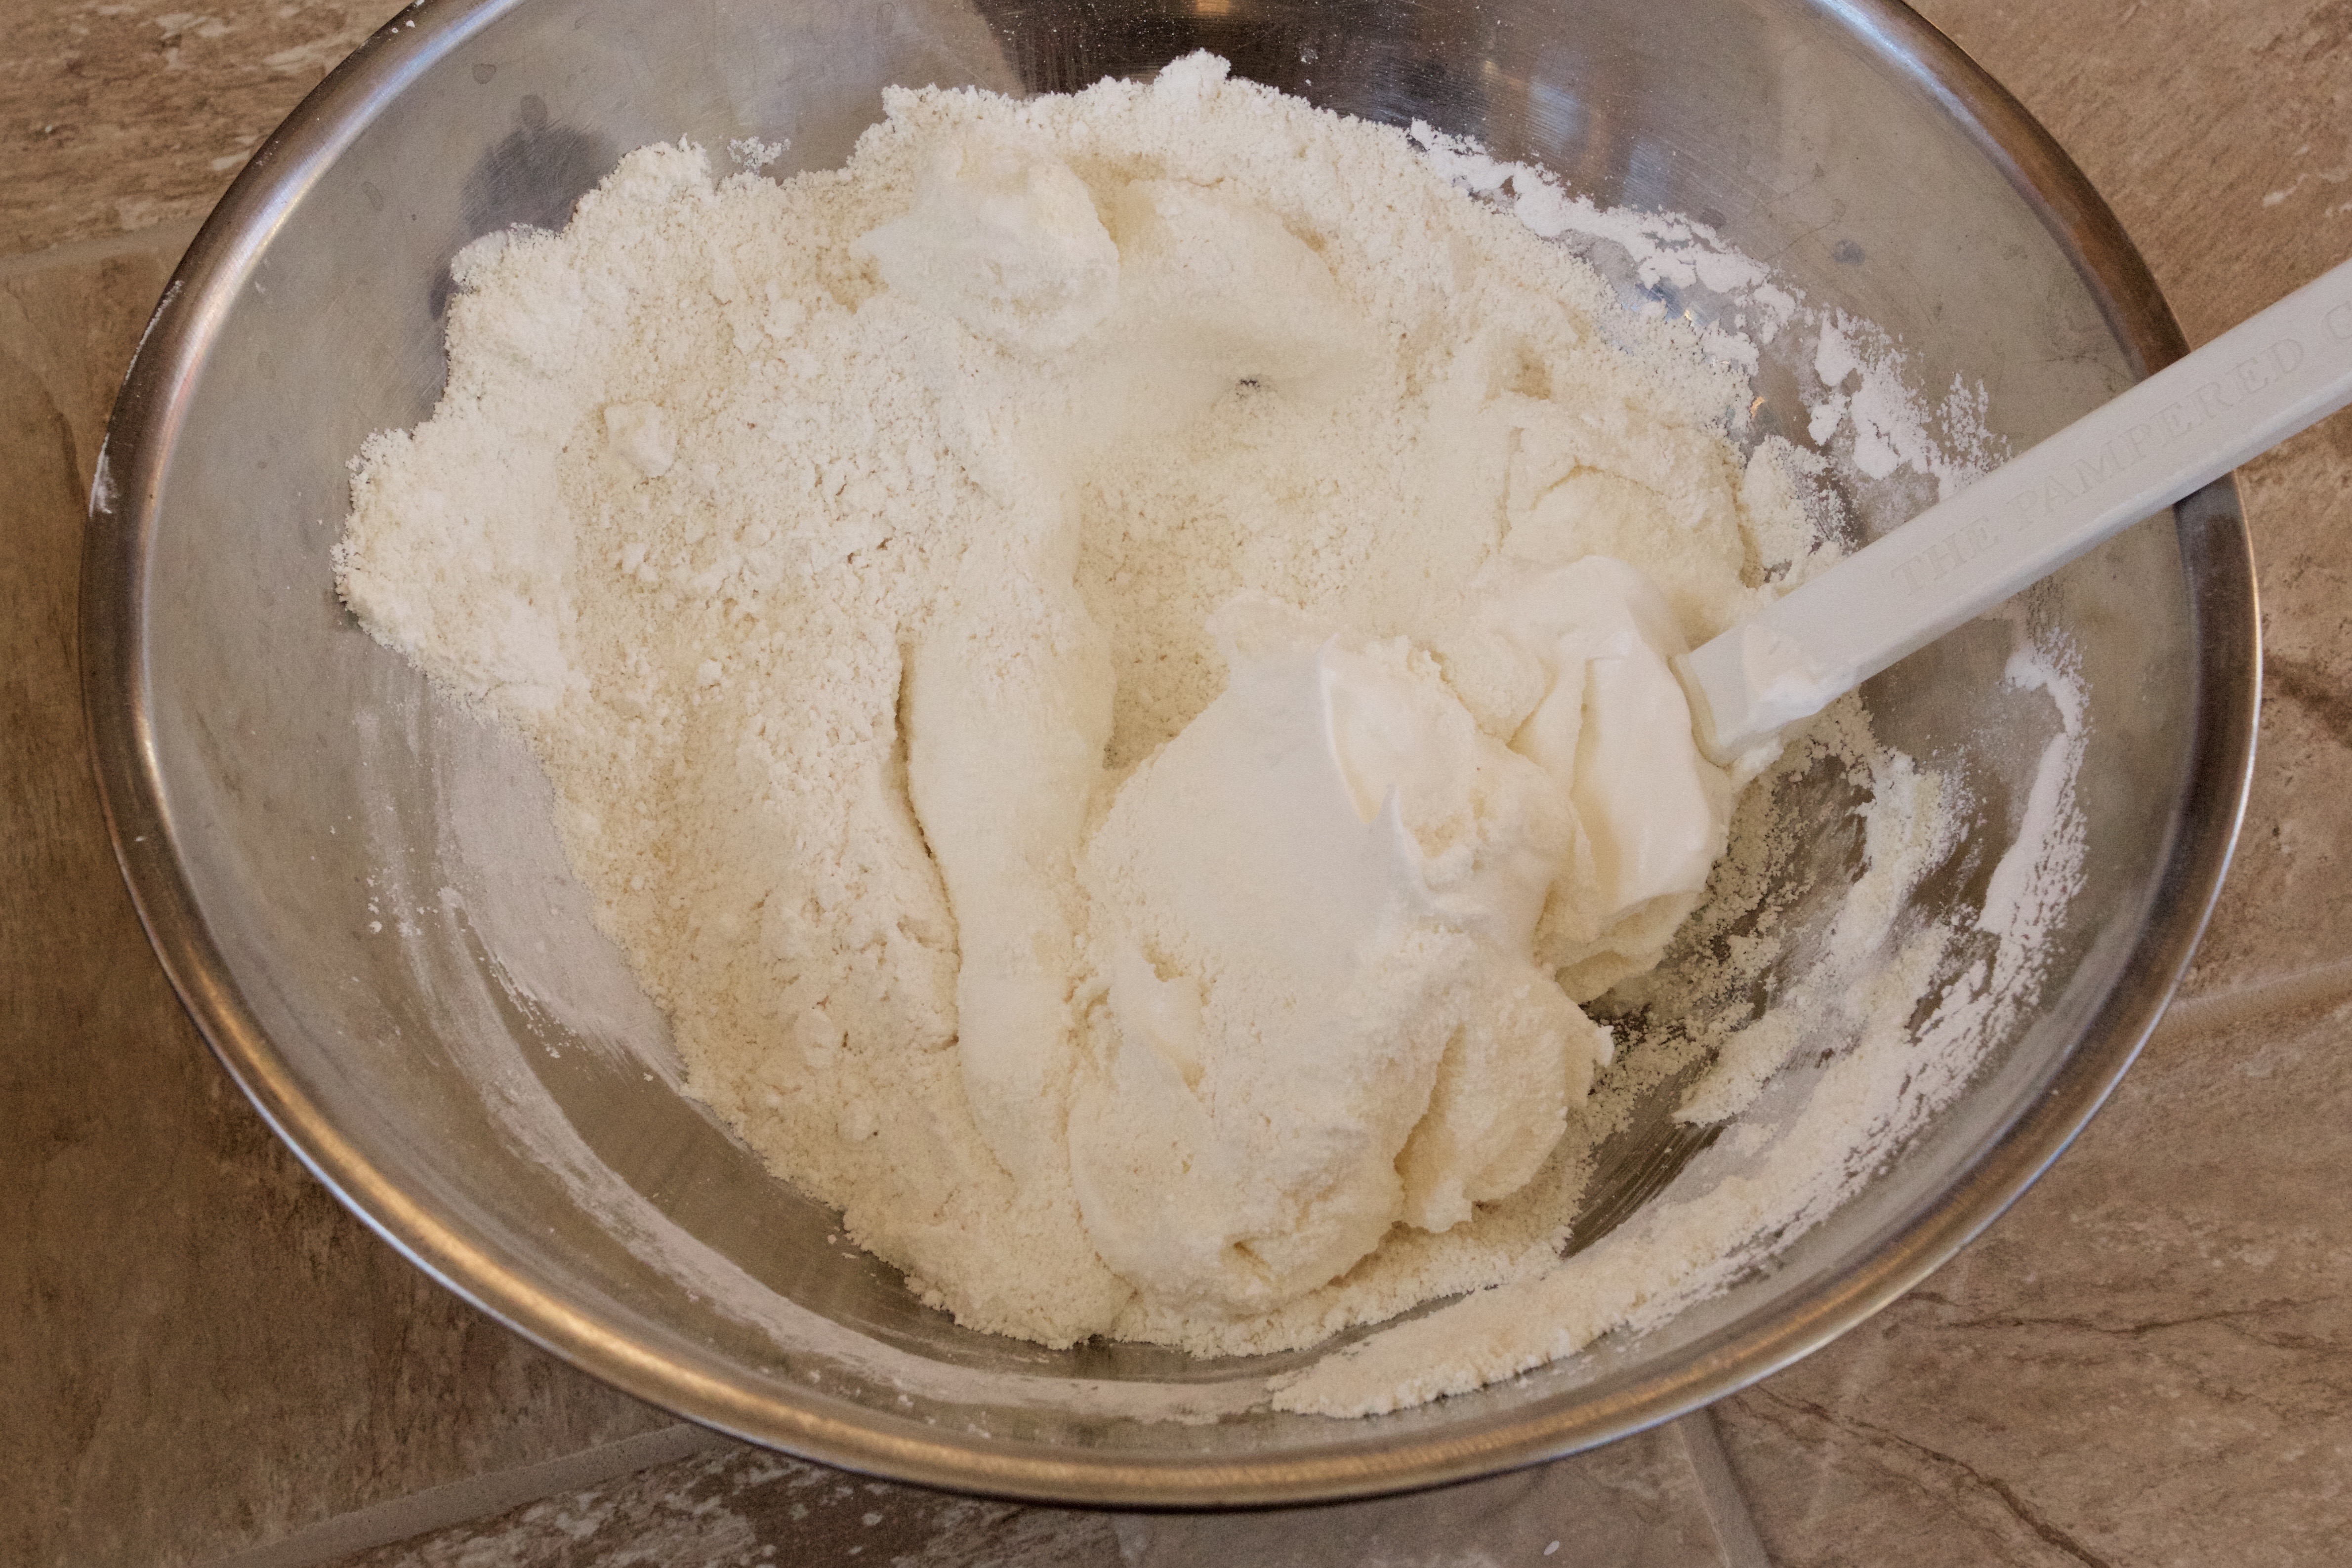
Mix the dry ingredients. It is SO important that the sugar and almond aren’t clumpy at all. Clumpy macaroons are no fun. Sift the ingredients in small batches into the big mixing bowl.
Step Three.
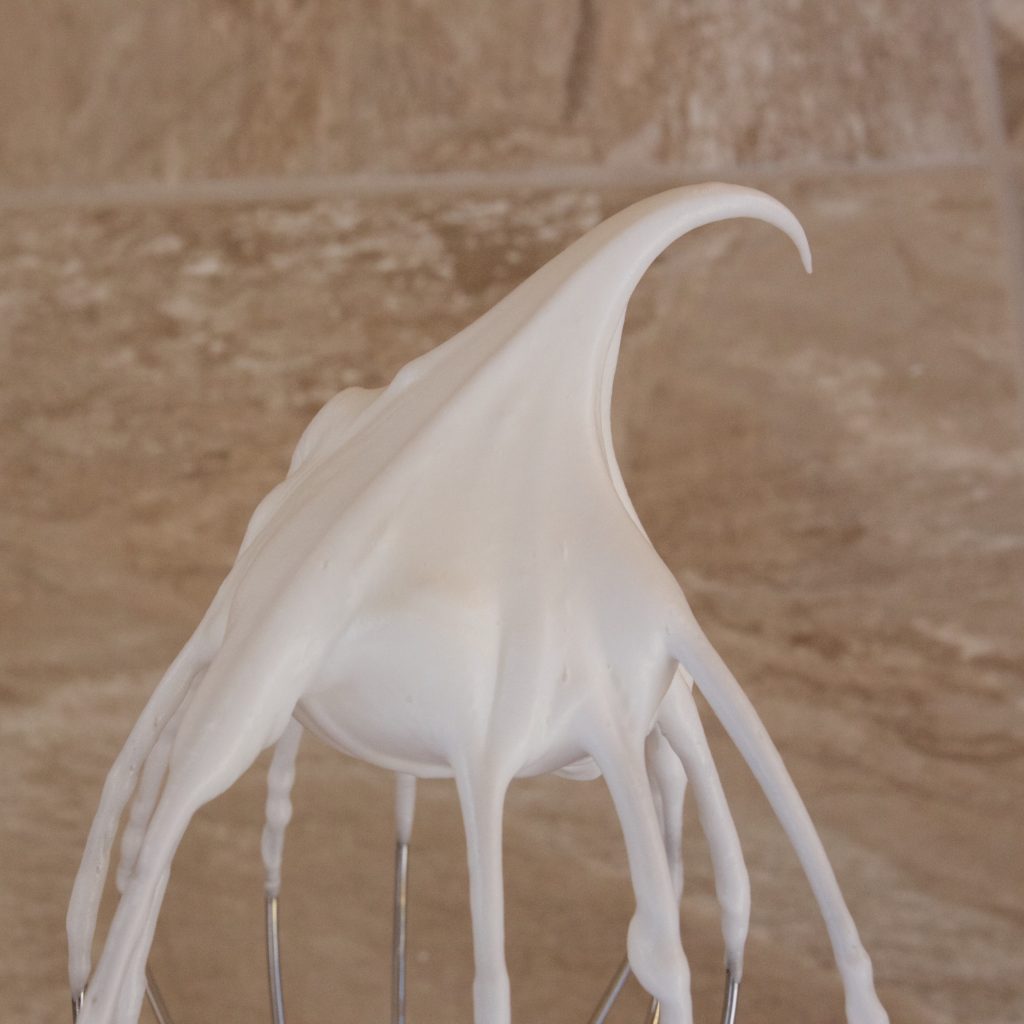
Add the egg whites to a mixing bowl. Begin to beat on medium speed. Add the cream of tartar and salt, and beat until soft peaks form. Scrape down the sides of the bowl. Now, increase the mixer to medium-high. Slowly, add the caster sugar in a fine stream. Increase the speed to high, and beat until stiff peaks form, about 3 more minutes.
Step Four.
Mix the extracts and color into your egg whites, folding gently. Scoop the whipped egg whites into the big mixing bowl with the dry ingredients, and fold gently until it is completely incorporated. Let it sit for about ten minutes.
Step Five.
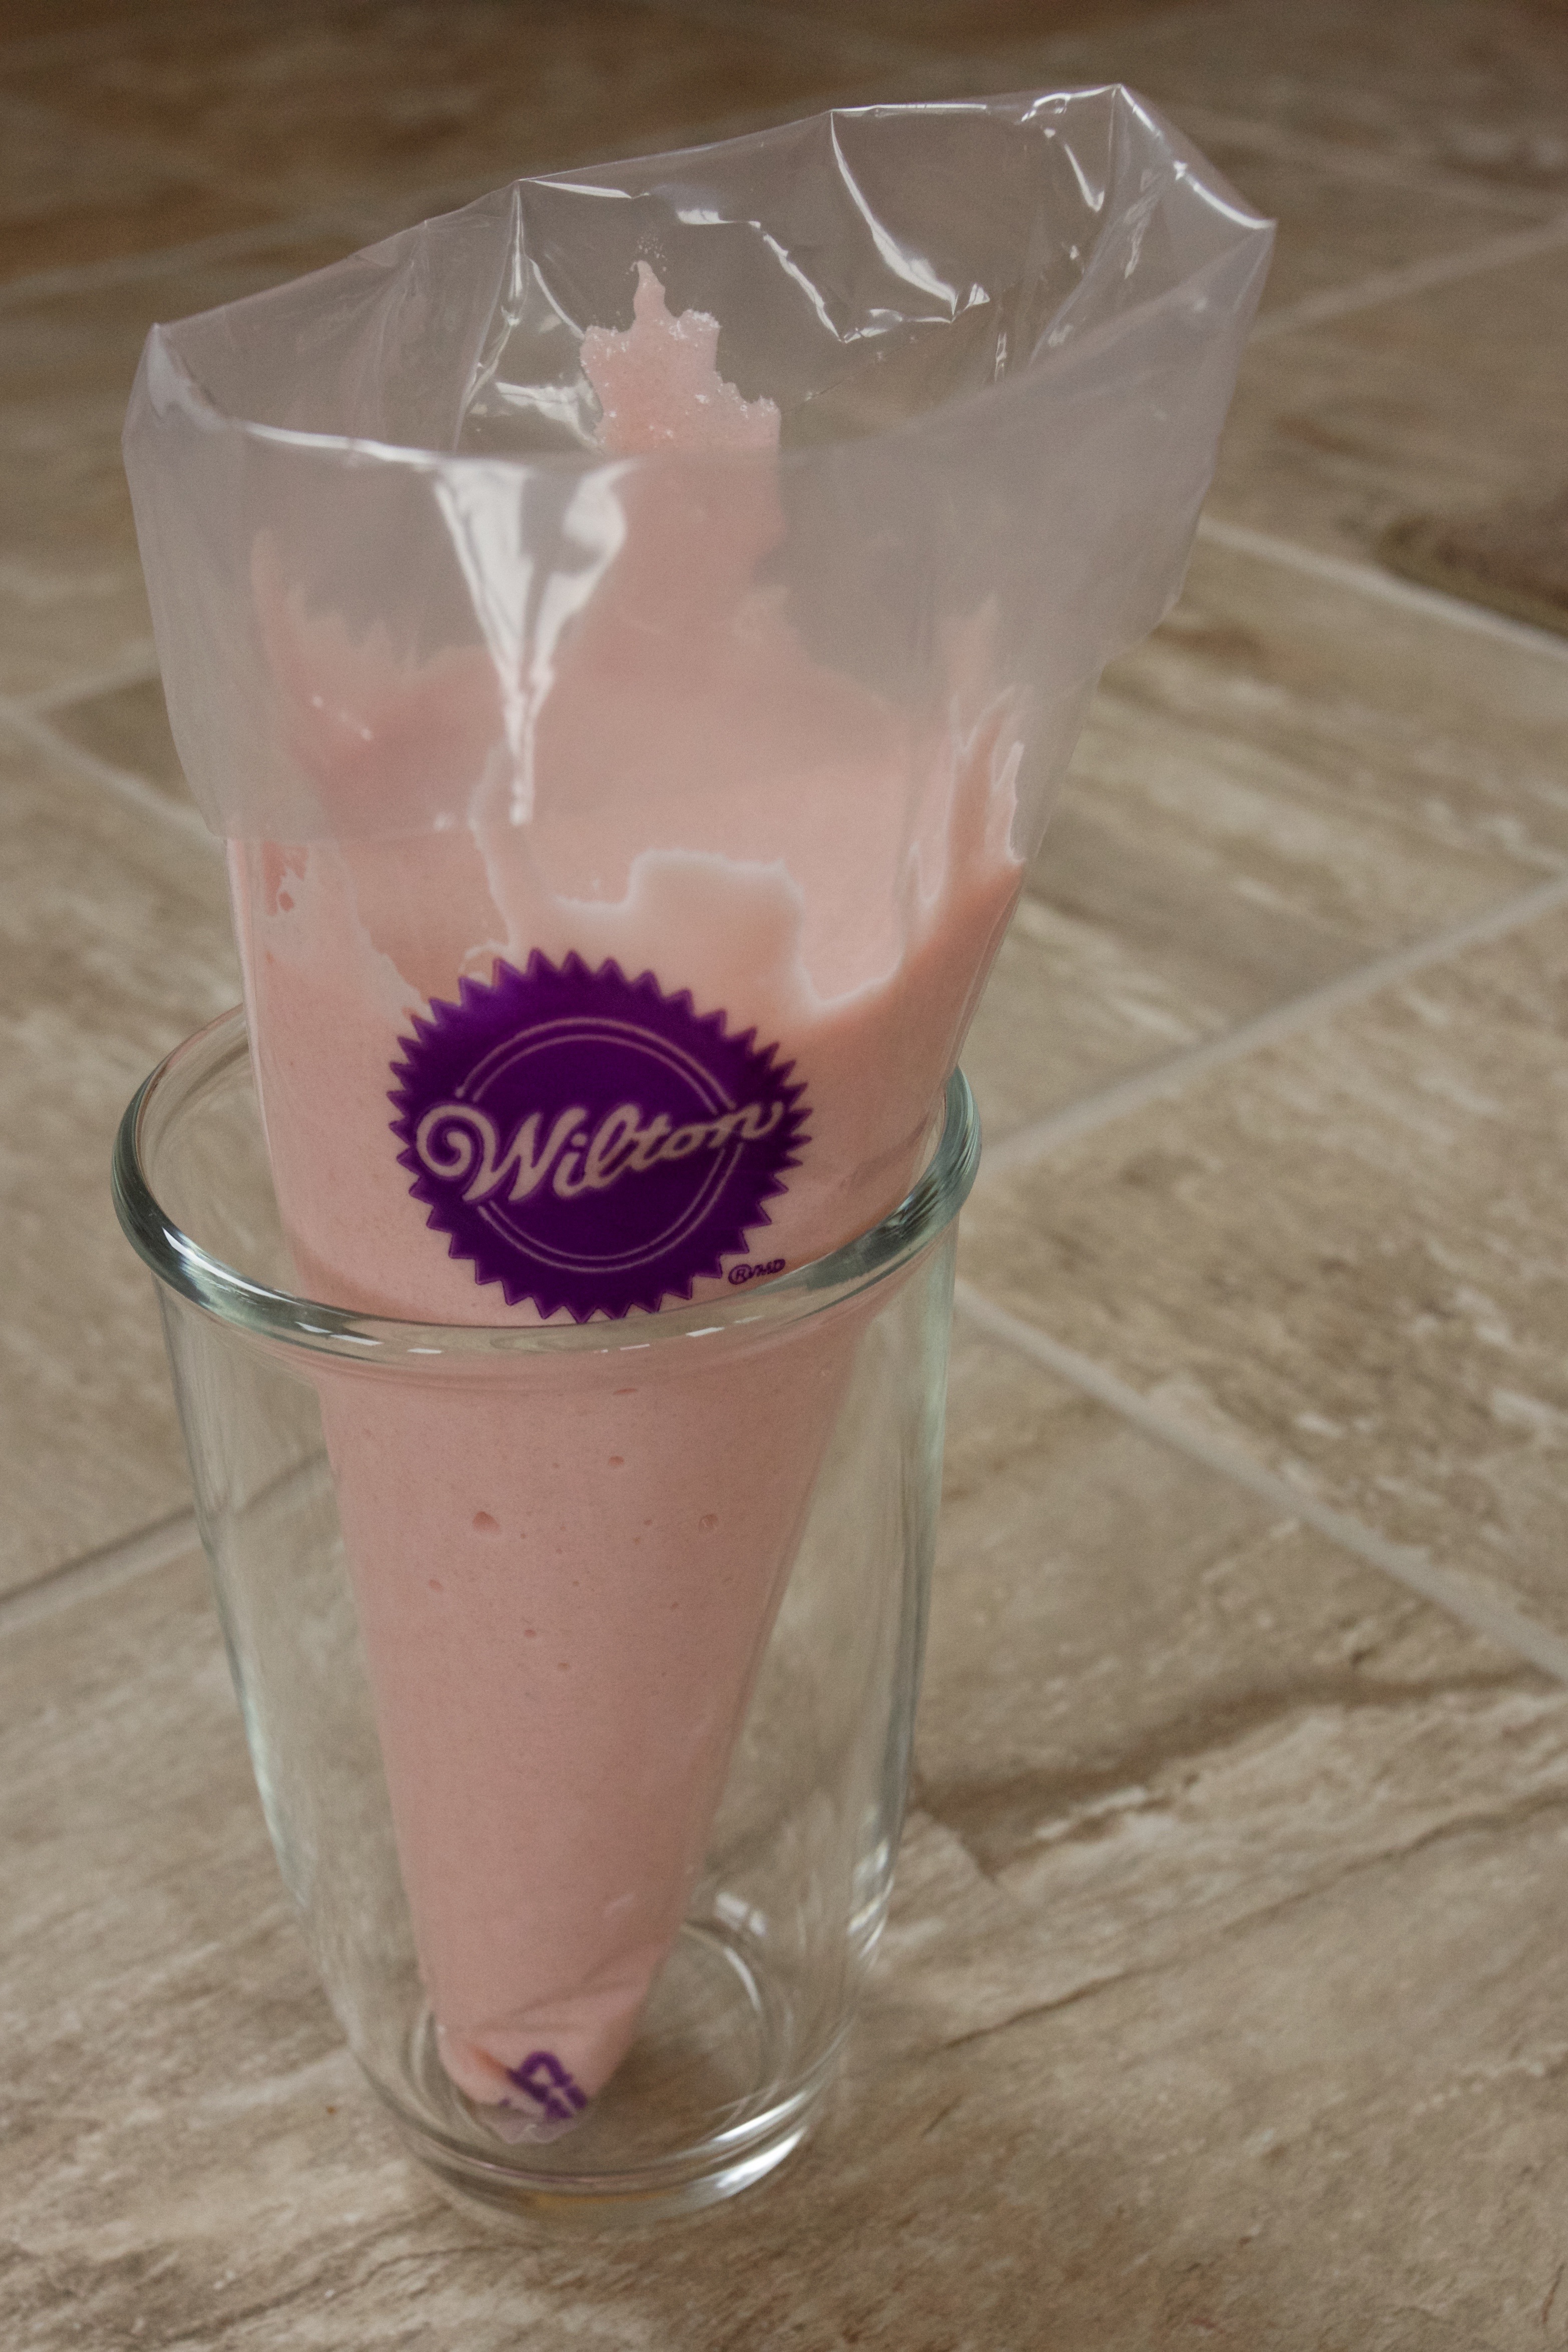
Add the mix into a piping bag. It works best if you first put the bag, opened, into a glass (see picture!) Cut off the tip about 3/4 of an inch up from the bottom, so that you have a small hole.
![]()
Step Six.
Pipe small rounds of batter, so that they spread out to be about an inch in diameter. Let the cookies dry on the sheet before baking. The required time varies depending on your local humidity levels. At home in New Orleans, I let them dry for about 45 minutes. In Wisconsin for the holidays, it only took about 20 minutes. Preheat your oven to 300°F.
Step Seven.
Bake the macaroons for about 12 to 15 minutes, or until they are hard and have developed that characteristic little edge on the bottom. Let them cool completely before your carefully remove them – don’t crack them! They are fragile.
Step Eight.
Frosting prep! Measure your ingredients.
Step Nine.
Reduce the champagne in a small pot over medium-high heat until it is reduced by about half. You can measure by pouring it into a measuring glass to see if it is 1/3 cup. Let it cool to room temperature.
Step Ten.
Beat the butter on medium-high speed until it is fluffier, for about five minutes. Slowly, add the powdered sugar and beat until incorporated. Add the champagne. If you like lighter frosting, add about 1 Tablespoon of heavy whipping cream. Beat until light and fluffy, about 3 more minutes.
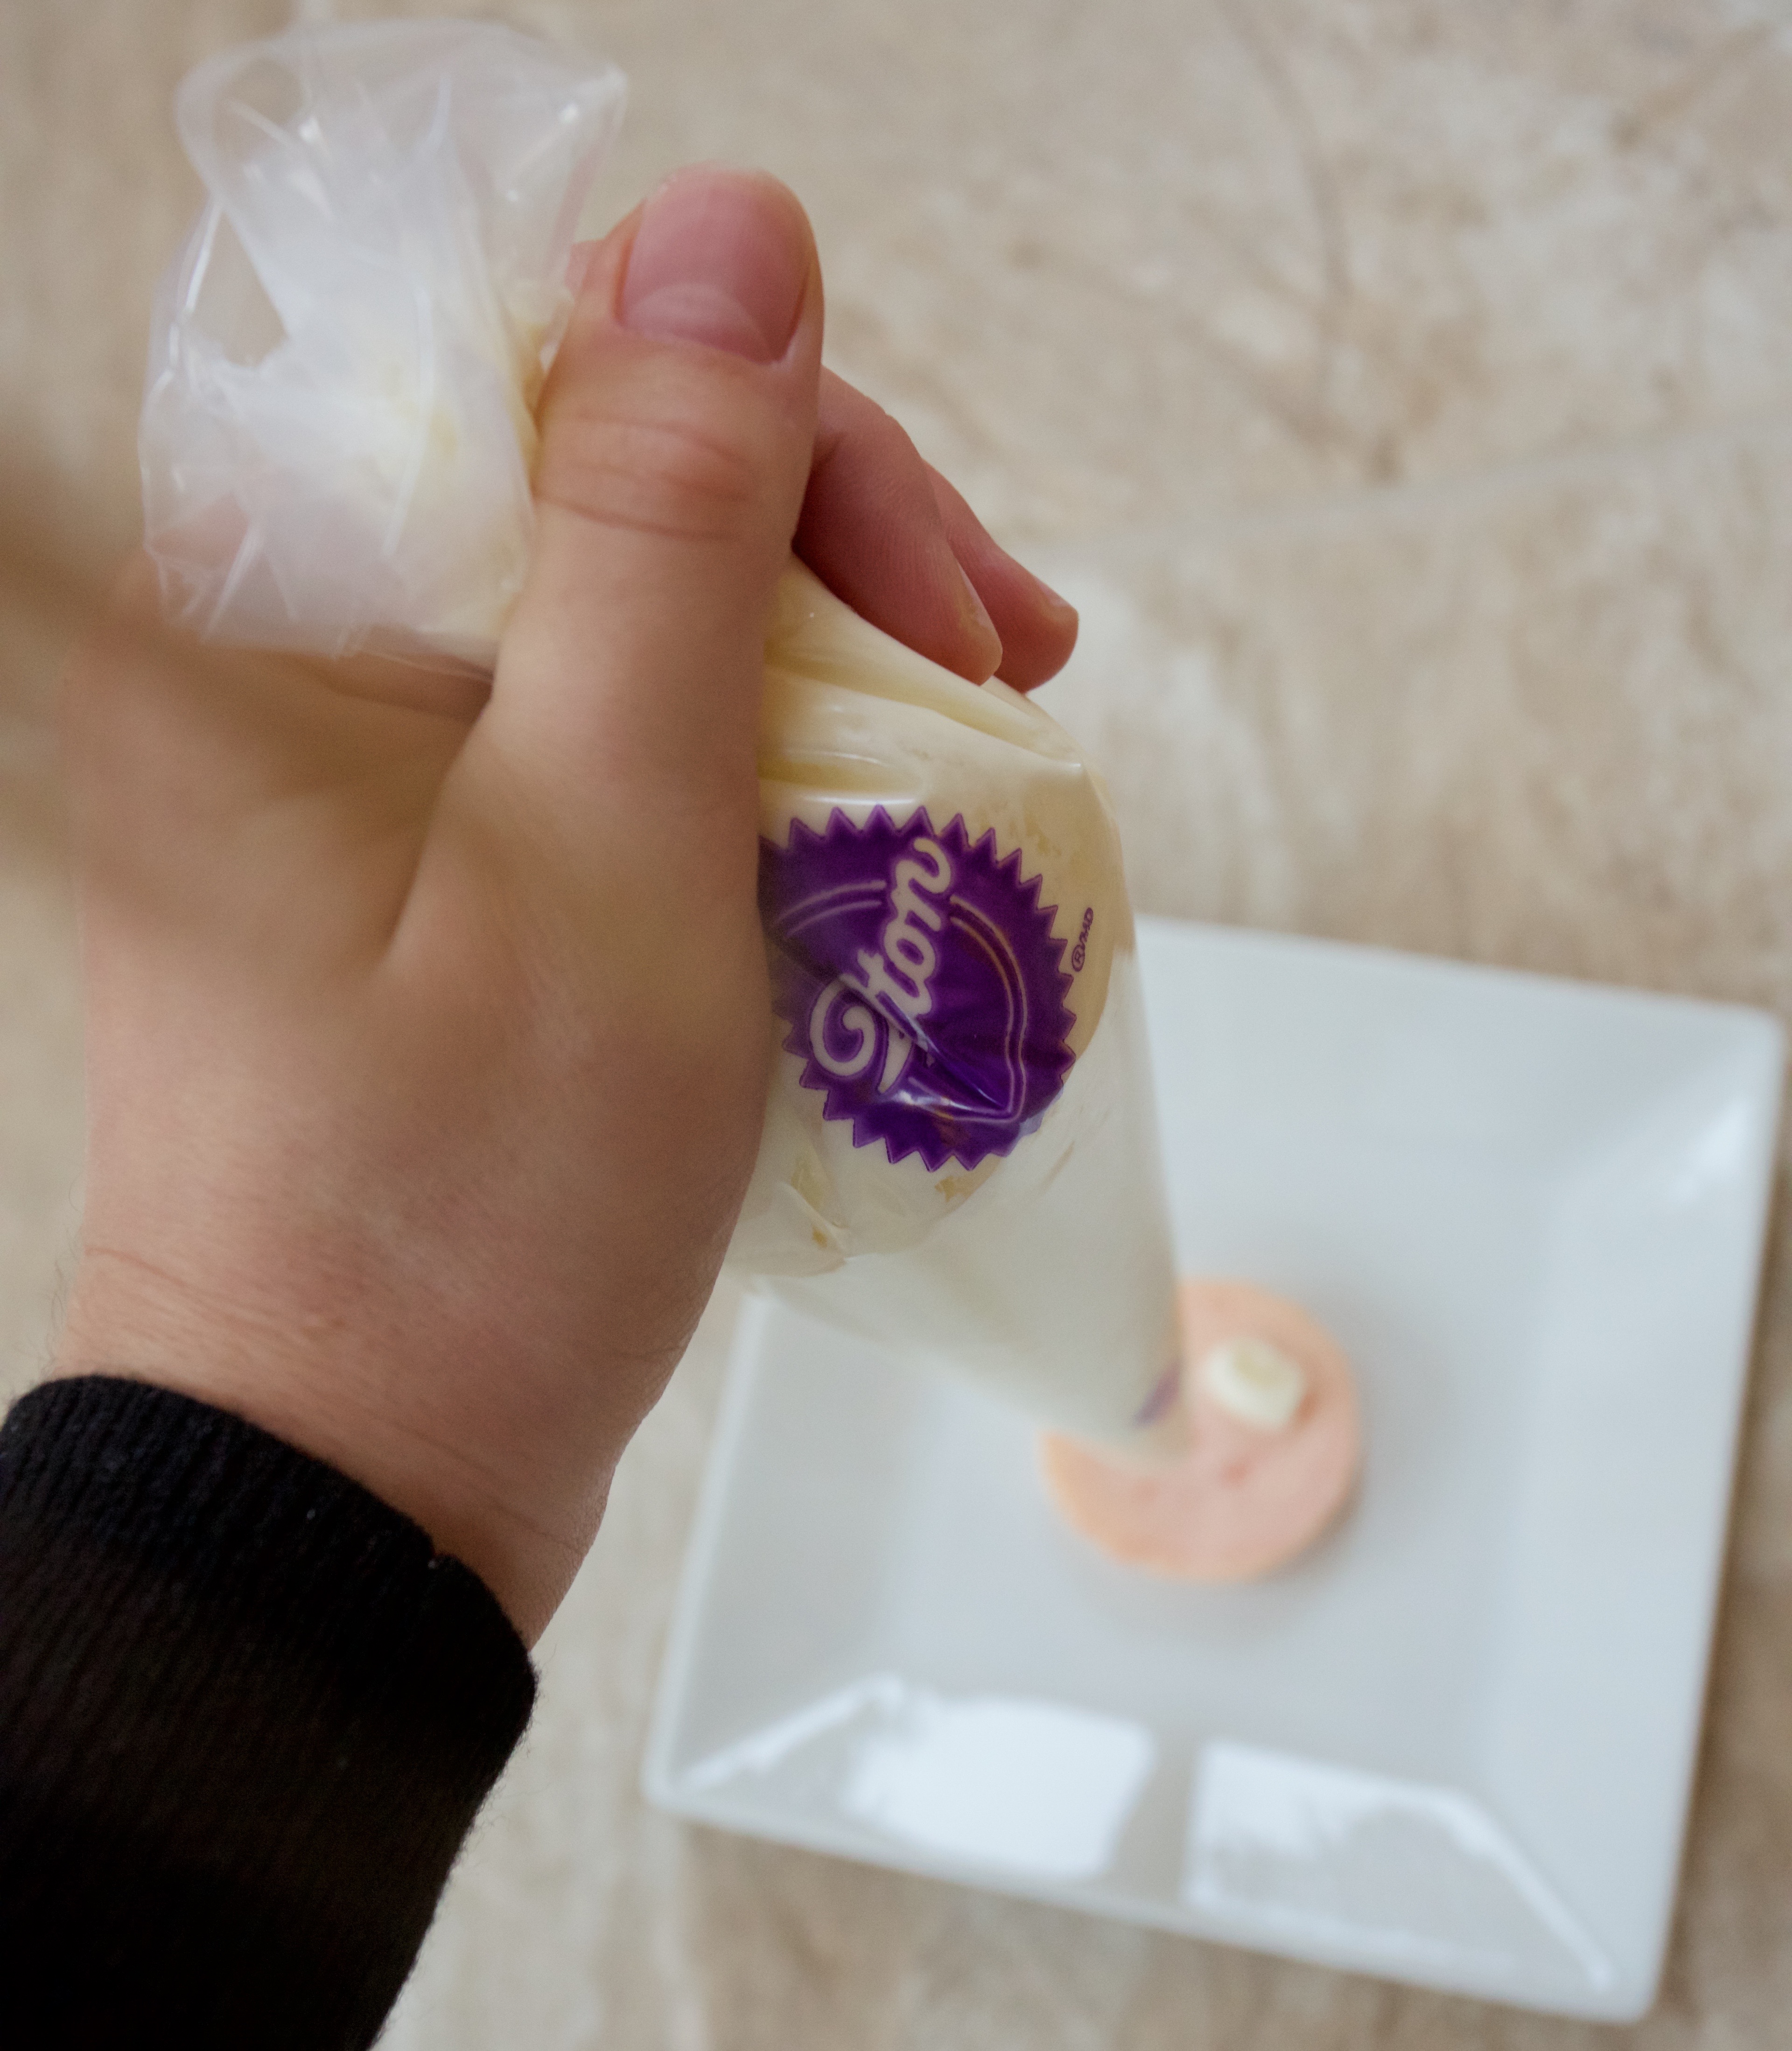
Step Eleven.
Time to put them together! Match the macaroons up by size. Add your frosting to another piping bag, and pipe the frosting into the center of one of the halves. Sandwich the two together, and press gently so that the frosting reaches out to the edges. Decorate as desired. I used edible gold spray paint and metallic sprinkles, all available at Michaels (best store ever!) Enjoy with a glass of champagne while you toast the New Year!

Ingredients
- Macaroons
- 1 3/4 cups powdered sugar
- 1 cup almond flour
- 3 egg whites
- 1/3 tsp cream of tartar
- 1/8 tsp salt
- 1/4 cup caster sugar (sometimes called baker’s sugar or superfine sugar)
- 1/2 tsp vanilla
- 1/4 tsp almond extract
- 1- 2 drops red food coloring
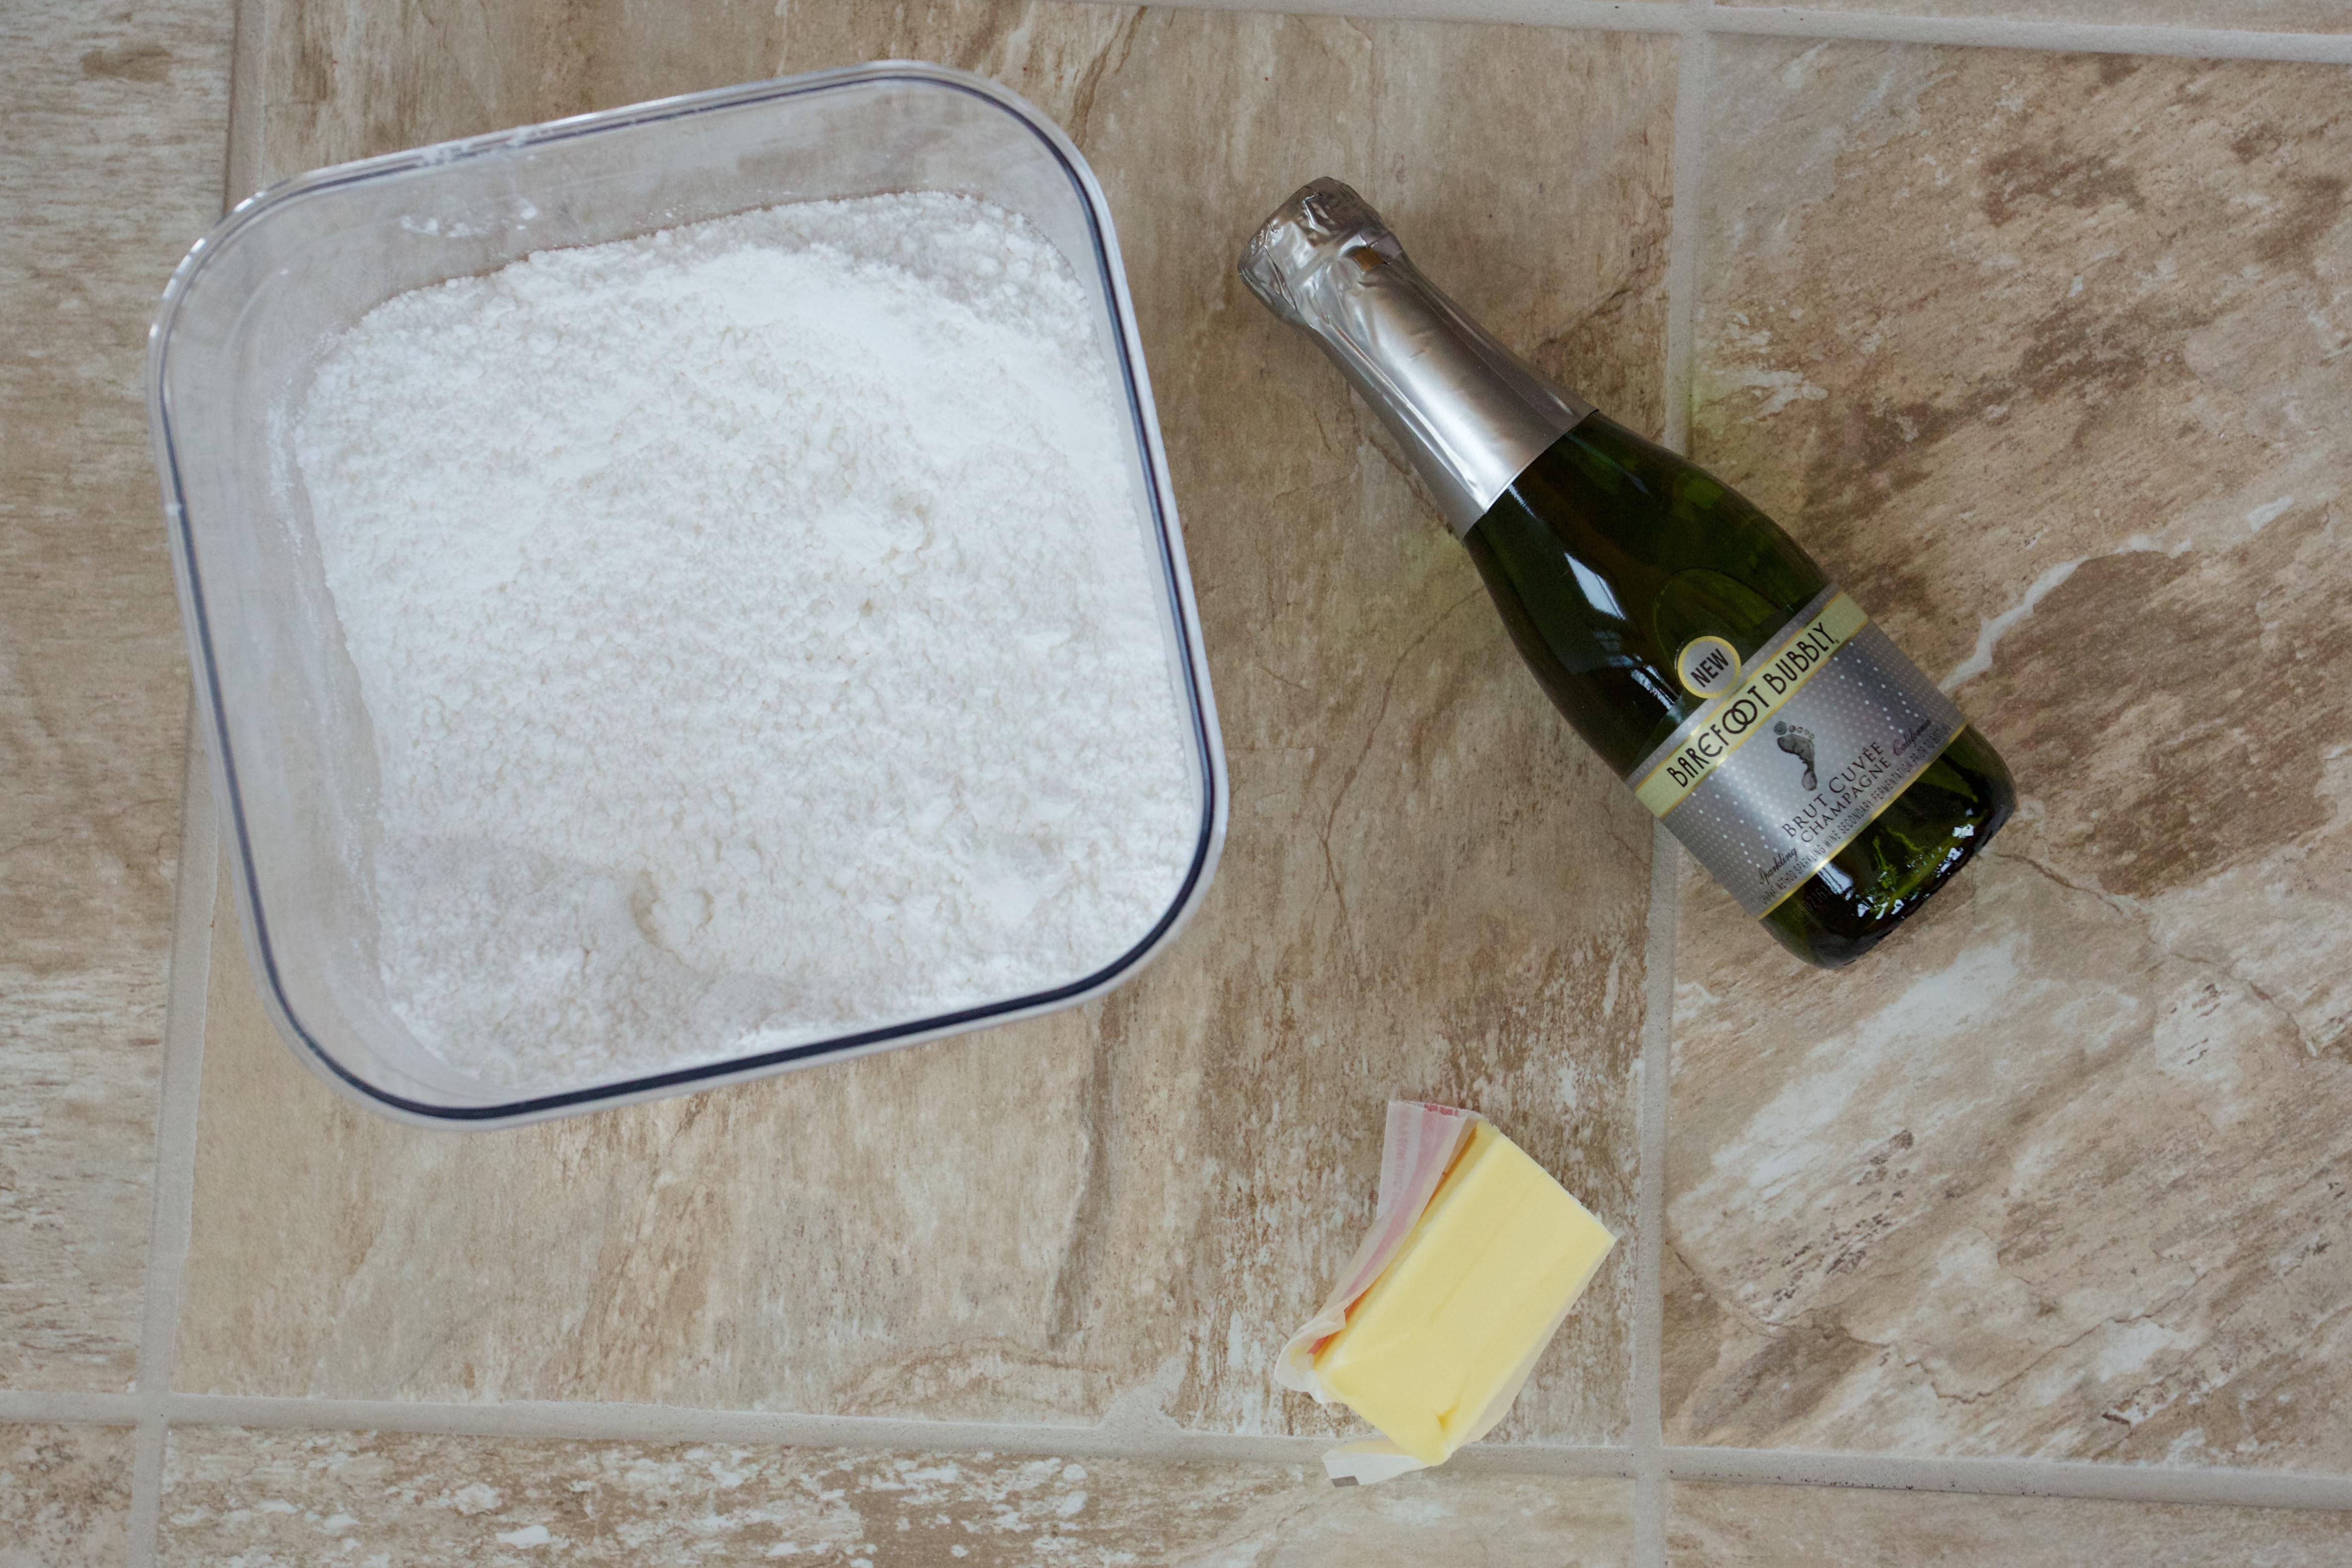
- Champagne Frosting
- 2/3 cup champagne
- 1/4 cup unsalted butter
- 2 cups powdered sugar
Instructions
- Prep step! Measure out your ingredients. Have a stand mixer, large bowl, sifter, and spatula ready. Line two or three baking sheets with parchment paper.
- Mix the dry ingredients. It is SO important that the sugar and almond aren't clumpy at all. Clumpy macaroons are no fun. Sift the ingredients in small batches into the big mixing bowl.
- Add the egg whites to a mixing bowl. Begin to beat on medium speed. Add the cream of tartar and salt, and beat until soft peaks form. Scrape down the sides of the bowl. Now, increase the mixer to medium-high. Slowly, add the caster sugar in a fine stream. Increase the speed to high, and beat until stiff peaks form, about 3 more minutes.
- Mix the extracts and color into your egg whites, folding gently. Scoop the whipped egg whites into the big mixing bowl with the dry ingredients, and fold gently until it is completely incorporated. Let it sit for about ten minutes.
- Add the mix into a piping bag. It works best if you first put the bag, opened, into a glass (see picture!) Cut off the tip about 3/4 of an inch up from the bottom, so that you have a small hole.
- Pipe small rounds of batter, so that they spread out to be about an inch in diameter. Let the cookies dry on the sheet before baking. The required time varies depending on your local humidity levels. At home in New Orleans, I let them dry for about 45 minutes. In Wisconsin for the holidays, it only took about 20 minutes. Preheat your oven to 300°F.
- Bake the macaroons for about 12 to 15 minutes, or until they are hard and have developed that characteristic little edge on the bottom. Let them cool completely before your carefully remove them - don't crack them! They are fragile.
- Frosting prep! Measure your ingredients.
- Reduce the champagne in a small pot over medium-high heat until it is reduced by about half. You can measure by pouring it into a measuring glass to see if it is 1/3 cup. Let it cool to room temperature.
- Beat the butter on medium-high speed until it is fluffier, for about five minutes. Slowly, add the powdered sugar and beat until incorporated. Add the champagne. If you like lighter frosting, add about 1 Tablespoon of heavy whipping cream. Beat until light and fluffy, about 3 more minutes.
- Time to put them together! Match the macaroons up by size. Add your frosting to another piping bag, and pipe the frosting into the center of one of the halves. Sandwich the two together, and press gently so that the frosting reaches out to the edges. Decorate as desired. I used edible gold spray paint and metallic sprinkles, all available at Michaels (best store ever!) Enjoy with a glass of champagne while you toast the New Year!
Football season is here!
Despite the fact that I love frosting so much, I tend to eat a very healthy diet on a day to day basis. I stay active and eat right, and it gives me energy to do everything that I want.
One thing that I cannot understand is football snacks. Whenever football season comes, all of a sudden you see field-themed chips, nachos, fat-covered carbs bombs. All you’re doing is sitting there! You don’t need 1500 calories of empty, greasy carb to fuel your football passion.
These snacks fix that problem. They are simple, they are cheesy, they are beyond addicting. And the best part – they are low carb. That means that you can eat them guilt free!
Snack without guilt this football season with these ranch-seasoned, spicy, cheesy pepper bites. You won’t even miss the chips!
~~~~~~~~~~
Step One.
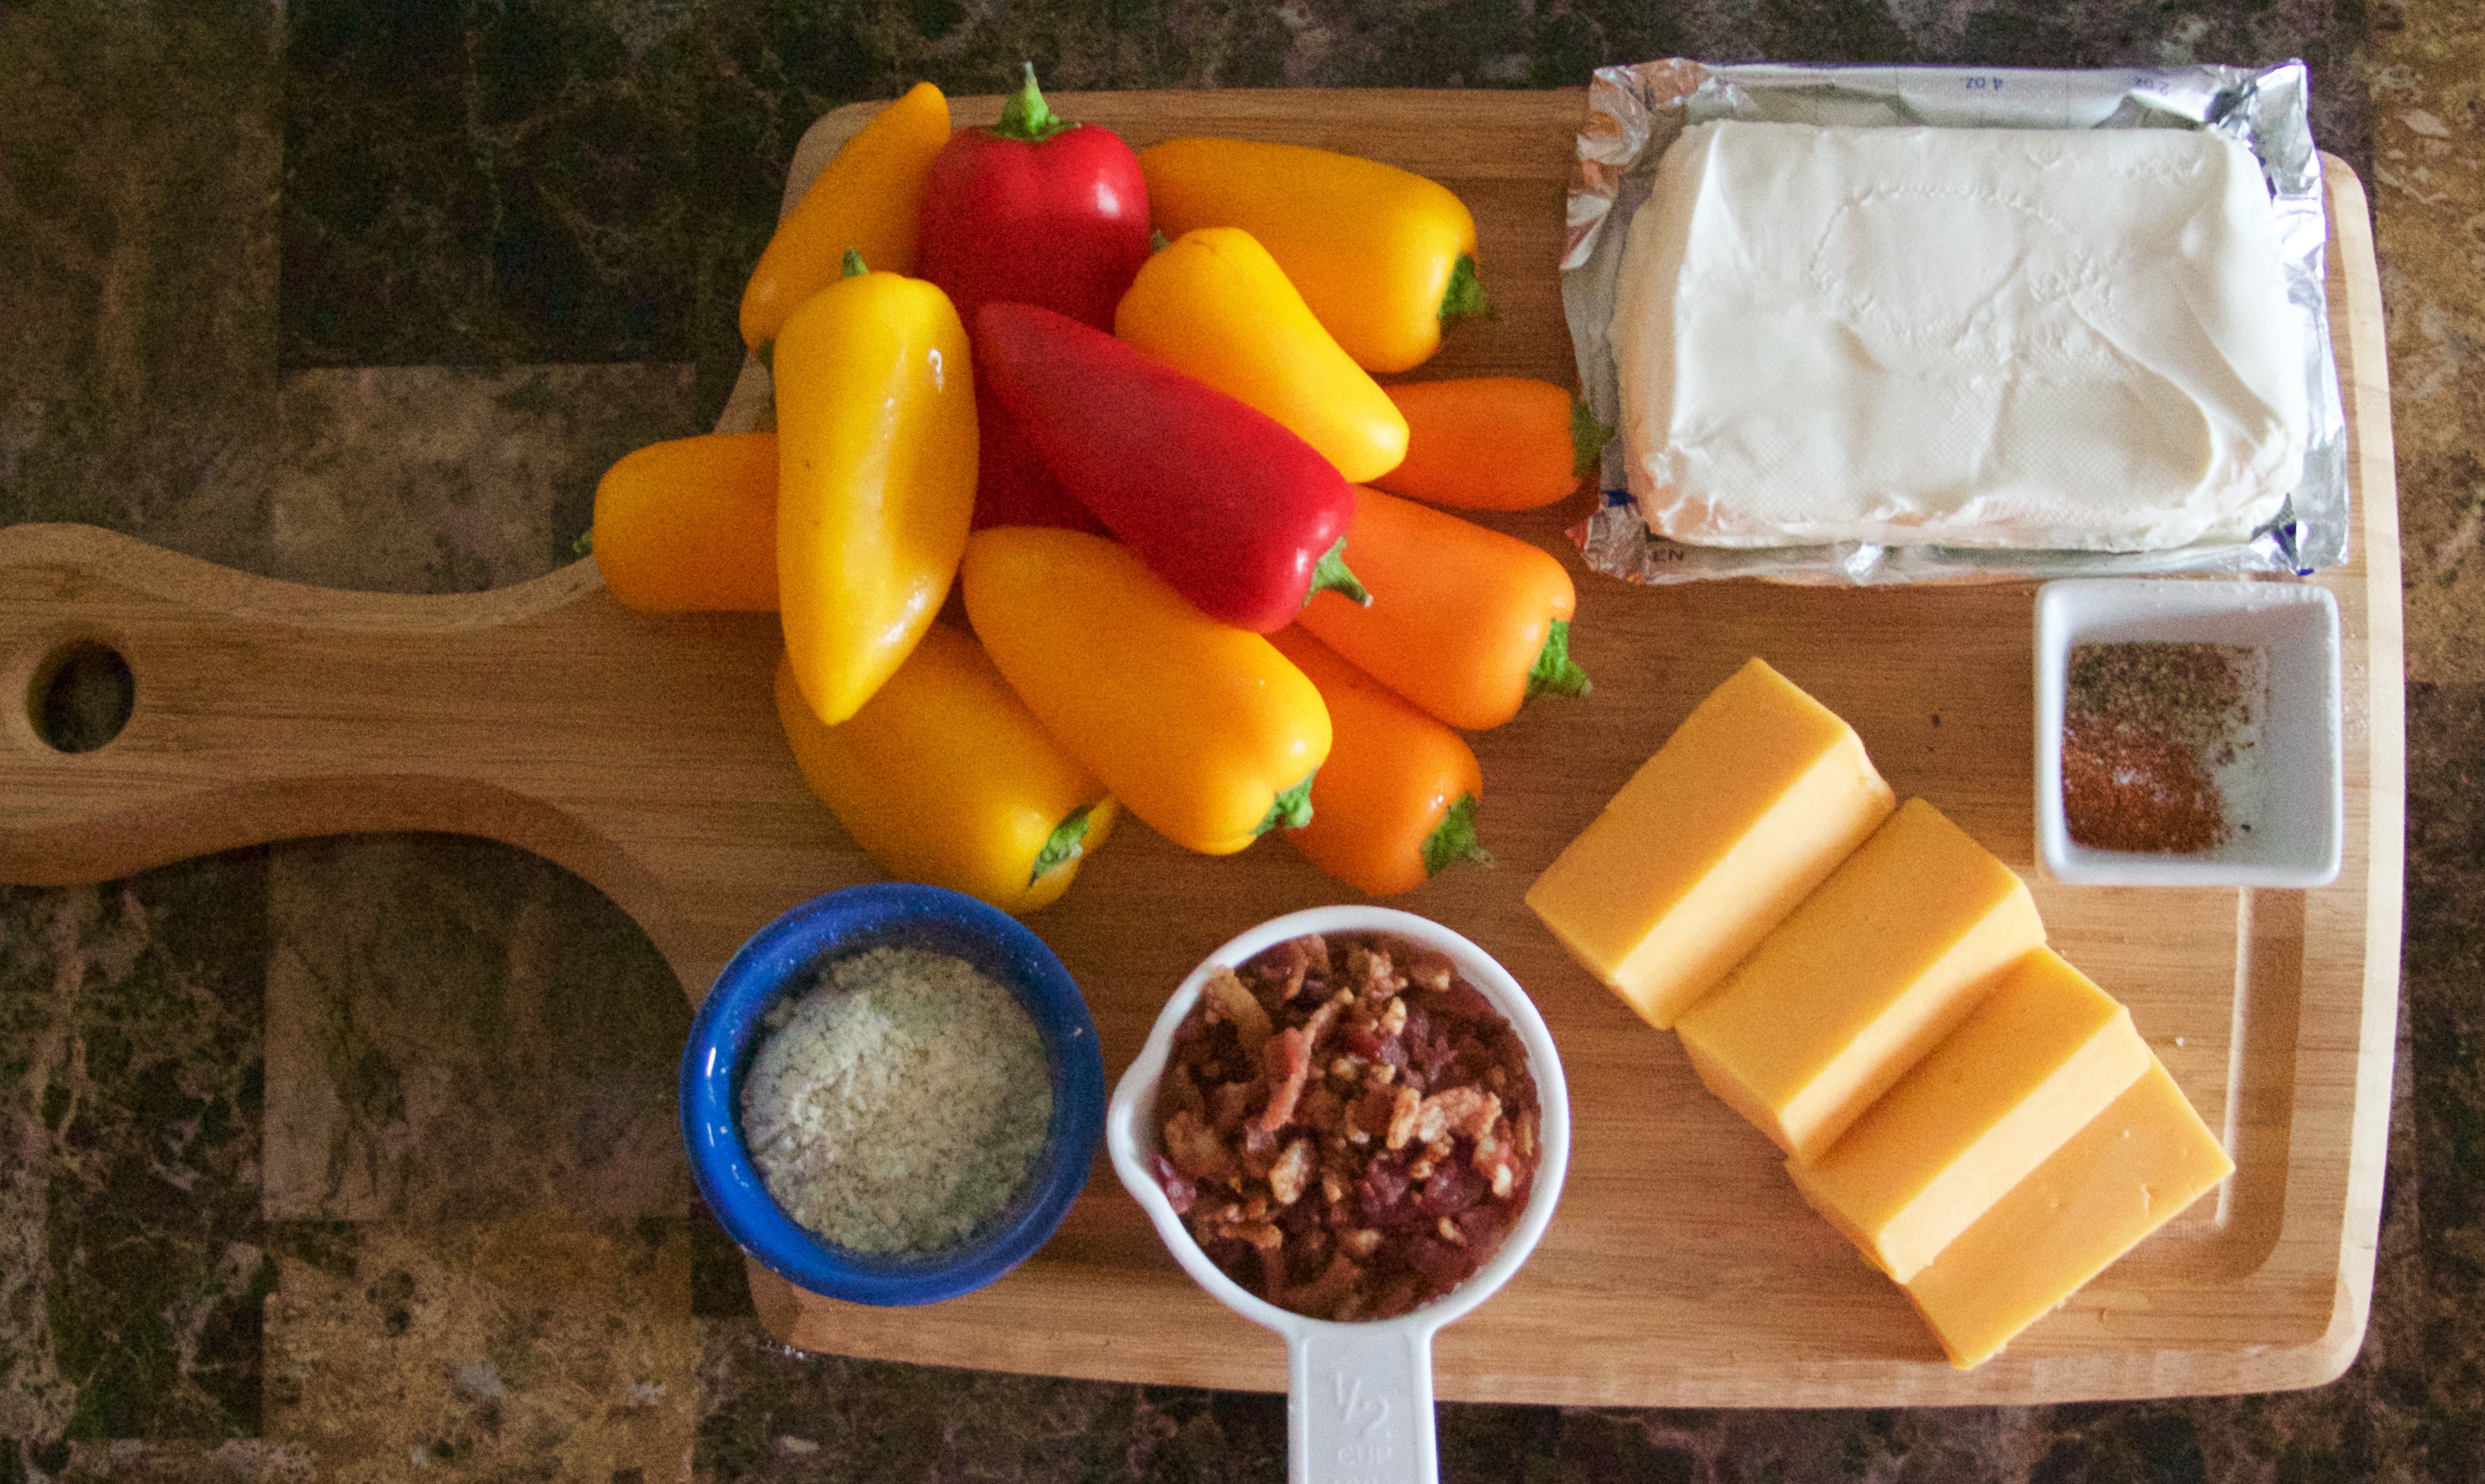
Prep Step! Measure out your ingredients. Preheat your oven to 350°F.
Step Two.
Prep the peppers! First, with a paring knife, cut the peppers in half so that you get two tall and deep halves, not the shallow ones.
Next, cut off the stems by making a “V” shape around it with your paring knife.
Finally, placing the blade of your knife flush with the pepper, cut off the veins.
Line up the peppers on a baking sheet lined with aluminum foil. If some of them tip over, slice a small piece off of the bottom to make it flat.
Step Three.
Make the filling! Beat the cream cheese in a stand mixer on high for three minutes.
Grate the cheddar cheese into the bowl and mix until incorporated.
Tip: Don’t want to take the time to grate? Buy shredded cheddar, and give it a few chops to make smaller pieces.
Add the spices and mix until incorporated.
Carefully mix in the bacon pieces.
Step Four.

Stuff the peppers!
Add about 1 Tablespoon of the cheese mix to each pepper, enough so that it is full. Careful, though – you don’t want to add too much, because then it will melt out in the oven.
Bake at 350°F FOR 20 minutes.
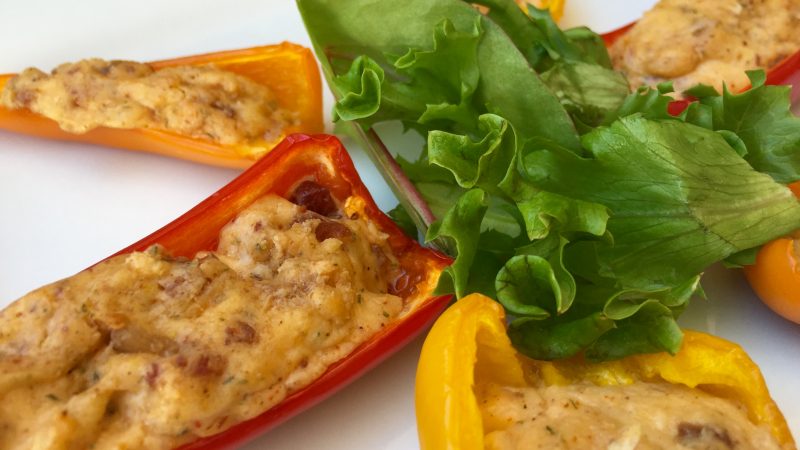
Serve with some greens for an added health benefit!

Snack without guilt this football season with these ranch-seasoned, spicy, cheesy pepper bites. You won't even miss the chips!
Ingredients
- Bite-sized peppers (about 15)
- 8 oz cream cheese, softened
- 4 oz block sharp cheddar cheese
- 2 Tbsp ranch dip mix
- 2 tsp cayenne pepper
- 1/2 tsp salt
- 1/2 tsp pepper
- 1/2 cup cooked bacon pieces (not bits)
Instructions
- Measure out your ingredients. Preheat the oven to 350°F
- First, with a paring knife, cut the peppers in half so that you get the tall, deep halves, not the flat, shallow ones.
- Cut off the stem by making a “V” shape around it with your paring knife.
- Placing the blade of your knife flush with the pepper, cut off the vein.
- Line up the peppers on a baking sheet lined with aluminum foil. If they are falling over, slice a small piece off of the bottom to make it flat.
- Beat the cream cheese in a stand mixer on high for three minutes.
- Grate the cheddar cheese into the bowl and mix until incorporated.
- Add the spices and mix until incorporated.
- Carefully mix in the bacon.
- Add about 1 Tablespoon of the mix to each pepper, enough so that it is full. You don’t want to add too much, because it will melt out in the oven.
- Bake at 350°F for 20 minutes.
- Serve with some greens for an added health benefit!