this is a page for
Category: Munchies
Whew! It’s been a minute since I’ve posted. The last month or so has been wrapped up in packing, moving, and unpacking. Though I tried to save the kitchen things for last – and then unpacked them first – I wouldn’t say that my apartment was exactly ready for photos 😉
But now I live in Colorado, I am thrilled by my new life adventure out here, and I am back in the kitchen!
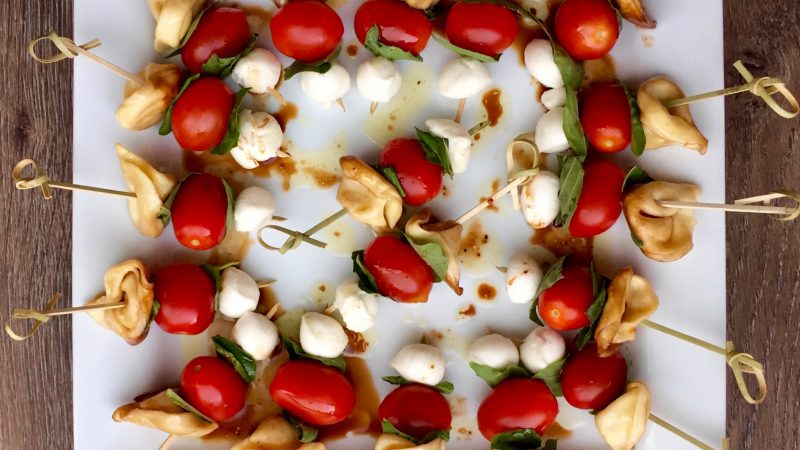
You’ve probably seen these around instagram – there’s a reason for the popularity! This is an amazingly simple and delicious summer appetizer. Whether you’re looking for a light snack, an appetizer, or a sharing dish for potluck, this recipe is a quick fix that is not only good for you, but tastes great too! And have I mentioned how easy it is? You can pick from a wide variety of pre-made tortellini to customize these to your preference. If you want even less steps, use a bottled balsamic vinaigrette to make it even easier!
~~~~~~~~~~
Step One.
Start with the tortellini so that they can cool before assembling the skewers. Cook the tortellini according to package directions. Drain them and put them in a heat-safe bowl. Pour some olive oil and balsamic vinegar over the top, stir, cover, and refrigerate them until they are cold.
Step Two.
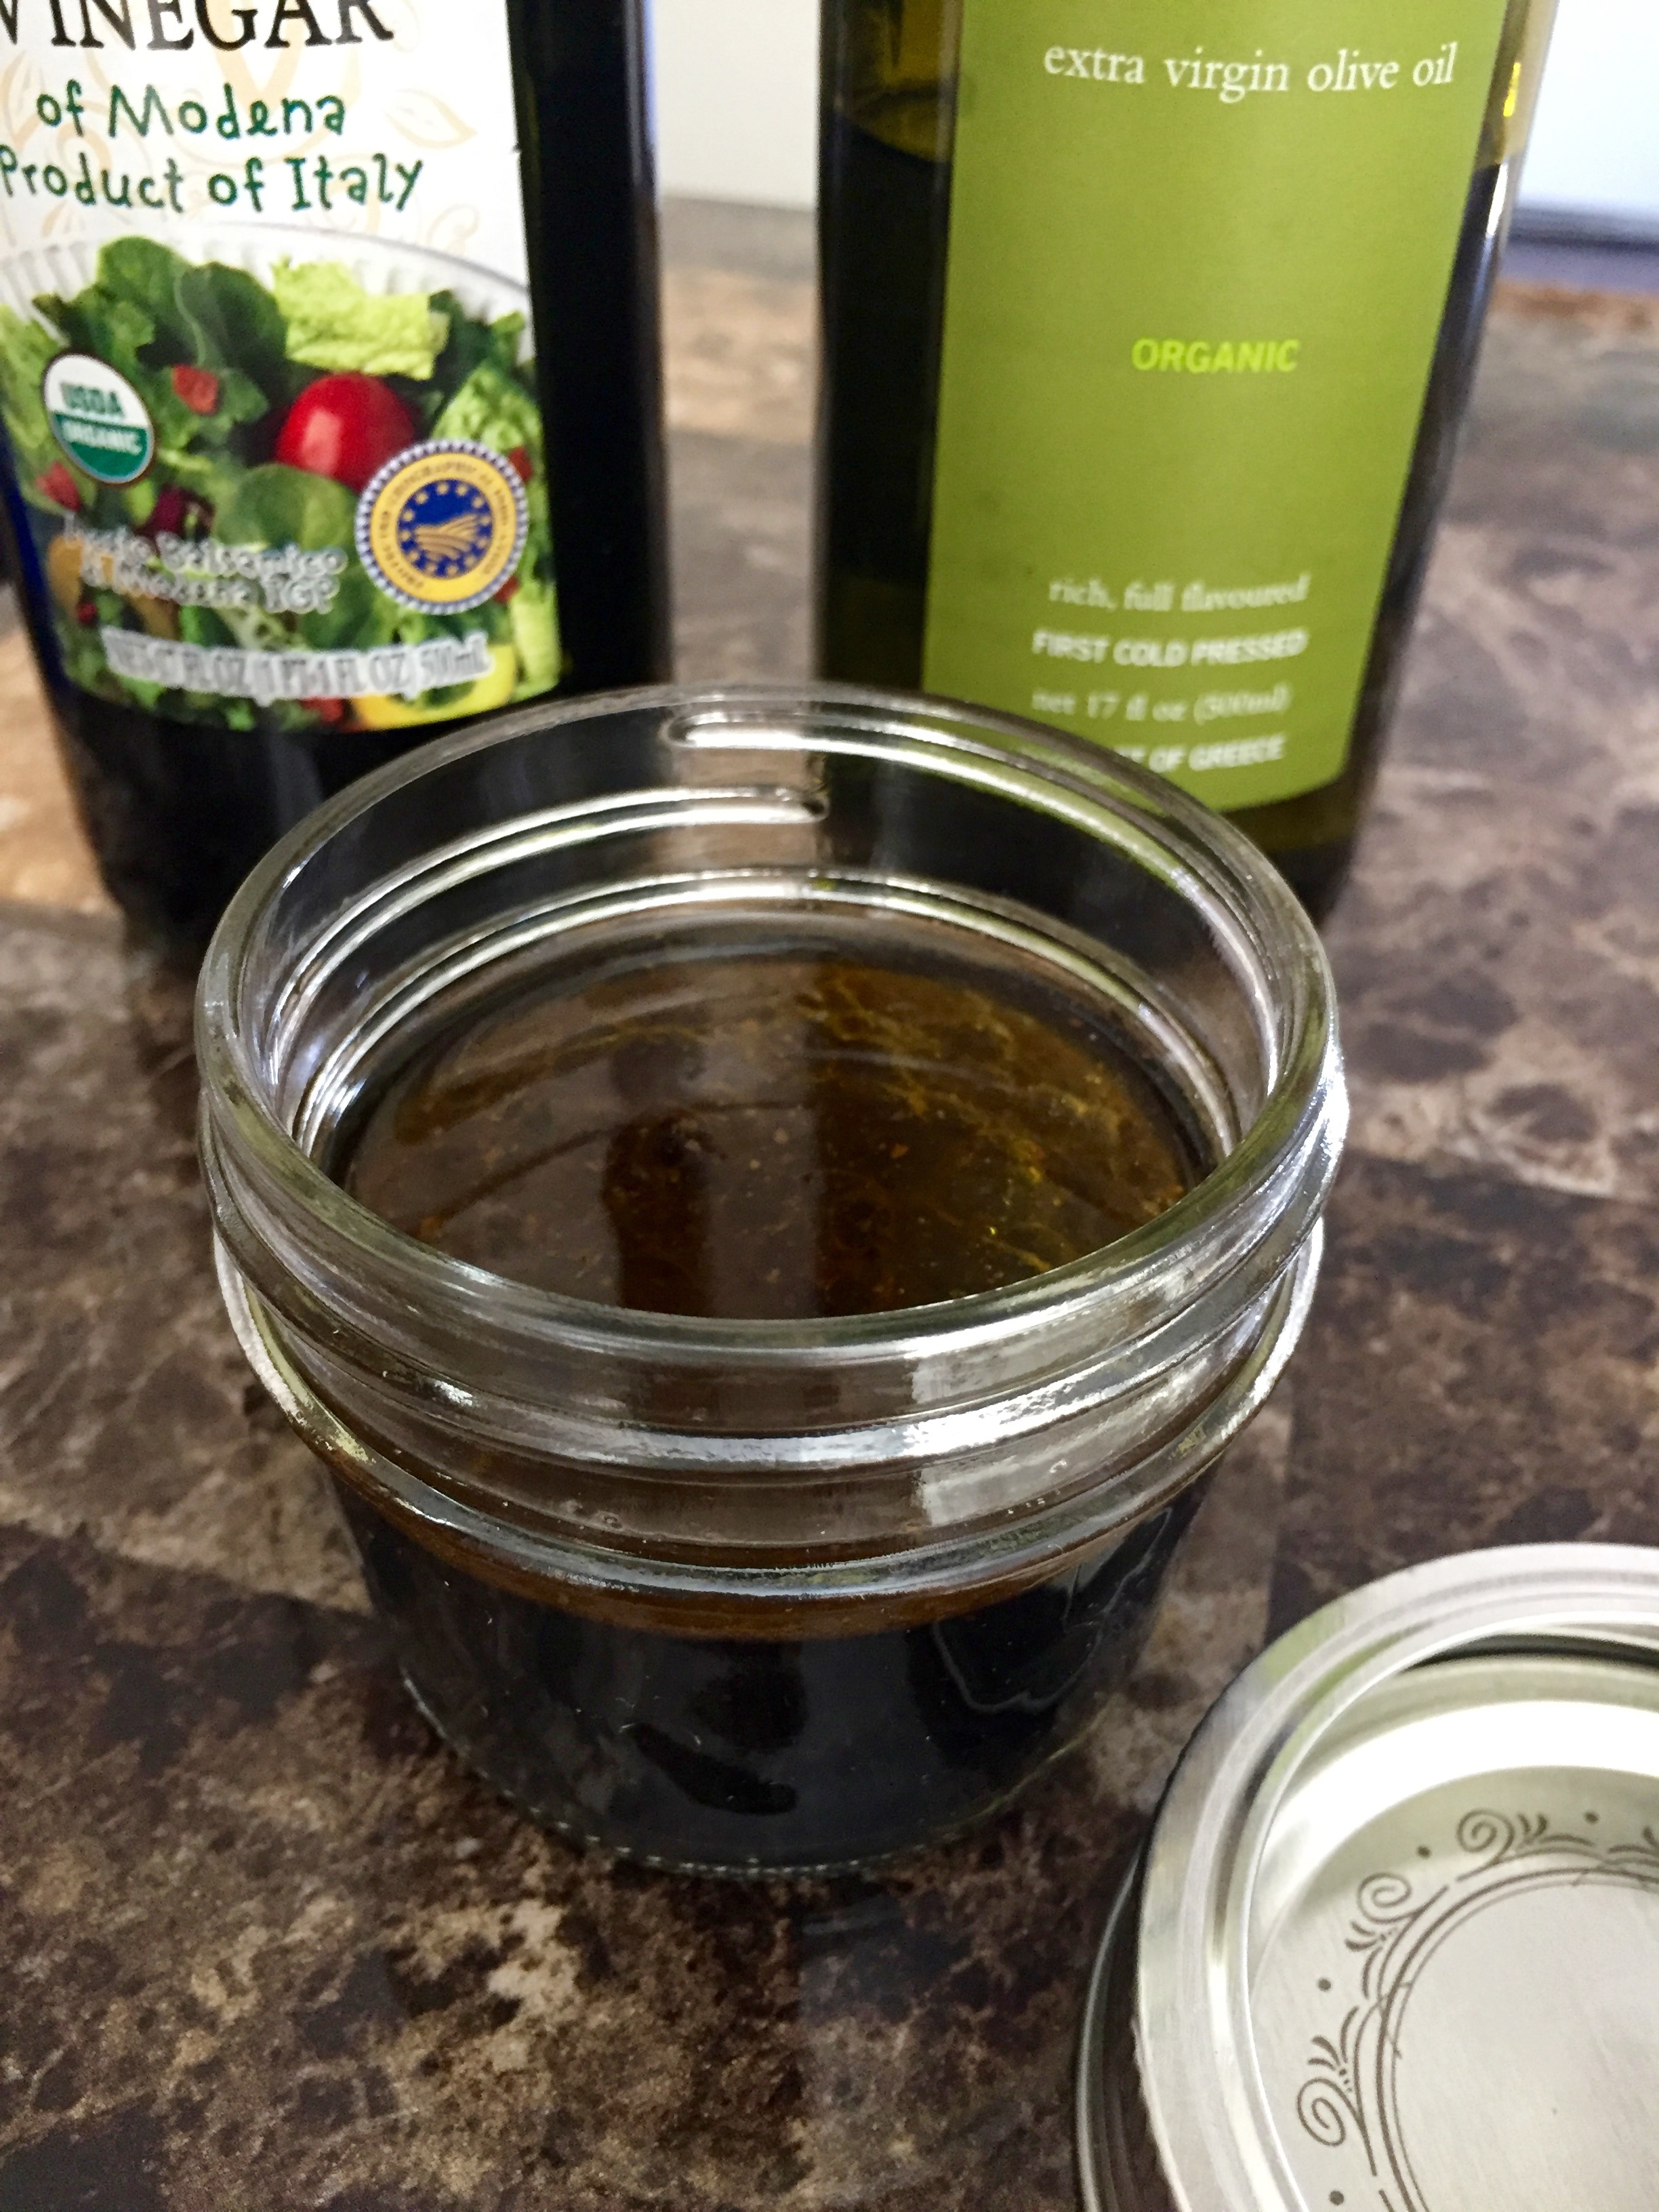
Prep step! Measure out the oil, vinegar, and lemon pepper. Drain the mozzarella, wash the tomatoes, and cut the basil into strips about 1/2 inch thick.
Step Three.
Prepare the vinaigrette. Pour the vinaigrette into a jar, and slowly add the oil while you stir it. Mix in the pepper. Seal the jar and shake the vinaigrette to complete the emulsion.
Pro Tip: If you want to make the emulsion even more perfectly, use a blender or a food processor to incorporate the oil.
 Step Four.
When the tortellini are cold, begin to assemble the skewers. I use this order, but pick whatever you like best: tortellini, basil, tomato, basil, mozzarella. When they are fully assembled, drizzle with the vinaigrette, and serve!
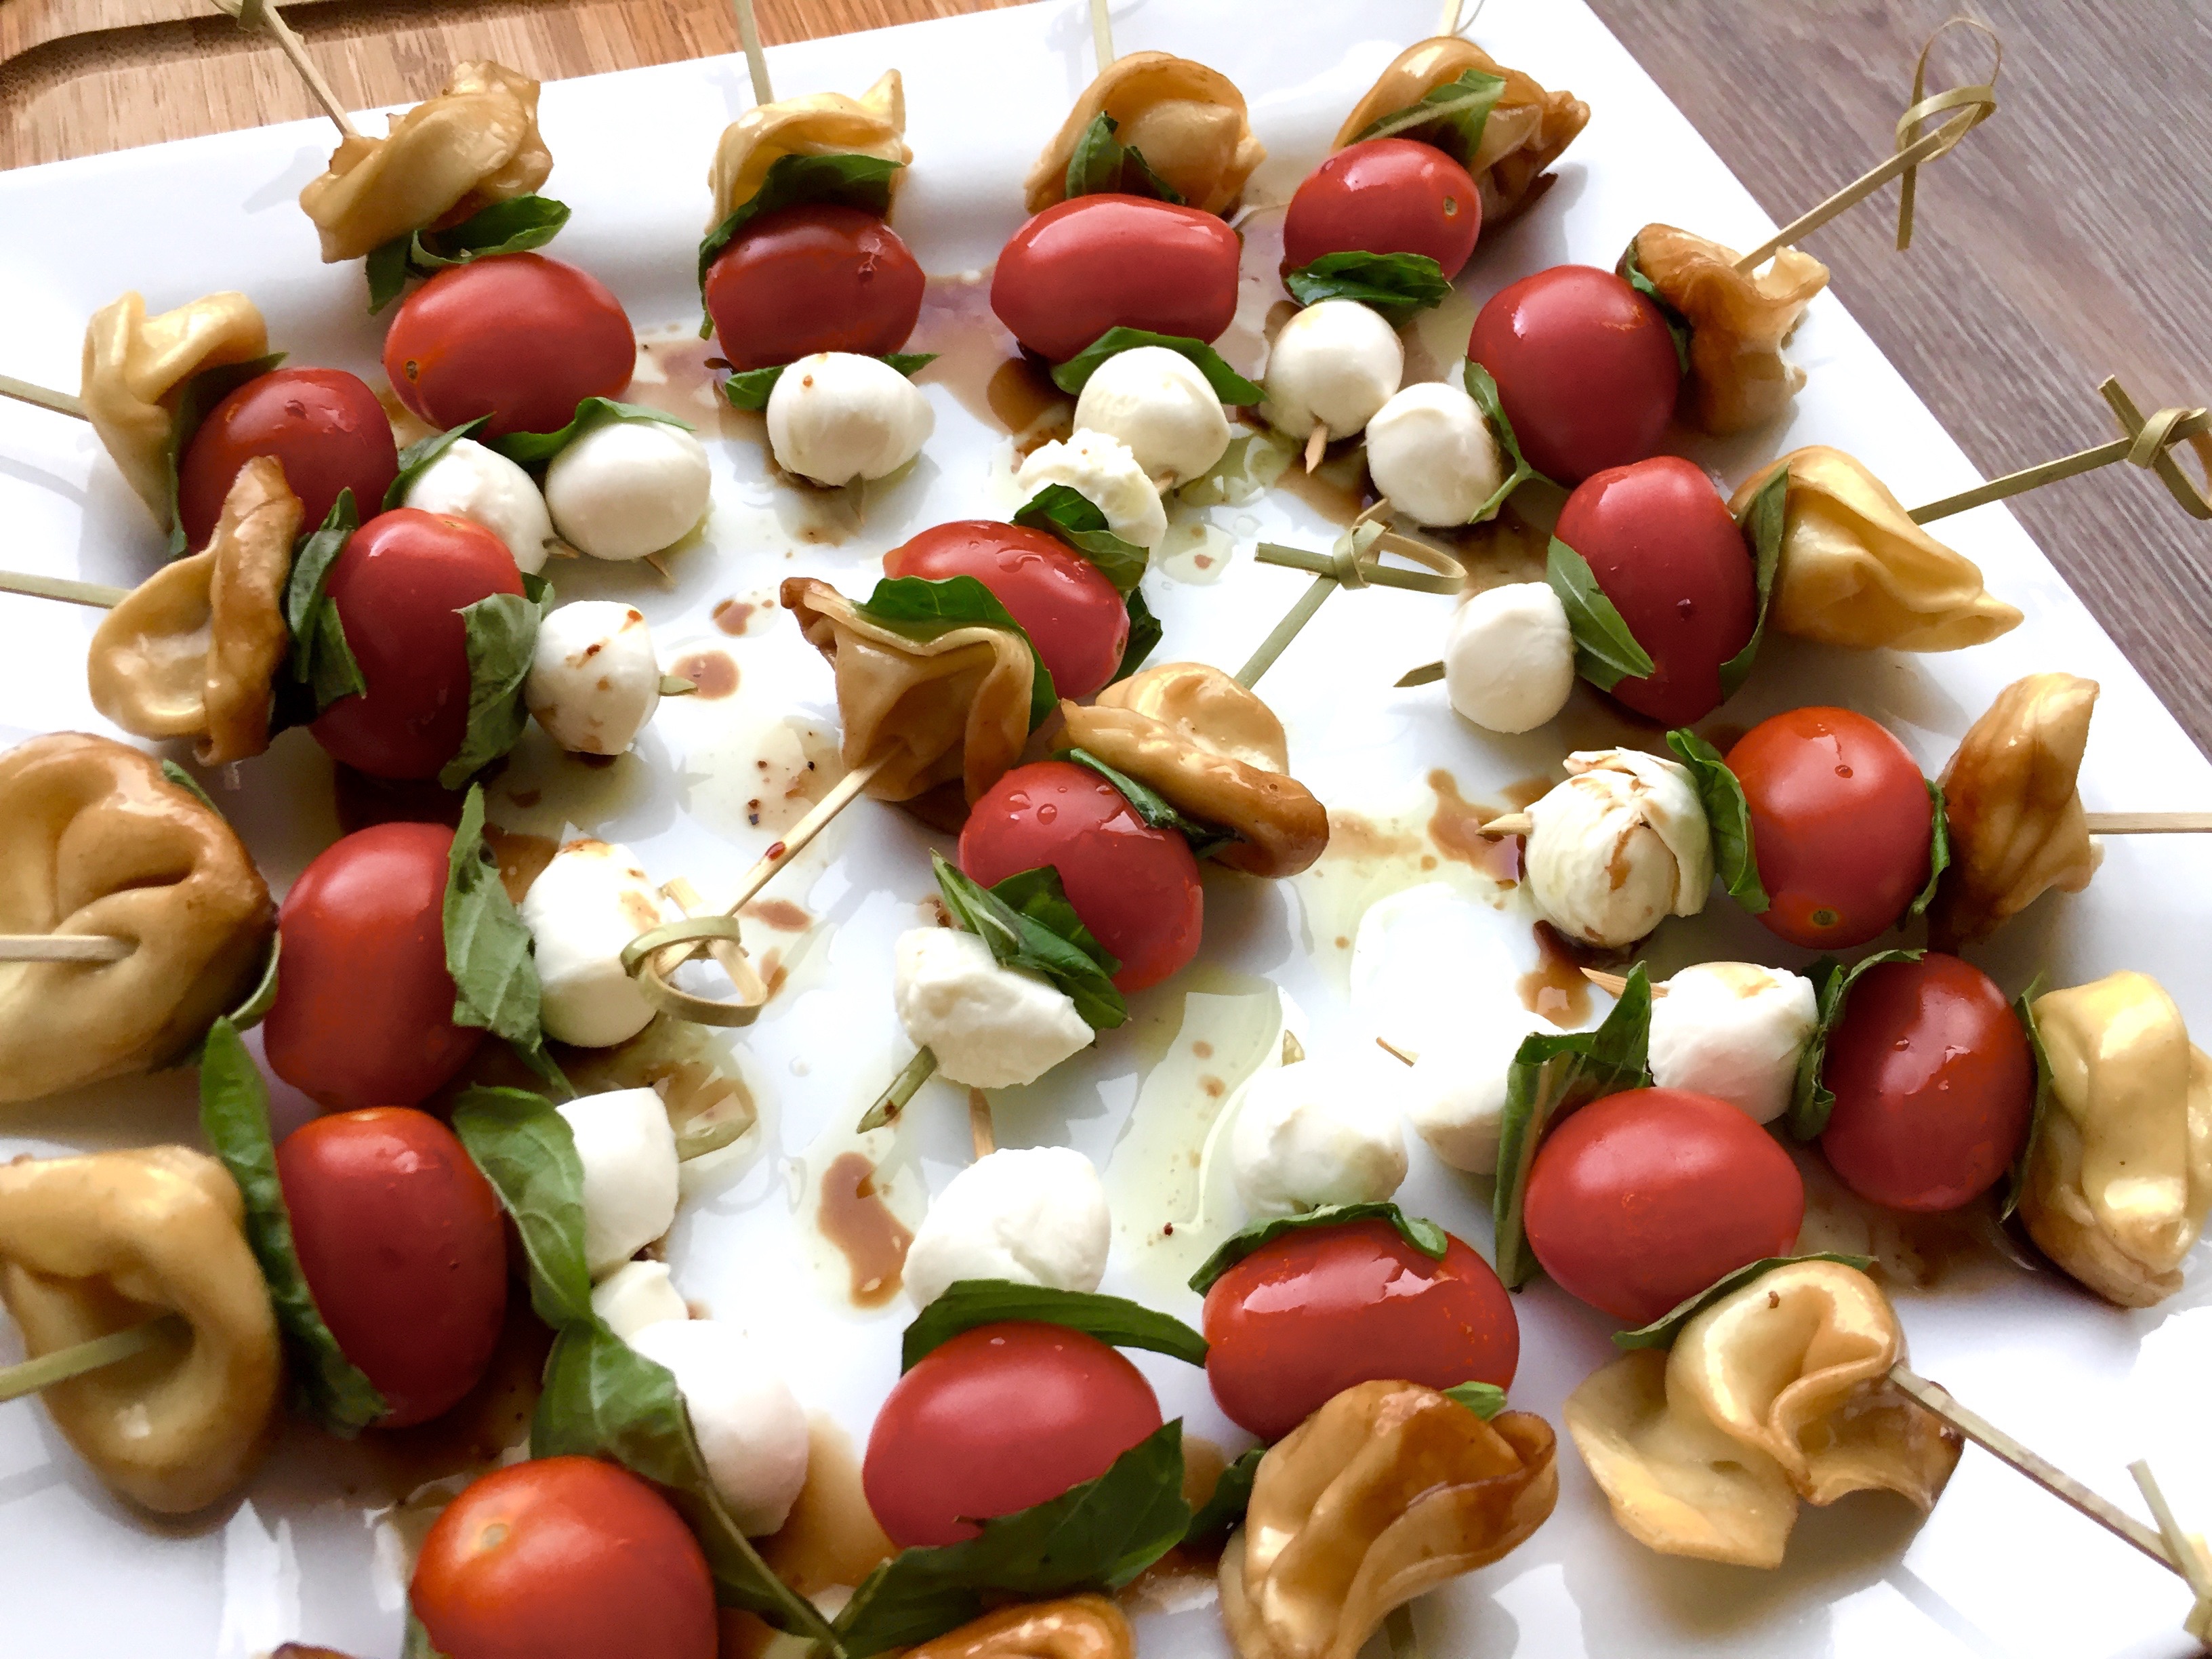

Whether you're looking for a light snack, an appetizer, or a sharing dish for potluck, this recipe is a quick fix that is not only good for you, but tastes great too!
Ingredients
- For the Vinaigrette
- 1/2 cup olive oil
- 1/4 cup balsamic vinegar
- 2 tsp lemon pepper
- For the Skewers
- 1 package prepared tortellini
- 1 cup basil
- 1 pint cherry tomatoes
- 1 tub of mini pearl mozzarella cheese
Instructions
- Start with the tortellini so that they can cool before assembling the skewers. Cook the tortellini according to package directions. Drain them and put them in a heat-safe bowl. Pour some olive oil and balsamic vinegar over the top, stir, cover, and refrigerate them until they are cold.
- Prep step! Measure out the oil, vinegar, and lemon pepper. Drain the mozzarella, wash the tomatoes, and cut the basil into strips about 1/2 inch thick.
- Prepare the vinaigrette. Pour the vinaigrette into a jar, and slowly add the oil while you stir it. Mix in the pepper. Seal the jar and shake the vinaigrette to complete the emulsion.
- Pro Tip: If you want to make the emulsion even more perfectly, use a blender or a food processor to incorporate the oil.
- When the tortellini are cold, begin to assemble the skewers. I use this order, but pick whatever you like best: tortellini, basil, tomato, basil, mozzarella. When they are fully assembled, drizzle with the vinaigrette, and serve!
Football season is here!
Despite the fact that I love frosting so much, I tend to eat a very healthy diet on a day to day basis. I stay active and eat right, and it gives me energy to do everything that I want.
One thing that I cannot understand is football snacks. Whenever football season comes, all of a sudden you see field-themed chips, nachos, fat-covered carbs bombs. All you’re doing is sitting there! You don’t need 1500 calories of empty, greasy carb to fuel your football passion.
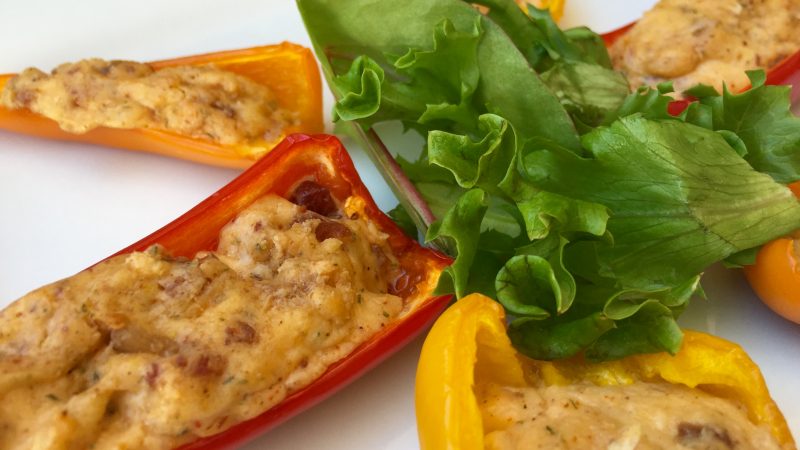
These snacks fix that problem. They are simple, they are cheesy, they are beyond addicting. And the best part – they are low carb. That means that you can eat them guilt free!
Snack without guilt this football season with these ranch-seasoned, spicy, cheesy pepper bites. You won’t even miss the chips!
~~~~~~~~~~
Step One.
Prep Step! Measure out your ingredients. Preheat your oven to 350°F.
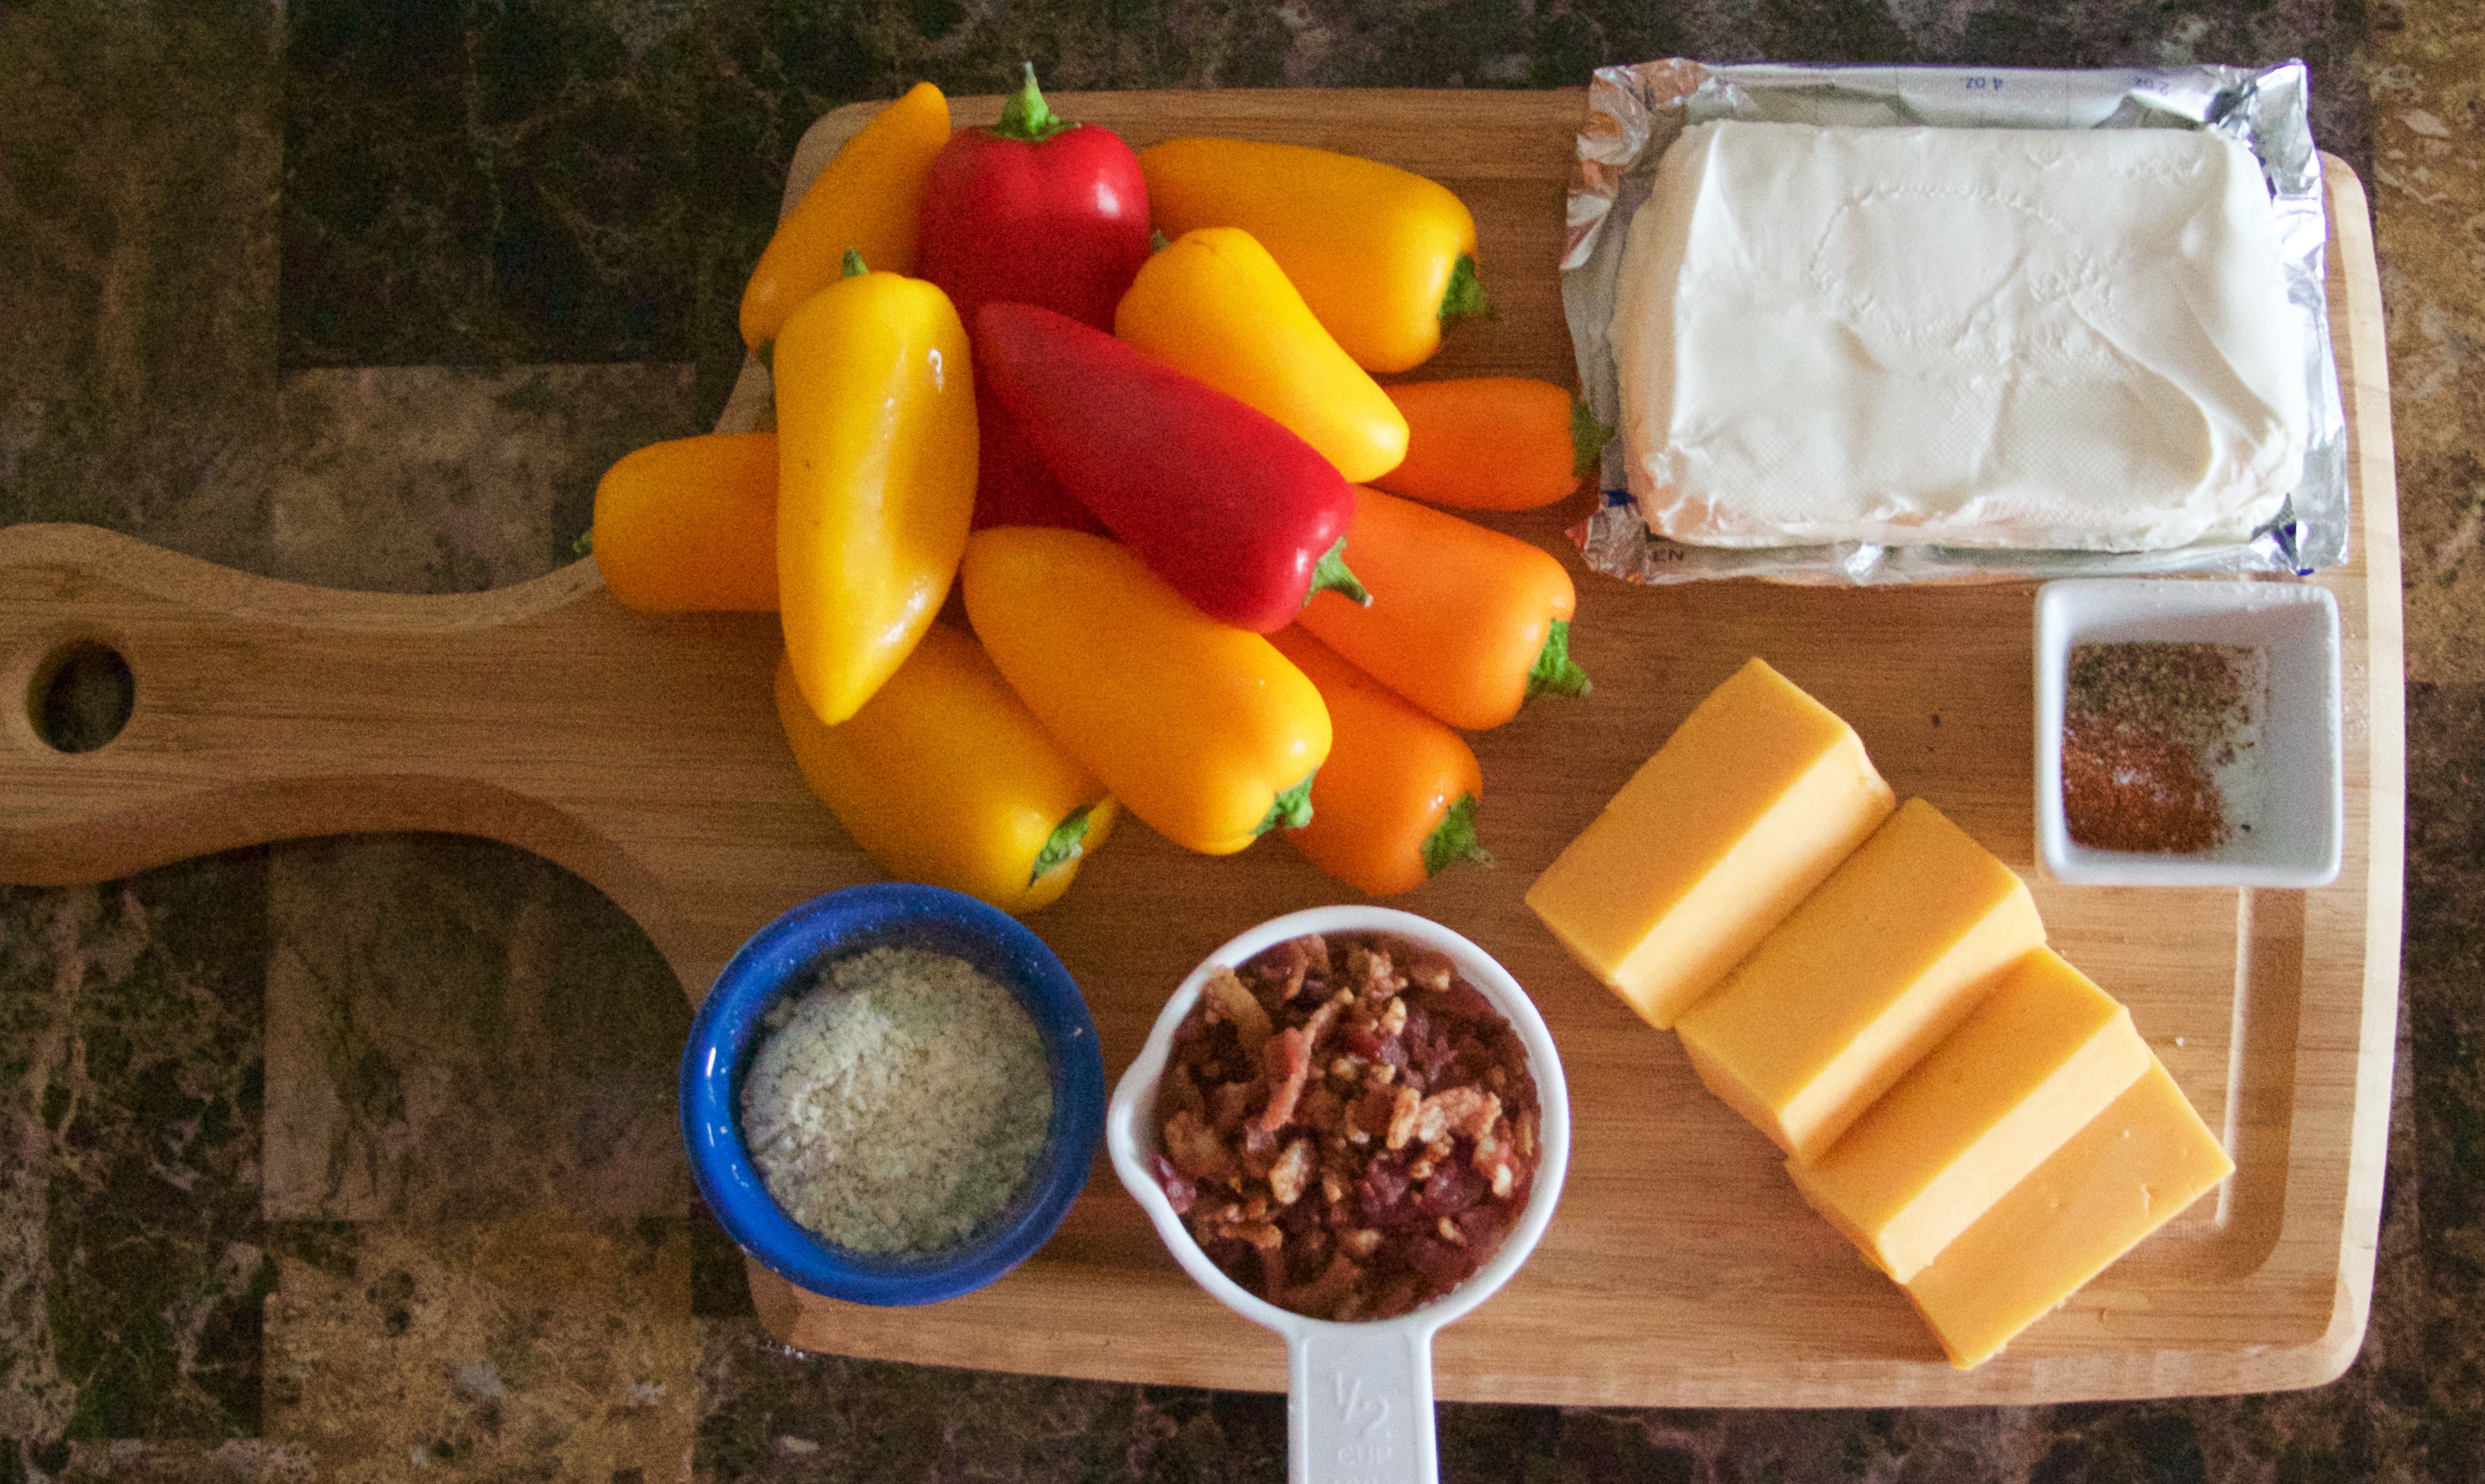
Step Two.
Prep the peppers! First, with a paring knife, cut the peppers in half so that you get two tall and deep halves, not the shallow ones.
Next, cut off the stems by making a “V” shape around it with your paring knife.
Finally, placing the blade of your knife flush with the pepper, cut off the veins.
Line up the peppers on a baking sheet lined with aluminum foil. If some of them tip over, slice a small piece off of the bottom to make it flat.
Step Three.
Make the filling! Beat the cream cheese in a stand mixer on high for three minutes.
Grate the cheddar cheese into the bowl and mix until incorporated.
Tip: Don’t want to take the time to grate? Buy shredded cheddar, and give it a few chops to make smaller pieces.
Add the spices and mix until incorporated.
Carefully mix in the bacon pieces.
Step Four.

Stuff the peppers!
Add about 1 Tablespoon of the cheese mix to each pepper, enough so that it is full. Careful, though – you don’t want to add too much, because then it will melt out in the oven.
Bake at 350°F FOR 20 minutes.
Serve with some greens for an added health benefit!

Snack without guilt this football season with these ranch-seasoned, spicy, cheesy pepper bites. You won't even miss the chips!
Ingredients
- Bite-sized peppers (about 15)
- 8 oz cream cheese, softened
- 4 oz block sharp cheddar cheese
- 2 Tbsp ranch dip mix
- 2 tsp cayenne pepper
- 1/2 tsp salt
- 1/2 tsp pepper
- 1/2 cup cooked bacon pieces (not bits)
Instructions
- Measure out your ingredients. Preheat the oven to 350°F
- First, with a paring knife, cut the peppers in half so that you get the tall, deep halves, not the flat, shallow ones.
- Cut off the stem by making a “V” shape around it with your paring knife.
- Placing the blade of your knife flush with the pepper, cut off the vein.
- Line up the peppers on a baking sheet lined with aluminum foil. If they are falling over, slice a small piece off of the bottom to make it flat.
- Beat the cream cheese in a stand mixer on high for three minutes.
- Grate the cheddar cheese into the bowl and mix until incorporated.
- Add the spices and mix until incorporated.
- Carefully mix in the bacon.
- Add about 1 Tablespoon of the mix to each pepper, enough so that it is full. You don’t want to add too much, because it will melt out in the oven.
- Bake at 350°F for 20 minutes.
- Serve with some greens for an added health benefit!
Back to school! I always loved back to school. New outfit, new pencils, new goals.
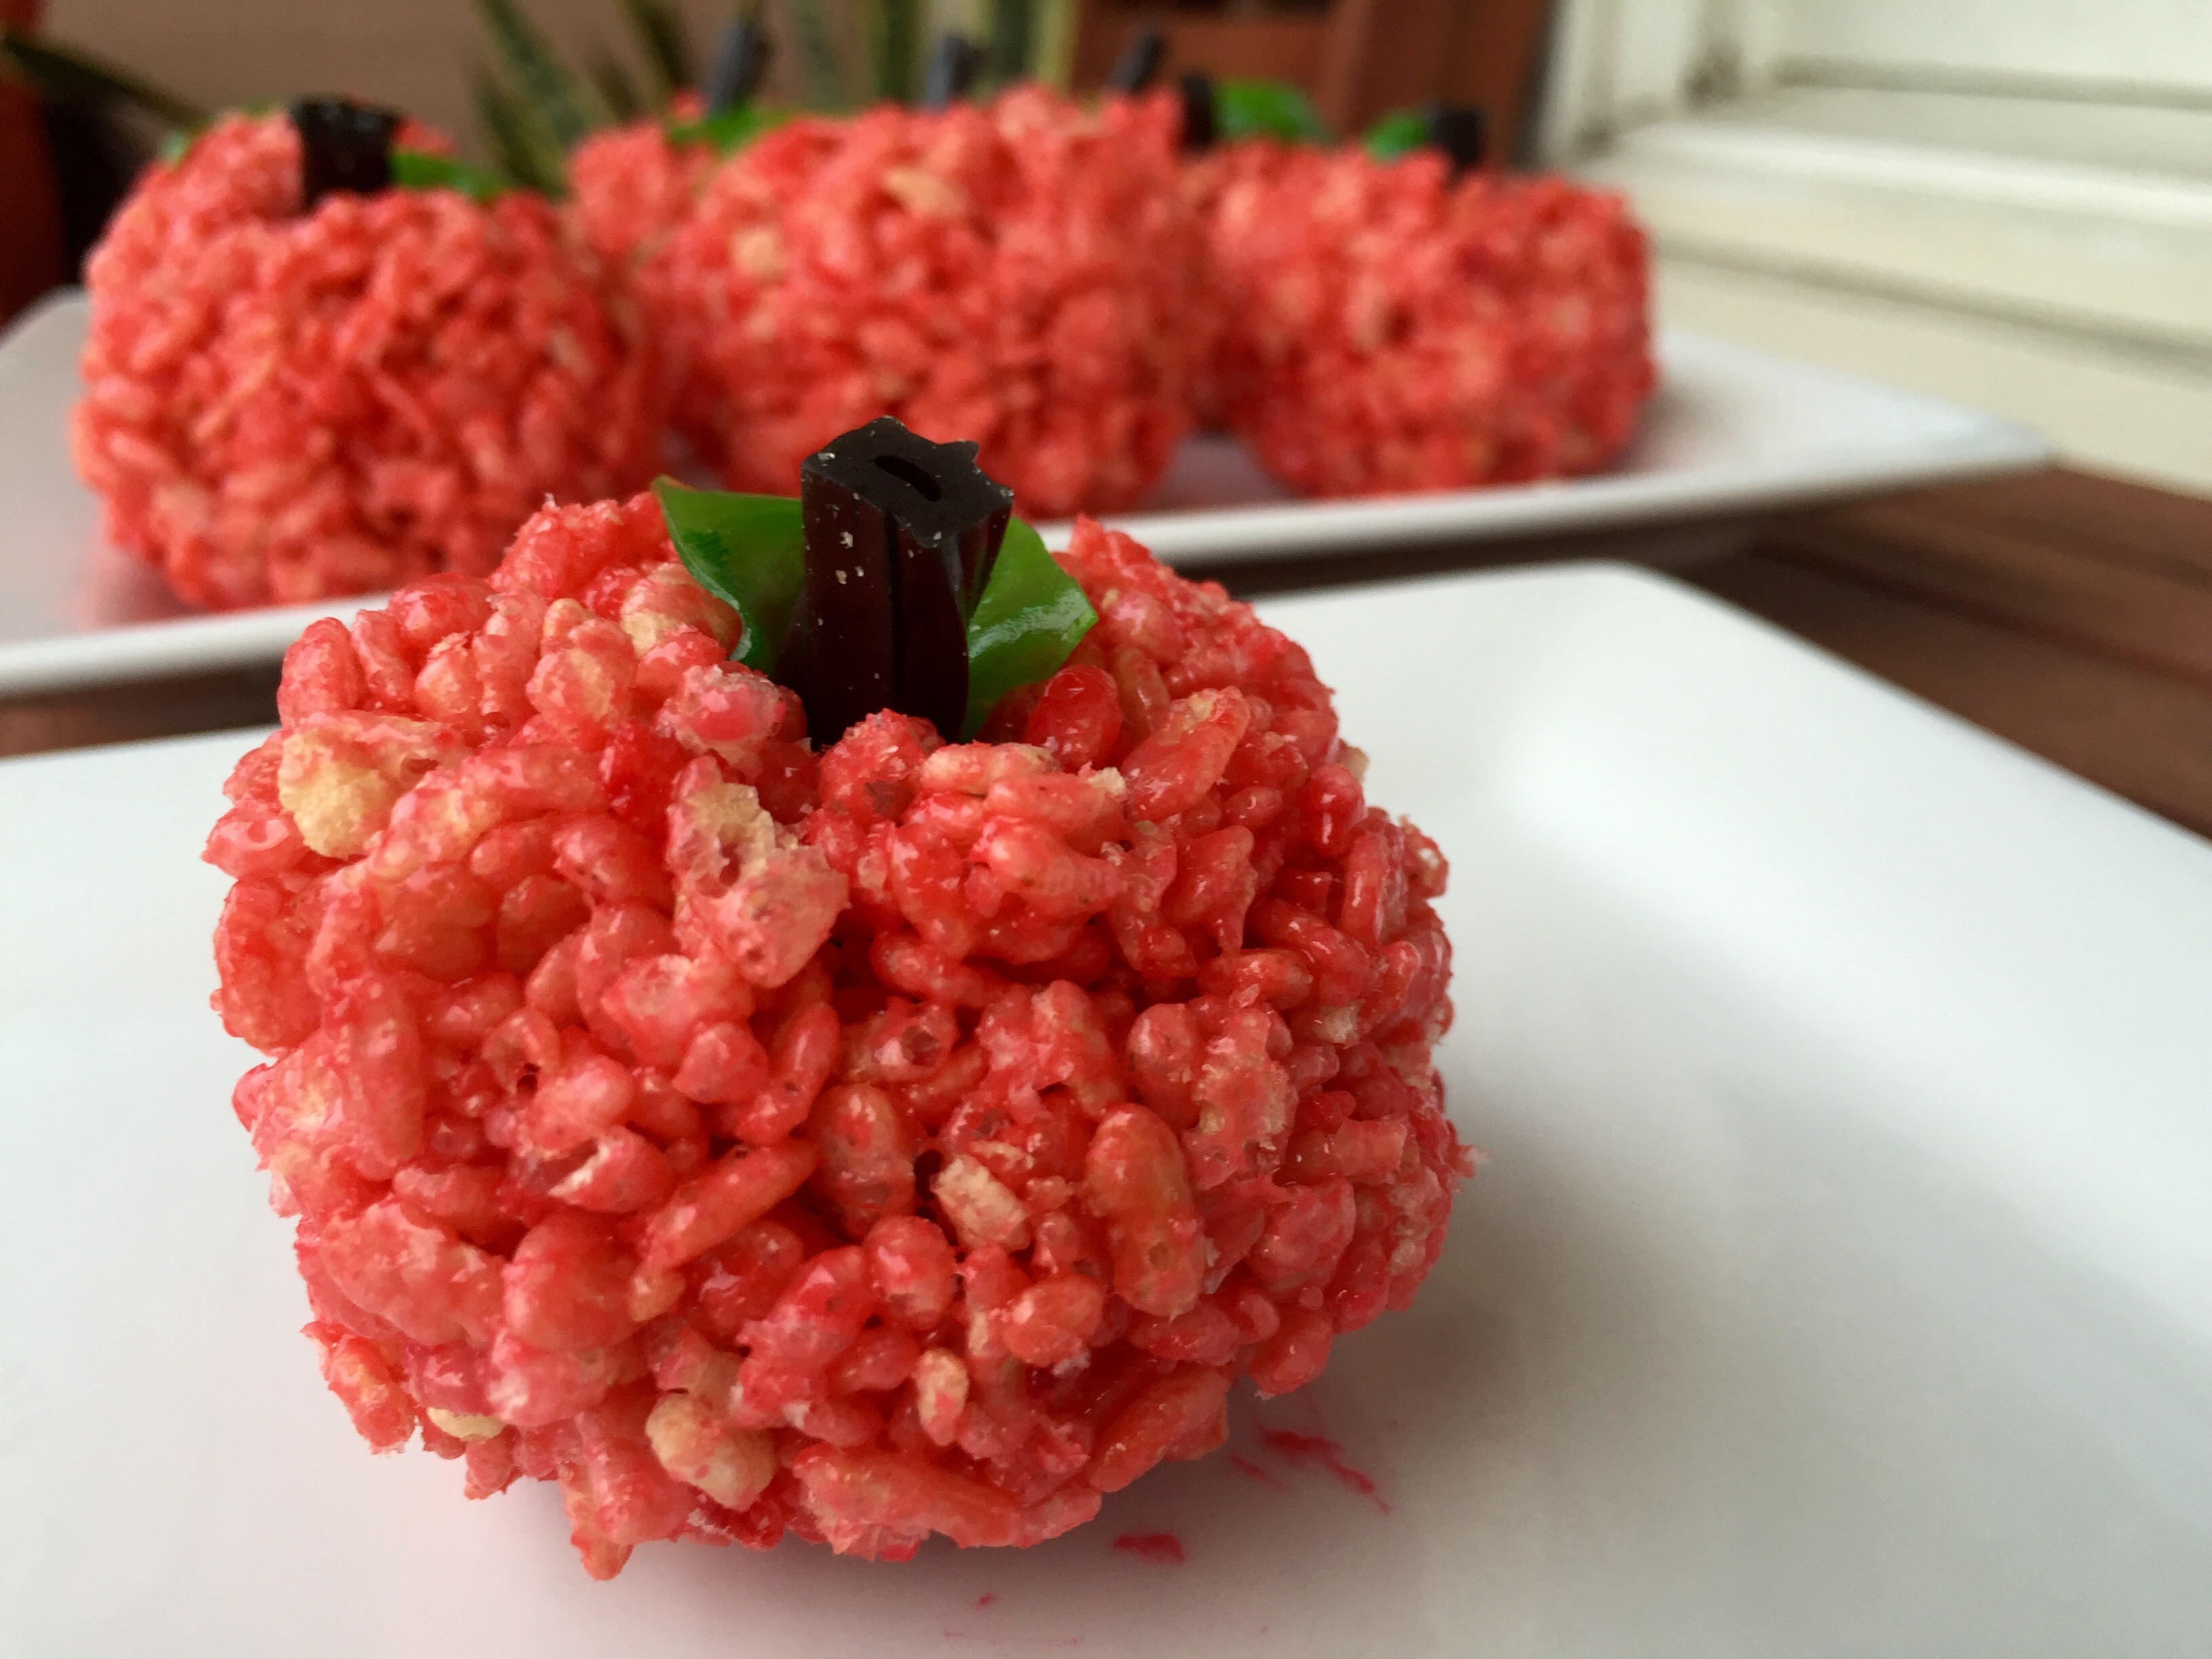
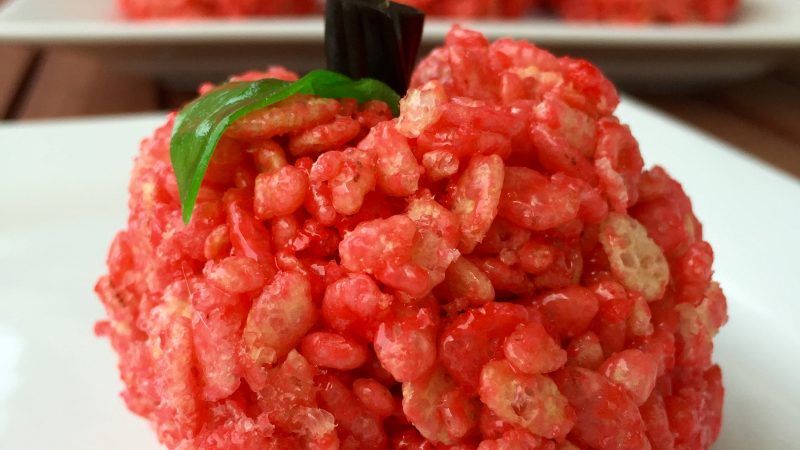
 Apples for the Teachers")
Whether you are a teacher, a student, or a parent, you will absolutely enjoy these cute and tasty treats. They are so easy!
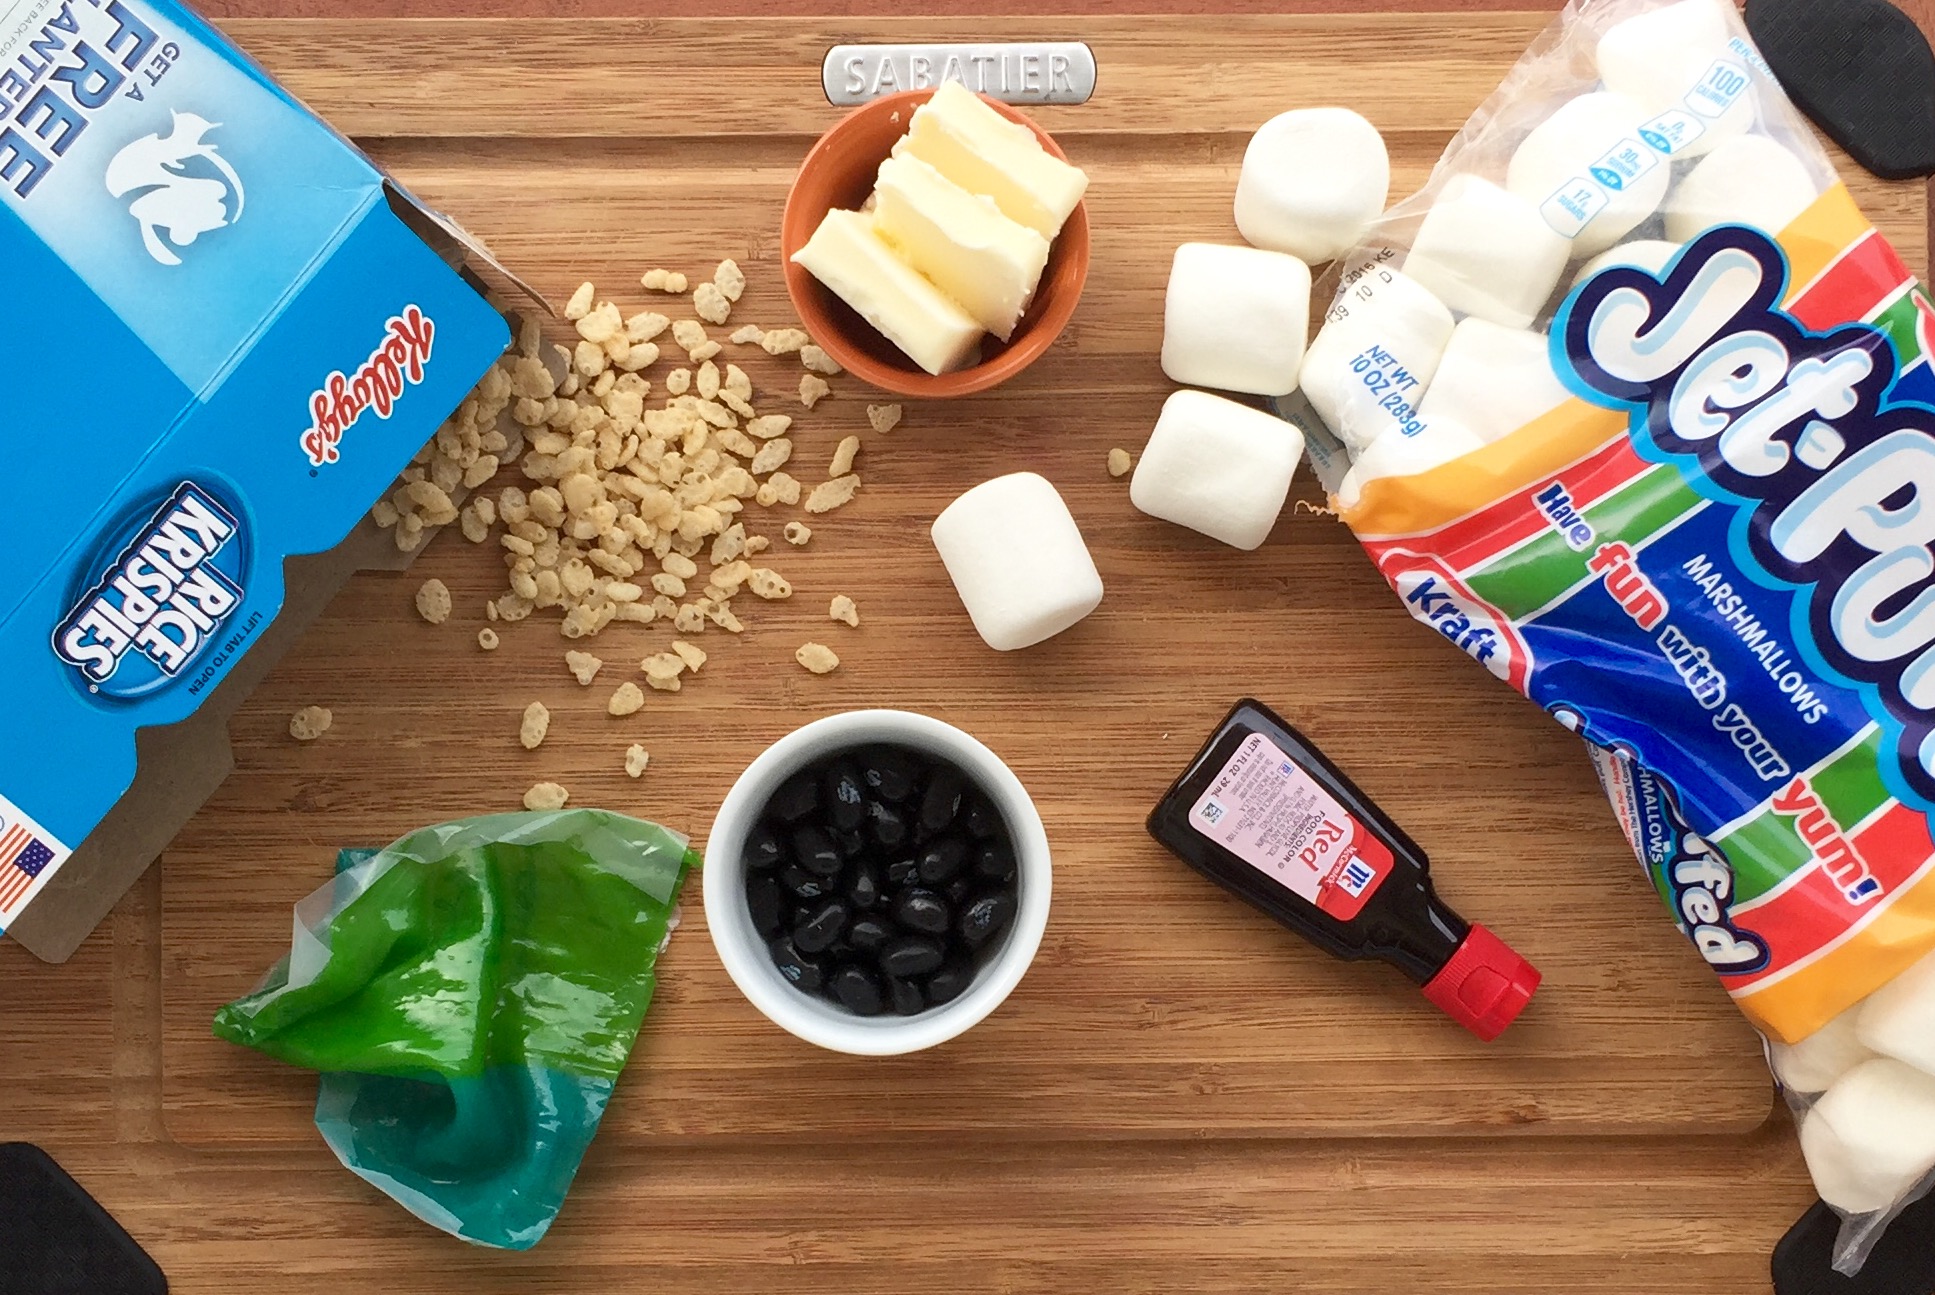
Ingredients
- 3 Tbsp butter
- 1 10-oz bag of marshmallows
- 1 tsp red food coloring
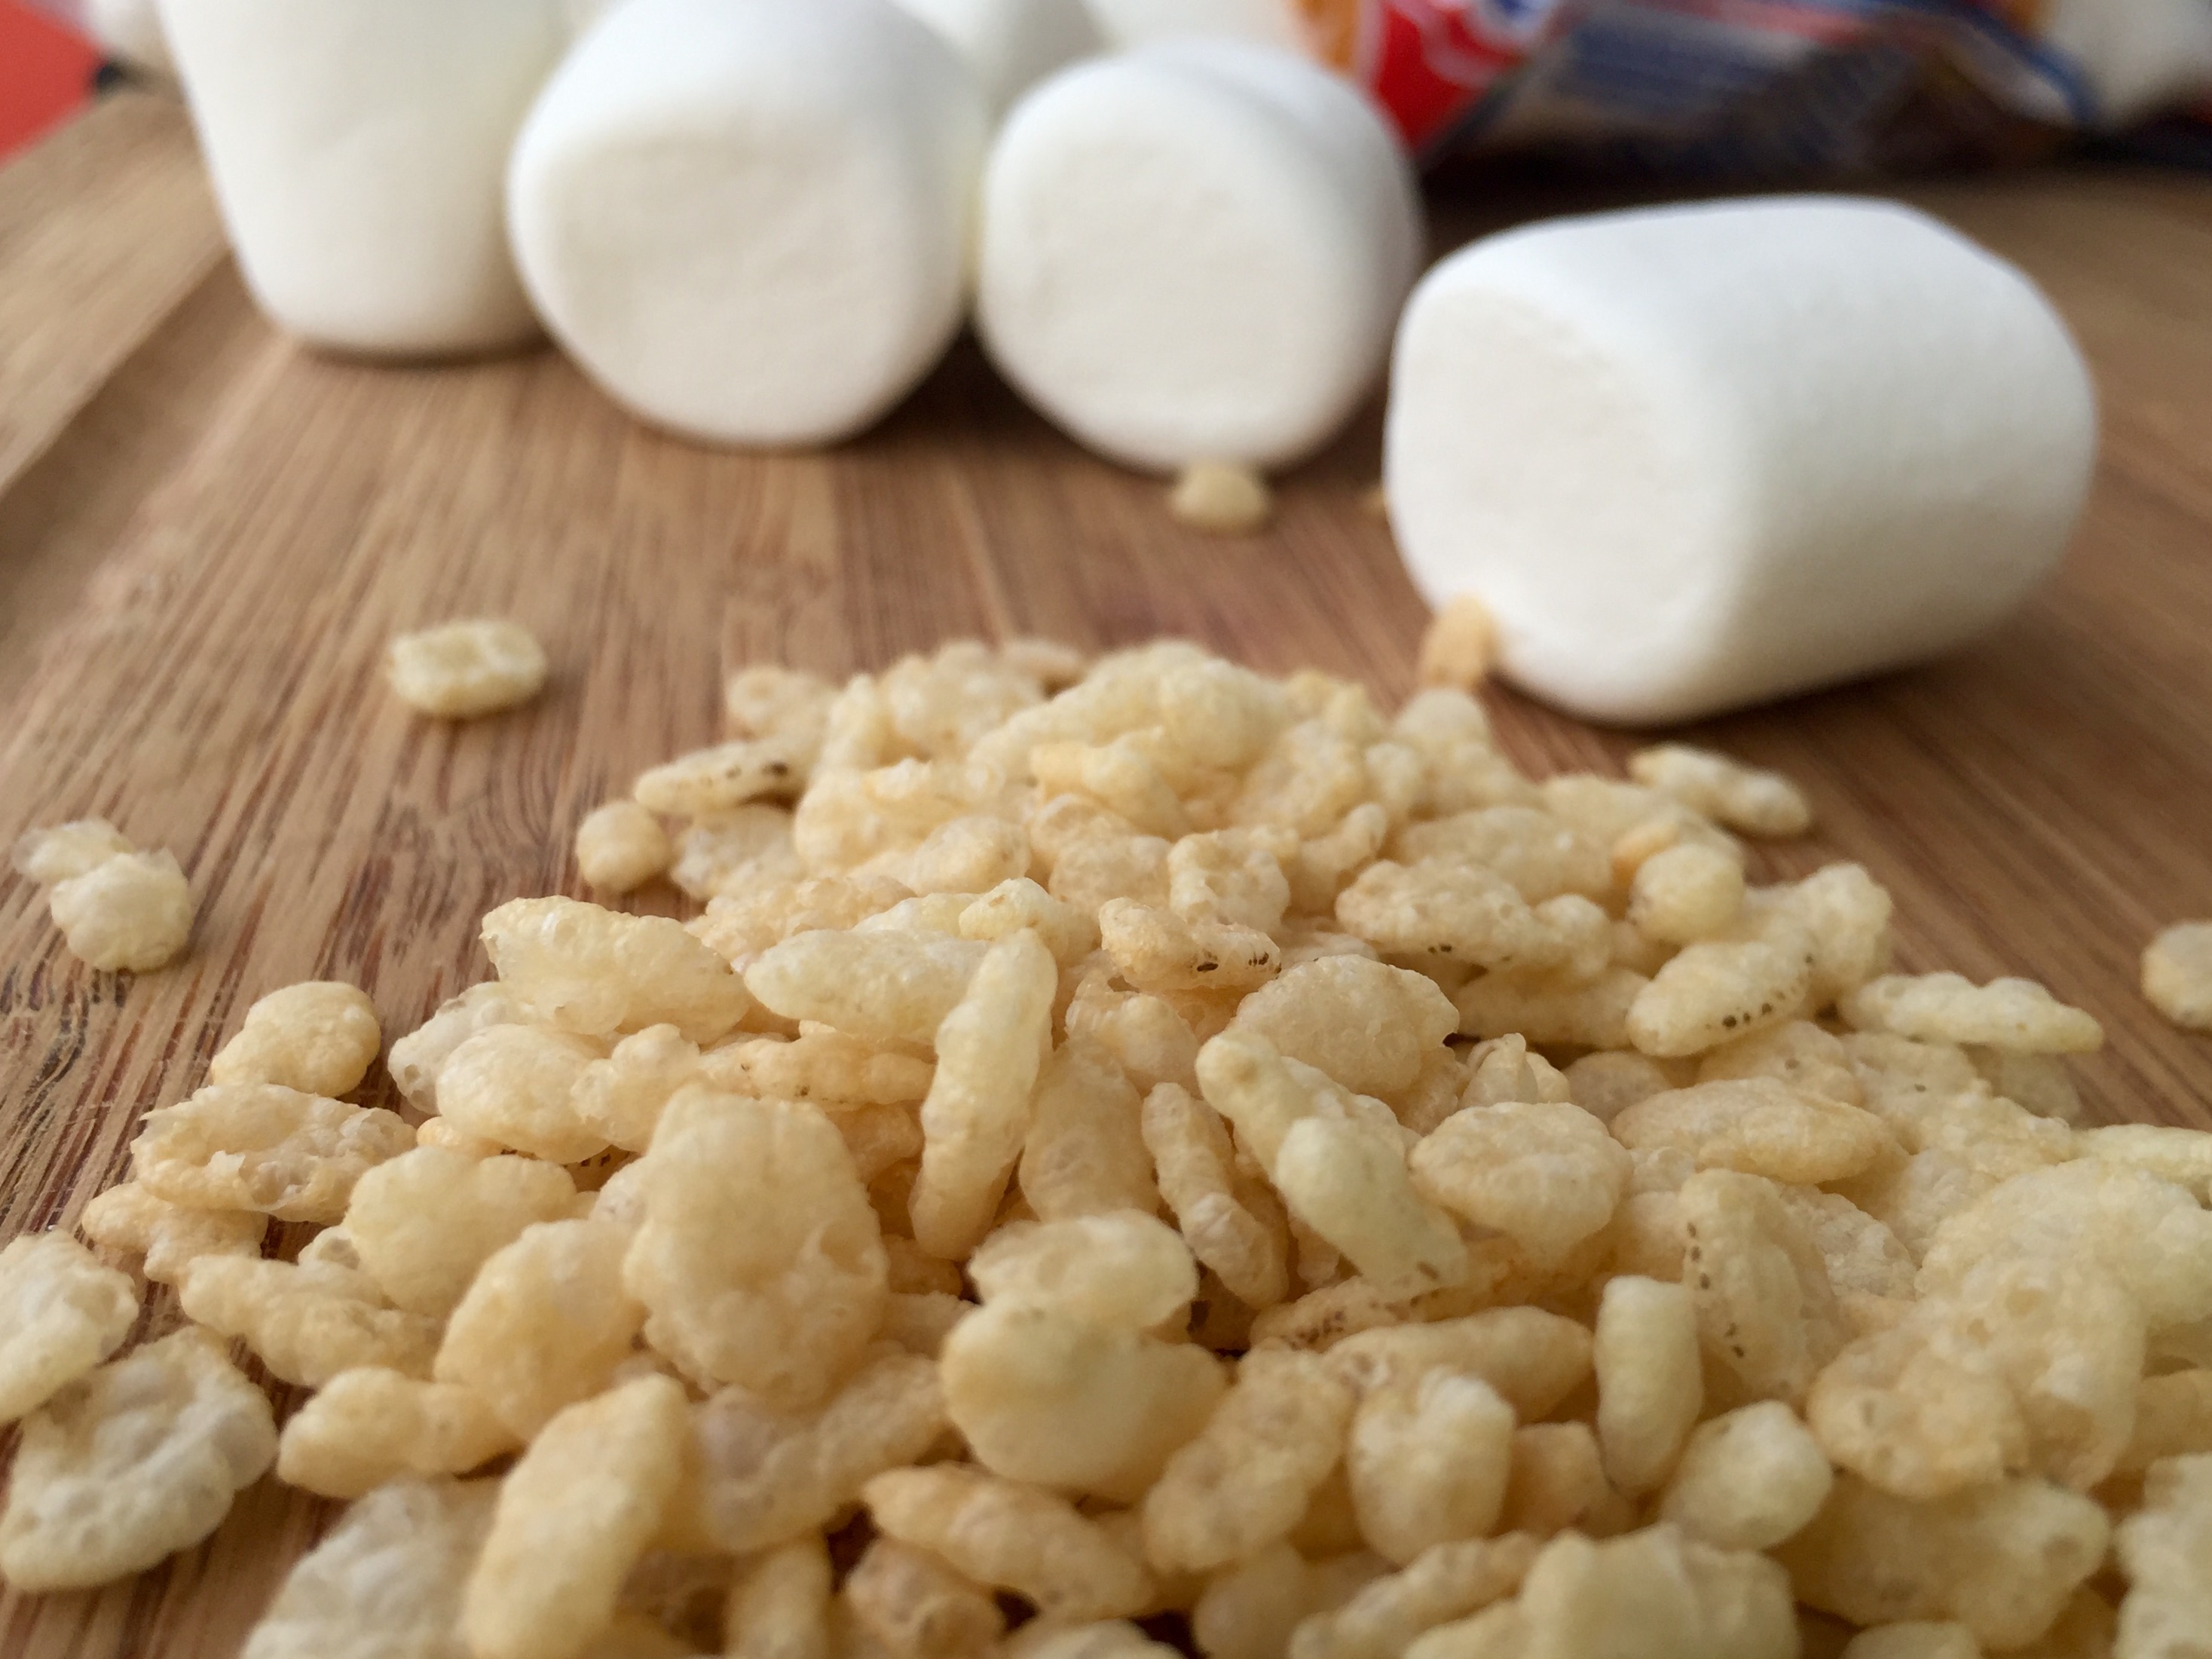
- 5 cups rice cereal
- 2 green fruit rollups for leaves
- Black licorice or Tootsie Rolls for stems
Instructions
- Prep Step! Measure out all of your ingredients. Hold off on cutting the leaves and stems, that will come later.
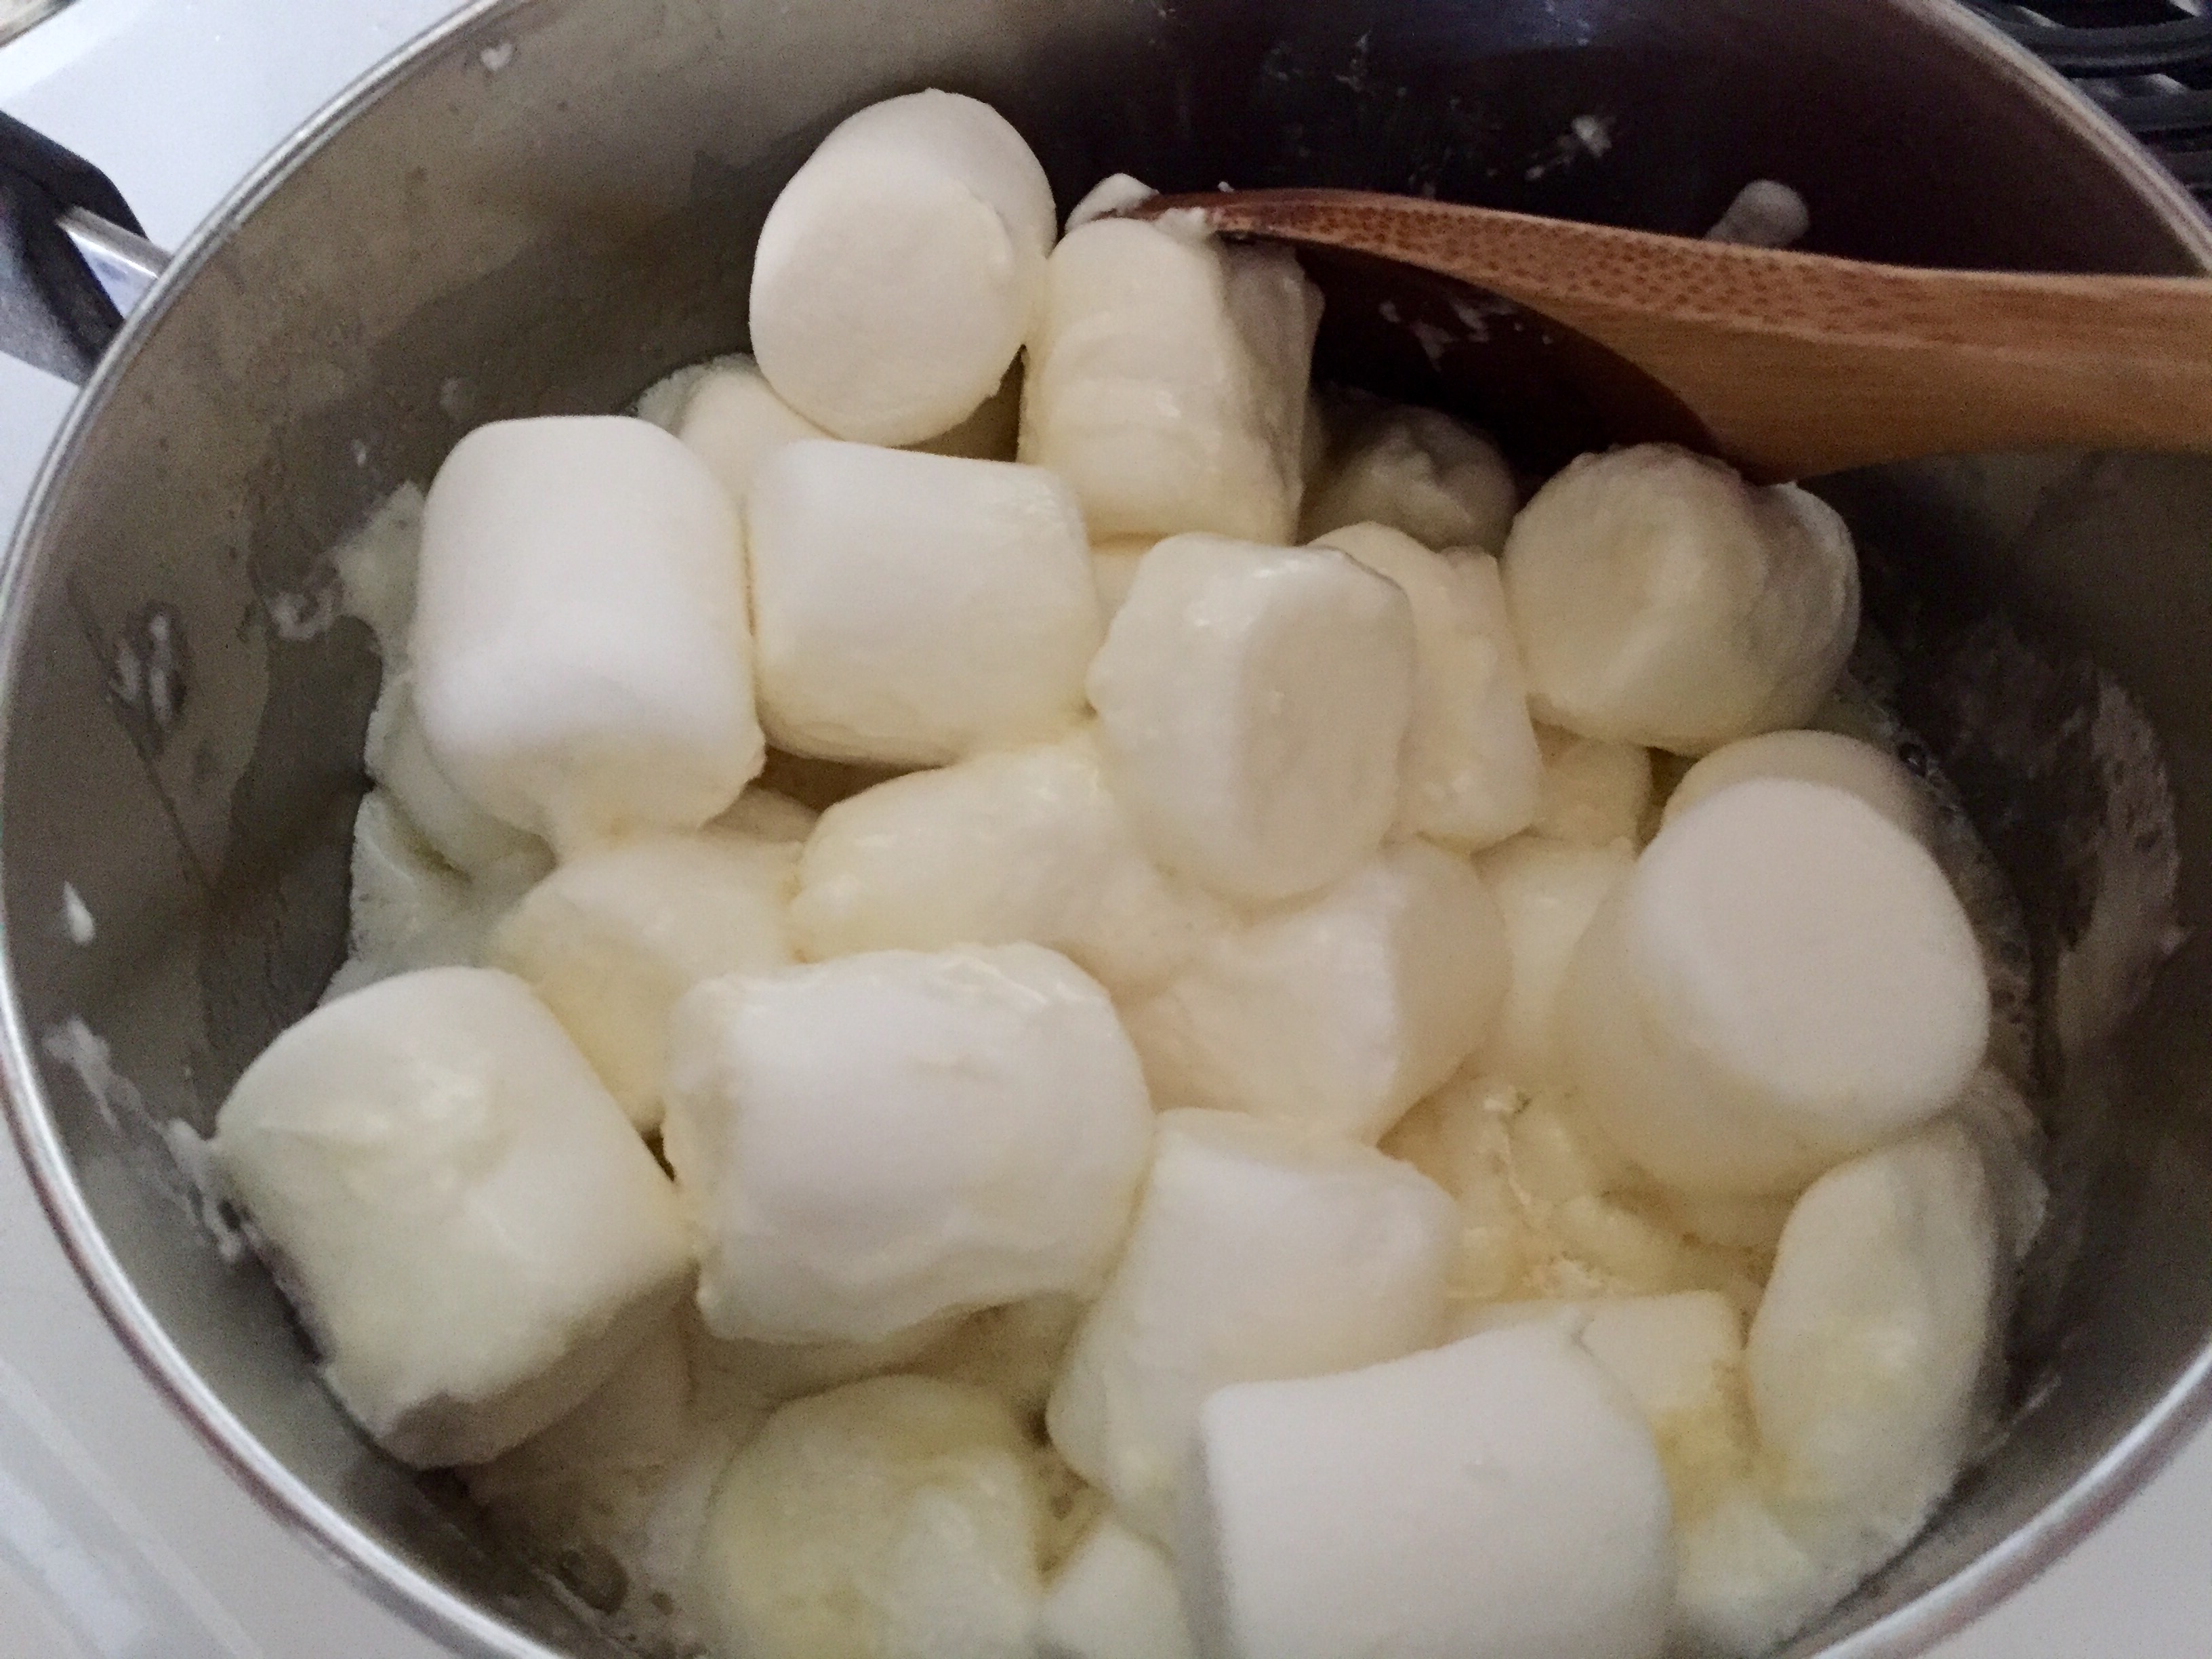
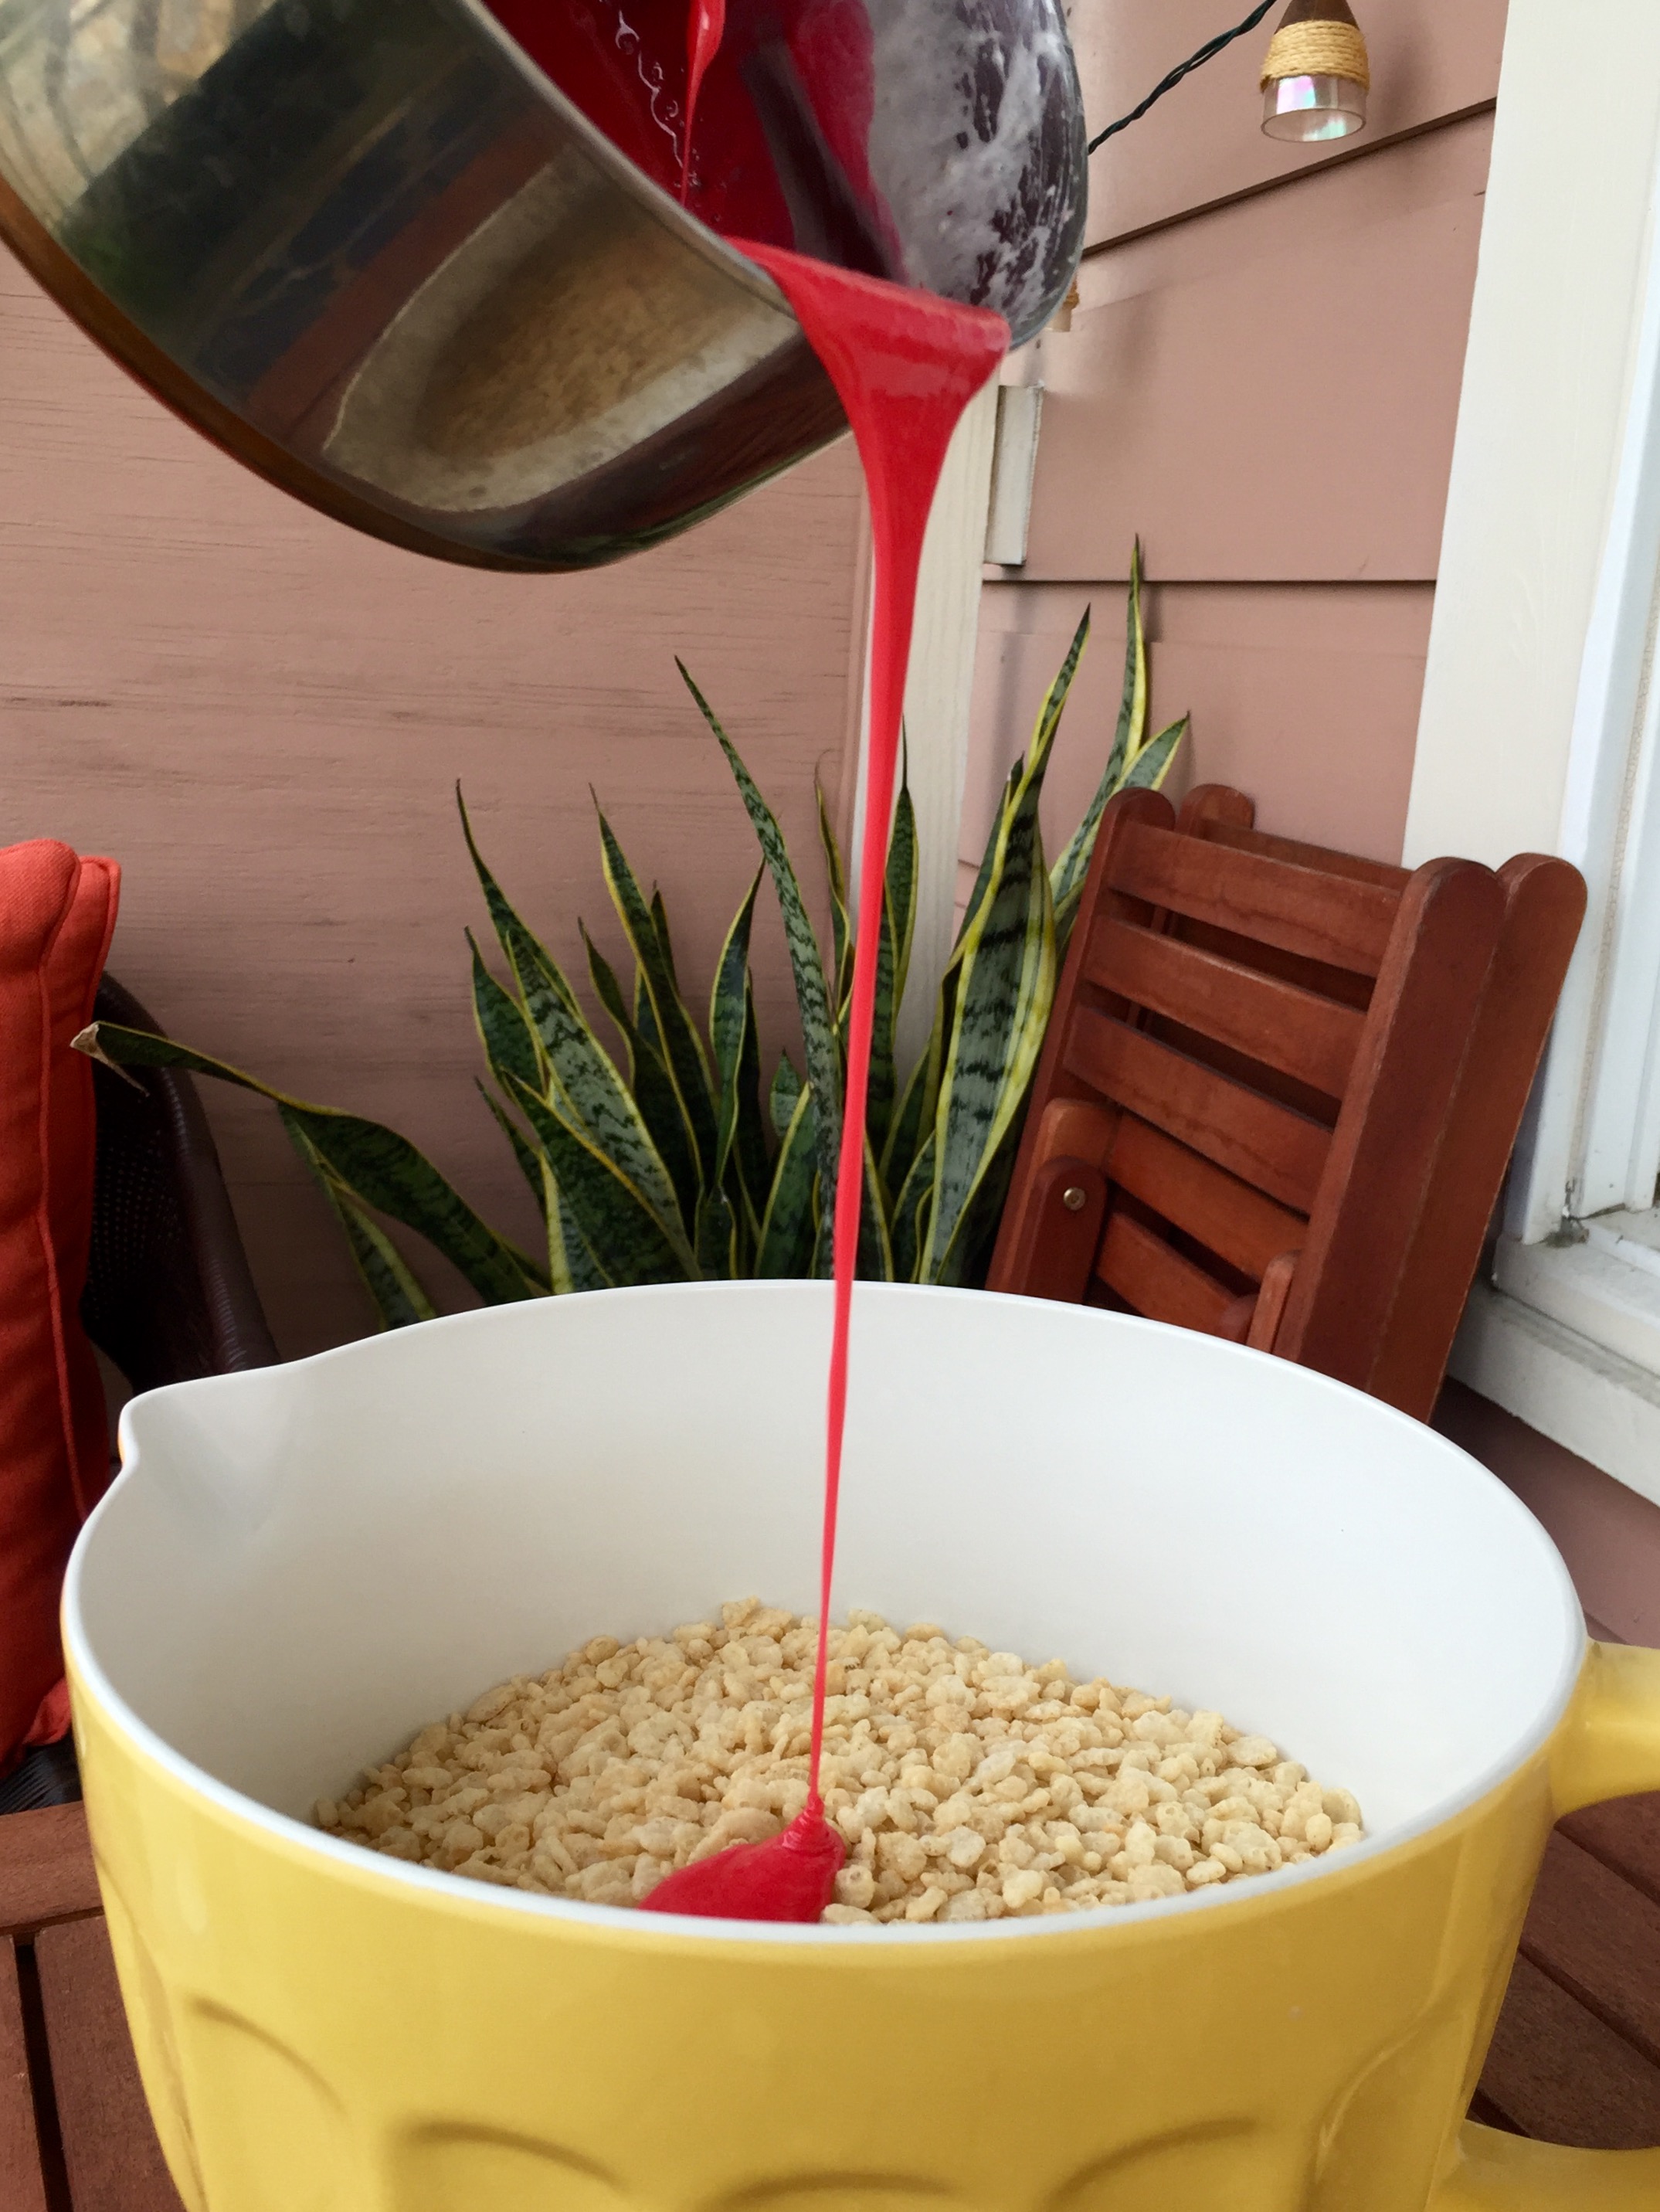
- Melt the butter in a pan over medium heat. Then add all of the marshmallows and stir together until they are dissolved. Mix the food coloring into the marshmallow.
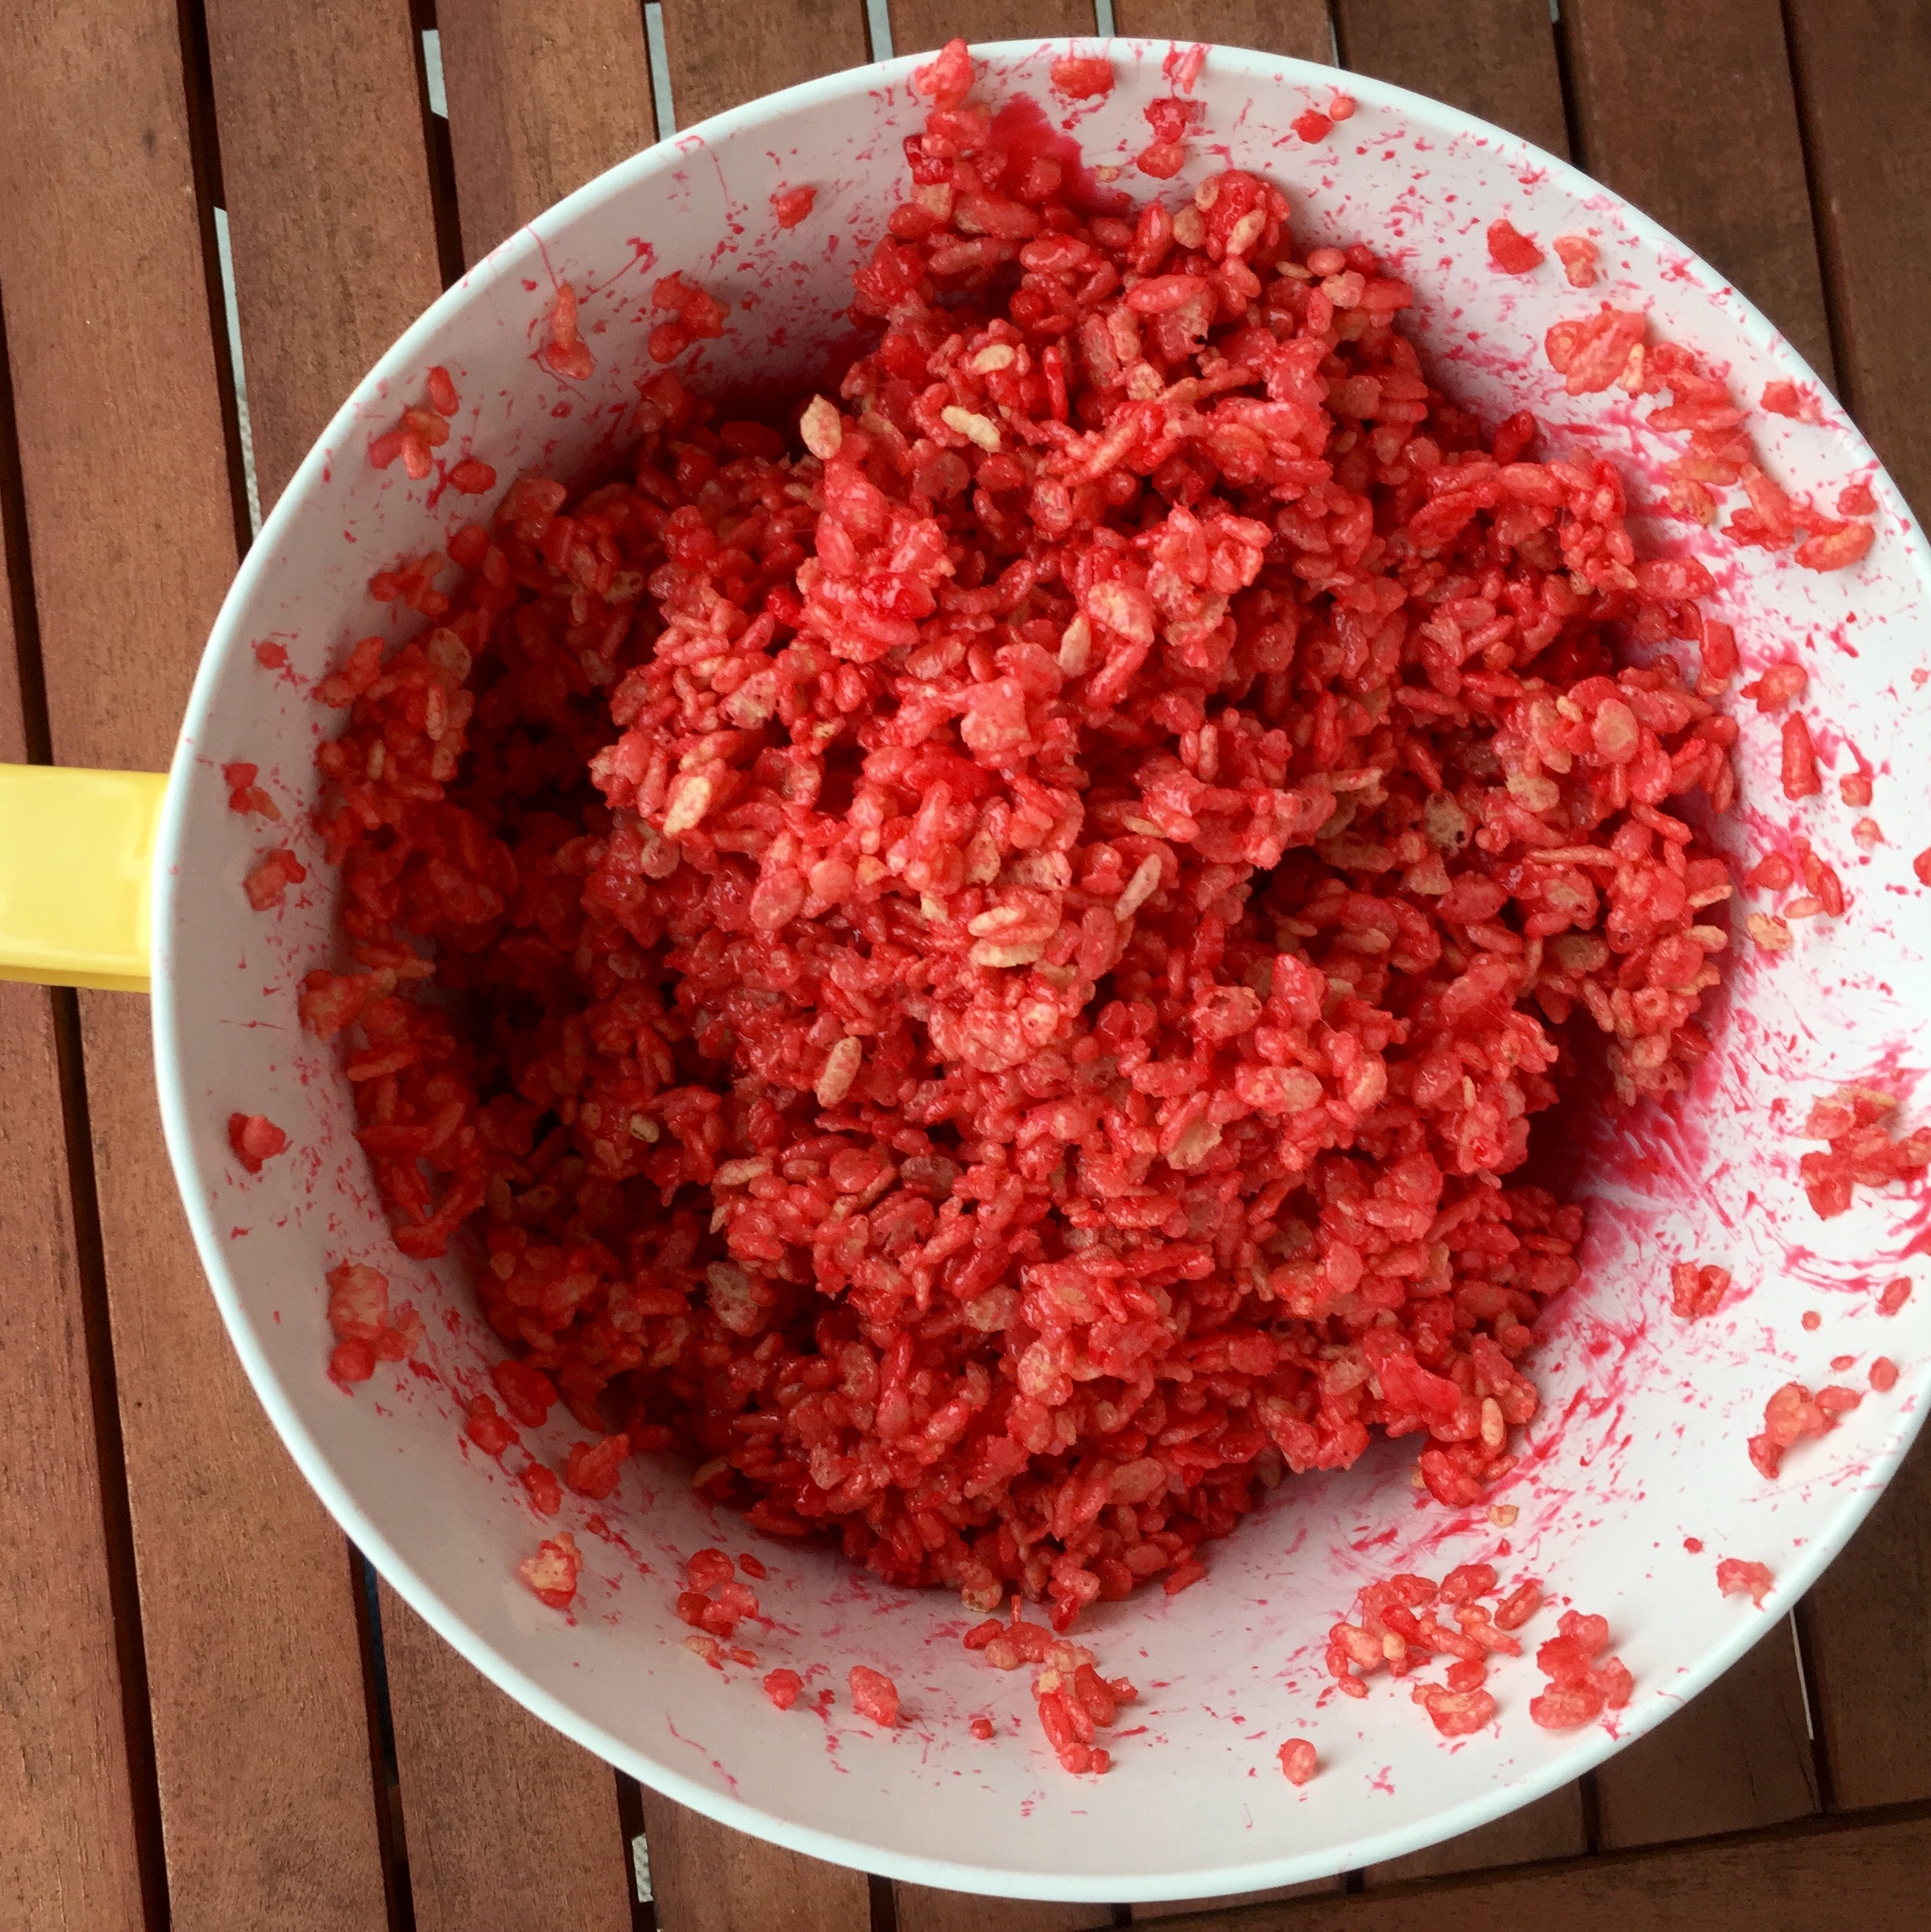
- Add the marshmallow mixture to the cereal. Fold it into the cereal carefully, so that you don't crush too much of the cereal.
- Now you need to wait a bit so that molding the apples is not a sticky mess. This is a good time to cut your leaves and stems.
- With a sharp knife, cut a leaf shape out of the green fruit rollup. Cut the "stem", whatever you choose to use, into a length that looks good with the size of your "apples." I cut mine to about 3/4 in.
- Once the treats are cool, grab a handful and mold it into a sphere with your hands. Using your smallest finger, push a little depression in the middle.
- Put the leaf in the hole first, then add the stem. Eat like an apple!