this is a page for
Browsing Tag: white chocolate
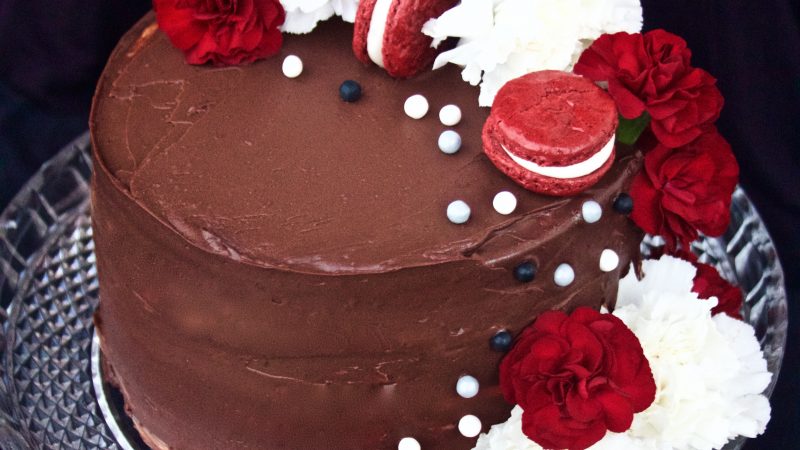
This cake says “I love you” like nothing else! It requires lots of love and patience, and the result is a fluffy, delectable creation that not only looks amazing but also tastes even better.
(I really don’t have anything else to say this post…. Most Valentine’s Day posts go on about how great this or that girlfriend, fiancee, husband is…. well…. my cats are doing just fine, thank you, and we will have a wonderful, normal Tuesday together.)
~~~~~~~~~~
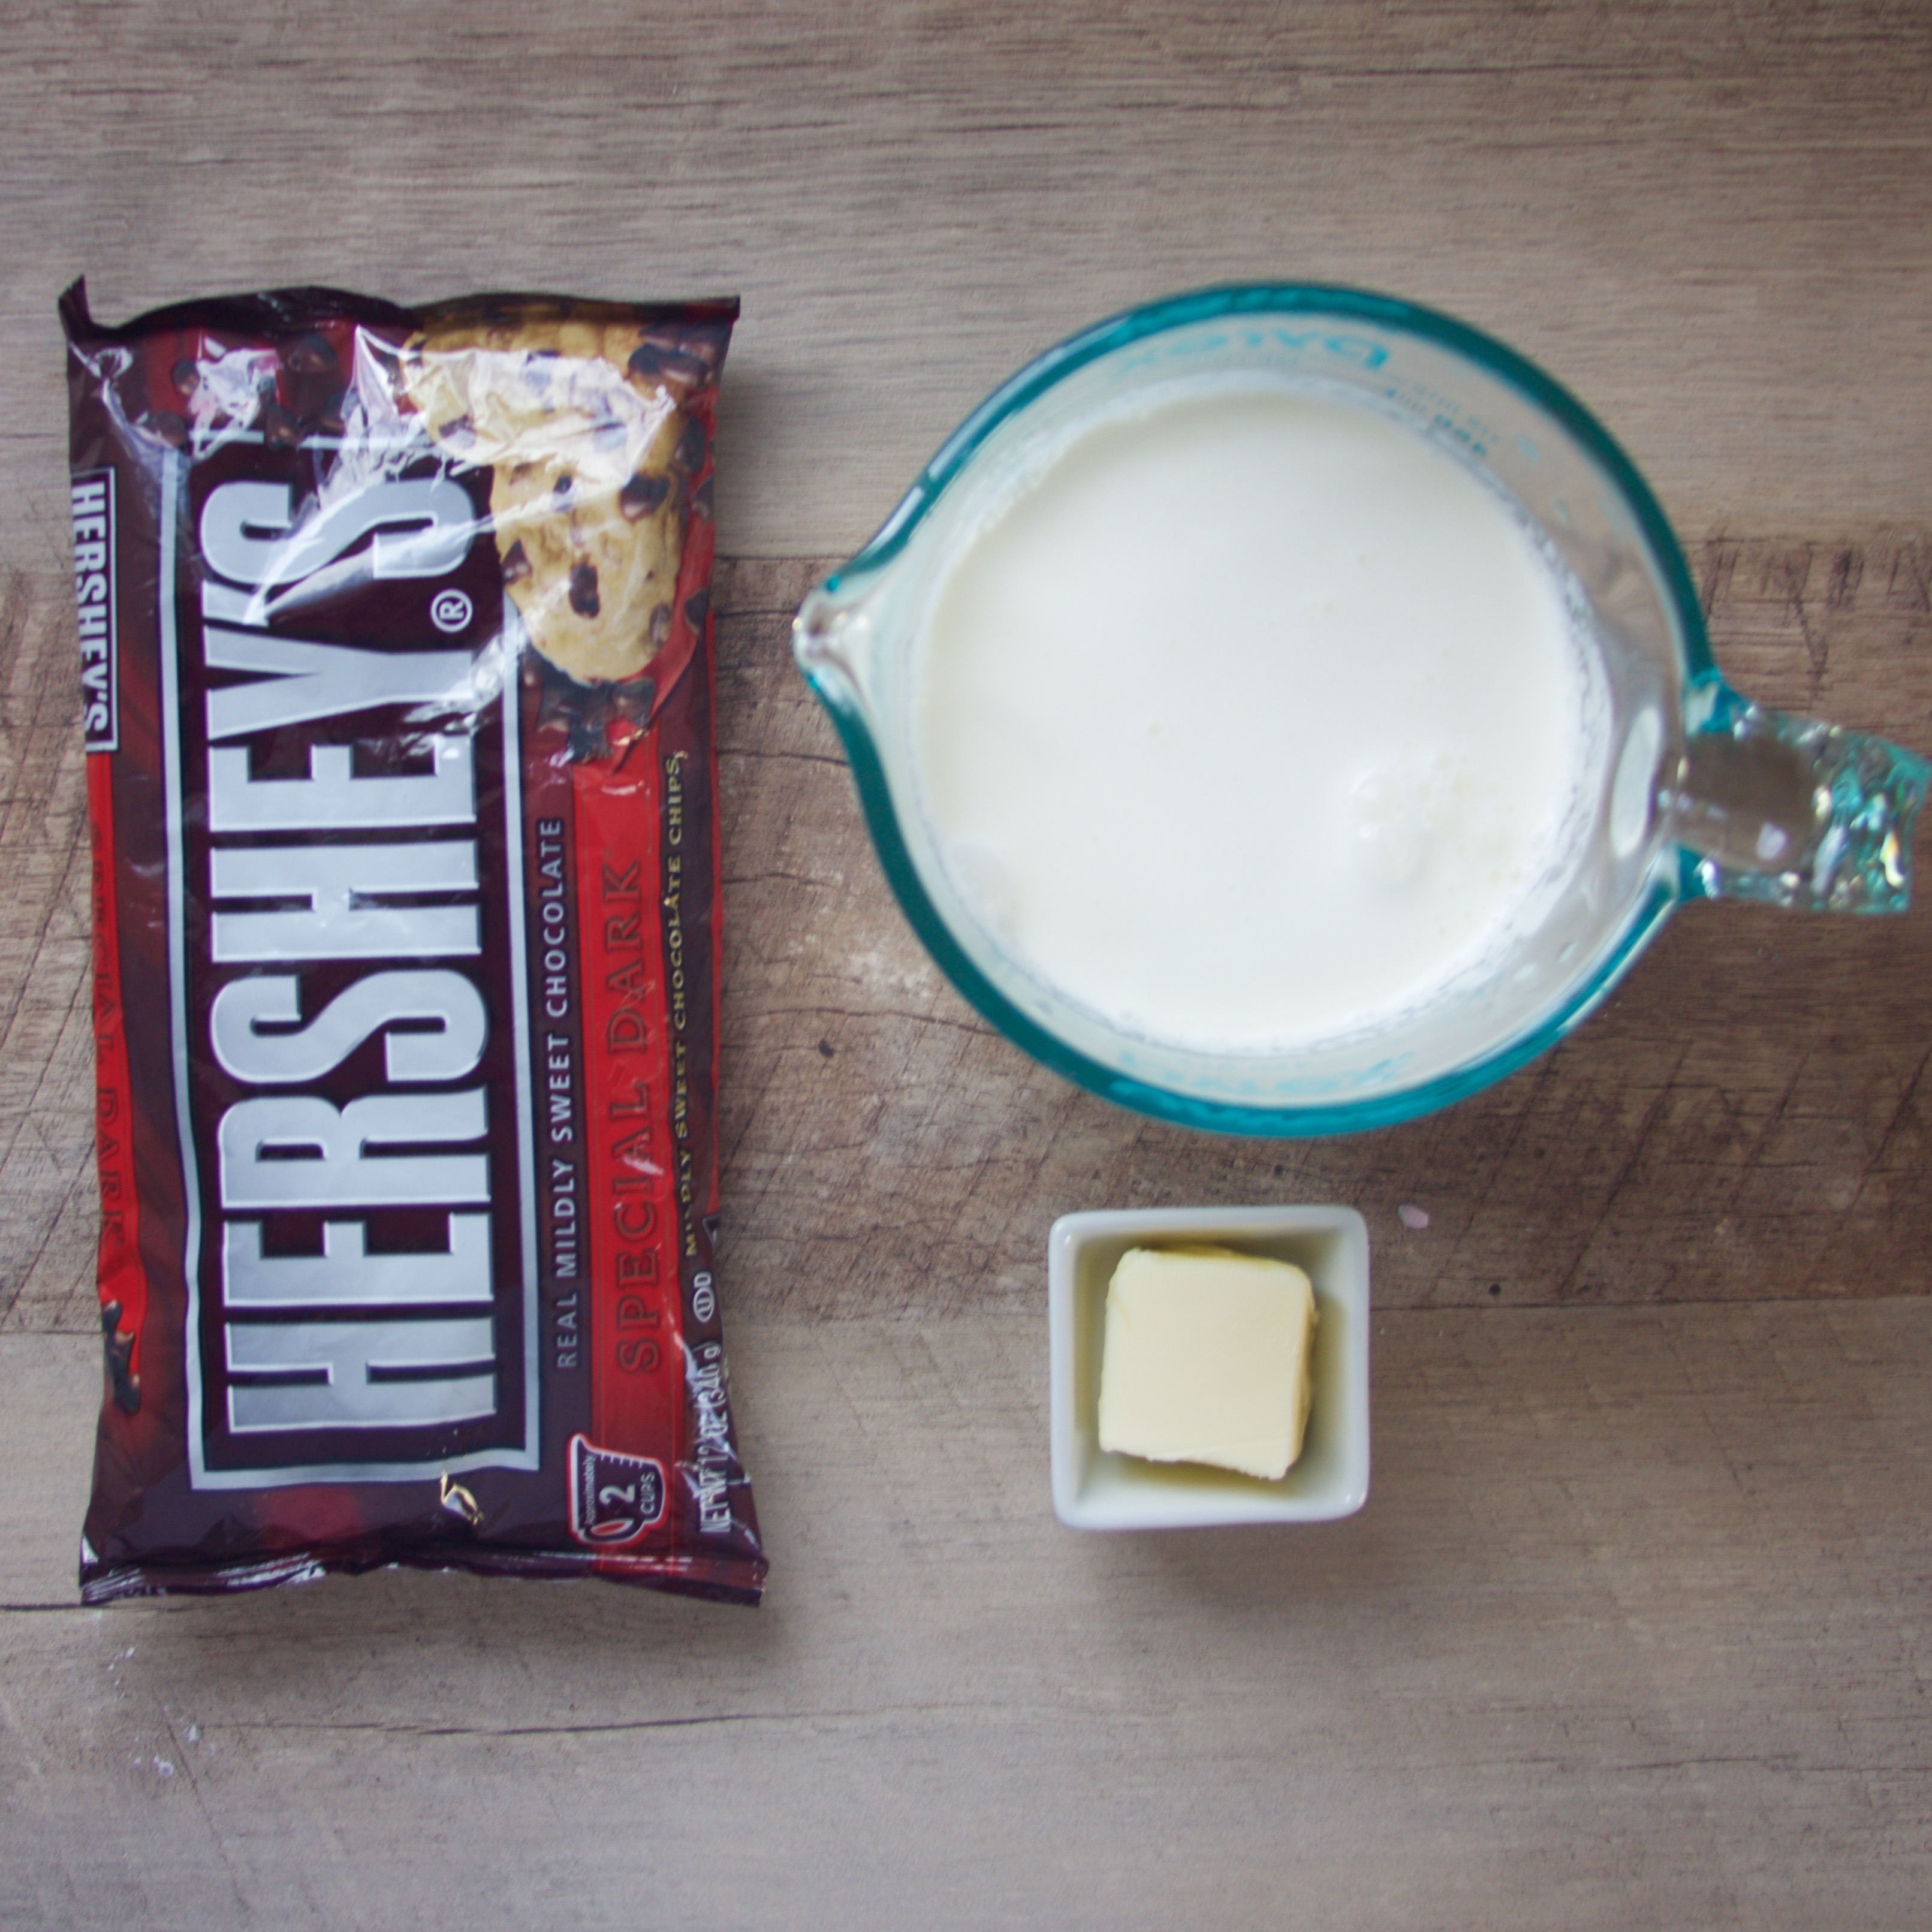
THE CHOCOLATE GANACHE
Tip: You want to make the ganache first because it has to cool for a while!
Step One.
Measure out your ingredients. Heat the heavy whipping cream in a pan or in the microwave until it is hot enough to steam a little bit but not boil. Add the chocolate chips to a sturdy mixing bowl, and pour the hot cream over the chocolate chips. whisk them together until they are melted. Whisk in the butter and stir until it is completely melted. Let it cool at room temperature until it is cool; then, let it cool in the fridge until it is the consistency of frosting.
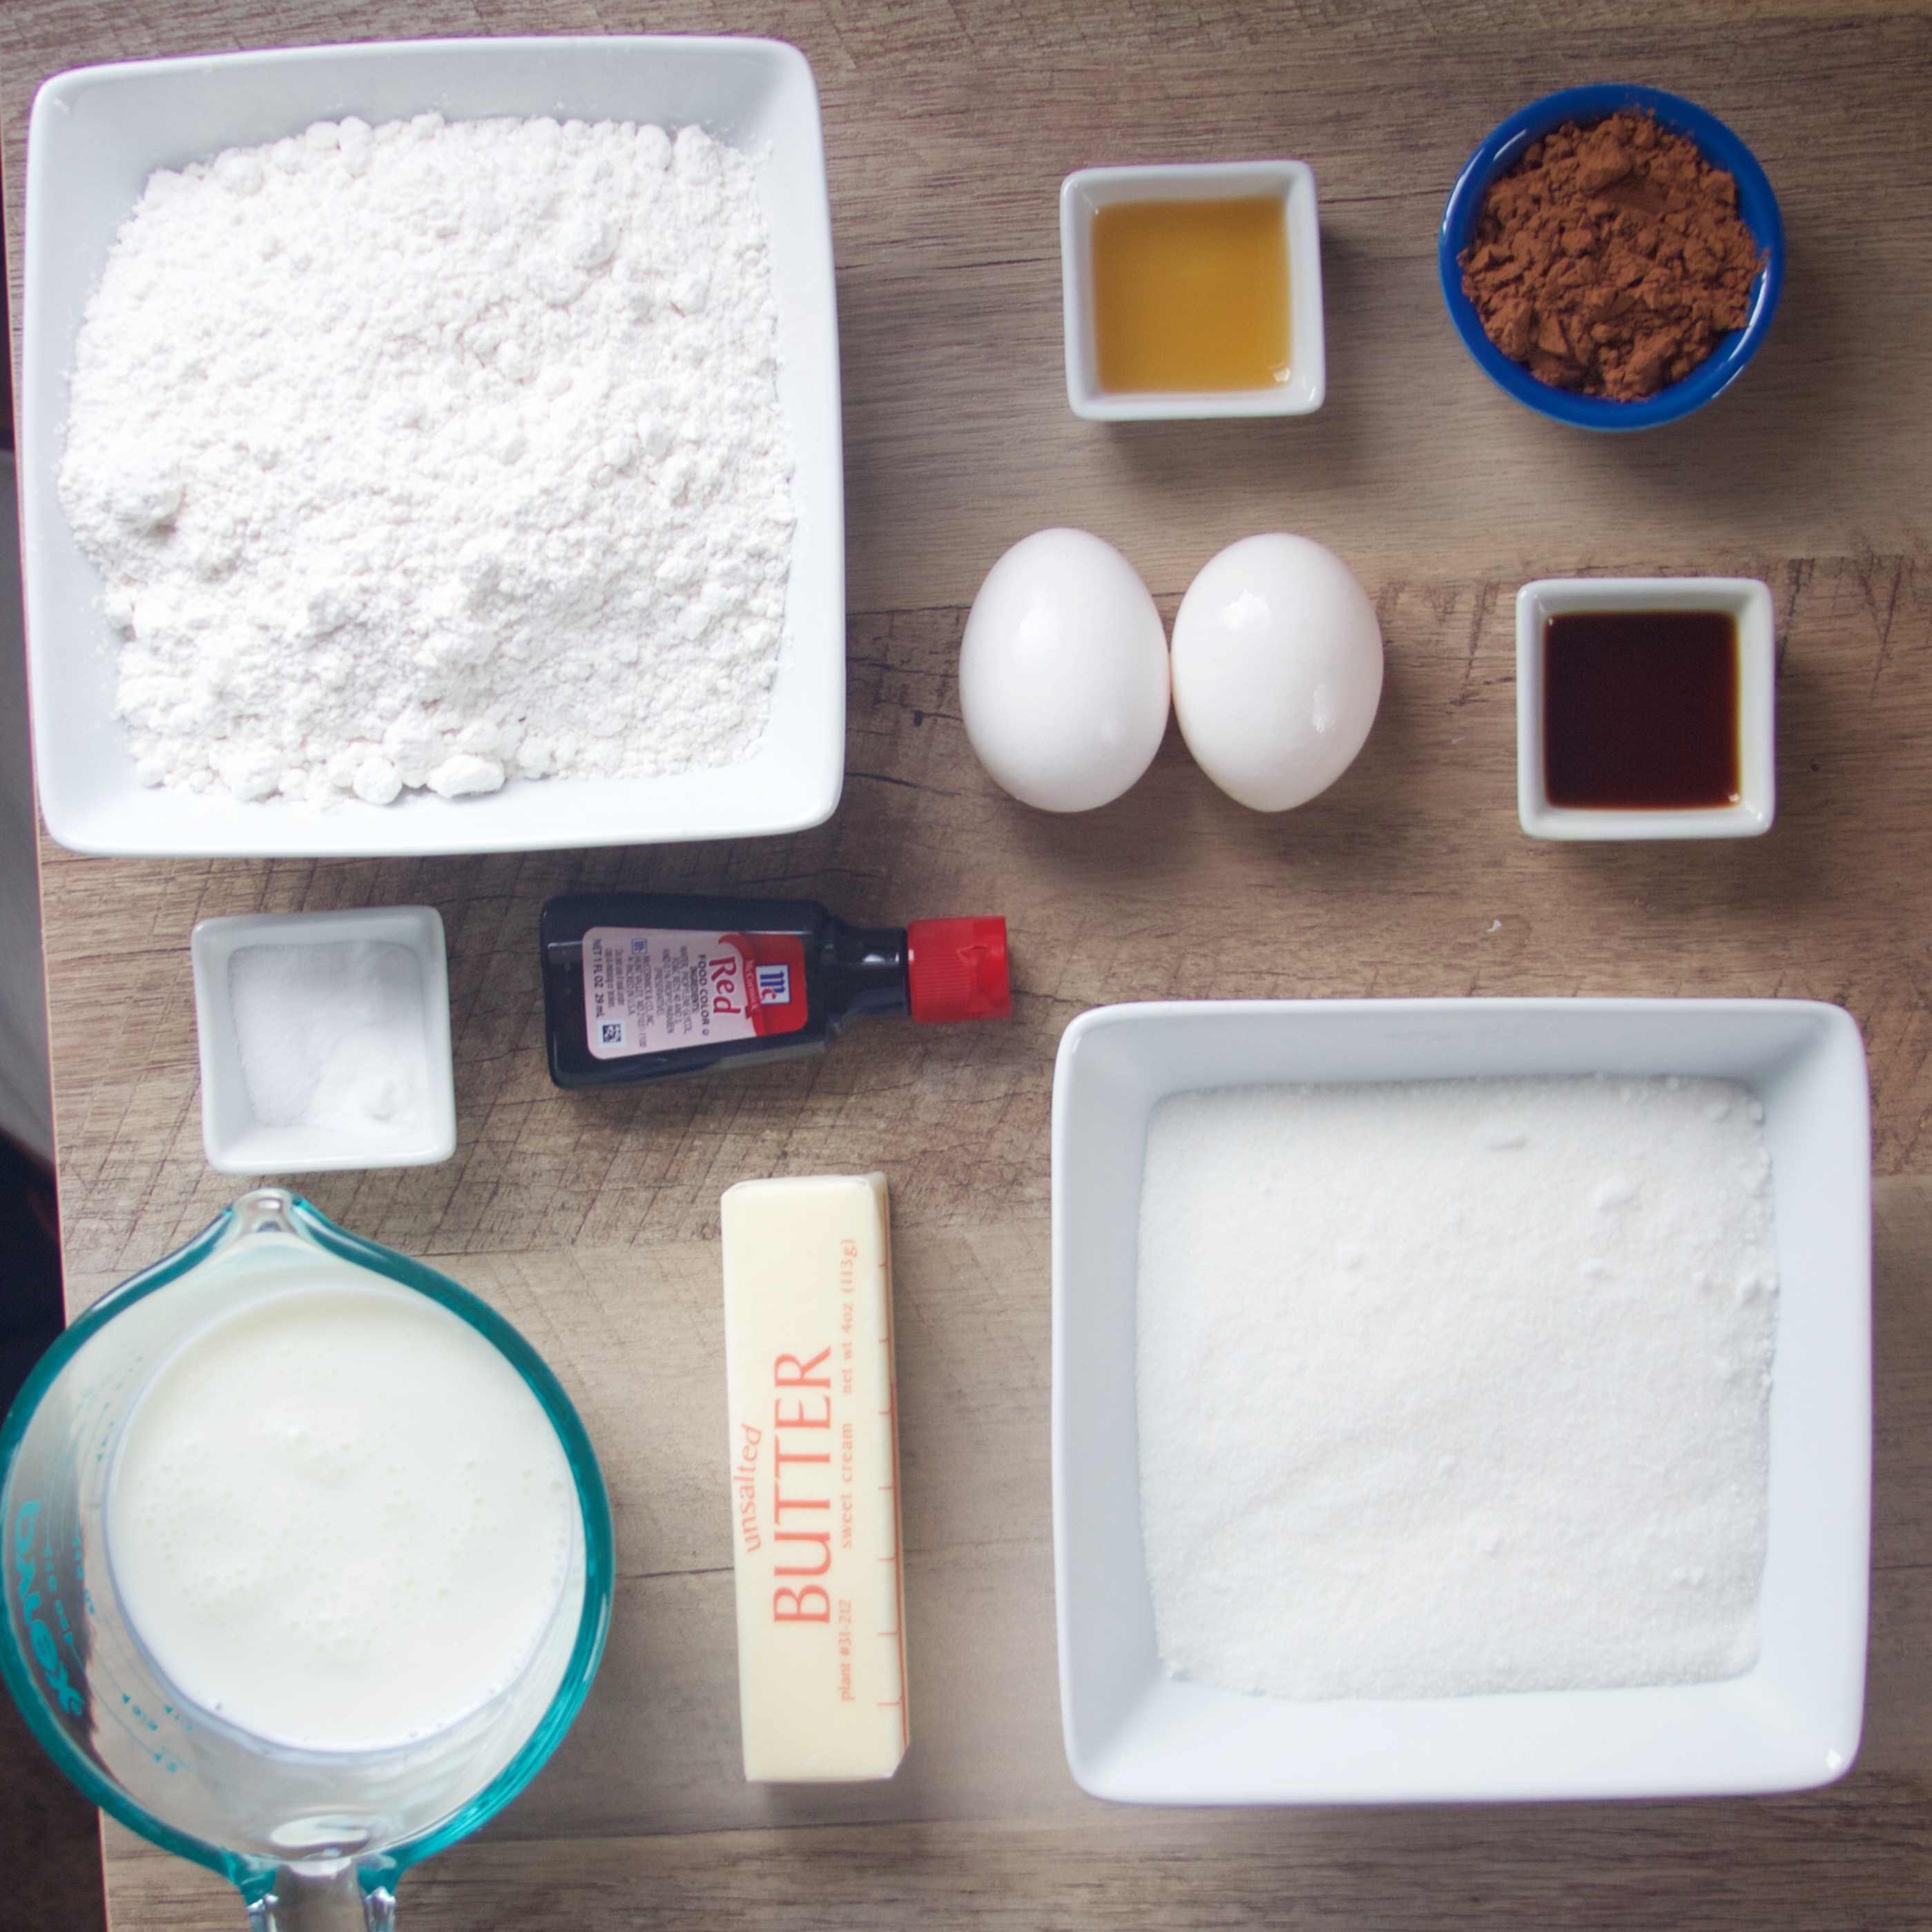
THE RED VELVET CAKE
Step One.
Measure out your ingredients. Cut out parchment to fit the bottoms of four cake pans. Preheat your oven to 350°F.
Step Two.
Mix the dry ingredients together in a bowl. In a mixing bowl, beat the butter on high speed for three minutes, until it is light-colored. Add the sugar to the bowl and beat on high for five minutes, until the mixture is light and fluffy. Scrape down the sides of the bowl.
Step Three.
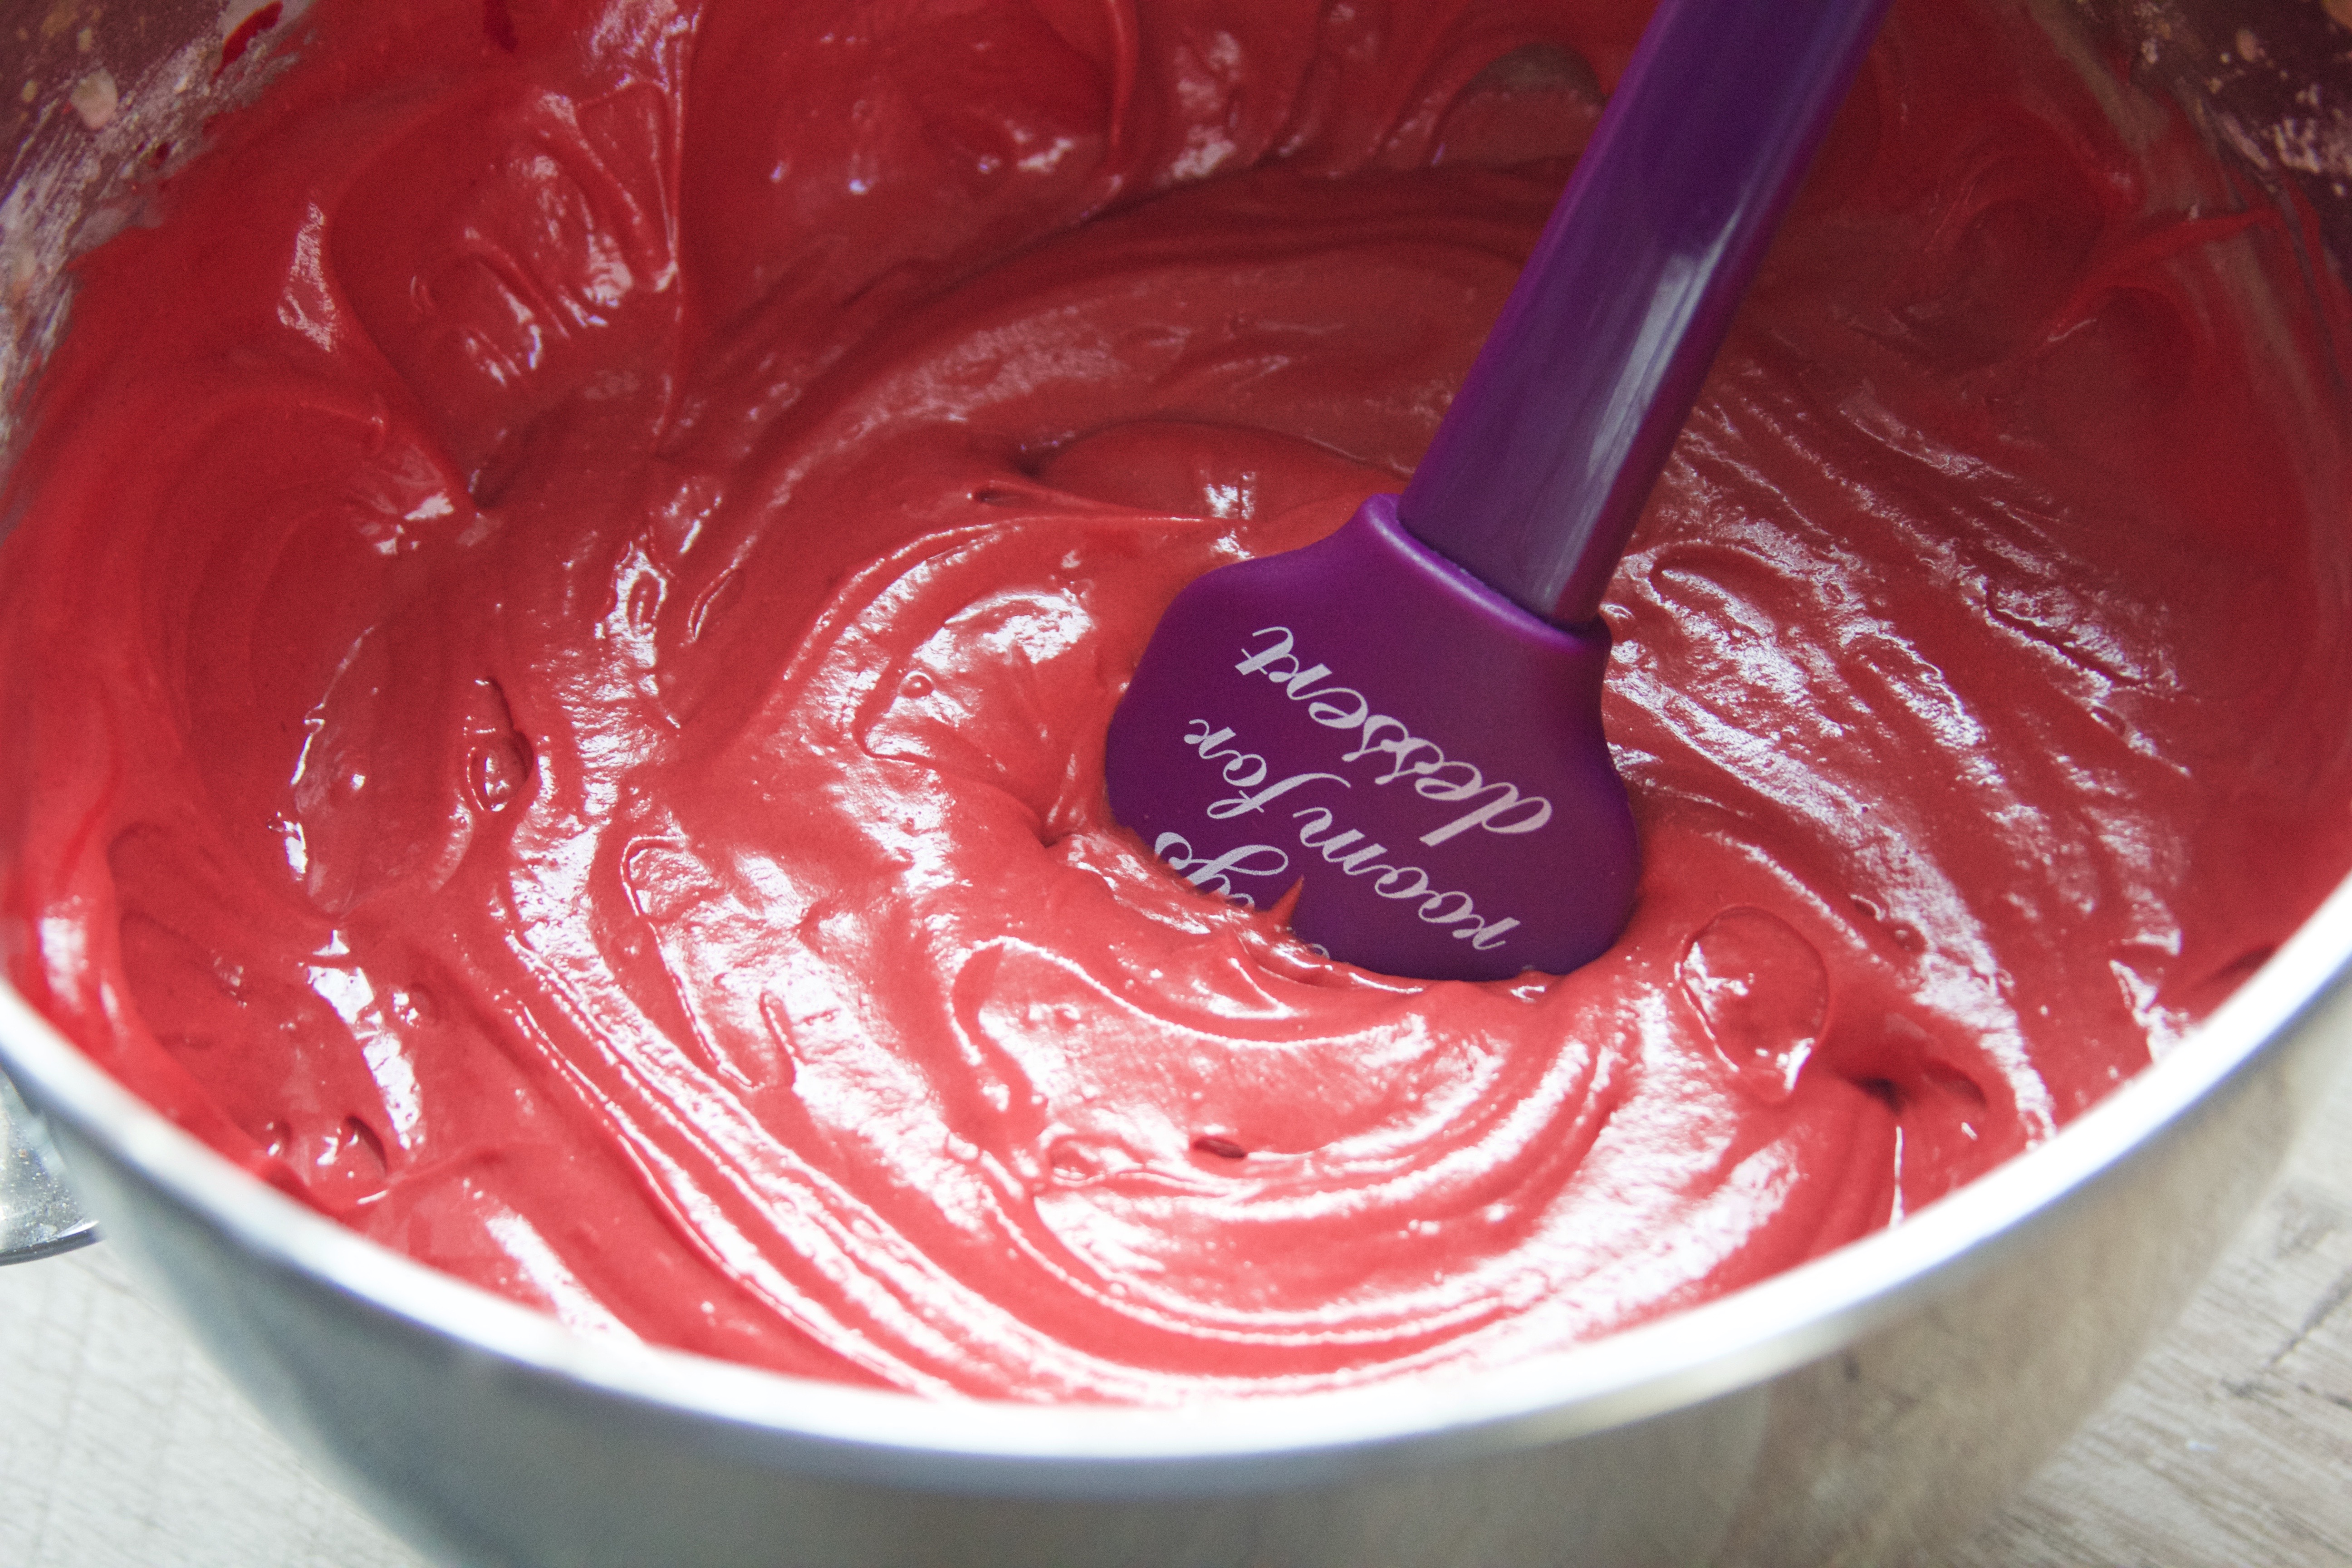
One by one, mix in the eggs on low speed. Add the vanilla and the vinegar and mix in on low speed. Now, working in batches, add the flour mixture and the buttermilk, alternating each. Mix in the red food coloring and beat on medium for one minute.
Step Four.
Add the batter evenly to the pans. Bake at 350°F for about 20 minutes, or until a toothpick inserted in the middle comes out clean. Let the cakes cool to room temperature.
THE WHITE CHOCOLATE MOUSSE
Step One.
Prep your ingredients. Melt the white chocolate in the microwave at 30 second intervals until it is smooth.
Step Two.
Add the heavy whipping cream to a bowl and beat on high for two minutes, until it starts to become fluffy. Add in the powdered sugar and beat until stiff peaks form.
Step Three.
Mix a little of the whipped cream into the chocolate. Next, add that to the bowl of whipped cream and stir in with a spatula. Set aside for assembly.
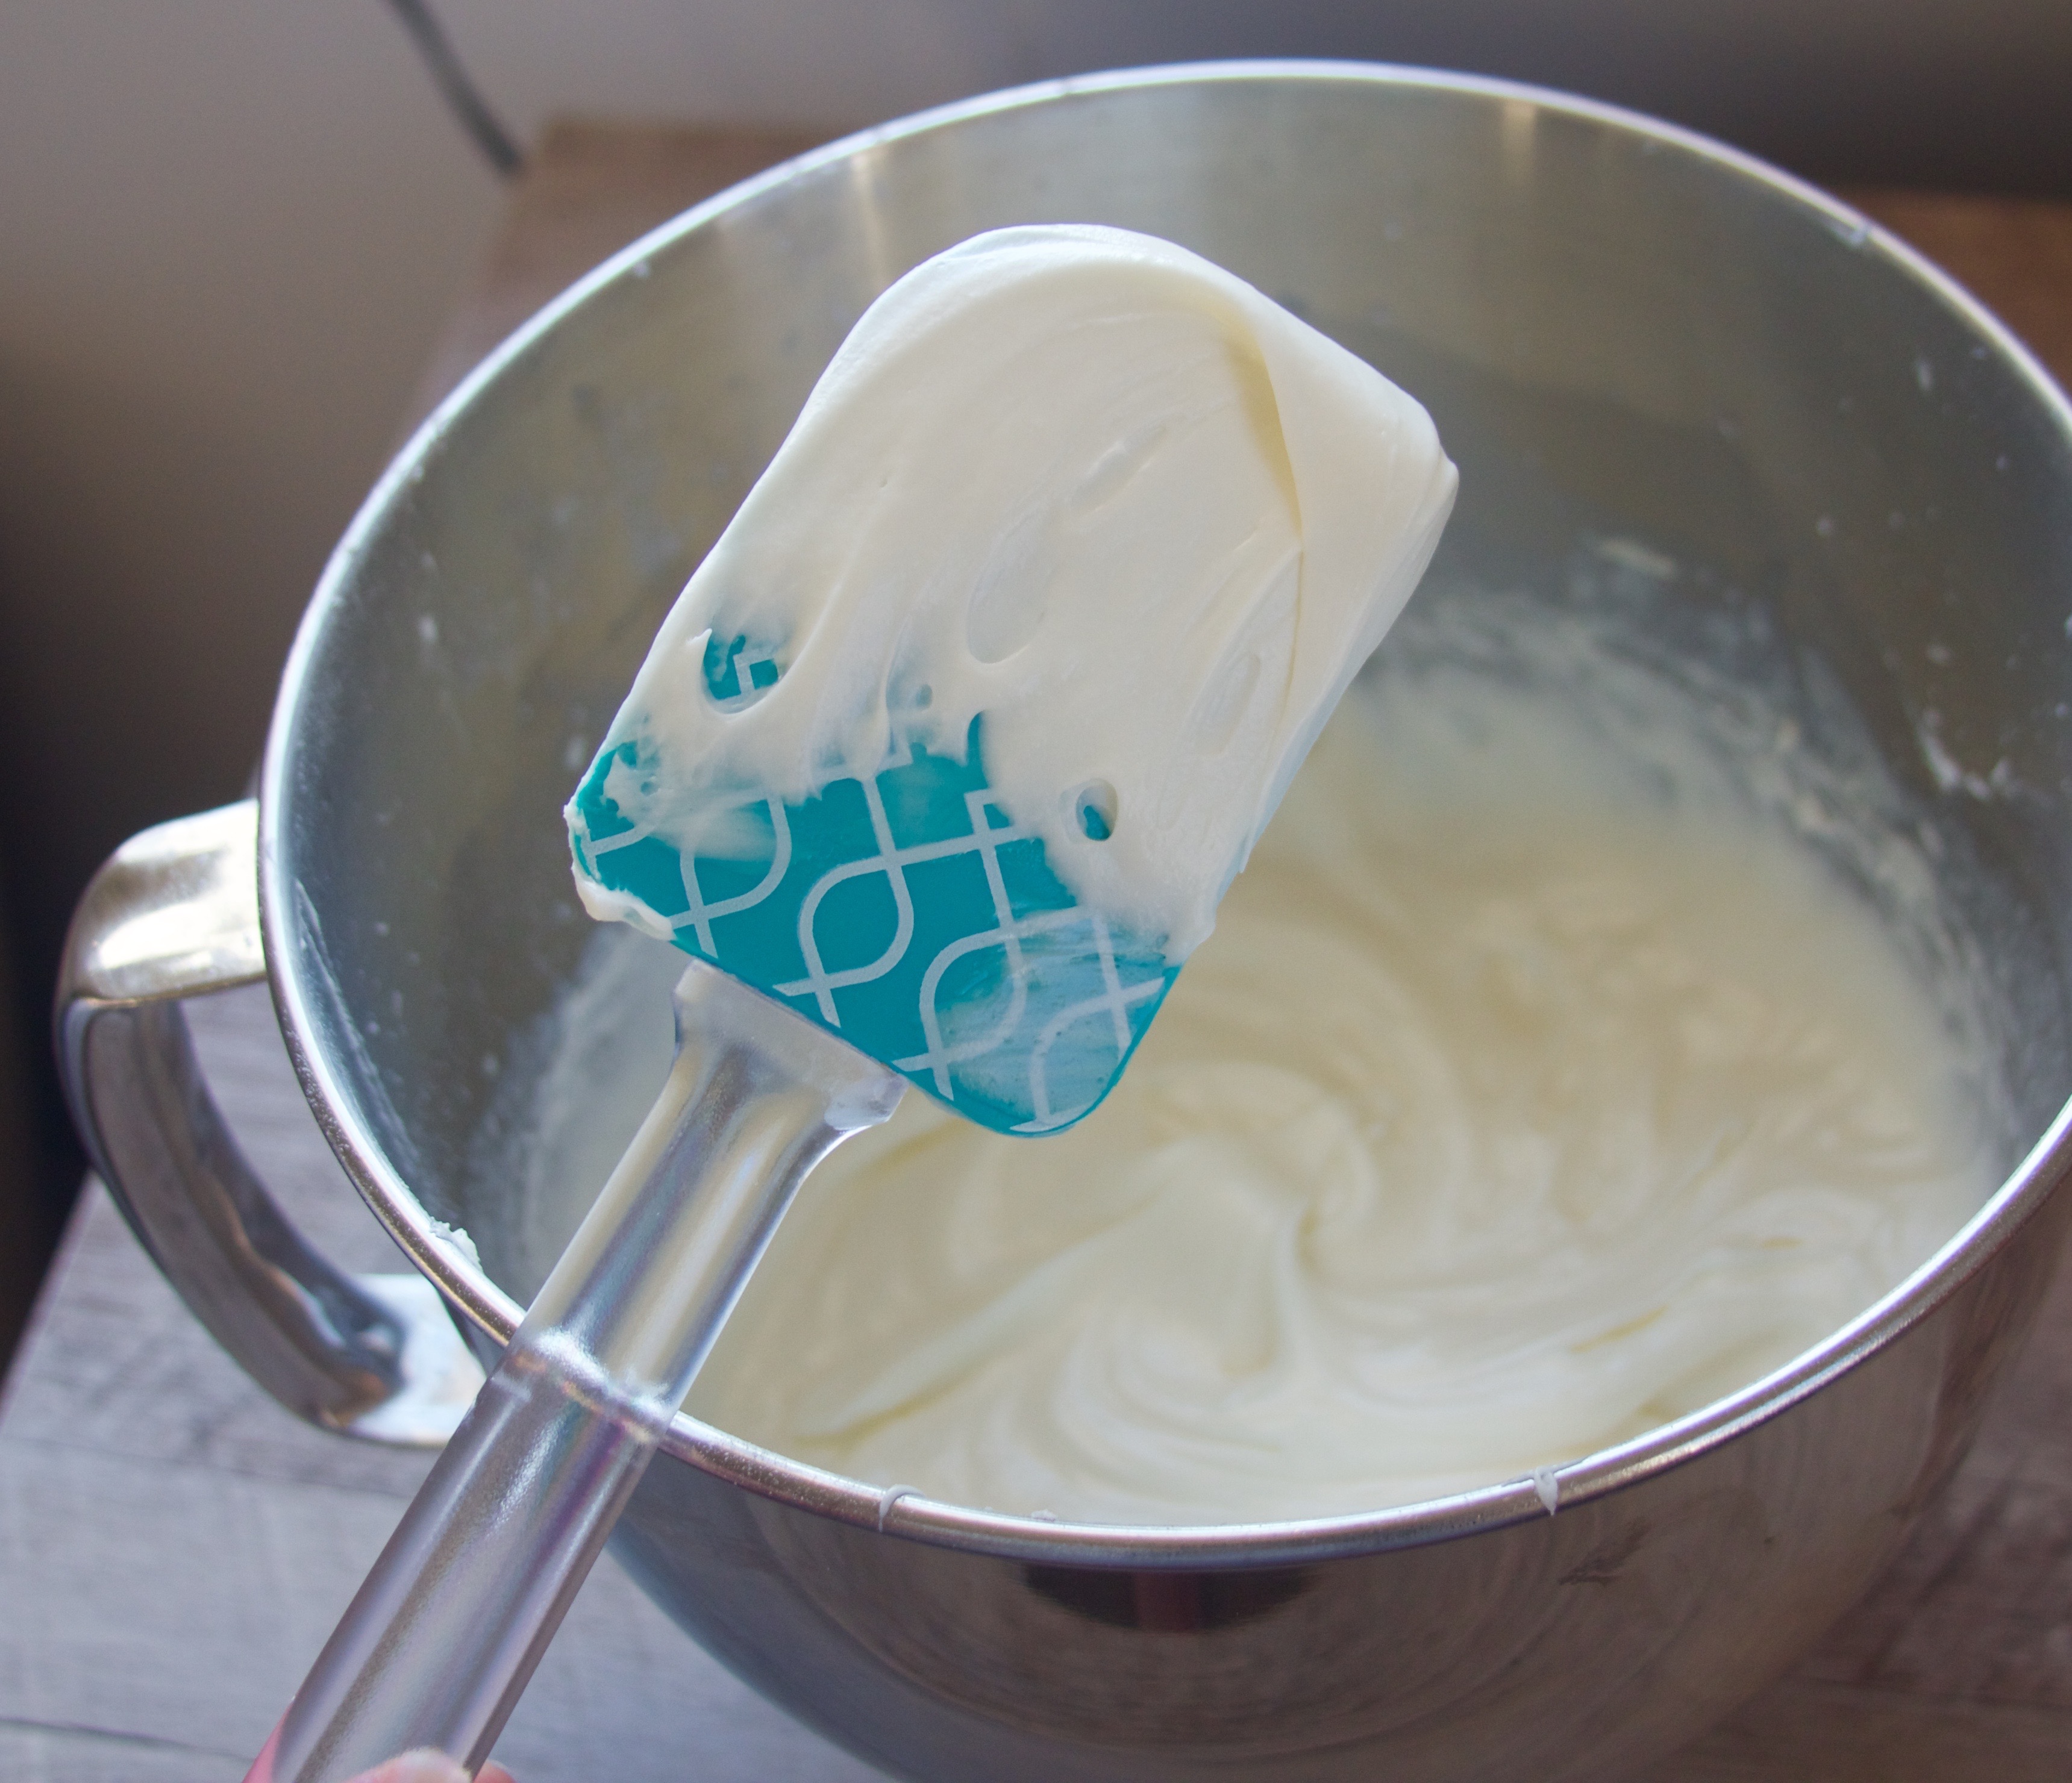
THE CREAM CHEESE FROSTING
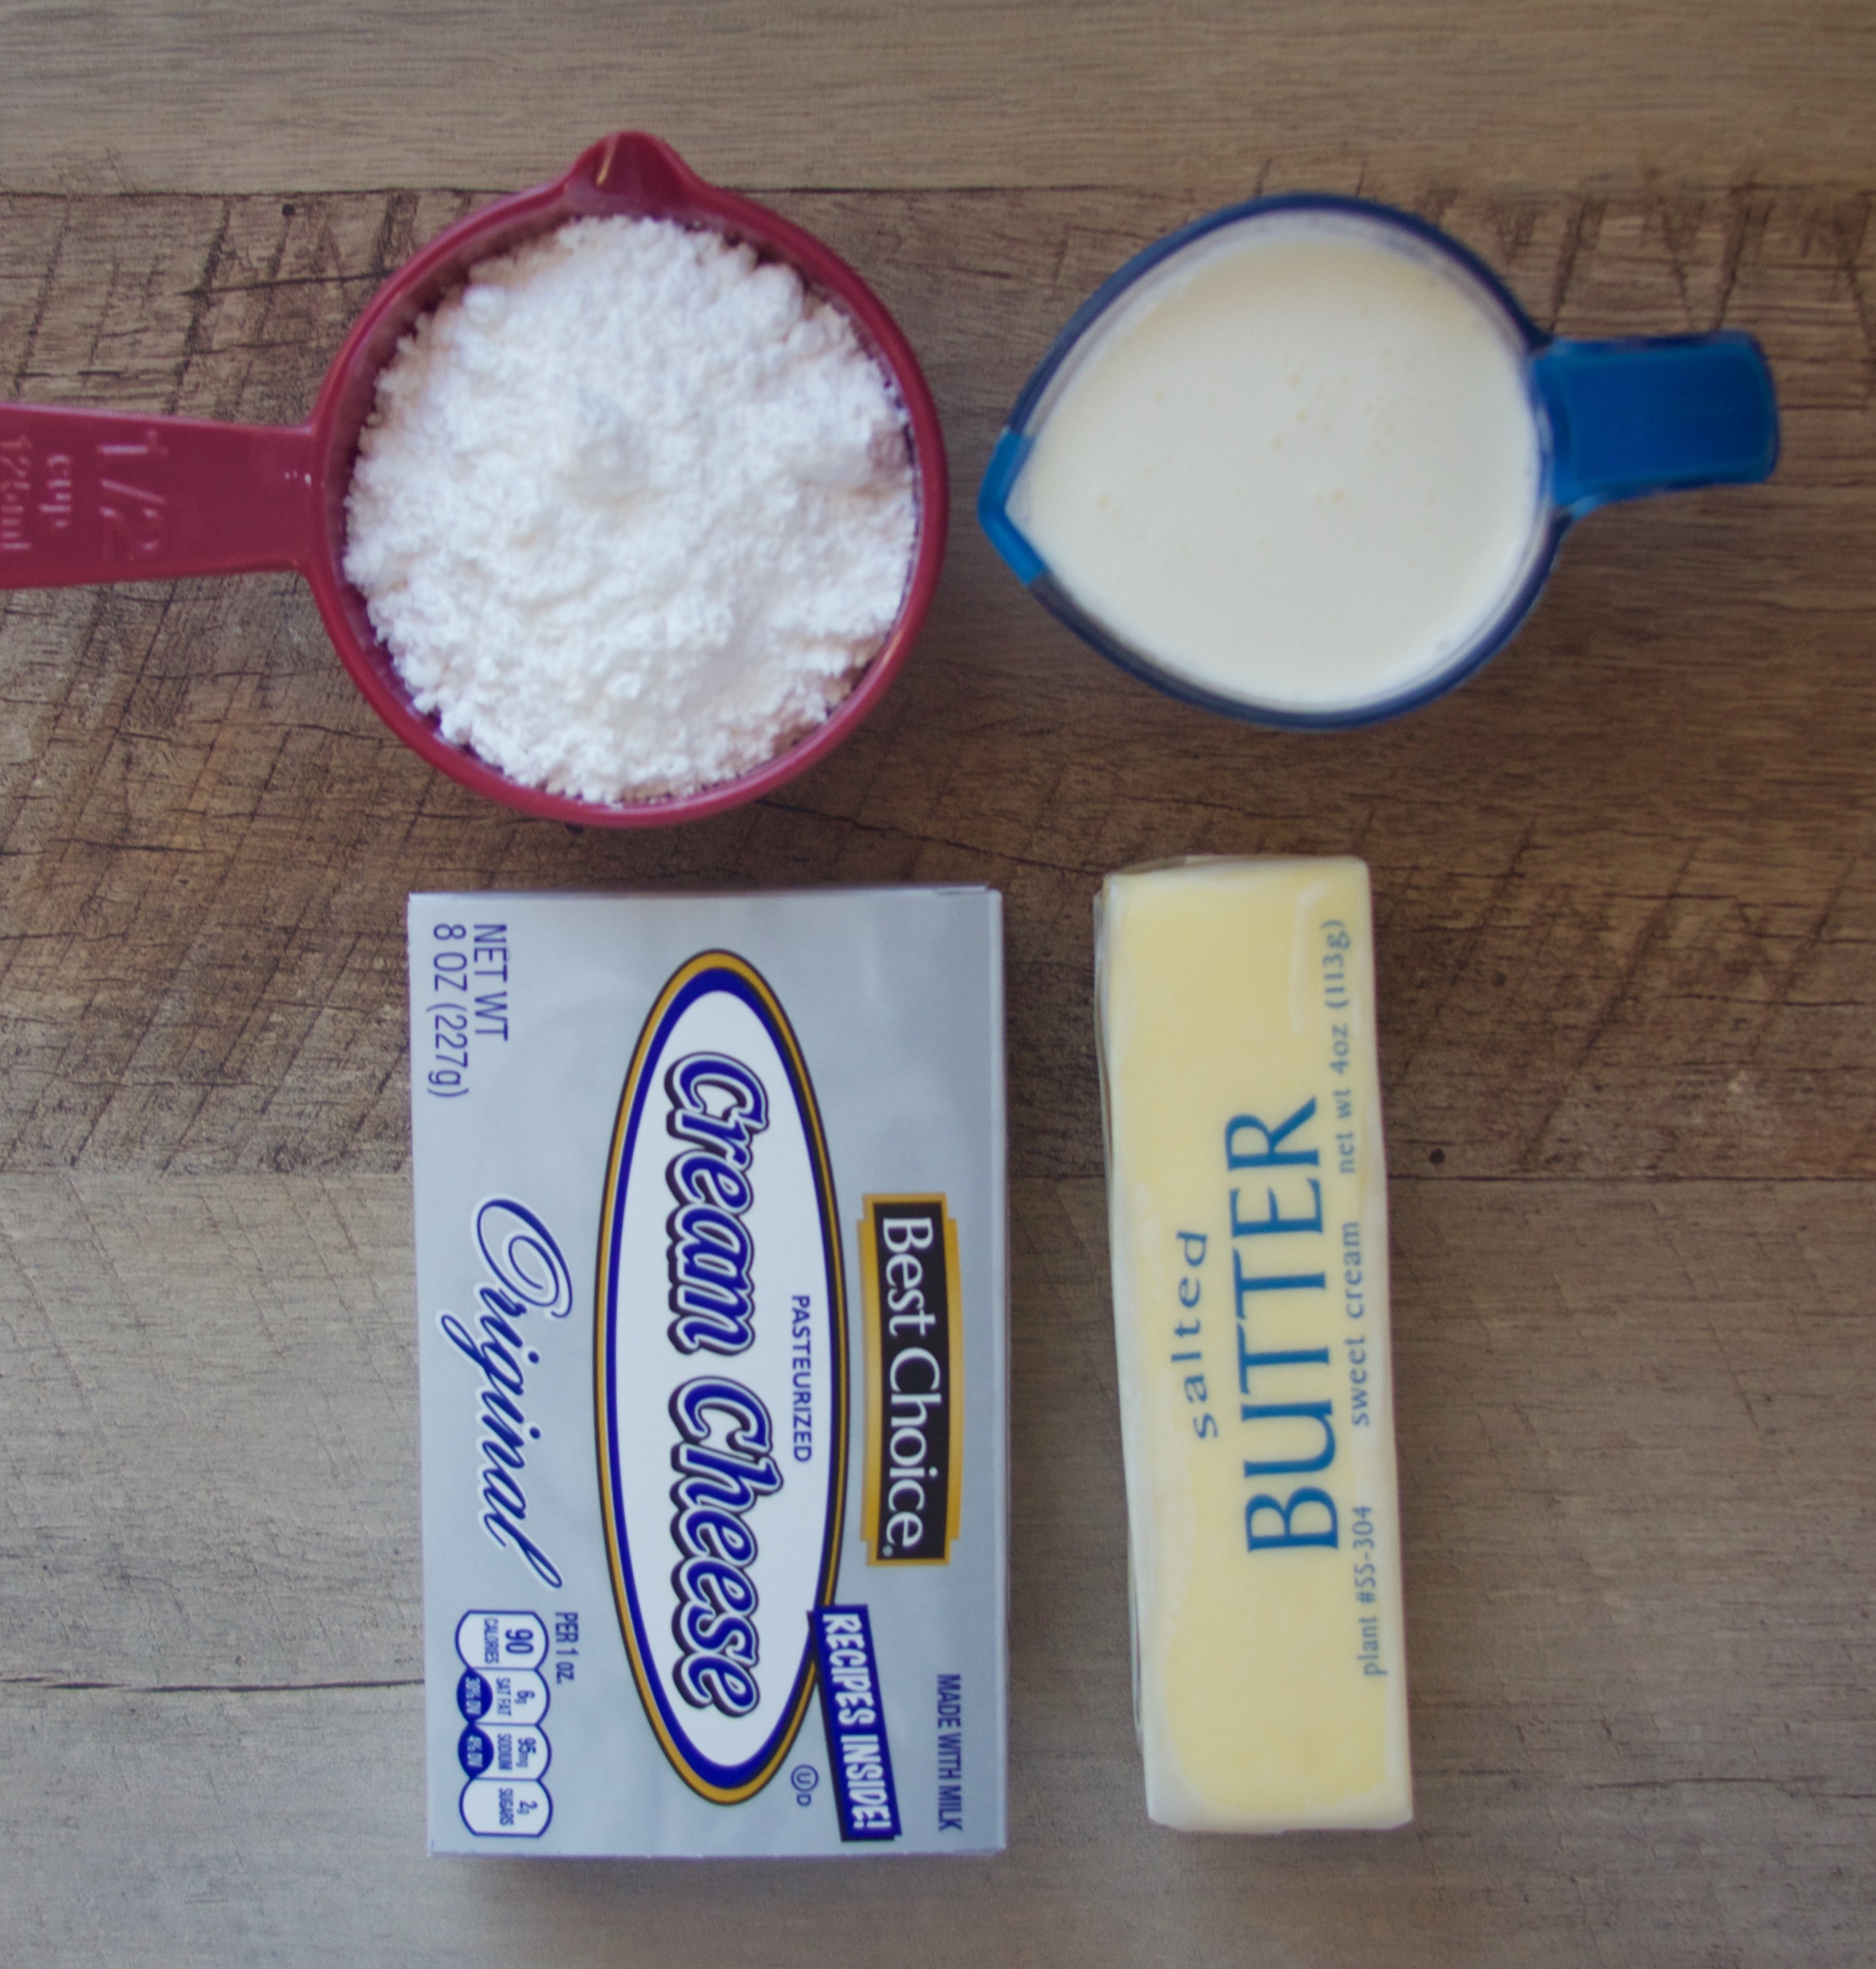
Step One.
Prep your ingredients. Beat the butter and the cream cheese in a mixer on high speed for two minutes.
Step Two.
Slowly beat in the powdered sugar, 1 cup at a time, until it is all incorporated. Add the heavy whipping cream and beat on high for another five minutes, until it is thoroughly whipped.
ASSEMBLE THE CAKE
Step One.
Place the first layer of the cake on a decorating turntable (or another plate, if you don’t have one!). Add 1/3 of the mousse to the top. Repeat with the other layers until the cake is complete.
Step Two.
With a frosting spatula, coat the outside of the cake in a “crumb layer.” This is a thin layer of frosting that will seal in the mousse and any crumbs from the cake. Refrigerate the cake for about an hour; this will make it easier to spread the ganache.
Step Three.
With a frosting spatula, carefully spread the ganache on. Decorate with flowers, sprinkles, whatever you want! Serve with a smile to your Valentine!

This over-the-top red velvet cake is the perfect way to say "I love you" to your special someone!
Ingredients
- THE CHOCOLATE GANACHE
- 12 oz special dark chocolate chips
- 1 3/4 cups heavy whipping cream
- 1 Tbsp unsalted butter
- THE RED VELVET CAKE
- 1/2 cup unsalted butter, softened
- 1 1/2 cups granulated sugar
- 2 eggs
- 1 Tablespoon apple cider vinegar
- 1 Tablespoon vanilla extract
- 2 1/2 cups cake flour
- 2 Tbsp cocoa powder
- 1 tsp salt
- 1 tsp baking powder
- 1 cup buttermilk
- 1 bottle red food coloring
- THE WHITE CHOCOLATE MOUSSE
- 12 oz white chocolate chips
- 2 cups heavy whipping cream
- 1/2 cup powdered sugar
- THE CREAM CHEESE FROSTING
- 8 oz cream cheese, softened
- 1/2 cup butter, softened
- 4 cups powdered sugar
- 1/4 cup heavy whipping cream
Instructions
- THE CHOCOLATE GANACHE
- Measure out your ingredients. Heat the heavy whipping cream in a pan or in the microwave until it is hot enough to steam a little bit but not boil. Add the chocolate chips to a sturdy mixing bowl, and pour the hot cream over the chocolate chips. whisk them together until they are melted. Whisk in the butter and stir until it is completely melted. Let it cool at room temperature until it is cool; then, let it cool in the fridge until it is the consistency of frosting.
- THE RED VELVET CAKE
- Measure out your ingredients. Cut out parchment to fit the bottoms of four cake pans. Preheat your oven to 350°F.
- Mix the dry ingredients together in a bowl. In a mixing bowl, beat the butter on high speed for three minutes, until it is light-colored. Add the sugar to the bowl and beat on high for five minutes, until the mixture is light and fluffy. Scrape down the sides of the bowl.
- One by one, mix in the eggs on low speed. Add the vanilla and the vinegar and mix in on low speed. Now, working in batches, add the flour mixture and the buttermilk, alternating each. Mix in the red food coloring and beat on medium for one minute.
- Add the batter evenly to the pans. Bake at 350°F for about 20 minutes, or until a toothpick inserted in the middle comes out clean. Let the cakes cool to room temperature.
- THE WHITE CHOCOLATE MOUSSE
- Prep your ingredients. Melt the white chocolate in the microwave at 30 second intervals until it is smooth.
- Add the heavy whipping cream to a bowl and beat on high for two minutes, until it starts to become fluffy. Add in the powdered sugar and beat until stiff peaks form.
- Mix a little of the whipped cream into the chocolate. Next, add that to the bowl of whipped cream and stir in with a spatula. Set aside for assembly.
- THE CREAM CHEESE FROSTING
- Prep your ingredients. Beat the butter and the cream cheese in a mixer on high speed for two minutes.
- Slowly beat in the powdered sugar, 1 cup at a time, until it is all incorporated. Add the heavy whipping cream and beat on high for another five minutes, until it is thoroughly whipped.
- ASSEMBLE THE CAKE
- Place the first layer of the cake on a decorating turntable (or another plate, if you don't have one!). Add 1/3 of the mousse to the top. Repeat with the other layers until the cake is complete.
- With a frosting spatula, coat the outside of the cake in a "crumb layer." This is a thin layer of frosting that will seal in the mousse and any crumbs from the cake. Refrigerate the cake for about an hour; this will make it easier to spread the ganache.
- With a frosting spatula, carefully spread the ganache on. Decorate with flowers, sprinkles, whatever you want! Serve with a smile to your Valentine!

Peppermint bark is one of my favorite parts of the holidays. I enjoy white chocolate year round – a little too much, probably – but there is something special for me about white chocolate with crunchy peppermint on top.
I think my true obsession with it blossomed in high school. I fondly remember studying for exams with a cup of coffee and peppermint bark next to me and the Christmas tree. Add some fluffy, falling snow, and I am in nostalgia heaven. An added bonus was that my brother hated (and still does) peppermint bark. Something about the sticky candy in his teeth. More for me!
But I can understand that some people feel guilty about eating exorbitant amounts of pure sugar. These cookies try to make a compromise. Since the peppermint bark decorates a cookie, it is easier to coerce yourself into taking just one! And the brownie cookies that support this glorious peppermint bark are a chocolate dream. They are thick and gooey but not so overwhelming that you wish you had stuck with just an after-dinner mint.
Make sure that these cookies have a place on your holiday table or at your next cookie exchange party! Direct the fans to Adventures of a Frostaholic © so that they can share the deliciousness!

~~~~~~~~~~
Step One.
Prep Step! Measure out all of your ingredients.

Step Two.
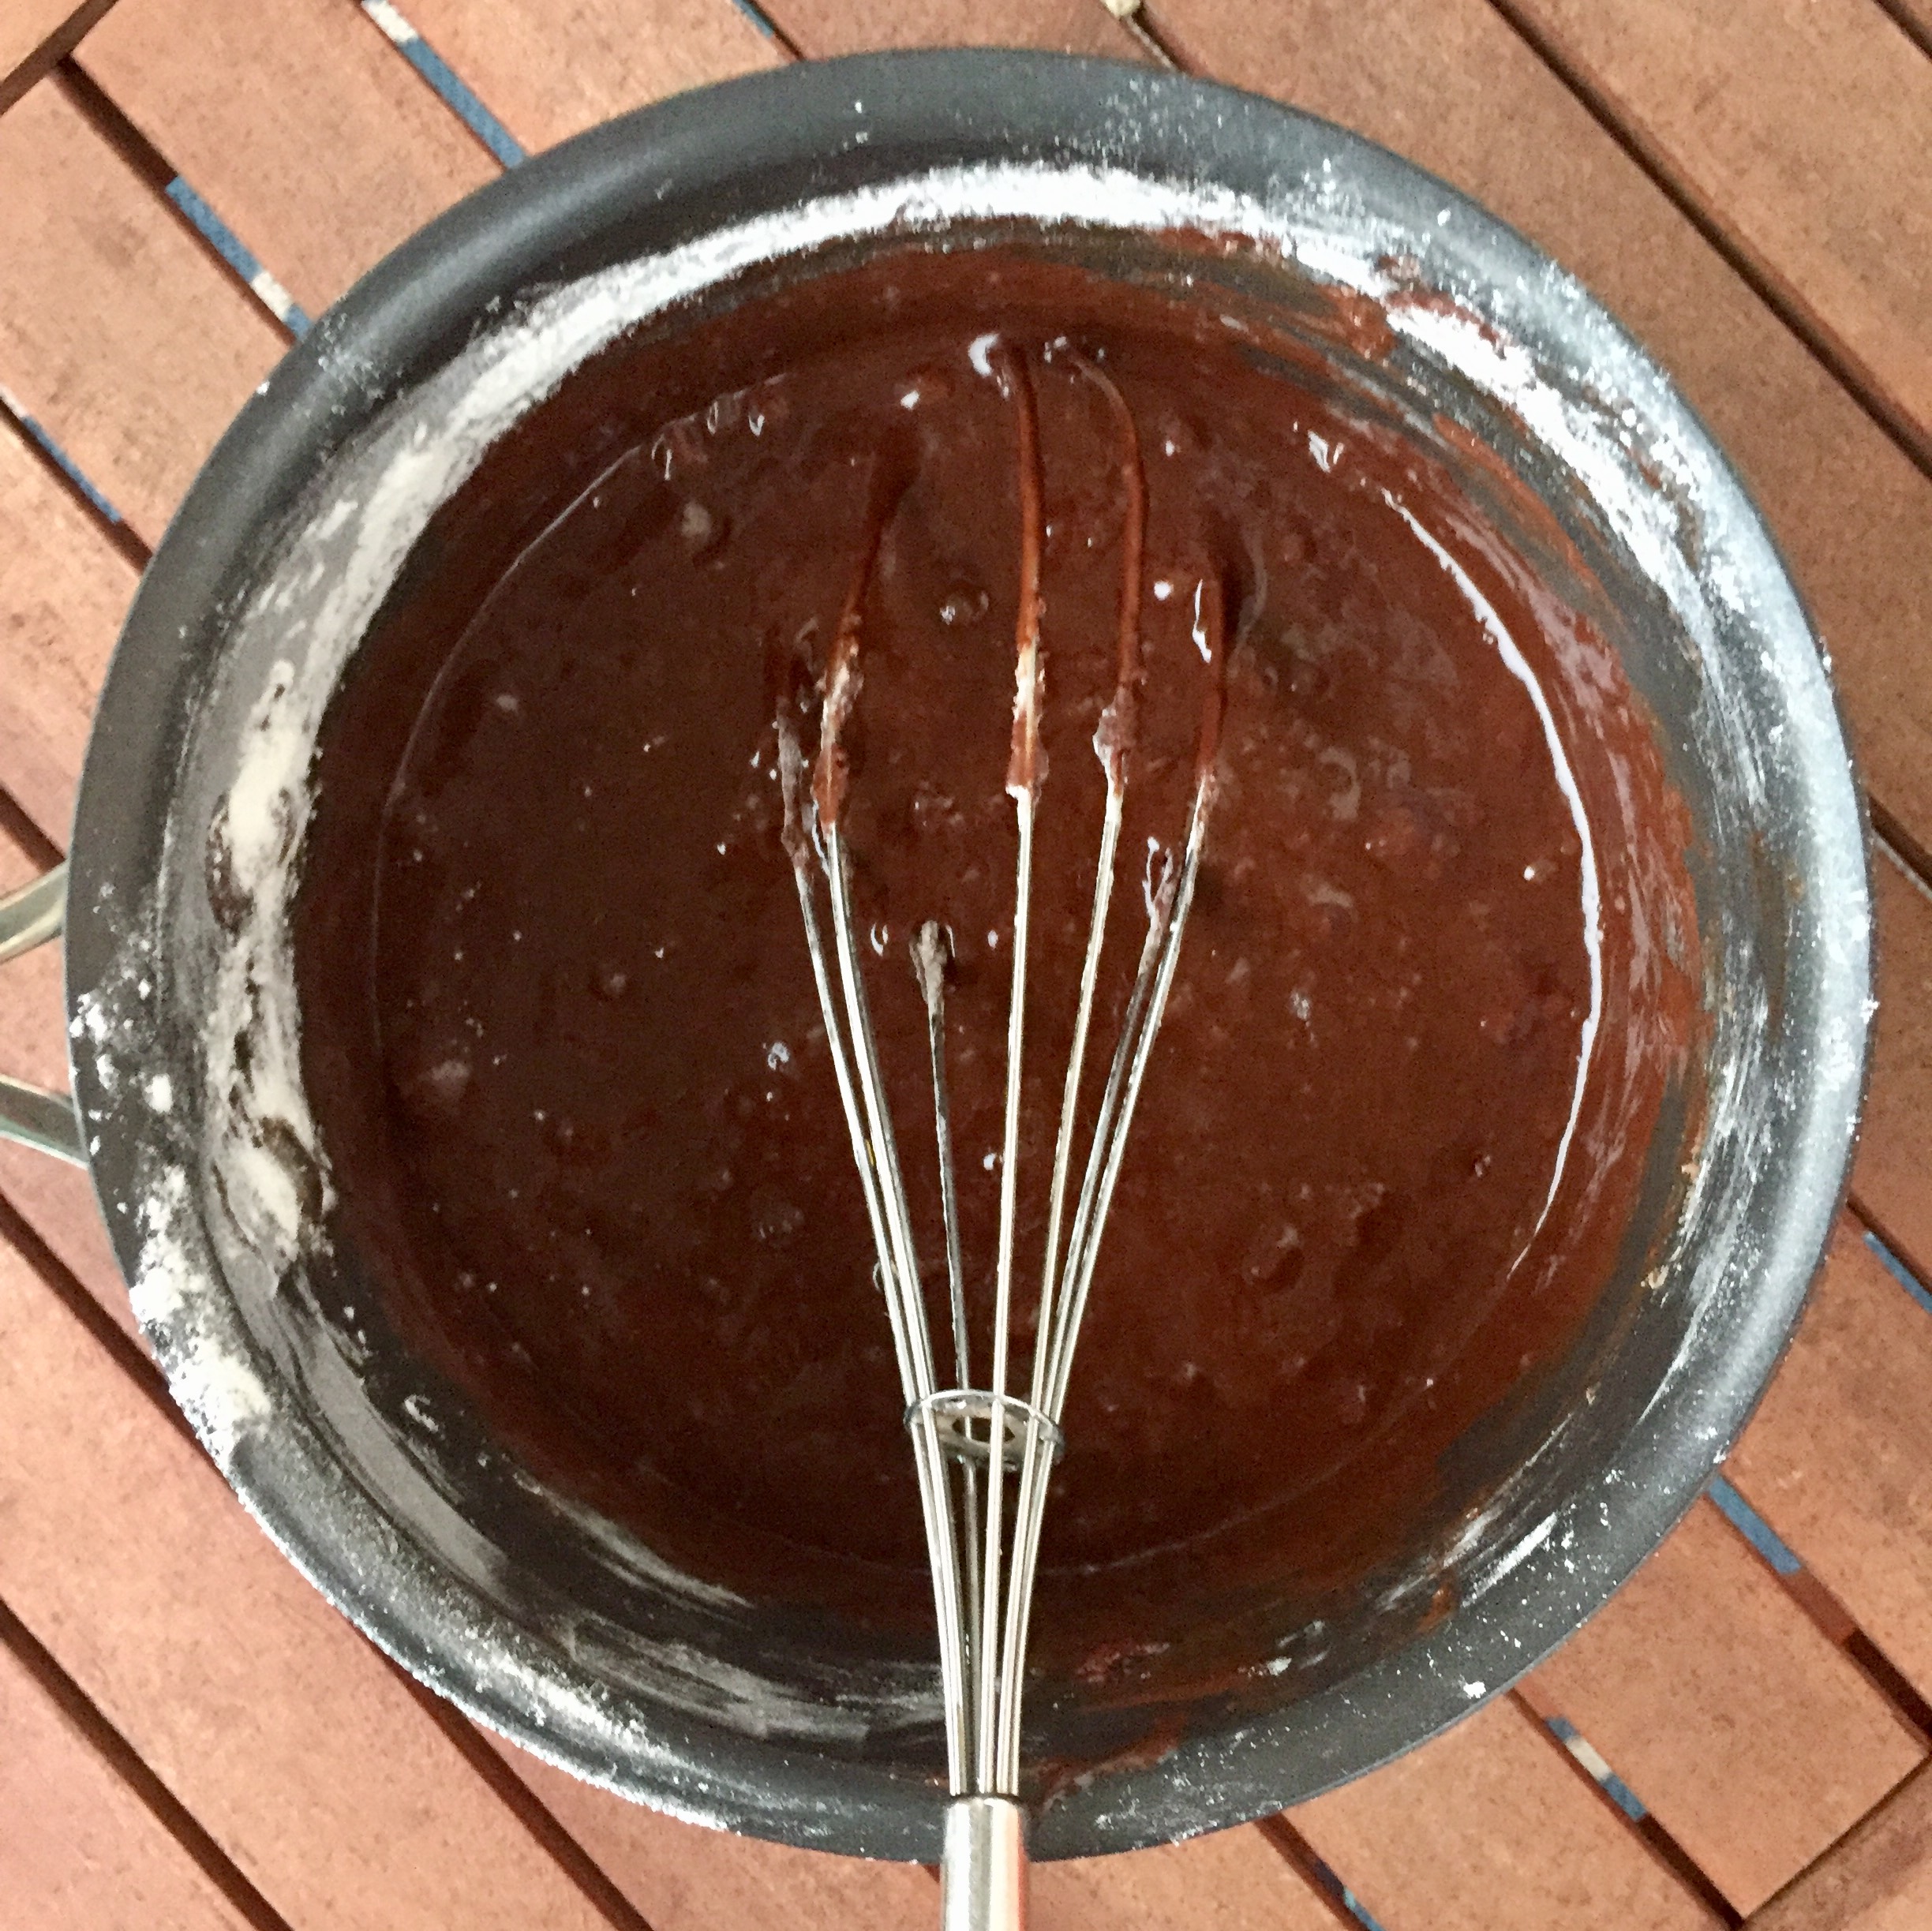
In a double-boiler (or a bowl over a pot of simmering water), melt the chocolate and the butter. Let the chocolate mixture cool.
Step Three.
In a small bowl, mix the dry ingredients (flour, baking powder, and salt).
In a stand mixer on medium-high speed, beat the eggs and sugar together until light in color. Mix in the vanilla. Slowly incorporate the cooled chocolate mixture. Finally, fold in the dry ingredients until incorporated.
Step Four.
Chill the batter for an hour or until firm. When the time is almost up, preheat your oven to 350°F and line a baking sheet with parchment paper.
Step Five.
Scoop dough with a Tablespoon and place balls of dough on the baking sheet. Bake at 350°F for about 10-12 minutes, or until the cookies resemble a crackled brownie. Set the cookies on a rack to cool.
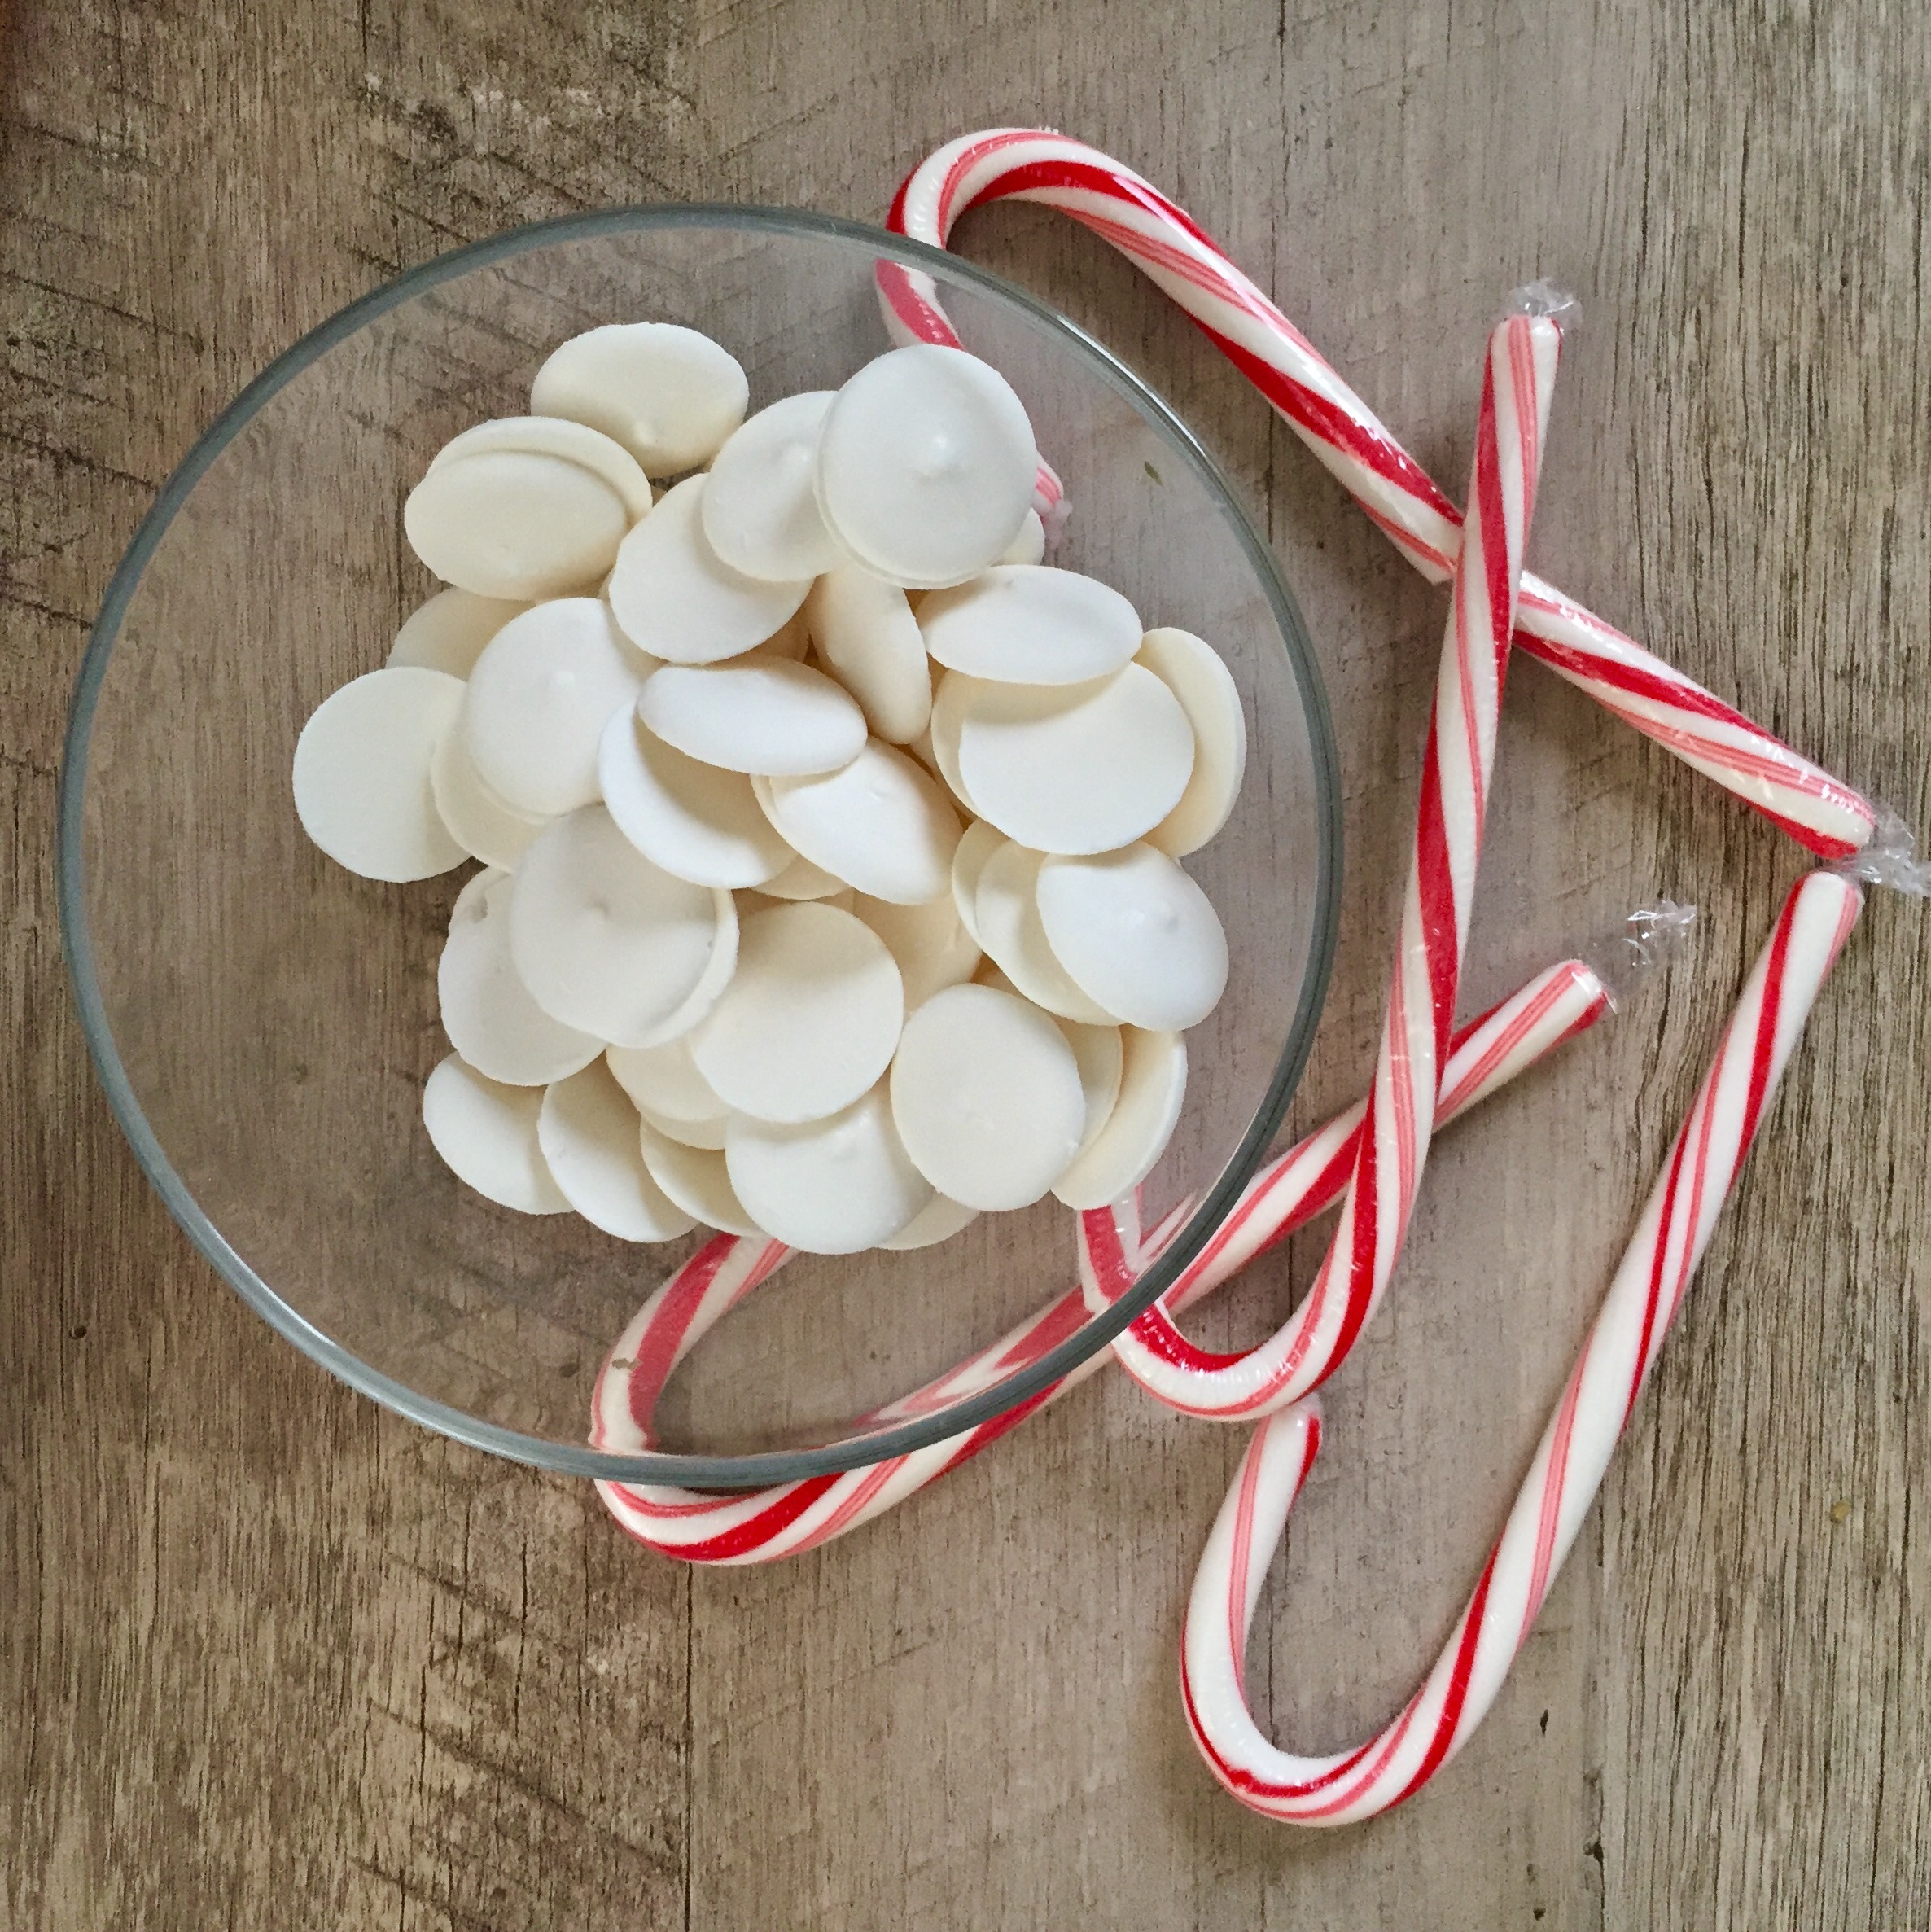
Step Six.
While the cookies cool, melt the chocolate and crush the candy canes. Dip the cookies into the chocolate, then sprinkle with crushed candy. These are best when dunked in hot chocolate! =]

The peppermint bark atop these chewy brownie cookies adds an extra touch for a tasty holiday treat!
Ingredients
- 16 ounces semisweet chocolate
- 6 Tablespoons unsalted butter
- ½ cup all-purpose flour
- ½ teaspoon baking powder
- 4 large eggs
- ½ cup light brown sugar (lightly packed)
- ½ cup sugar
- White chocolate melting chips
- Crushed candy canes
Instructions
- Prep Step! Measure out all of your ingredients.
- In a double-boiler (or a bowl over a pot of simmering water), melt the chocolate and the butter. Let the chocolate mixture cool.
- In a small bowl, mix the dry ingredients (flour, baking powder, and salt).
- In a stand mixer on medium-high speed, beat the eggs and sugar together until light in color. Mix in the vanilla. Slowly incorporate the cooled chocolate mixture. Finally, fold in the dry ingredients until incorporated.
- Chill the batter for an hour or until firm. When the time is almost up, preheat your oven to 350°F and line a baking sheet with parchment paper.
- Scoop dough with a Tablespoon and place balls of dough on the baking sheet. Bake at 350°F for about 10-12 minutes, or until the cookies resemble a crackled brownie. Set the cookies on a rack to cool.
- While the cookies cool, melt the chocolate and crush the candy canes. Dip the cookies into the chocolate, then sprinkle with crushed candy. These are best when dunked in hot chocolate!