this is a page for
Browsing Tag: garlic
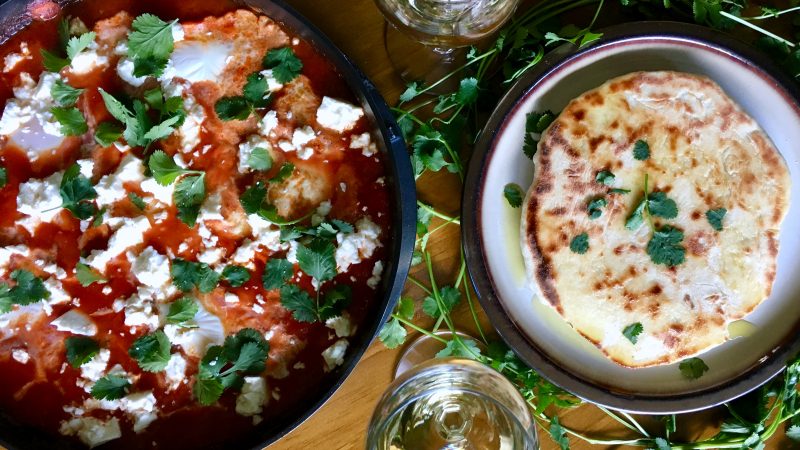
I first made shashuka last year at New Year’s to provide a nice and cozy brunch for a cold and, well, let’s be honest, hungover day. I made it Italian-style, with a bunch of ads-ins, and it was delicious. The only caveat was that I realized, after adding some goat cheese, I forgot to mix in the spice! So the goat cheese got all mixed in too. Don’t get me wrong, it was delicious, but the food photography wasn’t blog-worthy.
Now I decided to try again, which a more standard take on the shashuka. As I was writing pita bread on the grocery list, I thought hey, why not make my own??
Whip up the aromatic and comforting shashuka with homemade pita for a delicious start to your weekend. Middle Eastern and North African flavors give it a warm quality, but it would be a good choice for any season!
~~~~~~~~~~
Step One.
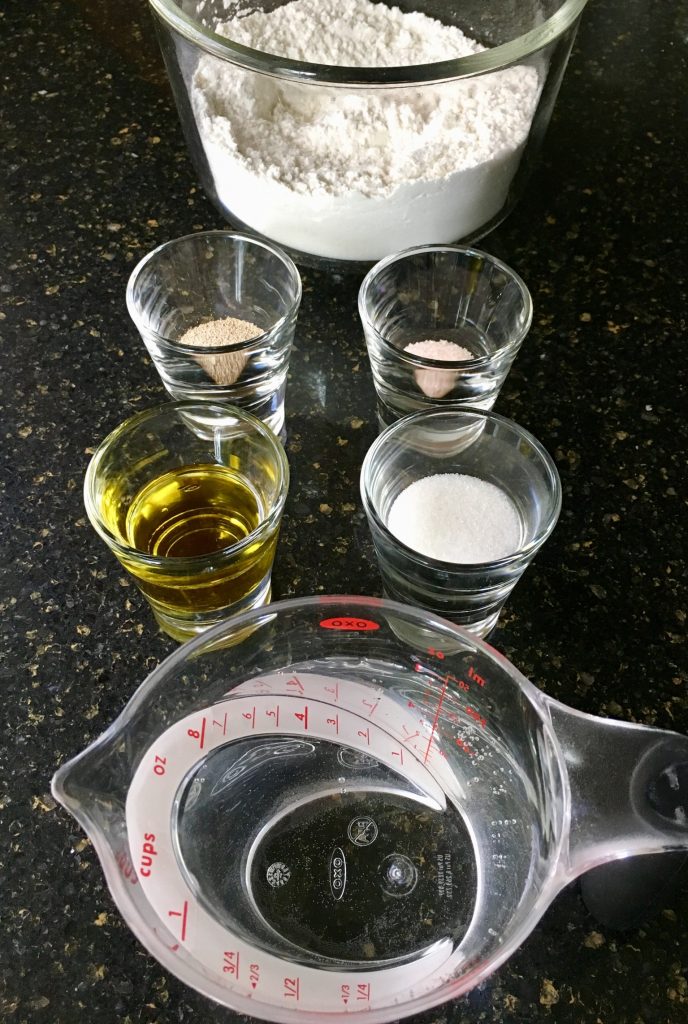
Prep the pita bread. It will need to rise for an hour, so get it started first! Measure out your ingredients.
Step Two.
Heat the water to about 110F. It should be warm but not hot. Bloom the yeast for 5 minutes
Step Three.
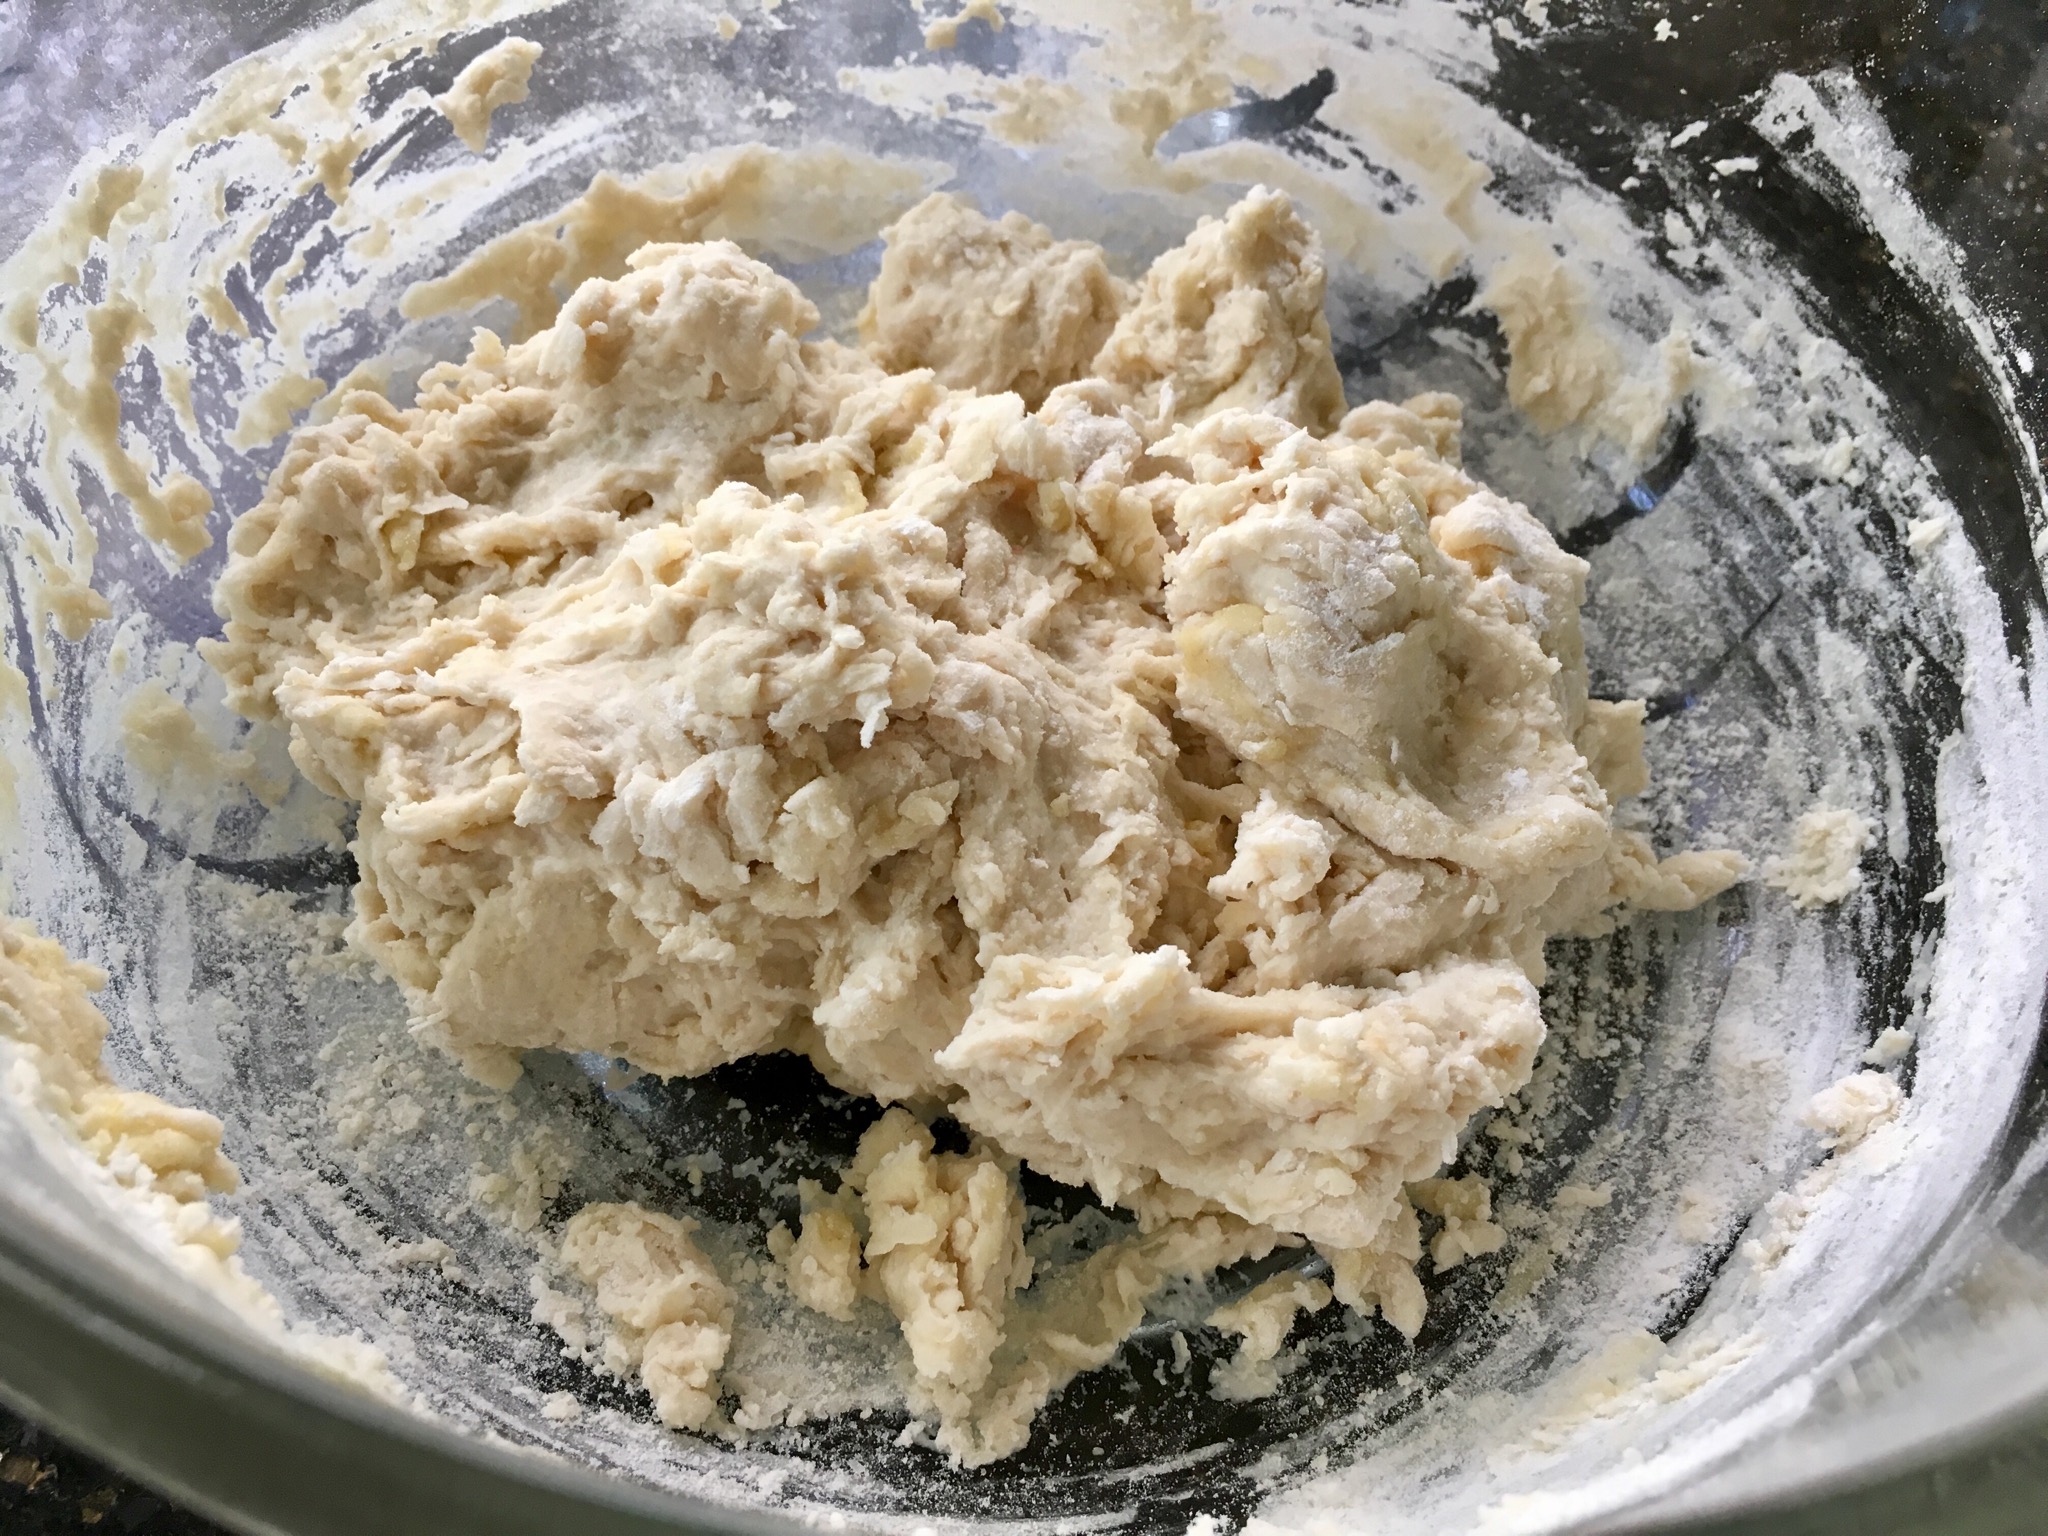
Mix together the dry ingredients; pour in the yeast mixture and olive oil. Mix together with a fork until a dough forms.
Step Four.
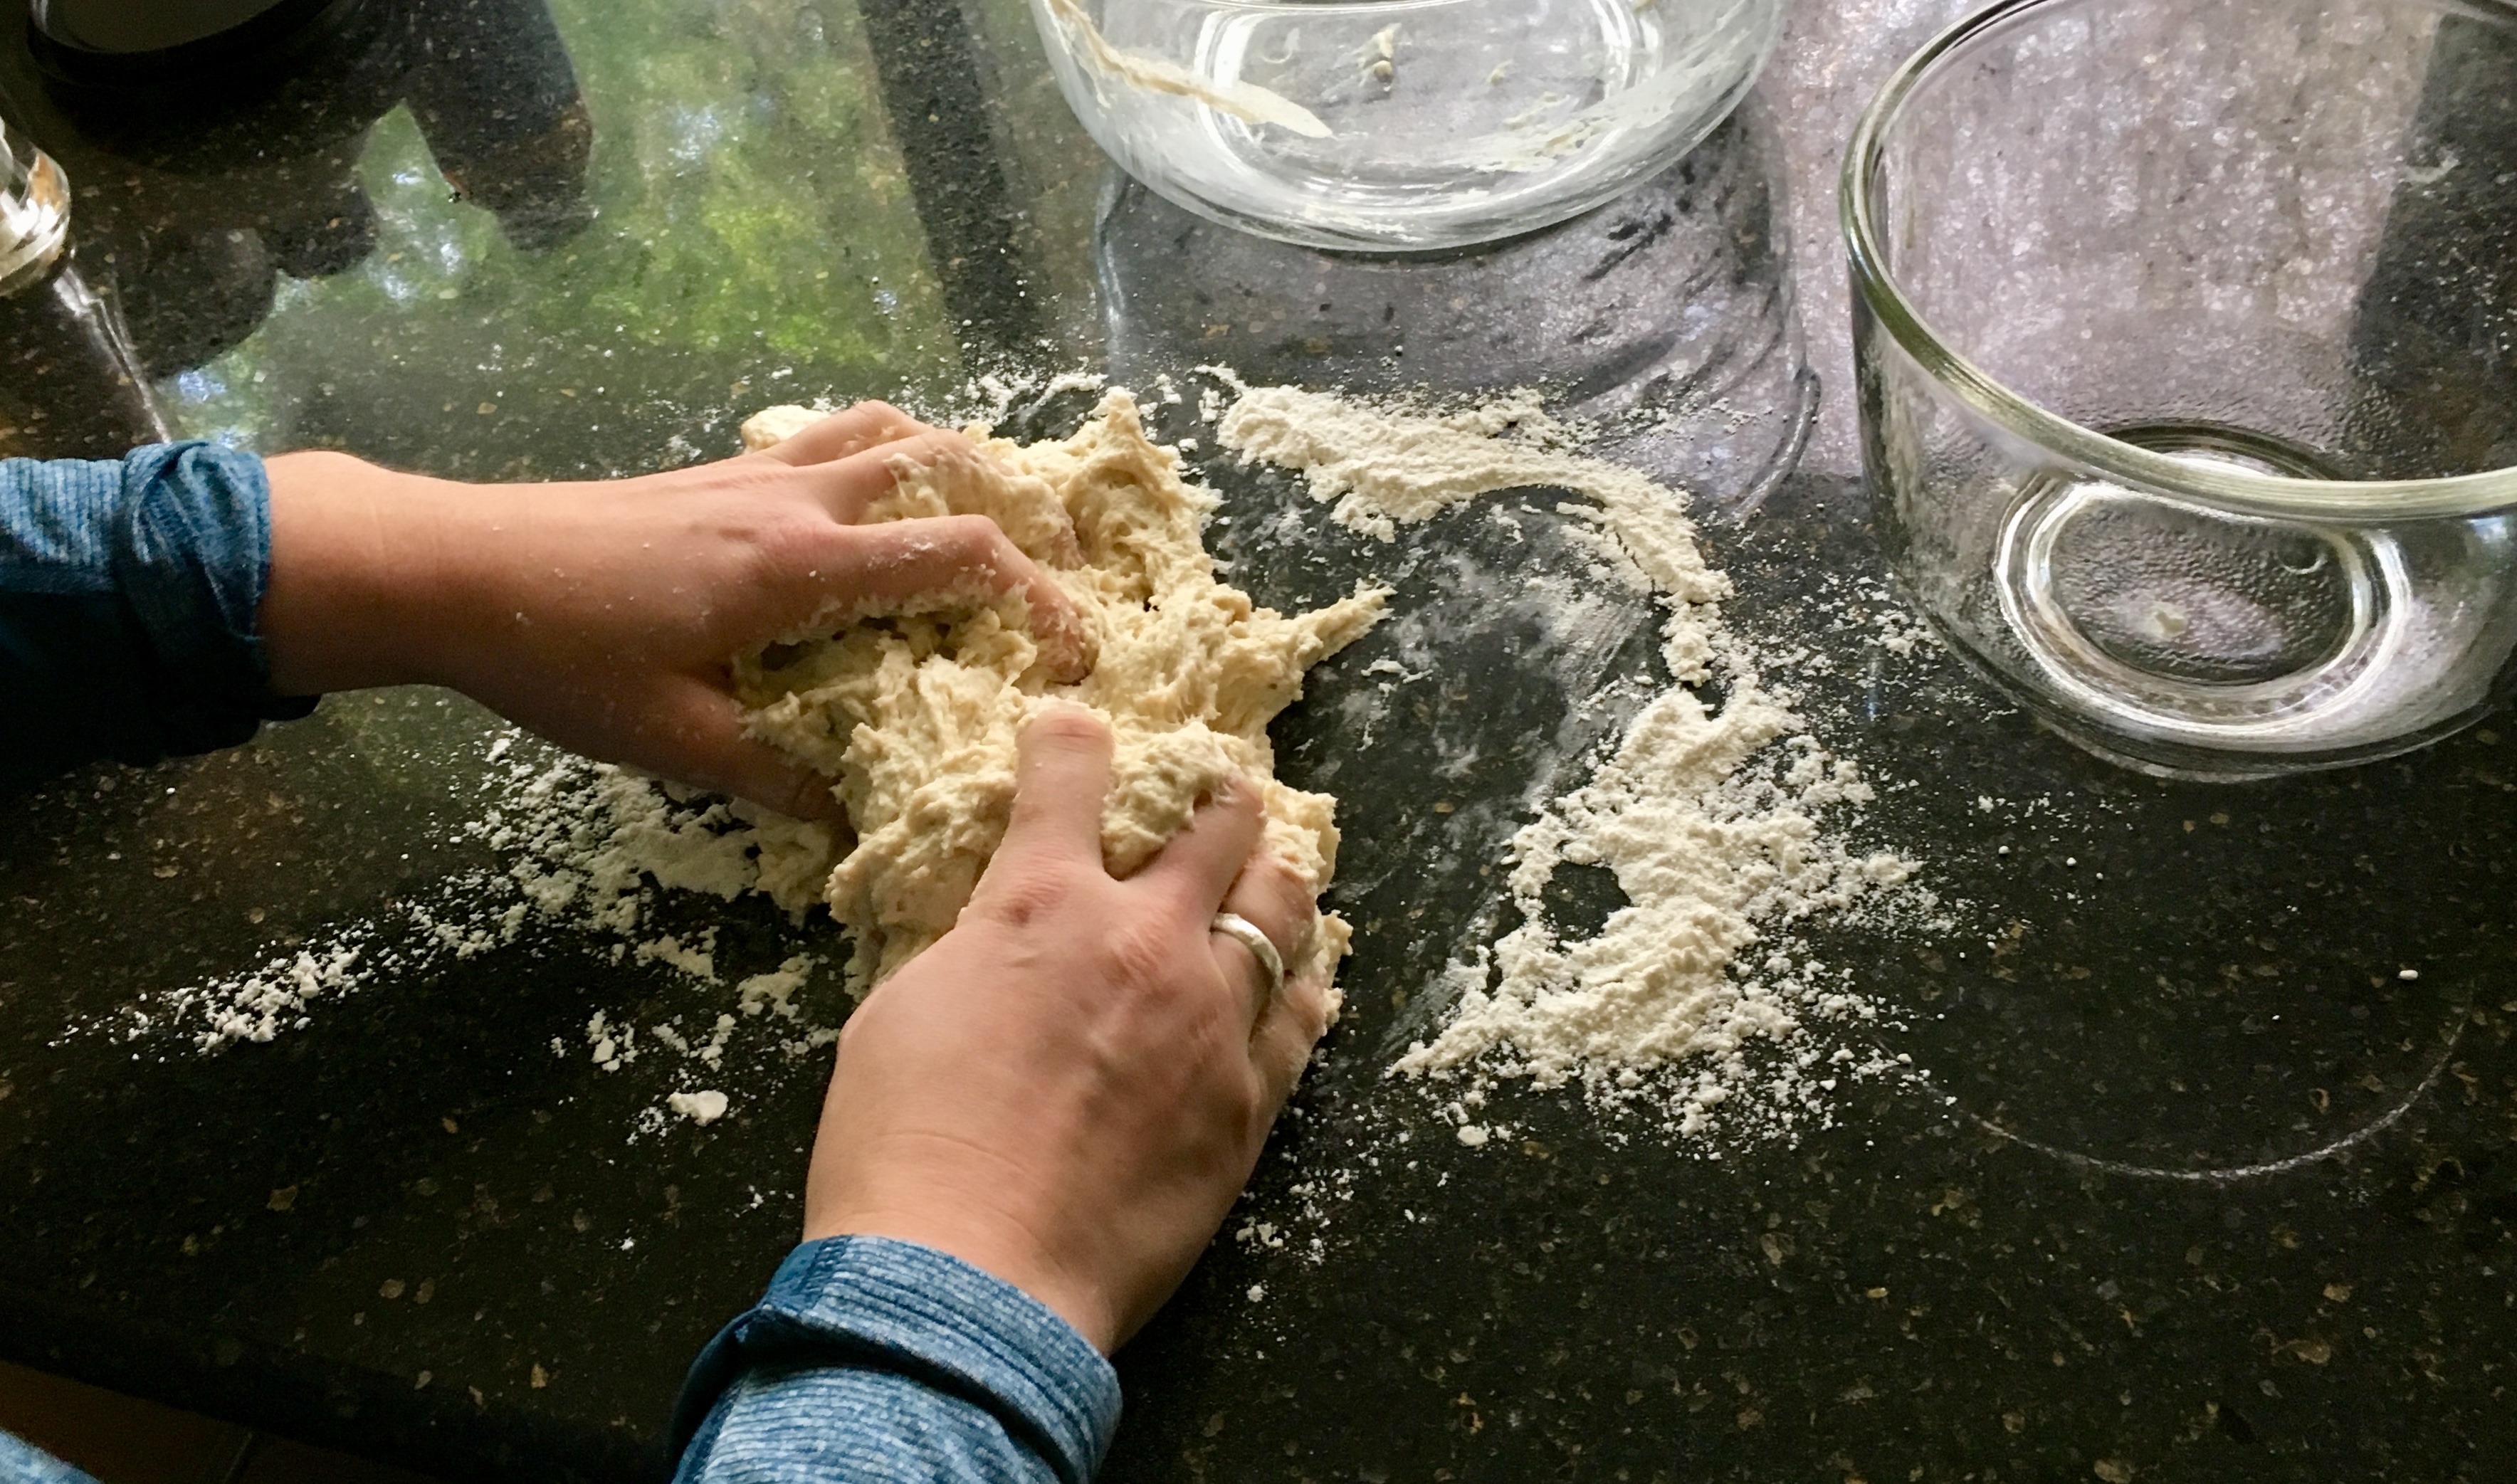
Turn the dough out into a floured surface. Knead the dough until it is stringy- this means that the gluten bonds are forming! This process should take about six minutes. Flour the bowl and put the dough back in it. Let the dough rise in a warm place for the total of an hour. Set a timer for 40 minutes. This is when you will start the shashuka. Measure out and chop your ingredients, then go make yourself busy for a bit.
Step Five.
When your timer rings, set it for another 20 minutes for the dough. It’s time to start the shashuka! You need to make the shashuka in a skillet or other oven-safe pan. Add the olive oil to a skillet over medium heat. Cook the onion, garlic, olives, and pepper until the onions are translucent (about 5 minutes). Then, add the tomatoes. Cook until the mixture starts to simmer slightly. Mix in your spices and reduce the mixture for another 5 minutes. Preheat your broiler on high heat.

Step Six.
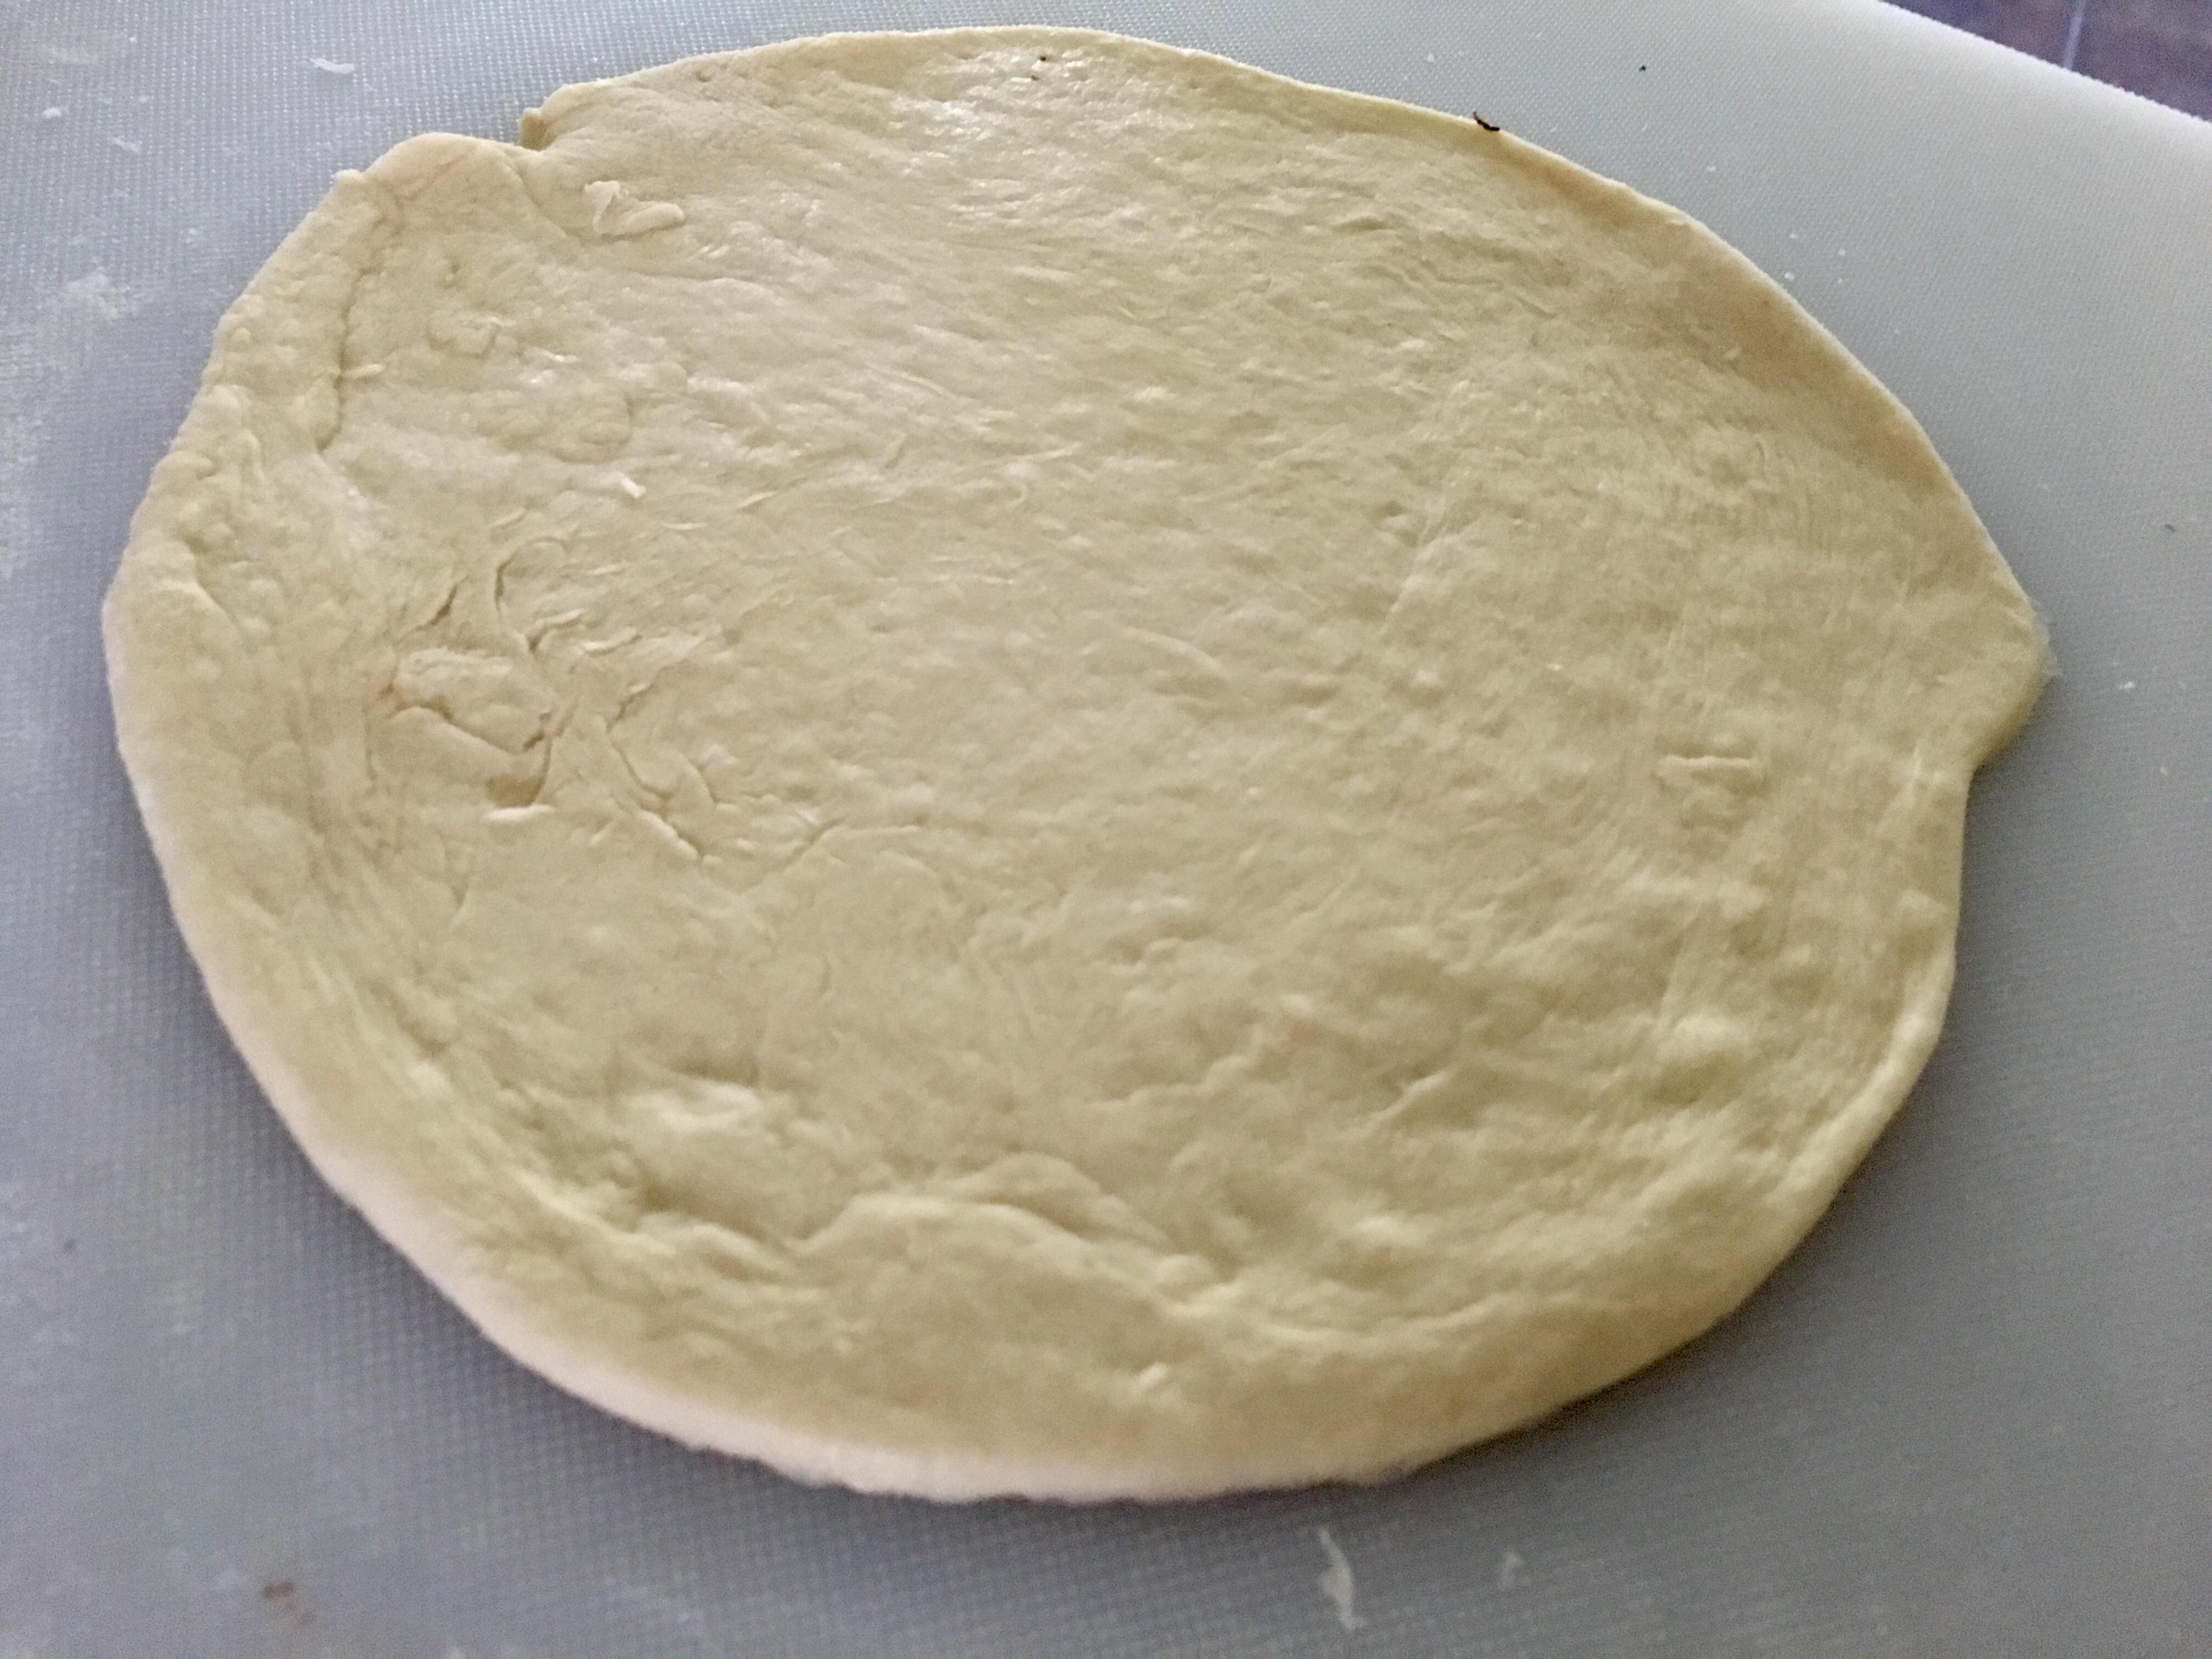
By now, your dough should be ready. Punch down the risen dough and divide it into six pieces. Roll each piece into a ball, and roll out the ball to 1/4 in thickness on a floured surface. Heat 1 teaspoon of oil over medium high heat.
Step Seven.
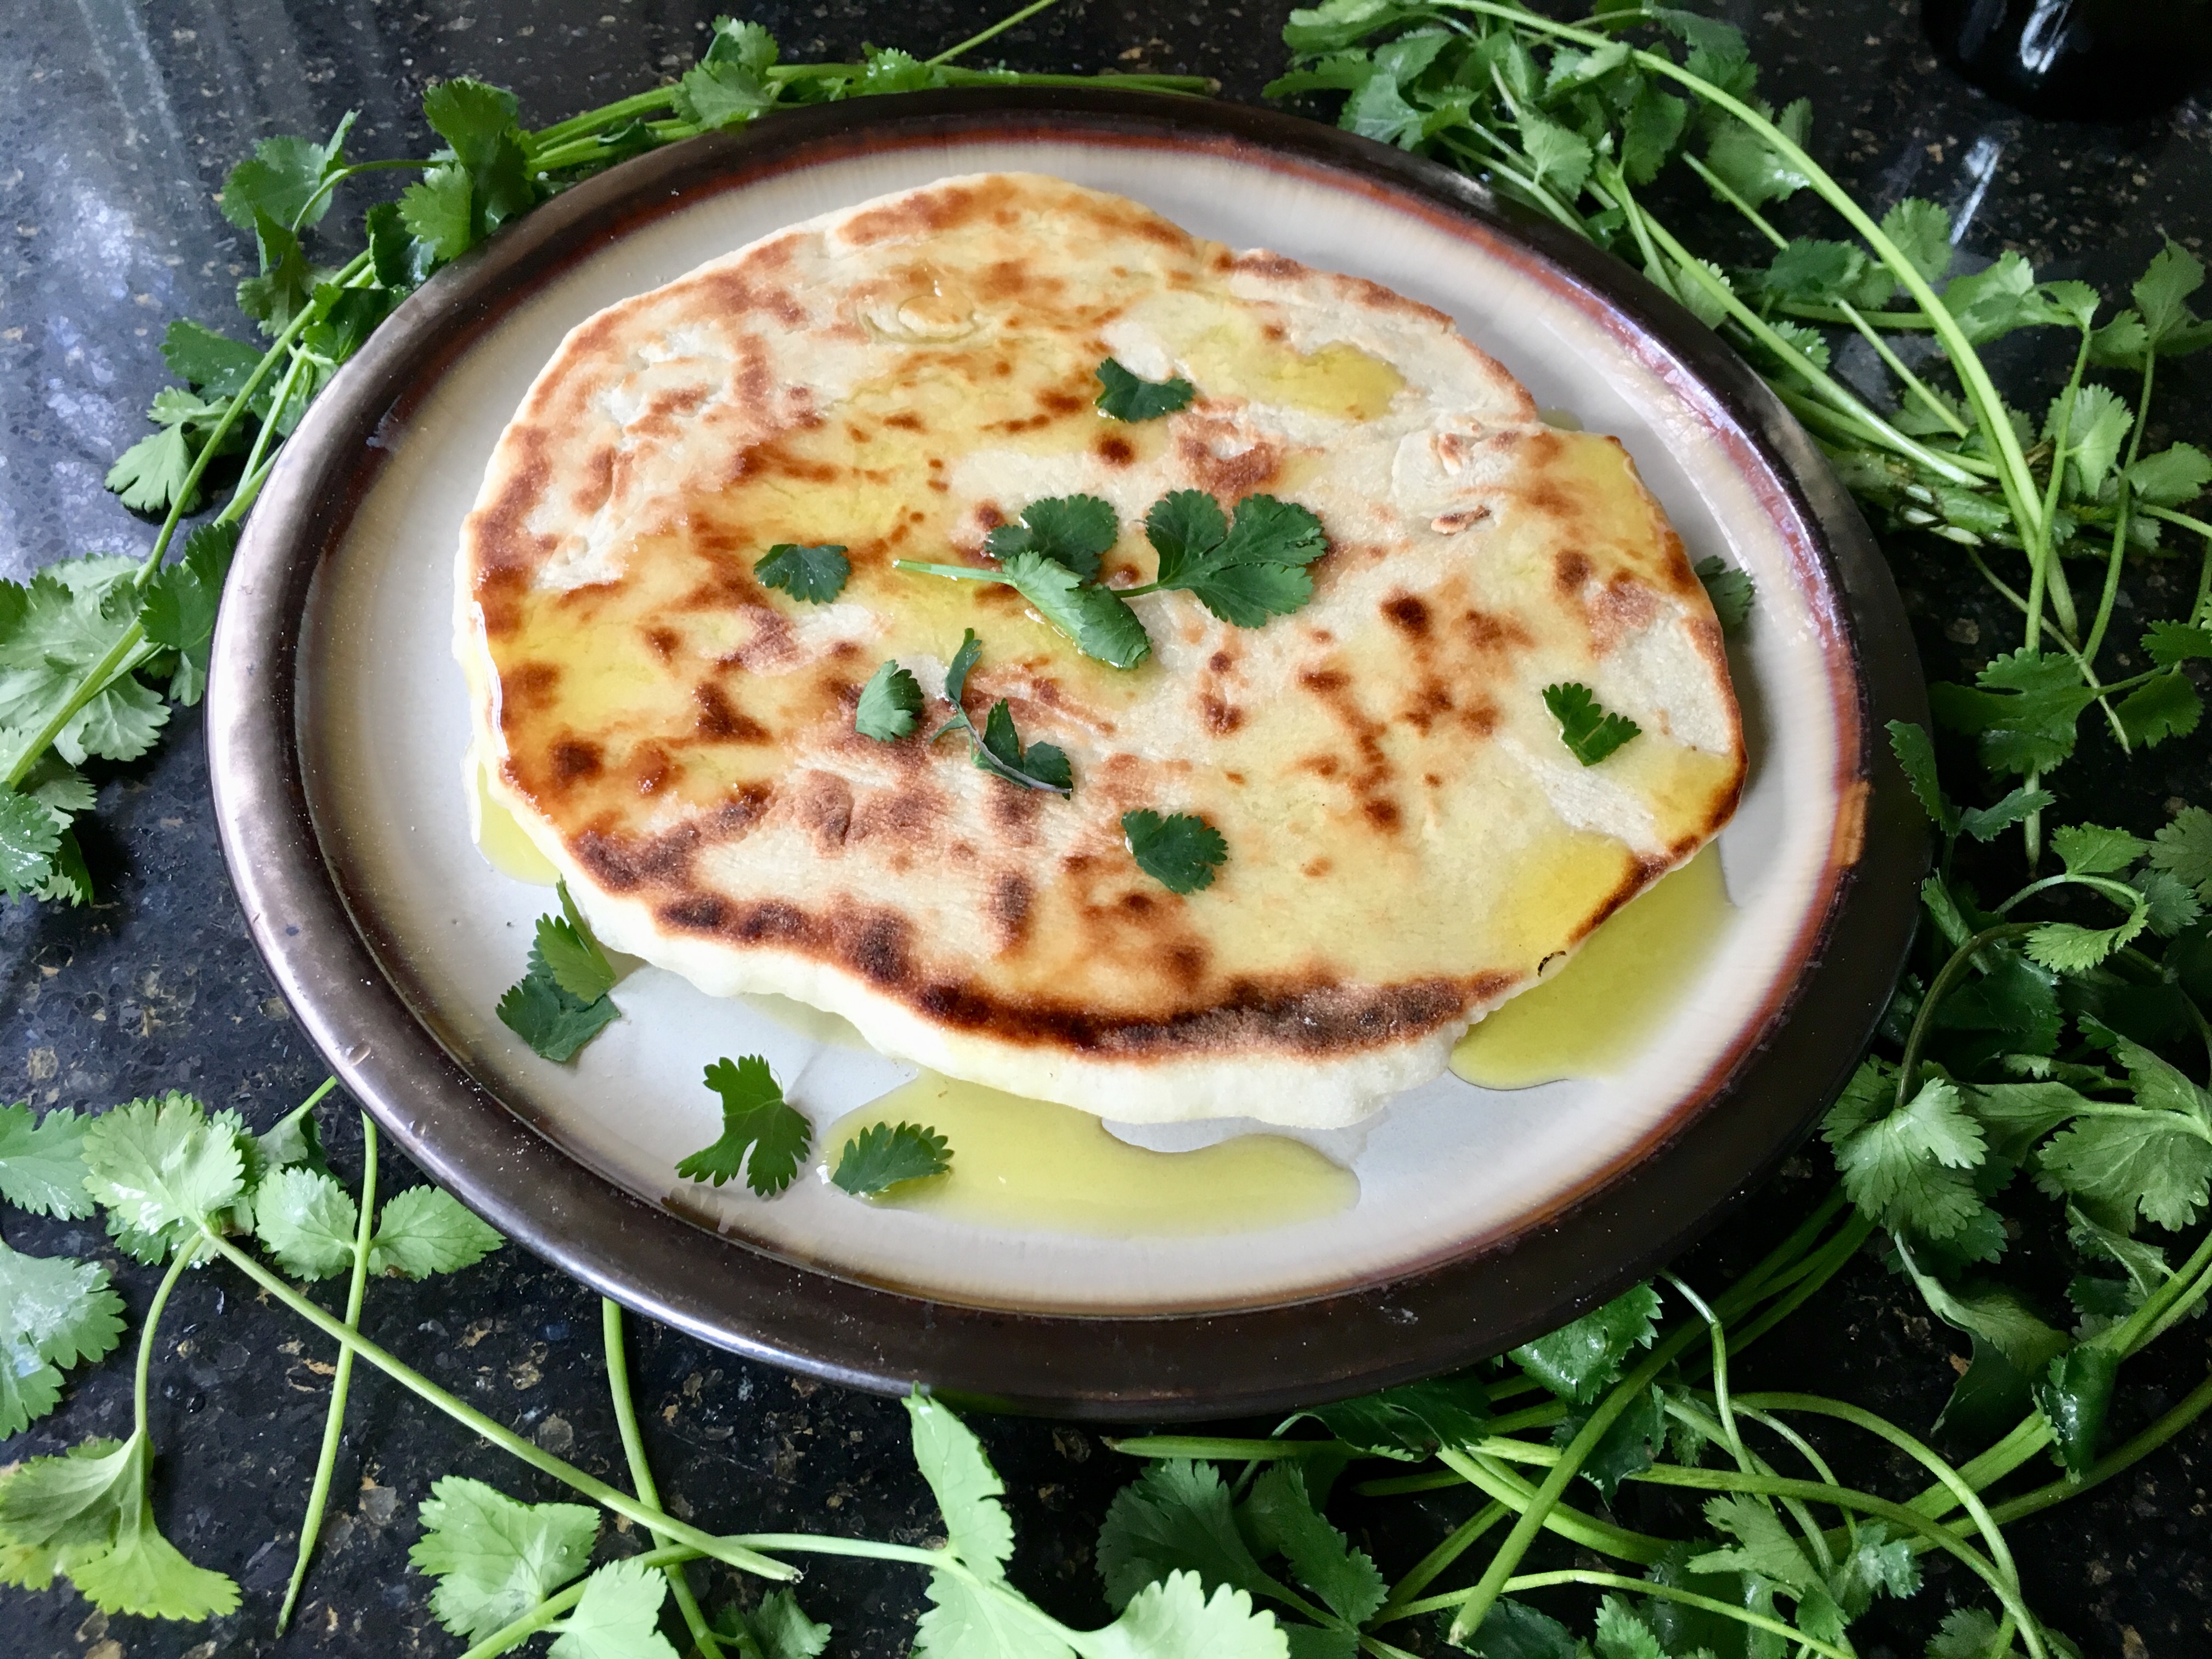
One at a time, cook the pitas. Cook the first side for 45 seconds, then flip and cook the other side for one minute. Flip one more time and cook an additional minute; store the finished pita in a basket with a towel so that they don’t cool before you’re ready to serve them! Repeat the process with the remaining dough, but you don’t need to add more oil in-between.
Step Eight.
Now it’s time to add the eggs. Crack five of the eggs into a star pattern near the rim of the pan. Crack the last egg into the middle. Continue to cook over medium heat for five minutes; next, broil the pan until the eggs are done but the yolks are still runny (about 3 minutes). Crumble feta and top with cilantro; serve with warm pita. Enjoy!


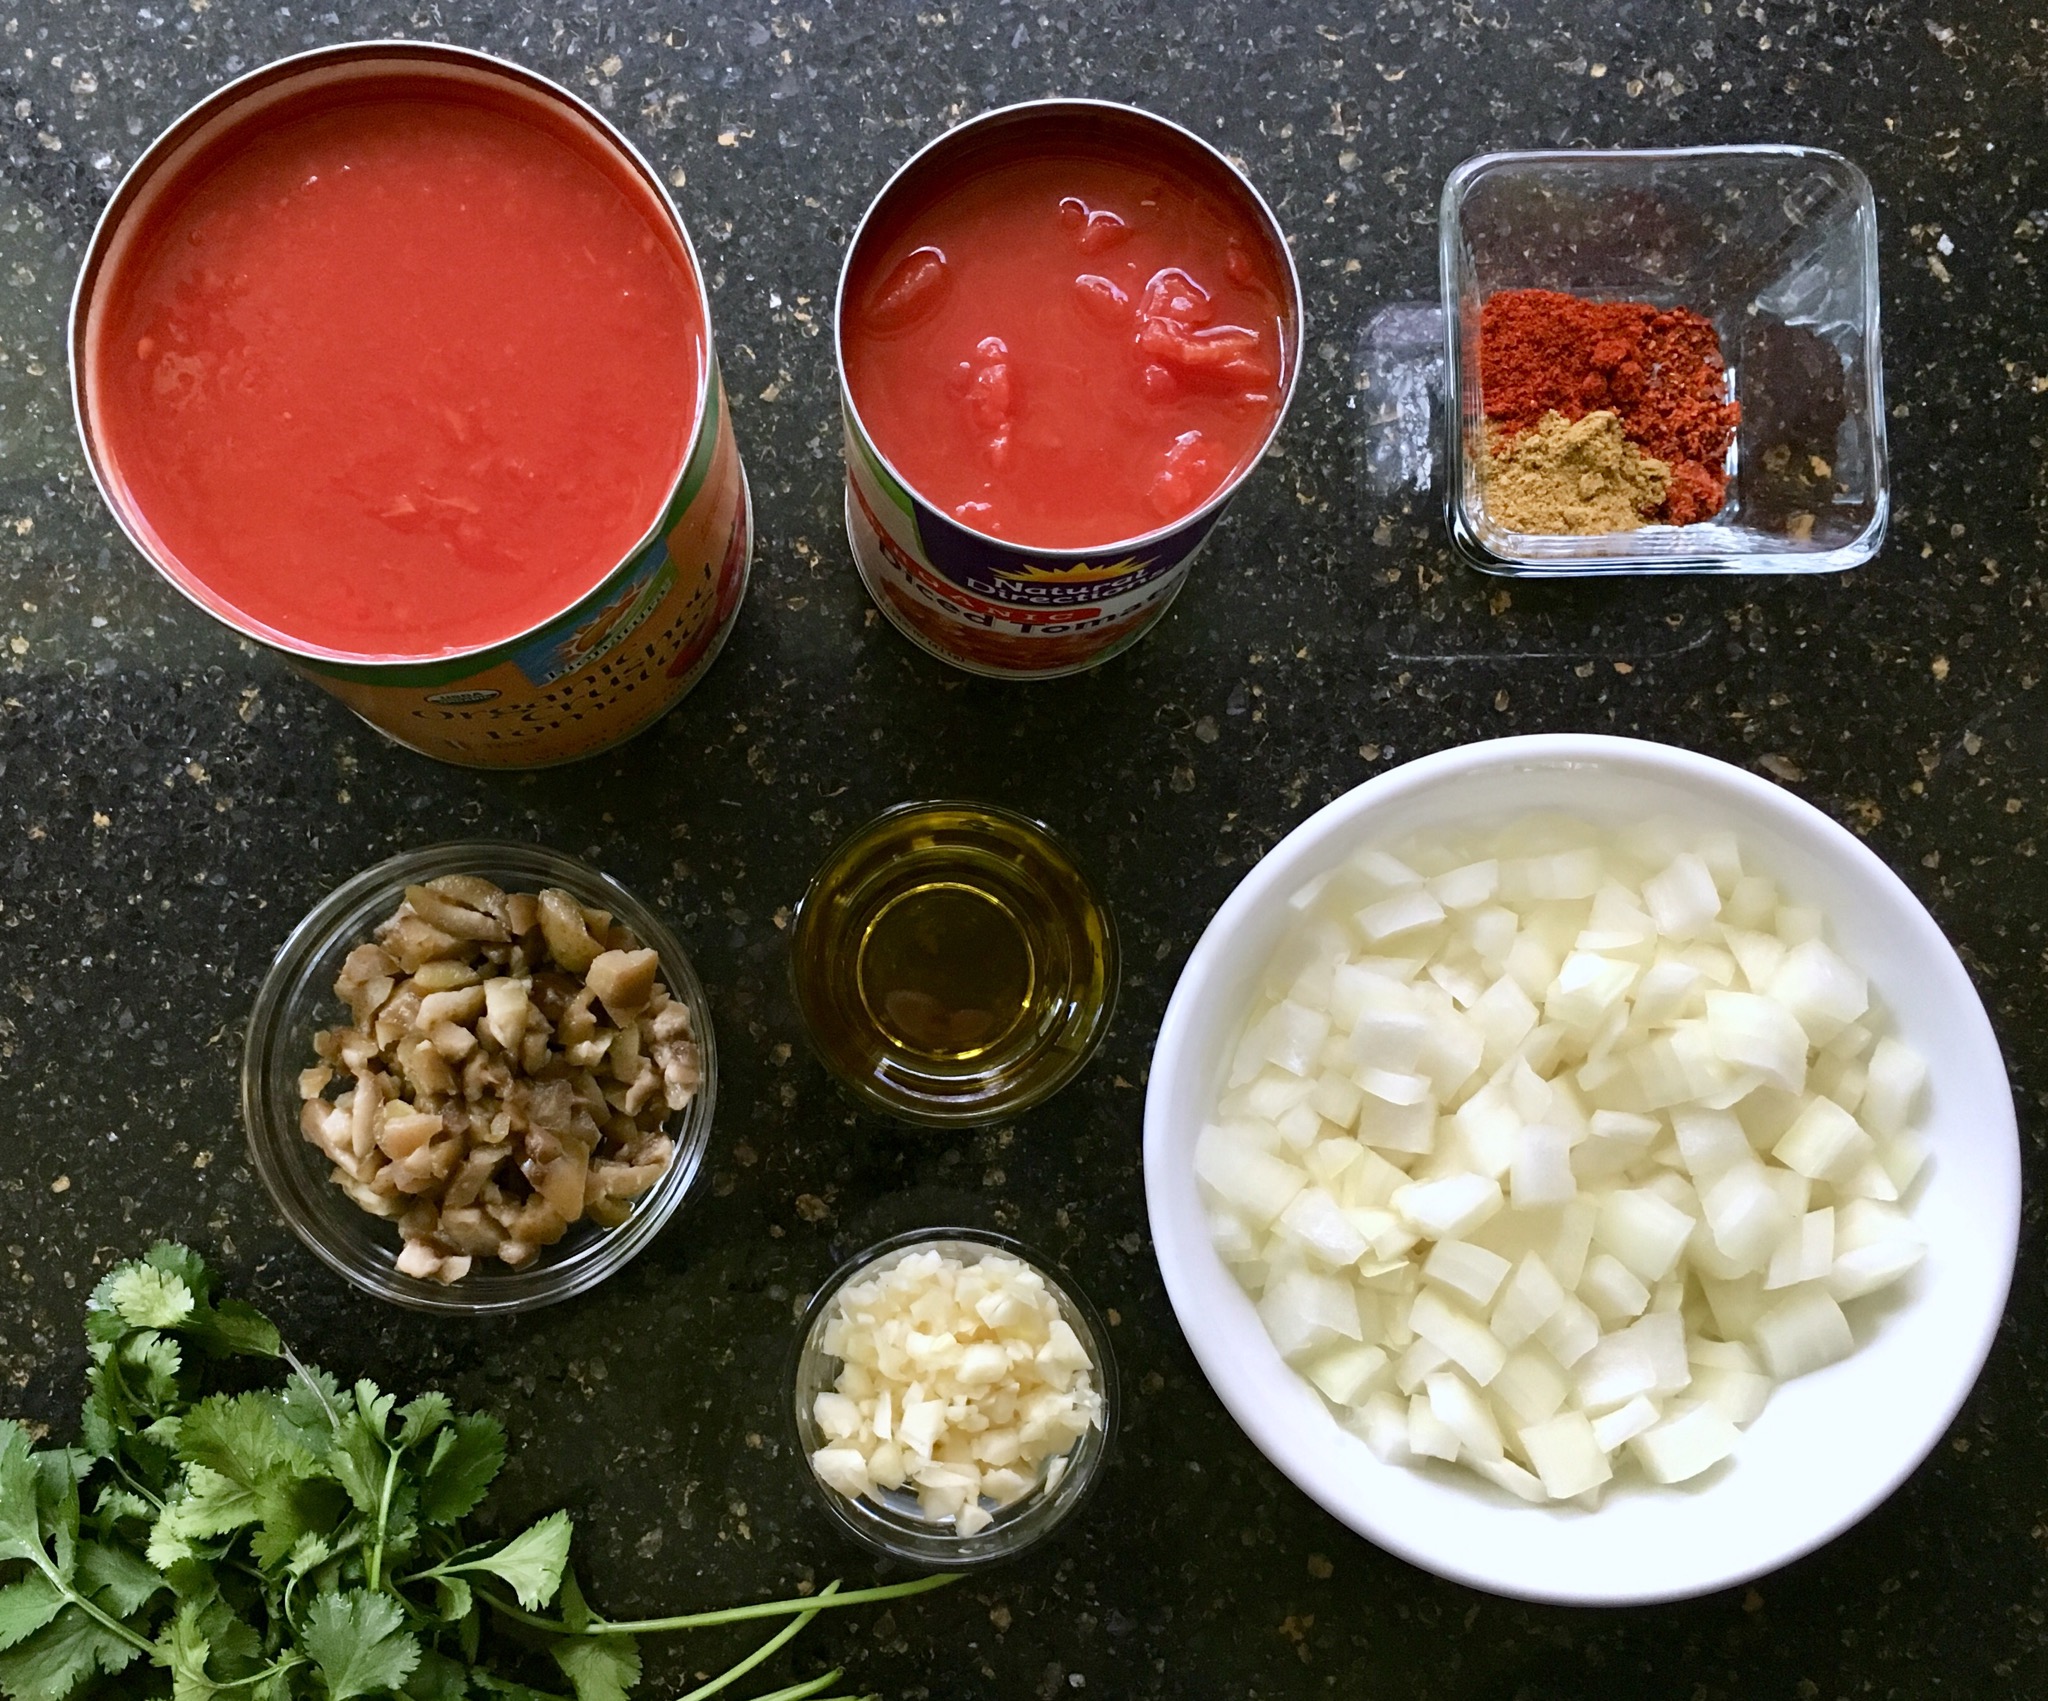
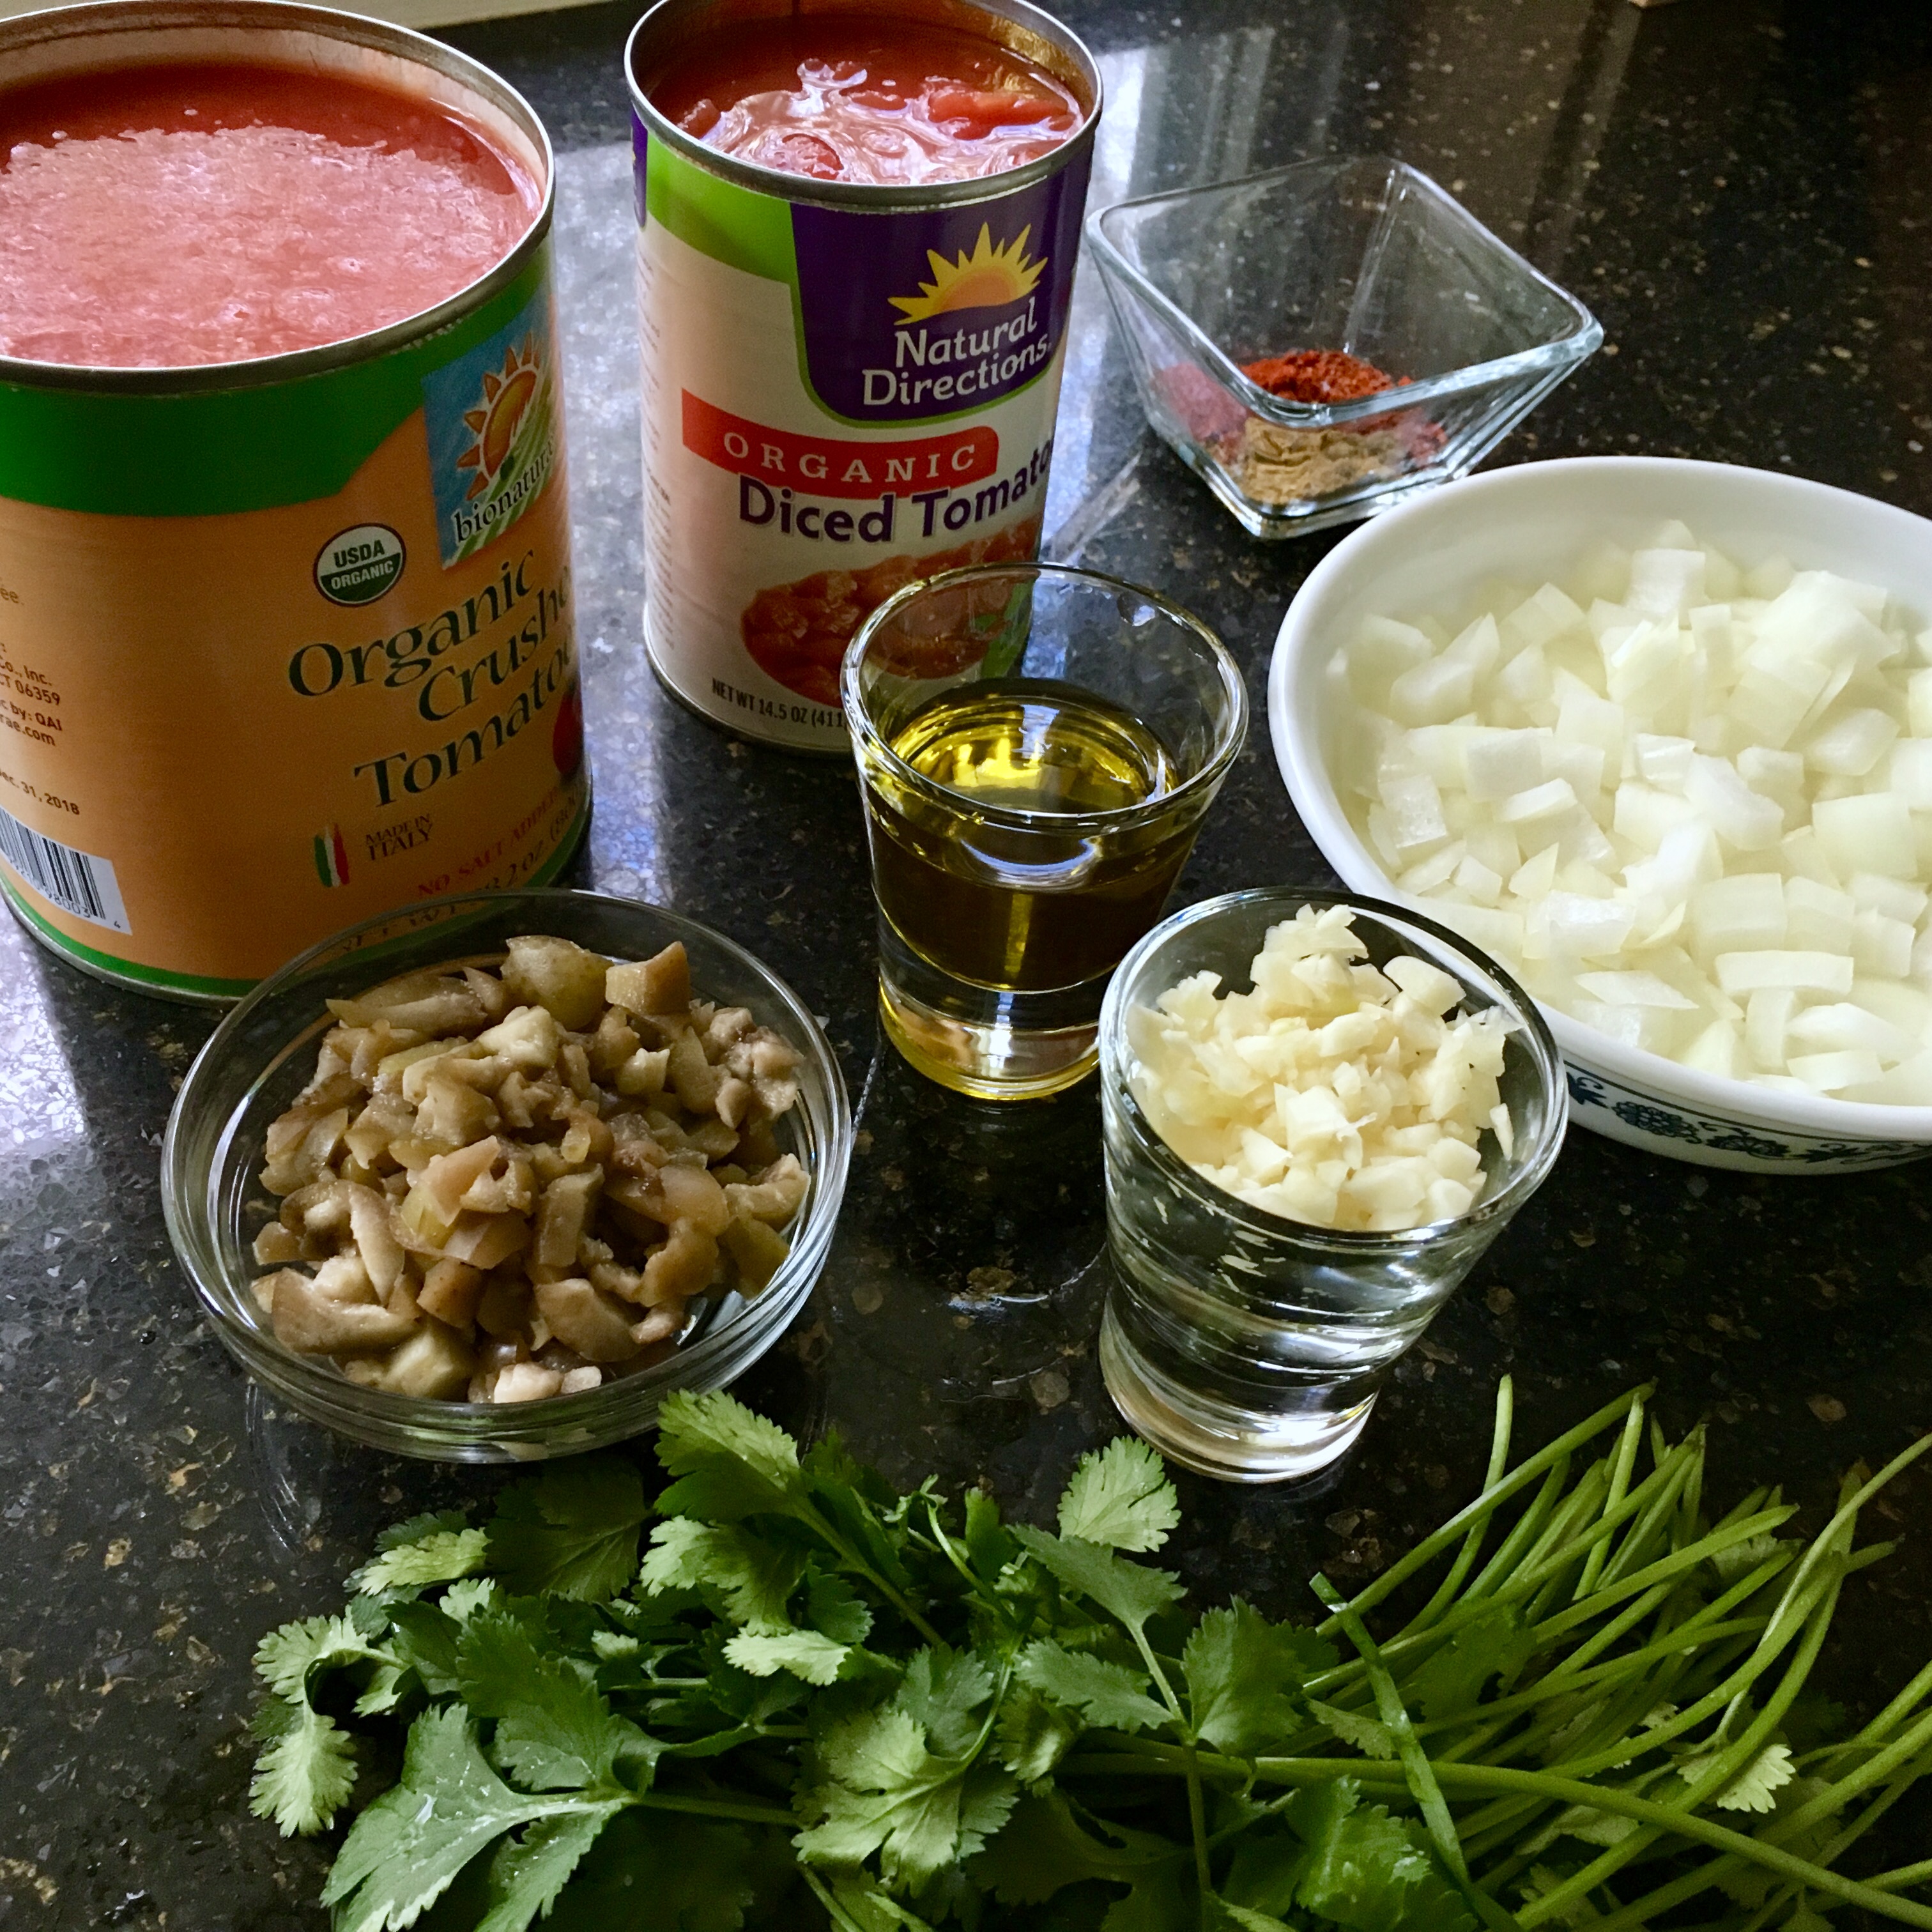
Ingredients
- PITA BREAD
- 1 cup water
- 1 package instant yeast
- 1 Tbsp olive oil
- 2 tsp sugar
- 2 tsp salt
- 3 cups all purpose flour
- 1 tsp olive oil, for cooking
- SHASHUKA
- 1/2 yellow onion, chopped
- 4 cloes garlic, minced
- 1 bell pepper (any color), chopped
- 1/2 cup green olives, chopped
- 28 oz crushed tomatoes
- 14.5 oz diced tomatoes
- 1/2 tsp chili powder
- 1/2 tsp chili flakes
- 1/2 tsp cayenne pepper
- 1/2 tsp cumin
- 6 eggs
- 1/4 cup torn cilantro
- 1/4 cup crumbled feta
Instructions
- Prep the pita bread. It will need to rise for an hour, so get it started first! Measure out your ingredients.
- Heat the water to about 110F. It should be warm but not hot. Bloom the yeast for 5 minutes
- Mix together the dry ingredients; pour in the yeast mixture and olive oil. Mix together with a fork until a dough forms.
- Turn the dough out into a floured surface. Knead the dough until it is stringy- this means that the gluten bonds are forming! This process should take about six minutes. Flour the bowl and put the dough back in it. Let the dough rise in a warm place for the total of an hour. Set a timer for 40 minutes. This is when you will start the shashuka. Measure out and chop your ingredients, then go make yourself busy for a bit.
- When your timer rings, set it for another 20 minutes for the dough. It’s time to start the shashuka! You need to make the shashuka in a skillet or other oven-safe pan. Add the olive oil to a skillet over medium heat. Cook the onion, garlic, olives, and pepper until the onions are translucent (about 5 minutes). Then, add the tomatoes. Cook until the mixture starts to simmer slightly. Mix in your spices and reduce the mixture for another 5 minutes. Preheat your broiler on high heat.
- By now, your dough should be ready. Punch down the risen dough and divide it into six pieces. Roll each piece into a ball, and roll out the ball to 1/4 in thickness on a floured surface. Heat 1 teaspoon of oil over medium high heat.
- One at a time, cook the pitas. Cook the first side for 45 seconds, then flip and cook the other side for one minute. Flip one more time and cook an additional minute; store the finished pita in a basket with a towel so that they don’t cool before you’re ready to serve them! Repeat the process with the remaining dough, but you don’t need to add more oil in-between.
- Now it’s time to add the eggs. Crack five of the eggs into a star pattern near the rim of the pan. Crack the last egg into the middle. Continue to cook over medium heat for five minutes; next, broil the pan until the eggs are done but the yolks are still runny (about 3 minutes). Crumble feta and top with cilantro; serve with warm pita. Enjoy!
Years ago, before the trend, I decided to go low carb. It was for a number of reasons, but it was incredibly difficult to find recipes and ingredients that worked with my new diet. I came across the idea of ricing cauliflower in place of regular rice. I decided to try it, and it was awesome. But it was a bit tedious to do. Now that they have riced cauliflower available at the store, I am making recipes with it left and right!

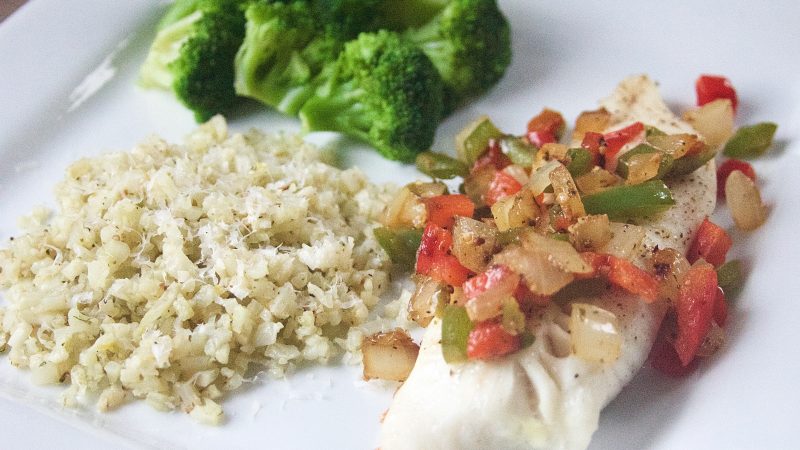
This recipe combines healthy protein with fresh spring flavors for a satisfying meal. Customize it however you want - your culinary imagination is the limit!
Ingredients
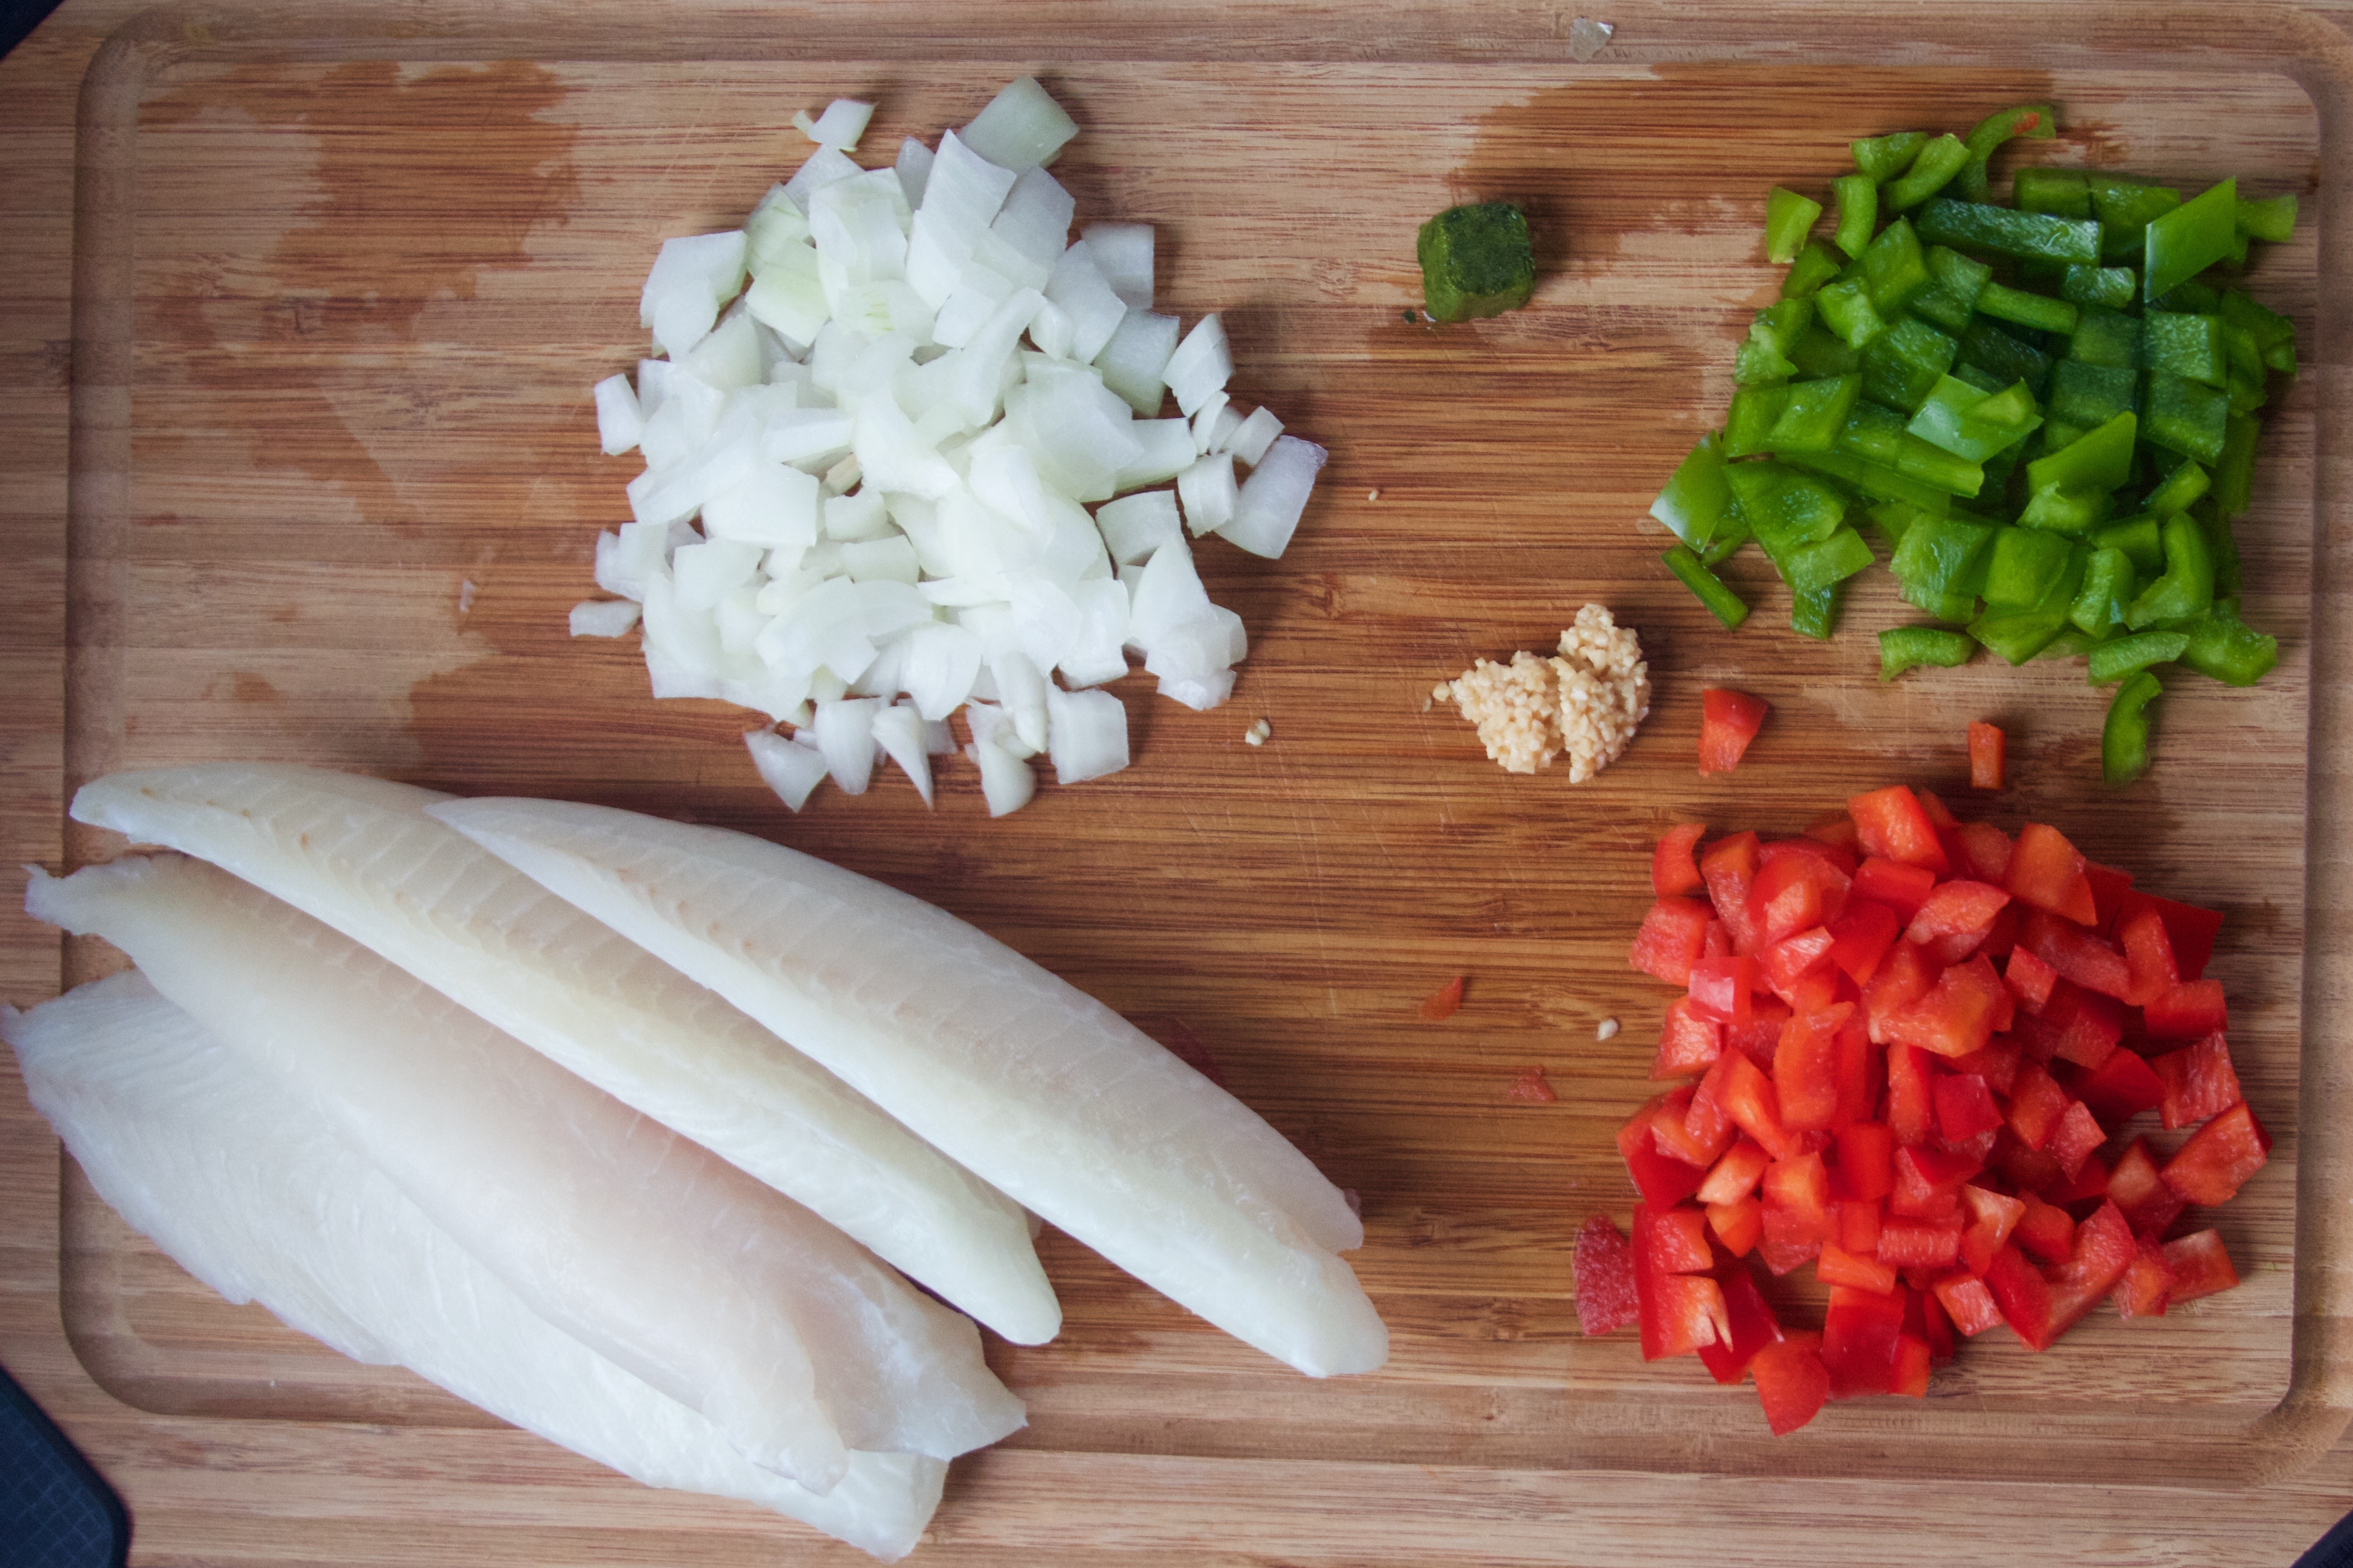
- The Fish
- 4 tilapia filets
- oil to coat
- salt
- pepper
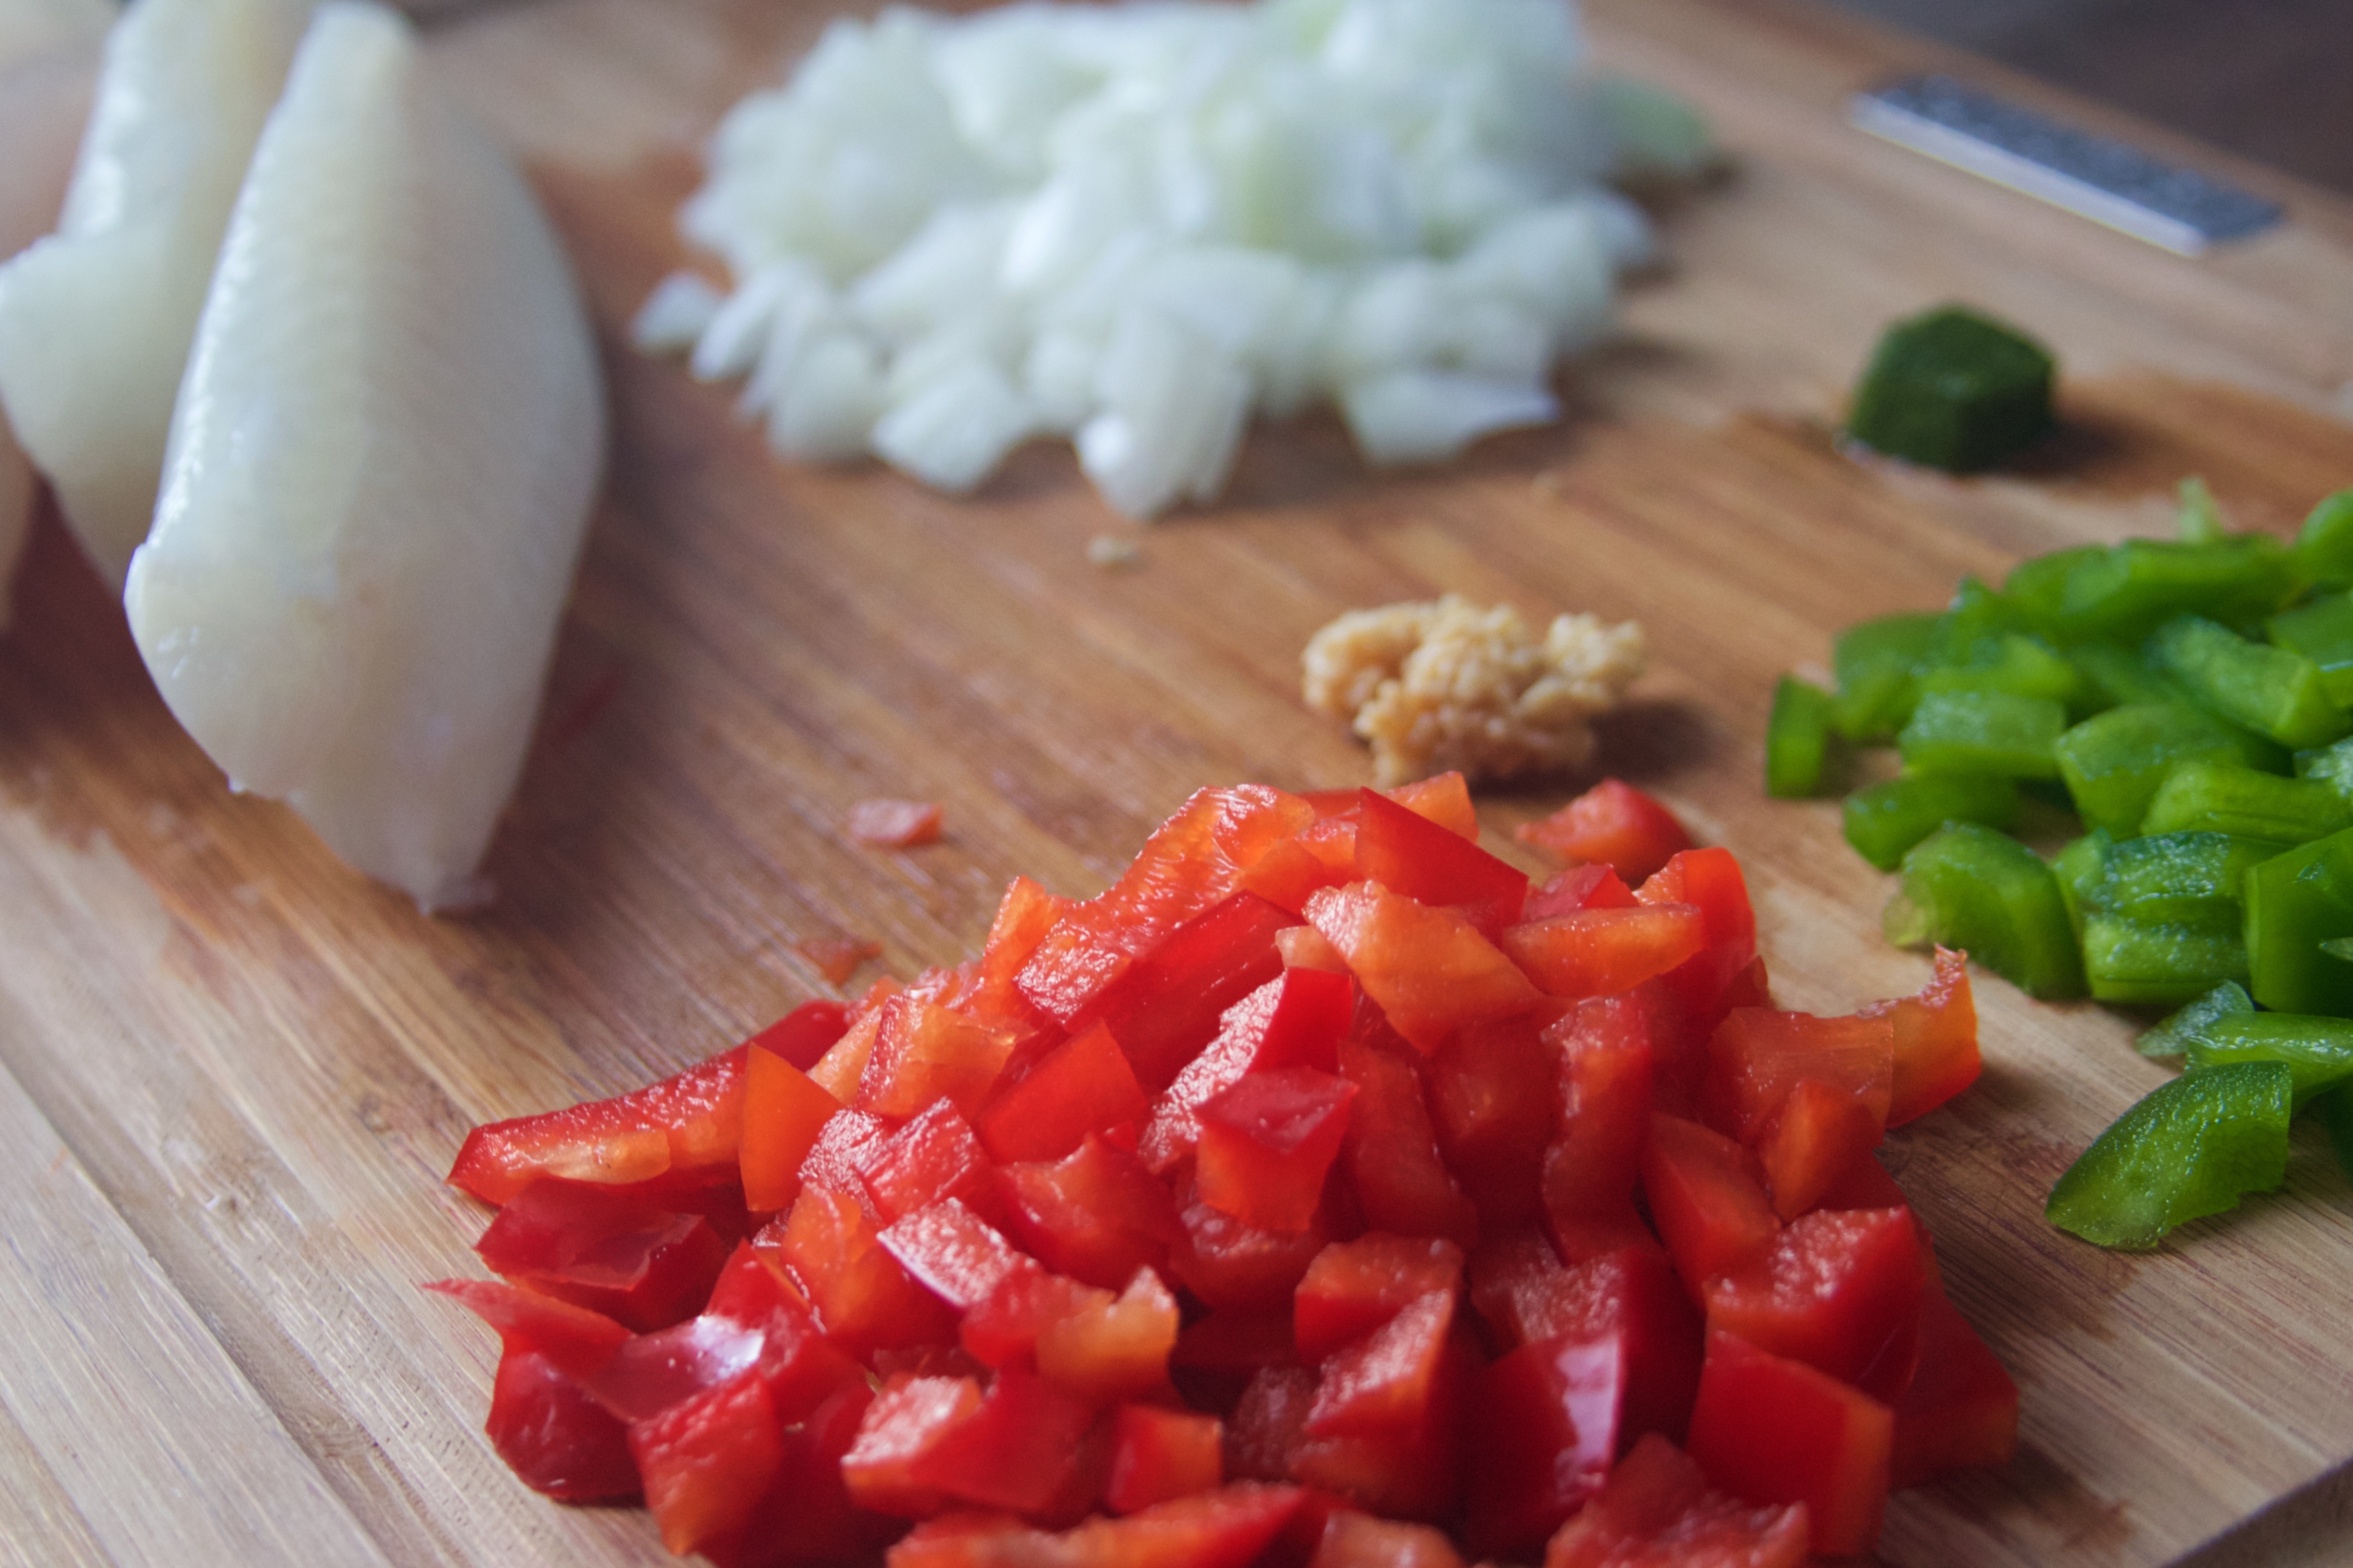
- The Peppers & Onions
- 1 Tbsp olive oil
- 1 green bell pepper
- 1 red bell pepper
- 1 onion
- 1 Tbsp minced garlic
- 1 cube frozen basil
- salt and pepper to taste
- Lemon Cauliflower Rice
- 1 Tbsp olive oil
- 1 package riced cauliflower (Trader Joe's has a great one!)
- 1 cube frozen basil
- 1 Meyer lemon
- salt and pepper to taste
Instructions
- Prep Step! Measure out and prepare all of your ingredients. Dice the peppers and onion - a diced size works nicely here since it is a topping for the fish. Preheat your oven to 425°F, and line a pan with parchment paper or foil.
- For The Fish: Lightly coat the fish with olive oil, salt, and pepper. Bake for about 15 minutes, or until done. While the fish bakes, prepare the topping and the cauliflower.
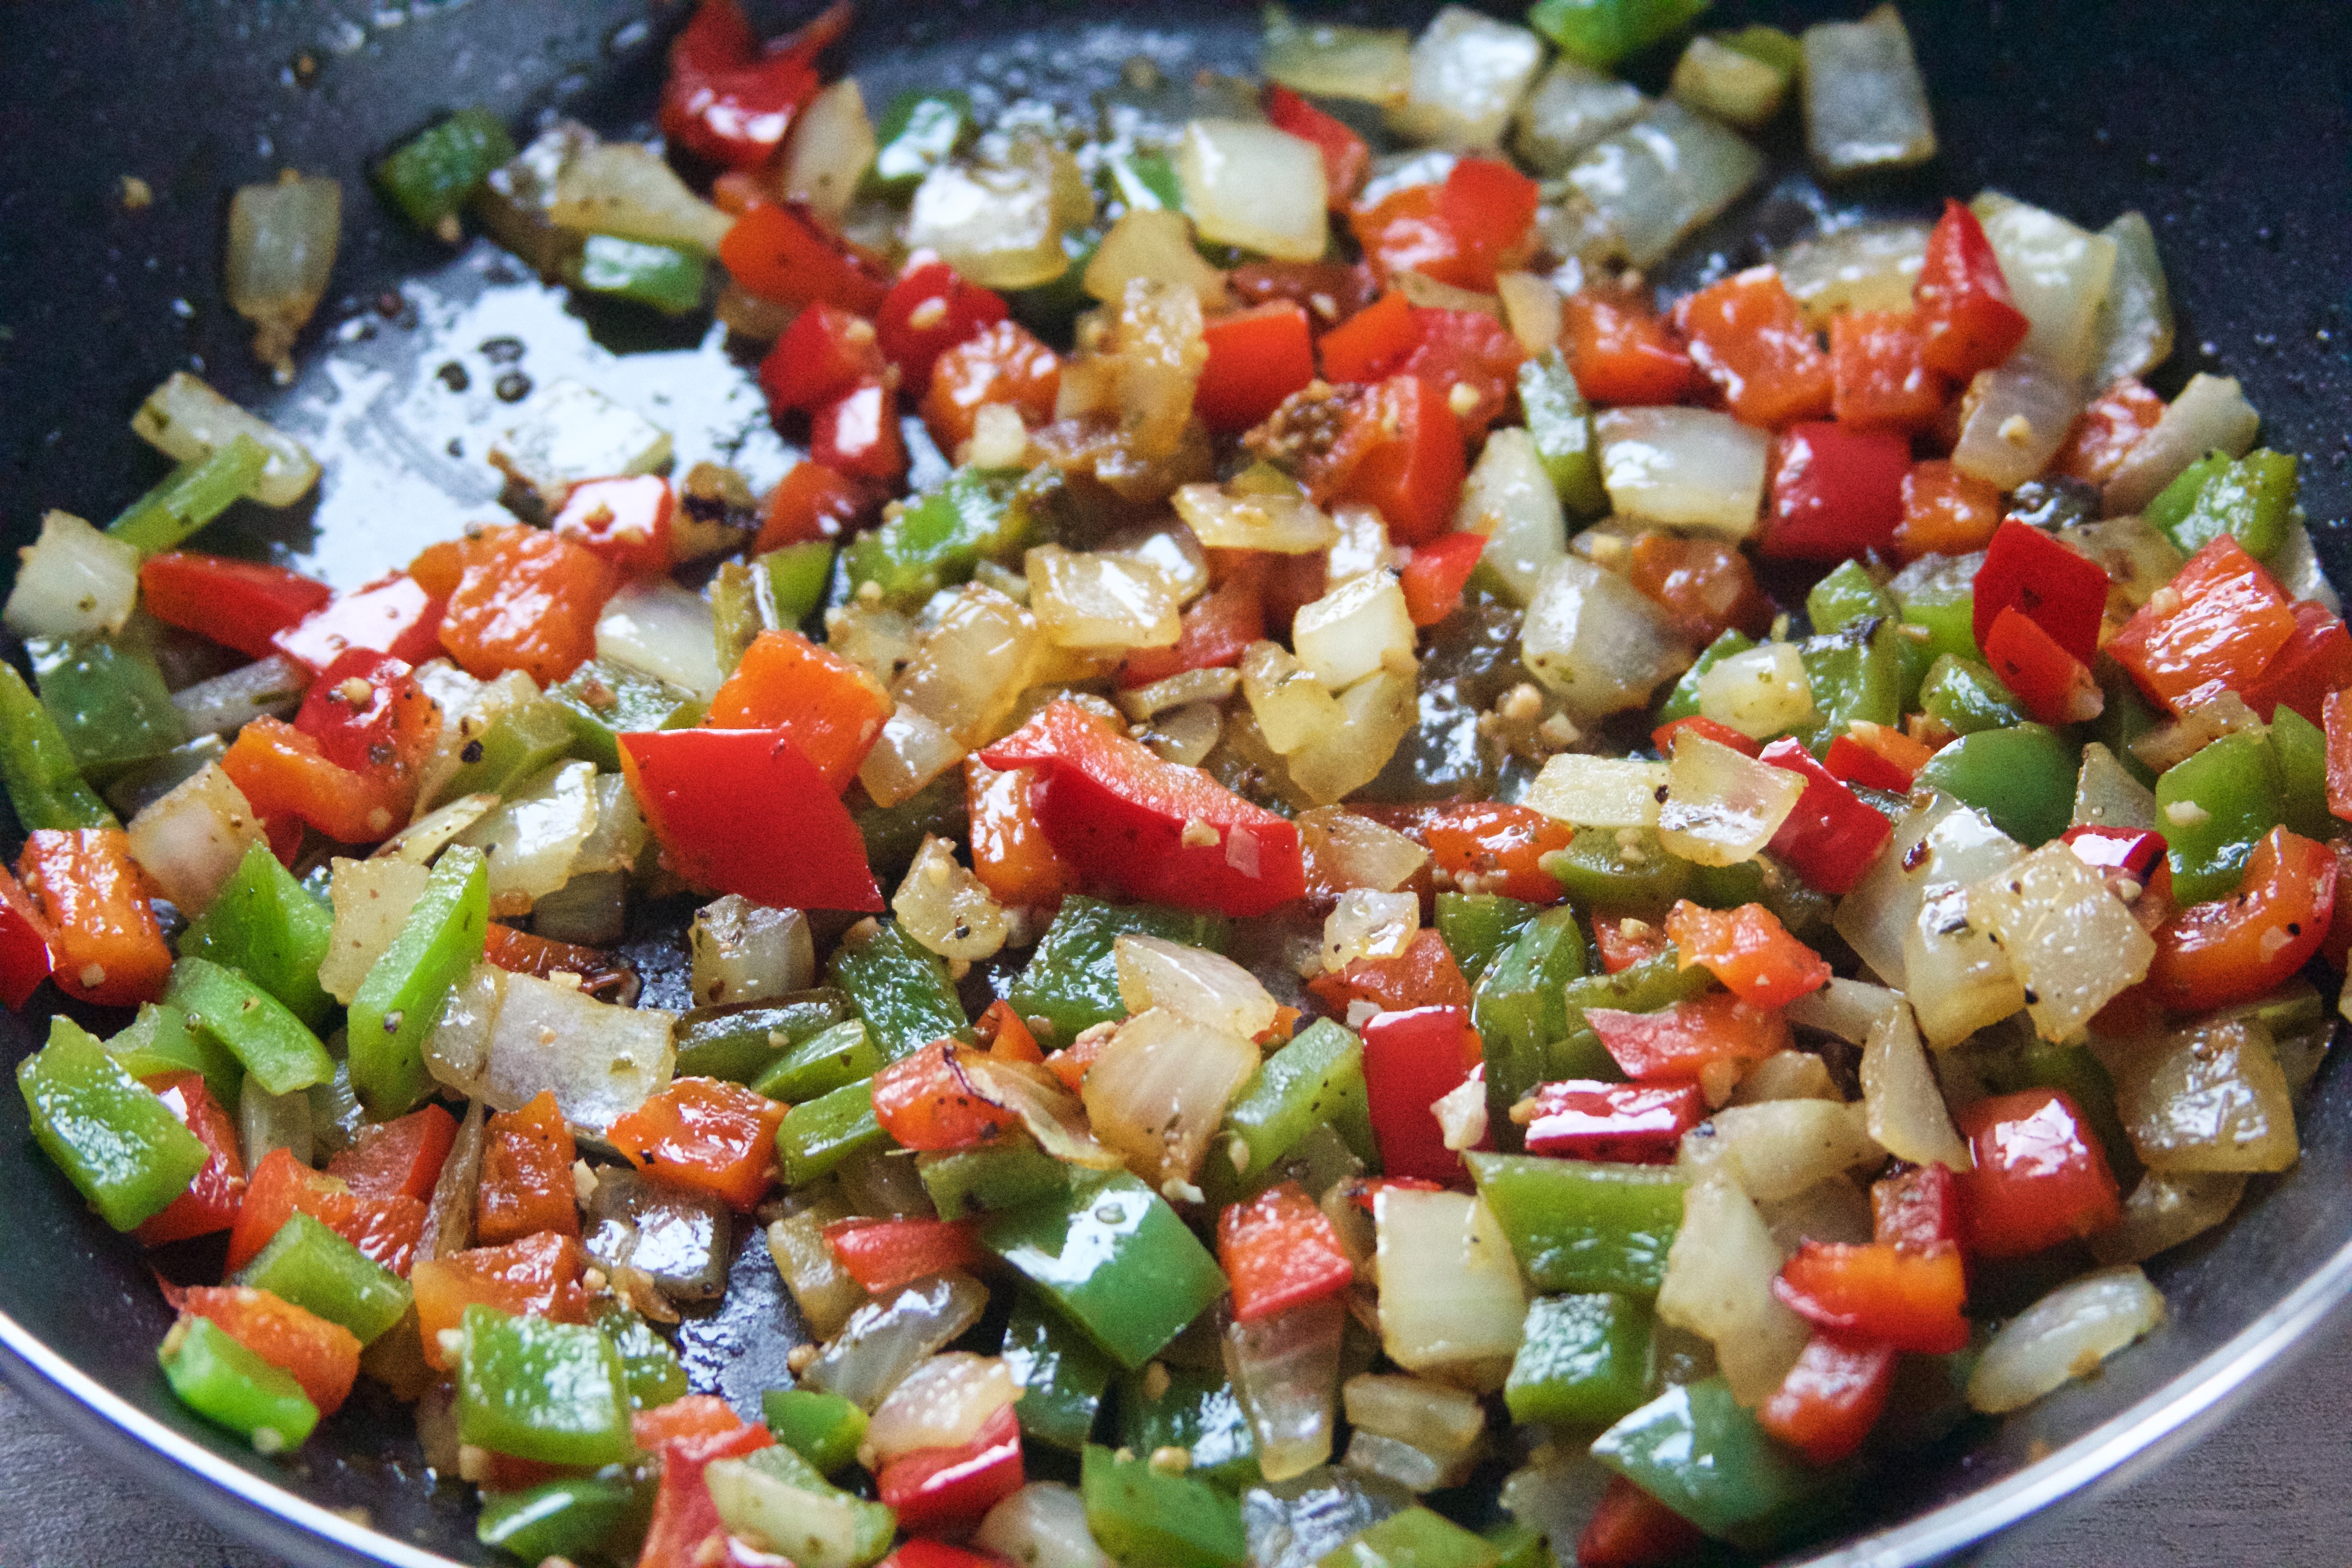
- For The Peppers Topping: Add 1 Tbsp of the oil into a pan set over medium heat. When the oil is warm, add the peppers, onion, garlic, and basil. Season with salt and pepper as you like. Stir occasionally over medium heat until onions are translucent and the peppers are cooked.
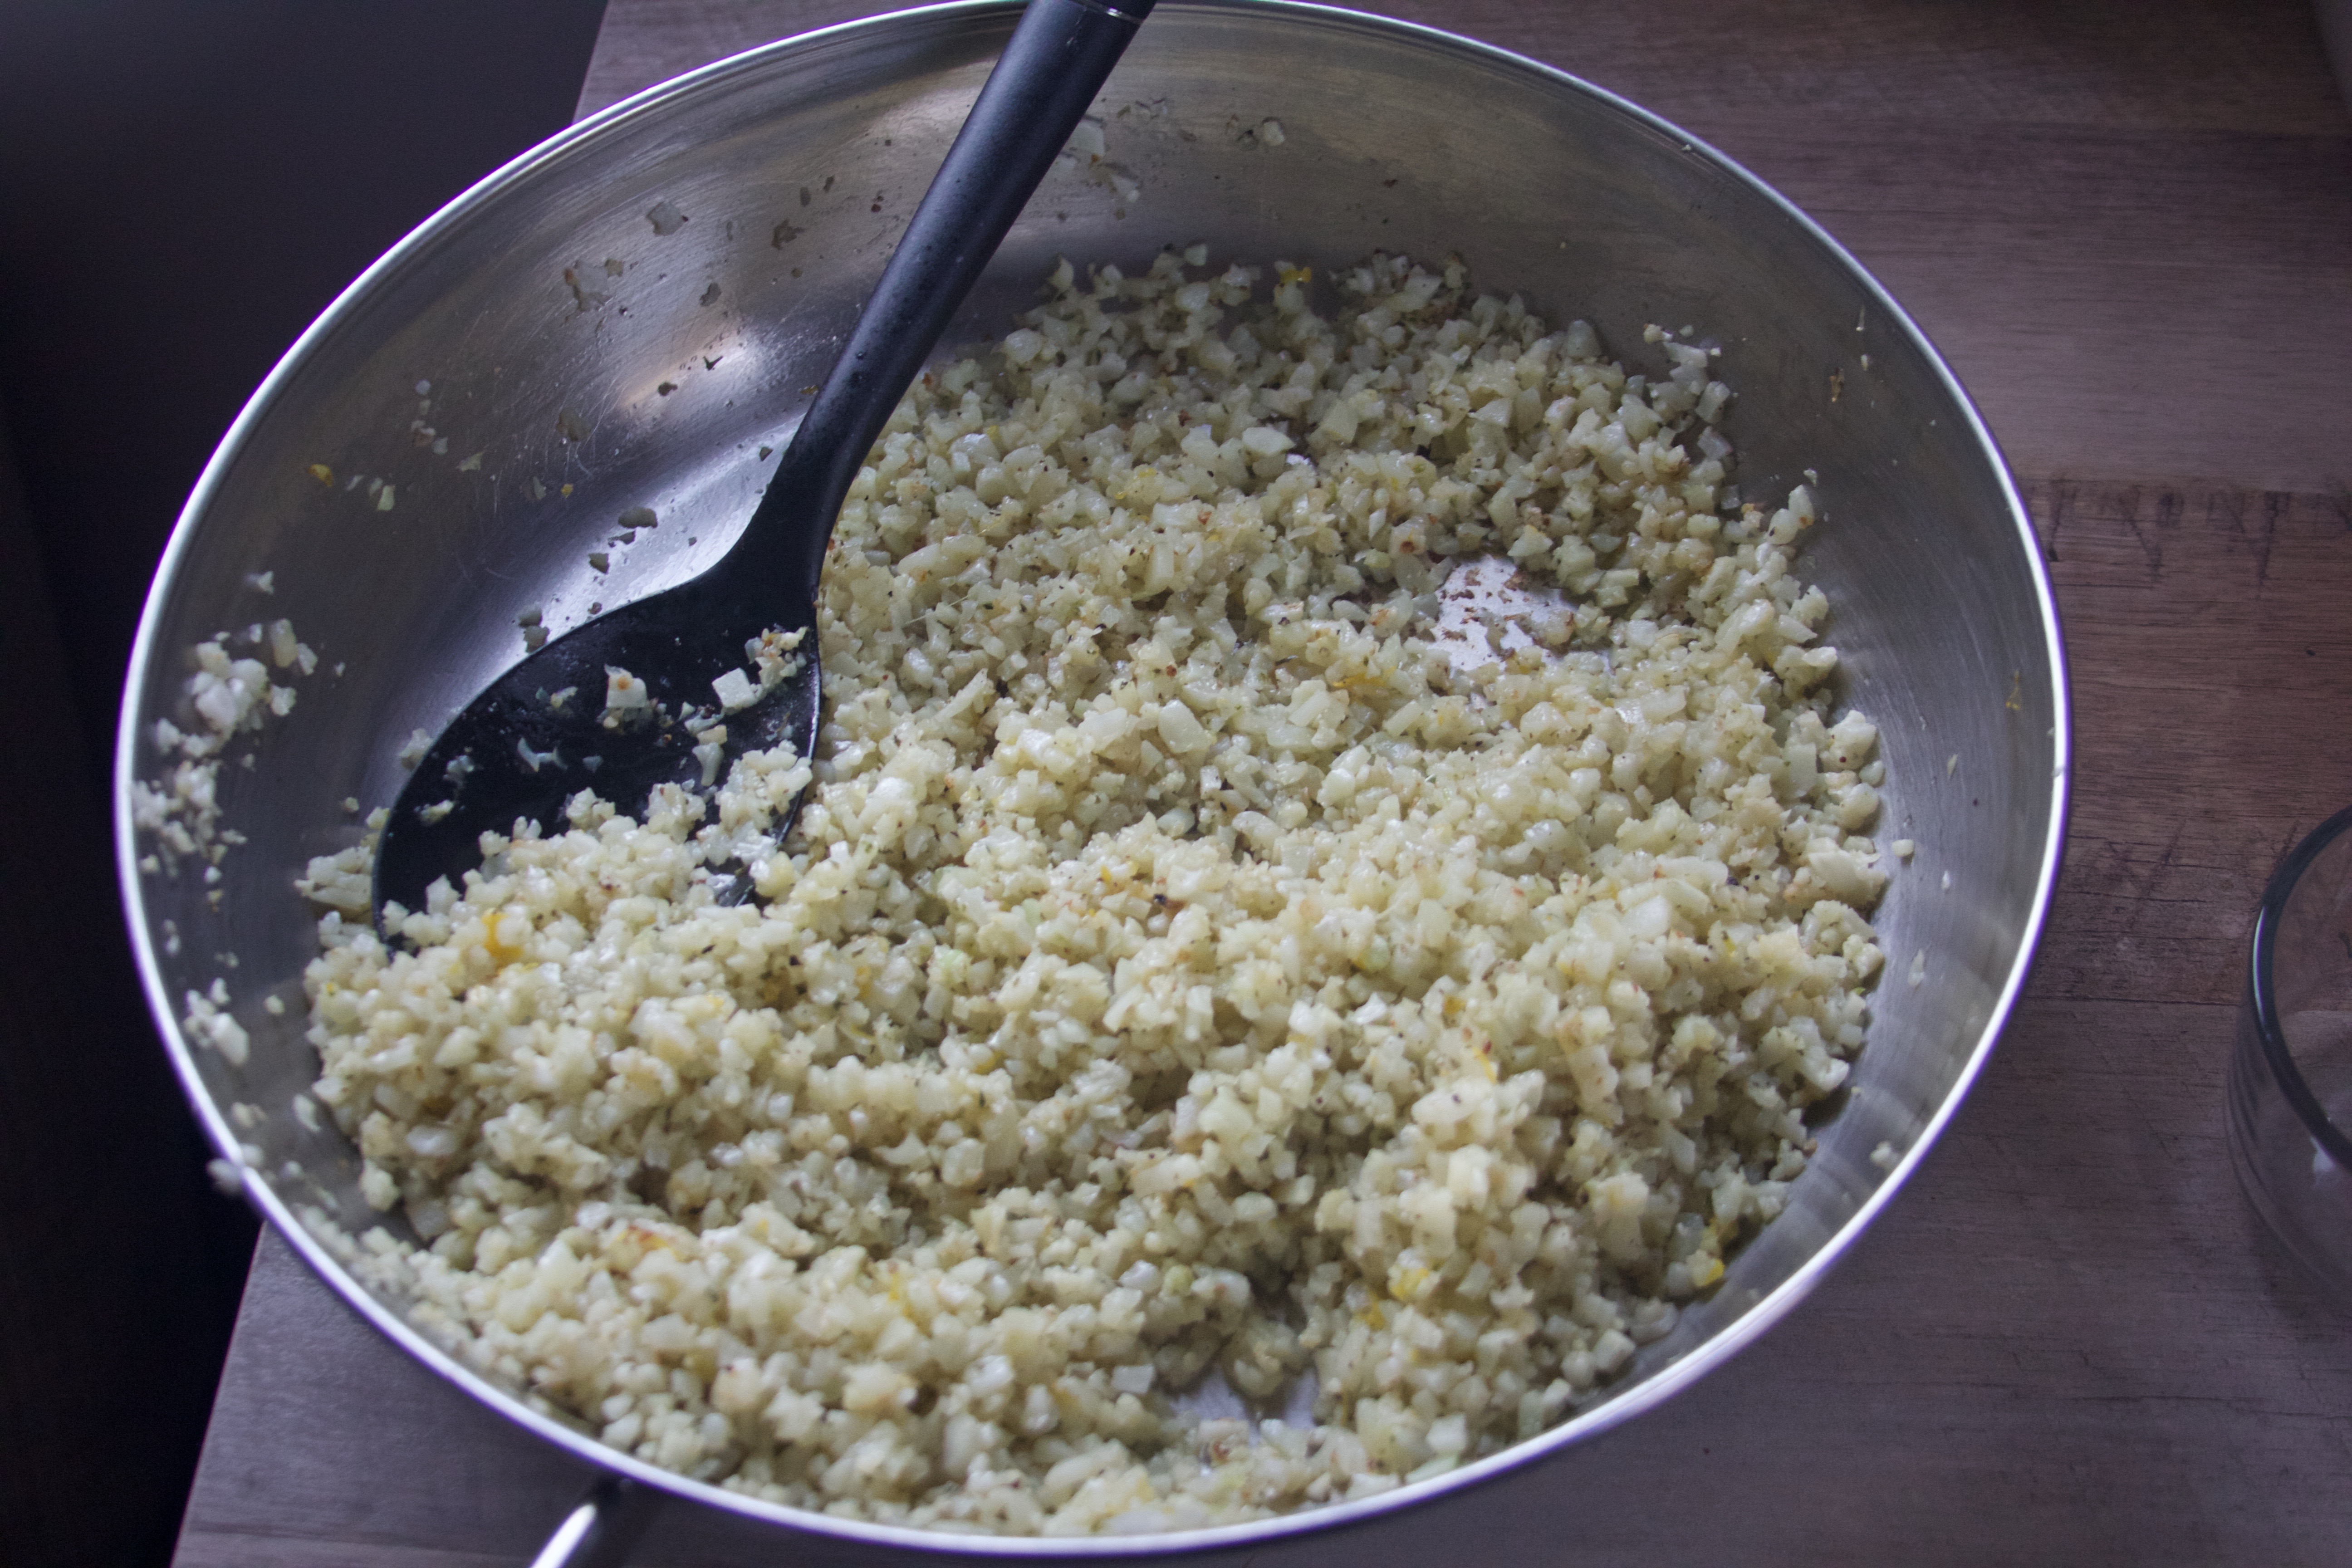
- For The Cauliflower Rice: Heat another 1 Tbsp of oil in a separate pan over medium heat. When the oil is warm, add the cauliflower rice. Stir to cook for about four minutes, then add the basil and zest the lemon into the pan. Cut the lemon in half, and squeeze the juice into the pan. Season as desired with salt and pepper.
- To Assemble: Top the fish filets generously with peppers, and scoop the cauliflower rice on the side. If you have it on hand, sprinkle a littler parmesan on top! Pair with your favorite vegetable. Enjoy your healthy meal!


This flavor-packed burger pairs well with the light crunch of coleslaw and the tang on fried pickles. It is best enjoyed relaxing outside with family and friends!
Ingredients
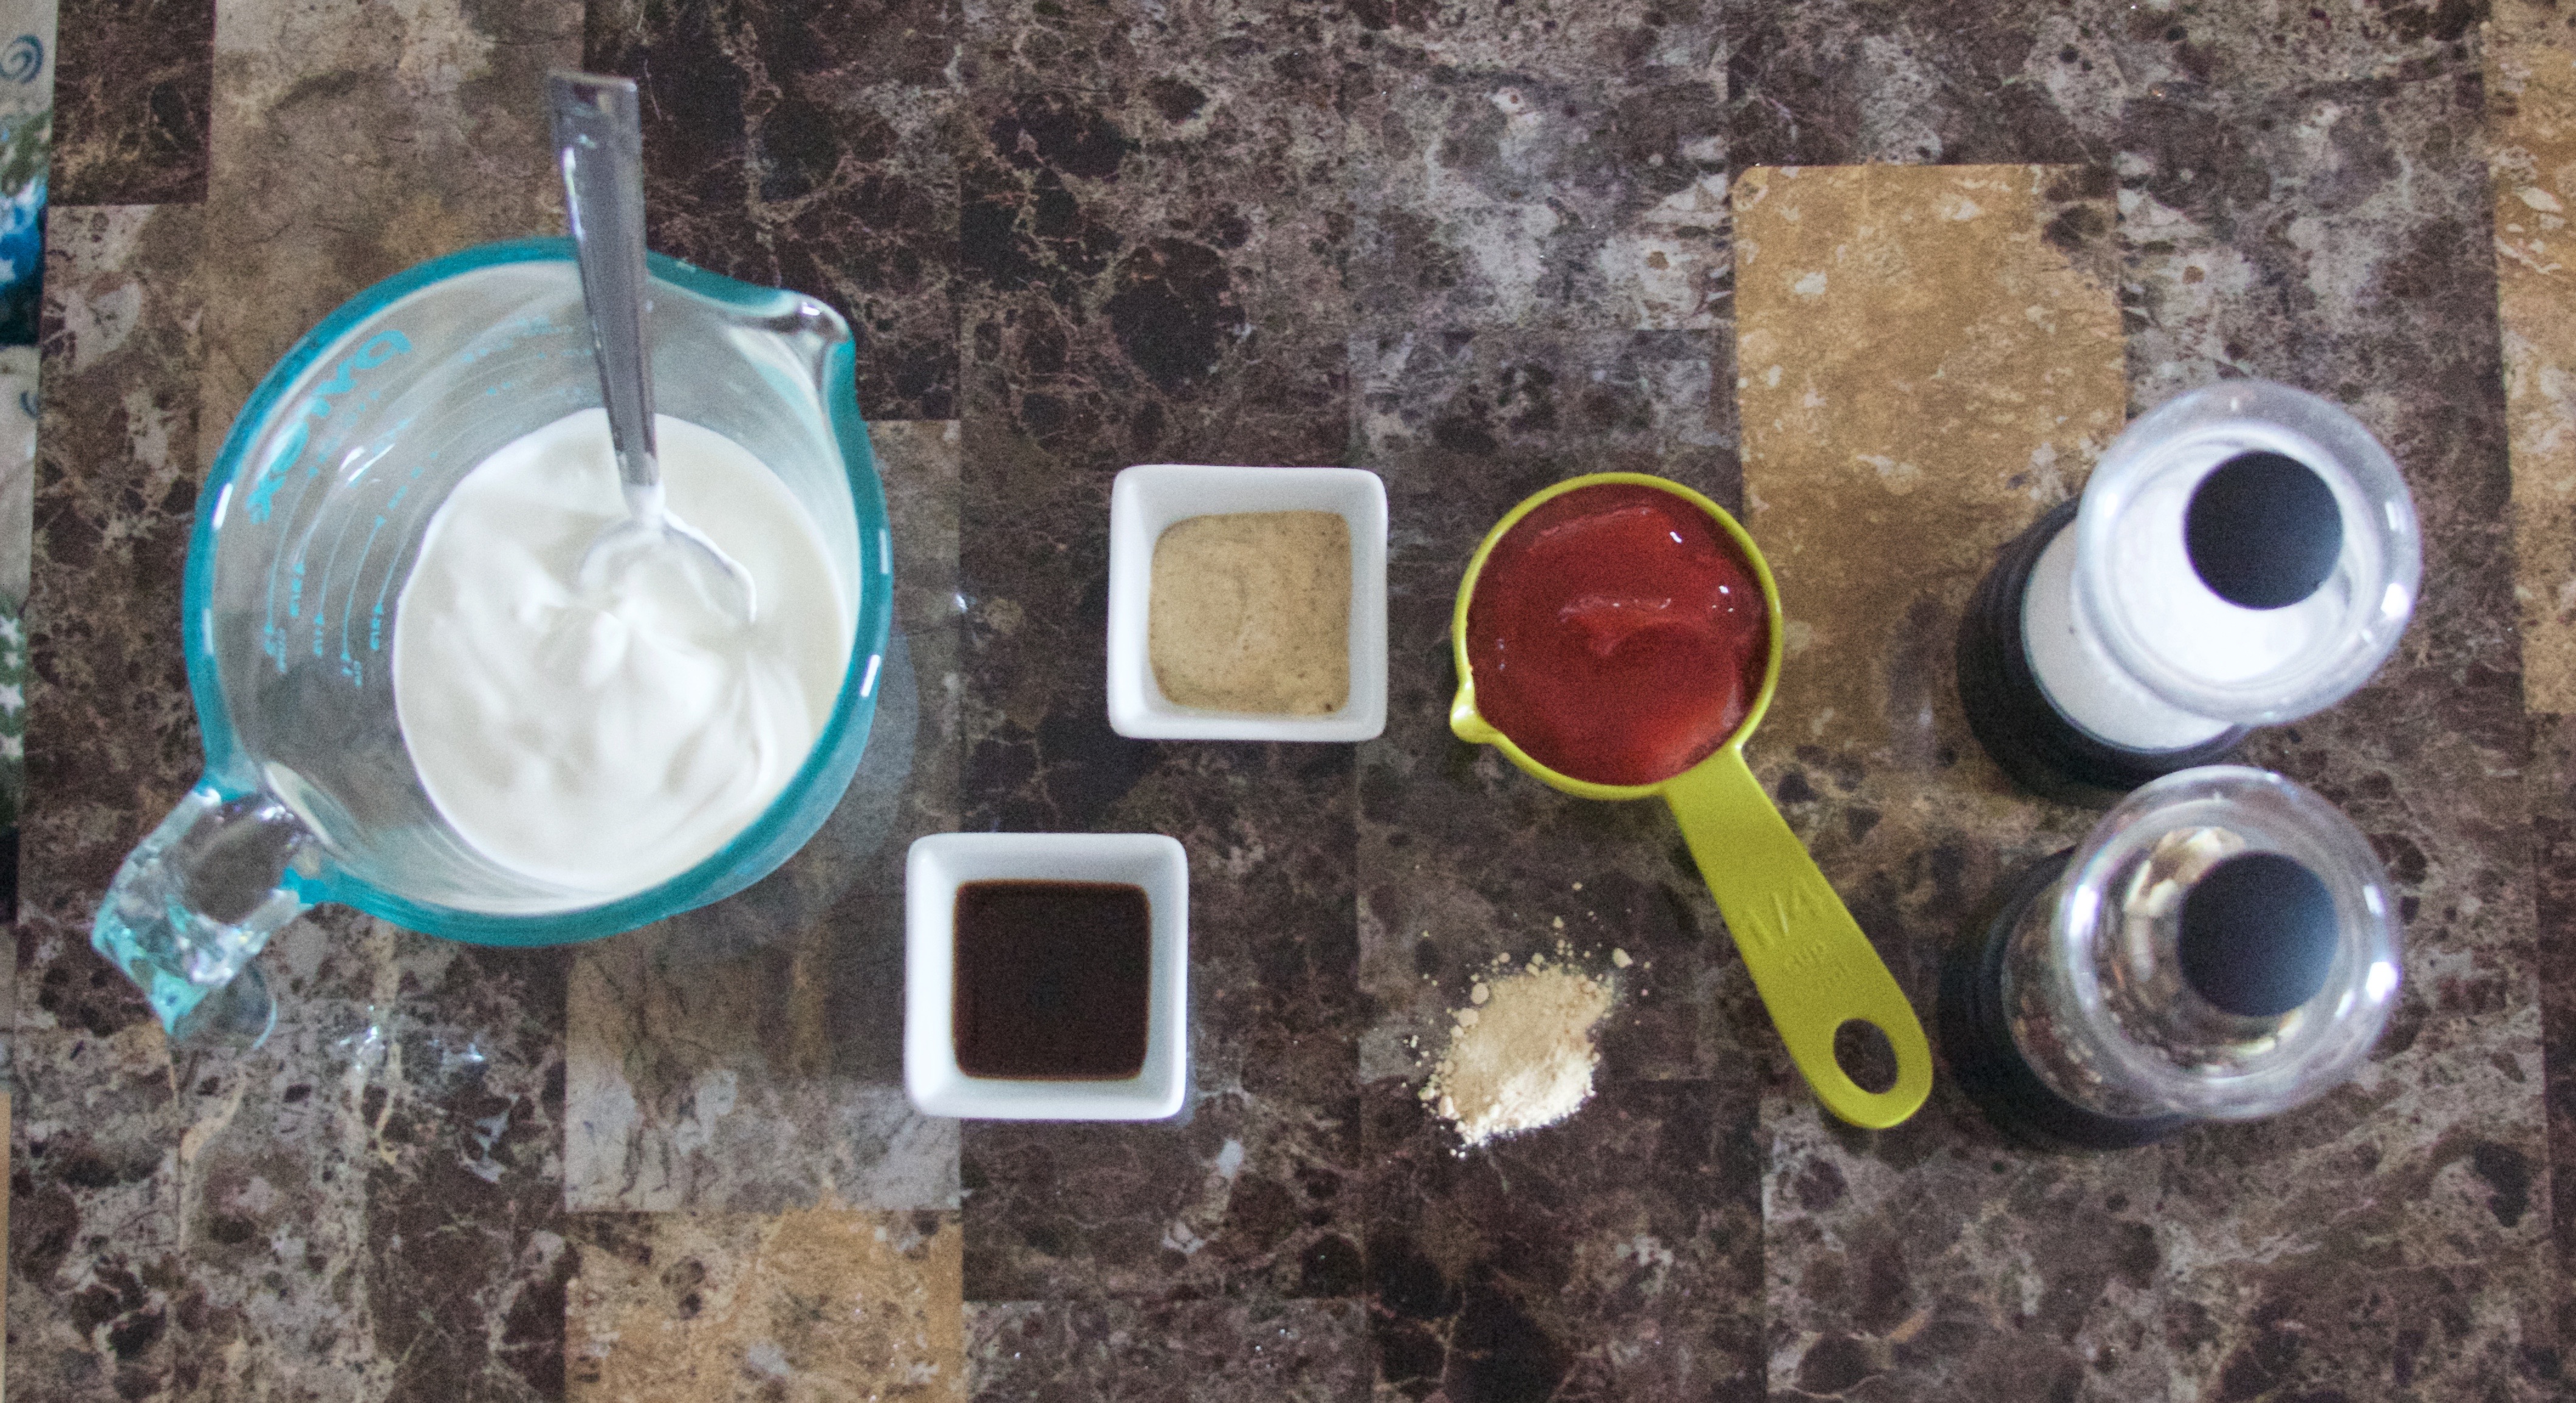
- 1/2 cup sour cream
- 1/4 cup catsup
- 1/2 tsp Worchestershire sauce
- 2 tsp spicy brown mustard
- 1/2 tsp garlic powder
- salt, pepper, and hot sauce to taste
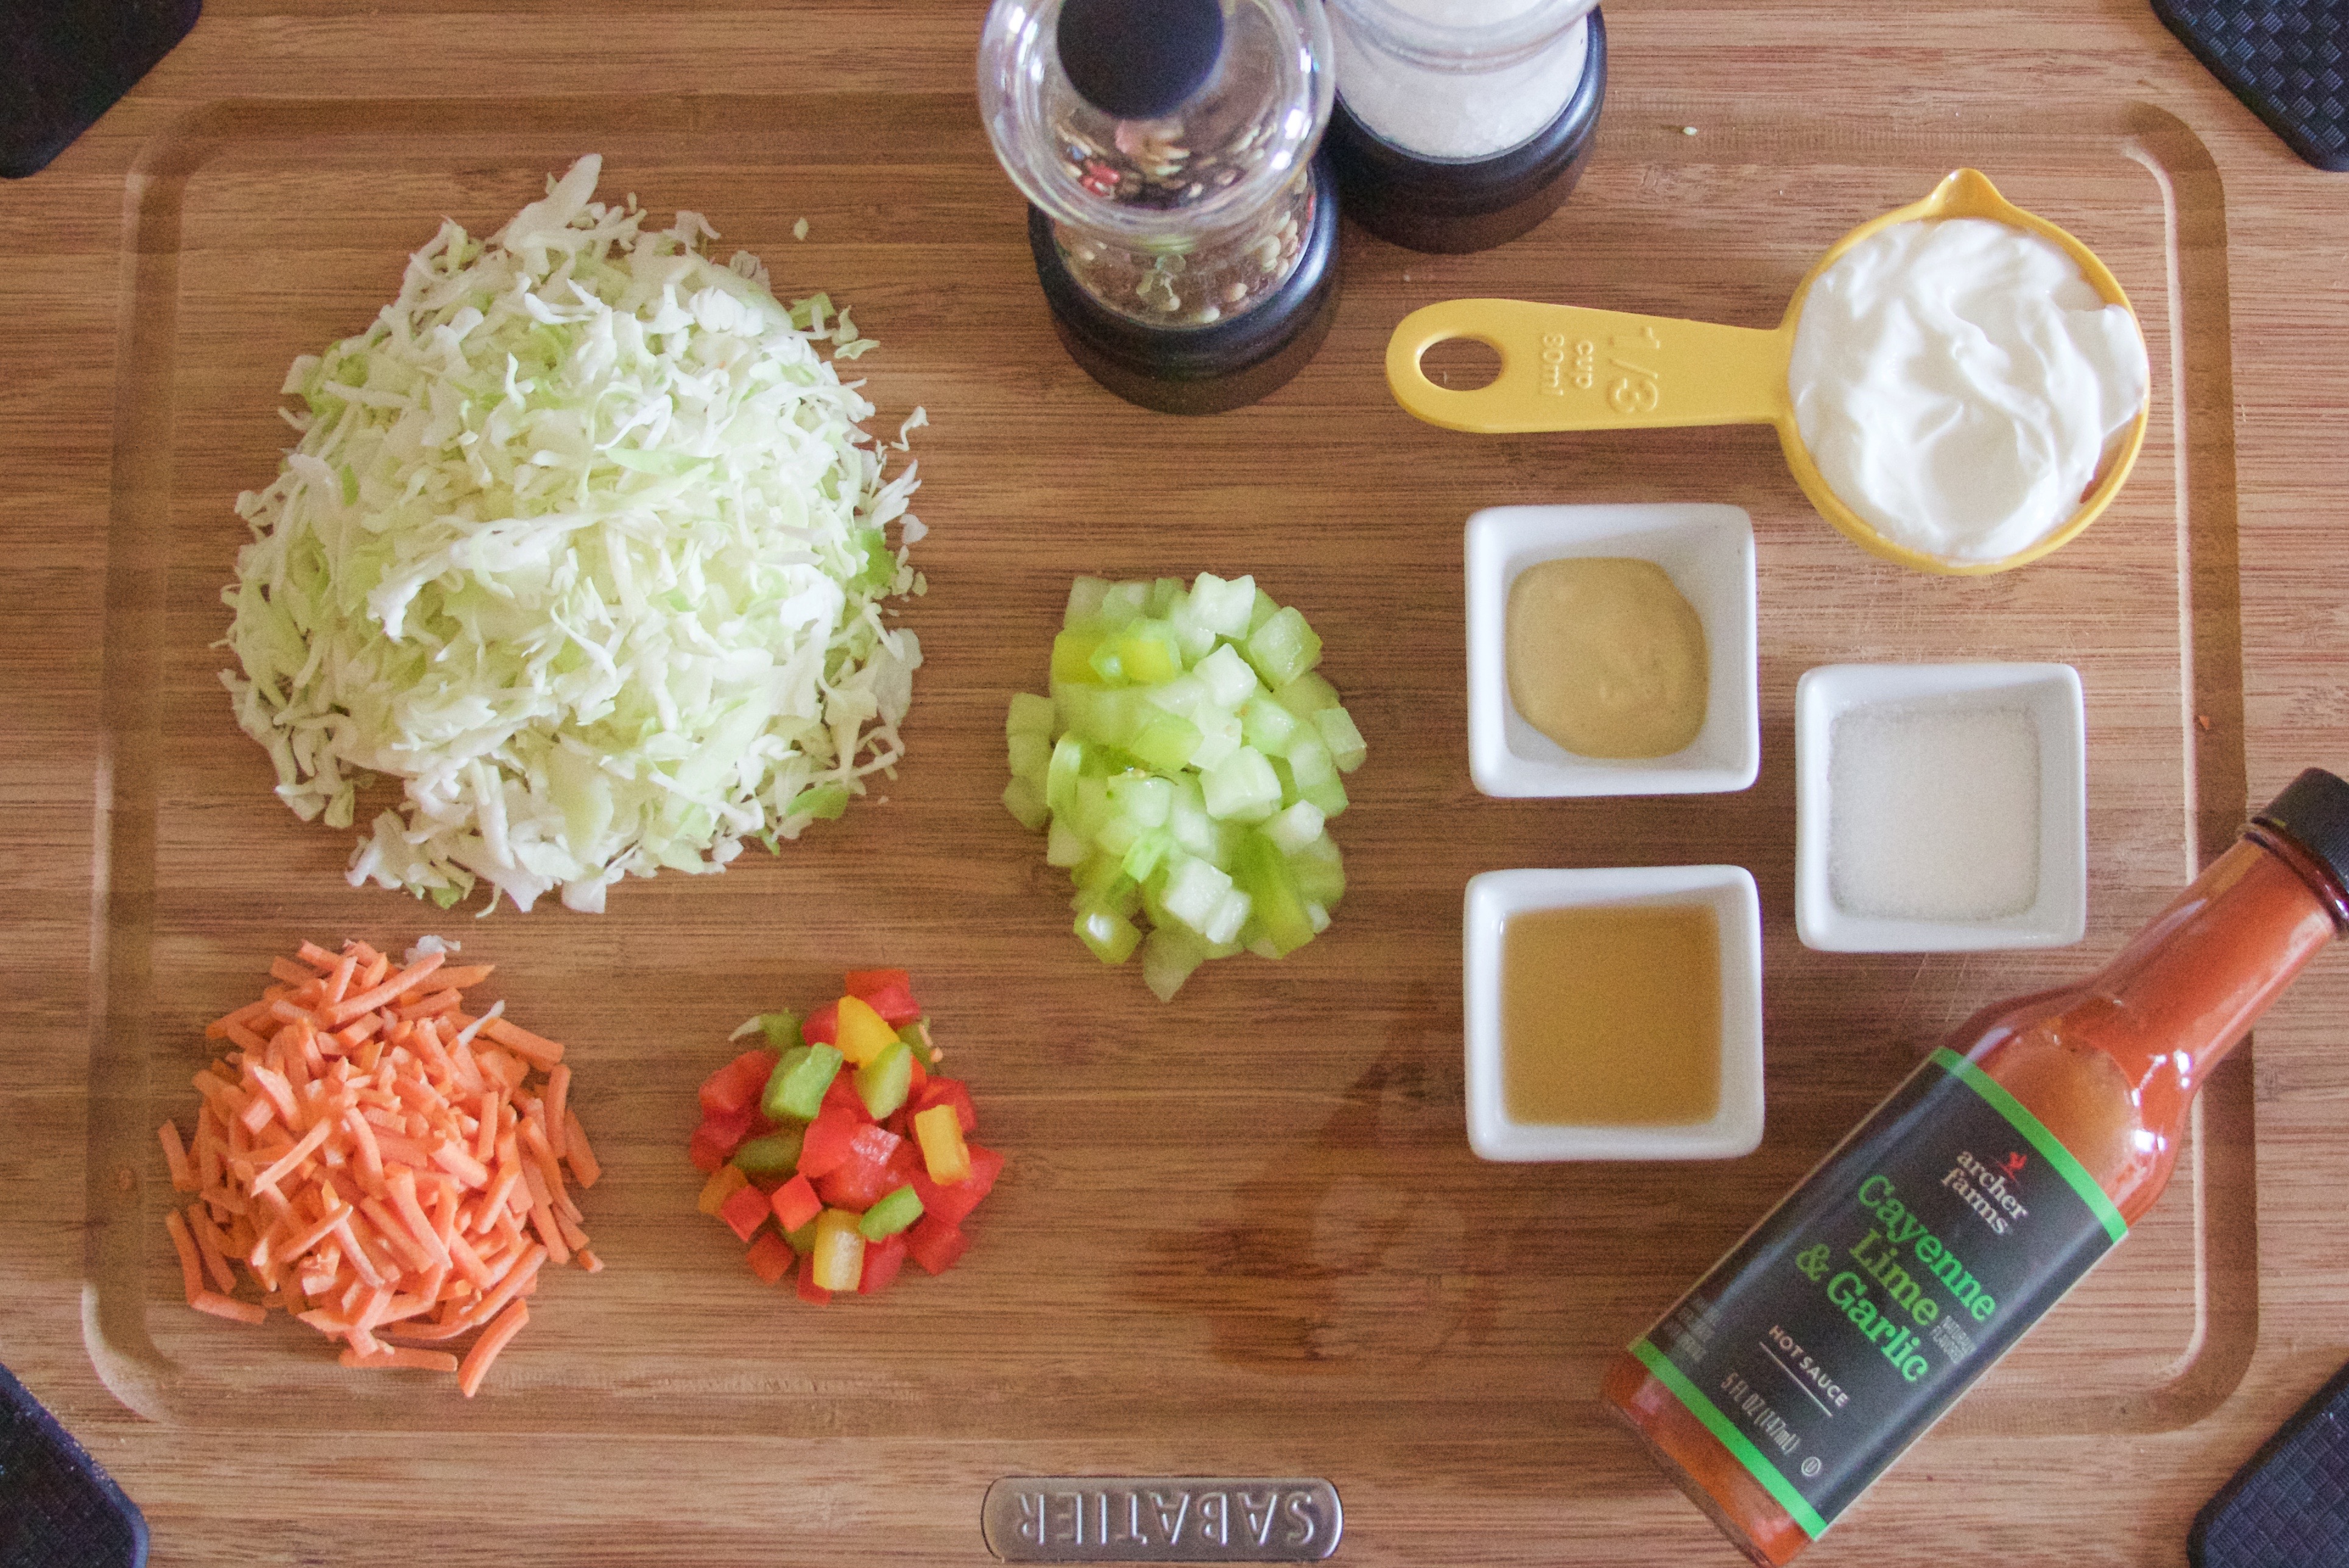
- 1/3 cup greek yogurt
- 1 Tbsp apple cider vinegar
- 2 tsp sugar
- 1 tsp dijon mustard
- salt, pepper, and hot sauce to taste
- 1 1/2 cups shredded cabbage
- 1/3 cup shredded carrots, diced
- 1/3 cup green tomato, seeds removed, diced
- 1/4 cup bell pepper, diced
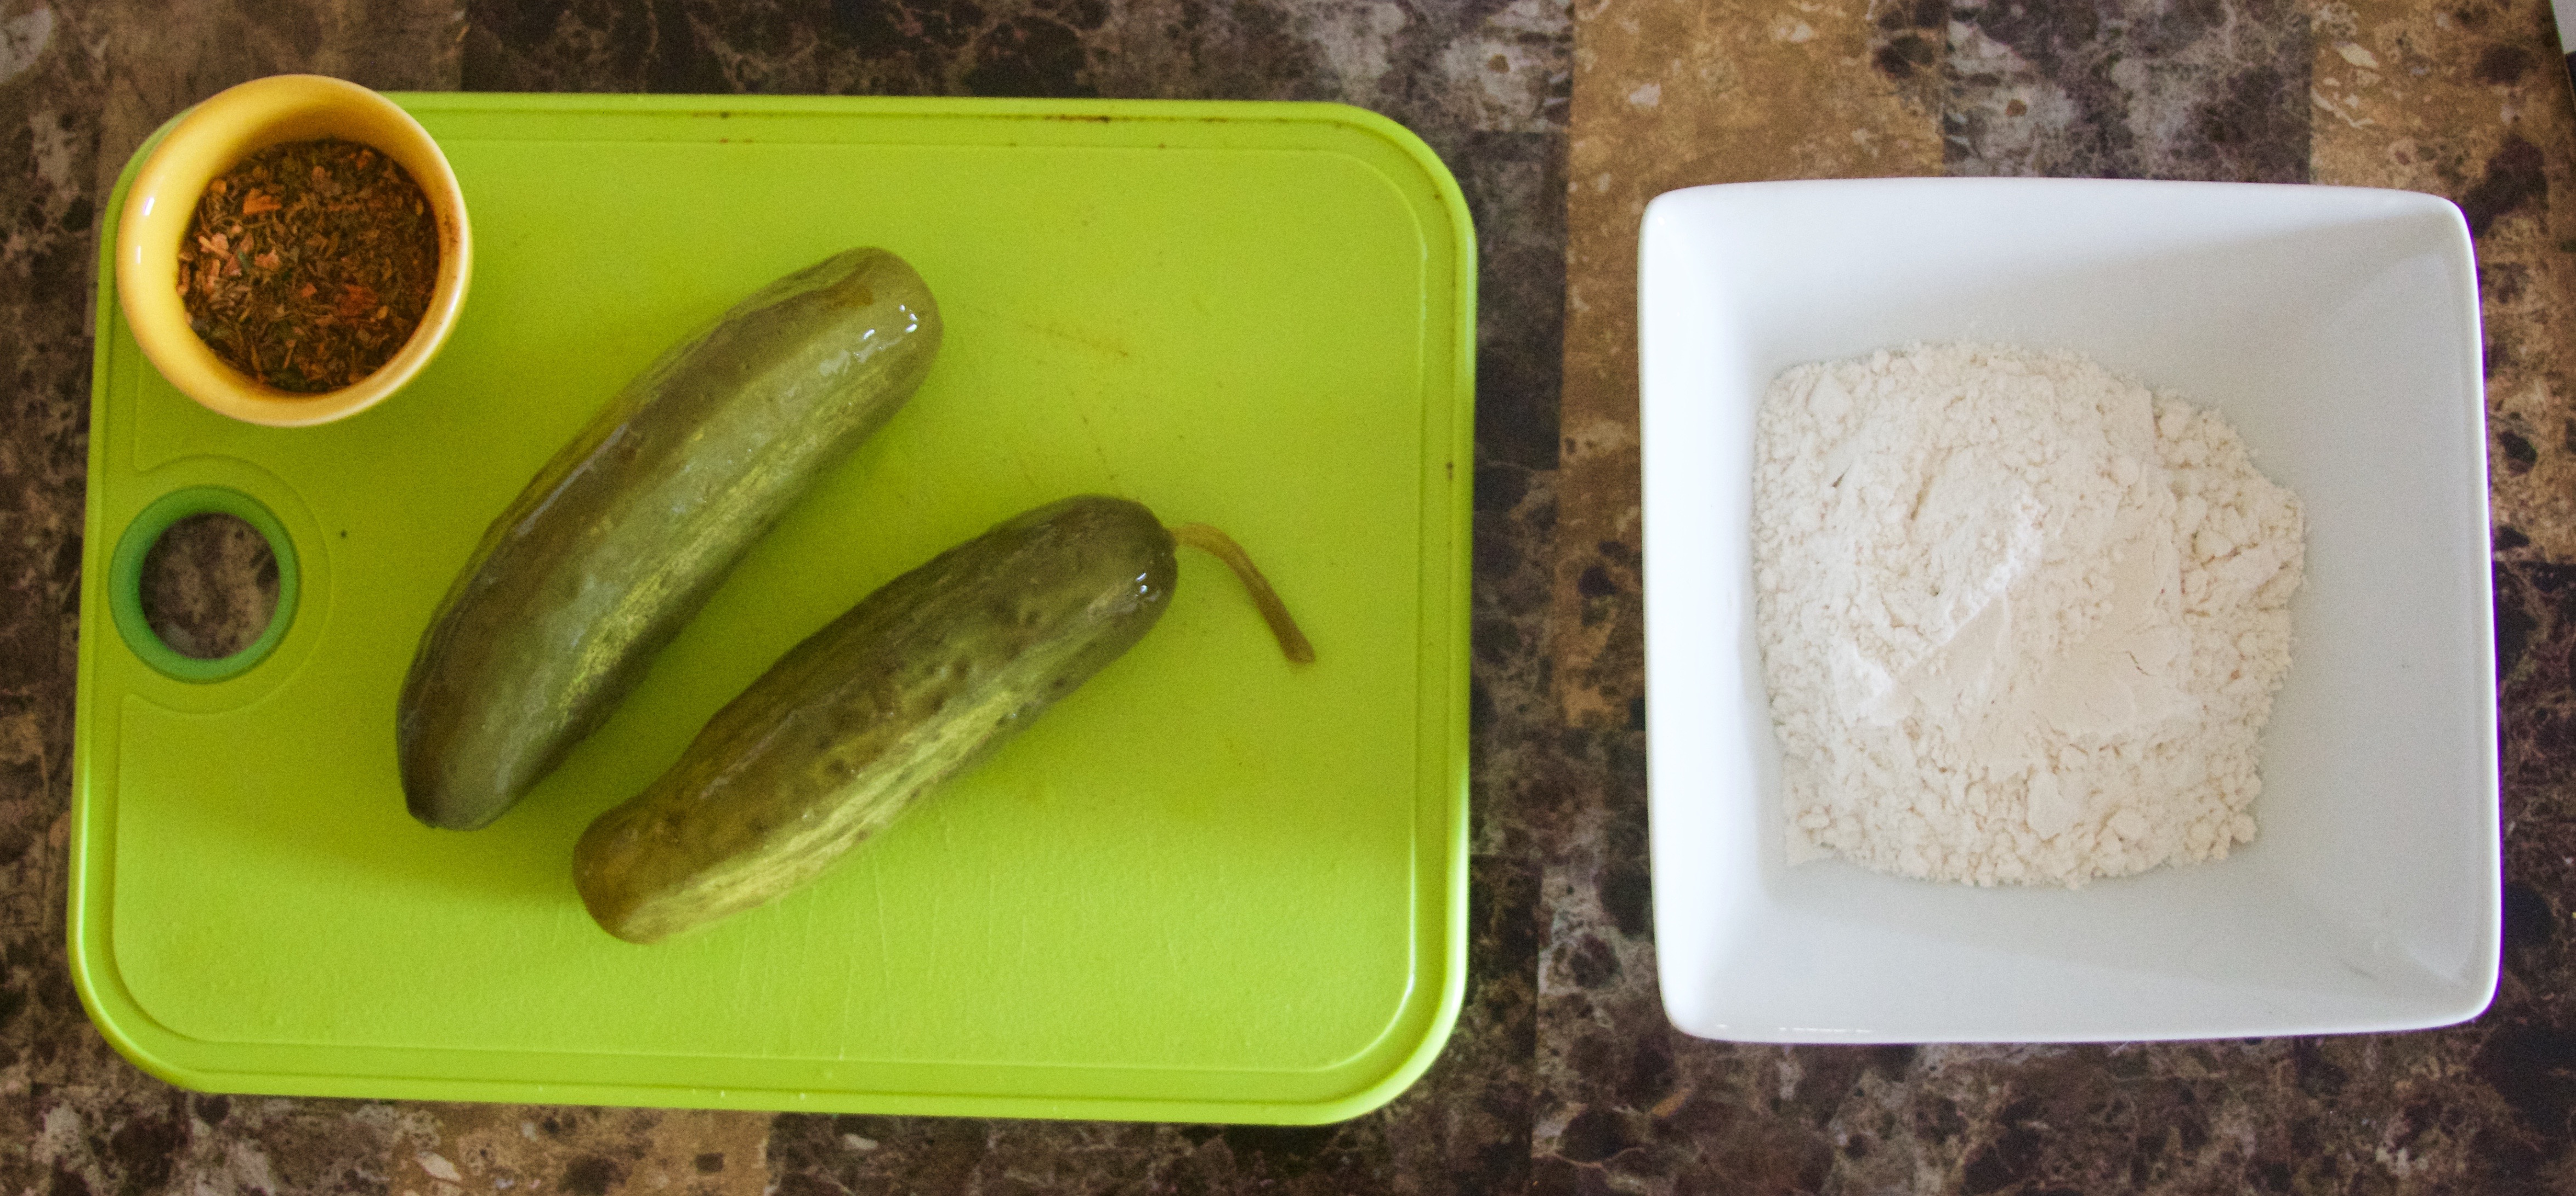
- 2 large pickles
- 1 cup all purpose flour
- 1 Tbsp cajun spice seasoning (no salt)
- 1 lb ground chuck
- 8 slices bacon
- 1 tsp minced garlic
- 1 tsp Tony’s seasoning (with salt)
- pepper
- 4 Brioche buns, sliced
- Mayonaise
Instructions
- Don’t pull everything out just yet. There is so much to prepare for this recipe, so walk through it with me in order.
- We will start with the sauce because it is easy and go in the fridge until we are ready to serve. With more rest time, the flavors have an excellent chance to mix and become more bold.
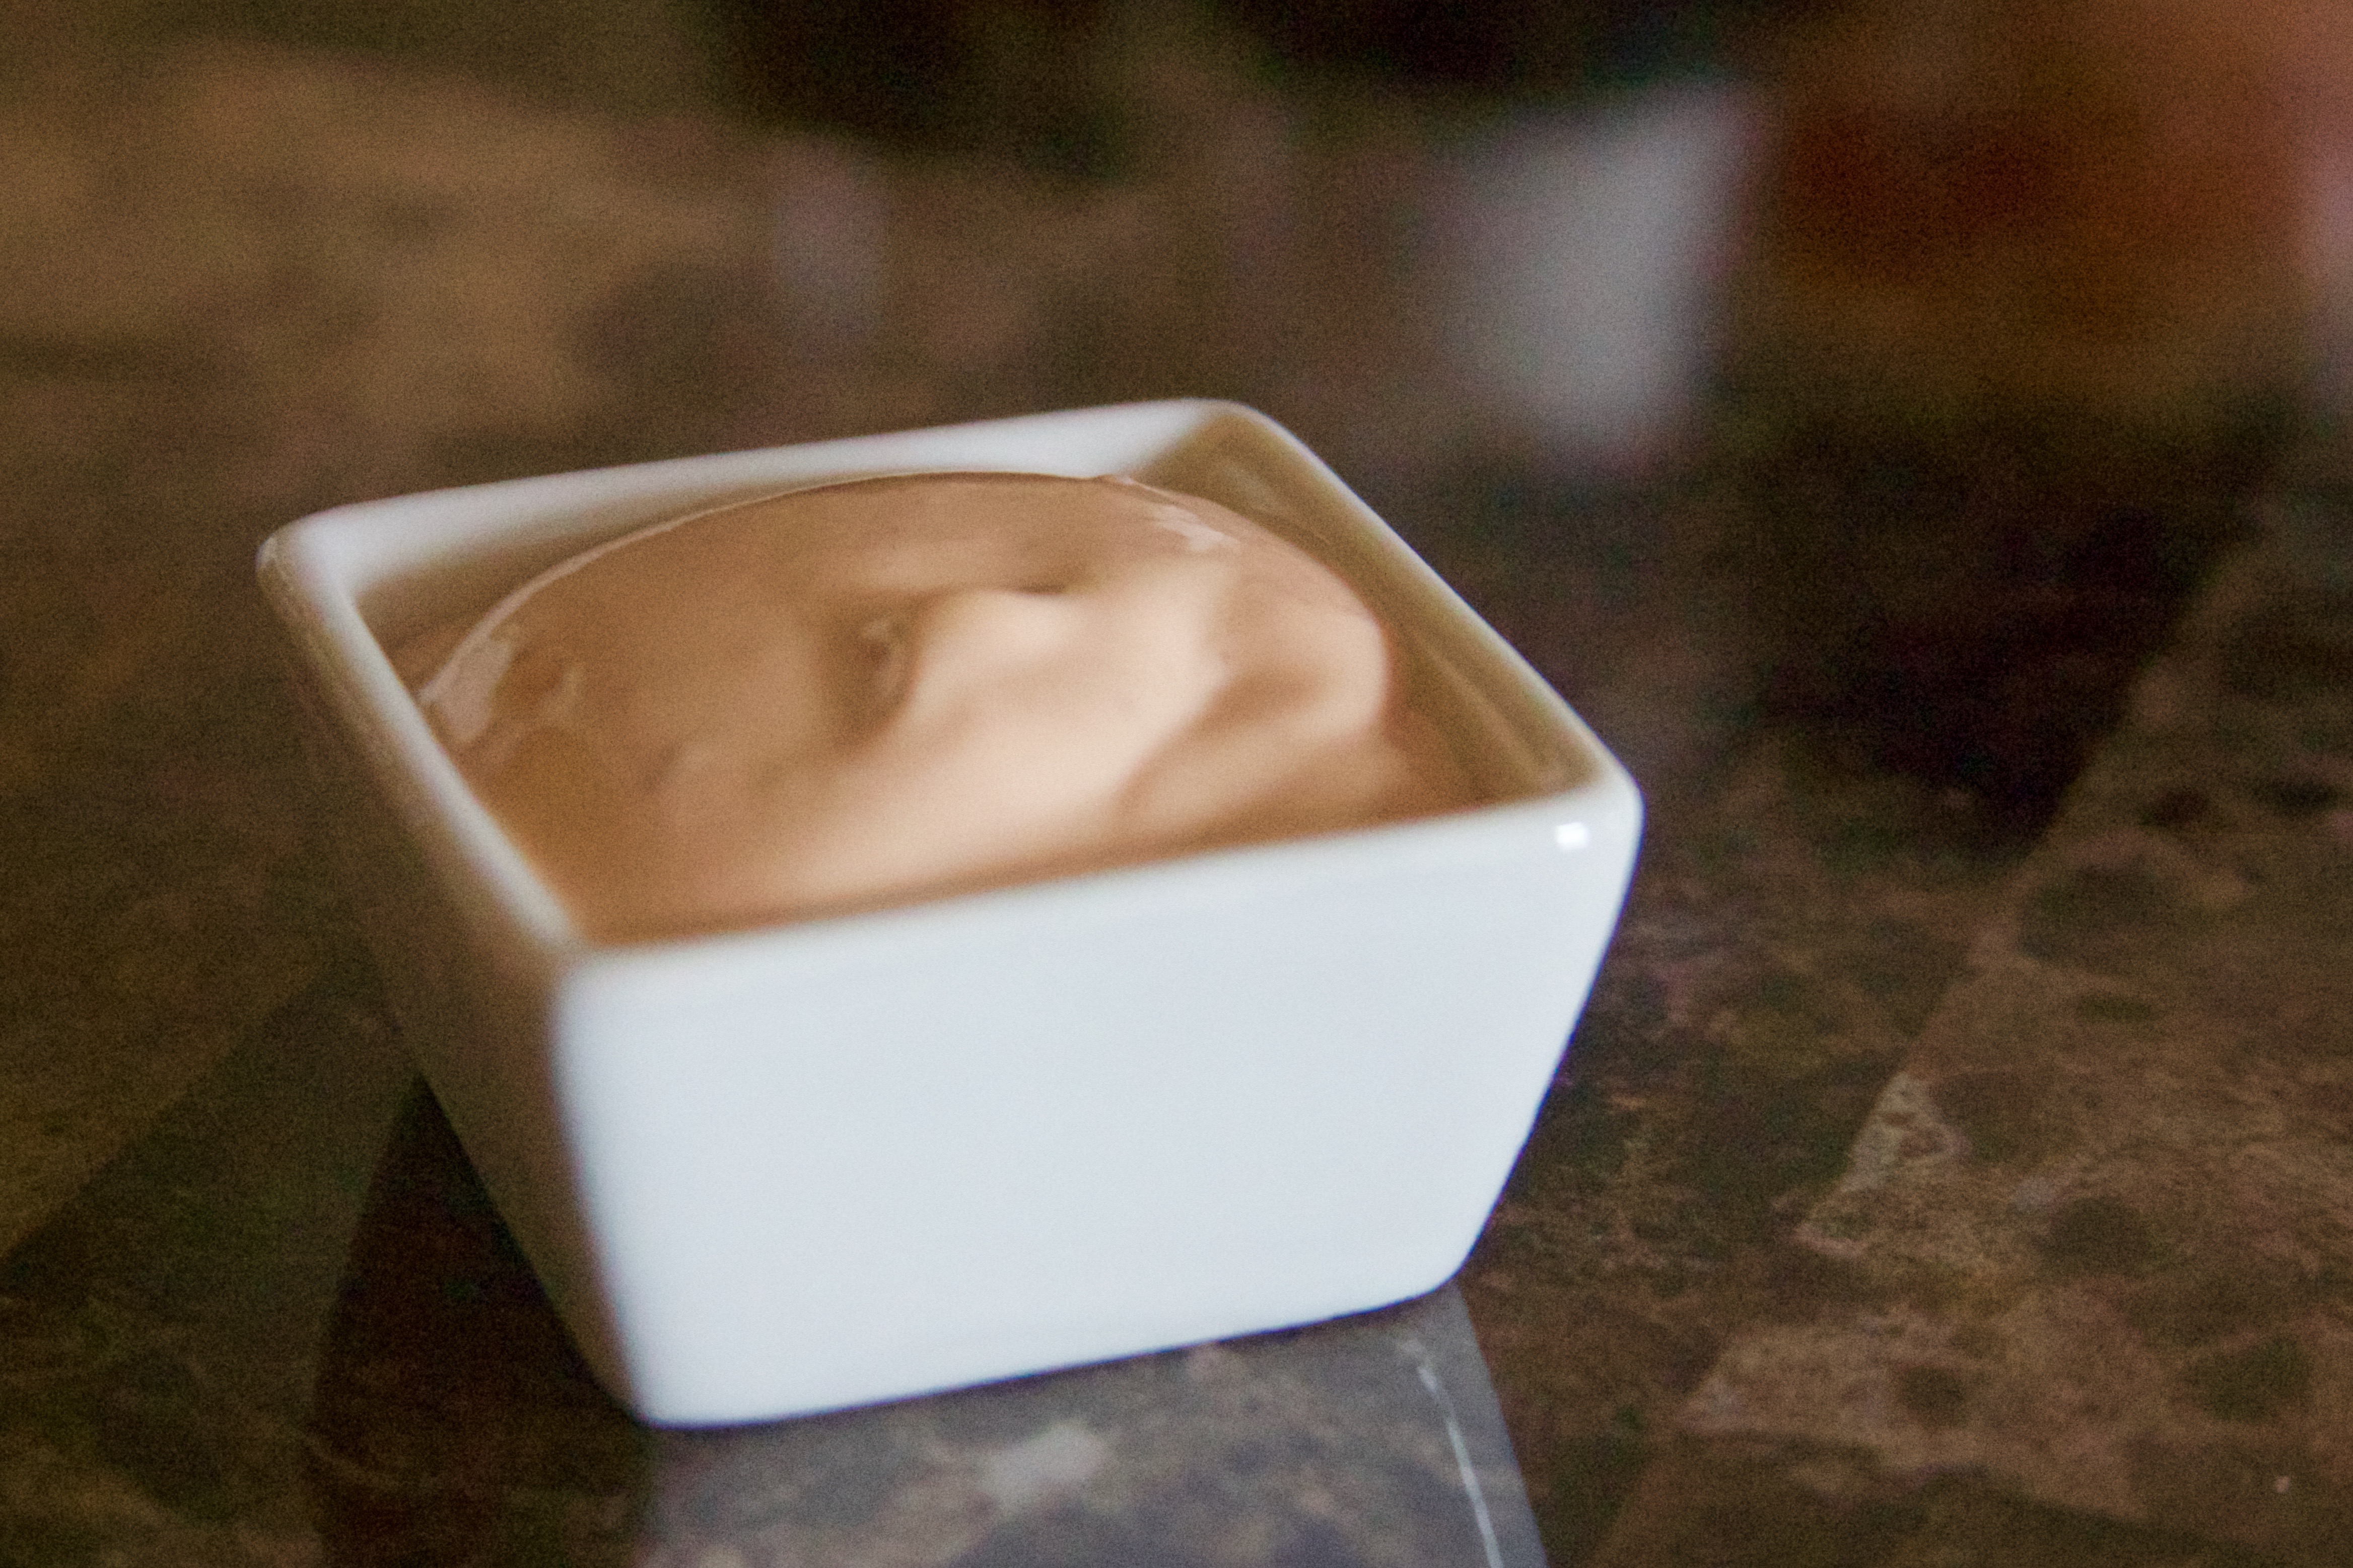
- Mix everything together in one bowl. Stir the sauce until is is homogenous, then cover with plastic wrap and chill until ready to use.
- Measure out your dressing ingredients. Dice the vegetables so that they are in small pieces. Even though the carrots are already shredded, you will want to chop them further so that you don’t get any big chunks in the final slaw. Remember, this is going on the burger! Manageable bites are best.
- In a large bowl, whisk together your dressing ingredients. Add all of the vegetables and toss to coat evenly with the dressing. Cover with plastic wrap and chill until ready to serve.
- **At this point, put the bacon for the burger into the freezer. It will cut a lot easier if it is partially frozen. Do not leave the slices in the freezer for longer than ten minutes**
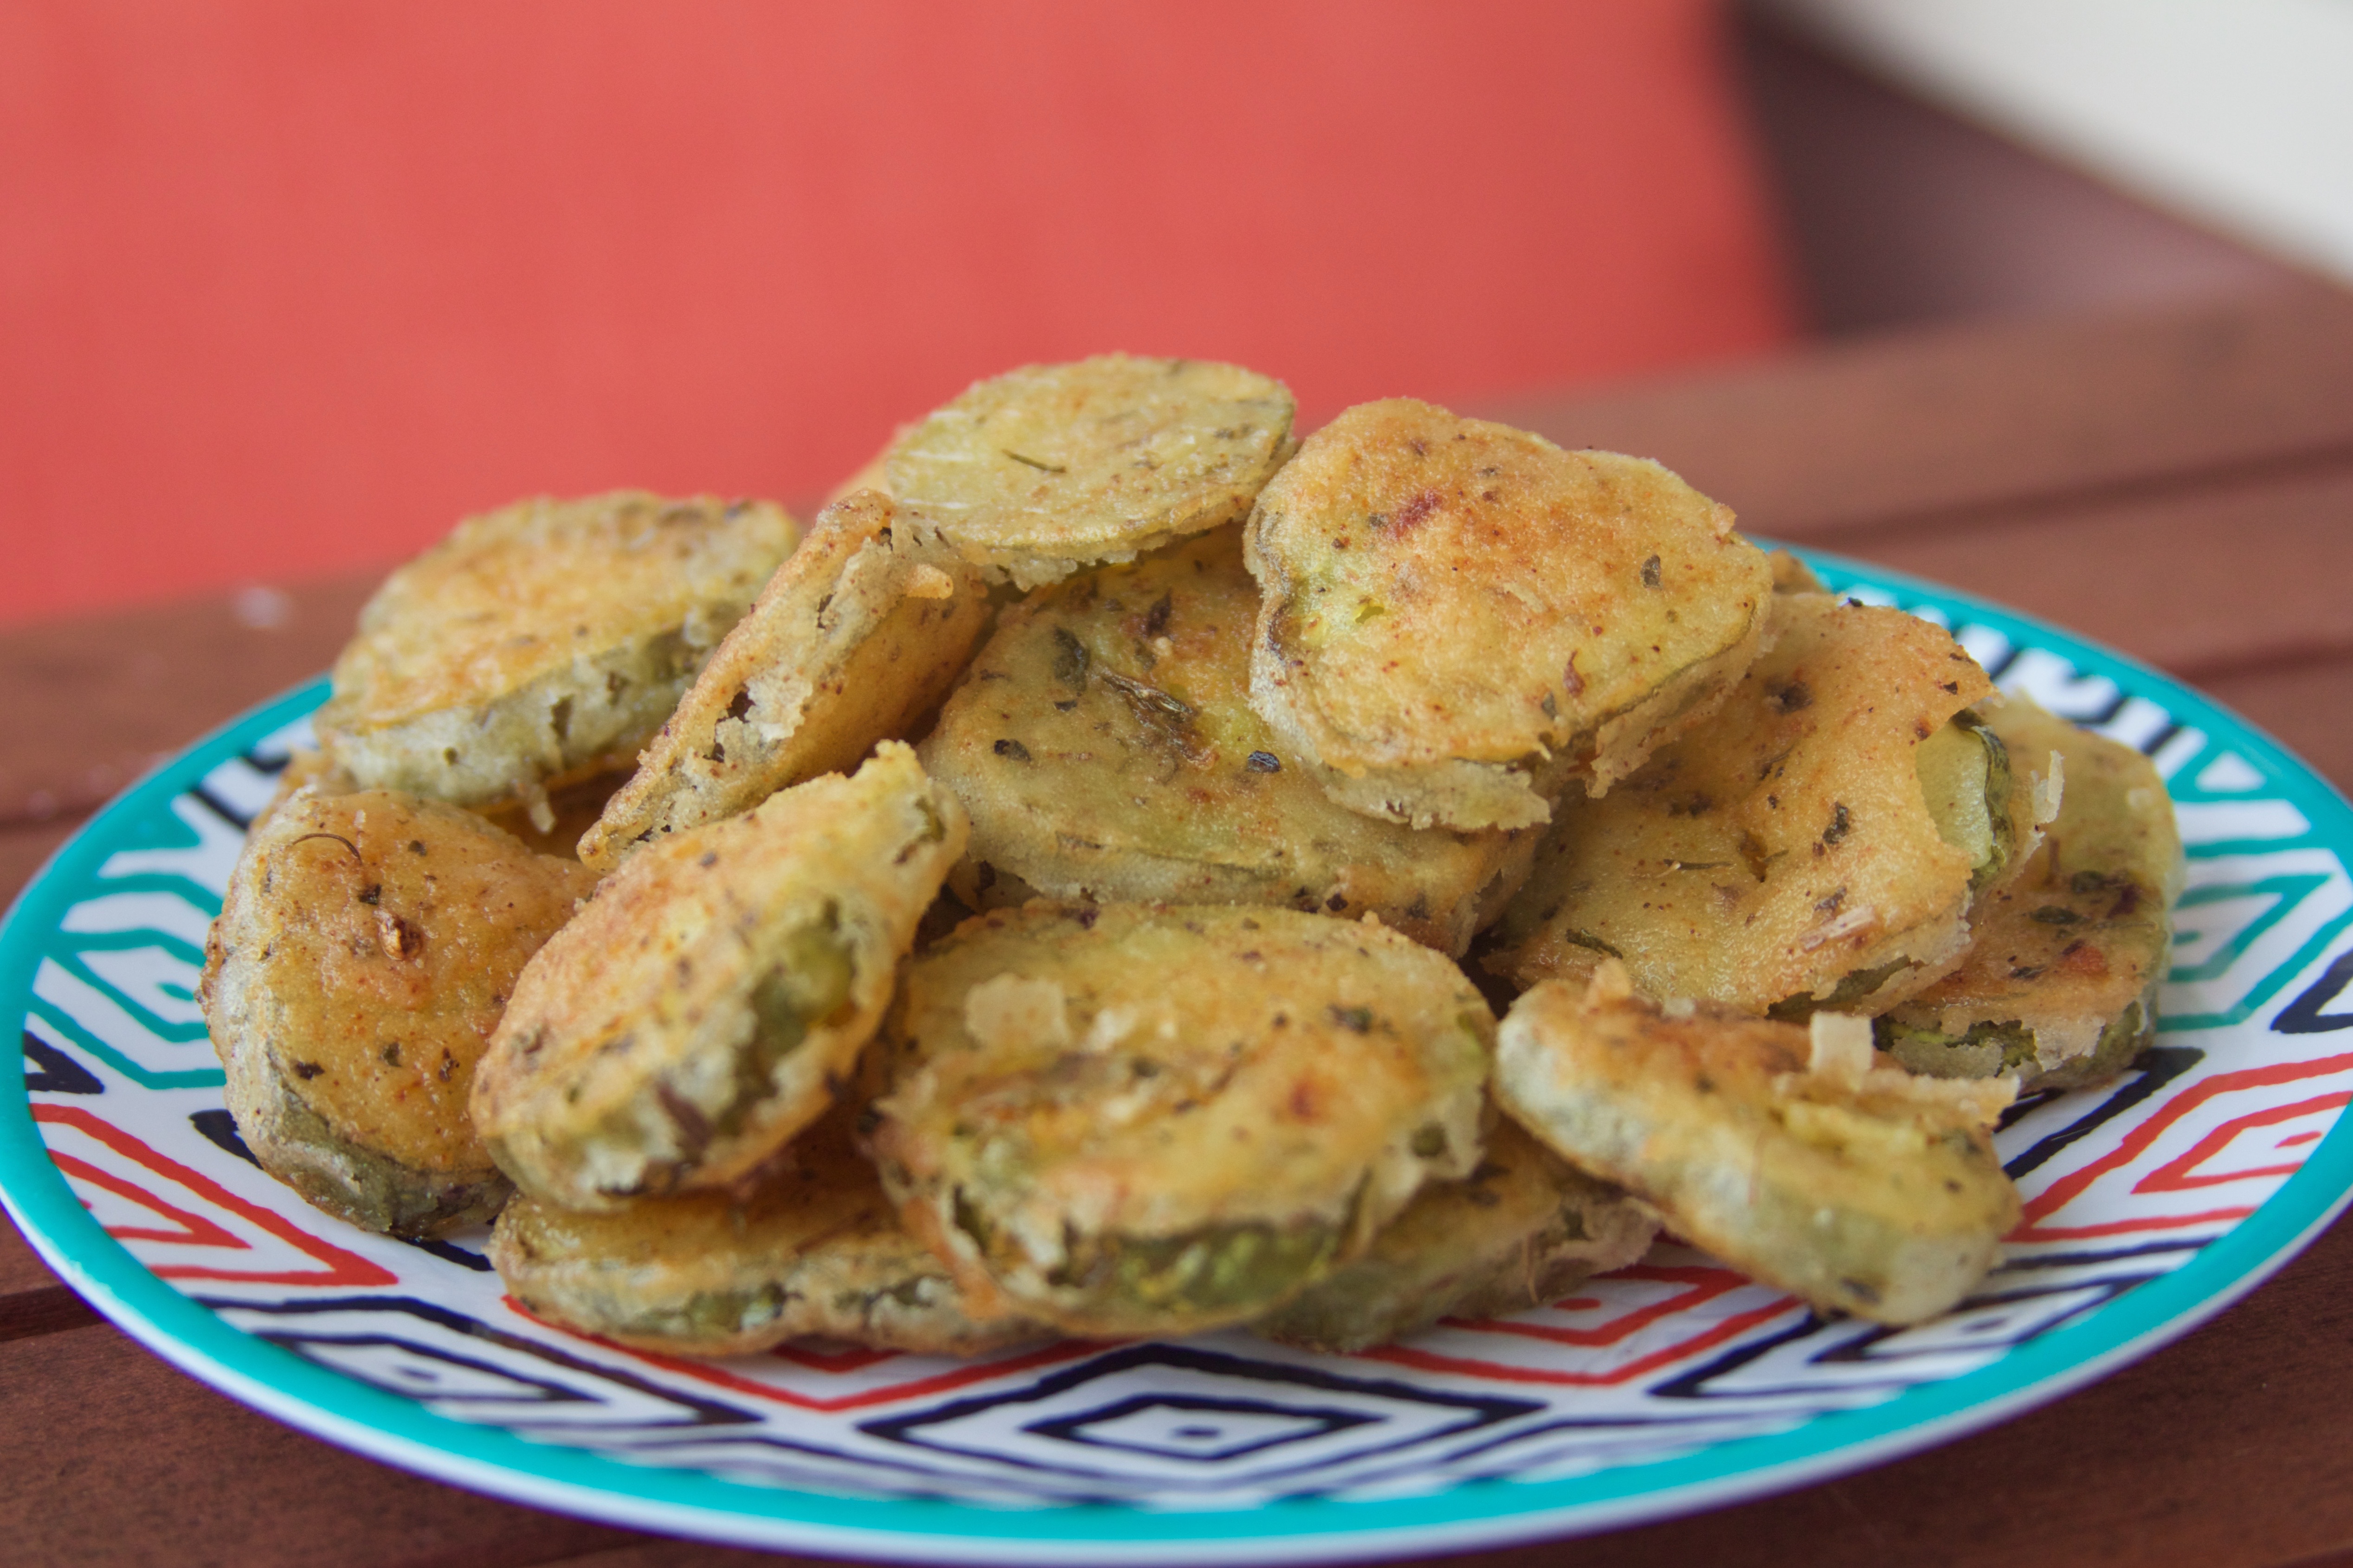
- Measure out your coating ingredients. Slice the pickles (about 1/4 inch thick)
- Mix the spice together with the flour. Lightly coat the pickles by adding them to the flour bowl and tossing them around. Let them sit for a minute (so that the flour soaks up a little of the juice), then repeat the coating process.
- Add all of your ingredients to a big bowl. Working quickly so that you don’t overwork the meat, mix the ingredients together. Divide the meat into four patties, making them about the size of your hamburger buns.
- Slice the buns in half; spread mayonnaise on each half.
- Grill the burgers following the recommendations for your grill. I do not have a grill, so I seared mine in a grill pan, then baked them at 350°F for 15 minutes, until the inside read 160°F when measured with a thermometer.
- While your burger are grilling, finish the pickles.
- I used a deep fryer for the pickles. It automatically heats the oil to 375°F, but you can do this in a pan as well. Once your oil is heated, fry for about two minutes, or until the flour coating is golden brown. Definitely taste test a lot of them 😉
- Place the fried pickles on paper towels until ready to serve.
- Once your burgers are off the grill, they need to rest for a few minutes. Use this time to grill the buns. Place the halves face side down on the grill; grill until they are browned and crisp.
- Lay the bottom half of the bun on a plate. Top with a generous scoop of coleslaw, and flatten with the spoon. Lay the burger patty on top. Spread a layer of Spicy Southern Sauce on top of the patty. Layer with fried pickles. Finally, top with the remaining half of the bun.
- Dig in!