this is a page for
Browsing Tag: sprinkles
HAPPY MARDI GRAS SEASON!!! Today is the Epiphany, or the Three King’s Day, which means that Christmas is over, and it’s the start of Mardi Gras season! Years ago, that would have meant nothing to me. But after living in New Orleans for so long, it means that it’s time to decorate the Christmas tree with the colors of faith, power, and justice and pop a king cake in the oven.
King Cake is a Mardi Gras staple, and everyone has an opinion as to which one is the best. But have you ever tried it at home?
Throughout the course of Mardi Gras, I will be making king cakes for THREE levels of difficulty. So if you’re nervous about yeast, make the easy one! If this seems like a good fit, bake away! If you’re up to a challenge, wait a little, and the blog will deliver.
There is always a baby or a bean hidden inside a King Cake. Well, unless you work for a bakery that is worried about getting sued for choking… At any rate, someone will inevitably find the hidden baby Jesus, and then that person makes the next king cake! Happy Mardi Gras!
~~~~~~~~~~
Step One.
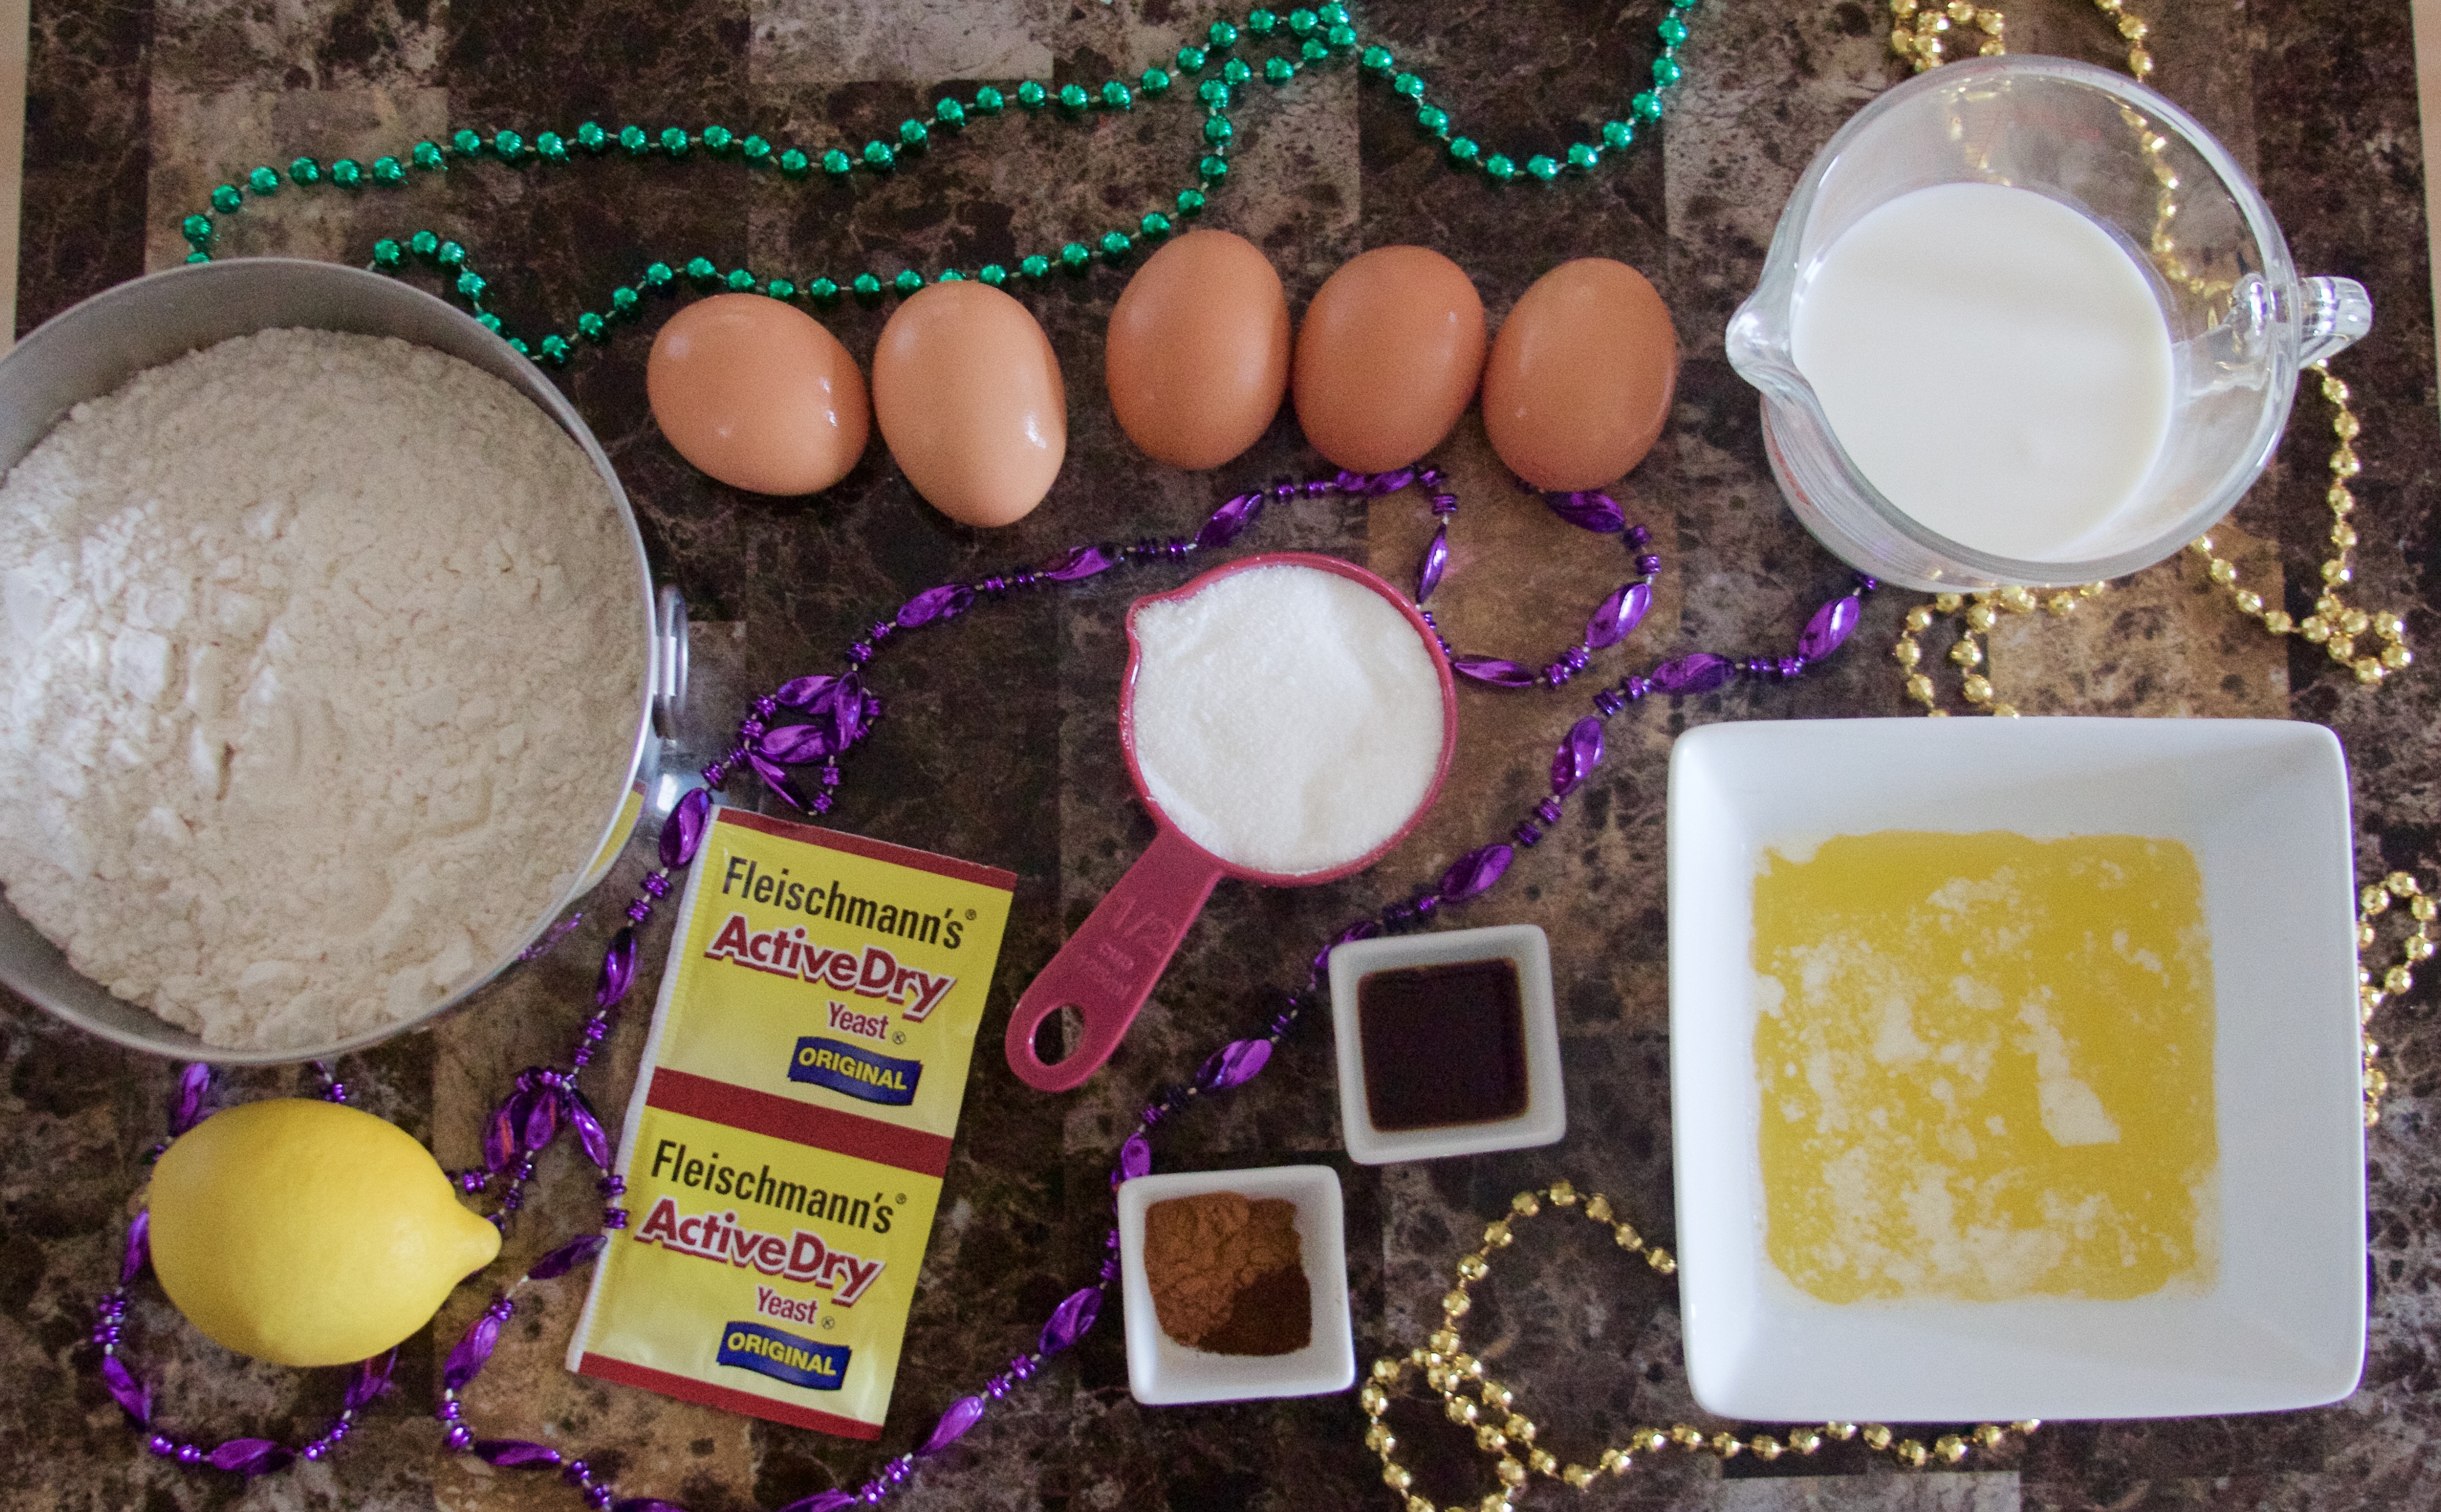
Prep Step! Measure out all of your ingredients. Mix the dry ingredients together.
Step Two.
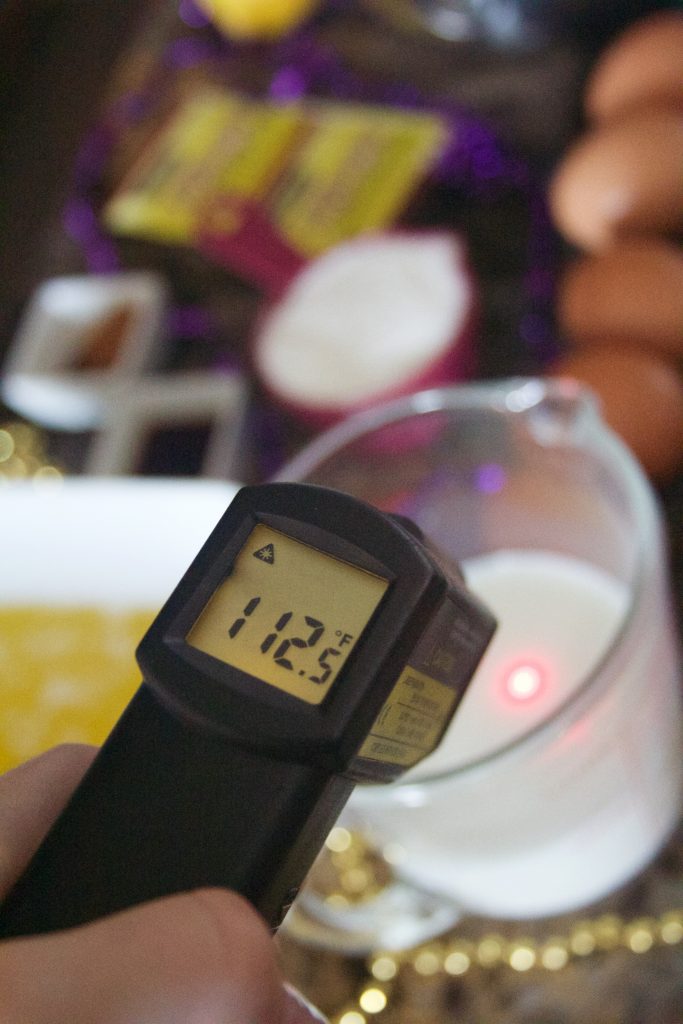
Heat the milk until it is lukewarm. That means that it needs to be between 110°F and 115°F. Sprinkle the yeast on top, and let it sit for about ten minutes, until it’s frothy.
Step Three.
Whisk the yolks in a separate bowl. Then, add the melted butter, egg yolks, vanilla, and lemon zest. Mix it all together. Slowly, beat in the dry ingredients.

Step Four.
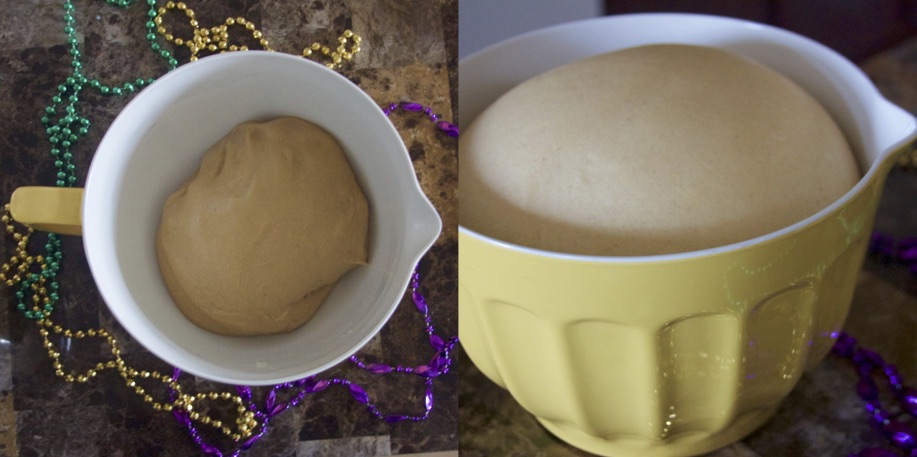
Time to knead! It’s more fun to do my hand, but you can let your mixer do it for you if you want. Make sure that i’s fitted with the dough hook. Knead for about ten minutes, until it stretches (kind of like taffy) when pulled. Place it in a greased bowl, and turn once so that the greased “bottom” is now on top. Cover the bowl with a towel, and set it in a warm place for an hour and a half. It will rise to about double of the volume!
Step Five.
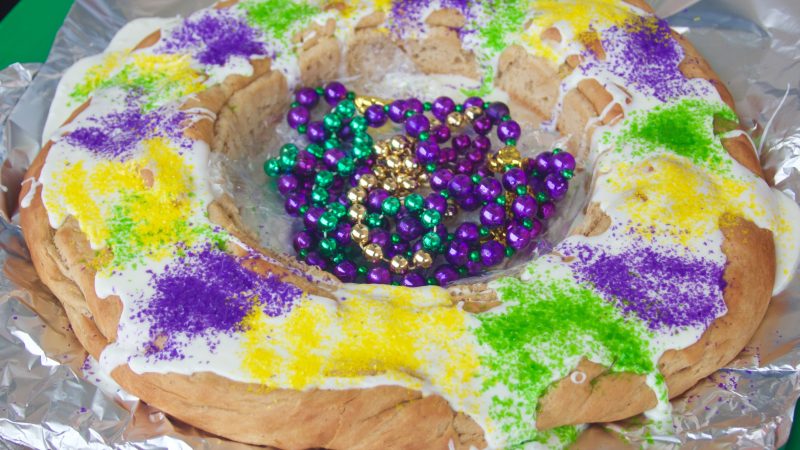
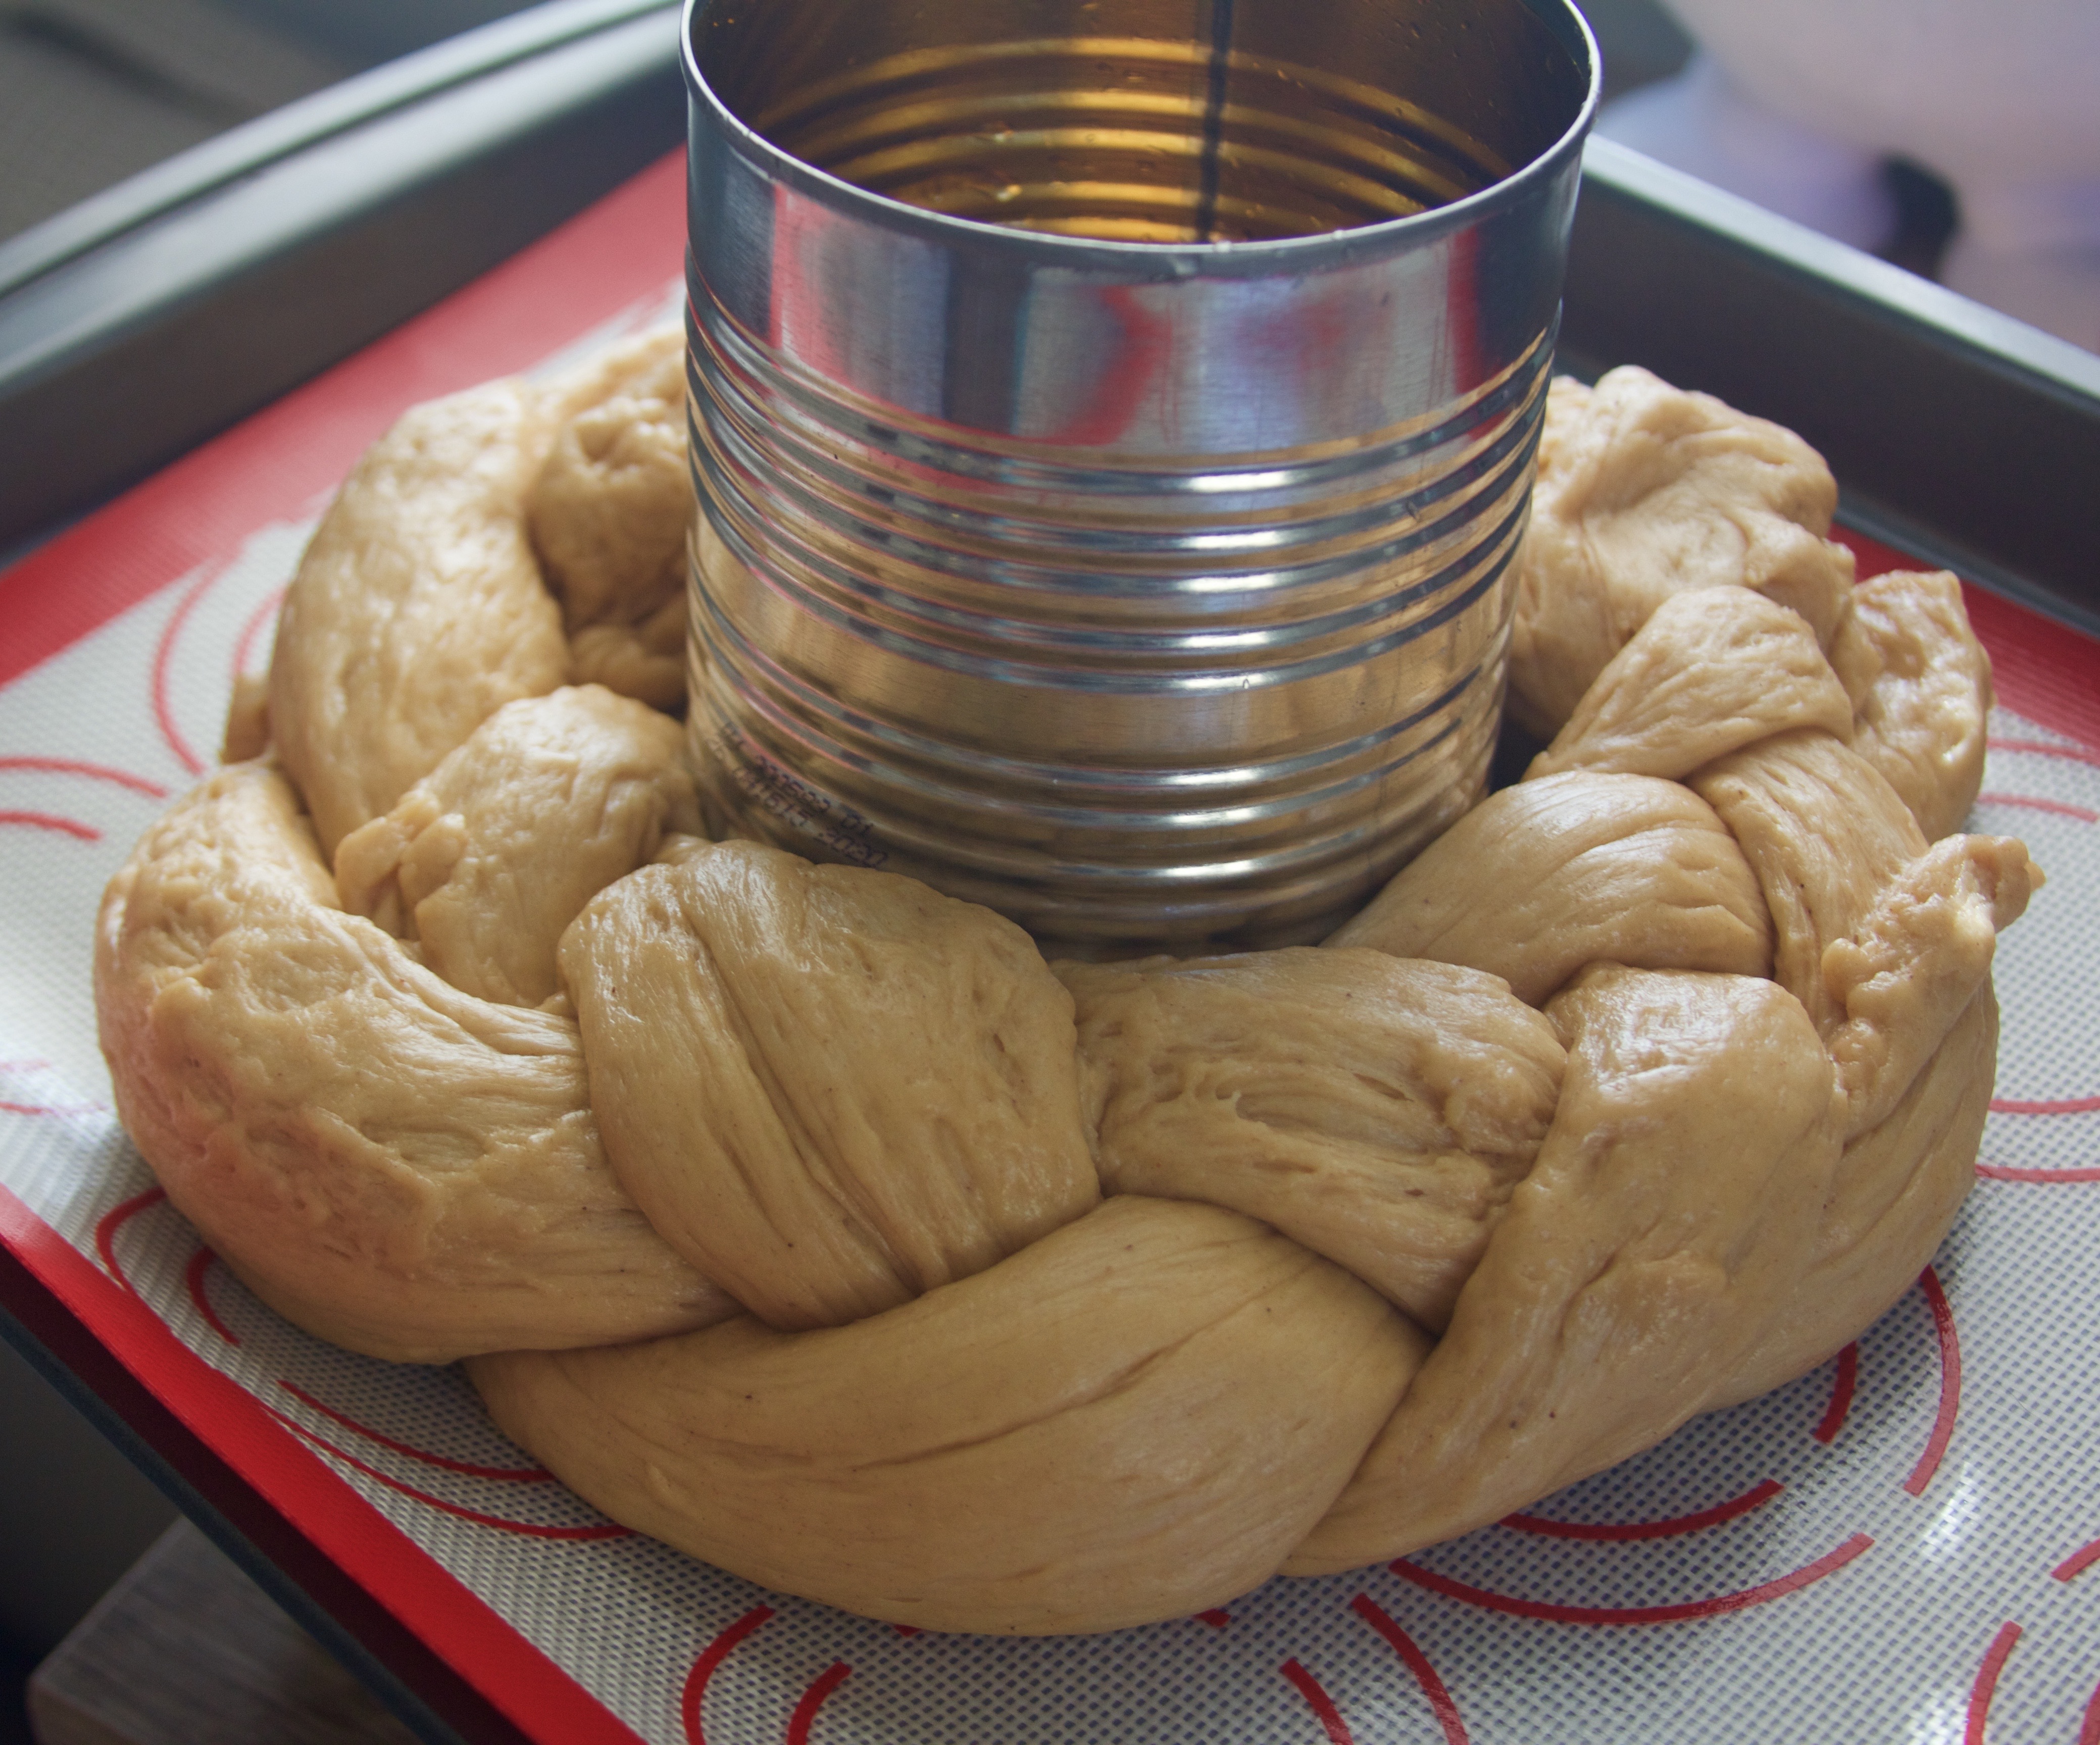
Punch down the dough. Then divide it into three balls. Roll each out until it is about two feet long. Braid the ropes of dough, and then shape it into a circle. You should put something in the middle so that it stays round while it bakes. Originally (in the picture) I used a 28oz tomato can, but I later switched it out with a round cake pan so that the ring would be larger. Cover the ring again with a towel, and let it rise for an additional 30 minutes. Preheat your oven to 350F.
Step Six.
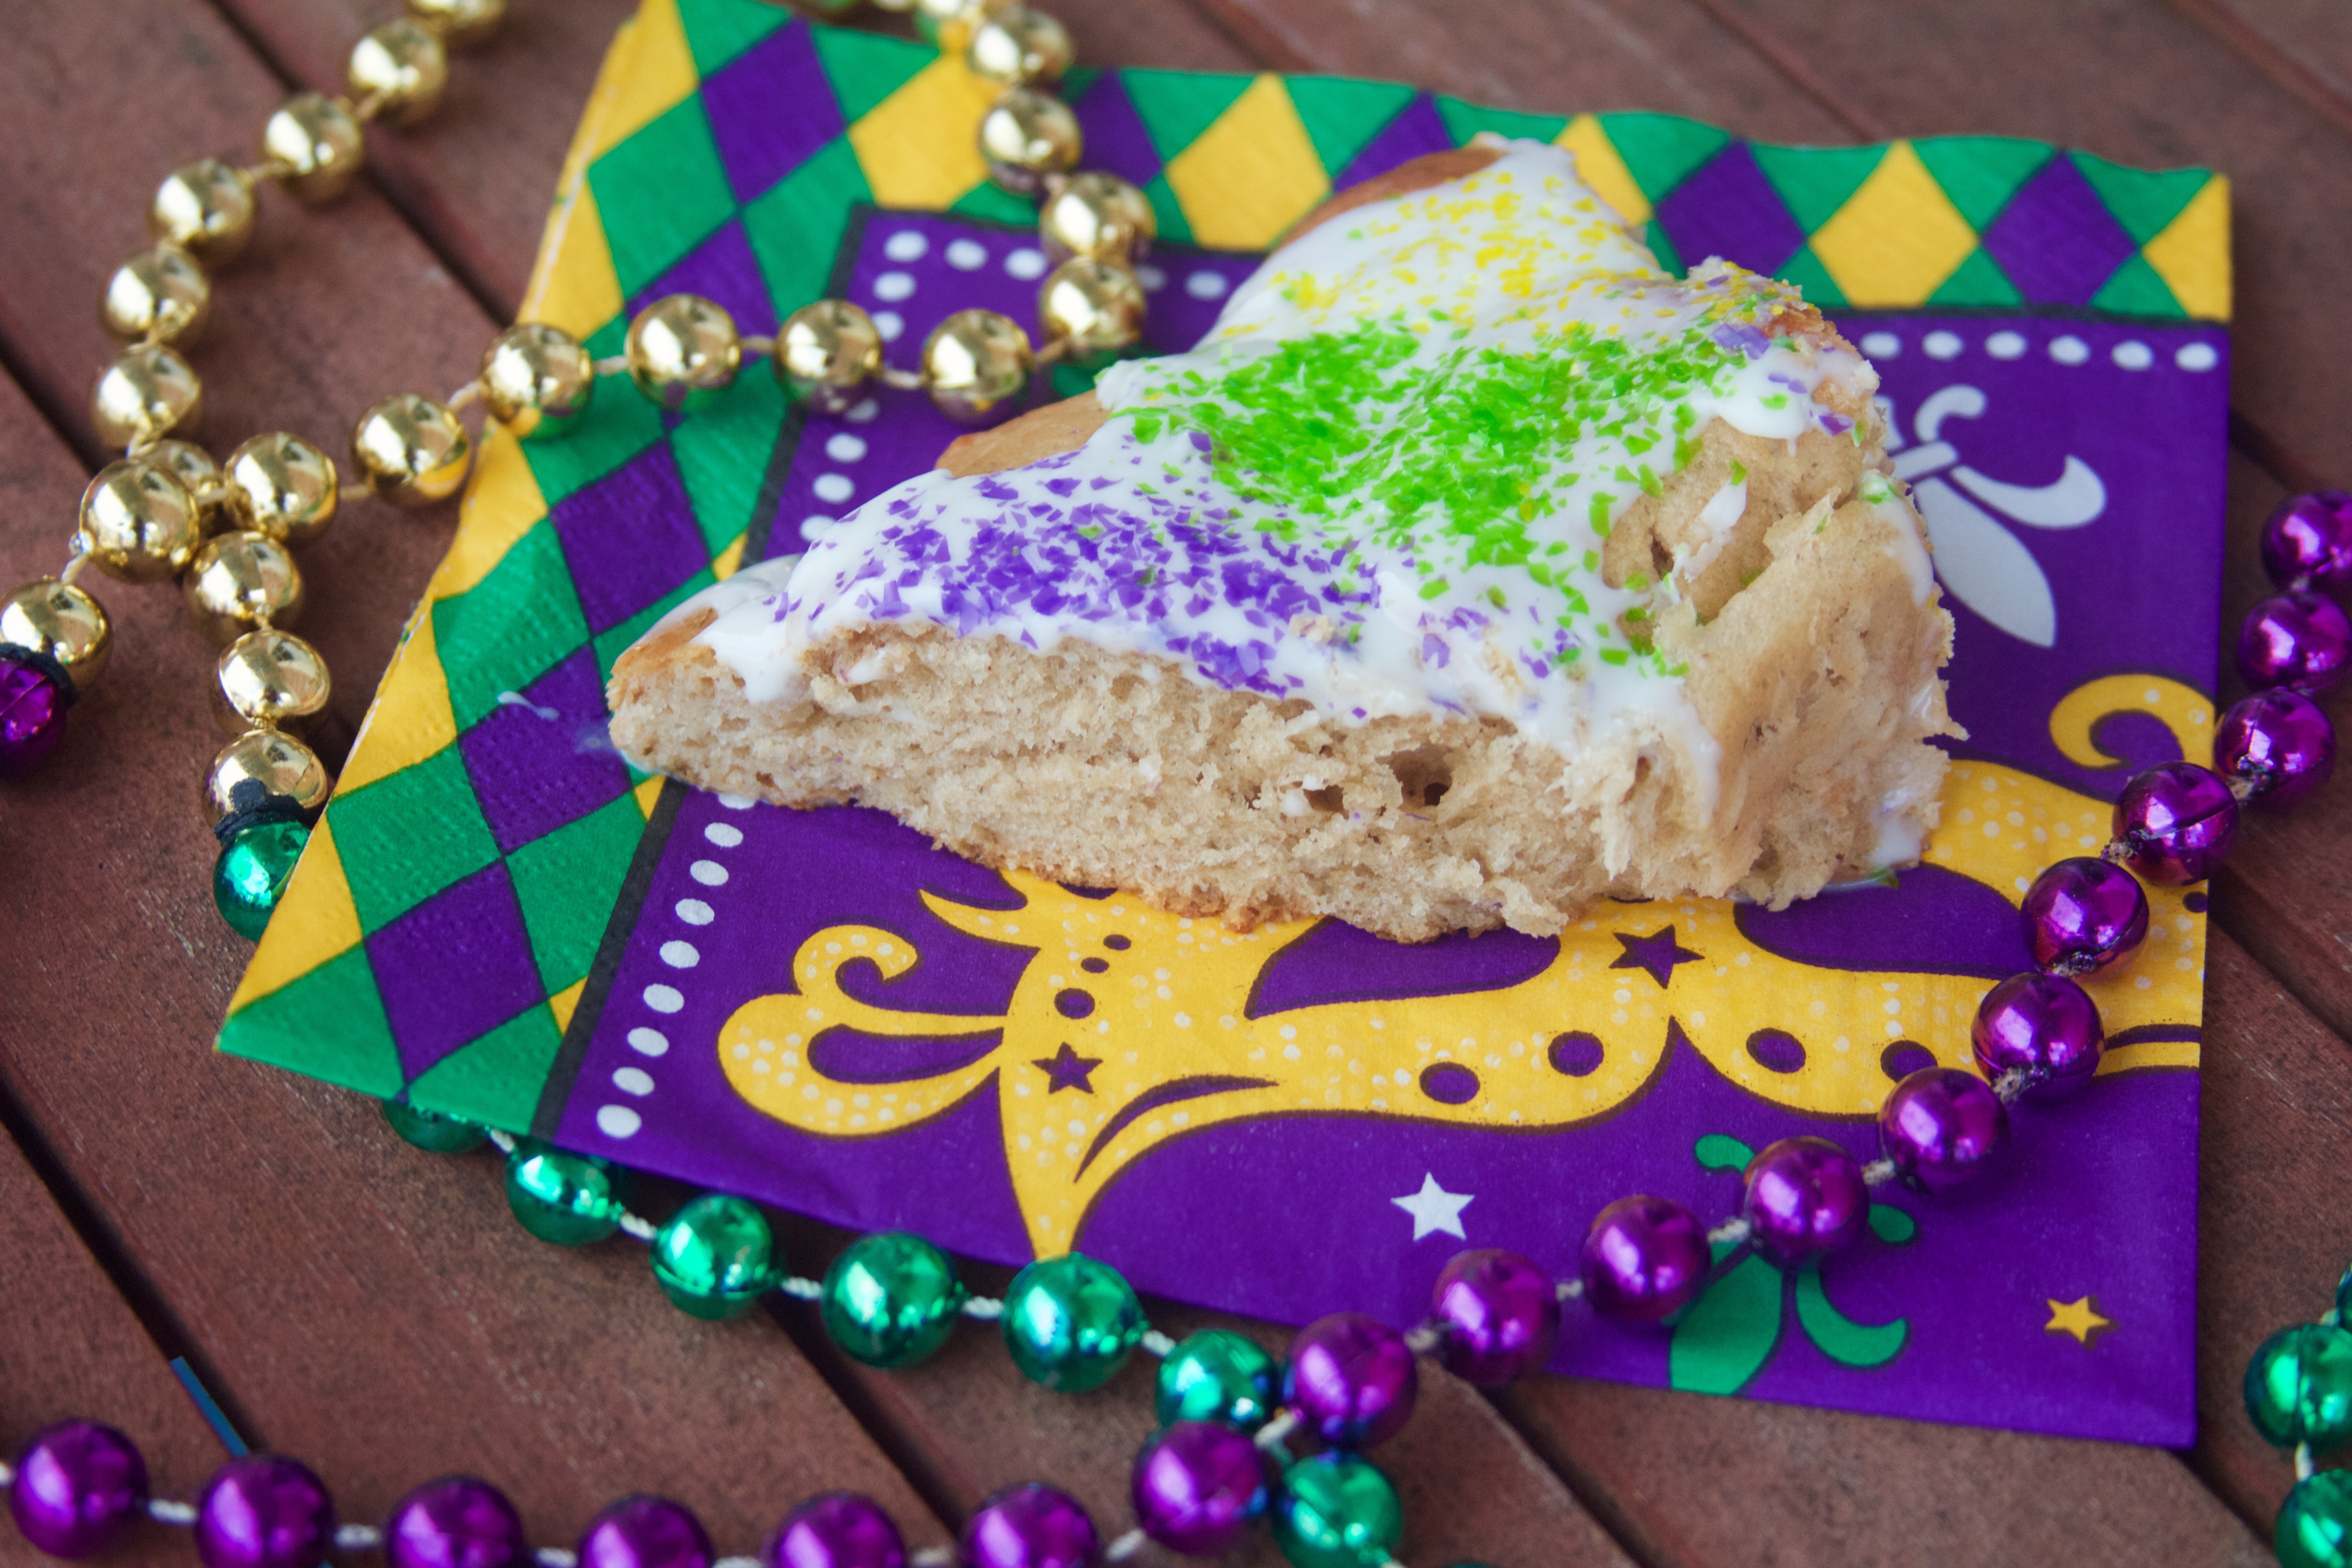
Cover the ring loosely with aluminum foil and pop it in the oven. Bake for about 25 minutes. Then, take the foil off and continue to bake for about 5 to 10 minutes, until the outside is golden brown. Let cool for about 30 minutes, or until it is cool to the touch.
Step Seven.
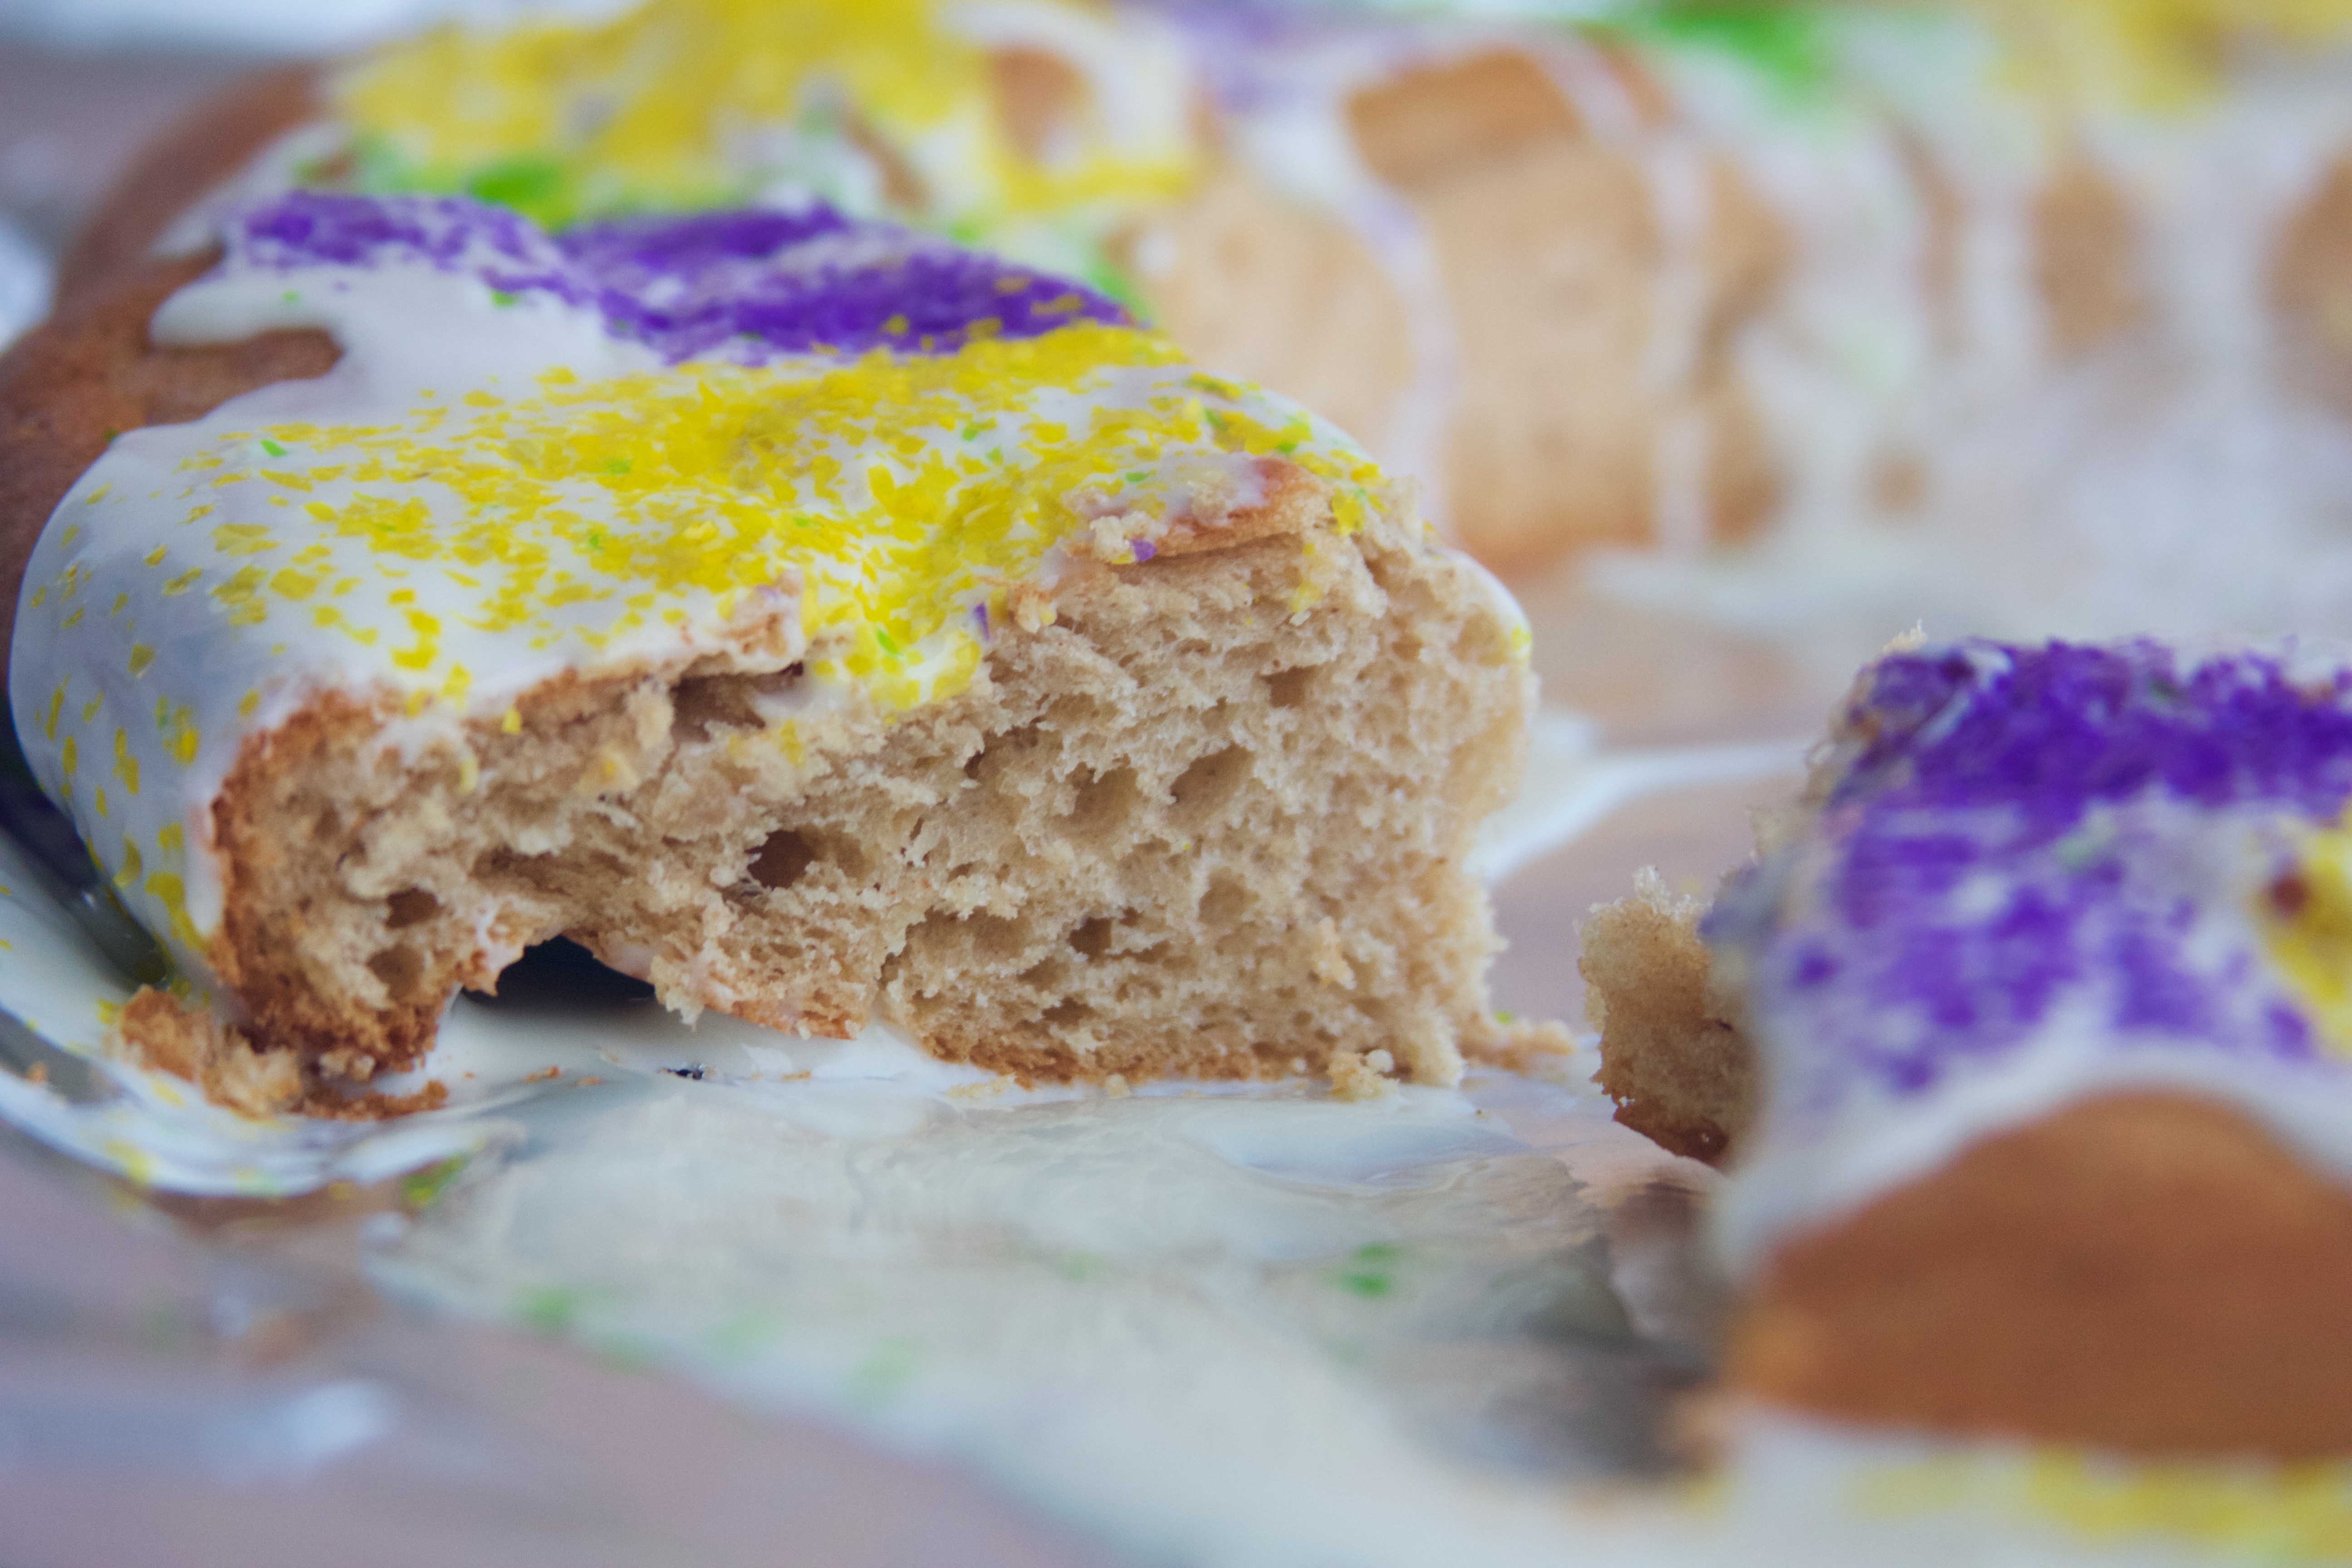
Whisk the ingredients for the icing together. Drizzle along the ring; the icing will drip off of the edges. Sprinkle with the Mardi Gras colors: purple, gold, green. Don’t forget to hide the baby!
")
Ingredients
- King Cake
- 1 cup lukewarm milk
- 2 packages active dry yeast (not instant)
- 1/2 cup sugar
- 4 cups all-purpose flour
- 3/4 cup melted butter
- 5 egg yolks
- 1 teaspoon vanilla
- zest of one lemon
- 1 teaspoon cinnamon
- 1/2 teaspoon nutmeg
- Icing
- 1/3 - 1/2 cup sweetened condensed milk
- 2 cups powdered sugar
- gold, purple, and green sprinkles
- King Cake baby
Instructions
- Prep Step! Measure out all of your ingredients. Mix the dry ingredients together.
- Heat the milk until it is lukewarm. That means that it needs to be between 110°F and 115°F. Sprinkle the yeast on top, and let it sit for about ten minutes, until it's frothy.
- Whisk the yolks in a separate bowl. Then, add the melted butter, egg yolks, vanilla, and lemon zest. Mix it all together. Slowly, beat in the dry ingredients.
- Time to knead! It's more fun to do my hand, but you can let your mixer do it for you if you want. Make sure that i's fitted with the dough hook. Knead for about ten minutes, until it stretches (kind of like taffy) when pulled. Place it in a greased bowl, and turn once so that the greased "bottom" is now on top. Cover the bowl with a towel, and set it in a warm place for an hour and a half. It will rise to about double of the volume!
- Punch down the dough. Then divide it into three balls. Roll each out until it is about two feet long. Braid the ropes of dough, and then shape it into a circle. You should put something in the middle so that it stays round while it bakes. Originally (in the picture) I used a 28oz tomato can, but I later switched it out with a round cake pan so that the ring would be larger. Cover the ring again with a towel, and let it rise for an additional 30 minutes. Preheat your oven to 350F.
- Cover the ring loosely with aluminum foil and pop it in the oven. Bake for about 25 minutes. Then, take the foil off and continue to bake for about 5 to 10 minutes, until the outside is golden brown. Let cool for about 30 minutes, or until it is cool to the touch.
- Whisk the ingredients for the icing together. Drizzle along the ring; the icing will drip off of the edges. Sprinkle with the Mardi Gras colors: purple, gold, green. Don't forget to hide the baby!
3…2…1… HAPPY NEW YEAR! What does 2017 have in store for you? There is something enchanting about the new year, even though I don’t buy into the whole “new year, new you” mentality. If you want a resolution to stick, it needs to be an all-year, all the time resolution! But it’s never too late to start, so go for it if you’re ready for a life change this new year!
My new life resolution is to update this blog more! I can’t tell you how many photos of awesome, delicious meals I have that never made it to the posting stage. Laziness, maybe. I attribute it to my internet, which takes about 9 minutes to upload each picture. Ugh.
But I am especially exited this for this New Year’s Eve because I am going to a fancy swing dancing party! We have always had a chill night in with our best family friends – which is very nice! – but I’ve always wanted to experience New Year’s Eve at home in New Orleans and out on the town. The anticipation might just be better than the event!
With visions of champagne bubbles dancing in my head, I dreamt up these delicate macaroons. They combine the drink of the evening with the class of the most sophisticated party. Here’s a toast to Auld Lang Syne!
~~~~~~~~~~

Step One.
Prep step! Measure out your ingredients. Have a stand mixer, large bowl, sifter, and spatula ready. Line two or three baking sheets with parchment paper.

Step Two.
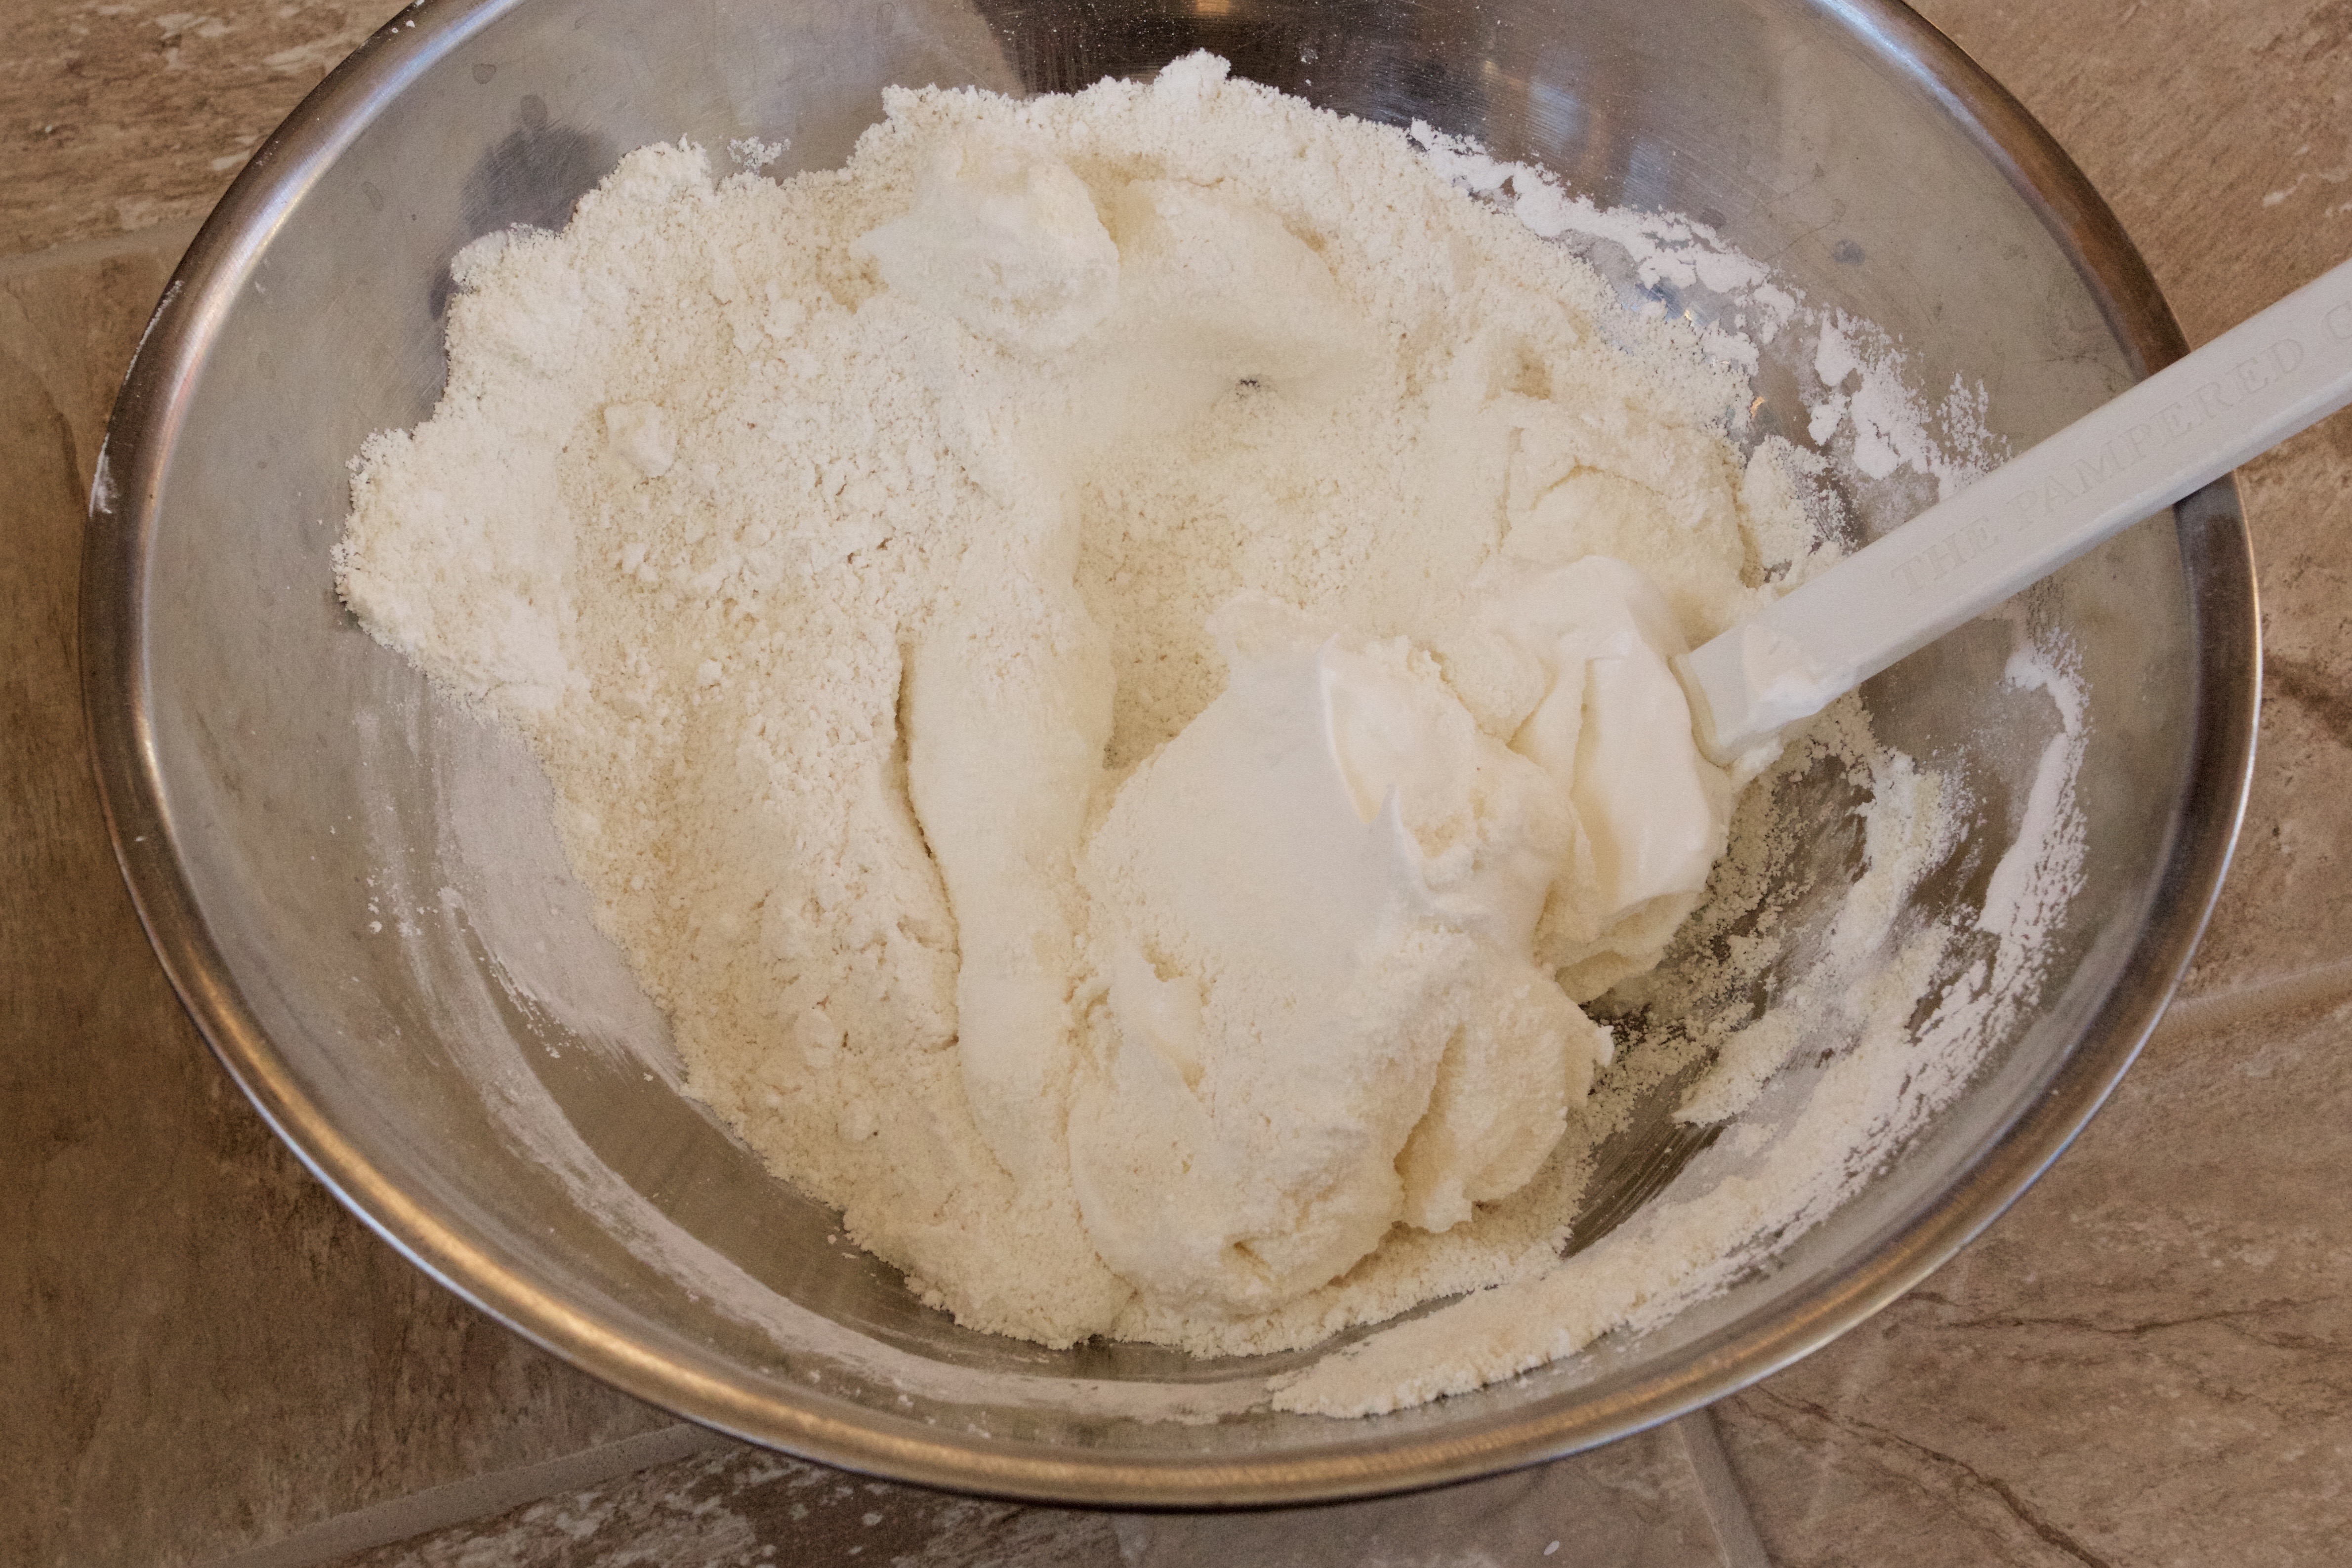
Mix the dry ingredients. It is SO important that the sugar and almond aren’t clumpy at all. Clumpy macaroons are no fun. Sift the ingredients in small batches into the big mixing bowl.
Step Three.
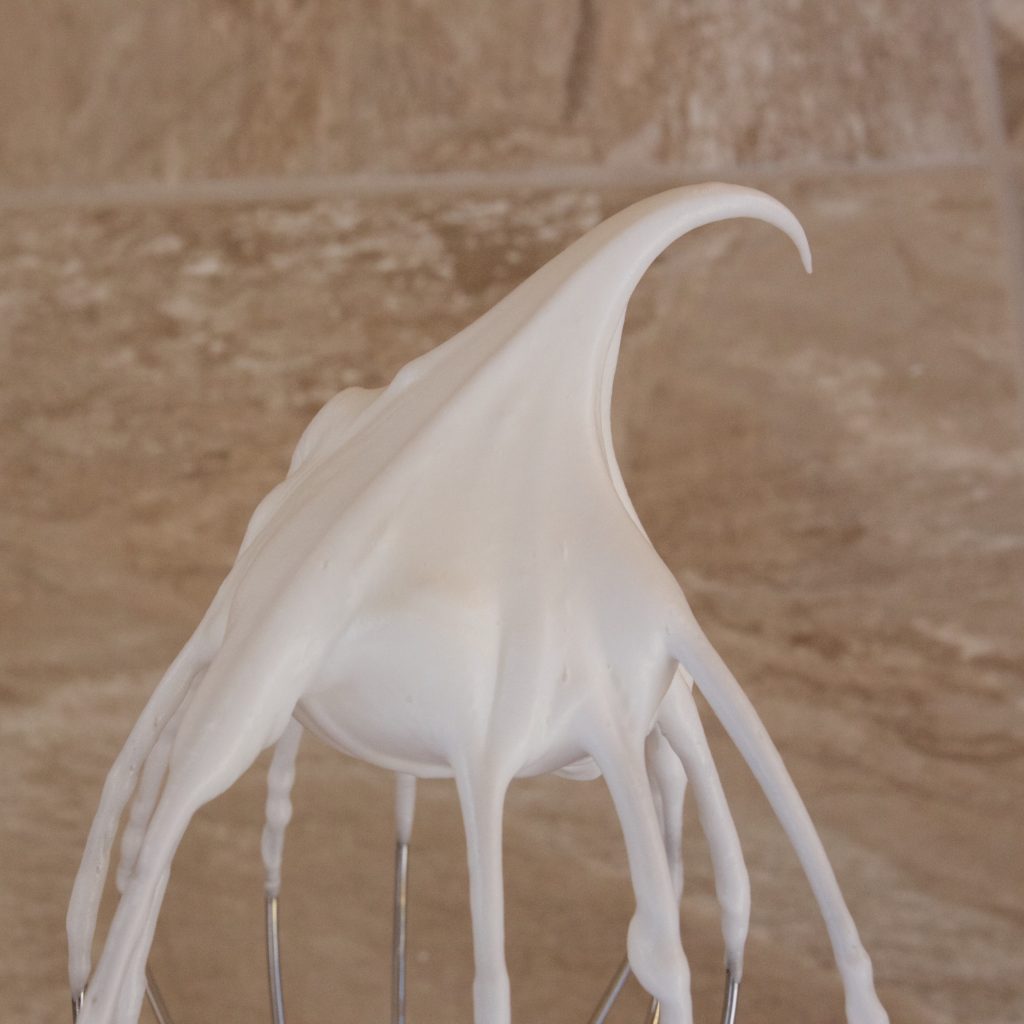
Add the egg whites to a mixing bowl. Begin to beat on medium speed. Add the cream of tartar and salt, and beat until soft peaks form. Scrape down the sides of the bowl. Now, increase the mixer to medium-high. Slowly, add the caster sugar in a fine stream. Increase the speed to high, and beat until stiff peaks form, about 3 more minutes.
Step Four.
Mix the extracts and color into your egg whites, folding gently. Scoop the whipped egg whites into the big mixing bowl with the dry ingredients, and fold gently until it is completely incorporated. Let it sit for about ten minutes.
Step Five.
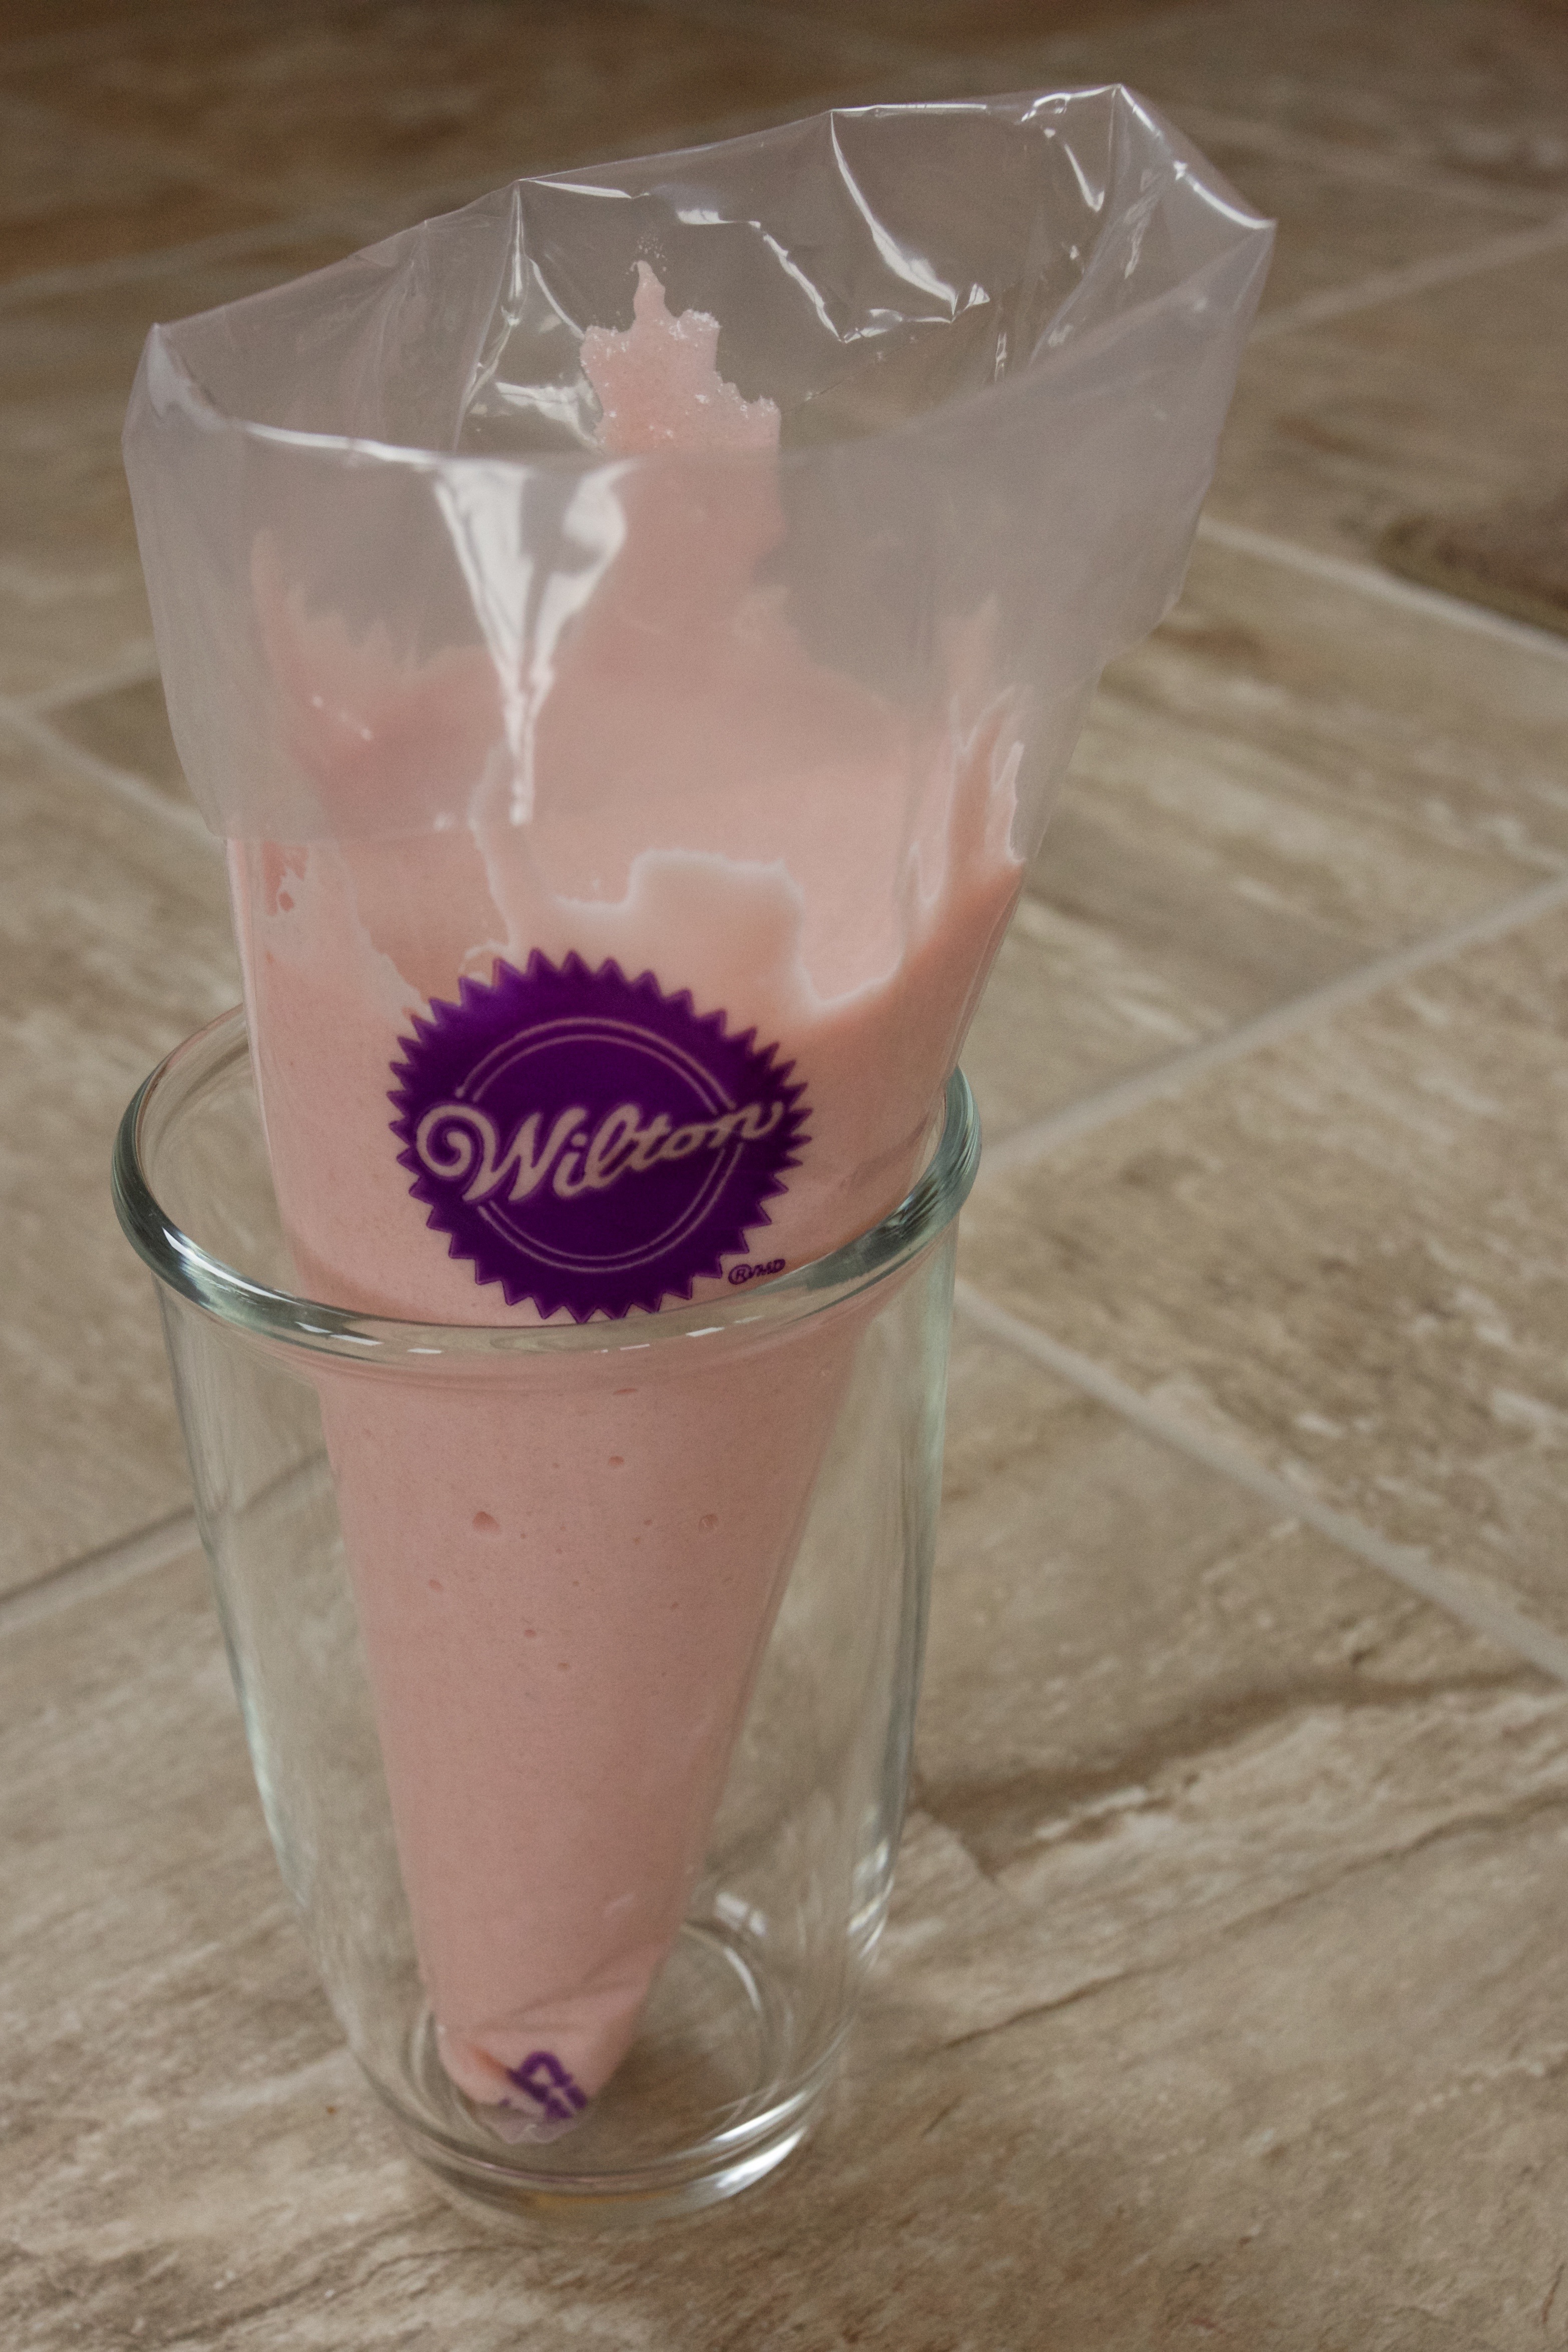
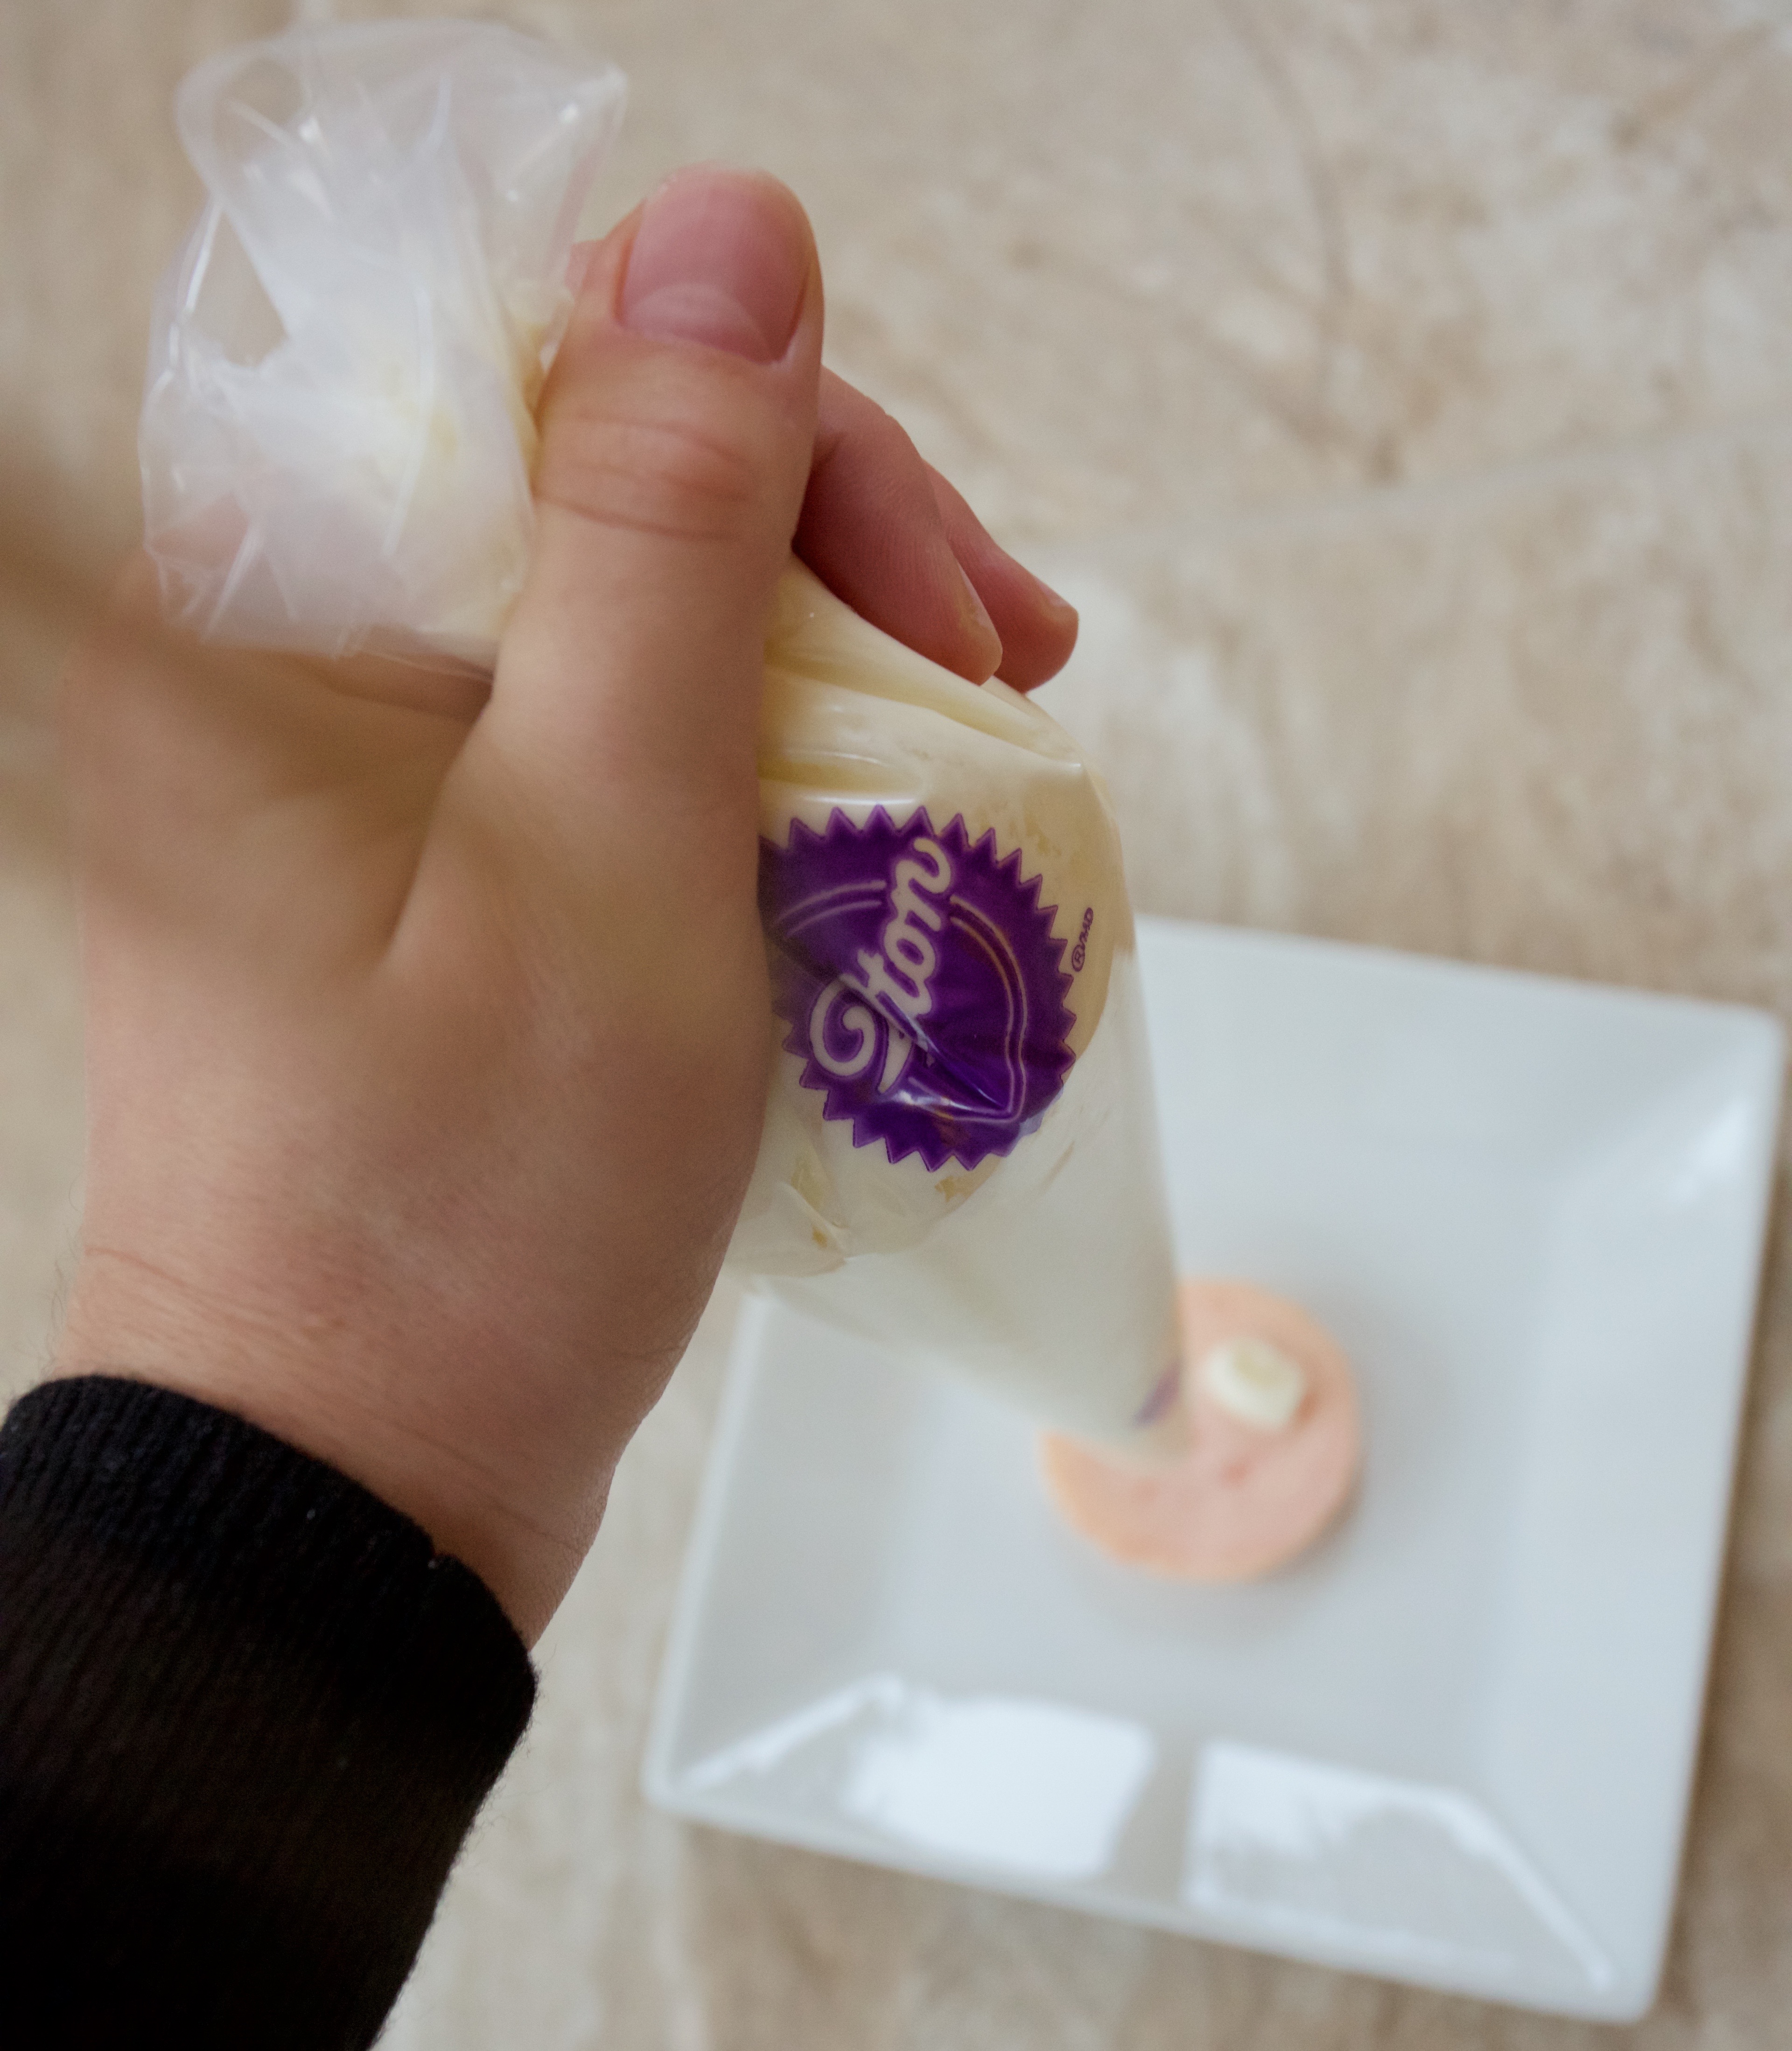
Add the mix into a piping bag. It works best if you first put the bag, opened, into a glass (see picture!) Cut off the tip about 3/4 of an inch up from the bottom, so that you have a small hole.
![]()
Step Six.
Pipe small rounds of batter, so that they spread out to be about an inch in diameter. Let the cookies dry on the sheet before baking. The required time varies depending on your local humidity levels. At home in New Orleans, I let them dry for about 45 minutes. In Wisconsin for the holidays, it only took about 20 minutes. Preheat your oven to 300°F.
Step Seven.
Bake the macaroons for about 12 to 15 minutes, or until they are hard and have developed that characteristic little edge on the bottom. Let them cool completely before your carefully remove them – don’t crack them! They are fragile.
Step Eight.
Frosting prep! Measure your ingredients.
Step Nine.
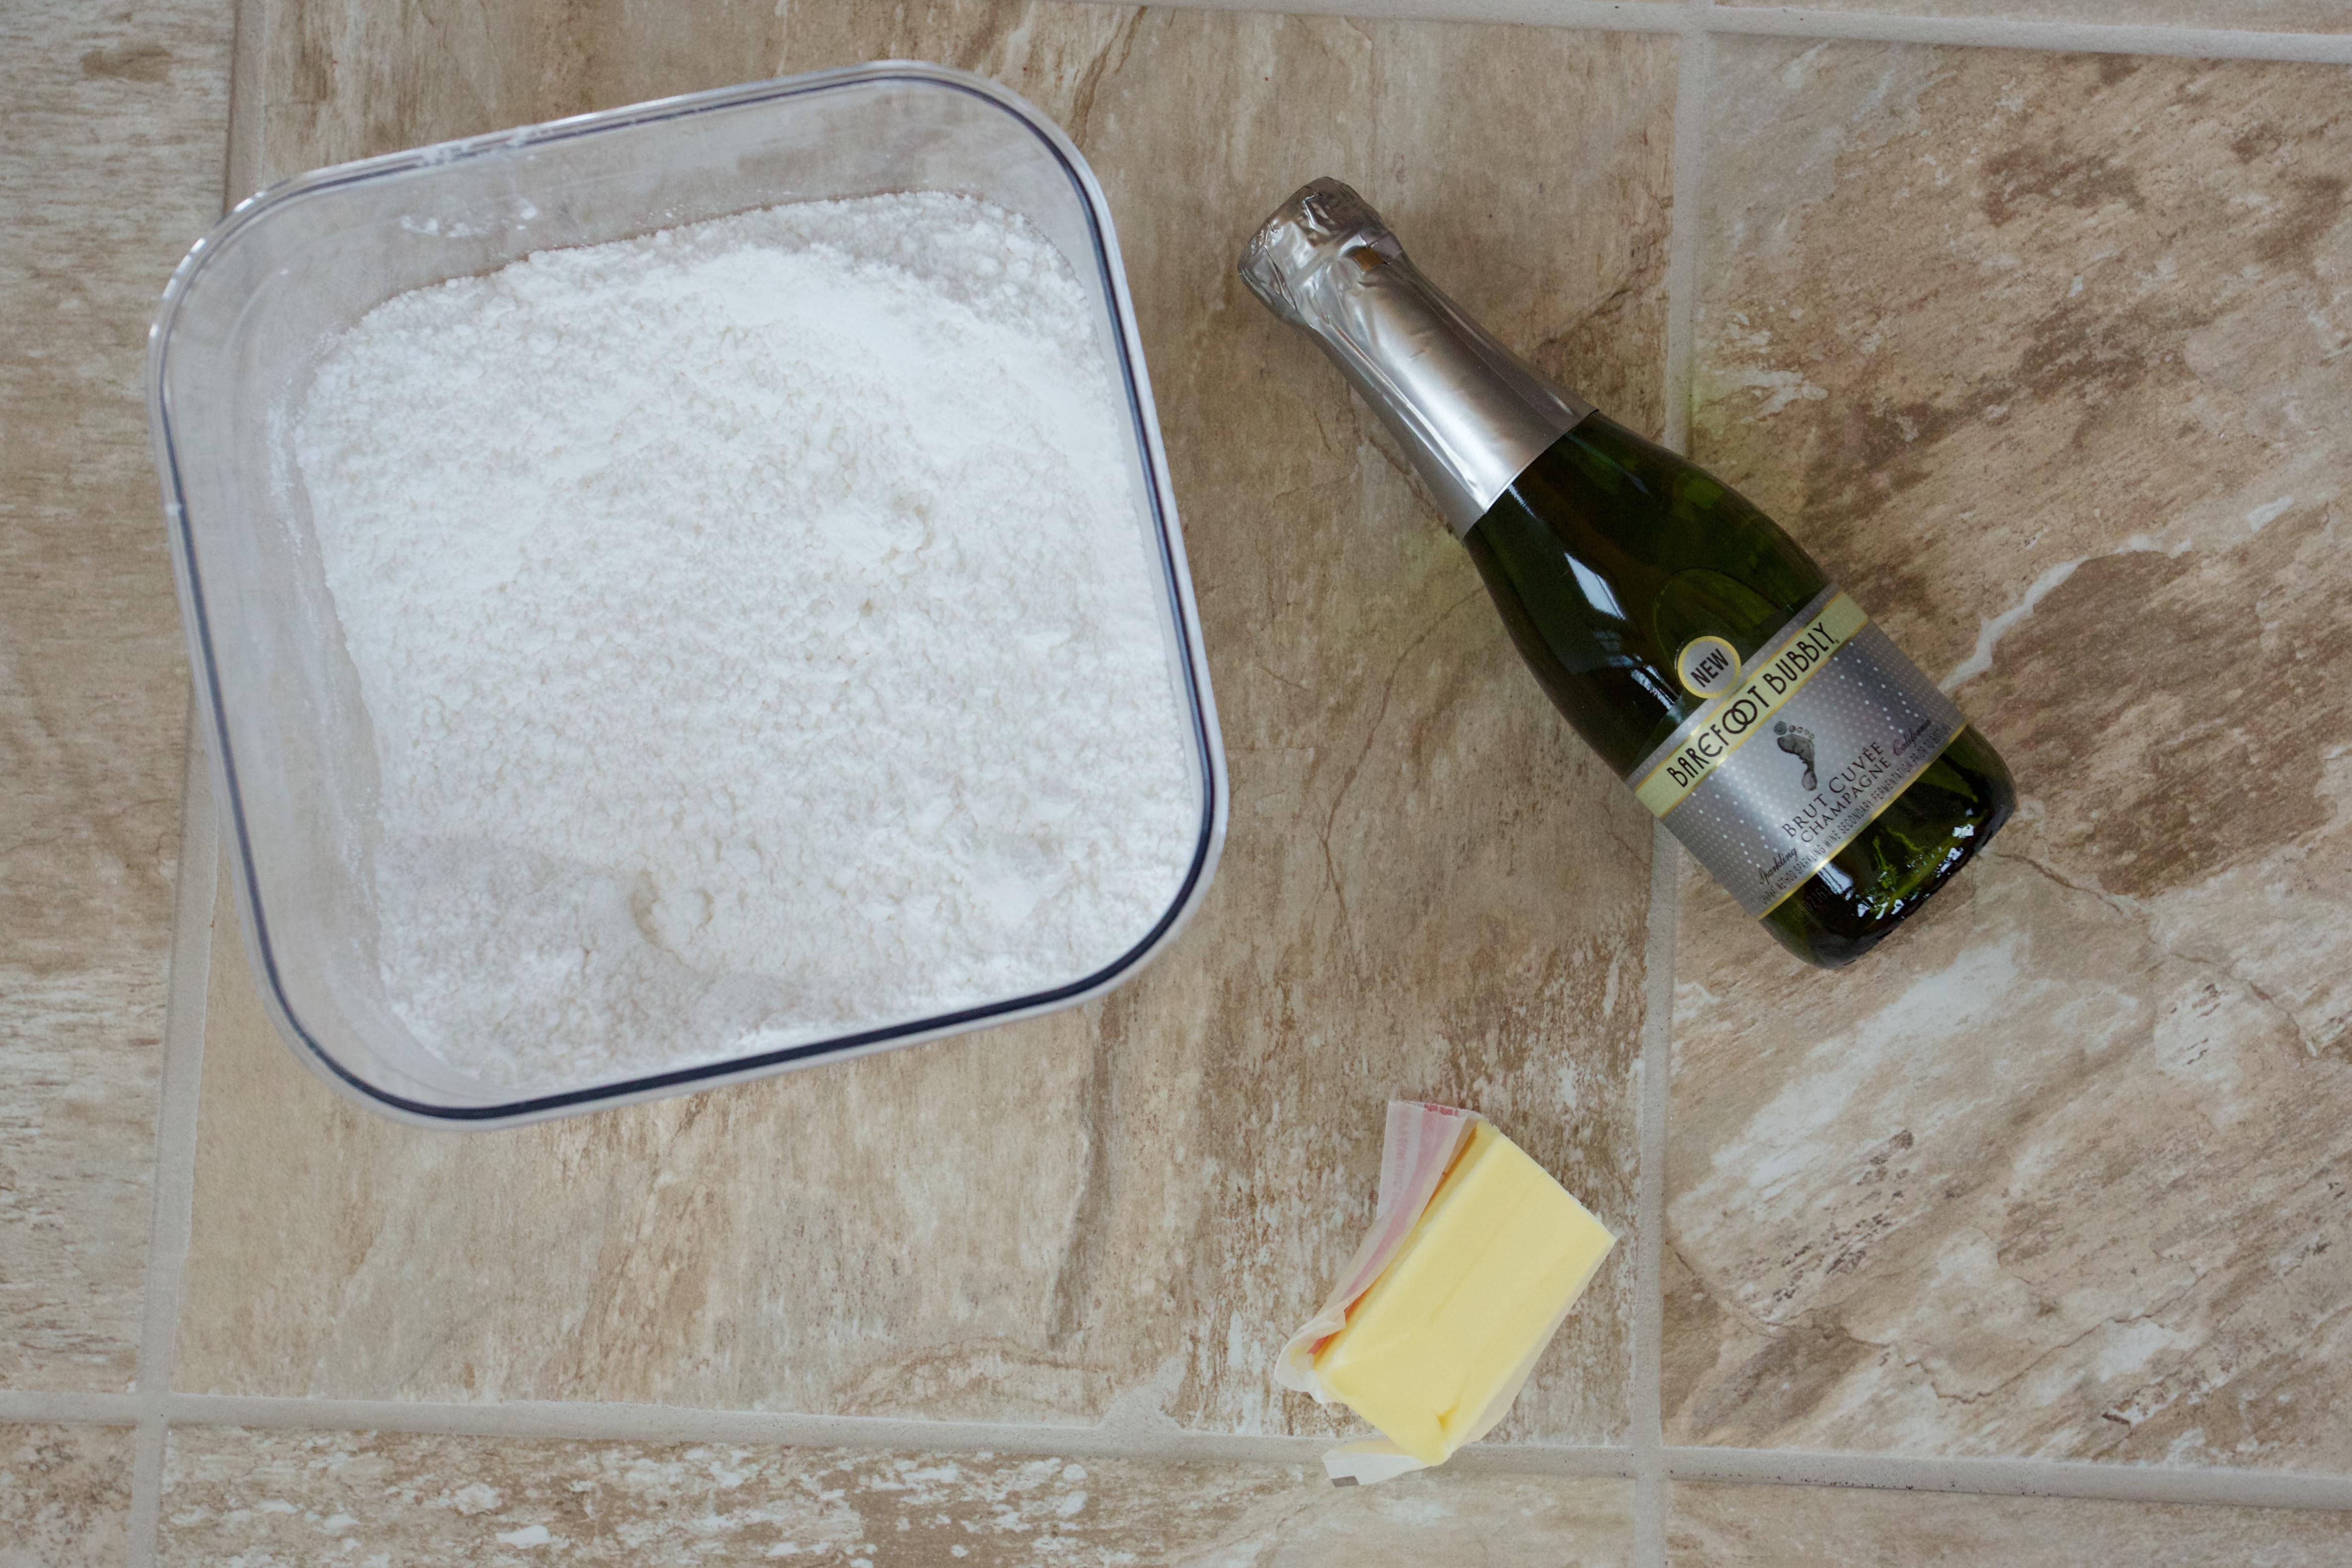
Reduce the champagne in a small pot over medium-high heat until it is reduced by about half. You can measure by pouring it into a measuring glass to see if it is 1/3 cup. Let it cool to room temperature.
Step Ten.
Beat the butter on medium-high speed until it is fluffier, for about five minutes. Slowly, add the powdered sugar and beat until incorporated. Add the champagne. If you like lighter frosting, add about 1 Tablespoon of heavy whipping cream. Beat until light and fluffy, about 3 more minutes.
Step Eleven.
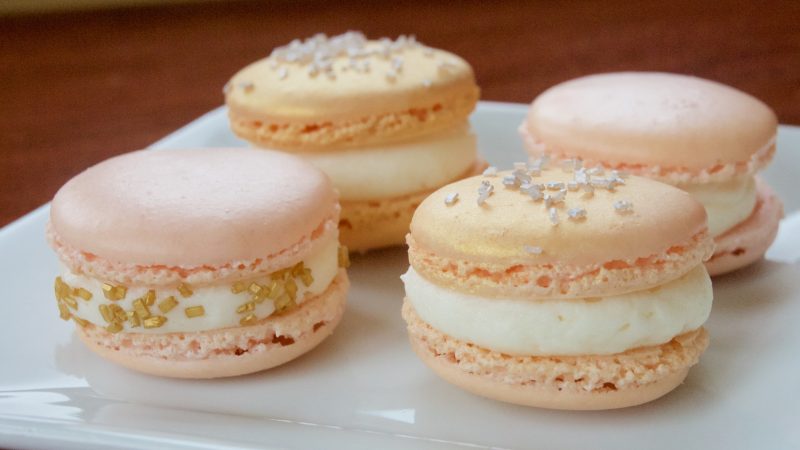
Time to put them together! Match the macaroons up by size. Add your frosting to another piping bag, and pipe the frosting into the center of one of the halves. Sandwich the two together, and press gently so that the frosting reaches out to the edges. Decorate as desired. I used edible gold spray paint and metallic sprinkles, all available at Michaels (best store ever!) Enjoy with a glass of champagne while you toast the New Year!

Ingredients
- Macaroons
- 1 3/4 cups powdered sugar
- 1 cup almond flour
- 3 egg whites
- 1/3 tsp cream of tartar
- 1/8 tsp salt
- 1/4 cup caster sugar (sometimes called baker’s sugar or superfine sugar)
- 1/2 tsp vanilla
- 1/4 tsp almond extract
- 1- 2 drops red food coloring
- Champagne Frosting
- 2/3 cup champagne
- 1/4 cup unsalted butter
- 2 cups powdered sugar
Instructions
- Prep step! Measure out your ingredients. Have a stand mixer, large bowl, sifter, and spatula ready. Line two or three baking sheets with parchment paper.
- Mix the dry ingredients. It is SO important that the sugar and almond aren't clumpy at all. Clumpy macaroons are no fun. Sift the ingredients in small batches into the big mixing bowl.
- Add the egg whites to a mixing bowl. Begin to beat on medium speed. Add the cream of tartar and salt, and beat until soft peaks form. Scrape down the sides of the bowl. Now, increase the mixer to medium-high. Slowly, add the caster sugar in a fine stream. Increase the speed to high, and beat until stiff peaks form, about 3 more minutes.
- Mix the extracts and color into your egg whites, folding gently. Scoop the whipped egg whites into the big mixing bowl with the dry ingredients, and fold gently until it is completely incorporated. Let it sit for about ten minutes.
- Add the mix into a piping bag. It works best if you first put the bag, opened, into a glass (see picture!) Cut off the tip about 3/4 of an inch up from the bottom, so that you have a small hole.
- Pipe small rounds of batter, so that they spread out to be about an inch in diameter. Let the cookies dry on the sheet before baking. The required time varies depending on your local humidity levels. At home in New Orleans, I let them dry for about 45 minutes. In Wisconsin for the holidays, it only took about 20 minutes. Preheat your oven to 300°F.
- Bake the macaroons for about 12 to 15 minutes, or until they are hard and have developed that characteristic little edge on the bottom. Let them cool completely before your carefully remove them - don't crack them! They are fragile.
- Frosting prep! Measure your ingredients.
- Reduce the champagne in a small pot over medium-high heat until it is reduced by about half. You can measure by pouring it into a measuring glass to see if it is 1/3 cup. Let it cool to room temperature.
- Beat the butter on medium-high speed until it is fluffier, for about five minutes. Slowly, add the powdered sugar and beat until incorporated. Add the champagne. If you like lighter frosting, add about 1 Tablespoon of heavy whipping cream. Beat until light and fluffy, about 3 more minutes.
- Time to put them together! Match the macaroons up by size. Add your frosting to another piping bag, and pipe the frosting into the center of one of the halves. Sandwich the two together, and press gently so that the frosting reaches out to the edges. Decorate as desired. I used edible gold spray paint and metallic sprinkles, all available at Michaels (best store ever!) Enjoy with a glass of champagne while you toast the New Year!
I remember the first time that I had a banana split. My grandpa had taken us fishing, and I had a really good day! This was not normal fishing, where 90% of the time is a test of your patience. This was a trout farm, where they bite the second the lure hits the water. So I was a very happy camper already, AND I got a banana split! I don’t know if I ate the whole thing, but I like to think I did. I remember liking the pineapple part the best.
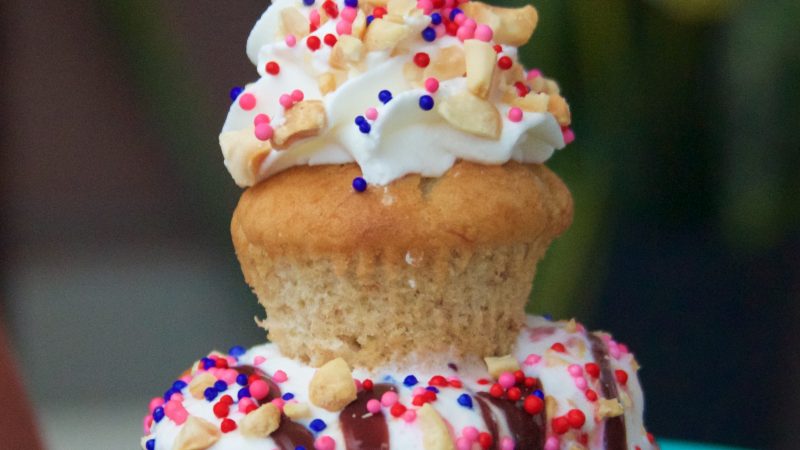
This cupcake combines all of the yumminess of a banana split into one delicious baked treat that you can enjoy year round!
~~~~~~~~~~
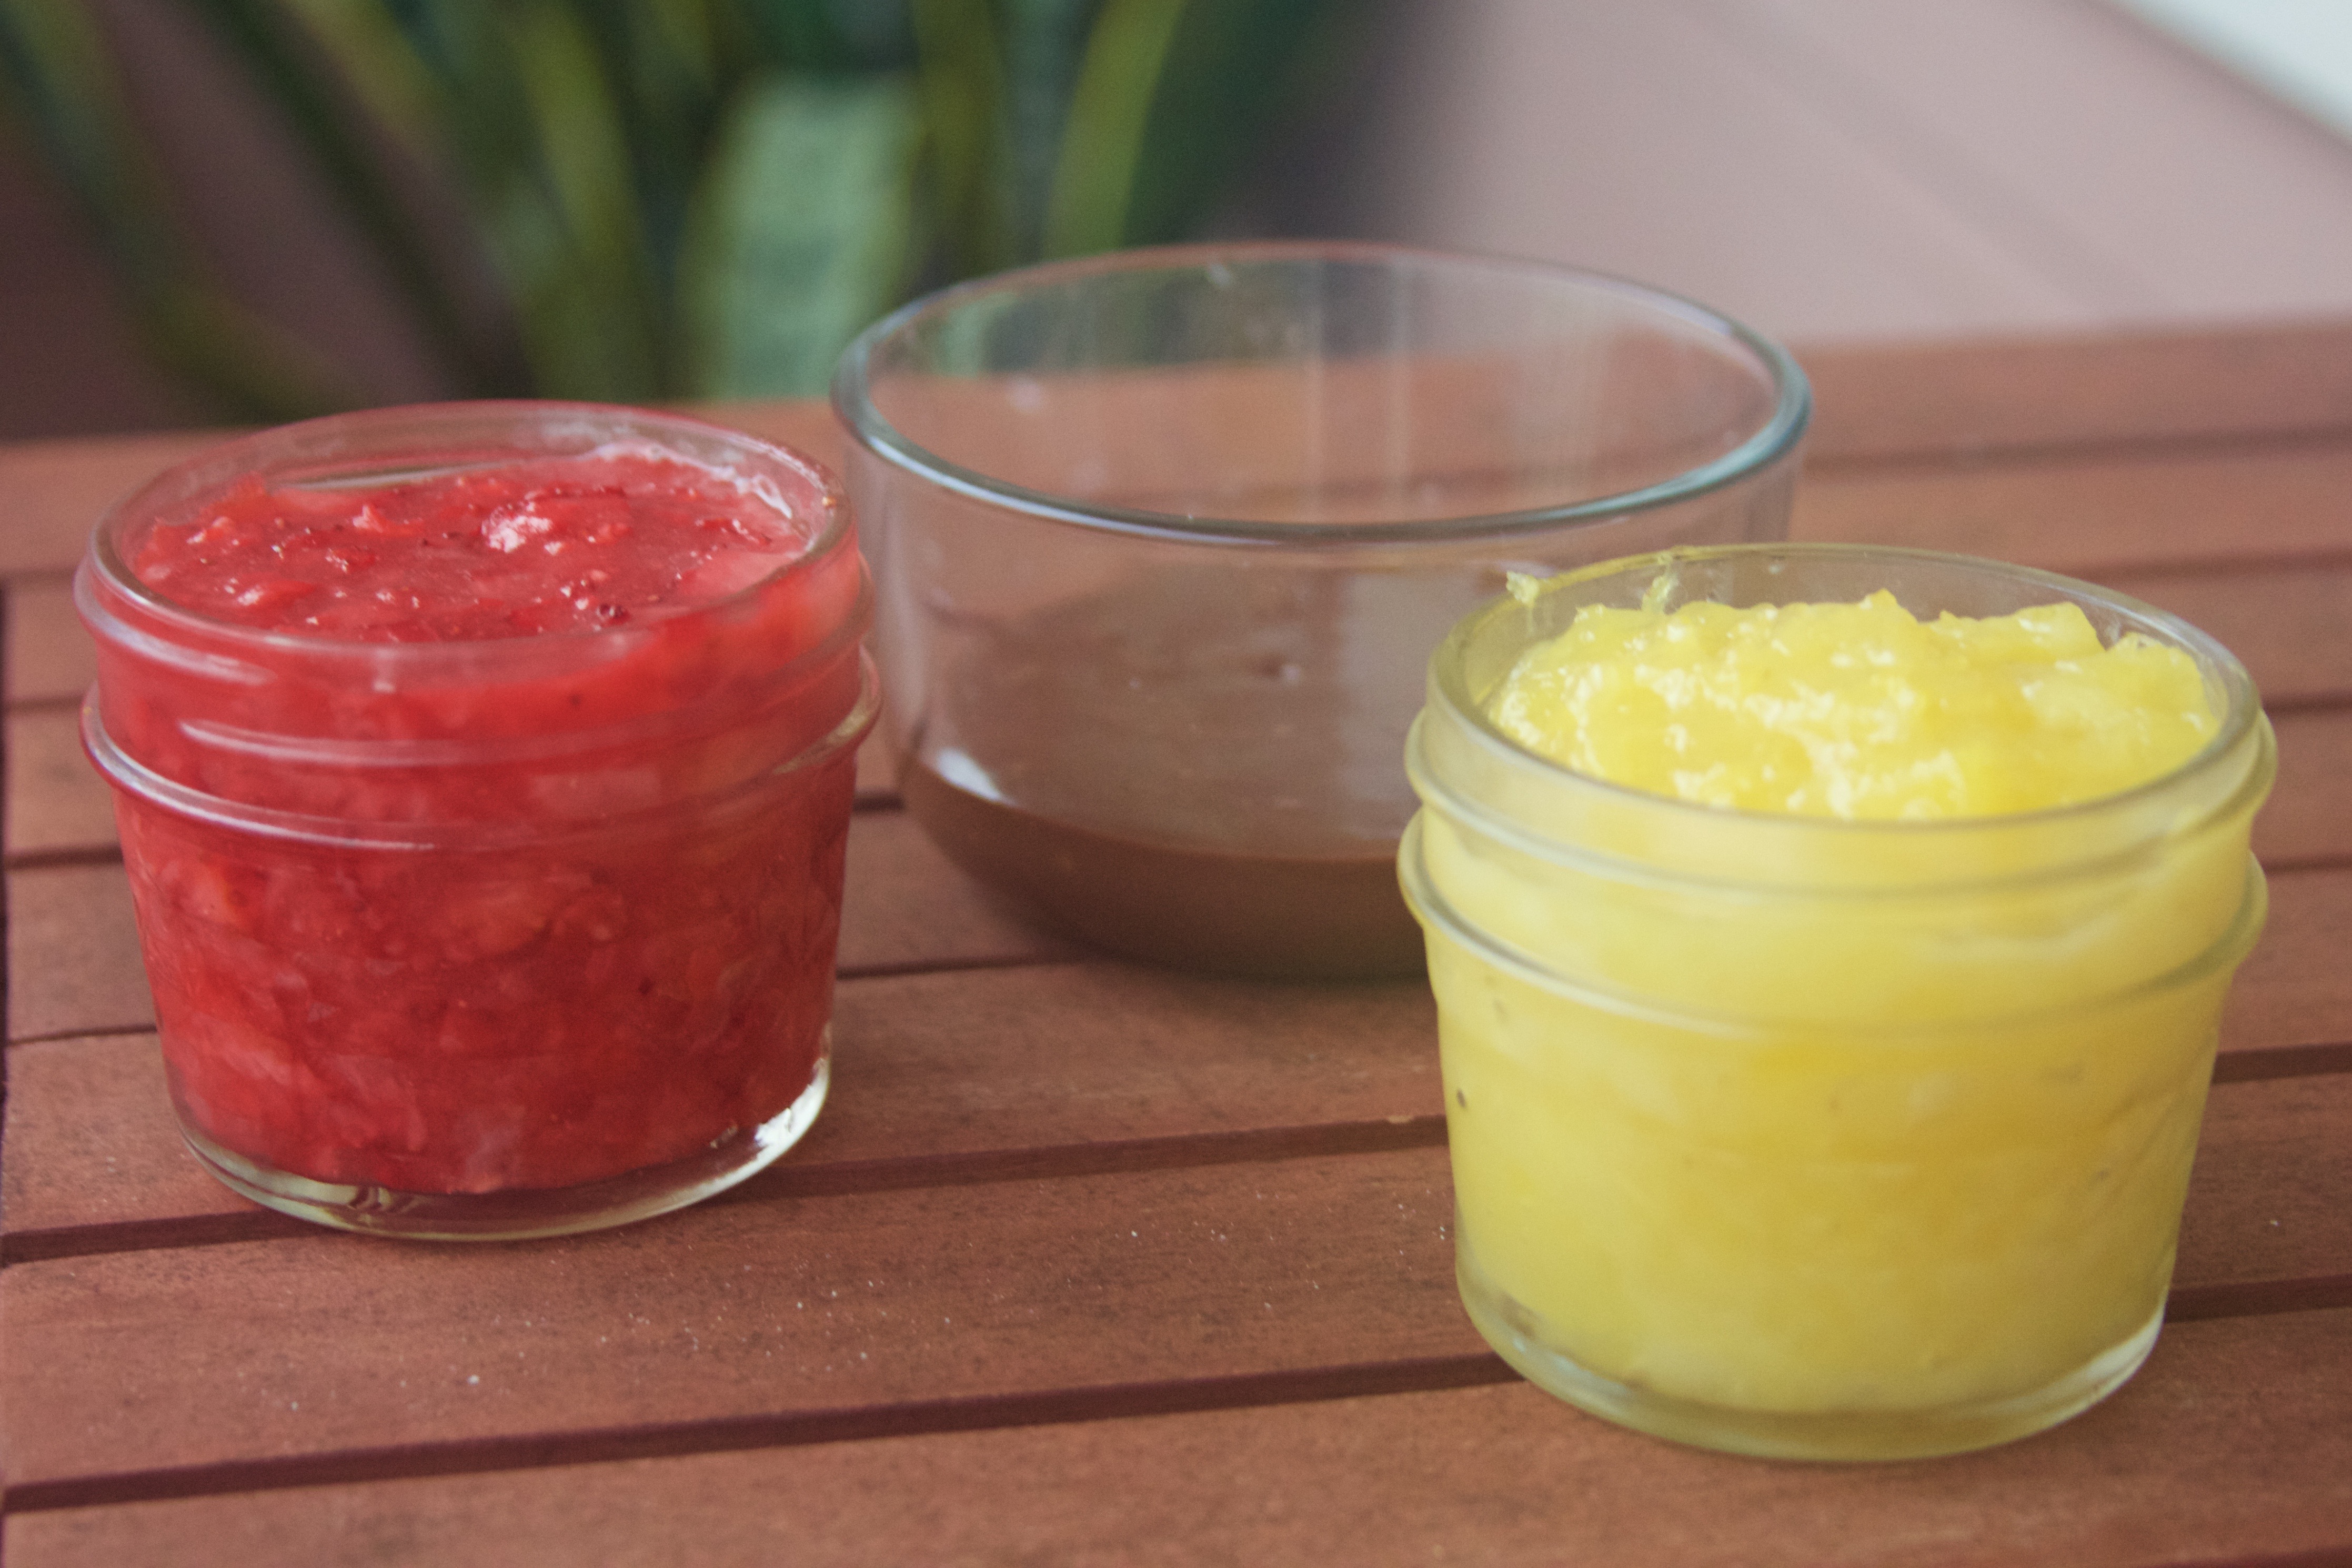
Step One – Sauces!

Step Two – Cupcakes!
Prep the cupcakes! Measure out all of your ingredients. Let the butter and the eggs warm up to room temperature (about 30 minutes). Preheat your oven to 350°F.
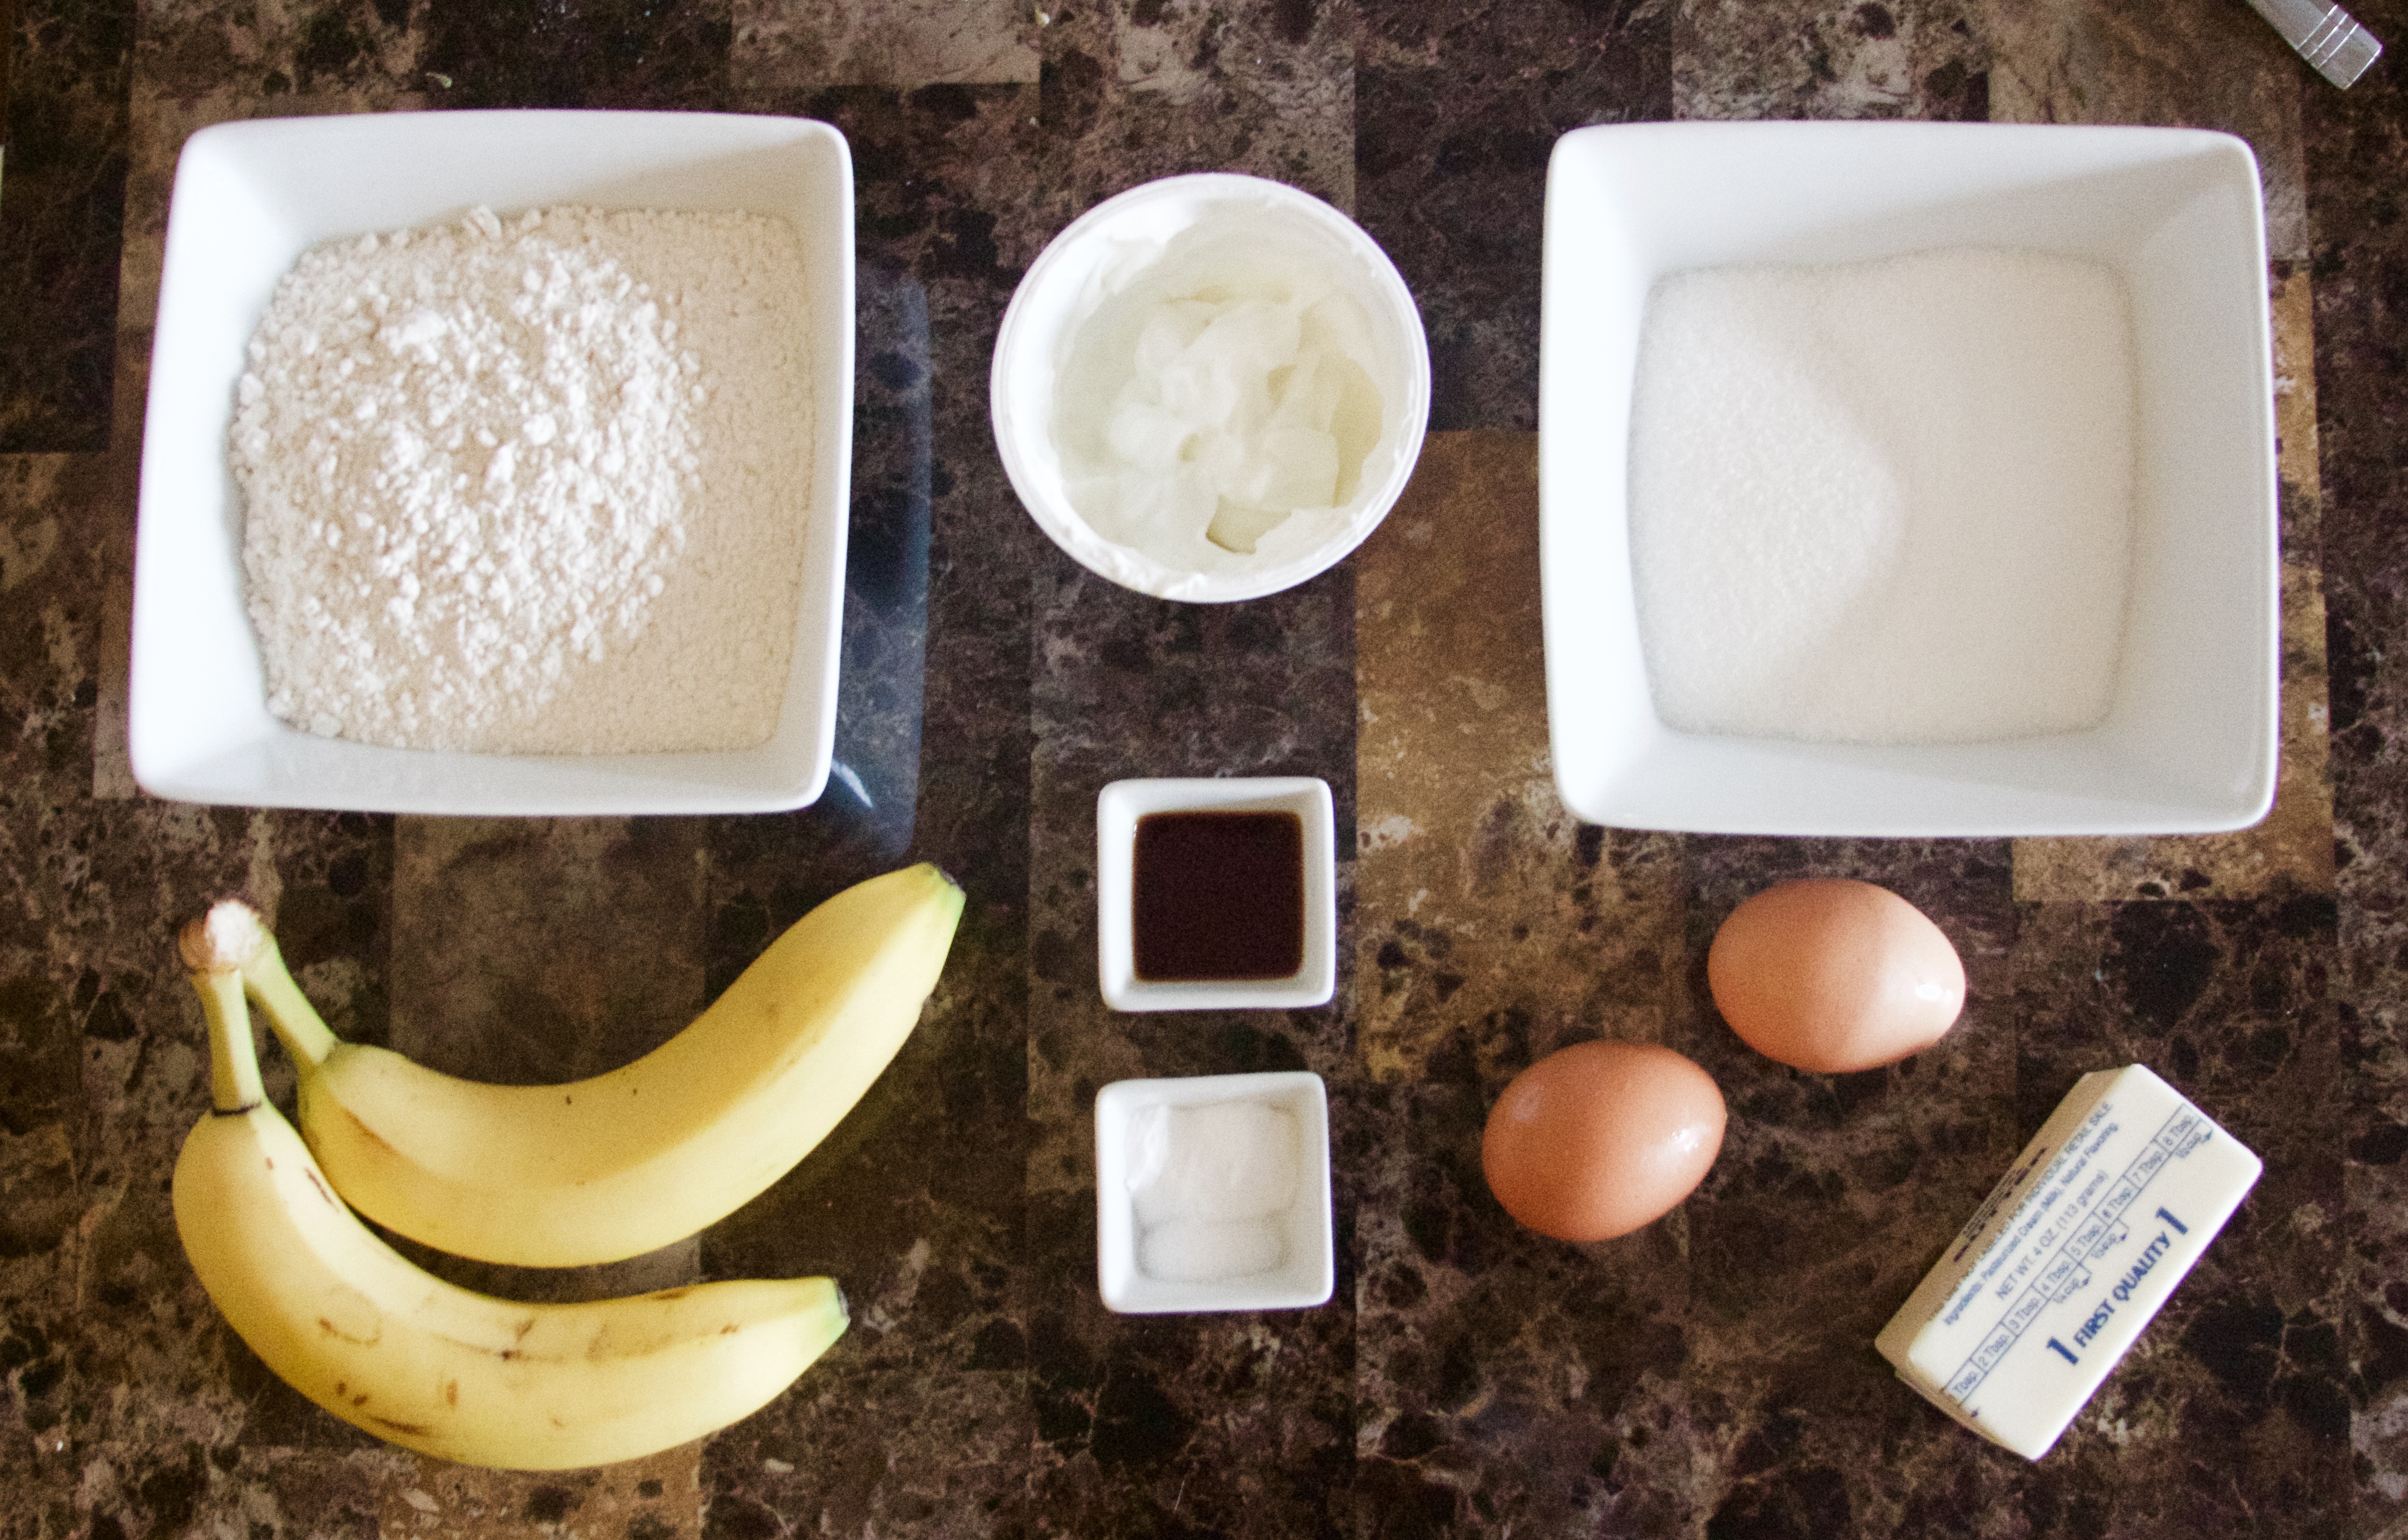
With a fork, mix together your dry ingredients in a bowl and set aside.

This cupcake combines all of the yumminess of a banana split into one delicious baked treat that you can enjoy year round!
Ingredients
- !Banana Cupcakes
- 1/2 cup (1 stick) unsalted butter
- 1 cup sugar
- 2 eggs
- 2 tsp vanilla
- 2 bananas, mashed
- 1 tsp baking soda
- 1/4 tsp salt
- 1/2 cup plain greek yogurt
- 2 cups strawberries, chopped
- 1 Tbsp sugar
- 1 Tbsp cornstarch
- 2 cups pineapple, chopped
- 1 Tbsp sugar
- 1 Tbsp cornstarch
- 1 cup milk chocolate morsels
- 1 Tbsp heavy whipping cream
- 1 cup heavy whipping cream
- 1 Tbsp powdered sugar
- Salted peanuts, crushed
- Sprinkles
- Ice cream (I used strawberry)
- Maraschino cherries
Instructions
- *Note: You want to make the sauces first so that they are cool enough to use when the cupcakes are done!
- Prep Step!
- Put the chopped strawberries into a saucepan over medium heat. Cook for about five minutes, until they start to lose their juices.
- Add the sugar and mix thoroughly.
- One the sauce looks slightly syrupy, add the cornstarch.
- *Tip: I pre-mix my cornstarch with about a teaspoon of water so that I don’t get clumps.
- Cook for about three minutes, just until it starts to thicken and come together.
- Repeat the same steps for the pineapple sauce.
- In a microwavable bowl, heat the chocolate chips and whipping cream at 30 second intervals, stirring in-between.
- Let all sauces cool to room temperature.
- Prep the cupcakes! Measure out all of your ingredients. Let the butter and the eggs warm up to room temperature (about 30 minutes). Preheat your oven to 350°F.
- With a fork, mix together your dry ingredients in a bowl and set aside.
- In a stand mixer, beat together the butter and sugar for about five minutes, until light and fluffy.
- Now add the eggs, one at a time, and beat until it is mixed together.
- Add the vanilla and beat until it is well-mixed.
- Stir in the mashed bananas.
- Add one-third of the dry ingredients and mix until just incorporated.
- Now, add half of the yogurt and mix until incorporated.
- Repeat this process until all of the dry ingredients and yogurt is used.
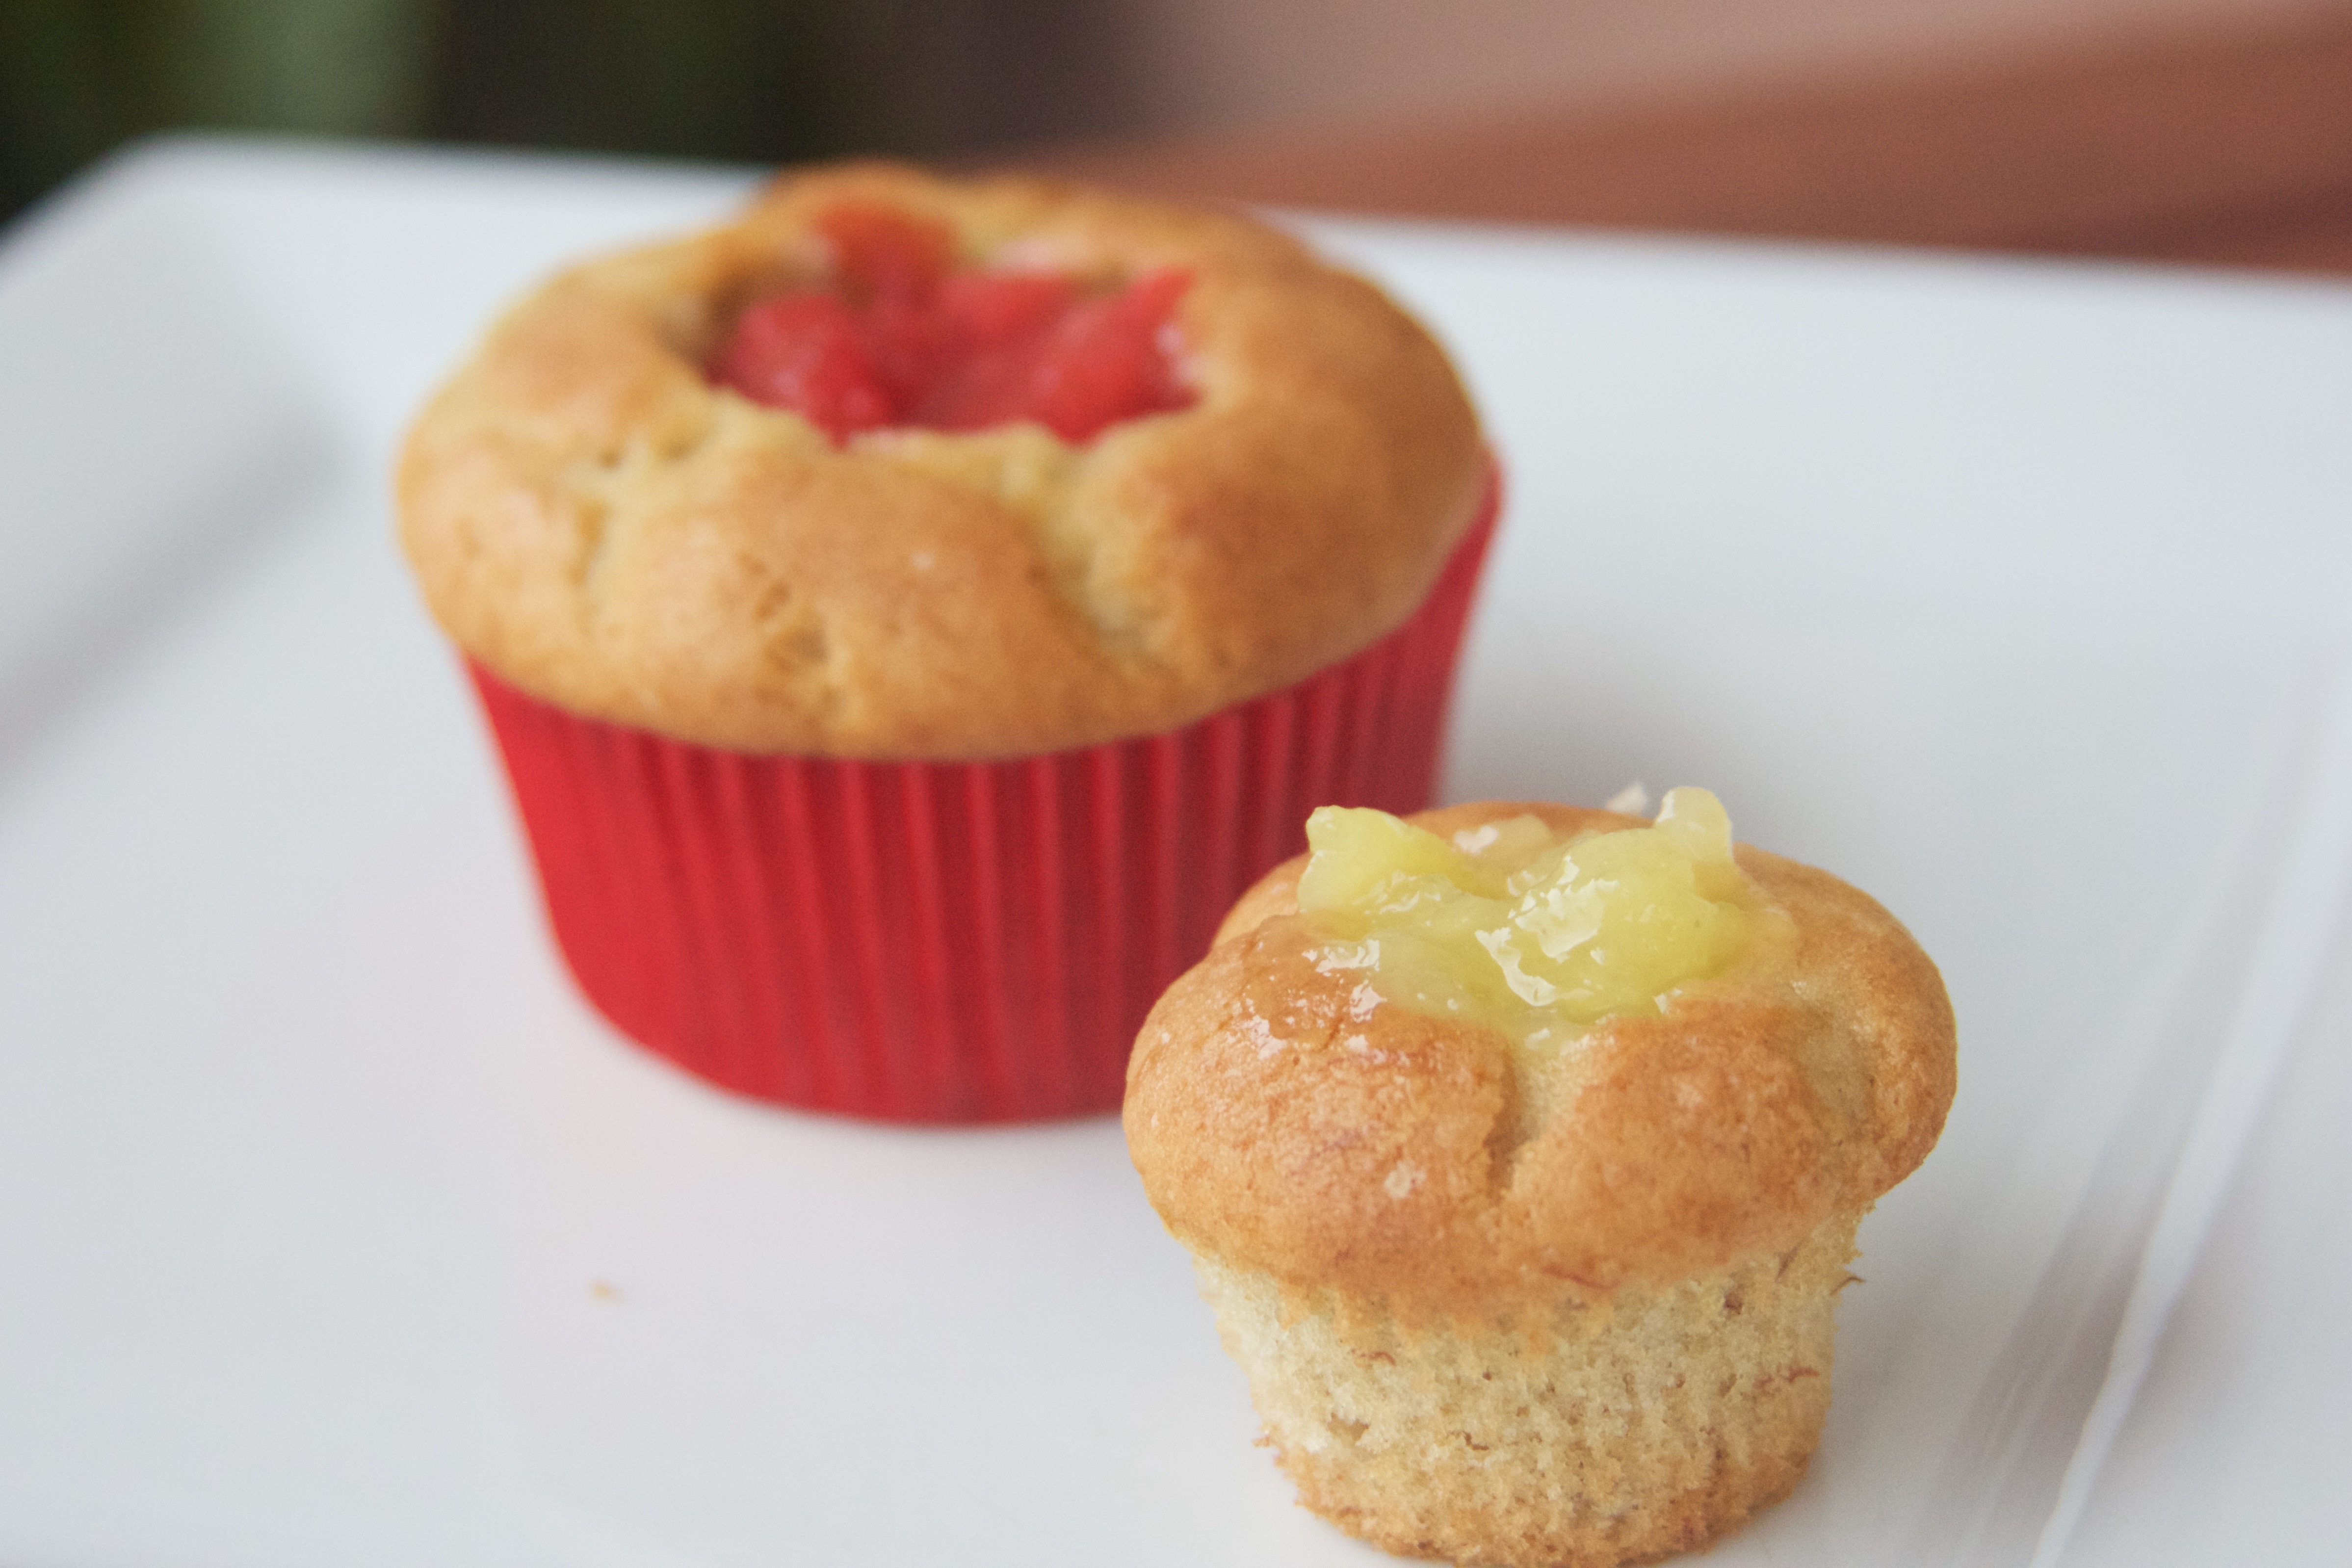
- Now they are ready to bake! Use about 2/3 of the batter in a regular sized pan; use the rest in a mini cupcake pan. Bake at 350°F for 20-22 minutes, or until the tops are golden brown.
- Add the heavy whipping cream and powdered sugar to a mixing bowl. Beat on high with the whisk attachment until stiff peaks form. Add to a piping bag fitted with a star attachment.
- Unwrap the mini cupcakes from their wrappers. Using either a knife or a fancy cupcake corer, cut the middle out of the big and small cupcakes.
- Fill the big cupcakes with strawberry filling and the small ones with pineapple filling.
- Place a scoop of the ice cream on the big cupcake. Drizzle with chocolate sauce.
- Place the small cupcake on top and “frost” with the whipped cream. Sprinkle with the peanuts and sprinkles, and add a cherry on top!