this is a page for
Browsing Tag: marshmallow
Valentine’s Day is just around the corner! Granted, I don’t care for the holiday that much, but it’s a great excuse to bake delicious treats!
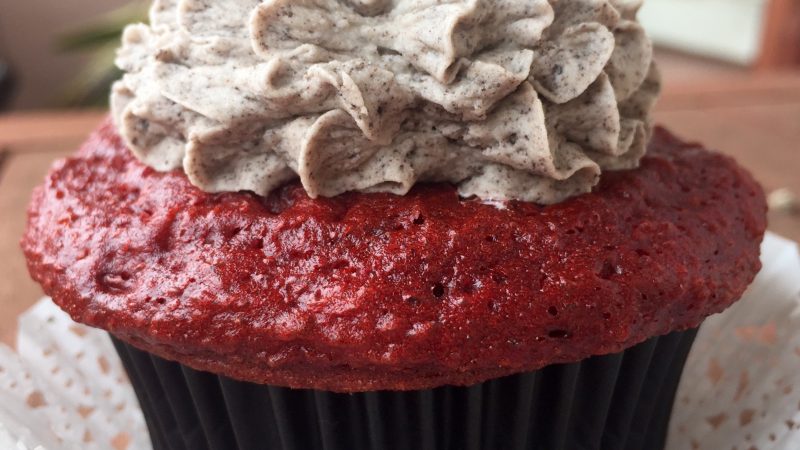
What baked good says “I love you” for you? I really enjoy red velvet, and that color is on point with the theme of the holiday.
If you’re having a romantic dinner, you probably want something fancier than a cupcake for dessert. But if you’re celebrating with your friends or baking a treat to bring in to school for the kids or the adults at work, these are a great choice!
They CHEAT! Shhhhhh don’t tell anyone. The base of these cupcakes is a box mix, making the recipe super easy. But the add-ins are fancy enough to transform the cake into something that tastes like it’s just from scratch! Which gives you more time to make individualized & adorable cards!
~~~~~~~~~~
Step One.
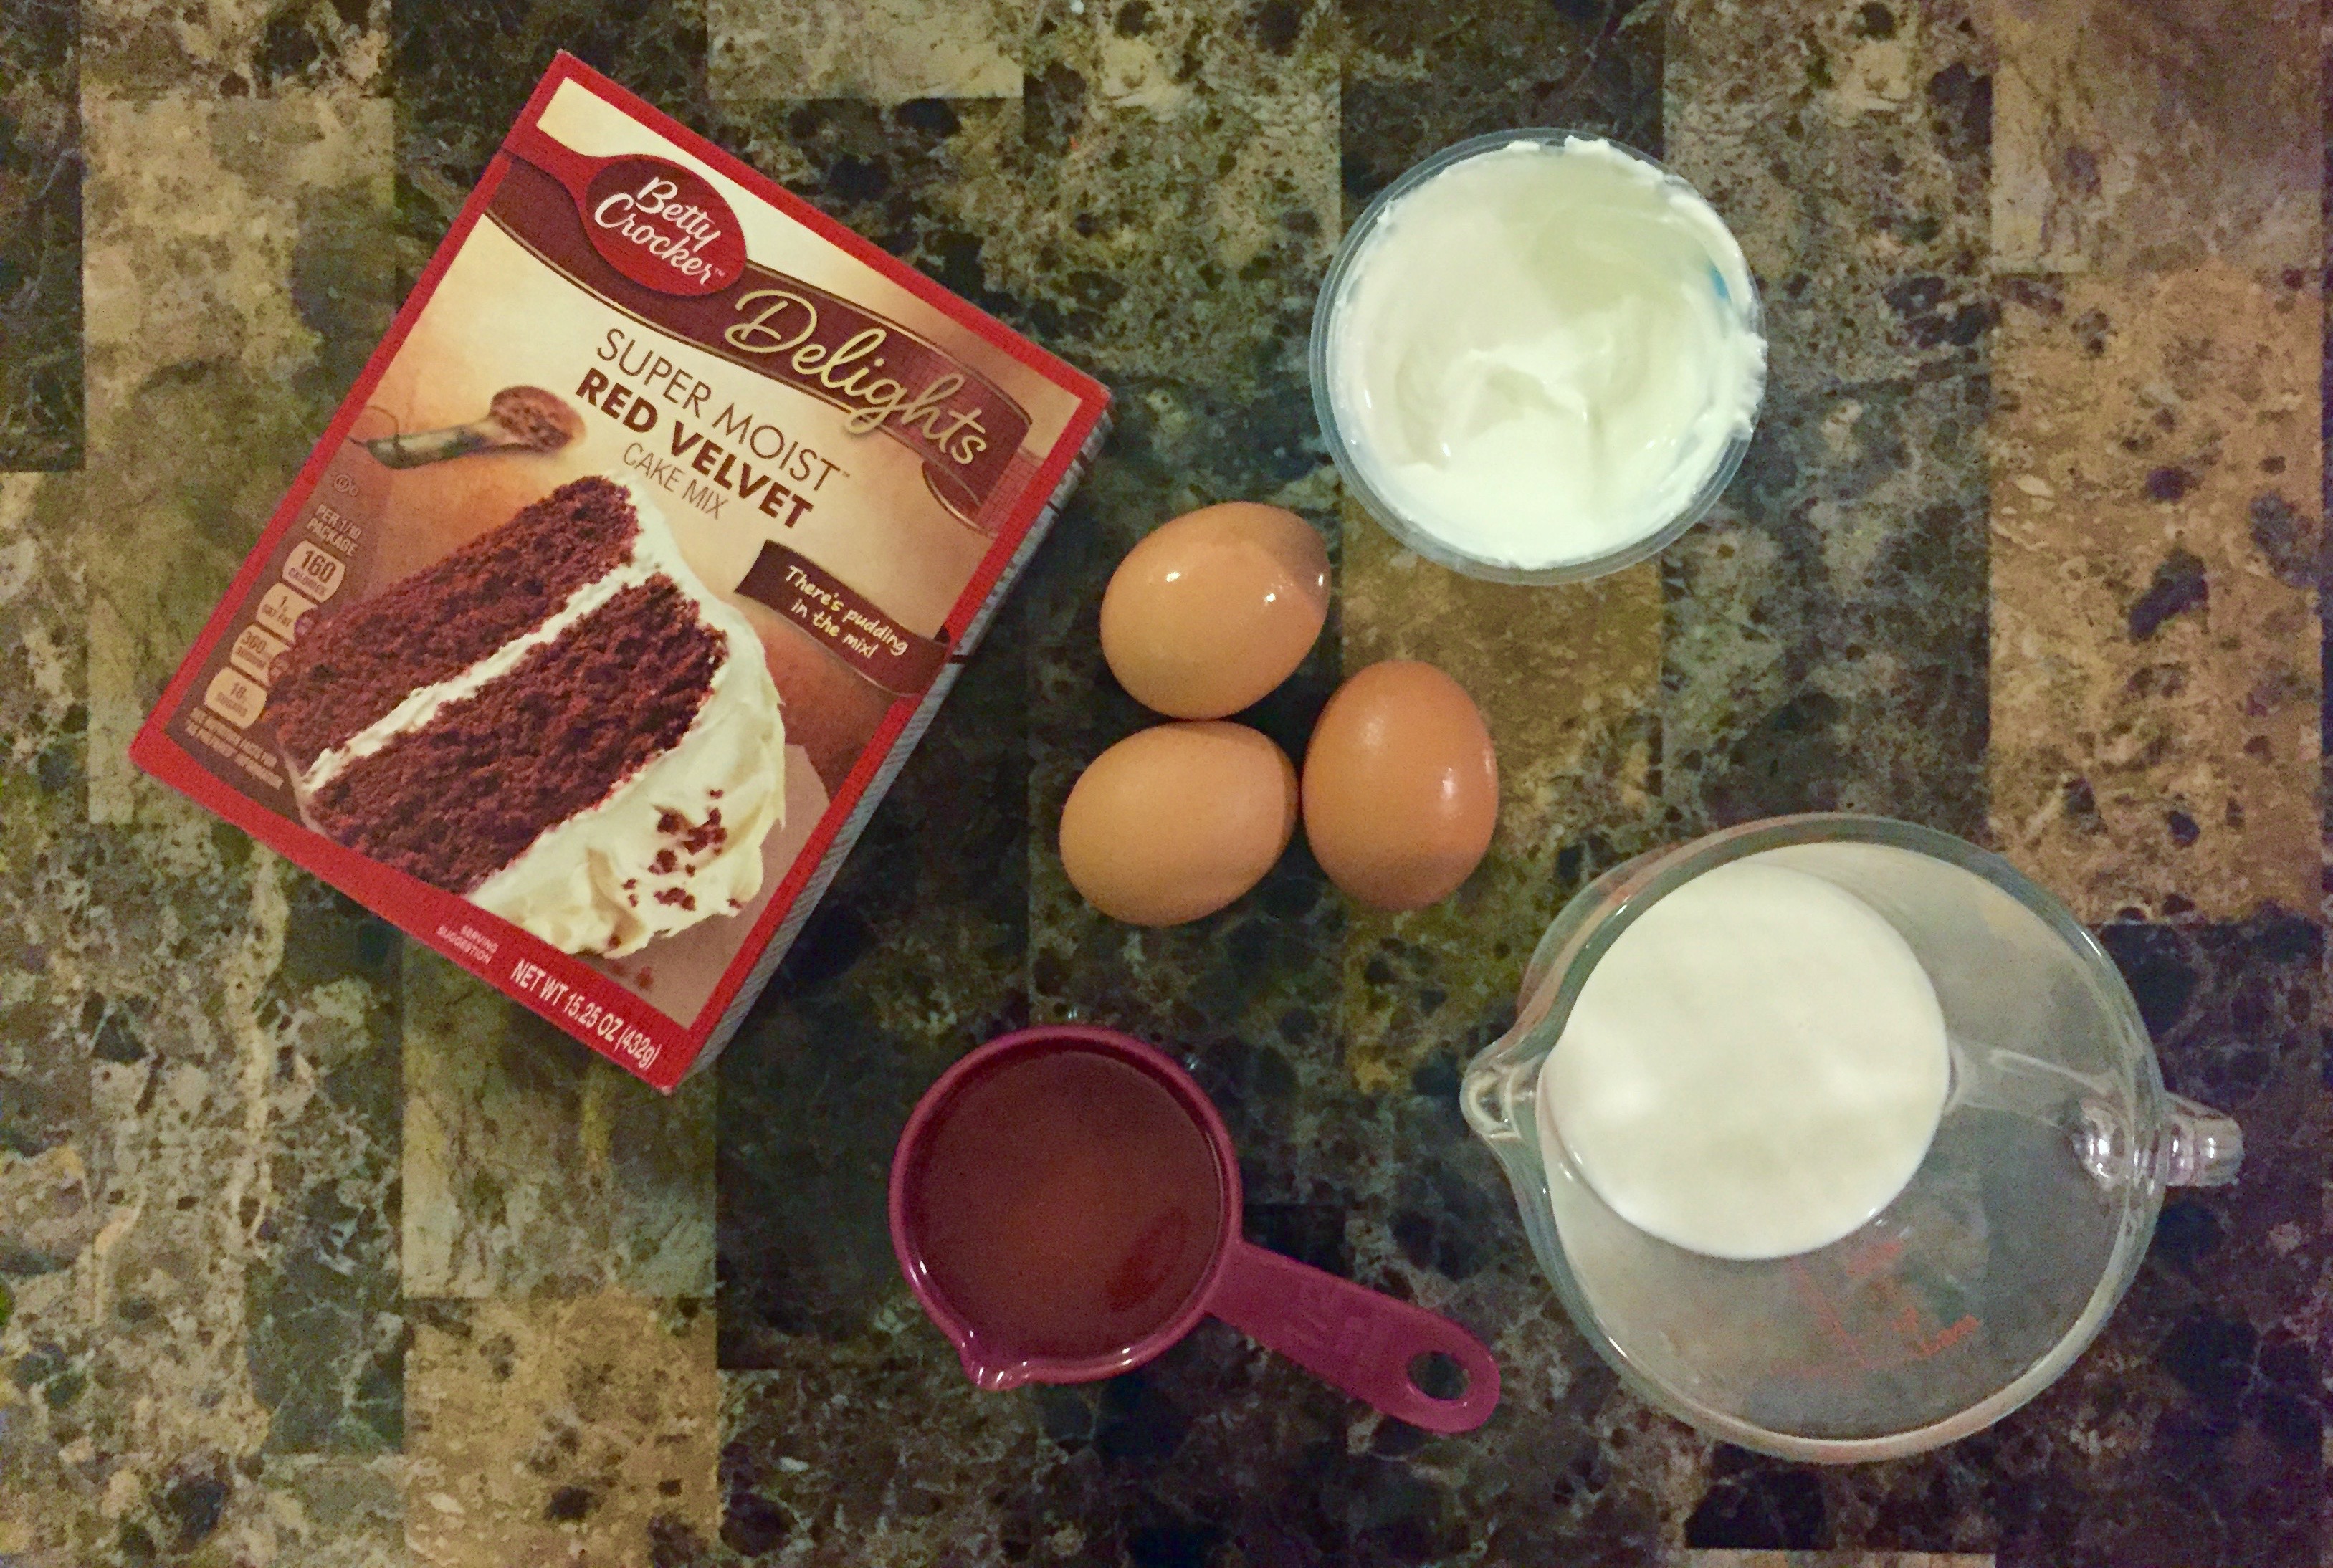
Prep Step! Measure out your ingredients and preheat your over to 350°F. Line a cupcake tin with your favorite wrappers.
Step Two.
Add the cake mix to your mixer; mix in the oil on a low speed, until incorporated. Beat in the eggs, one at a time, on medium speed. Next, beat in the yogurt until the batter is smooth. Slowly mix in the milk.
Step Three.
Fill the cupcake wrapper with batter. Bake at 350°F for about 20 minutes, or until a toothpick inserted in the center comes out clean. Let the cupcakes cool.

Step Four.
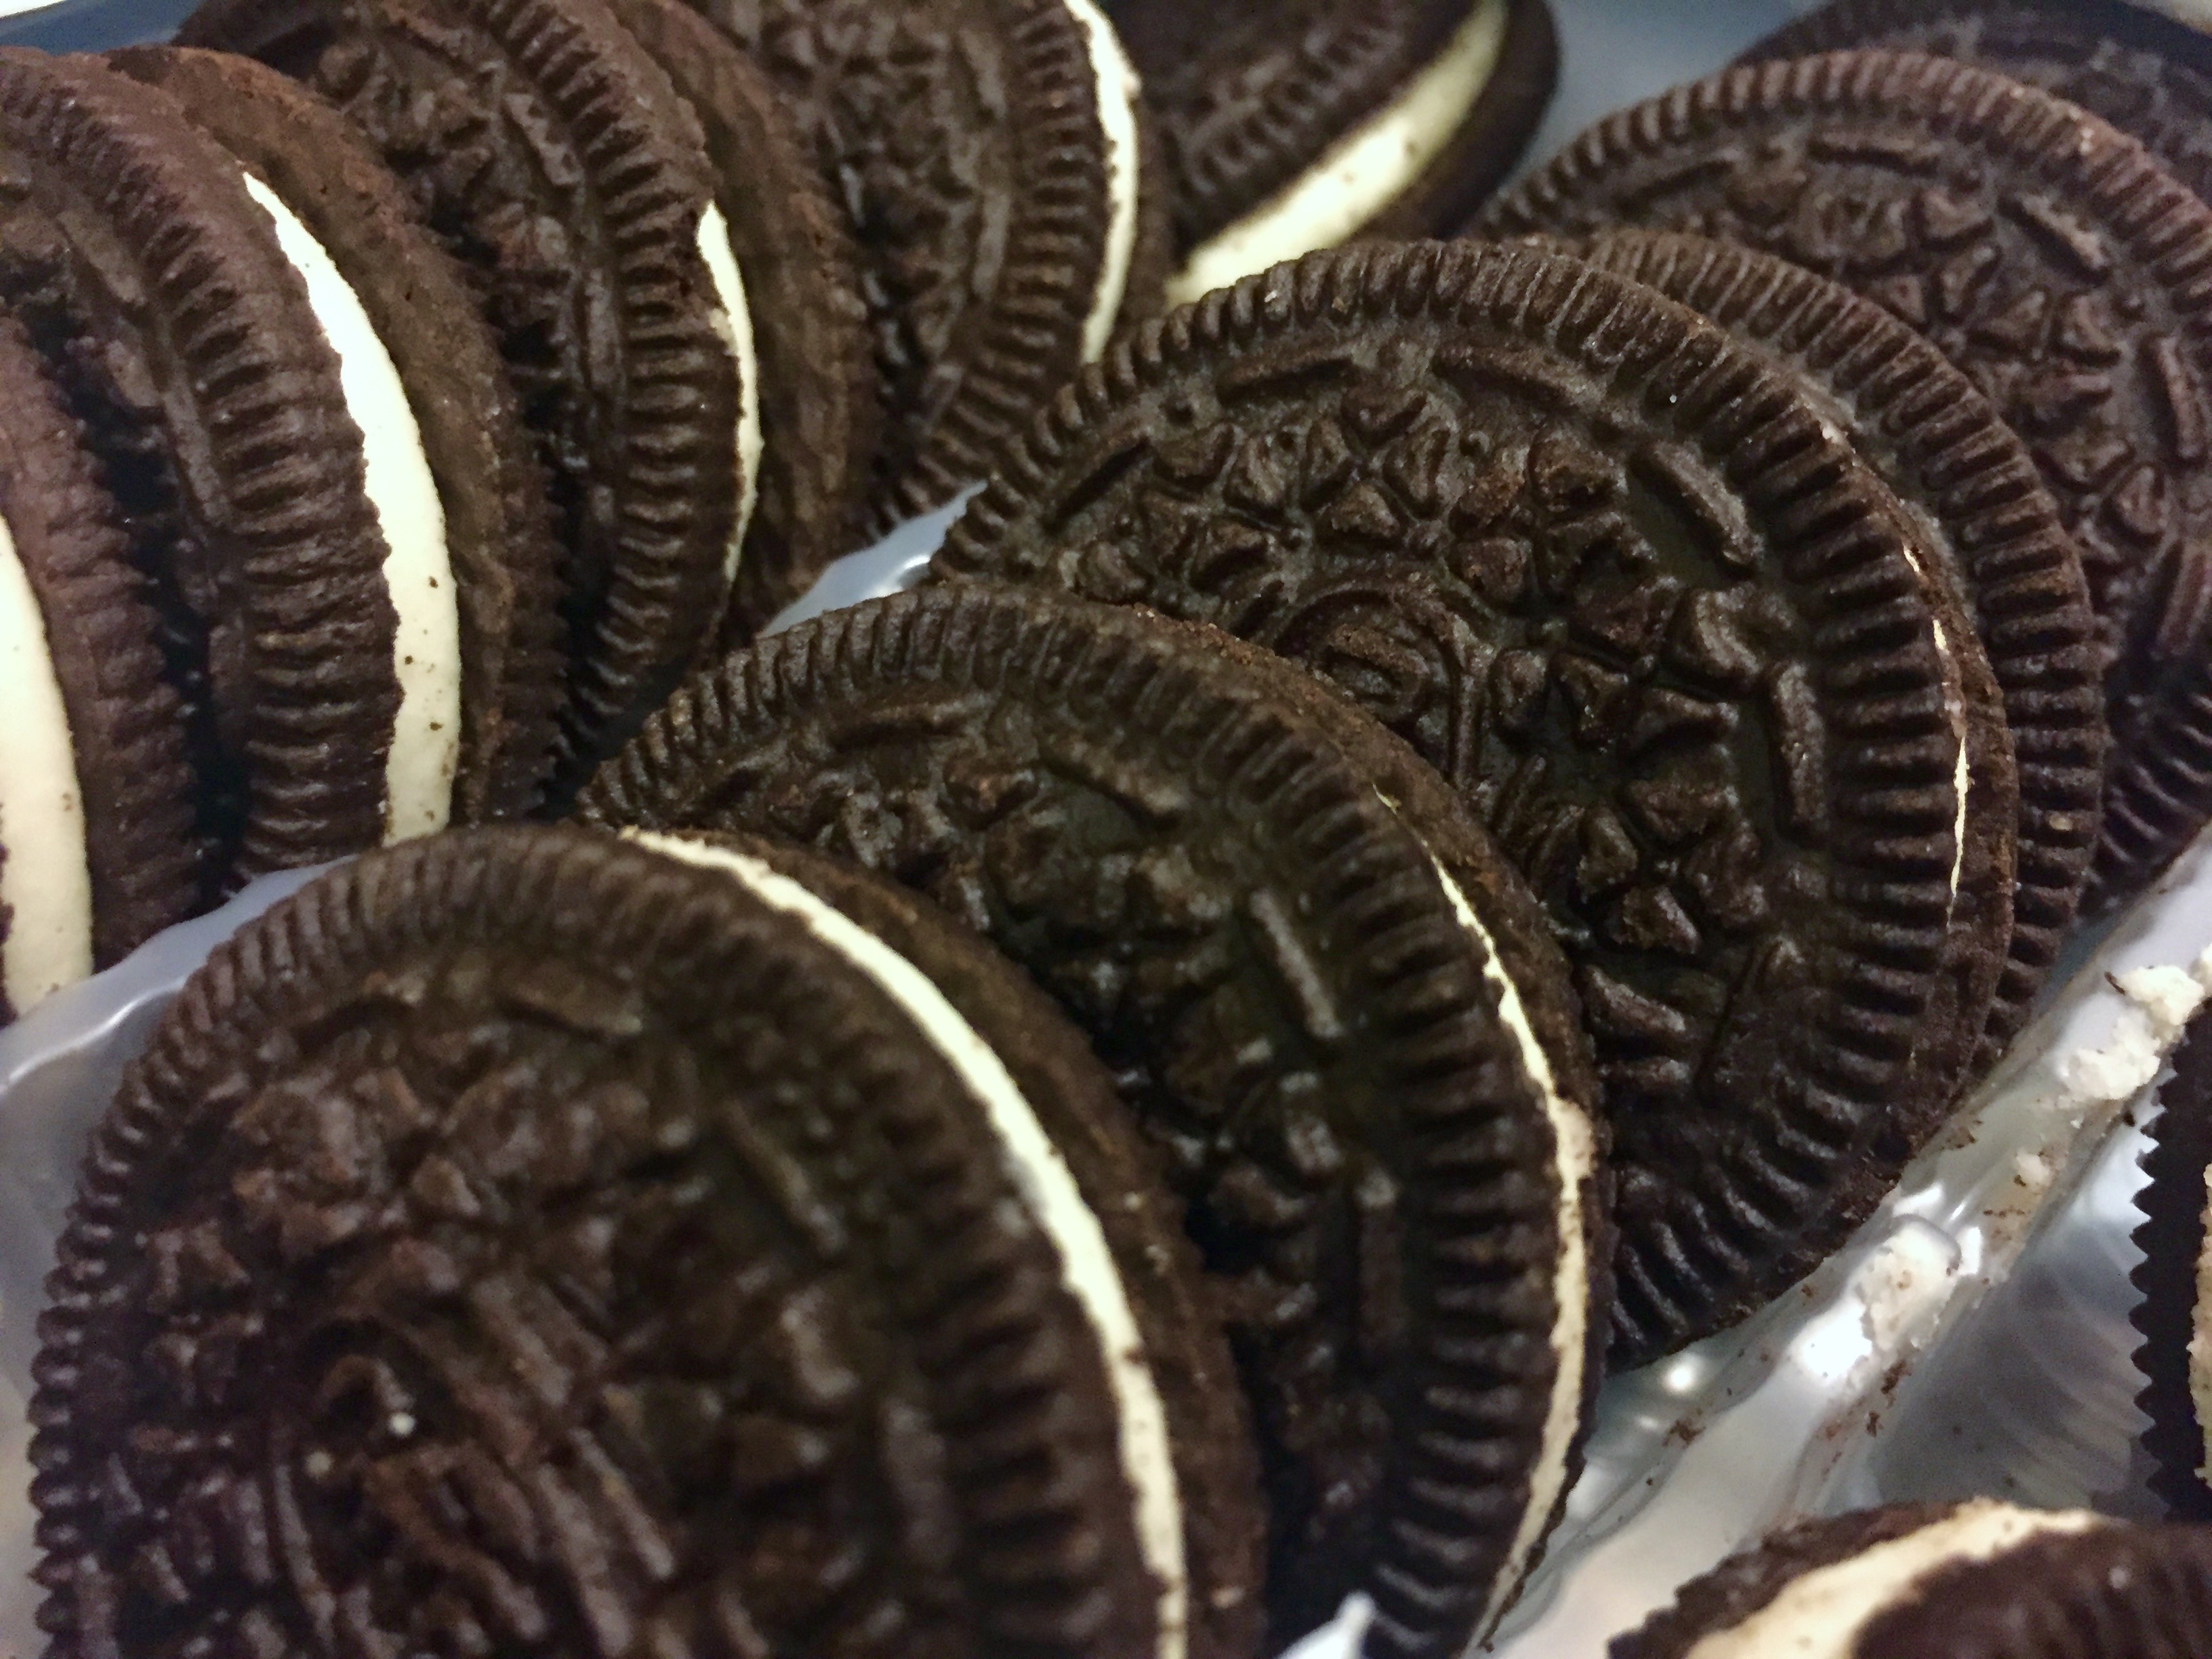
While the cupcakes cool, prepare the frosting. Process the Oreos in a food processor until they are completely crumbled. You may choose to keep bigger pieces in the frosting, but then you are going to have a hard time piping!
Step Five.
Beat the butter on high speed in a mixer fitted with the whisk attachment for about 2 minutes, until it is light. In small batches, beat in the powdered sugar. Next, beat in the heavy whipping cream. Mix in the Oreo crumbles and beat the frosting on high speed until light and fluffy. Add your frosting to a frosting bag fired with a wide star tip (in case there are still some larger pieces of cookie that could clog the tip!)
Step Six.
Now that the cupcakes are cool, core out the middle (either with a fancy-schmancy cupcake corer or a paring knife) and filling with marshmallow creme. Pipe frosting on top liberally. Decorate with leftover Oreos, if you want to, and enjoy your treat!

Nothing says "I Love You" like red velvet! Enjoy these treats for Valentine's Day or for year-round deliciousness!
Ingredients
- Red Velvet Cupcakes
- 1 box red velvet cake mix
- 1/3 cup canola oil (or vegetable oil)
- 3 eggs
- 1/2 cup (1 contained) nonfat Greek yogurt
- 2/3 cup whole milk
- Filling
- 1 tub marshmallow creme
- Cookies & Cream Frosting
- 1 cup unsalted butter
- 2 1/2 cups powdered sugar
- 1/4 cup heavy whelping cream
- 1 tray of Oreos (minus about four for decorating)
Instructions
- Pre Step! Measure out your ingredients and preheat your over to 350°F. Line a cupcake tin with your favorite wrappers.
- Add the cake mix to your mixer; mix in the oil on a low speed, until incorporated. Beat in the eggs, one at a time, on medium speed. Next, beat in the yogurt until the batter is smooth. Slowly mix in the milk.
- Fill the cupcake wrapper with batter. Bake at 350°F for about 20 minutes, or until a toothpick inserted in the center comes out clean. Let the cupcakes cool.
- While the cupcakes cool, prepare the frosting. Process the Oreos in a food processor until they are completely crumbled. You may choose to keep bigger pieces in the frosting, but then you are going to have a hard time piping!
- Beat the butter on high speed in a mixer fitted with the whisk attachment for about 2 minutes, until it is light. In small batches, beat in the powdered sugar. Next, beat in the heavy whipping cream. Mix in the Oreo crumbles and beat the frosting on high speed until light and fluffy. Add your frosting to a frosting bag fired with a wide star tip (in case there are still some larger pieces of cookie that could clog the tip!)
- Now that the cupcakes are cool, core out the middle (either with a fancy-schmancy cupcake corer or a paring knife) and filling with marshmallow creme. Pipe frosting on top liberally. Decorate with leftover Oreos, if you want to, and enjoy your treat!
Back to school! I always loved back to school. New outfit, new pencils, new goals.
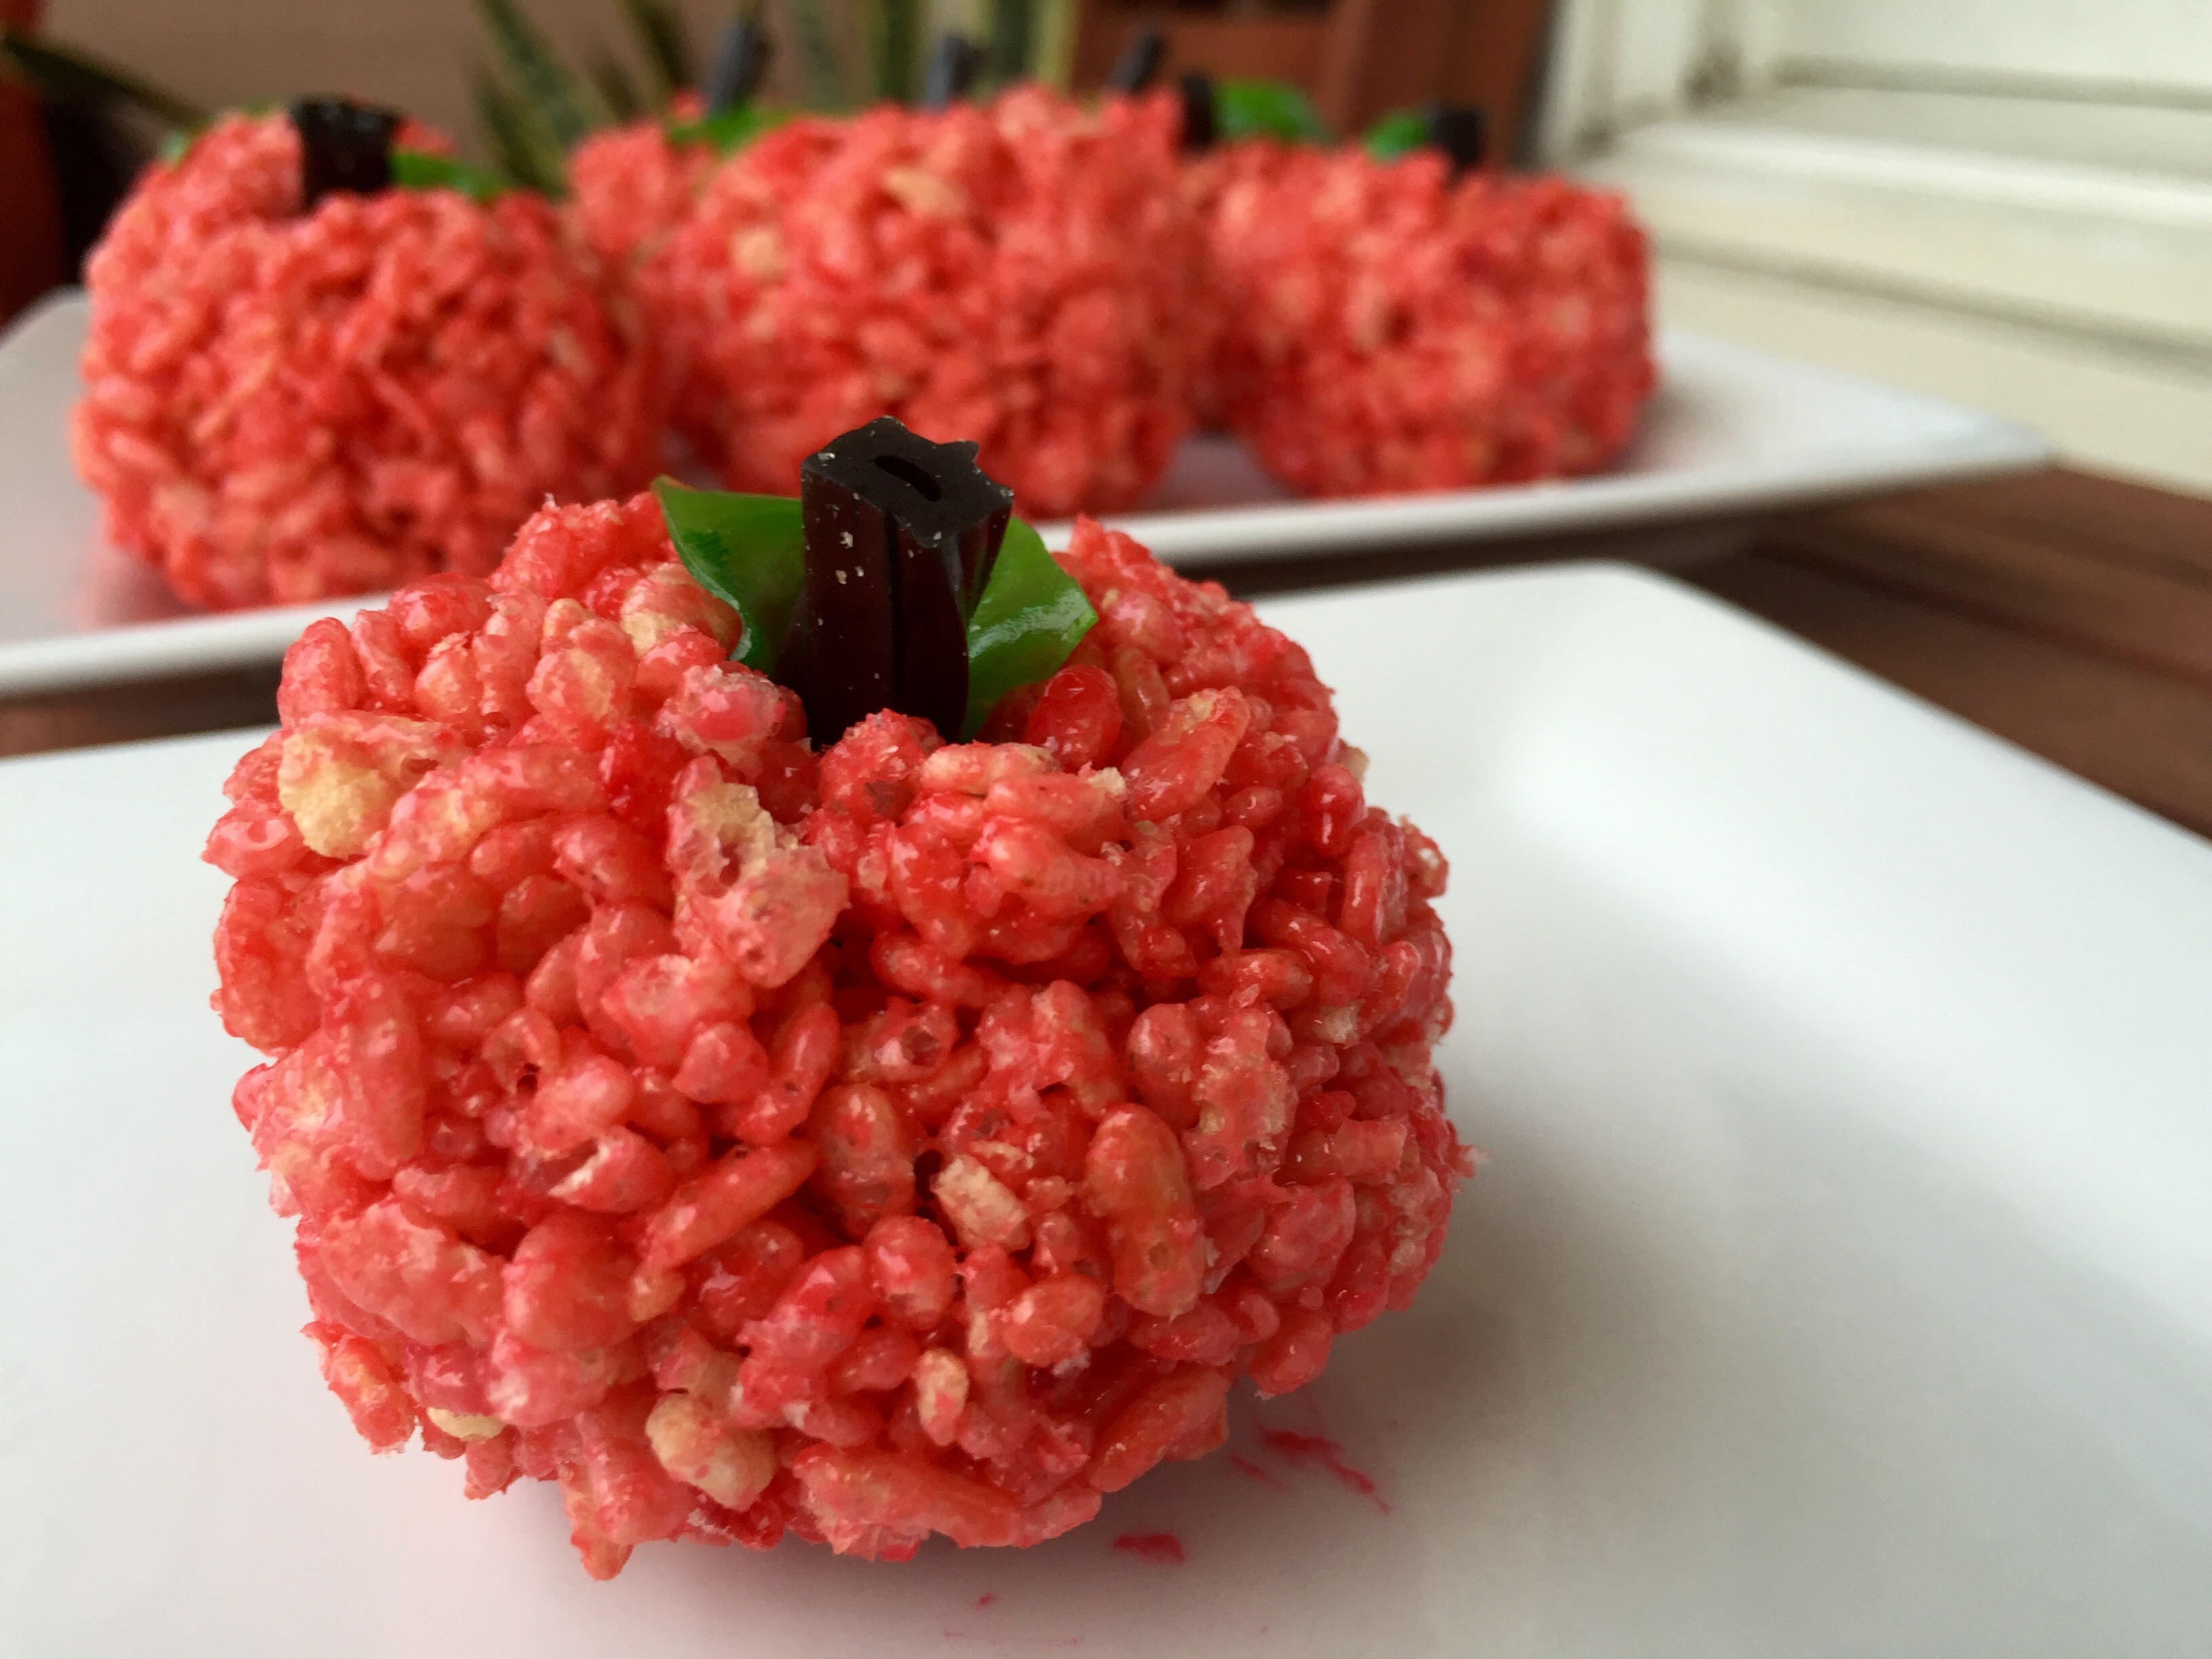
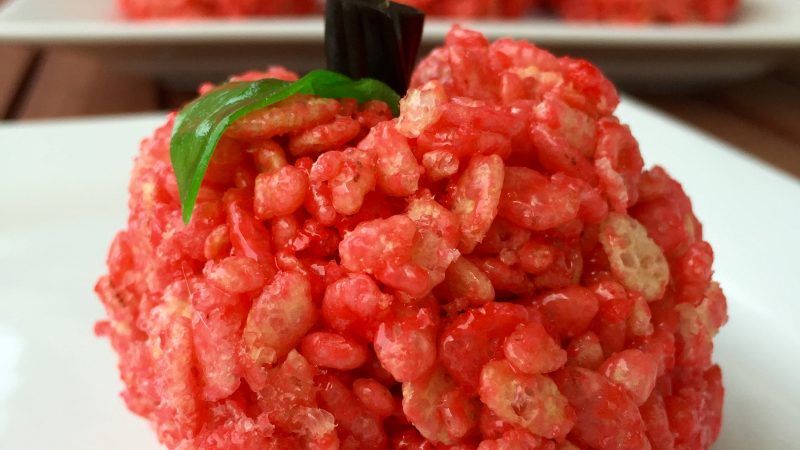
 Apples for the Teachers")
Whether you are a teacher, a student, or a parent, you will absolutely enjoy these cute and tasty treats. They are so easy!
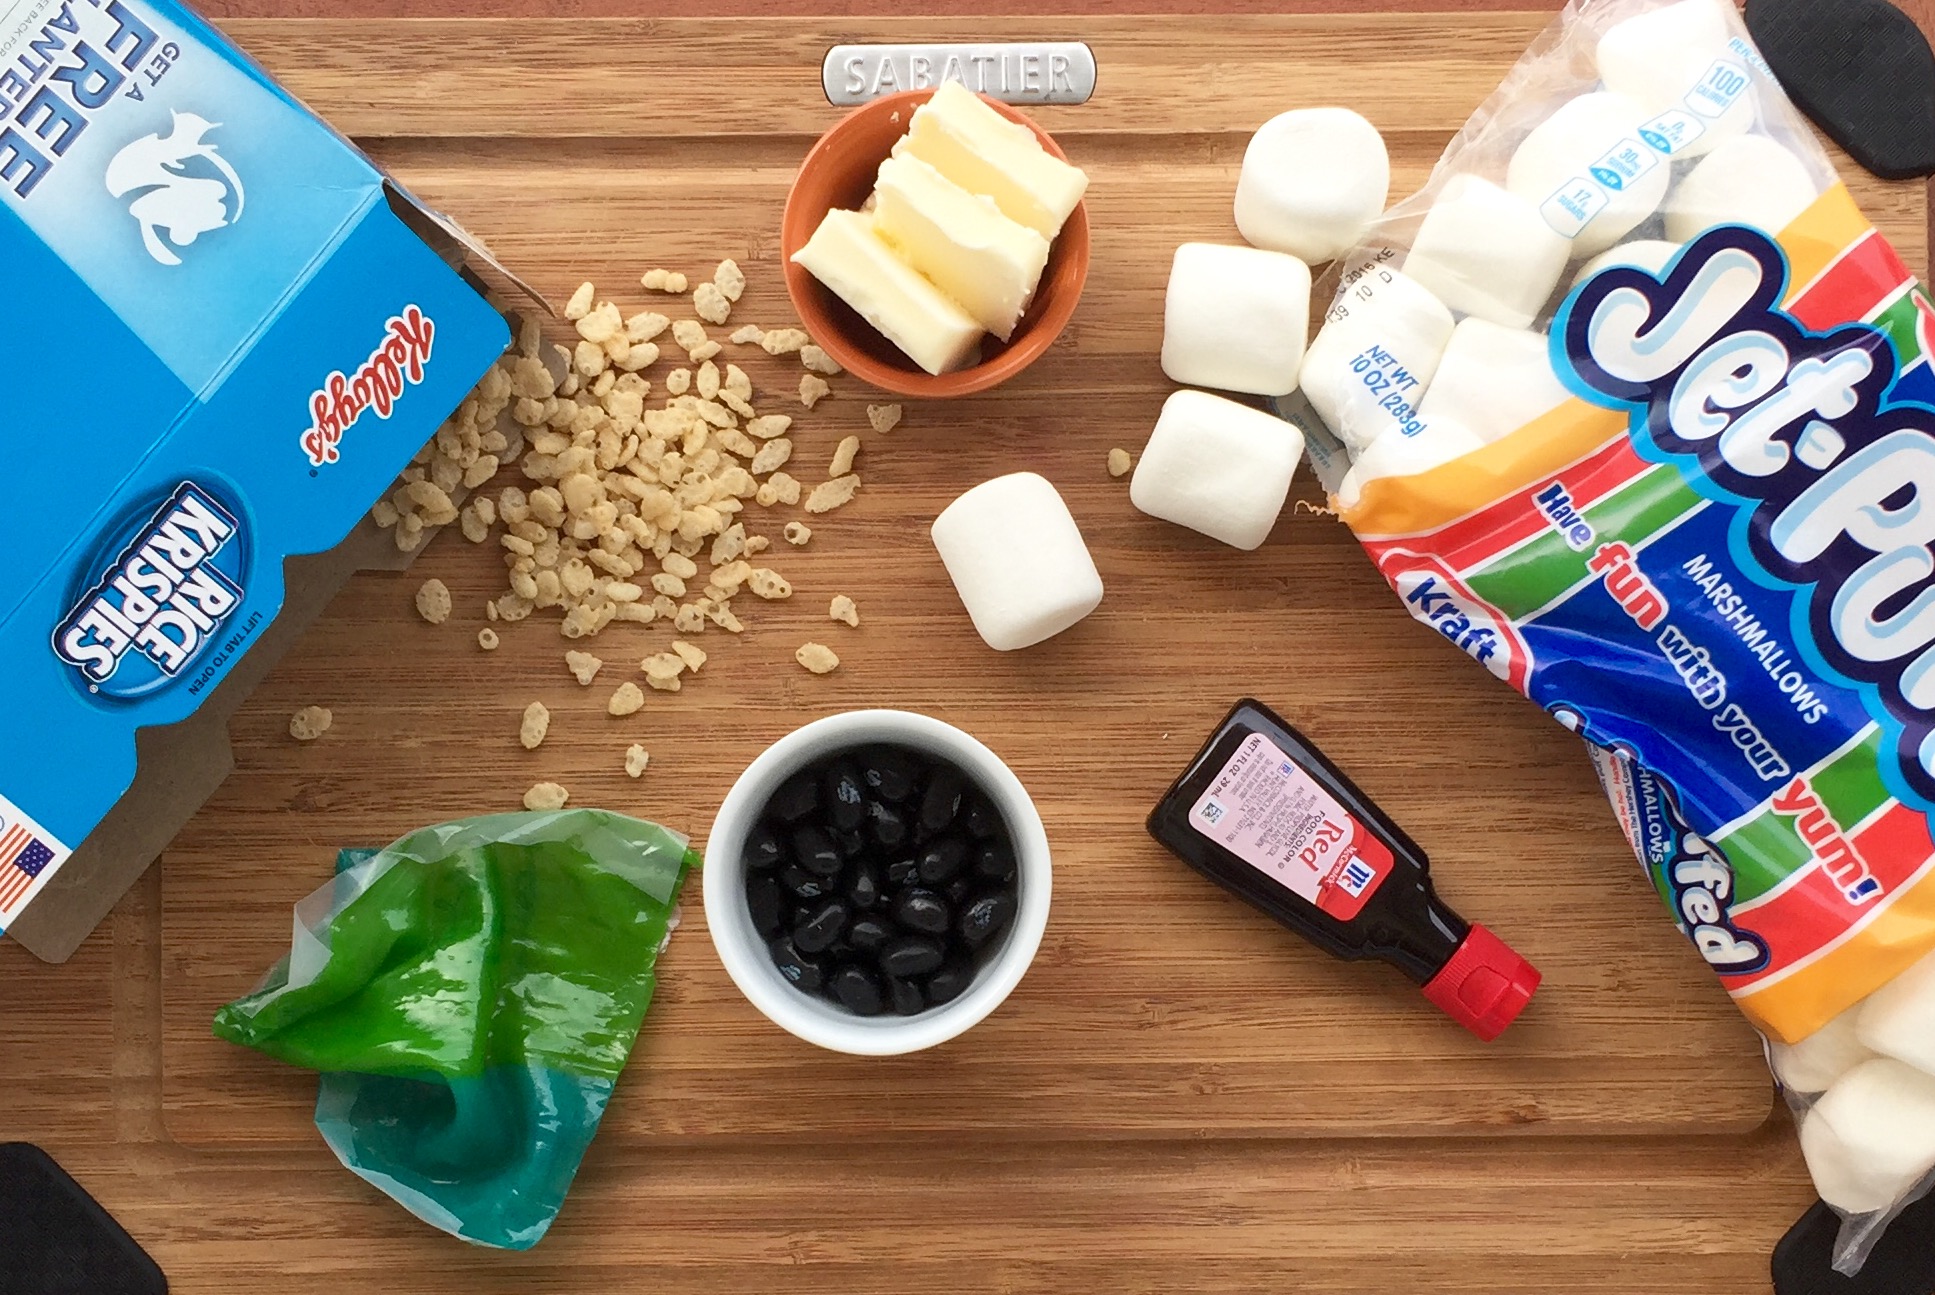
Ingredients
- 3 Tbsp butter
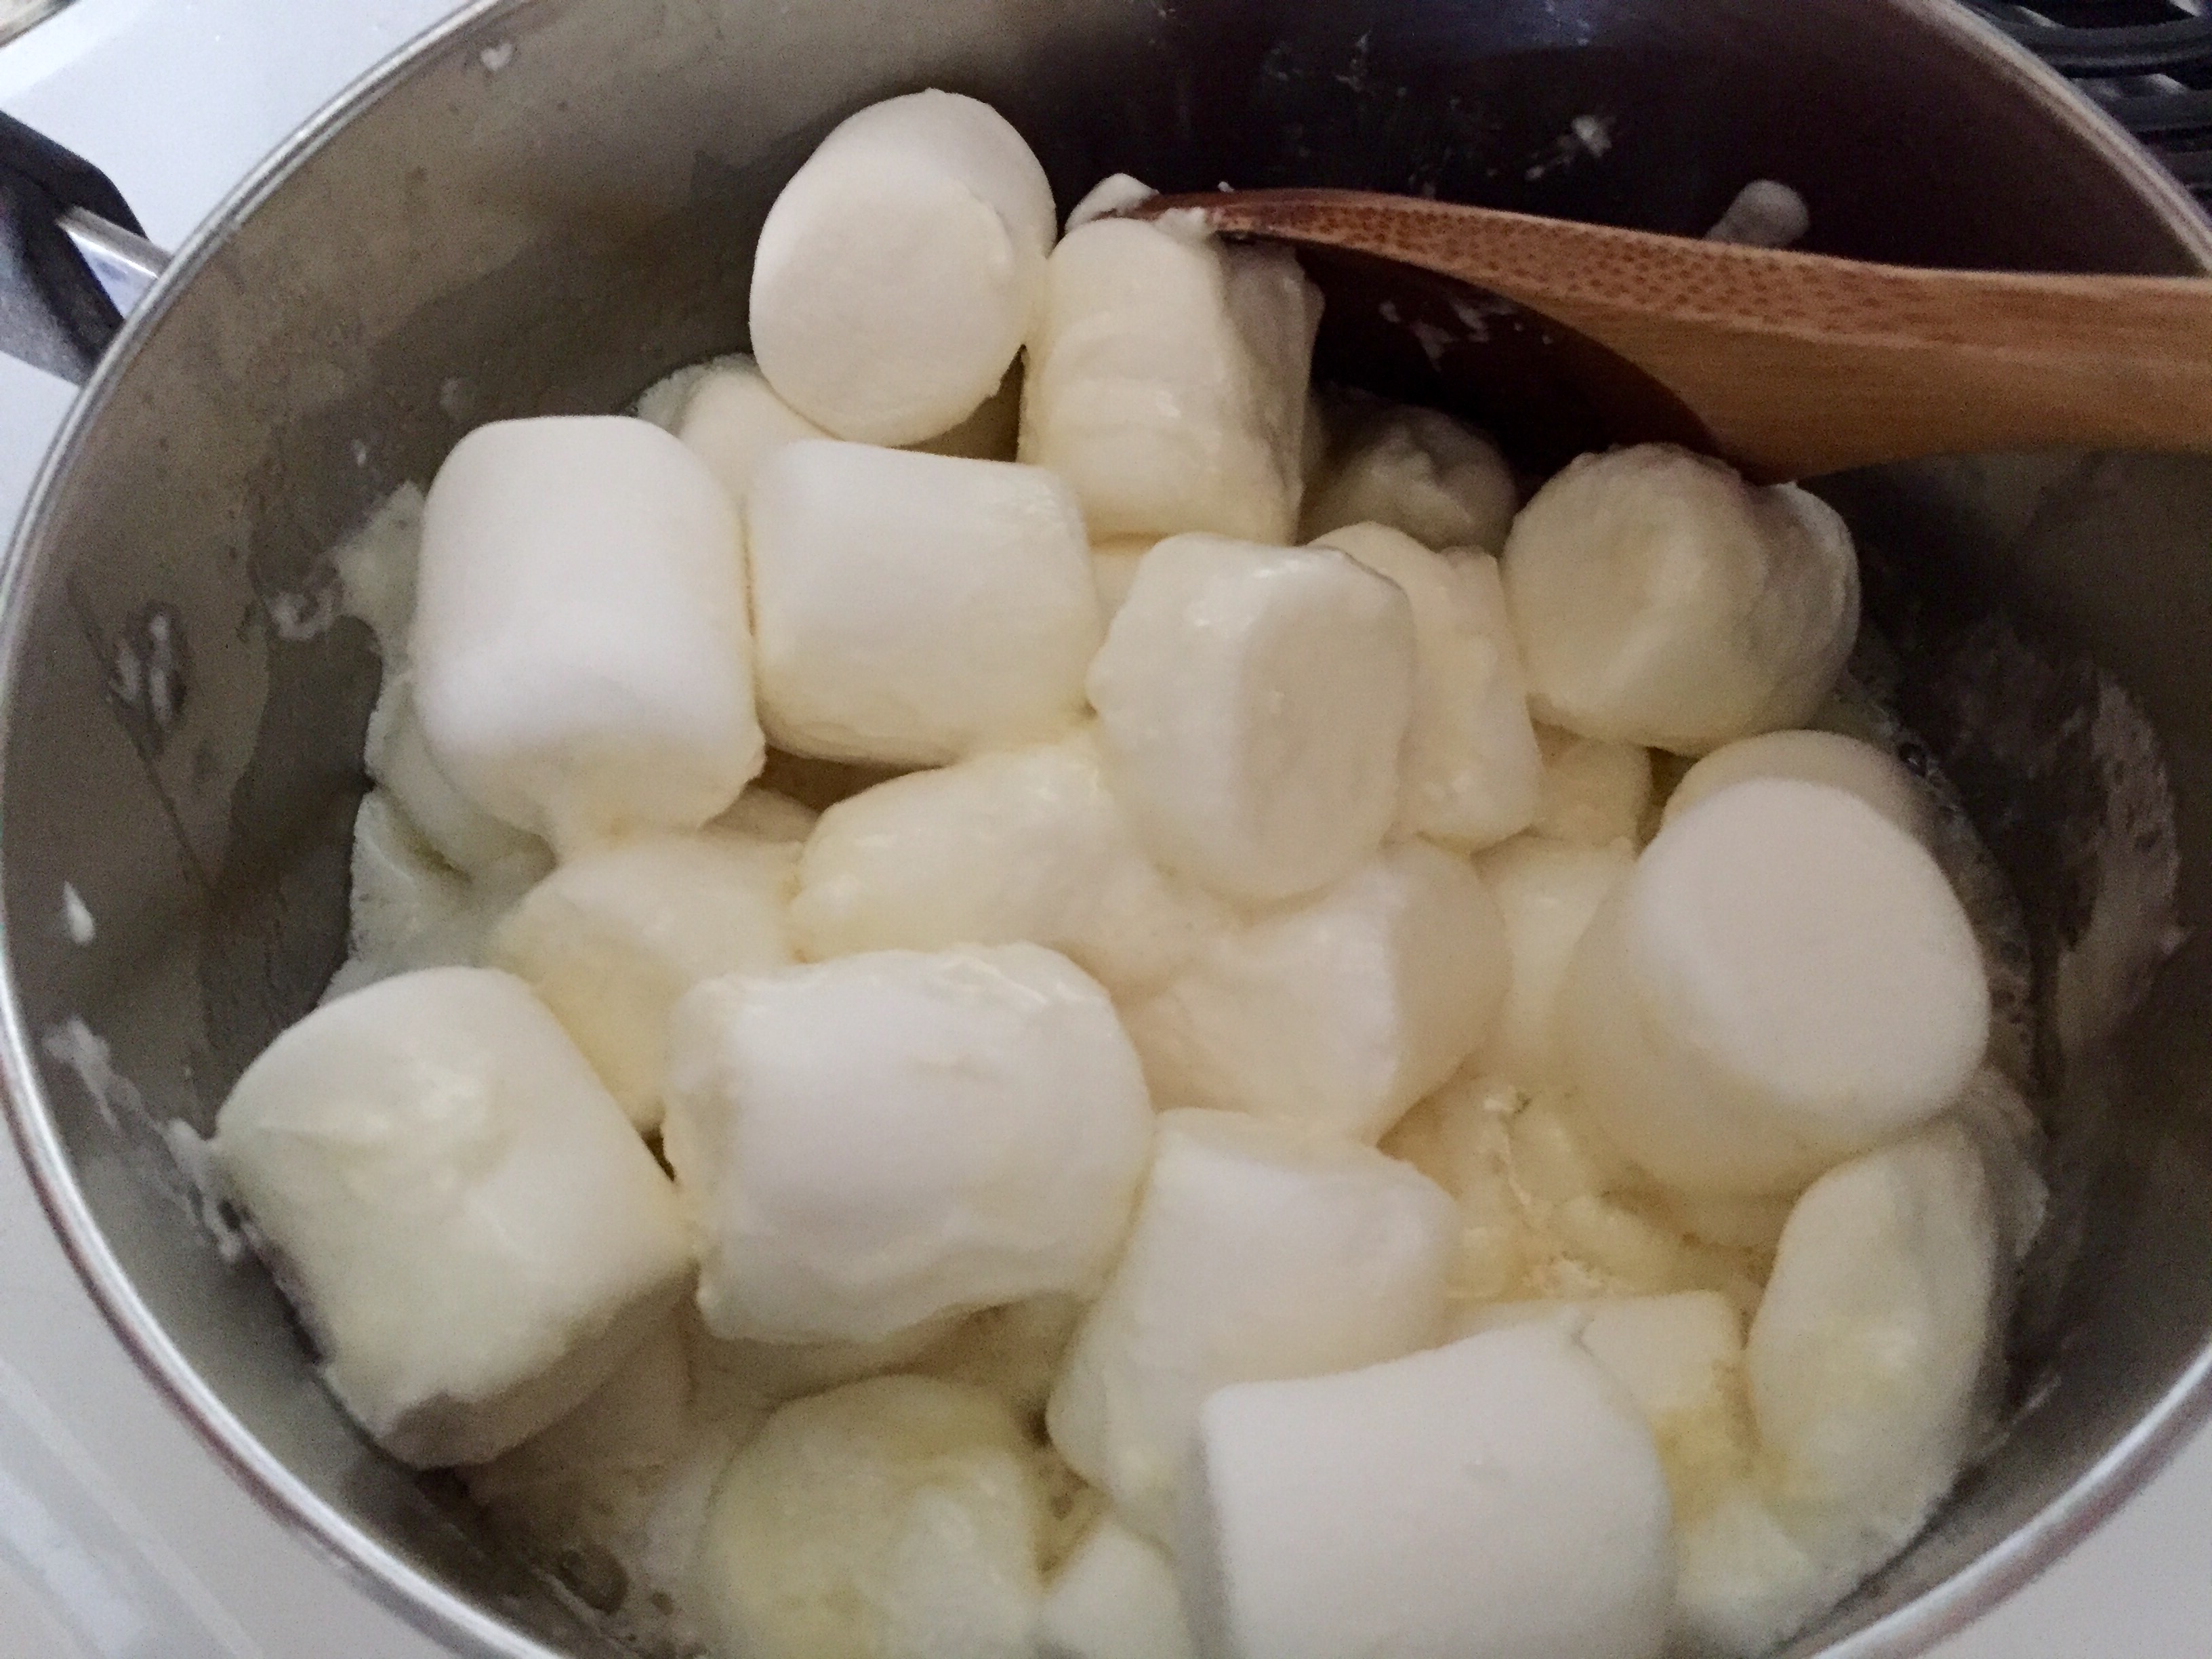
- 1 10-oz bag of marshmallows
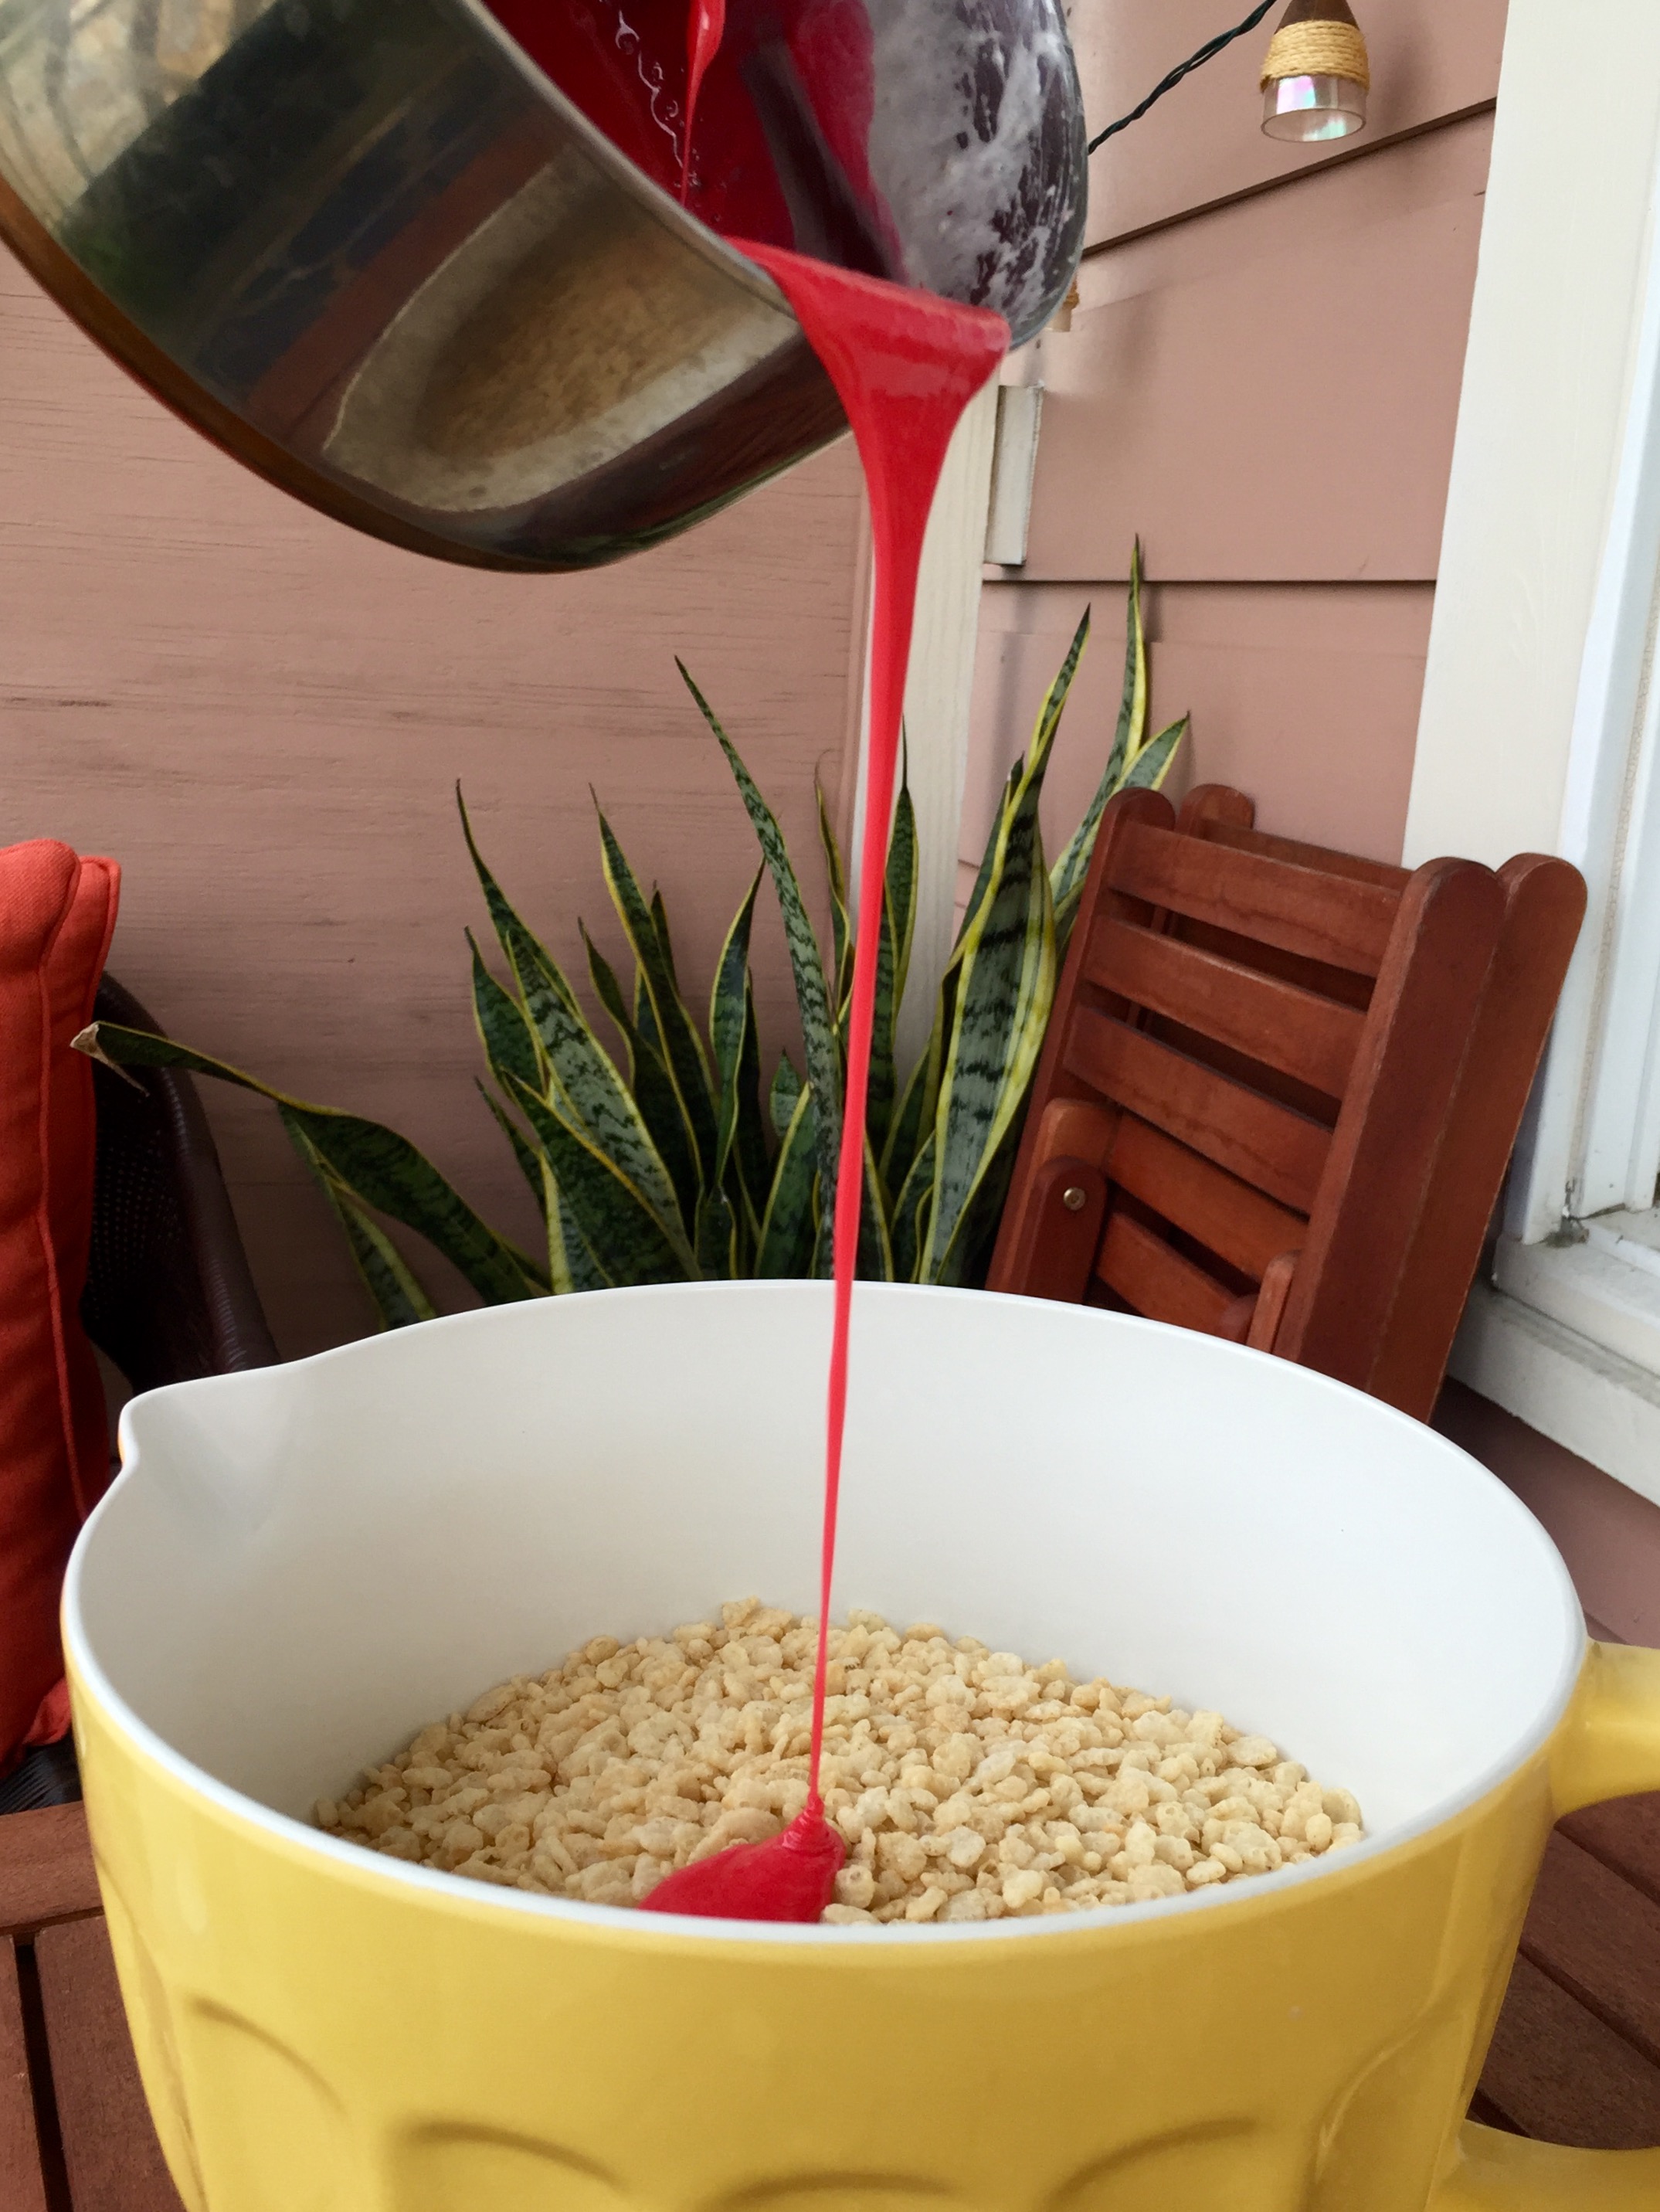
- 1 tsp red food coloring
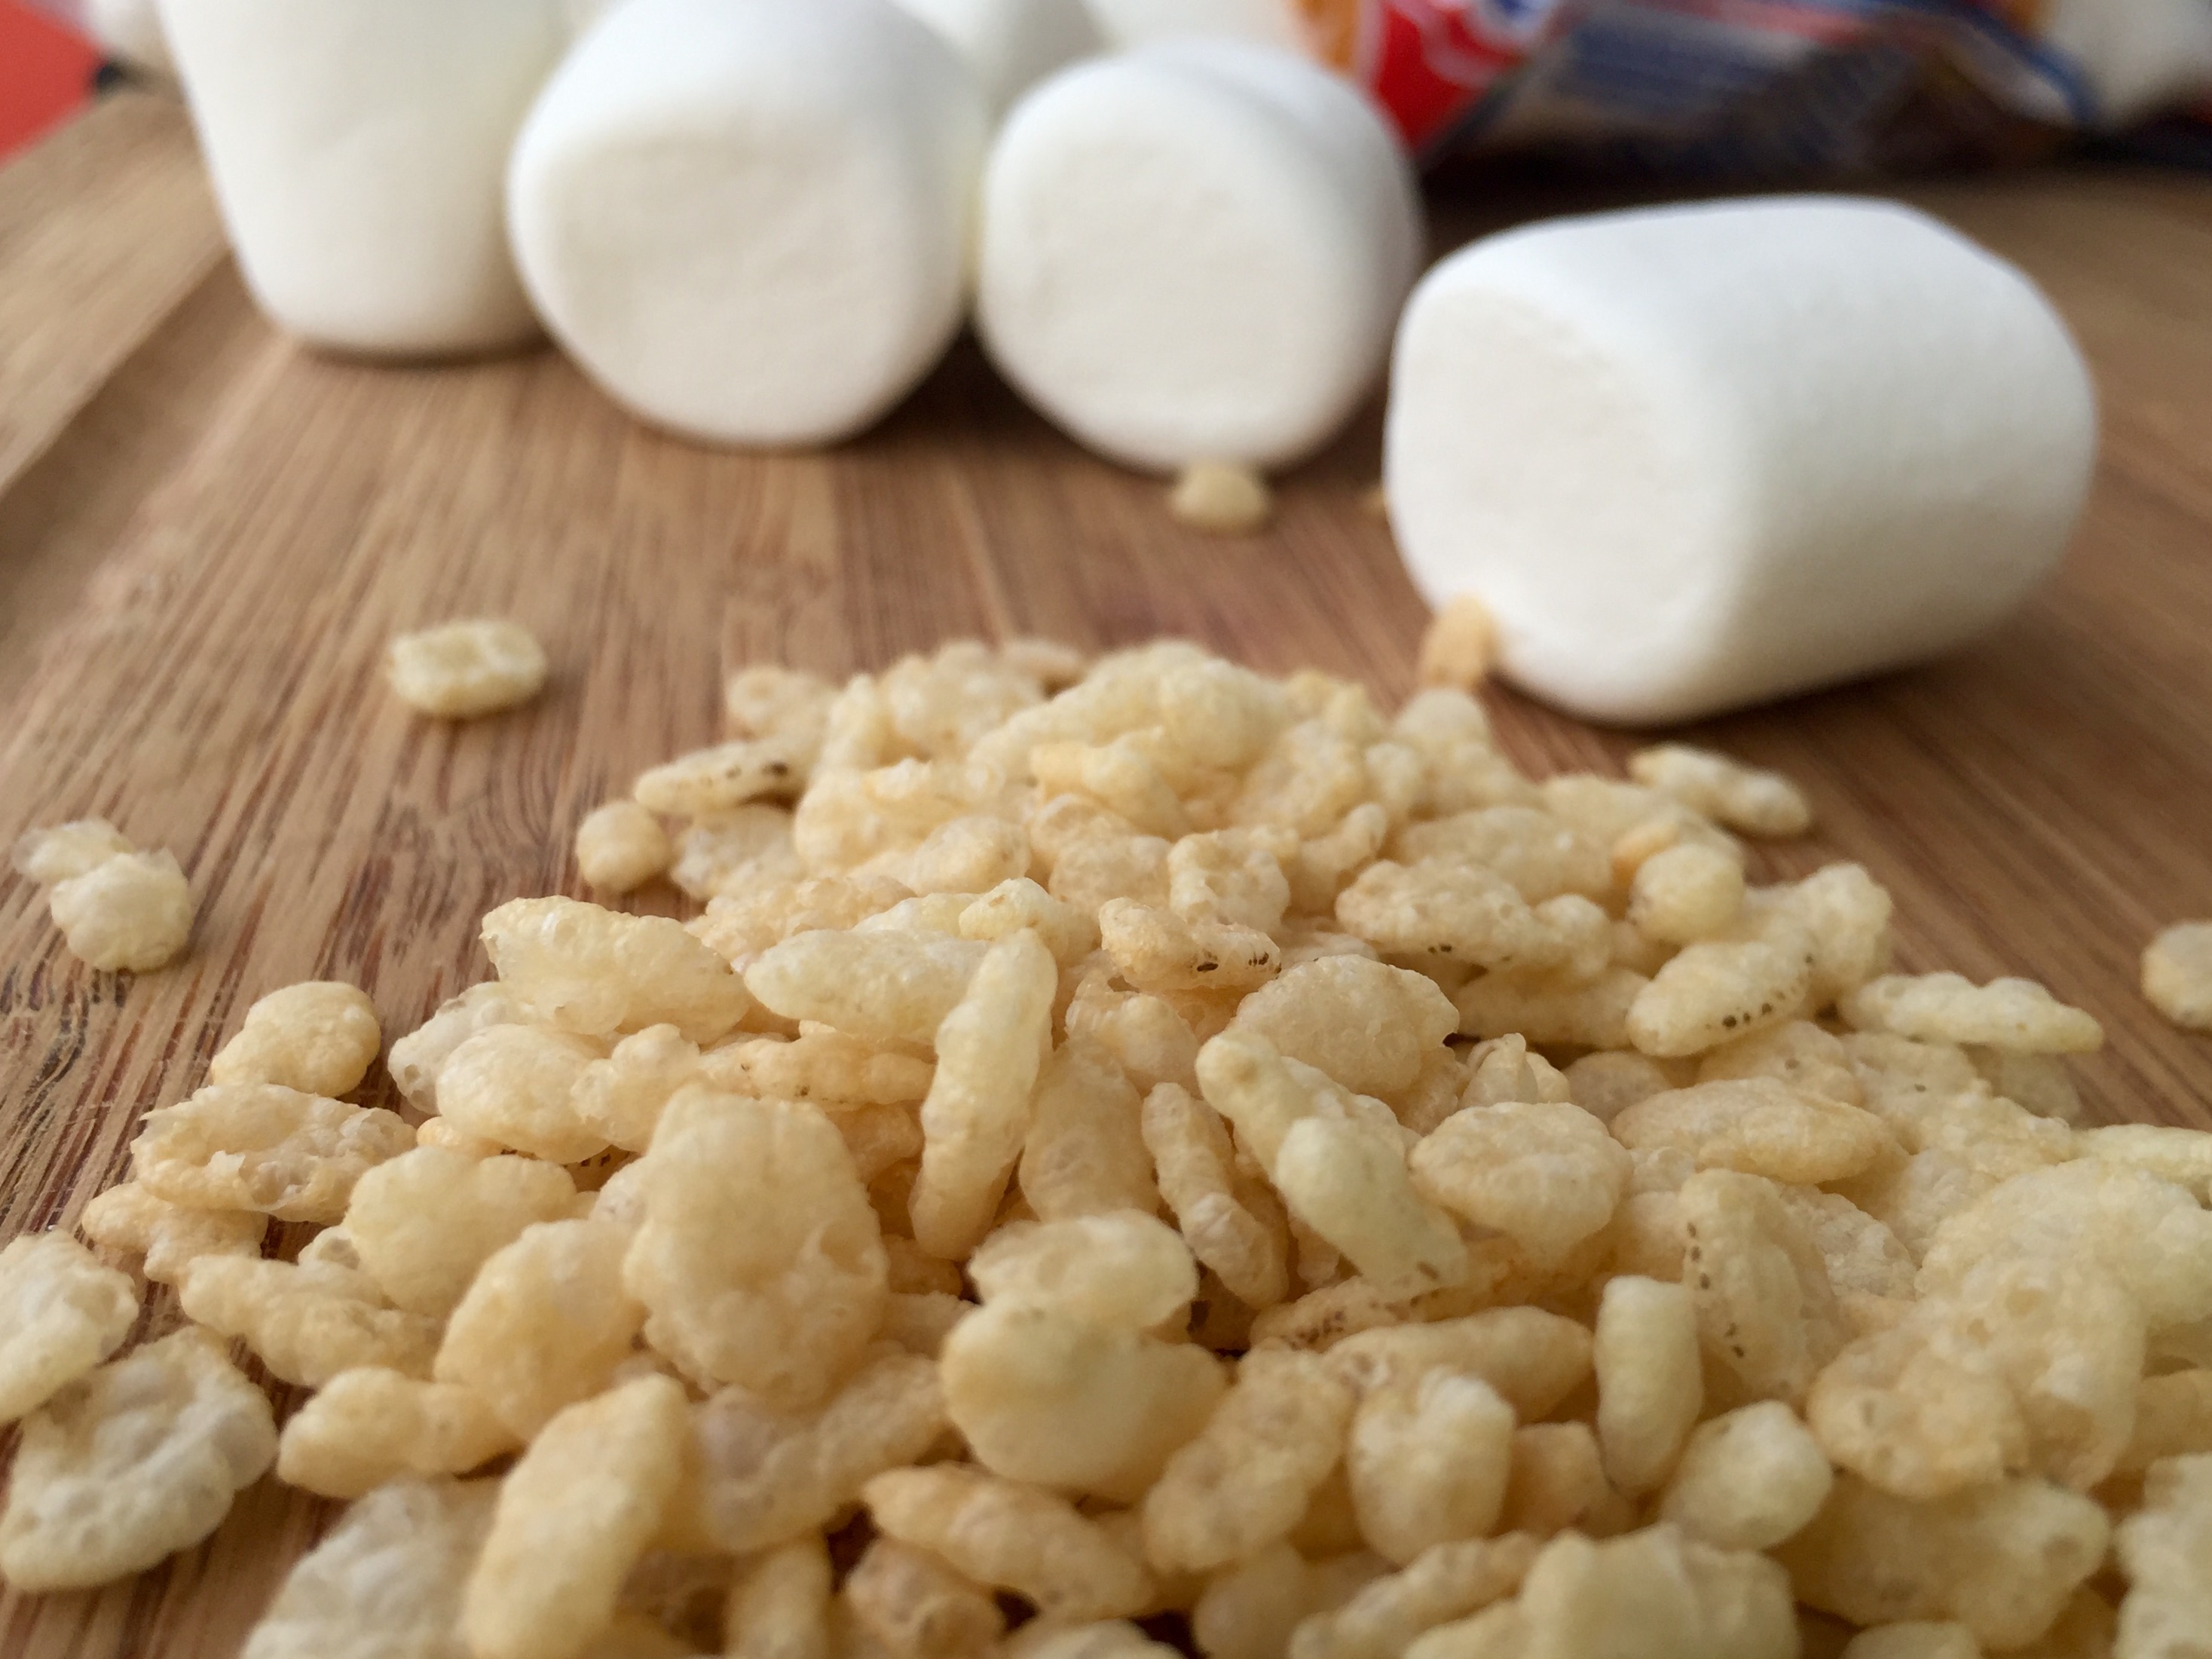
- 5 cups rice cereal
- 2 green fruit rollups for leaves
- Black licorice or Tootsie Rolls for stems
Instructions
- Prep Step! Measure out all of your ingredients. Hold off on cutting the leaves and stems, that will come later.
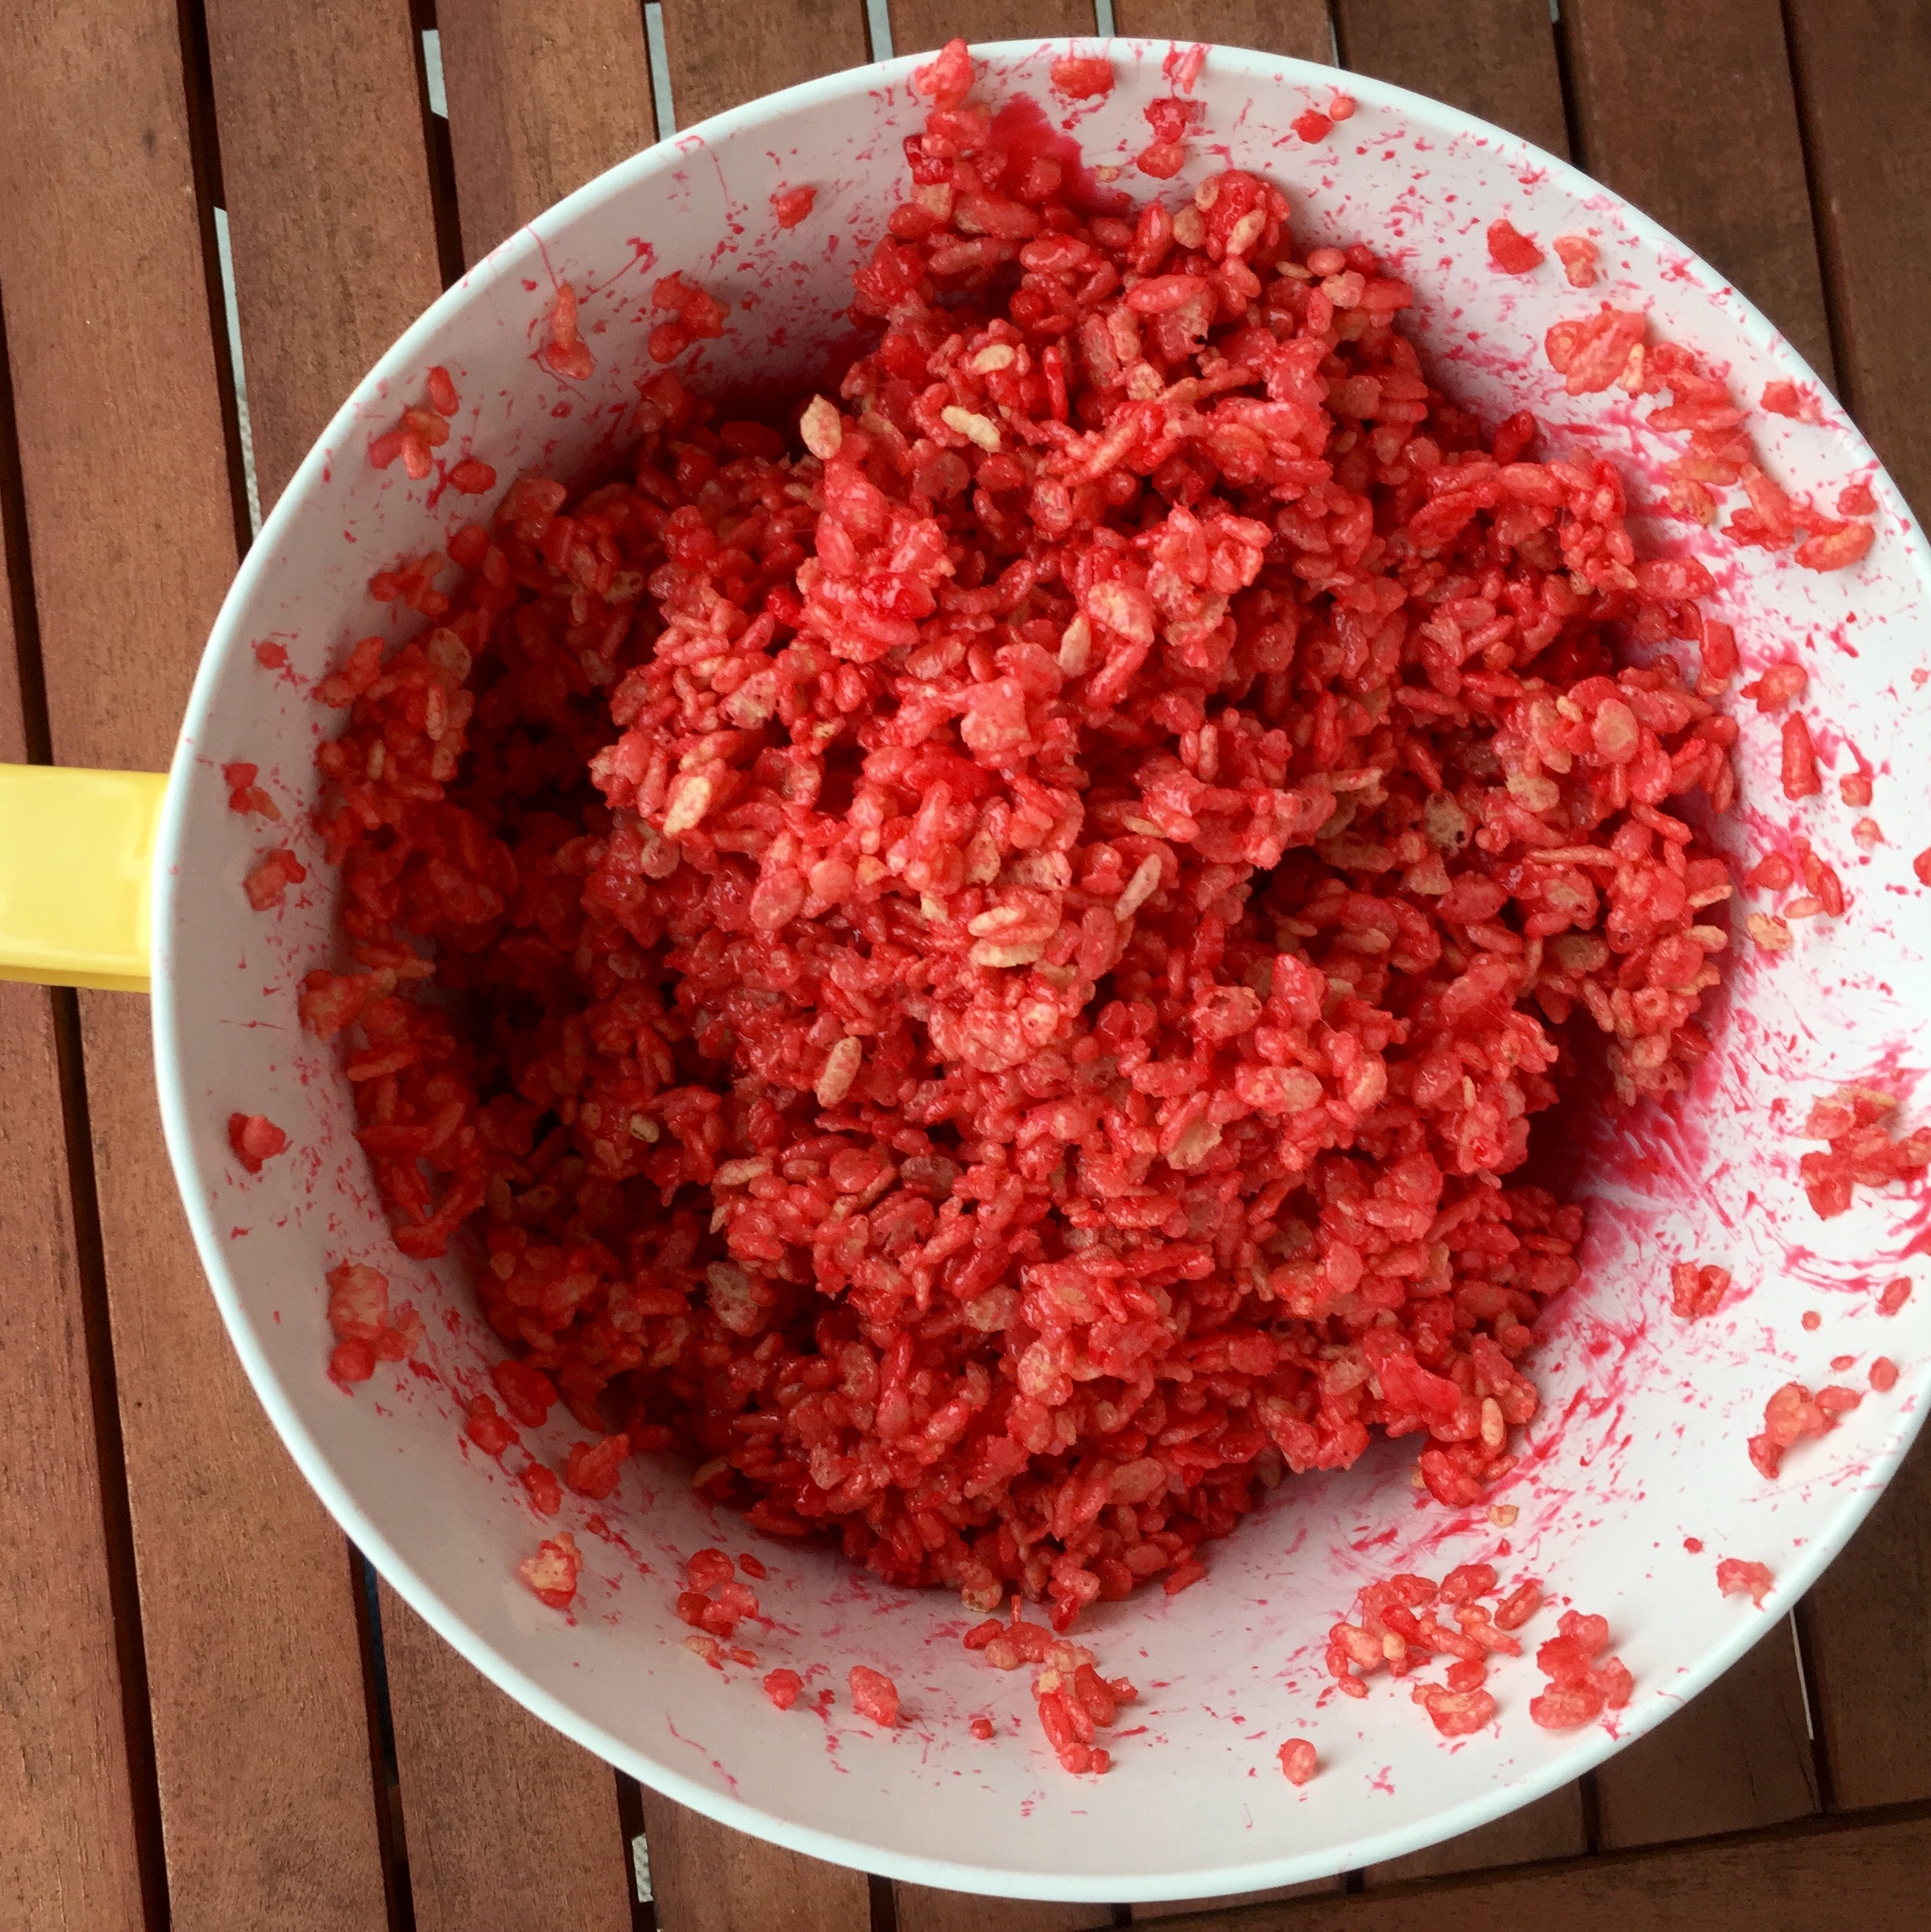
- Melt the butter in a pan over medium heat. Then add all of the marshmallows and stir together until they are dissolved. Mix the food coloring into the marshmallow.
- Add the marshmallow mixture to the cereal. Fold it into the cereal carefully, so that you don't crush too much of the cereal.
- Now you need to wait a bit so that molding the apples is not a sticky mess. This is a good time to cut your leaves and stems.
- With a sharp knife, cut a leaf shape out of the green fruit rollup. Cut the "stem", whatever you choose to use, into a length that looks good with the size of your "apples." I cut mine to about 3/4 in.
- Once the treats are cool, grab a handful and mold it into a sphere with your hands. Using your smallest finger, push a little depression in the middle.
- Put the leaf in the hole first, then add the stem. Eat like an apple!