this is a page for
Browsing Tag: holiday
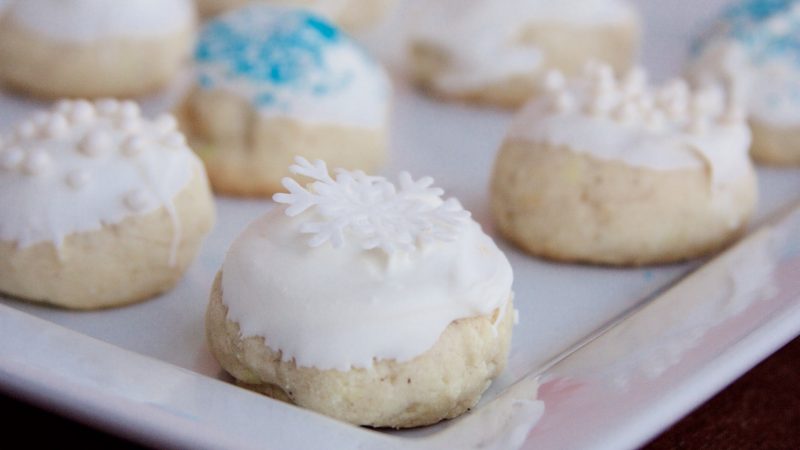
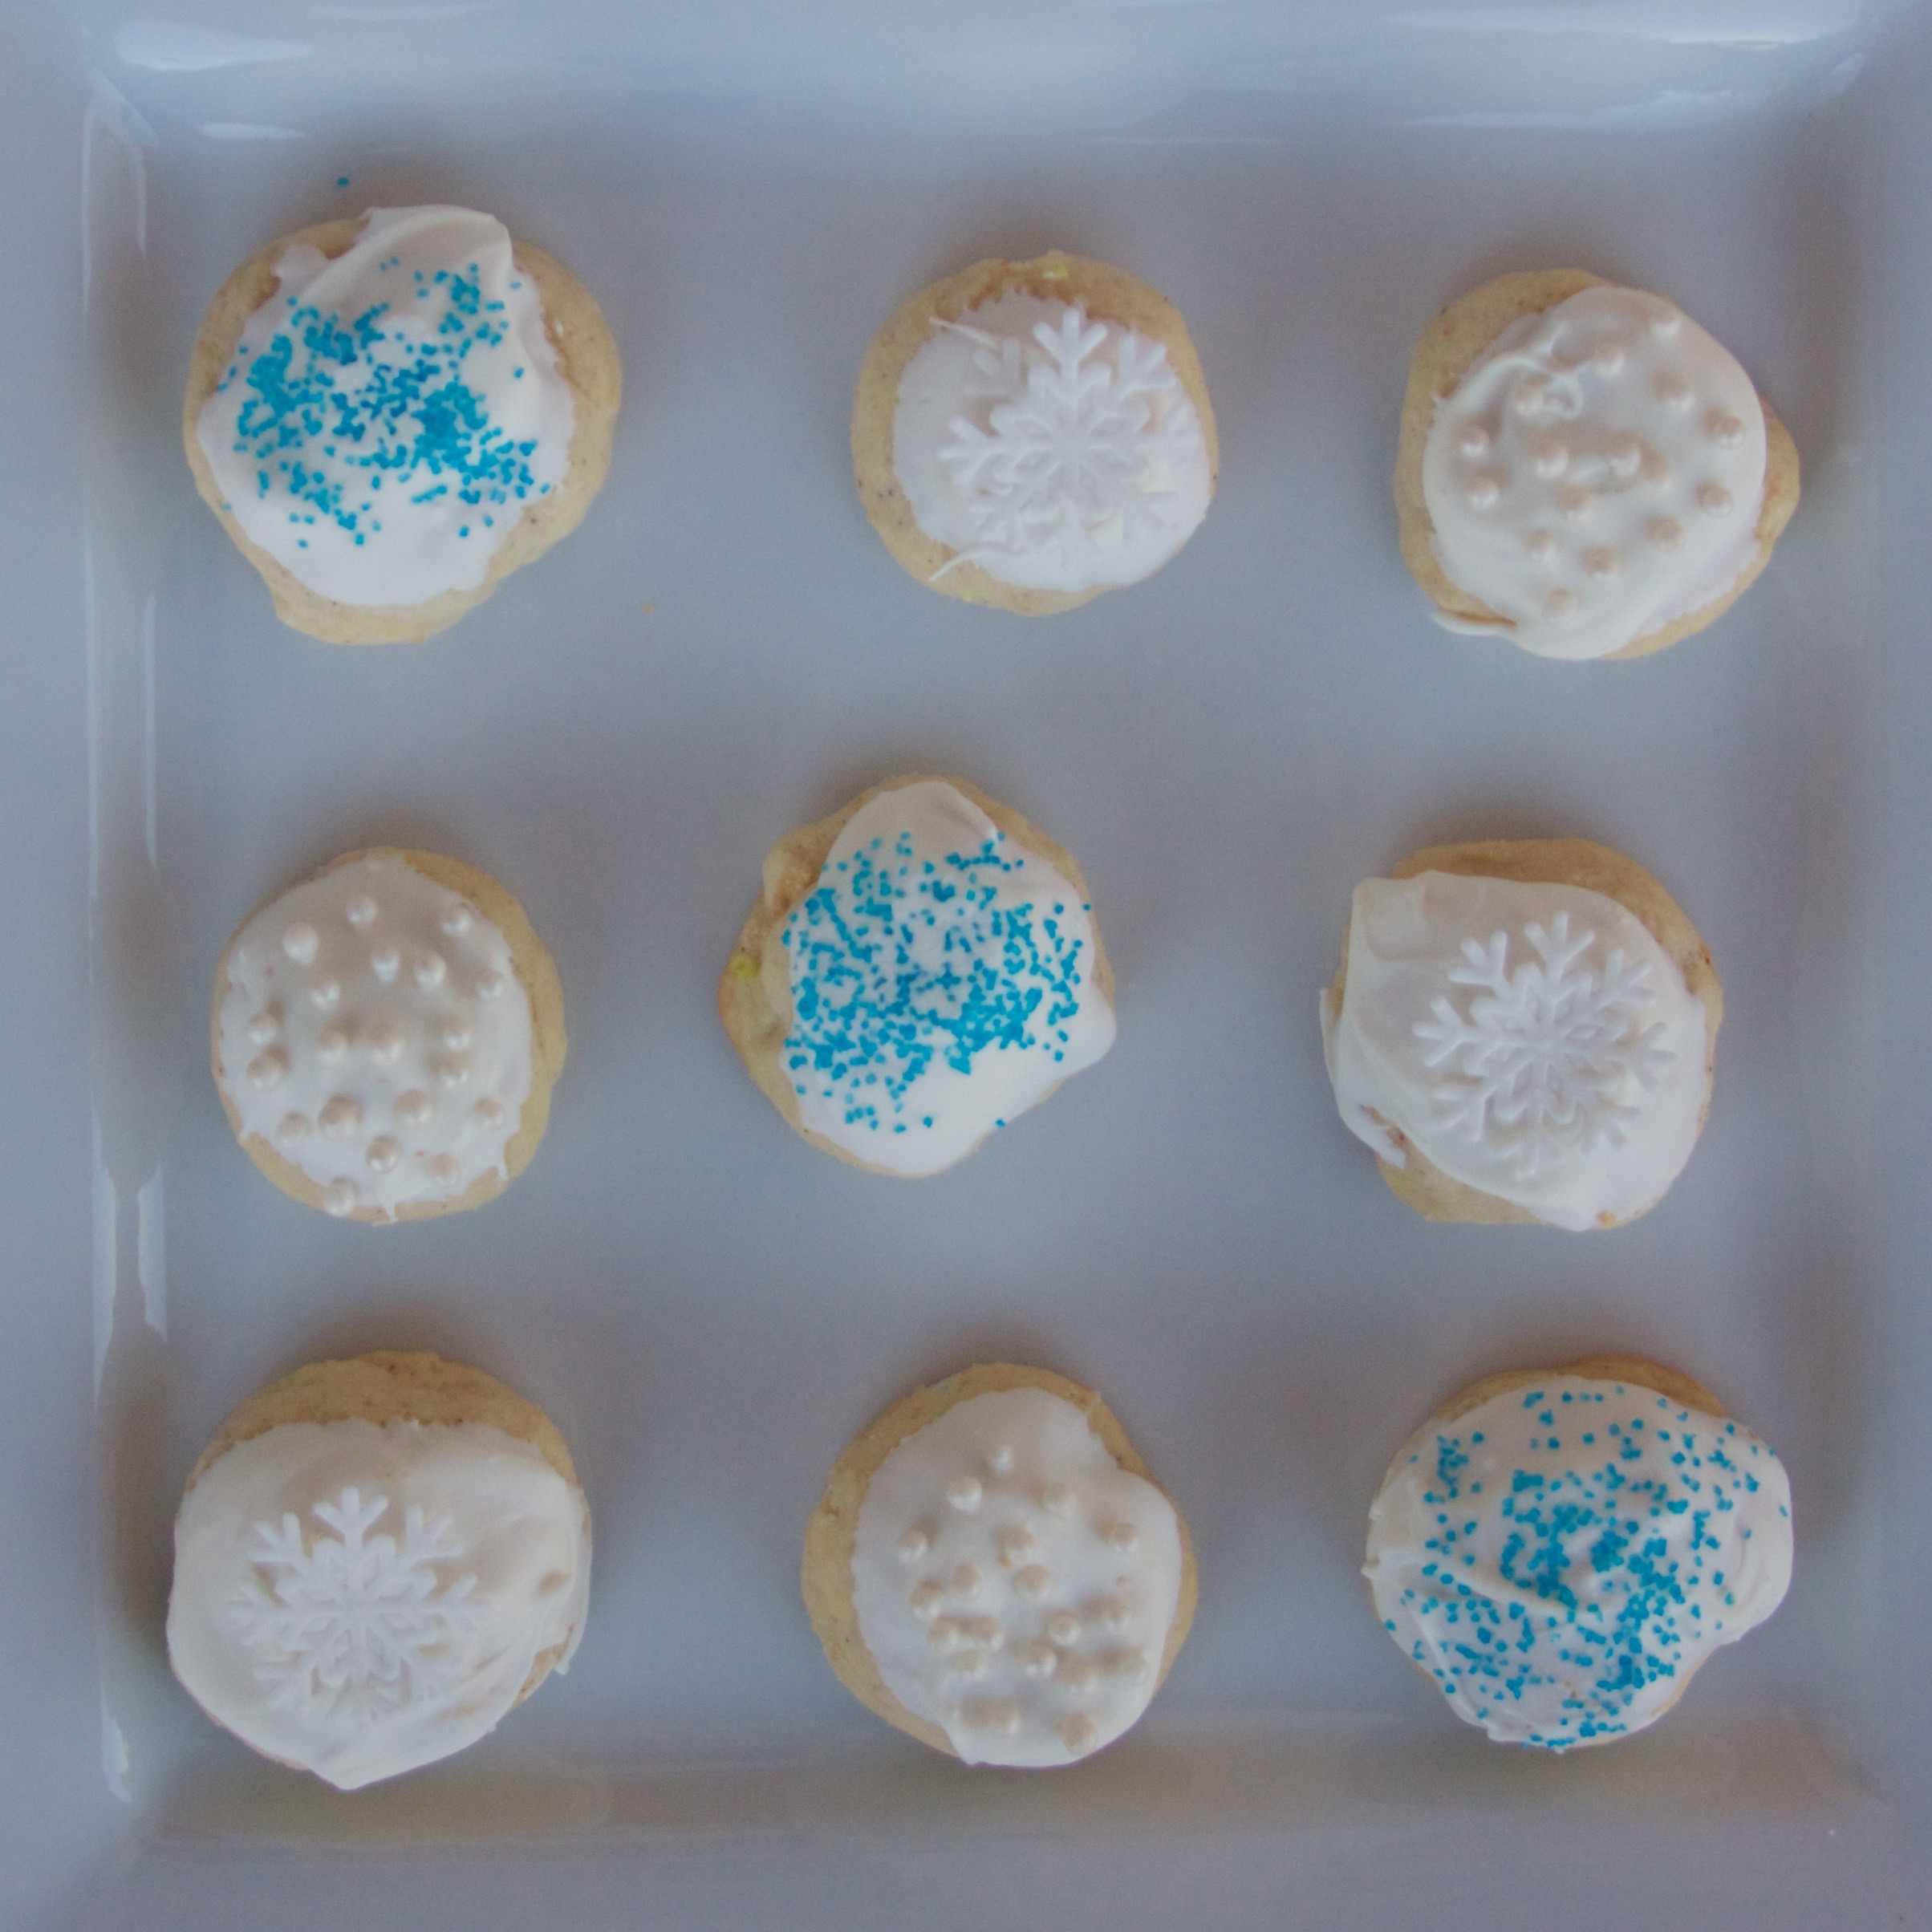
As long as I don’t think about how unhealthy it is, I love eggnog at the holidays. It has such a unique and creamy flavor that is good hot, cold, with rum… any way you want it! I am happy, too, that there are now almond milk-based versions. They are a little better for you, at least.
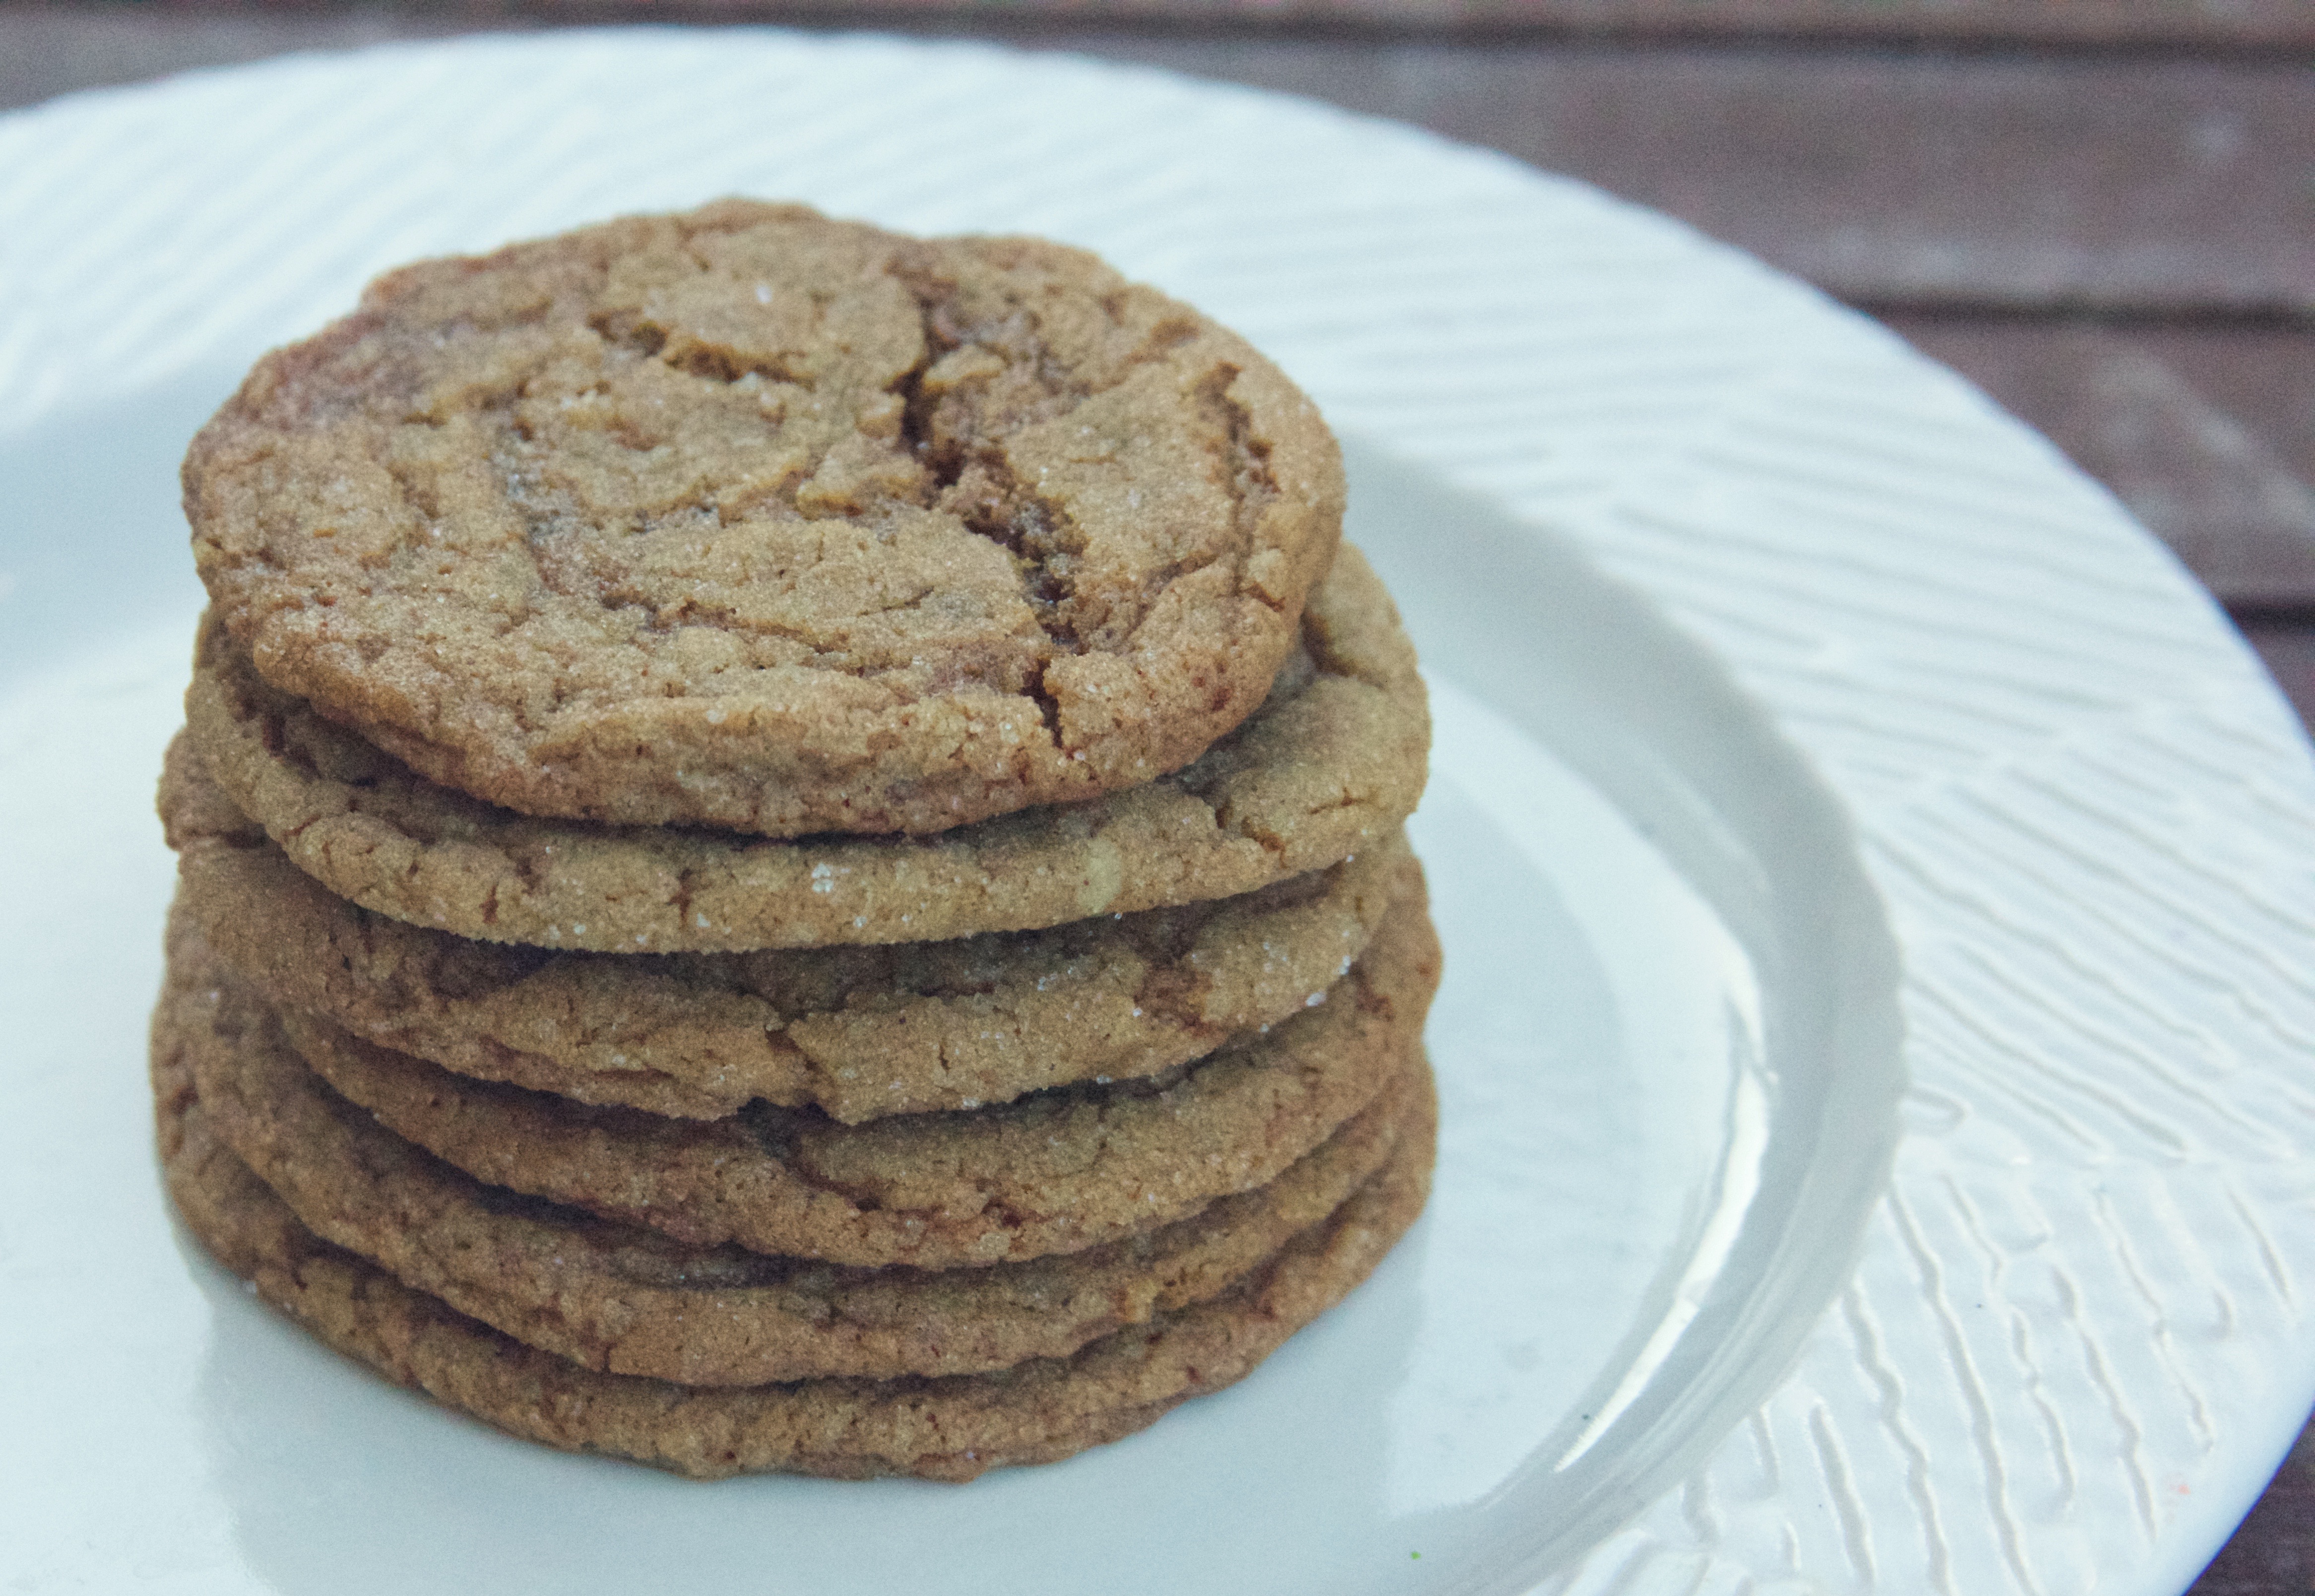
These cookies are also a great way to get your eggnog fix. They absolutely melt in your mouth! I assure that these will become a holiday favorite in your cookie repertoire.
~~~~~~~~~~
Step One.
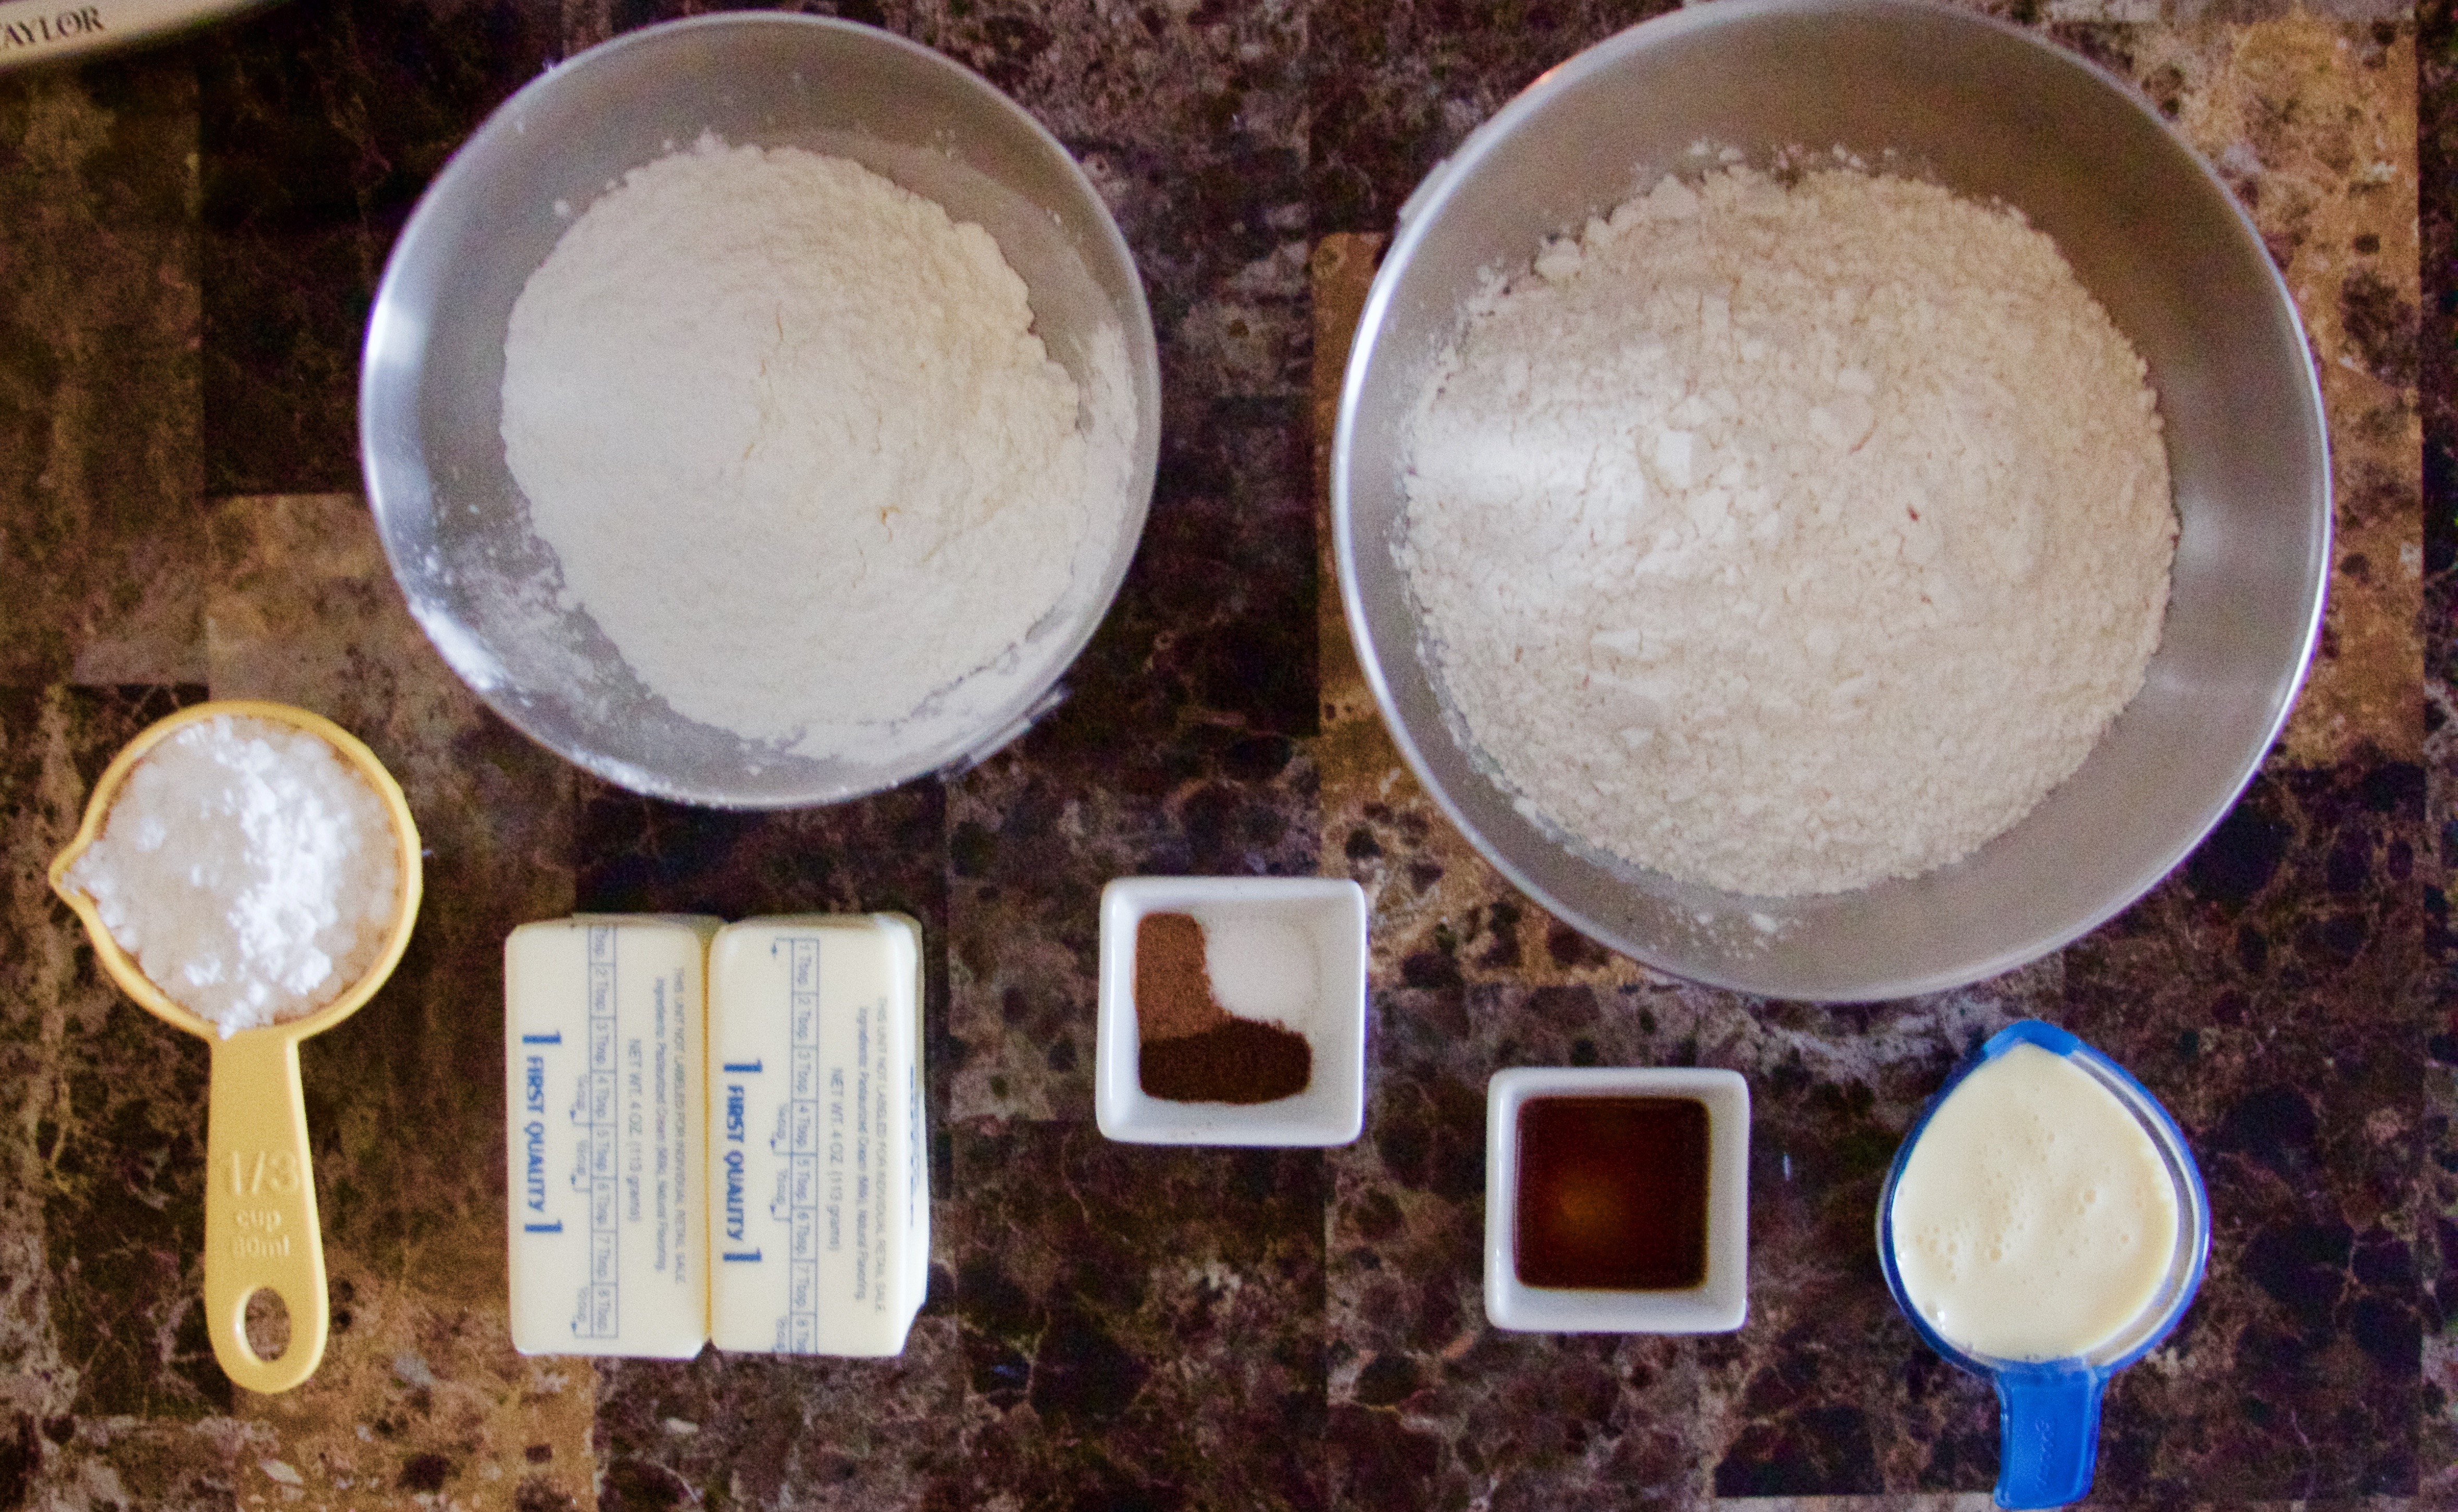
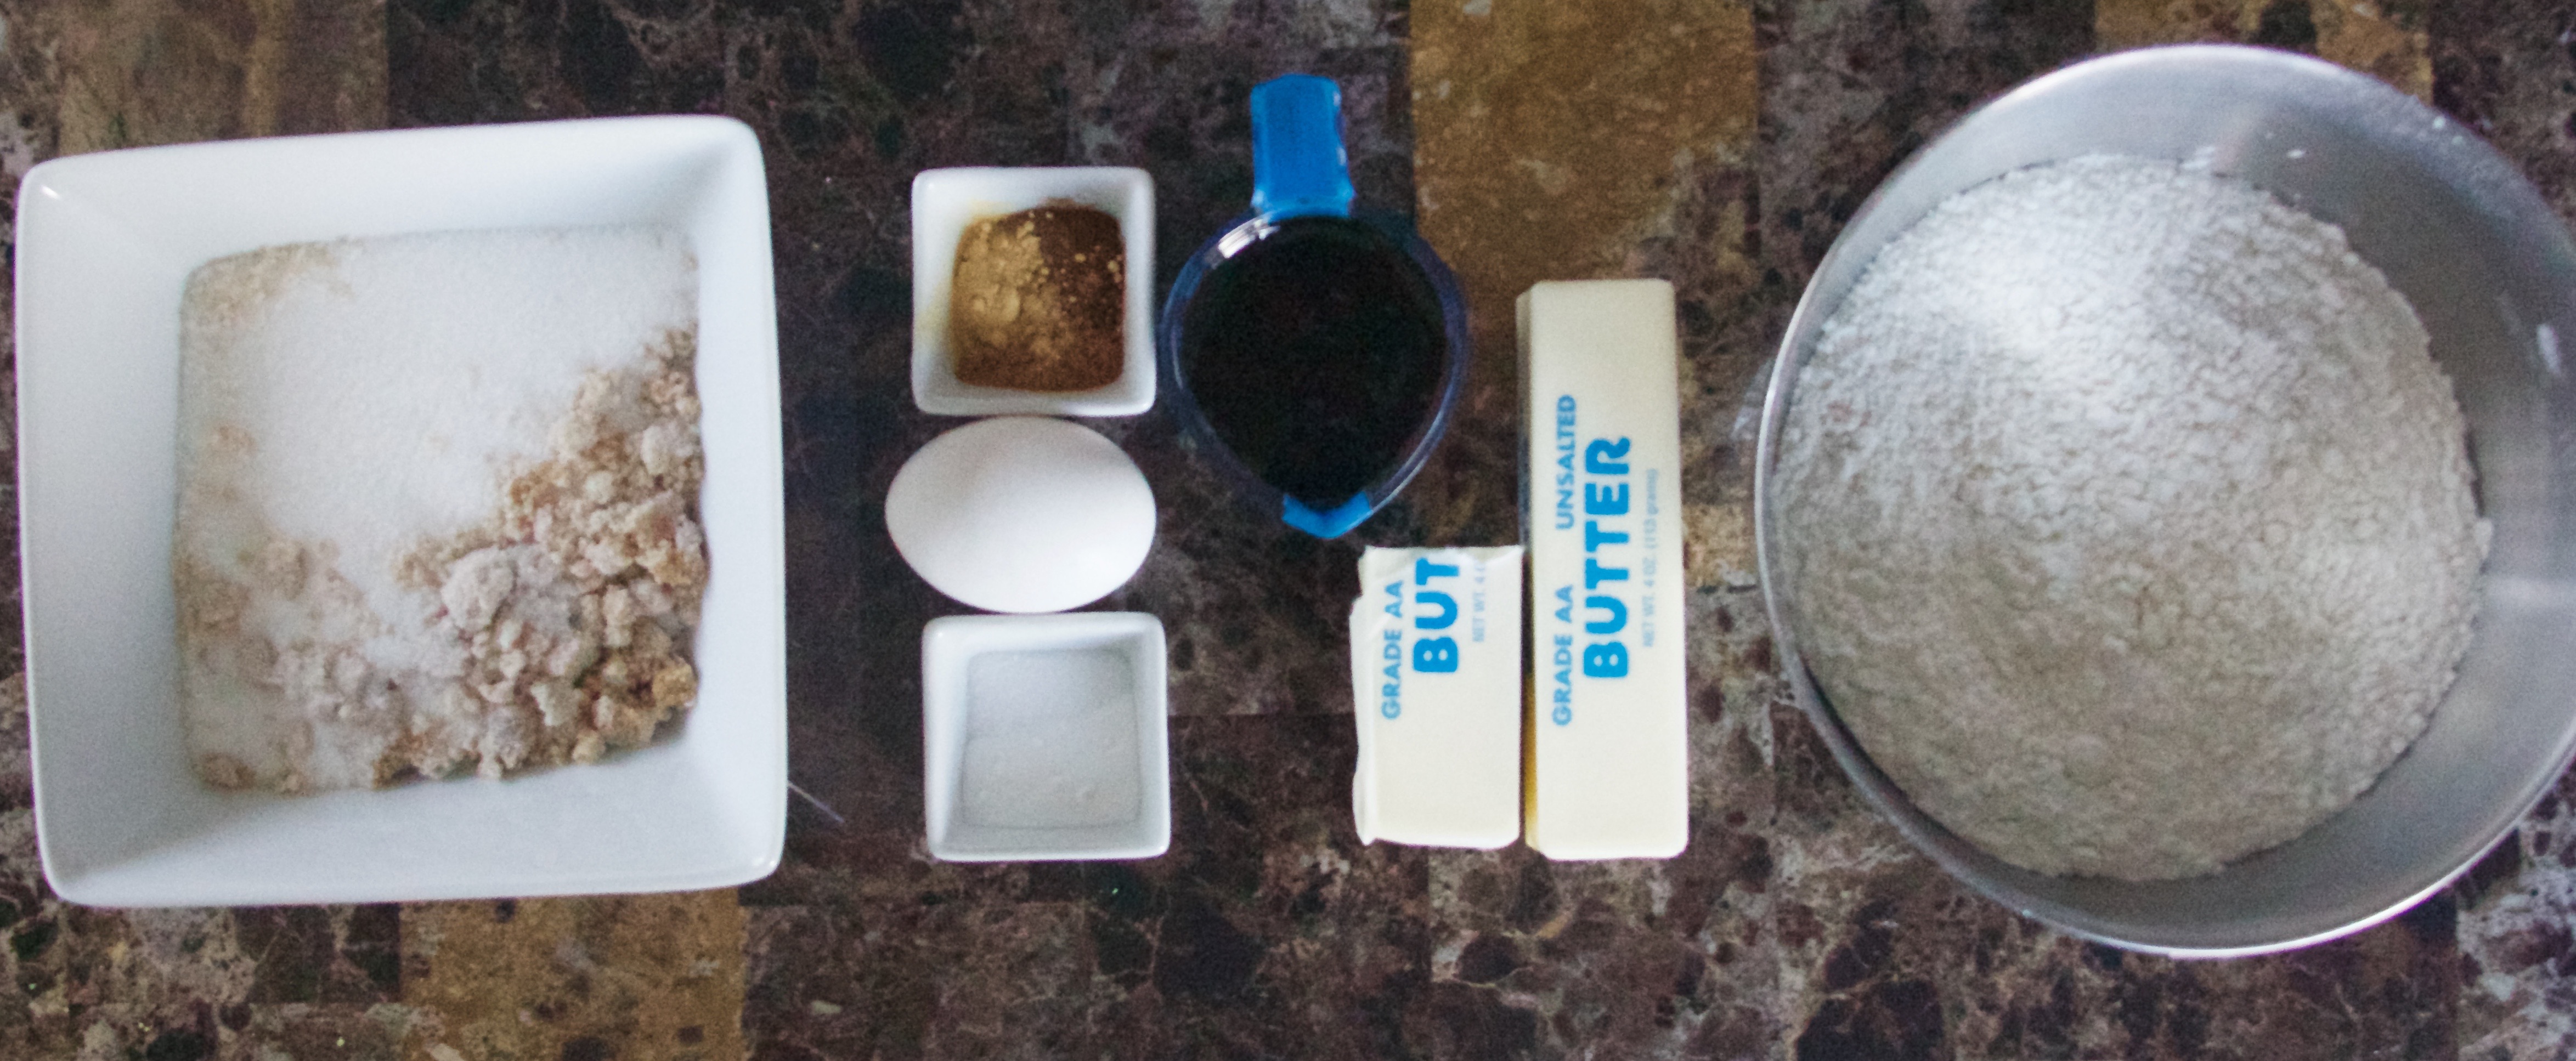
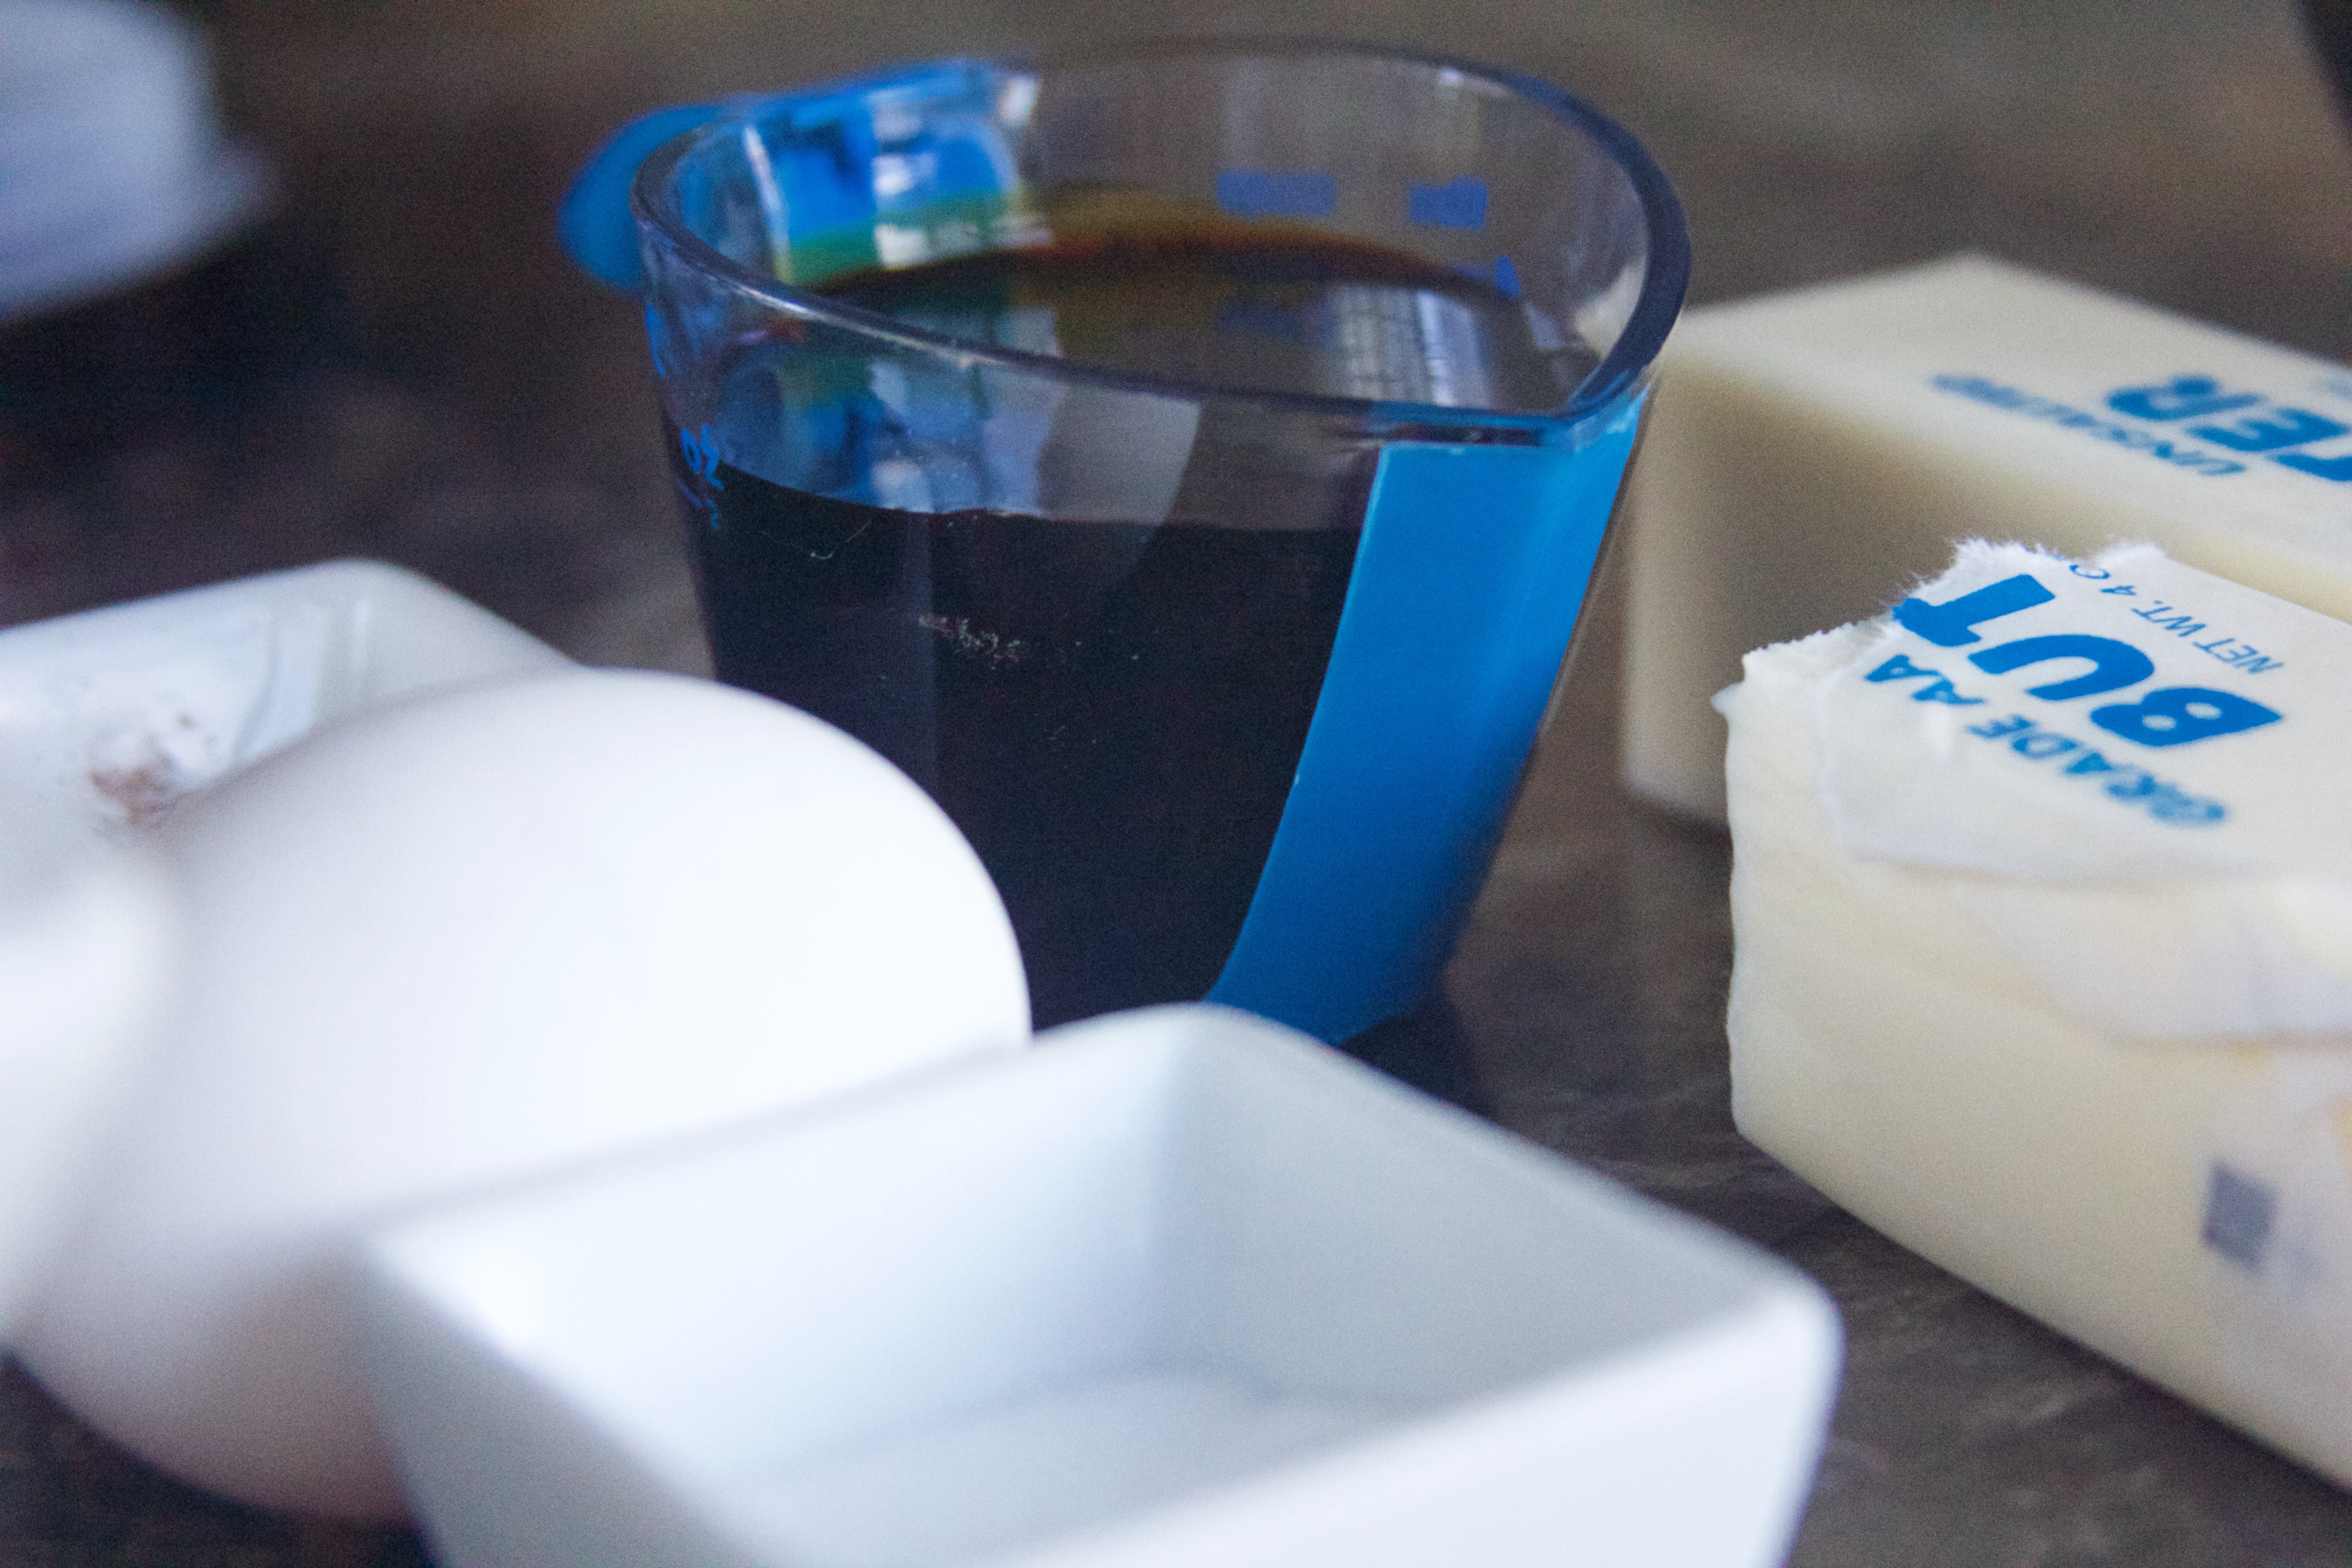
Prep Step! Measure out all of your ingredients, and preheat the oven to 350°F. Line a baking sheet with parchment paper.
Step Two.
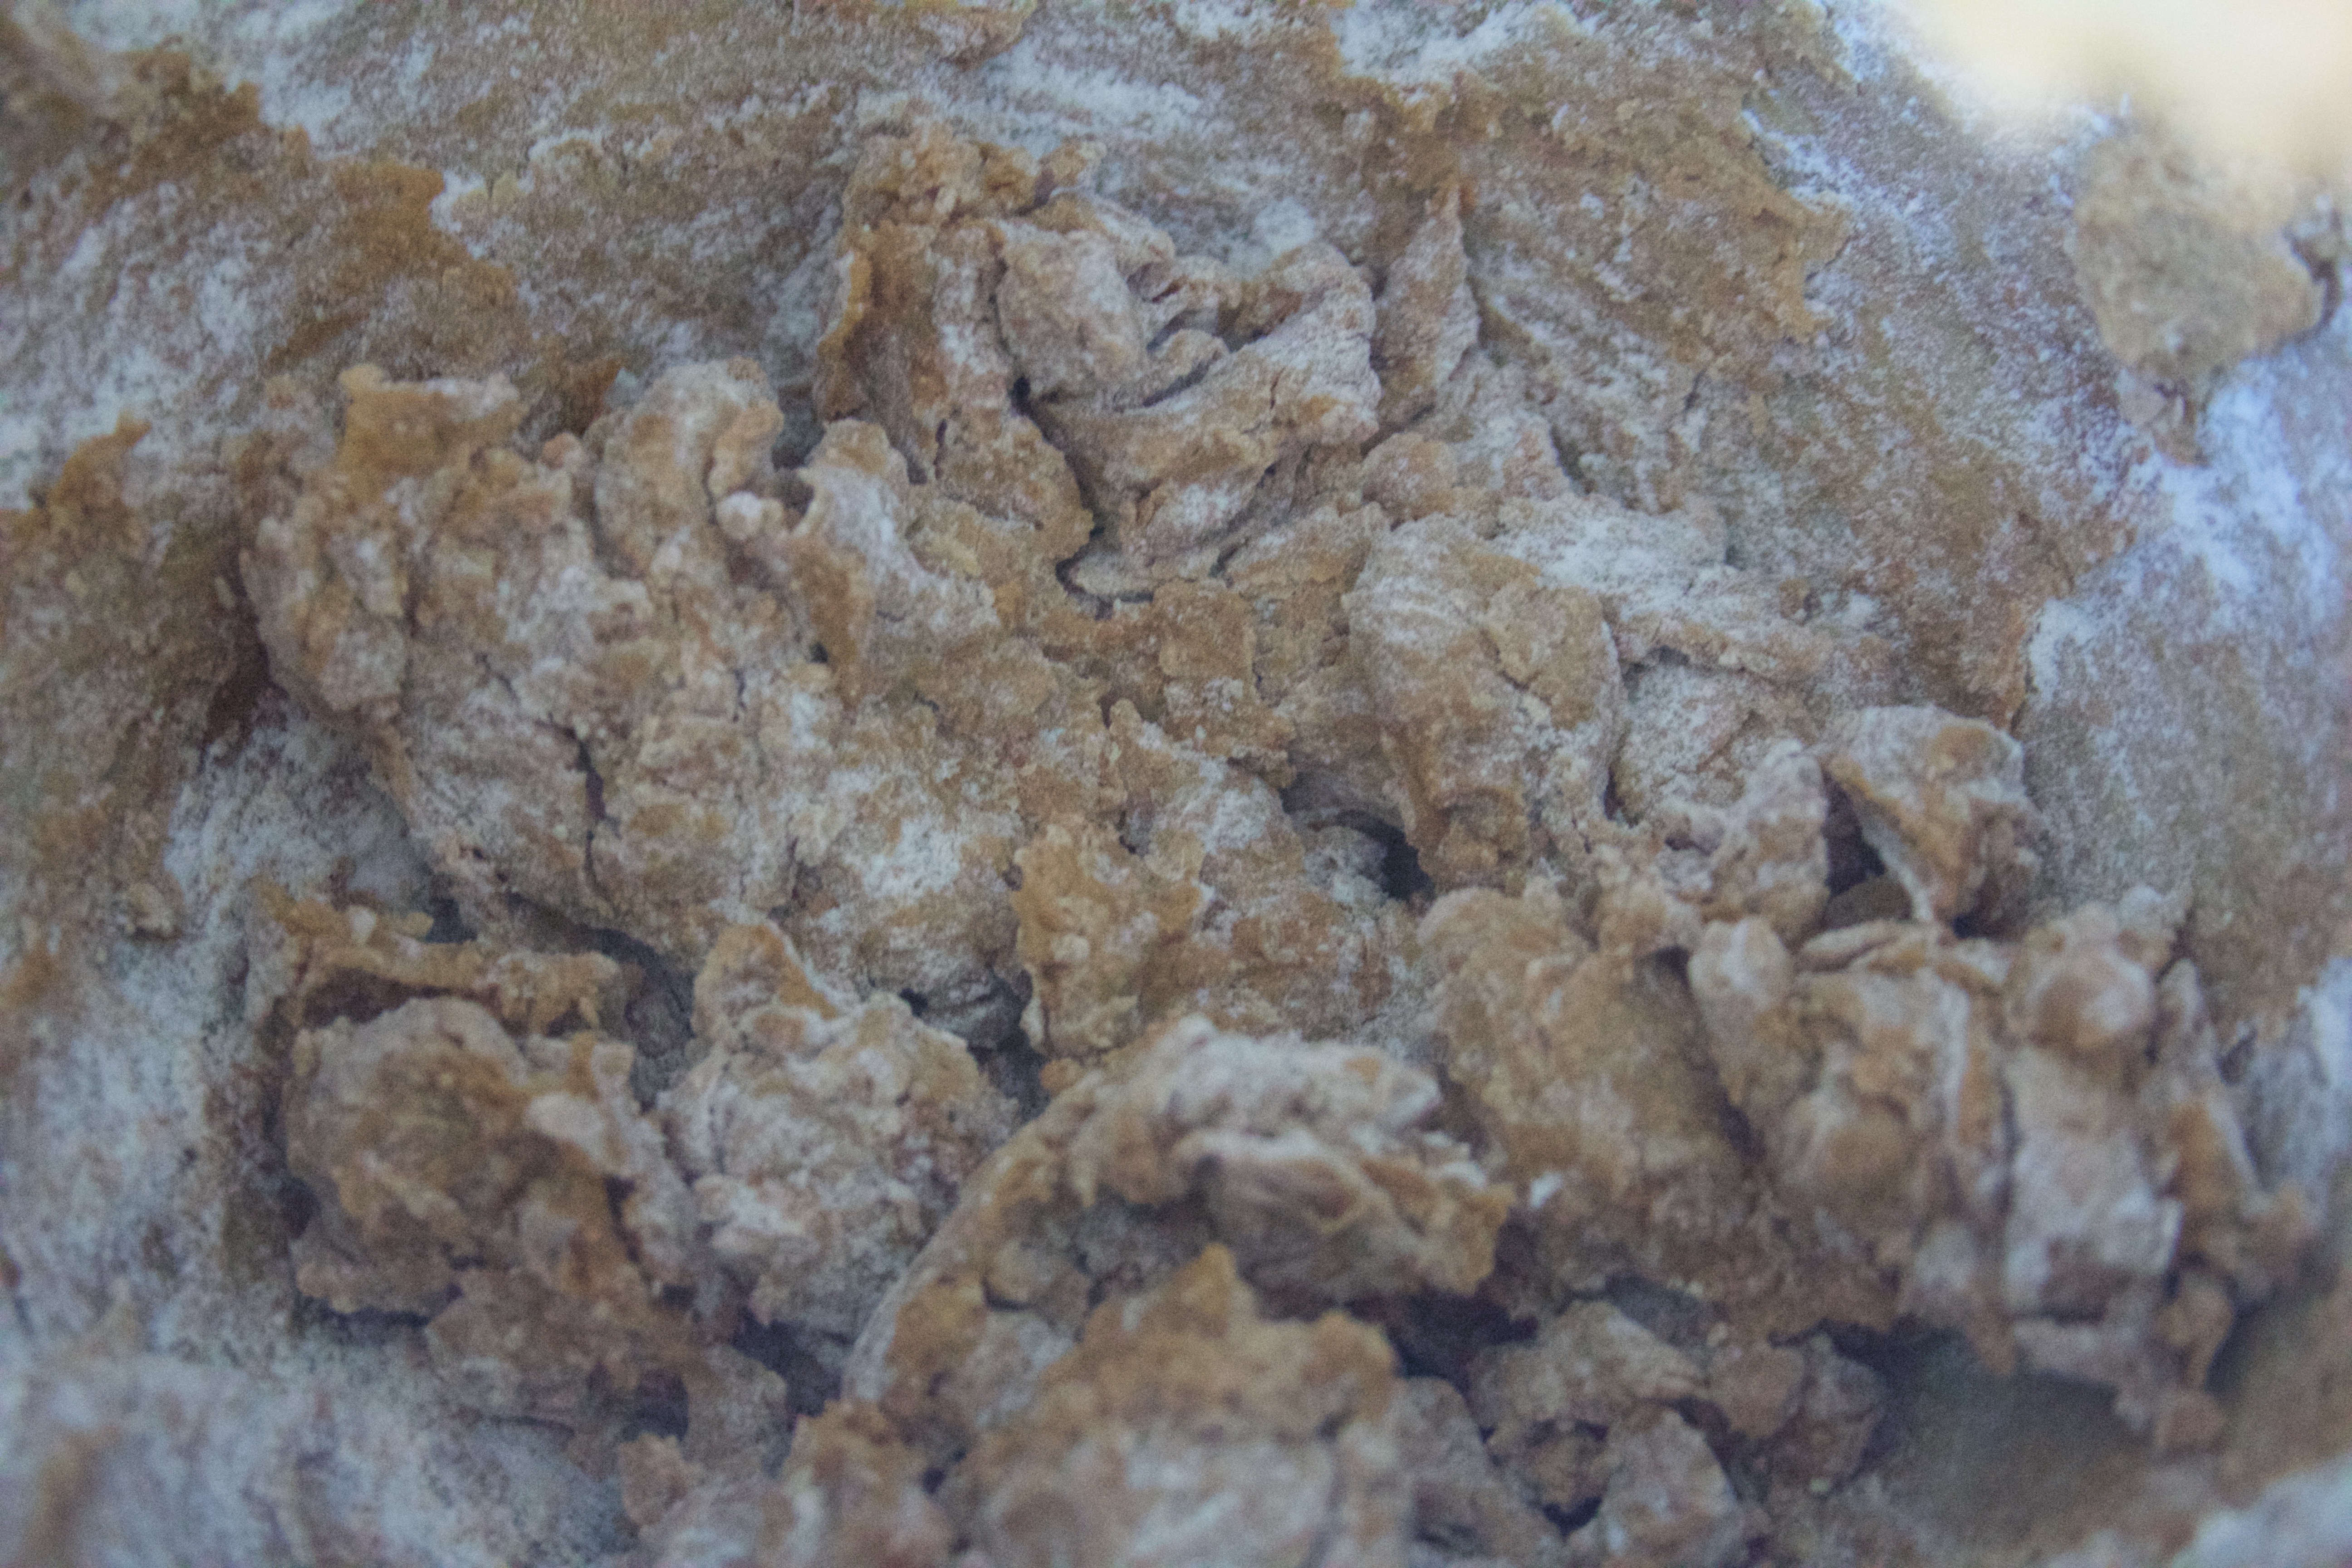
In a small bowl, mix together the dry ingredients with a fork. In a stand mixer, beat the butter and the powdered sugar until light and fluffy. Beat in the extracts and eggnog. Adding a third of the dry ingredients at a time, incorporate the dry ingredients until you form a dough.
Step Three.
Pinch off amounts that are about the size of two Tablespoons, and roll them into balls. Bake at 350°F for 13- 15 minutes. Cool on a cooling rack for about 20 minutes, or until room temperature.
Step Four.
While the cookies cool, melt the chocolate. Dip the cooled cookies into the chocolate, and let them drip and harden on the cooling rack. Before they cool completely, sprinkle holiday or winter-themed sprinkles on the top! Enjoy!
Ingredients
- 1 ¾ cup flour
- ½ cup corn starch
- ¼ teaspoon salt
- ½ teaspoon ground nutmeg
- ½ teaspoon ground cloves
- ⅓ cup powdered sugar
- 1 cup butter, softened
- ¼ cup eggnog
- 1 teaspoon rum extract
- ½ teaspoon vanilla
- ¼ cup eggnog
- White chocolate melting chips
Instructions
- Prep Step! Measure out all of your ingredients, and preheat the oven to 350°F. Line a baking sheet with parchment paper.
- In a small bowl, mix together the dry ingredients with a fork. In a stand mixer, beat the butter and the powdered sugar until light and fluffy. Beat in the extracts and eggnog. Adding a third of the dry ingredients at a time, incorporate the dry ingredients until you form a dough.
- Pinch off amounts that are about the size of two Tablespoons, and roll them into balls. Bake at 350°F for 13- 15 minutes. Cool on a cooling rack for about 20 minutes, or until room temperature.
- While the cookies cool, melt the chocolate. Dip the cooled cookies into the chocolate, and let them drip and harden on the cooling rack. Before they cool completely, sprinkle holiday or winter-themed sprinkles on the top! Enjoy!
There are a few basic things required for a perfect fall for me:
- a chill in the air
- crisp, yellow leaves falling off the trees
- folk music on constant repeat
- sweaters
- pumpkins
- apple cider
- gingersnaps
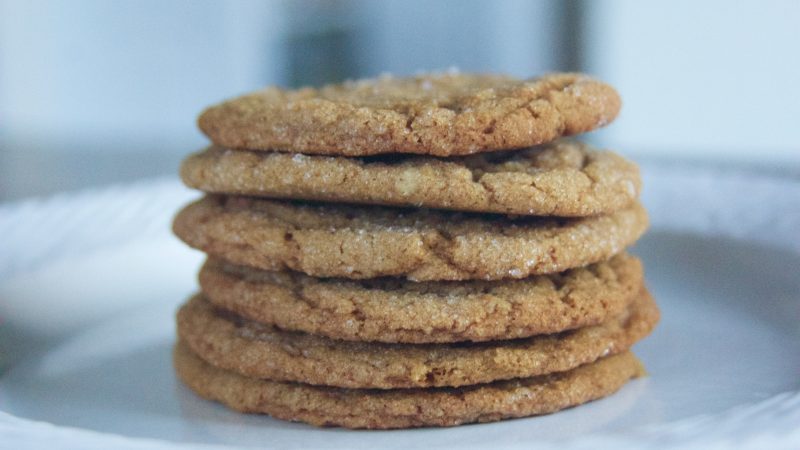
No fall is complete without this, and I regret that for the last six years, I have not enjoyed wonderful falls. But Colorado — Colorado has AMAZING falls. I am so happy about this season here! So of course I had to complete the list with the perfect gingersnap.
These cookies are a blend of crispy and chewy, with a slight tangy sweetness from the molasses. Enjoy!
~~~~~~~~~~
Step One.
Prep step! Measure out your ingredients (use a sifter for the perfect amount of flour). Combine your dry ingredients lightly with a fork.
Step Two.
In your mixer, beat the butter on high for 3 minutes until it is lighter in color. Add the sugars and beat for another 3 – 5 minutes, until the mixtures is light in color and slightly whipped.
Step Three.
Beat in the egg, then add the molasses and mix until incorporated. Gradually add the flour, in three parts, and mix to incorporate.
Step Four.
Pinch off Tablespoon-sized portions of the dough; roll
in your hands to make a ball. Roll the ball in sugar. Repeat until all of your dough is used.
Step Five.
Refrigerate the balled dough for about 30 minutes; after about 20 minutes, preheat your over to 325°F. Bake the cookies on a silicone or parchment-lined baking sheet for about 12 minutes, or until slightly browned and done. Enjoy your bite of fall!

These cookies are a blend of crispy and chewy, with a slight tangy sweetness from the molasses.
Ingredients
- 3/4 cup (1 1/2 sticks) unsalted butter
- 1/2 cup granulated sugar
- 1/2 cup brown sugar
- 1 egg
- 1/4 cup molasses
- 2 1/4 cup all purpose flour (sifted)
- 1 1/2 tsp ginger
- 1 tsp cinnamon
- 1/2 tsp cloves
- 2 tsp baking soda
- 1/2 tsp salt
- sugar for rolling
Instructions
- Prep step! Measure out your ingredients (use a sifter for the perfect amount of flour). Combine your dry ingredients lightly with a fork.
- In your mixer, beat the butter on high for 3 minutes until it is lighter in color. Add the sugars and beat for another 3 - 5 minutes, until the mixtures is light in color and slightly whipped.
- Beat in the egg, then add the molasses and mix until incorporated. Gradually add the flour, in three parts, and mix to incorporate.
- Pinch off Tablespoon-sized portions of the dough; roll in your hands to make a ball. Roll the ball in sugar. Repeat until all of your dough is used.
- Refrigerate the balled dough for about 30 minutes; after about 20 minutes, preheat your over to 325°F. Bake the cookies on a silicone or parchment-lined baking sheet for about 12 minutes, or until slightly browned and done. Enjoy your bite of fall!
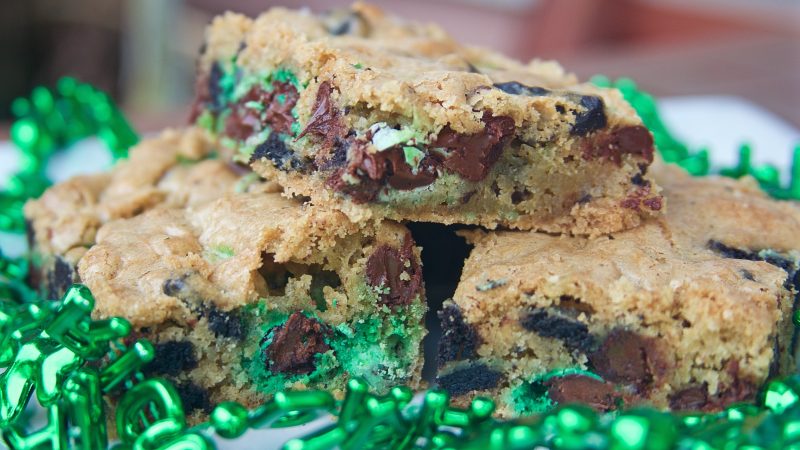
I think that I speak for a lot of New Orleanians when I say that right now, I am missing Mardi Gras! Even though this one in particular was exhausting – walking with the kids in parades, volunteering at work, dancing, doing grad school assignments between parties – I want more! Perhaps the only redeeming thing about the end of Mardi Gras season is that St. Patrick’s Day is right around the corner. This holiday brings more parades, more fun, and more green glitter to the spring season! In the kitchen, mint is one of my favorite flavors, so I LOVE being able to unashamedly add green, minty candies to my holiday baking in March. These cookie bars first made an appearance during my college days. They were so well-received that I decided to revisit – and tweak – the recipe for the blog!
This recipe is SO EASY, you’ll be modifying it to make year round. It’s the delight and comfort of a chocolate chip cookie without having to form dozens of cookie balls and bake in batches. One pan, in, bake, and done! I repeat: SO EASY!! These are great go-to cookies to treat everyone from your kid’s classmates to coworkers. Everyone loves a cookie!
So, without further ado, I introduce to you:
How to Lure a Leprechaun: Cookie Edition
~~~~~~~~~~

Step One.
Prep step! Measure out your ingredients, and let your butter and eggs come up to room temperature. In a mixing bowl, mix the salt and baking soda into the flour with a fork.
Preheat your oven to 350°F. Grease a 9×13 pan with butter. Add a Tablespoon or two of sugar to the pan and shake it around to cover the butter so that your cookies don’t stick.
Pro Tip = when baking, use sugar instead of flour to coat your pans! No one likes getting that chalky lump of flour that stuck to the bottom, so solve the problem with sugar. It also makes the outside of your treat a little crunchy, upping the “wow” factor for your tastebuds!
Sneak a few mint M&Ms (and maybe an Oreo) to munch on =]
Step Two.
In your mixing bowl, beat the butter on high speed for 3-5 minutes, until it is light in color. Add both sugars to the bowl, and beat again on high for another 3 – 5 minutes until the mixtures is light and fluffy. One at a time, add the eggs to the bowl and beat on medium speed until they are incorporated. Mix in the vanilla.
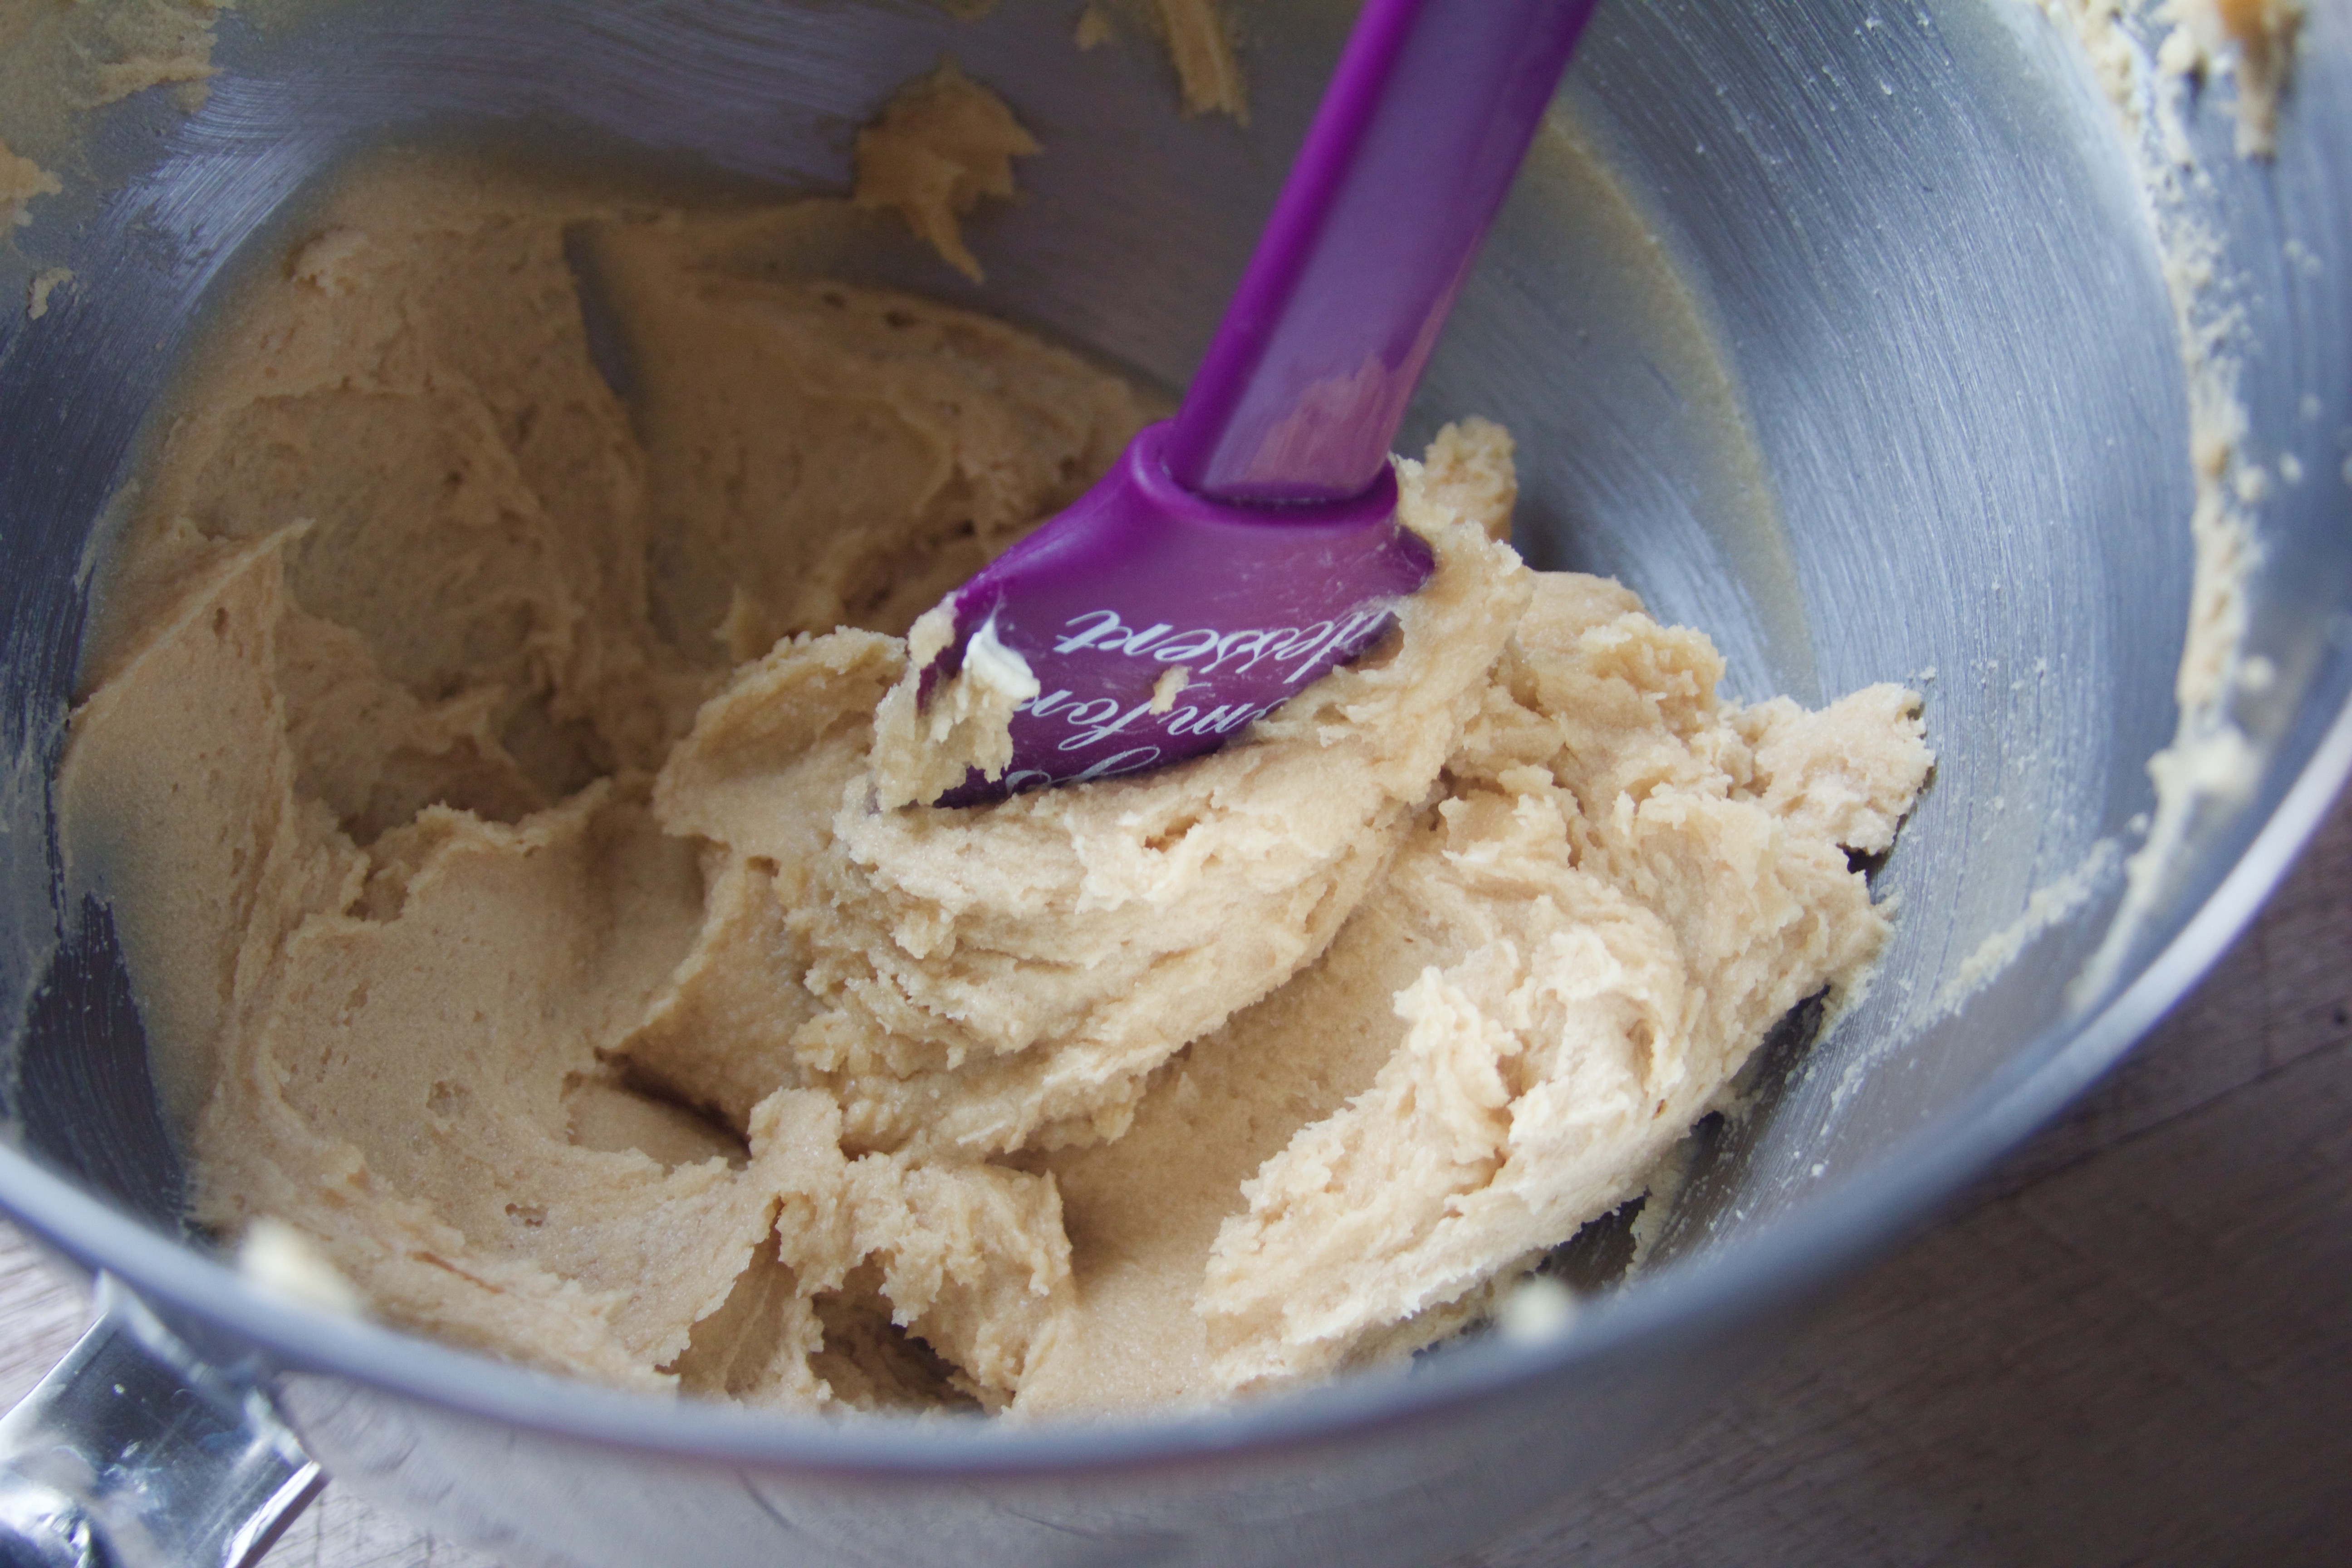
Step Three.
In small batches (I do about three), incorporate the flour into the mix on low speed. Dough is ready for the mash-up!
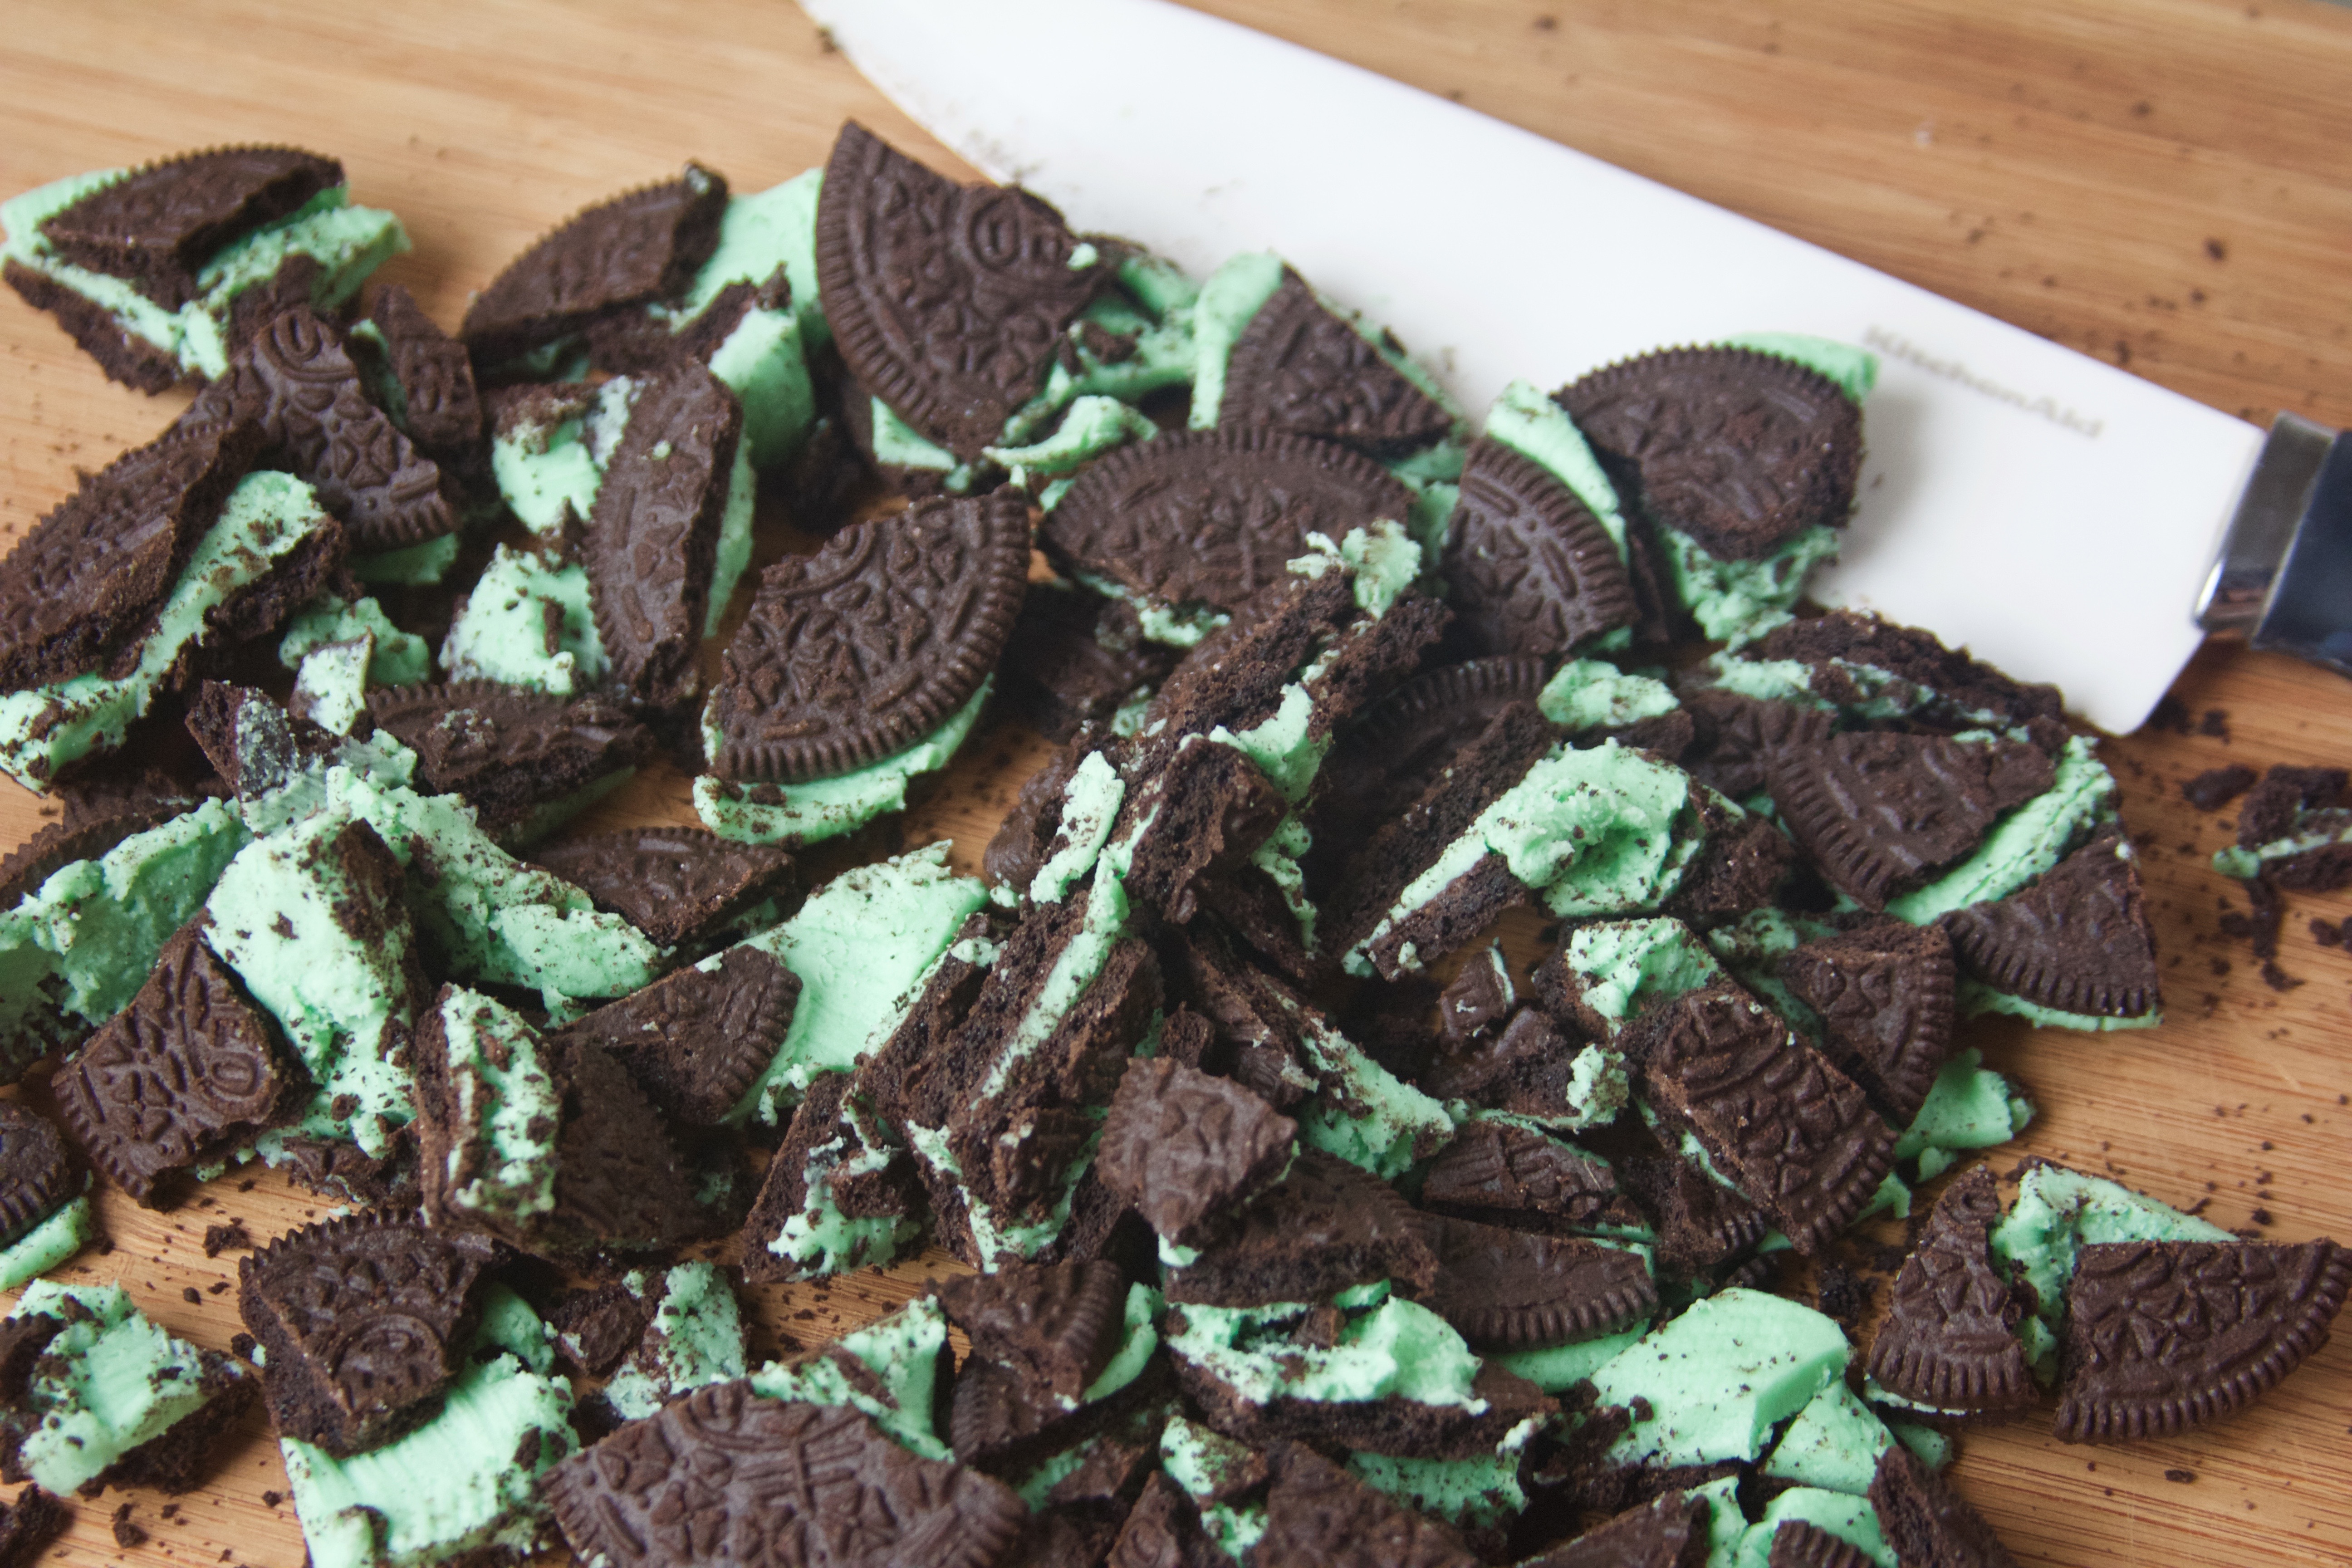
Step Four.
Chop up the Oreos. The size of the chunk really depends on your personal preference. I like big pieces of cookie in my cookies, so I give it a very rough chop. Add the Oreos, chocolate chips, and 2/3 of the Mint M&Ms to the dough, and fold in with a spatula.
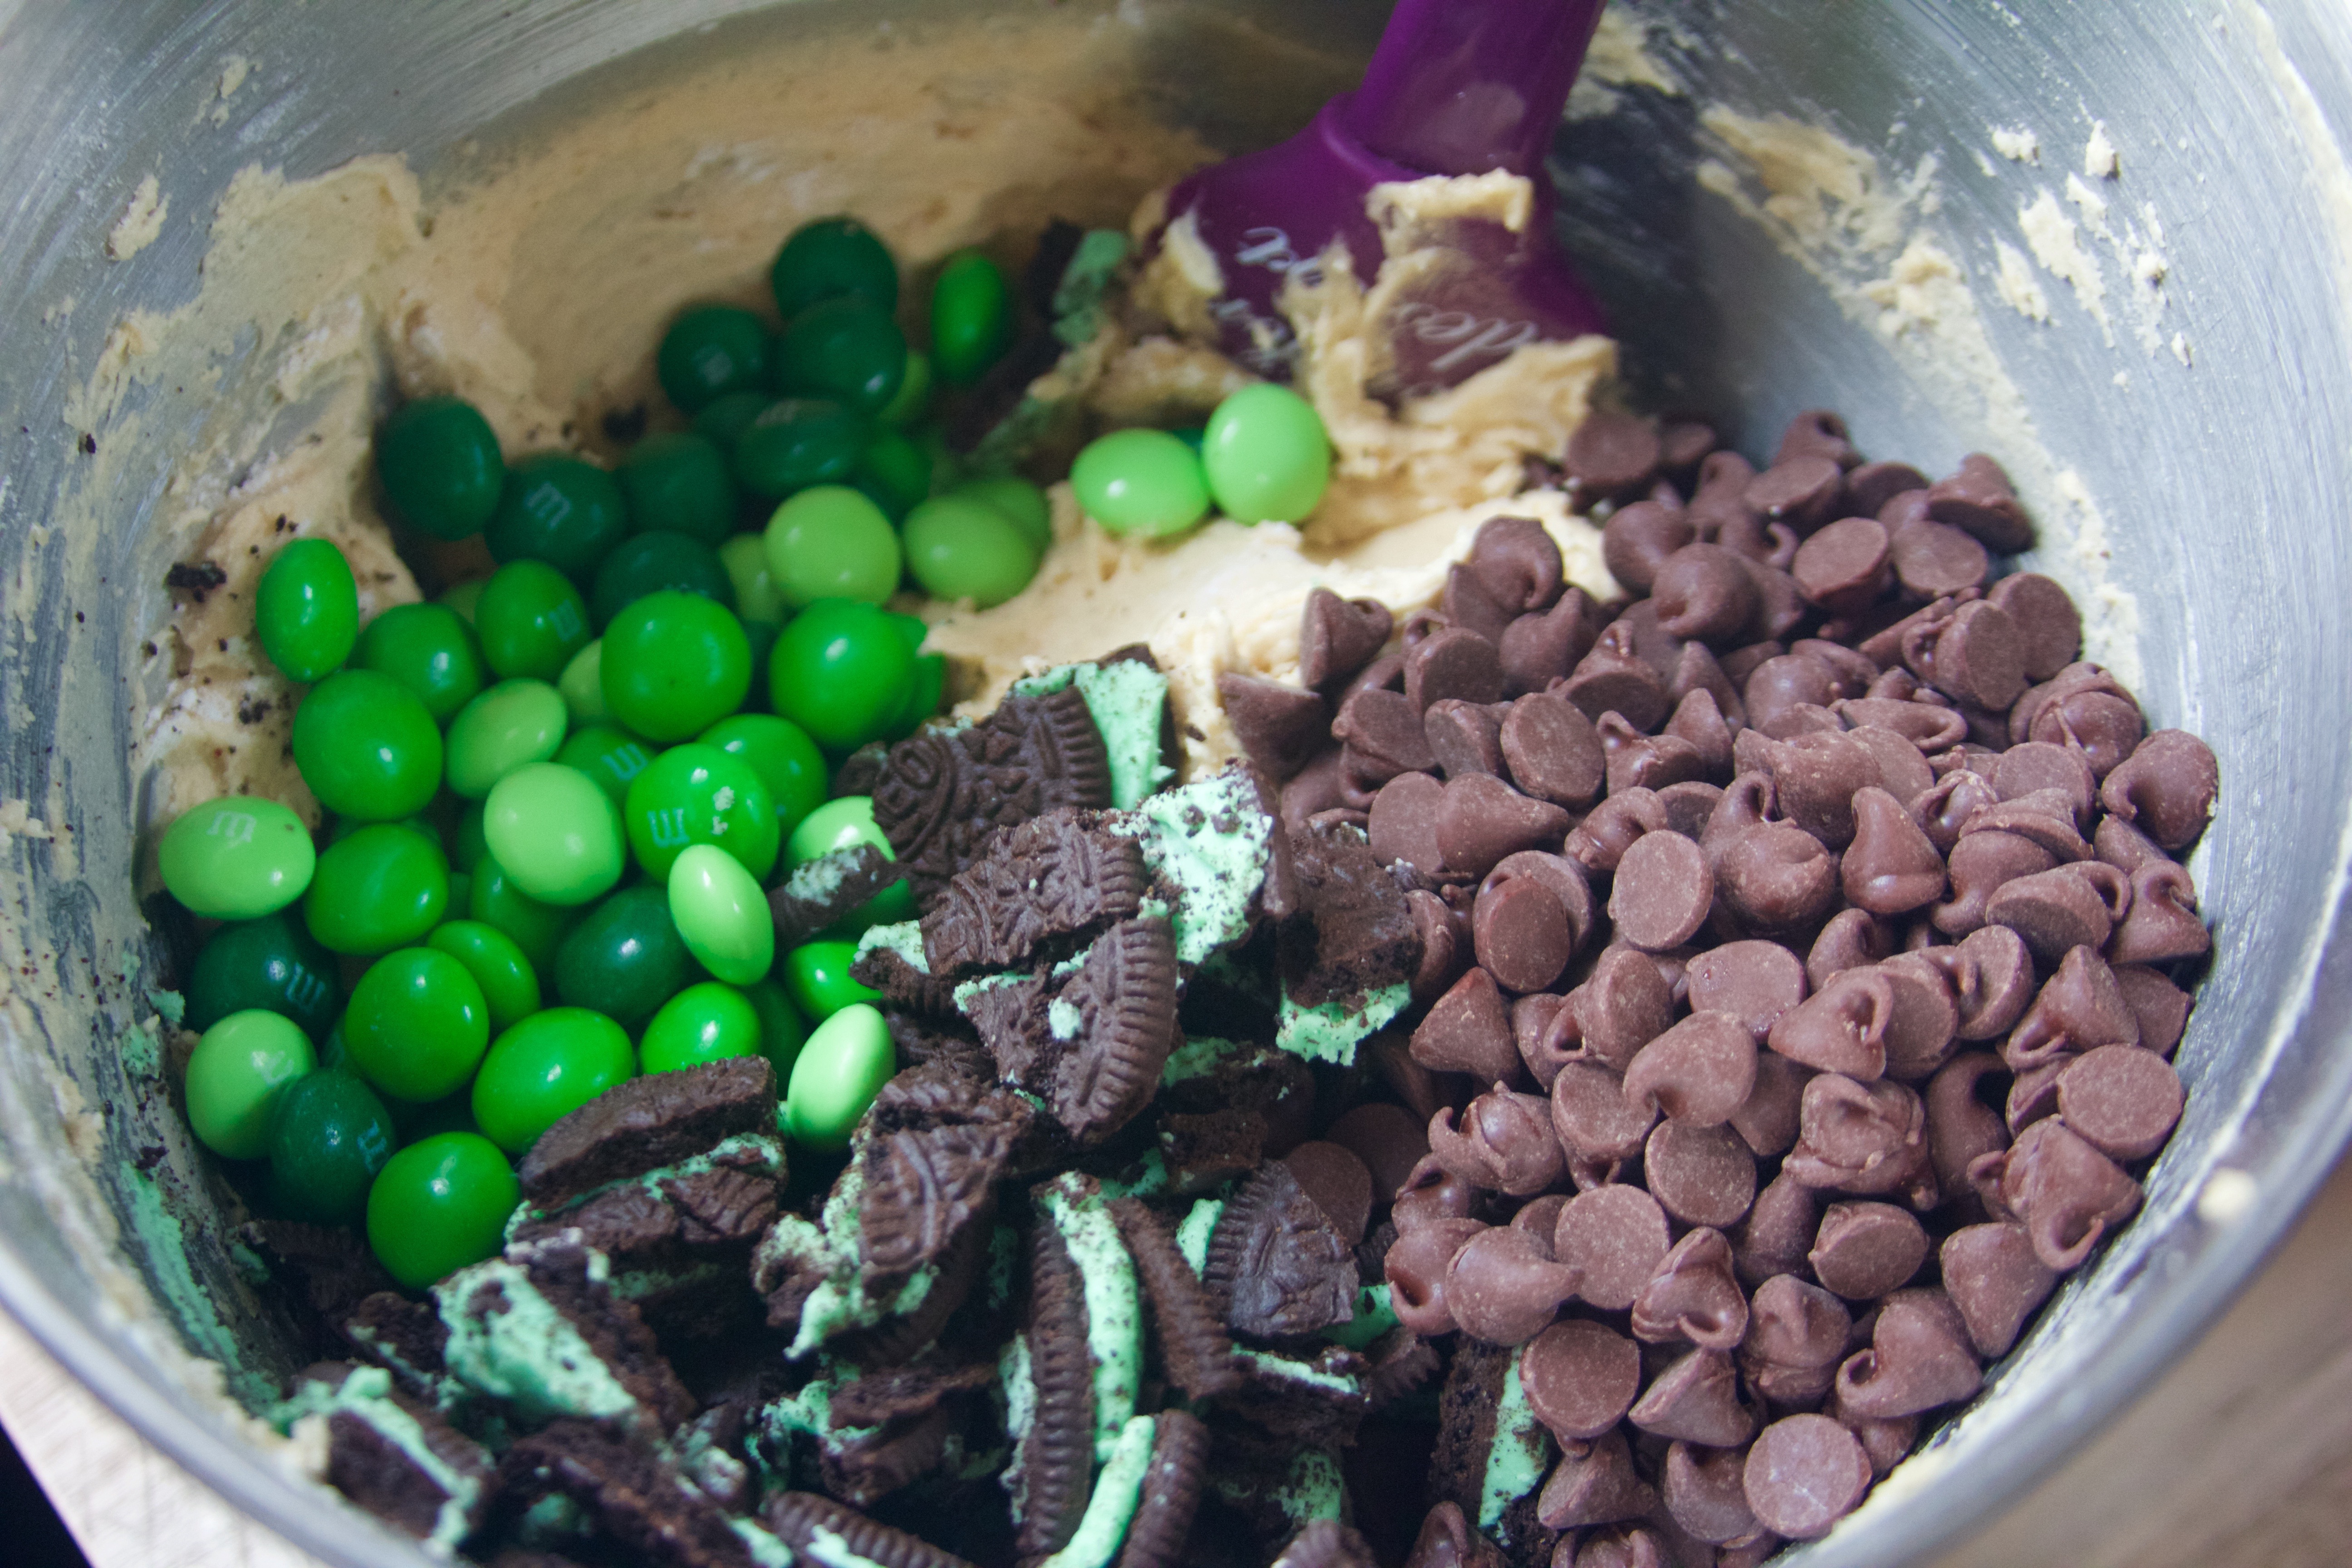
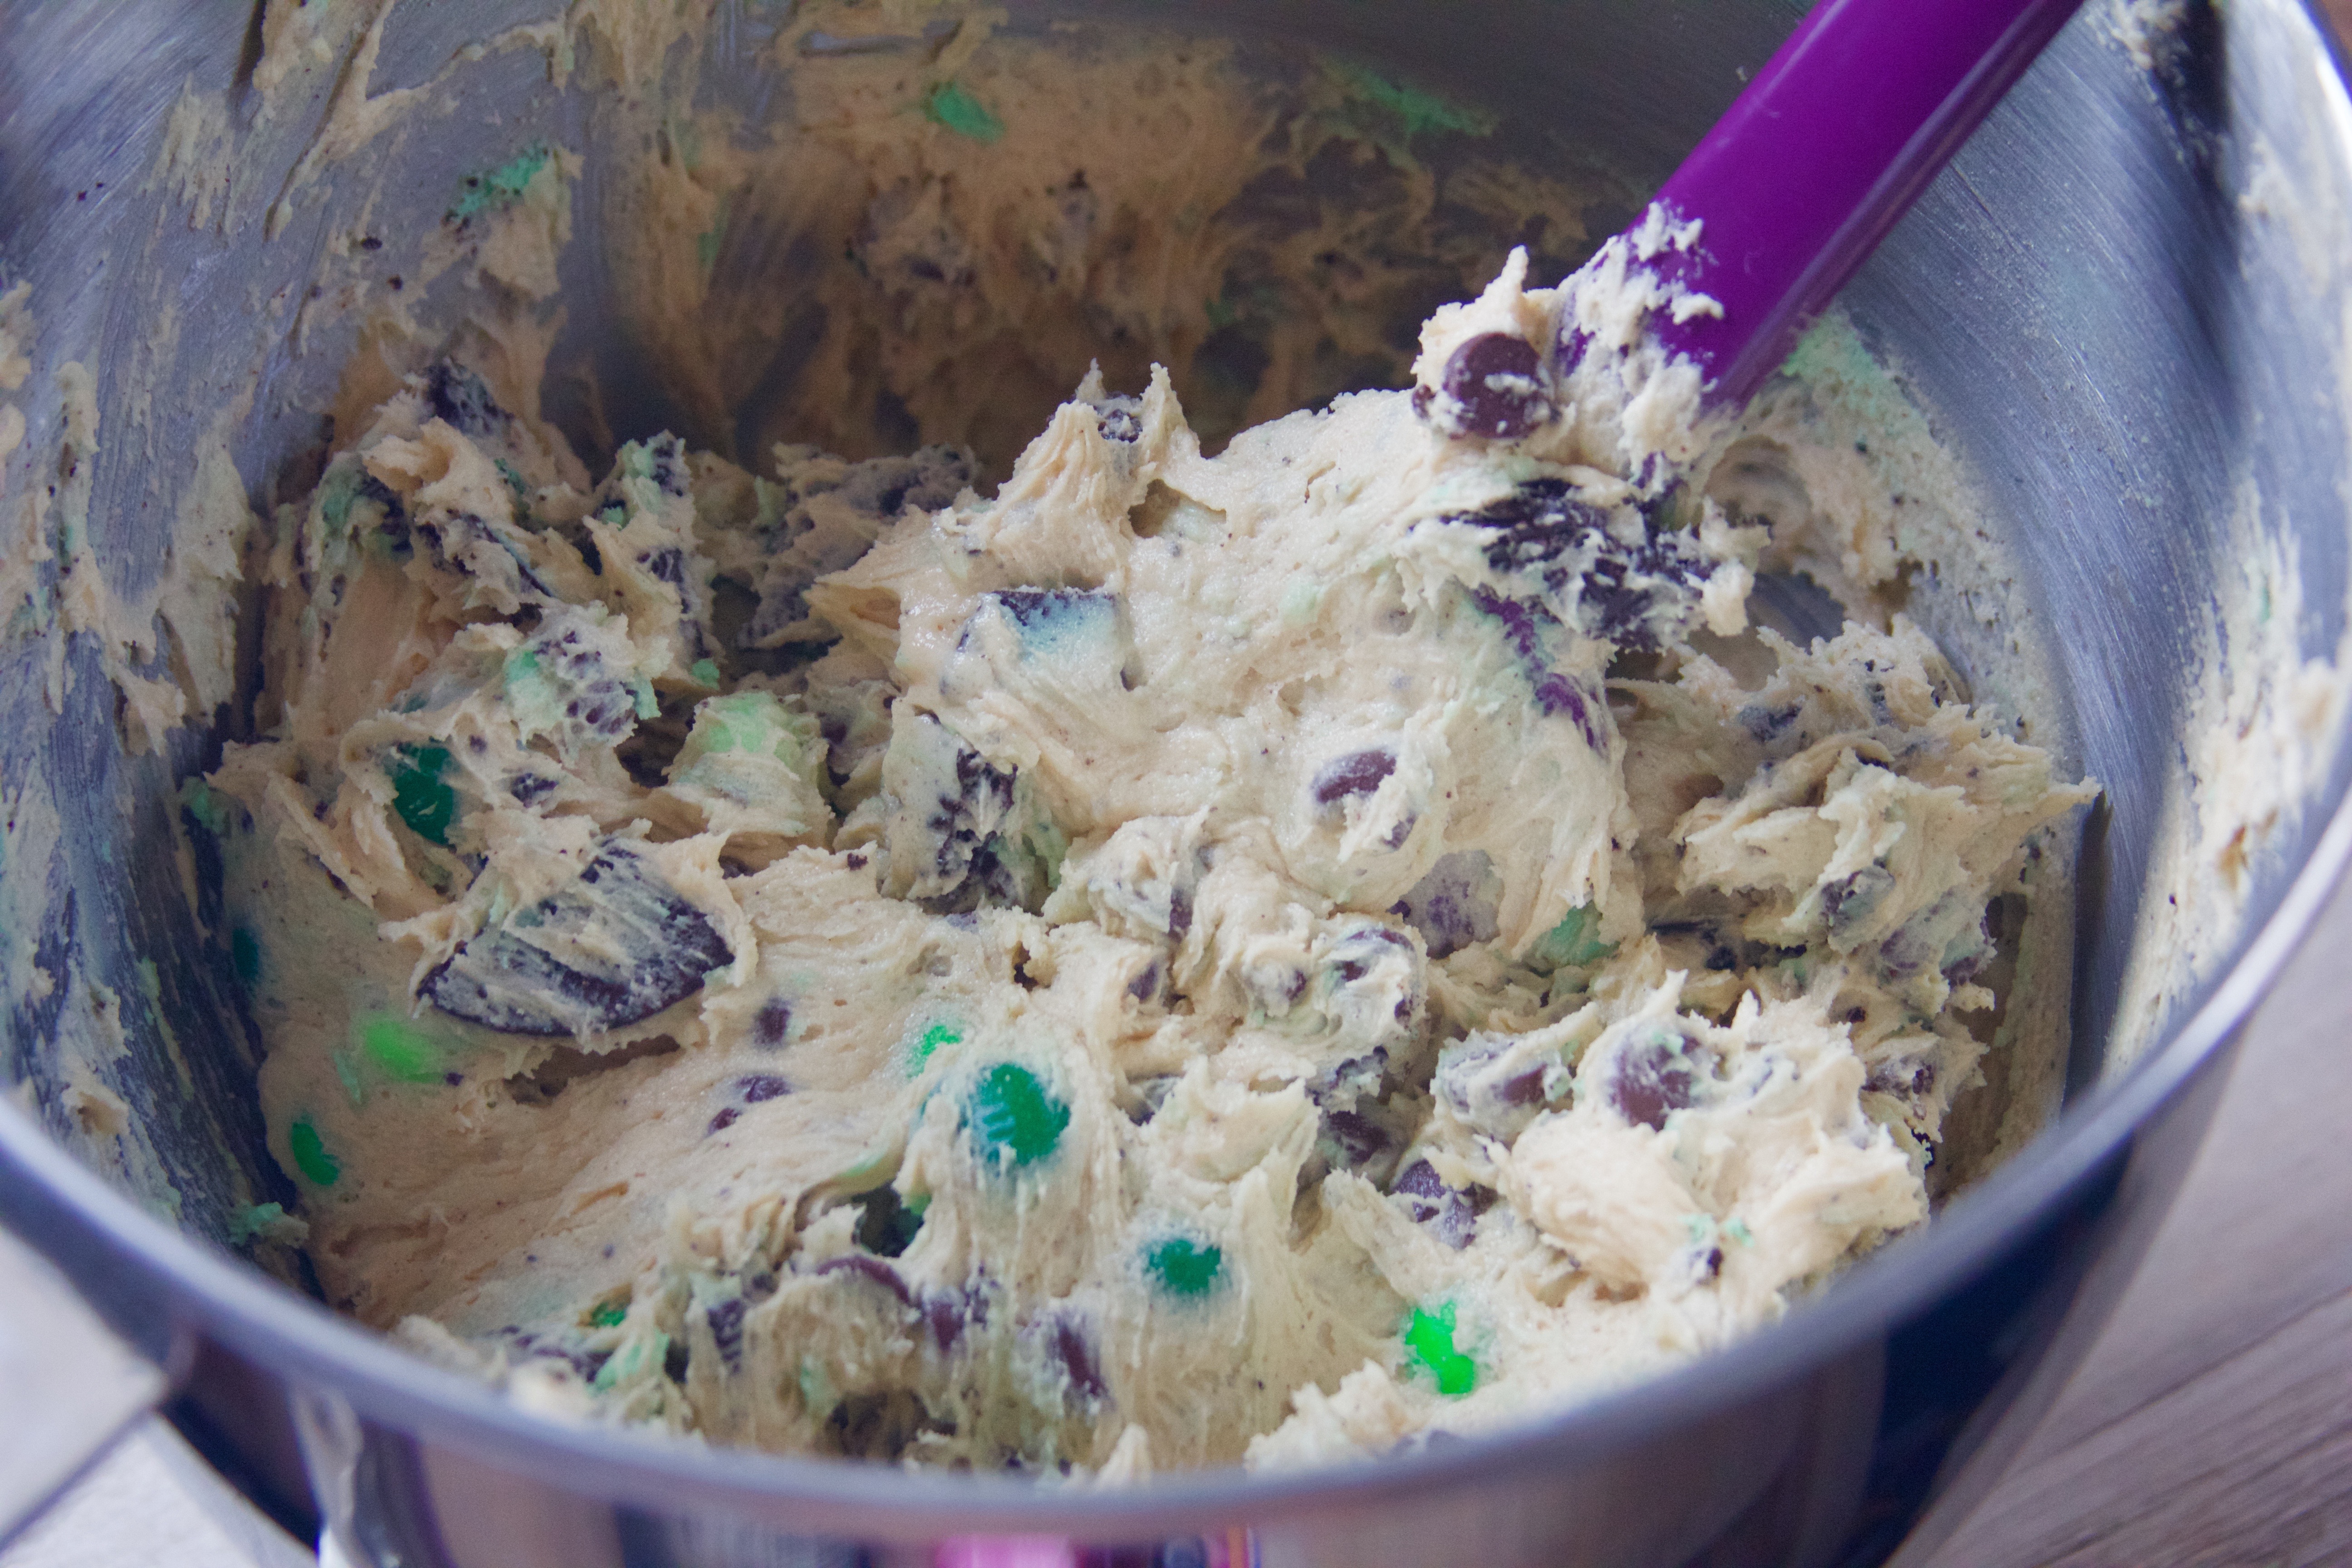
Step Five.
Spread the dough out evenly into your pan. Press the remainder of the M&Ms into the top of the dough. Bake at 350°F for 25 – 30 minutes, or until golden brown. Let the giant cookie cool, then slice up and dig in!
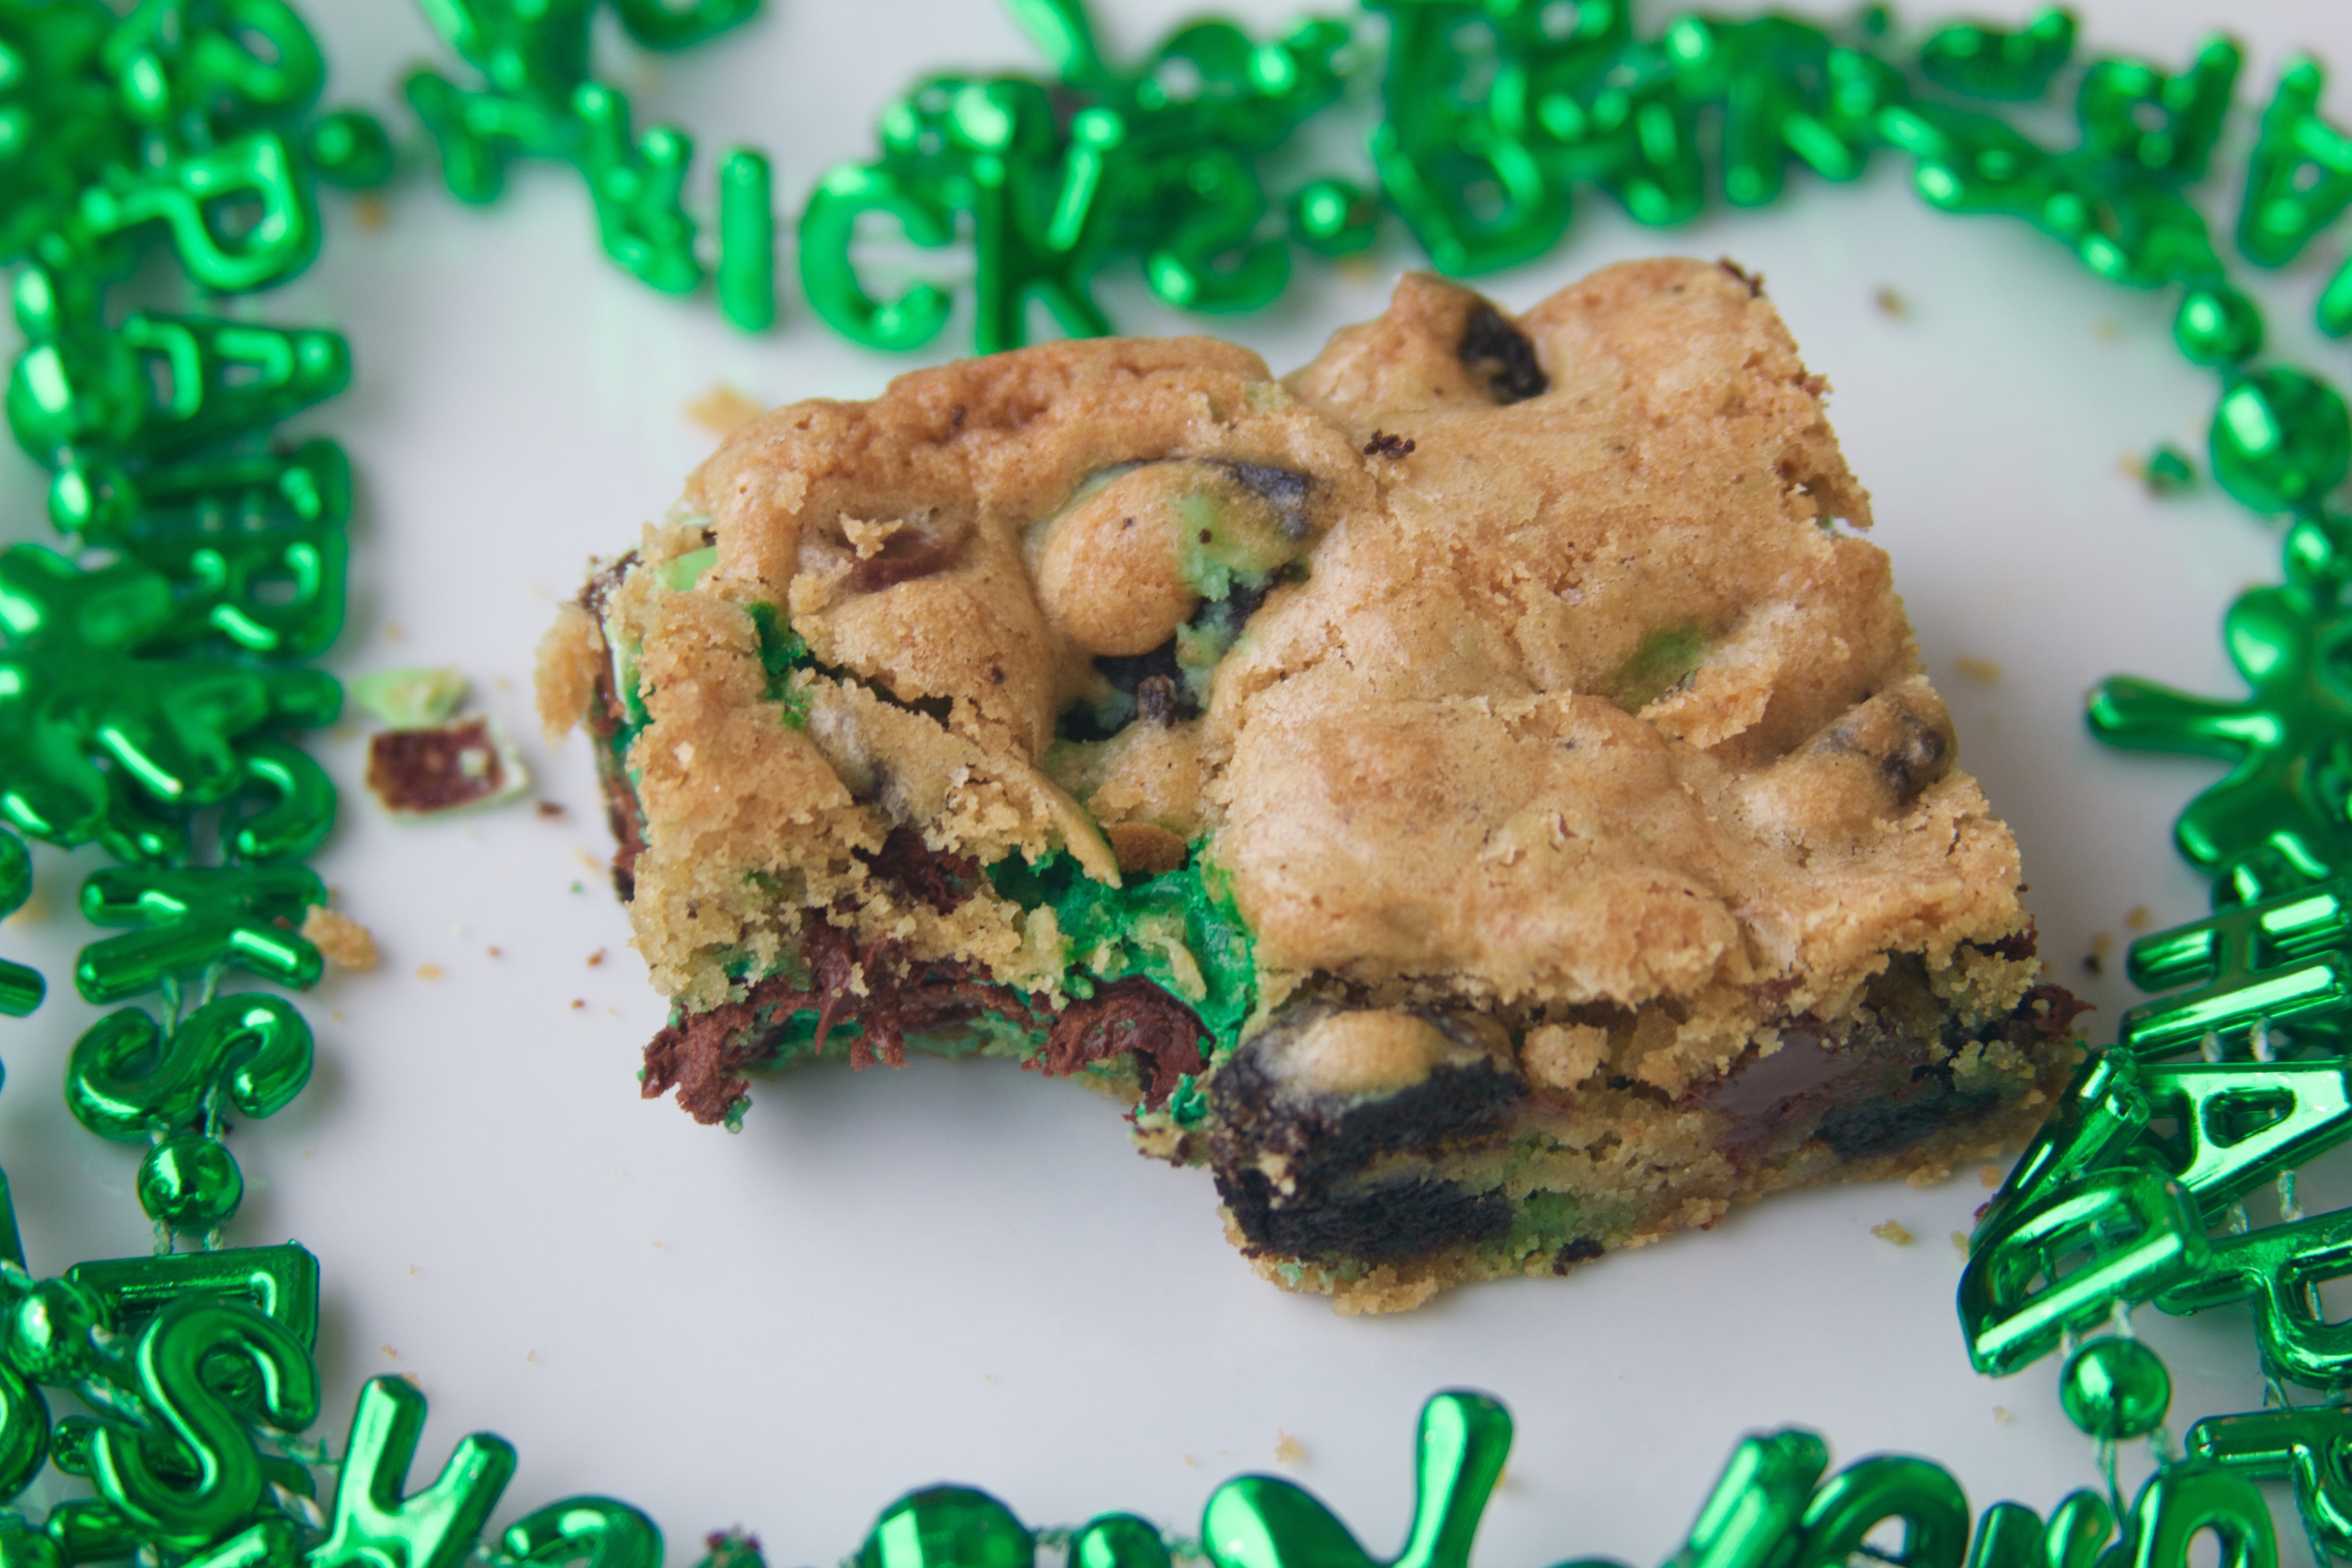

Enjoy a minty take on chocolate cookies to add a little green to St. Patrick's Day treats!
Ingredients
- 1 cup (2 sticks) unsalted butter, softened
- 1 cup brown sugar
- 1/2 cup granulated sugar
- 2 eggs
- 1 tsp vanilla
- 2 1/4 cups all-purpose flour
- 1 tsp salt
- 1 tsp baking soda
- 1 cup chocolate chips
- 1 row of Mint Oreos
- 1 package of Mint M&Ms
Instructions
- Prep step! Measure out your ingredients, and let your butter and eggs come up to room temperature. In a mixing bowl, mix the salt and baking soda into the flour with a fork.
- Preheat your oven to 350°F. Grease a 9x13 pan with butter. Add a Tablespoon or two of sugar to the pan and shake it around to cover the butter so that your cookies don't stick.
- In your mixing bowl, beat the butter on high speed for 3-5 minutes, until it is light in color. Add both sugars to the bowl, and beat again on high for another 3 - 5 minutes until the mixtures is light and fluffy. One at a time, add the eggs to the bowl and beat on medium speed until they are incorporated. Mix in the vanilla.
- In small batches (I do about three), incorporate the flour into the mix on low speed. Dough is ready for the mash-up!
- Chop up the Oreos. The size of the chunk really depends on your personal preference. I like big pieces of cookie in my cookies, so I give it a very rough chop. Add the Oreos, chocolate chips, and 2/3 of the Mint M&Ms to the dough, and fold in with a spatula.
- Spread the dough out evenly into your pan. Press the remainder of the M&Ms into the top of the dough. Bake at 350°F for 25 - 30 minutes, or until golden brown. Let the giant cookie cool, then slice up and dig in!
Notes
*You can cut the cookies as big or as small as you like, depending on your "yield" needs!