this is a page for
Browsing Tag: adventures of a frostaholic
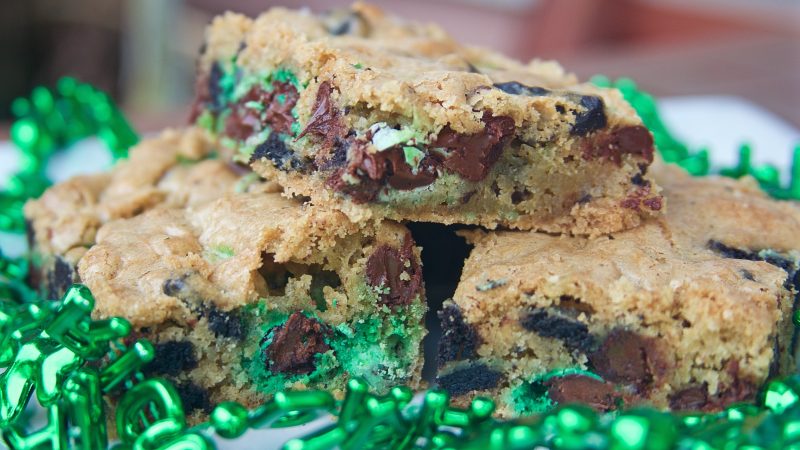
I think that I speak for a lot of New Orleanians when I say that right now, I am missing Mardi Gras! Even though this one in particular was exhausting – walking with the kids in parades, volunteering at work, dancing, doing grad school assignments between parties – I want more! Perhaps the only redeeming thing about the end of Mardi Gras season is that St. Patrick’s Day is right around the corner. This holiday brings more parades, more fun, and more green glitter to the spring season! In the kitchen, mint is one of my favorite flavors, so I LOVE being able to unashamedly add green, minty candies to my holiday baking in March. These cookie bars first made an appearance during my college days. They were so well-received that I decided to revisit – and tweak – the recipe for the blog!
This recipe is SO EASY, you’ll be modifying it to make year round. It’s the delight and comfort of a chocolate chip cookie without having to form dozens of cookie balls and bake in batches. One pan, in, bake, and done! I repeat: SO EASY!! These are great go-to cookies to treat everyone from your kid’s classmates to coworkers. Everyone loves a cookie!
So, without further ado, I introduce to you:
How to Lure a Leprechaun: Cookie Edition
~~~~~~~~~~

Step One.
Prep step! Measure out your ingredients, and let your butter and eggs come up to room temperature. In a mixing bowl, mix the salt and baking soda into the flour with a fork.
Preheat your oven to 350°F. Grease a 9×13 pan with butter. Add a Tablespoon or two of sugar to the pan and shake it around to cover the butter so that your cookies don’t stick.
Pro Tip = when baking, use sugar instead of flour to coat your pans! No one likes getting that chalky lump of flour that stuck to the bottom, so solve the problem with sugar. It also makes the outside of your treat a little crunchy, upping the “wow” factor for your tastebuds!
Sneak a few mint M&Ms (and maybe an Oreo) to munch on =]
Step Two.
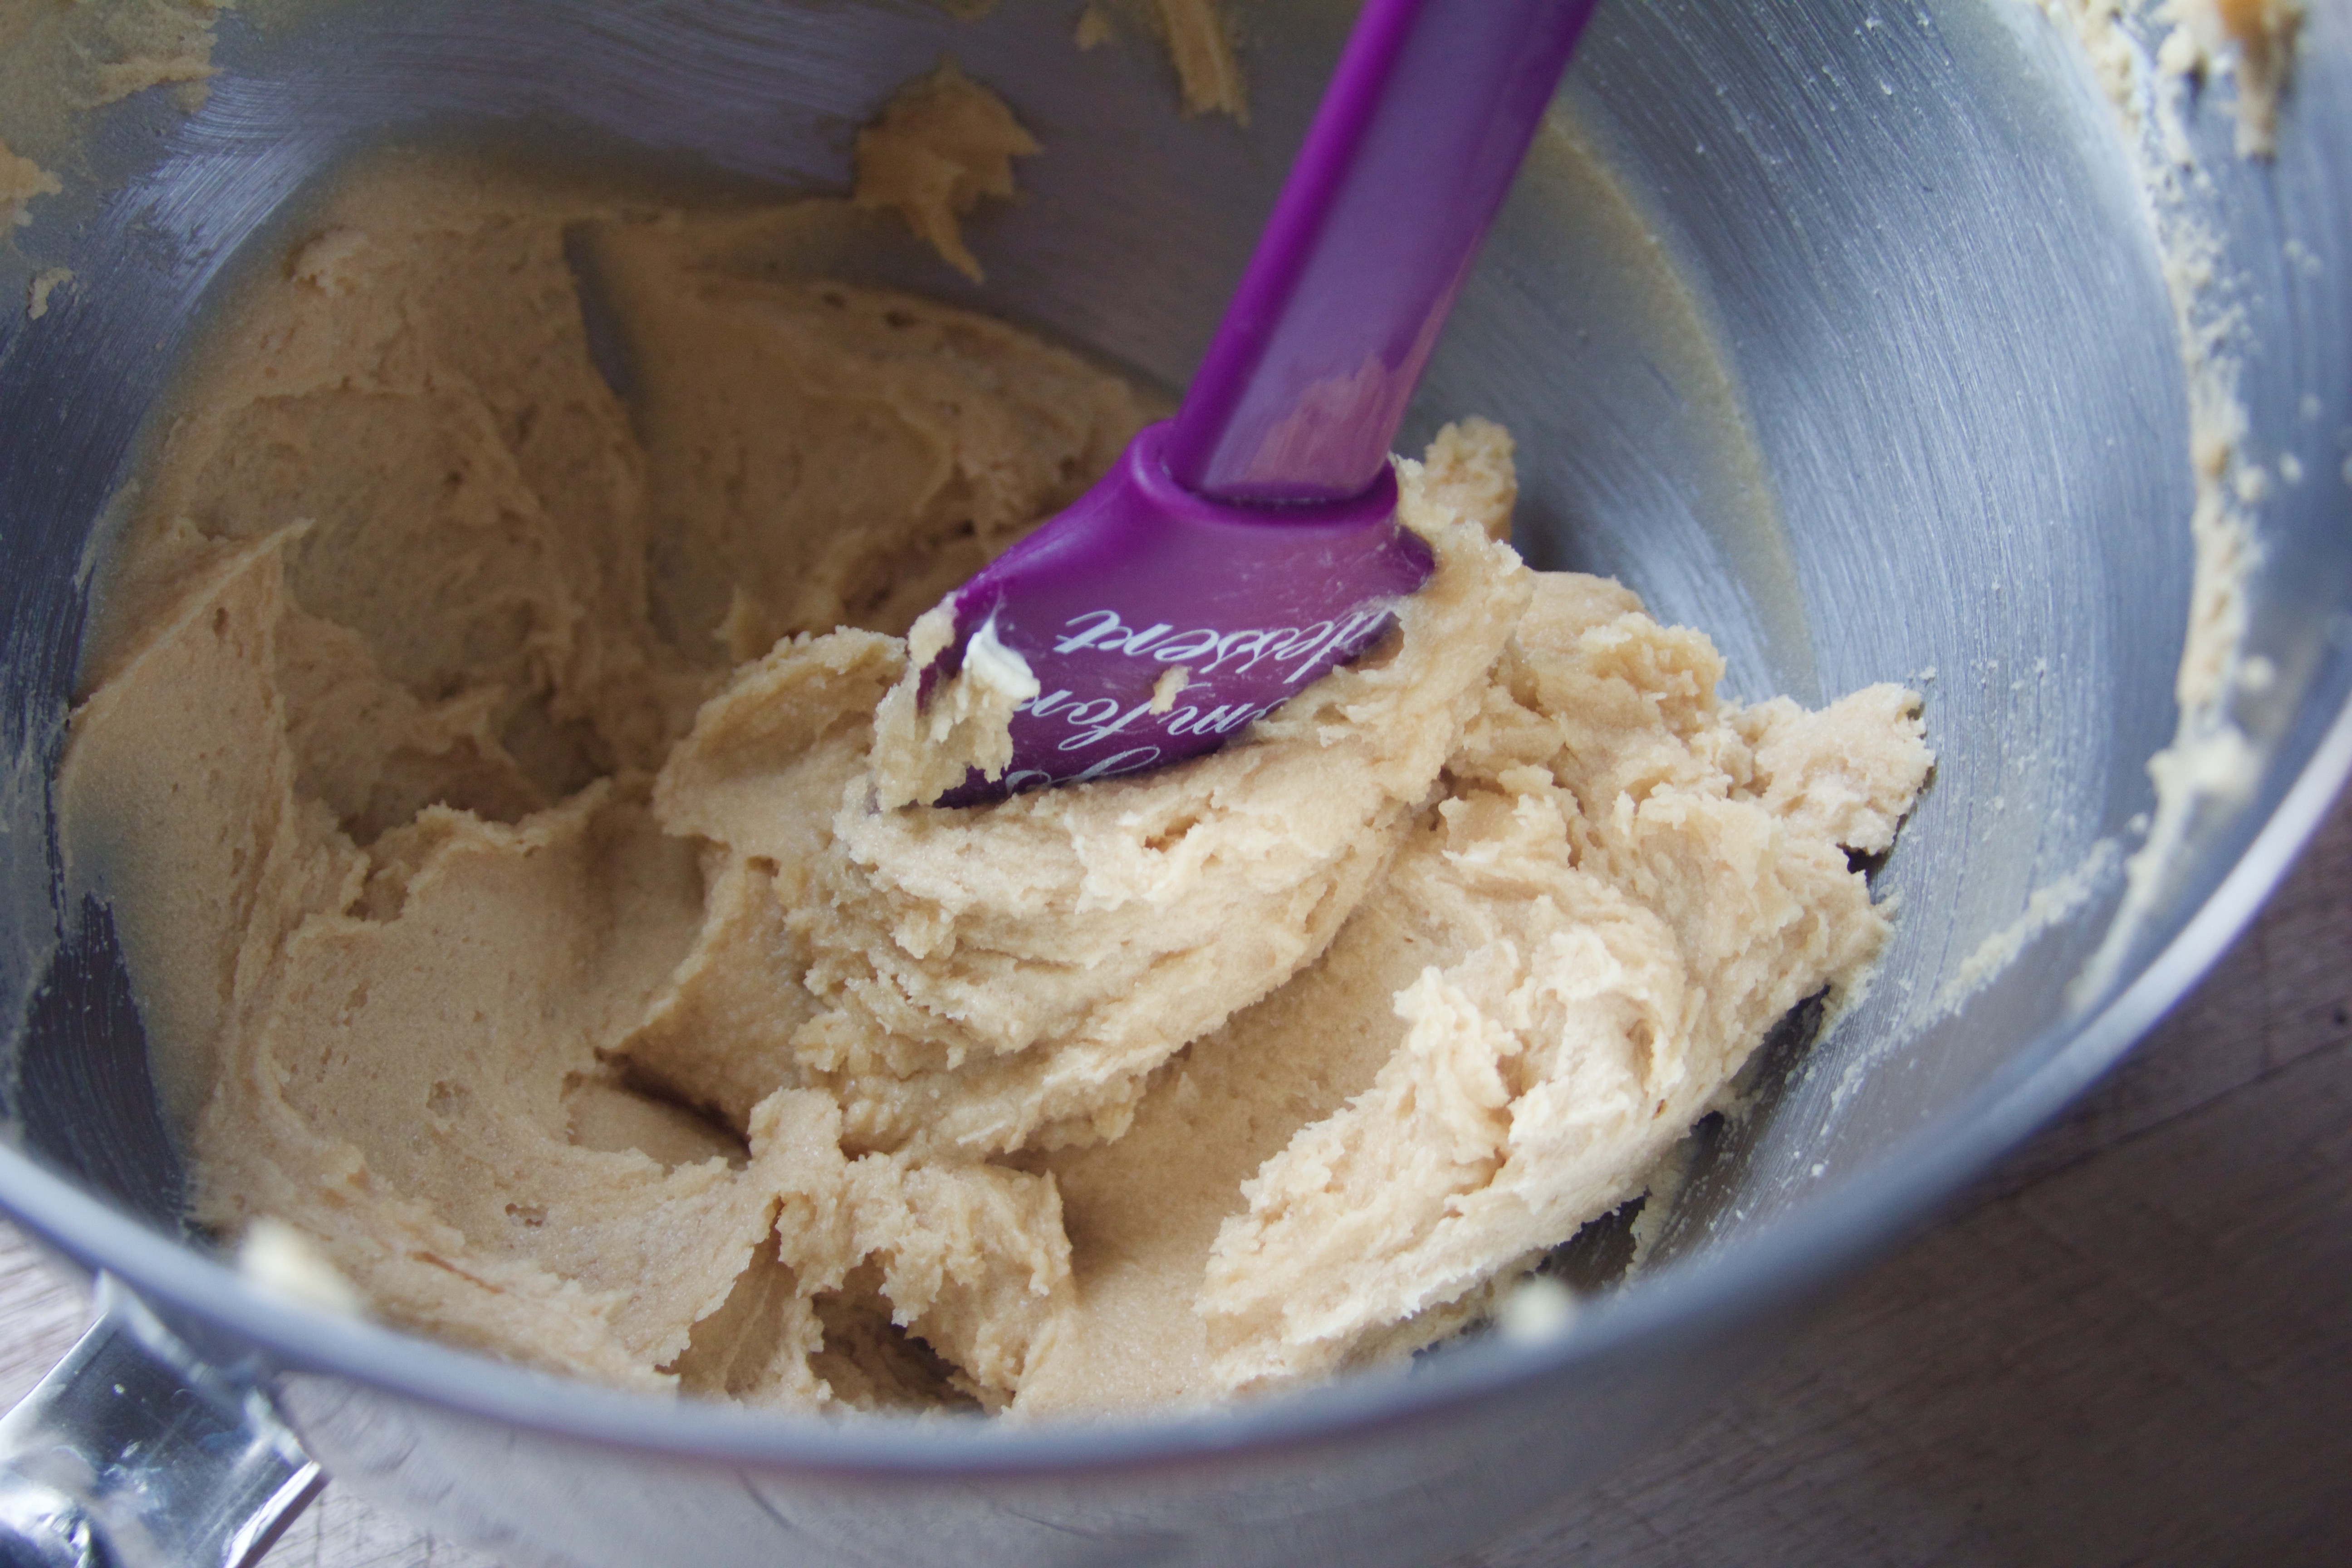
In your mixing bowl, beat the butter on high speed for 3-5 minutes, until it is light in color. Add both sugars to the bowl, and beat again on high for another 3 – 5 minutes until the mixtures is light and fluffy. One at a time, add the eggs to the bowl and beat on medium speed until they are incorporated. Mix in the vanilla.
Step Three.
In small batches (I do about three), incorporate the flour into the mix on low speed. Dough is ready for the mash-up!
Step Four.
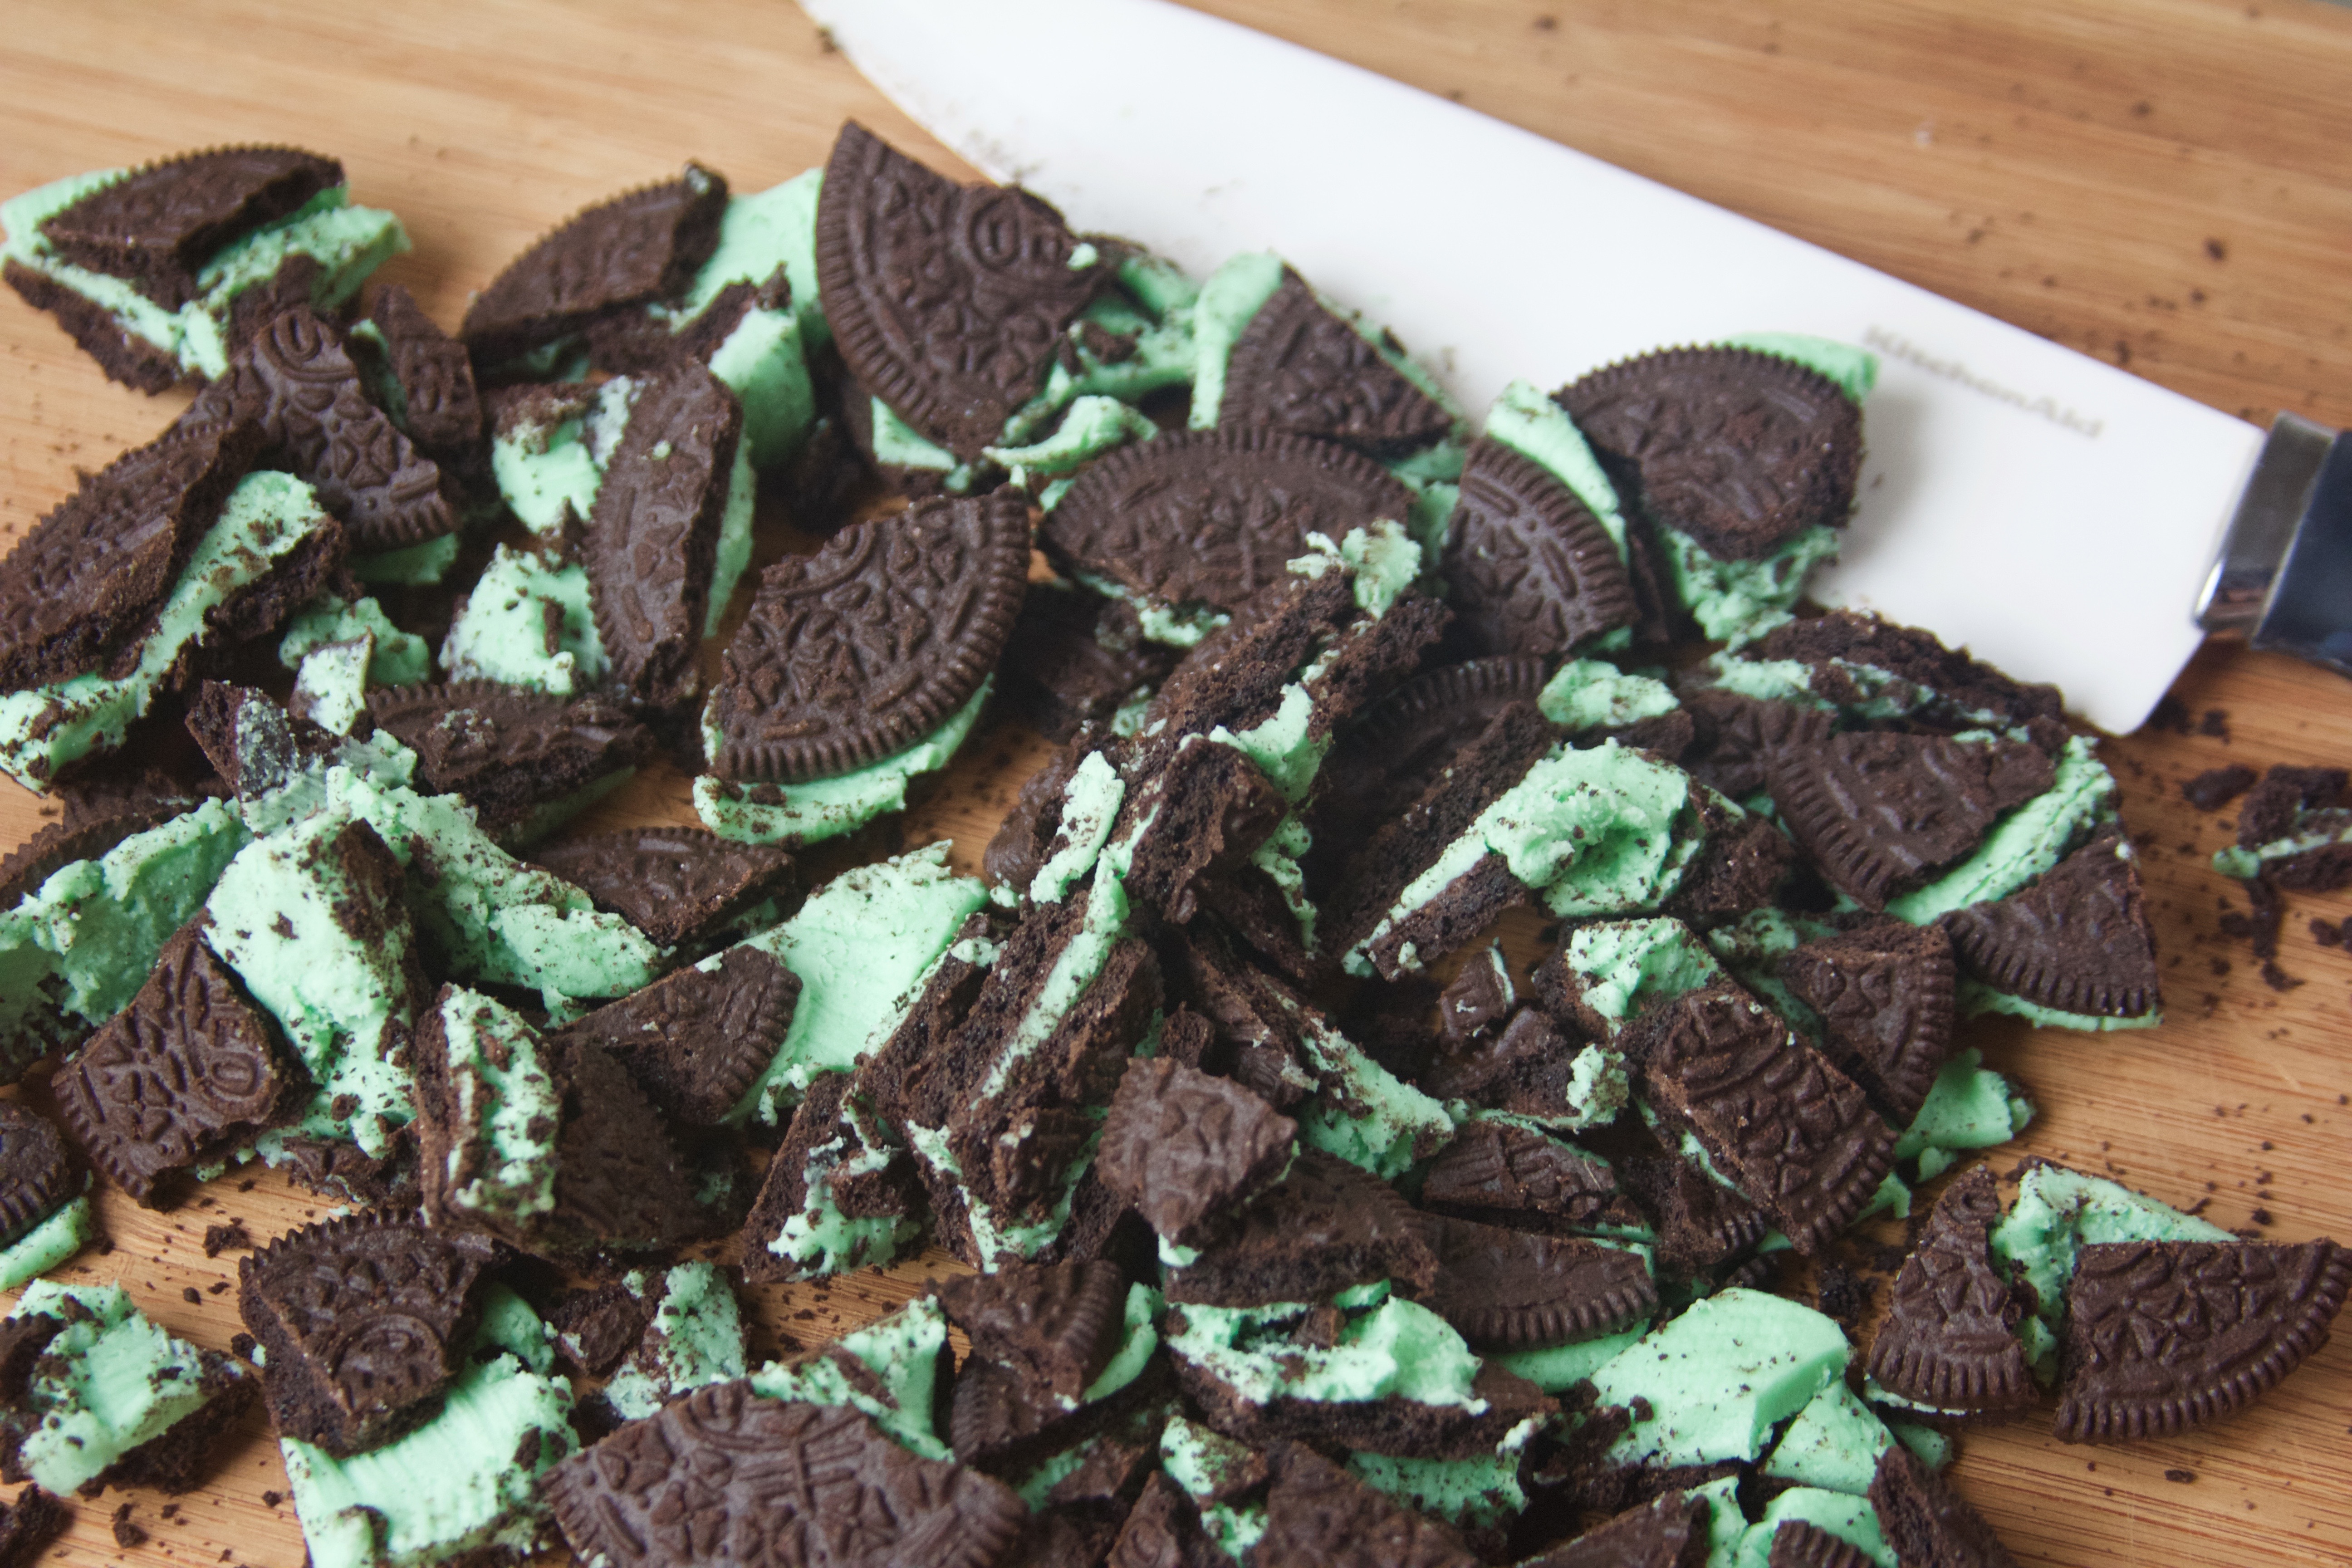
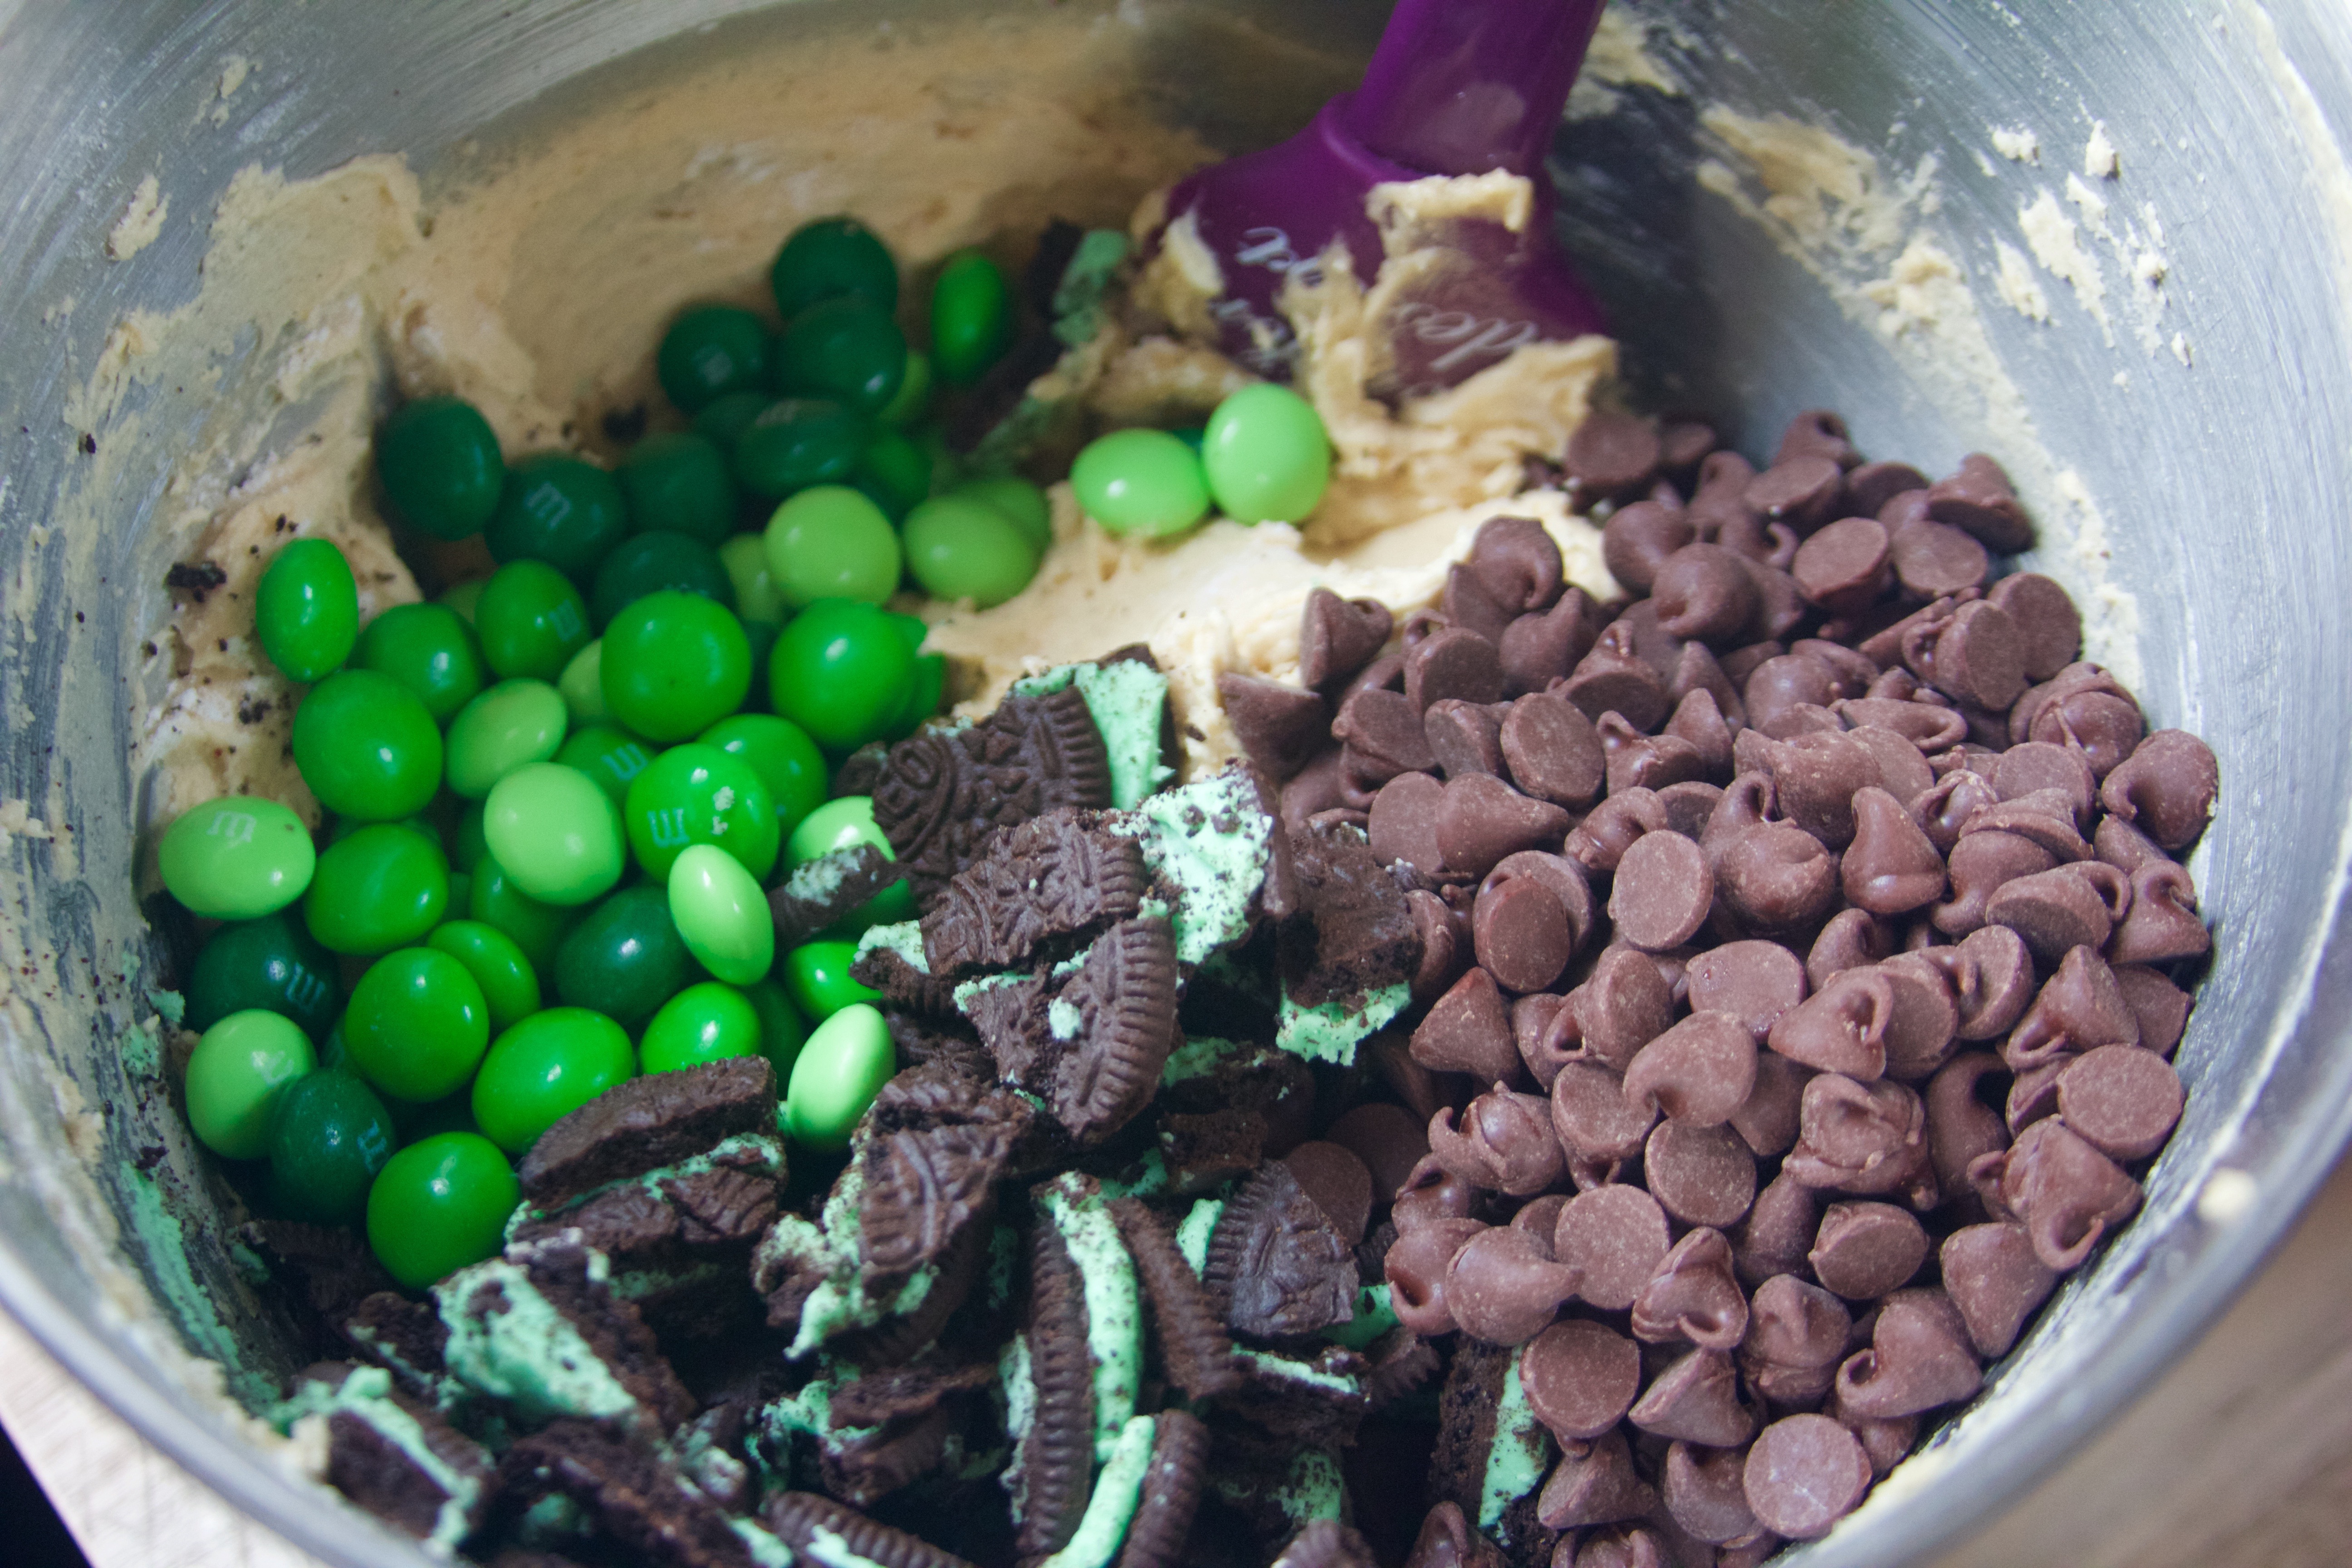
Chop up the Oreos. The size of the chunk really depends on your personal preference. I like big pieces of cookie in my cookies, so I give it a very rough chop. Add the Oreos, chocolate chips, and 2/3 of the Mint M&Ms to the dough, and fold in with a spatula.
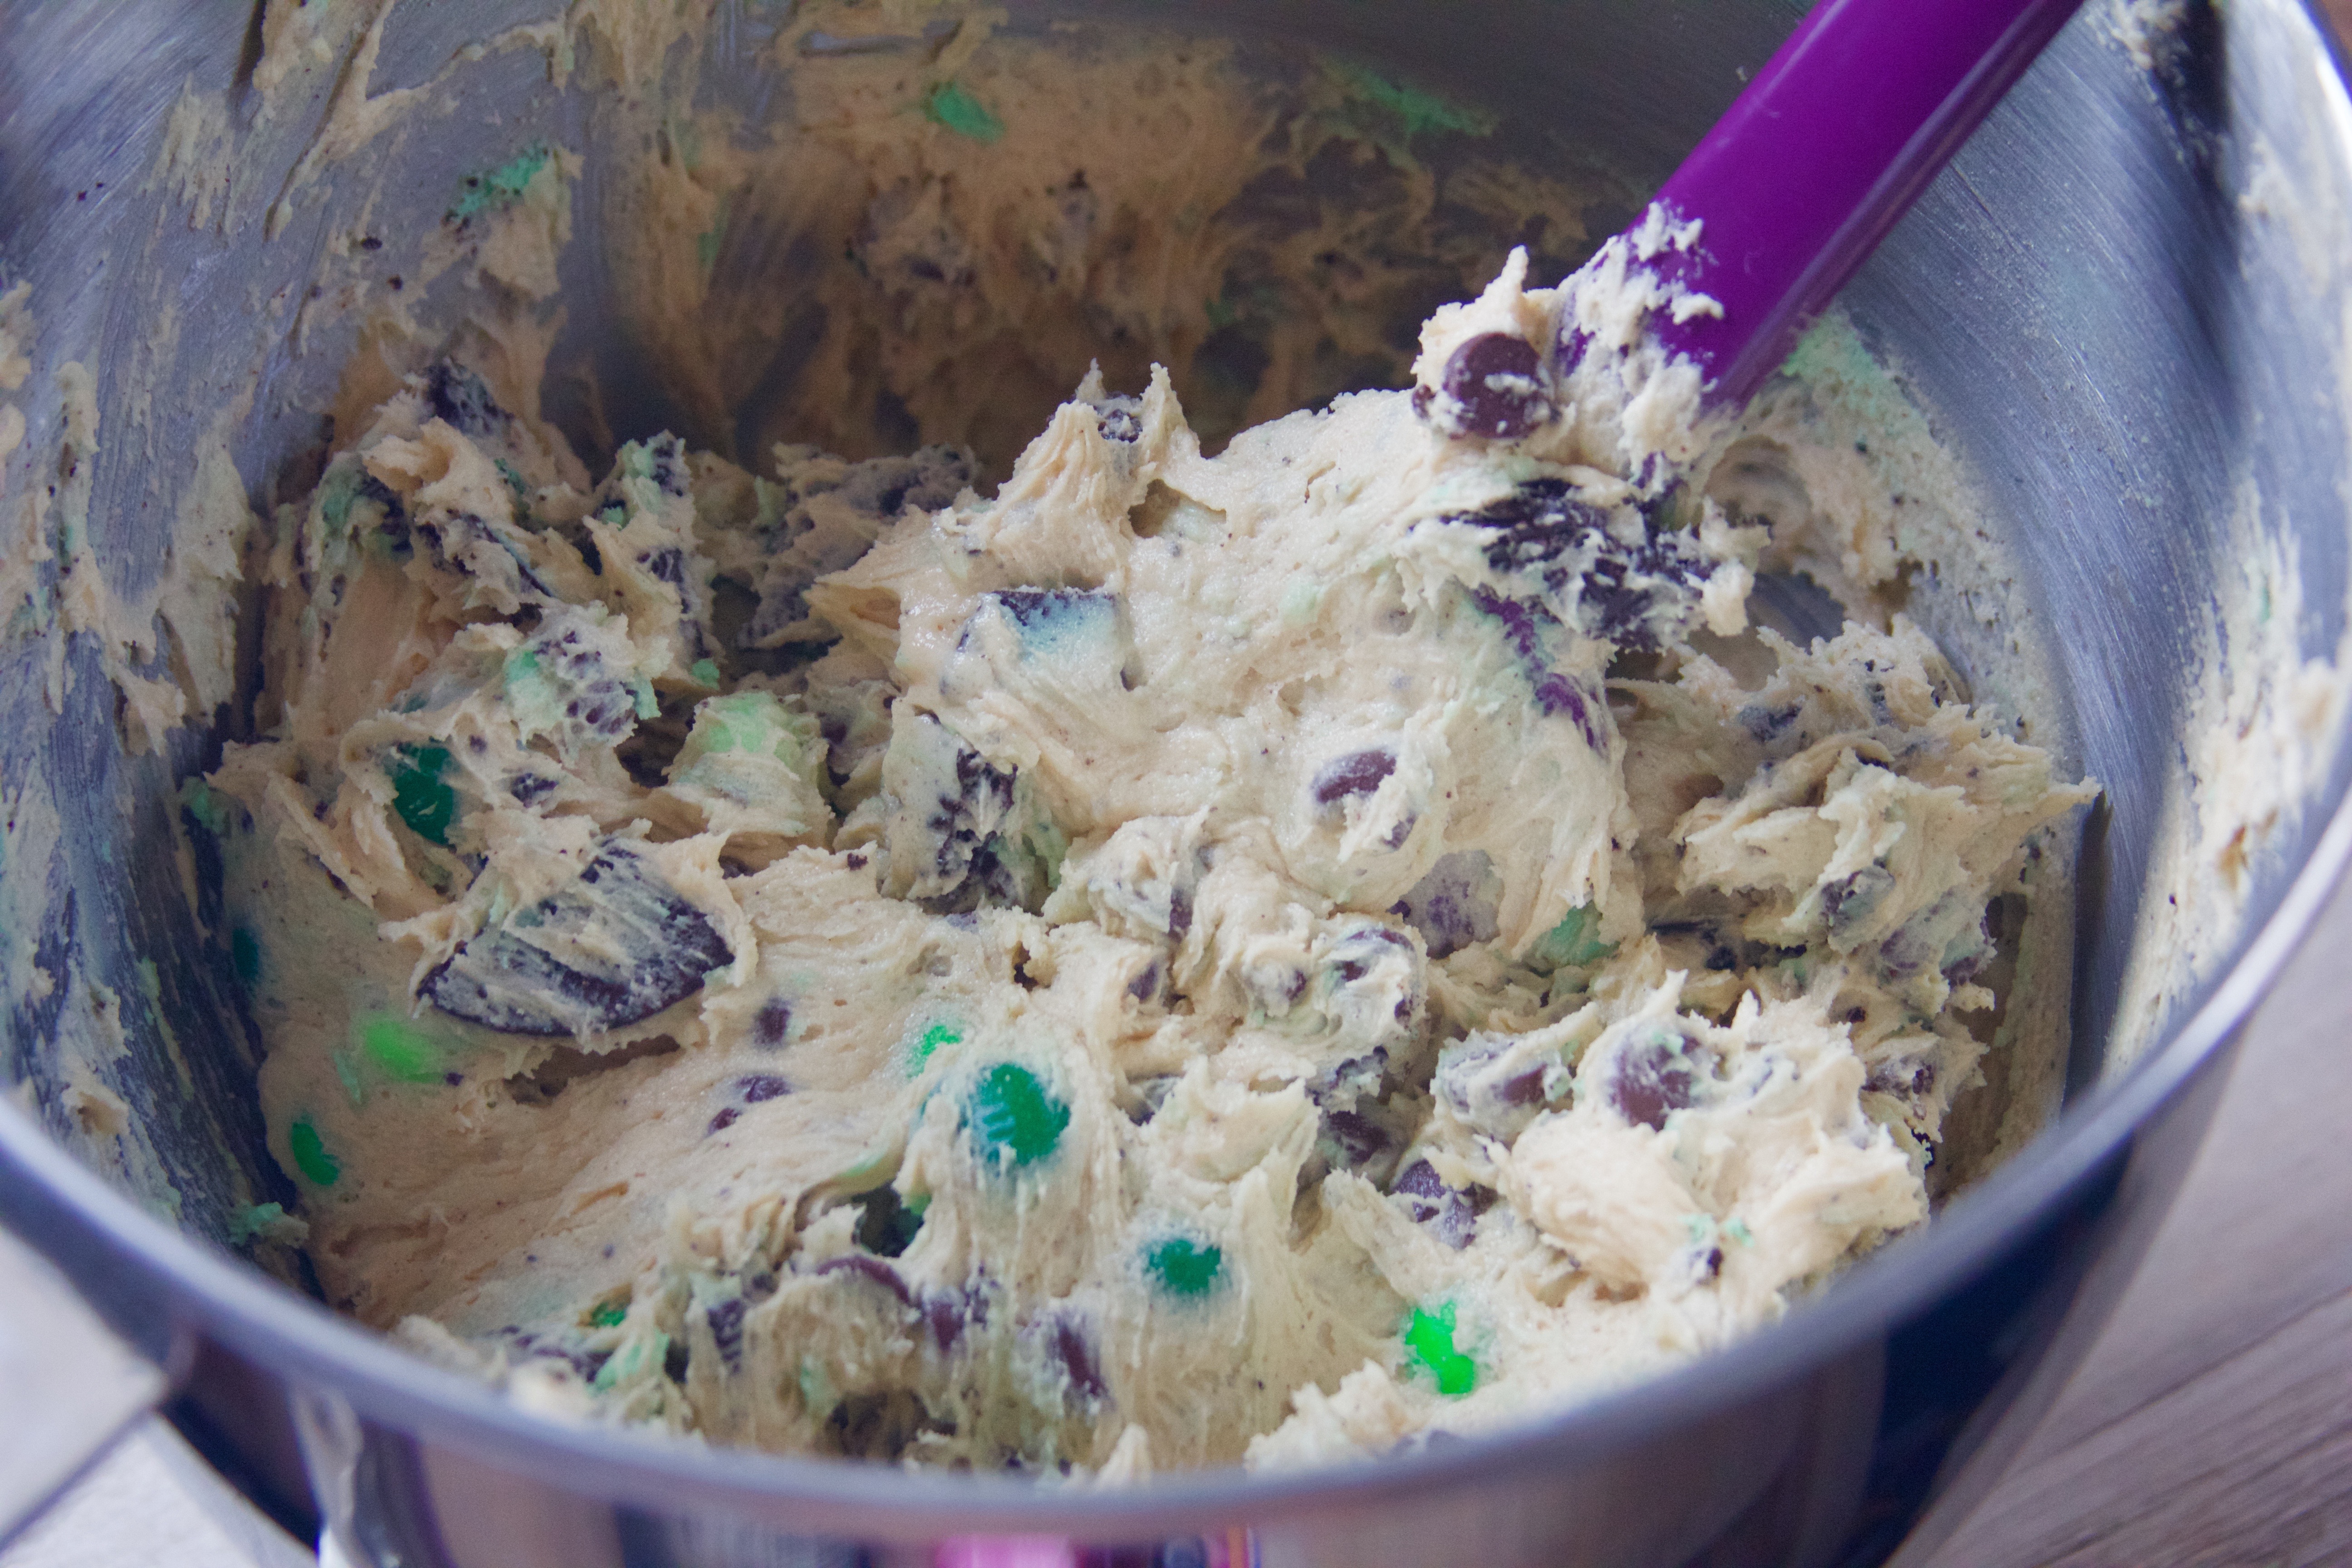
Step Five.
Spread the dough out evenly into your pan. Press the remainder of the M&Ms into the top of the dough. Bake at 350°F for 25 – 30 minutes, or until golden brown. Let the giant cookie cool, then slice up and dig in!
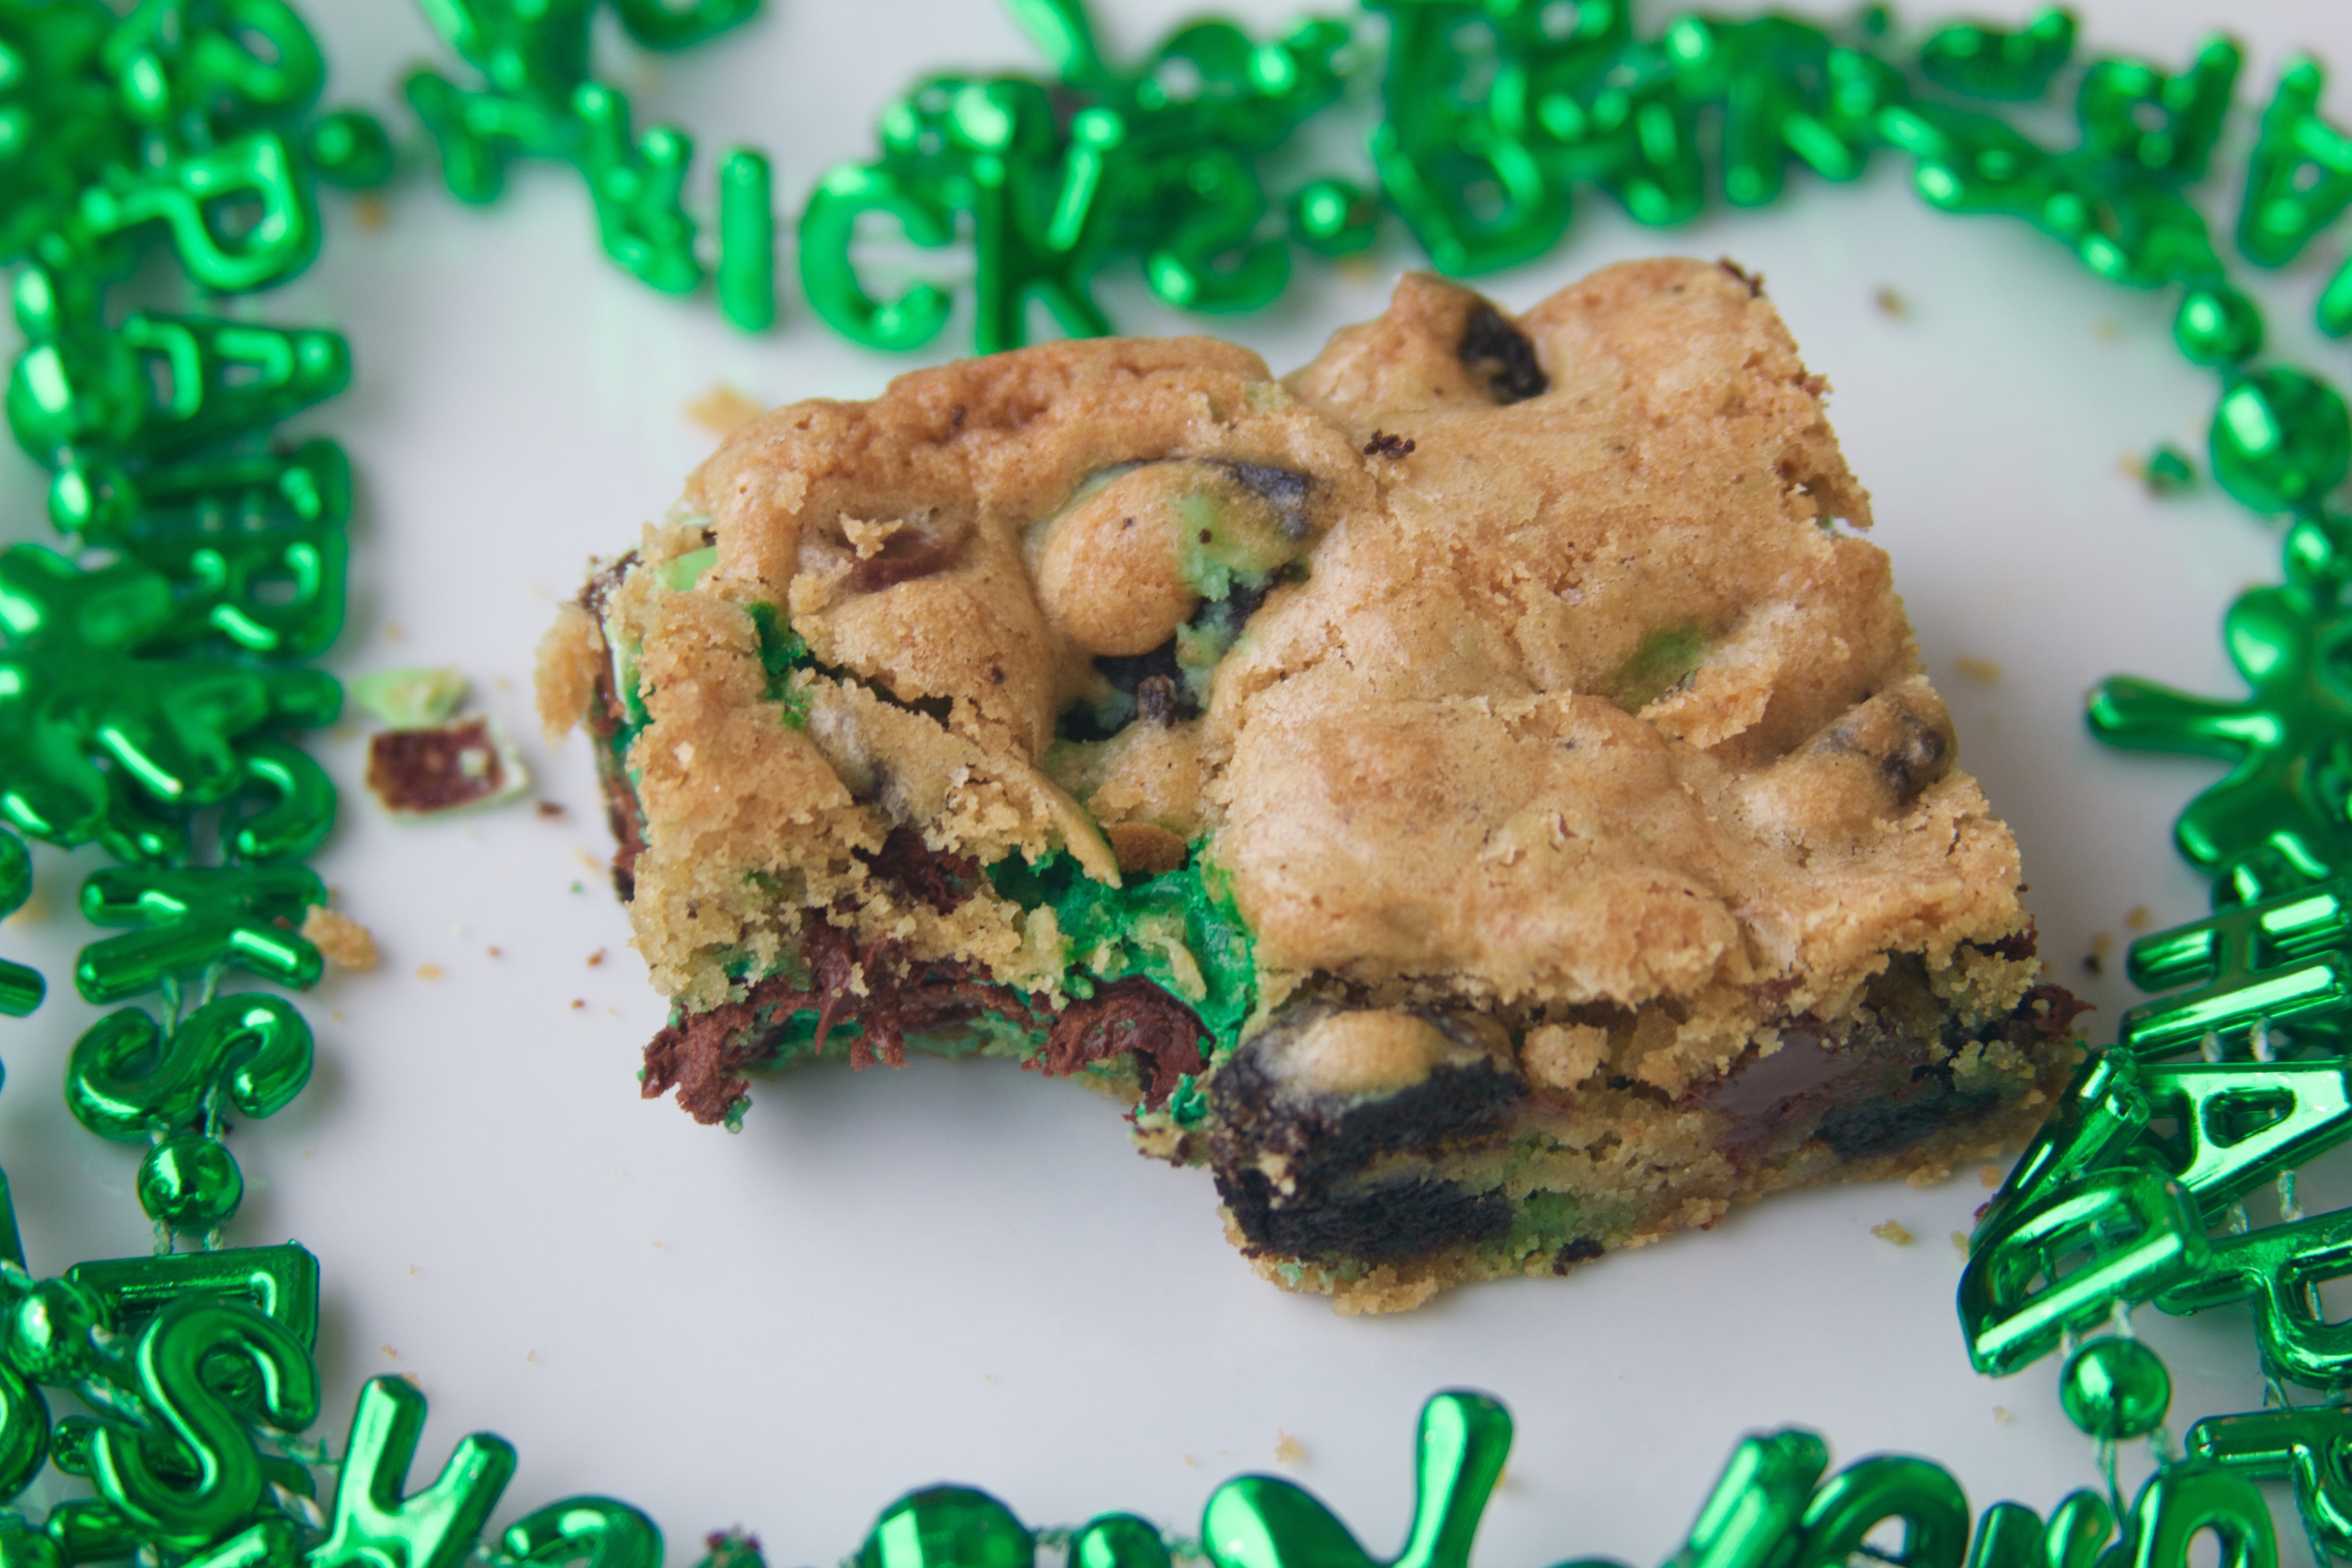

Enjoy a minty take on chocolate cookies to add a little green to St. Patrick's Day treats!
Ingredients
- 1 cup (2 sticks) unsalted butter, softened
- 1 cup brown sugar
- 1/2 cup granulated sugar
- 2 eggs
- 1 tsp vanilla
- 2 1/4 cups all-purpose flour
- 1 tsp salt
- 1 tsp baking soda
- 1 cup chocolate chips
- 1 row of Mint Oreos
- 1 package of Mint M&Ms
Instructions
- Prep step! Measure out your ingredients, and let your butter and eggs come up to room temperature. In a mixing bowl, mix the salt and baking soda into the flour with a fork.
- Preheat your oven to 350°F. Grease a 9x13 pan with butter. Add a Tablespoon or two of sugar to the pan and shake it around to cover the butter so that your cookies don't stick.
- In your mixing bowl, beat the butter on high speed for 3-5 minutes, until it is light in color. Add both sugars to the bowl, and beat again on high for another 3 - 5 minutes until the mixtures is light and fluffy. One at a time, add the eggs to the bowl and beat on medium speed until they are incorporated. Mix in the vanilla.
- In small batches (I do about three), incorporate the flour into the mix on low speed. Dough is ready for the mash-up!
- Chop up the Oreos. The size of the chunk really depends on your personal preference. I like big pieces of cookie in my cookies, so I give it a very rough chop. Add the Oreos, chocolate chips, and 2/3 of the Mint M&Ms to the dough, and fold in with a spatula.
- Spread the dough out evenly into your pan. Press the remainder of the M&Ms into the top of the dough. Bake at 350°F for 25 - 30 minutes, or until golden brown. Let the giant cookie cool, then slice up and dig in!
Notes
*You can cut the cookies as big or as small as you like, depending on your "yield" needs!
This cake says “I love you” like nothing else! It requires lots of love and patience, and the result is a fluffy, delectable creation that not only looks amazing but also tastes even better.
(I really don’t have anything else to say this post…. Most Valentine’s Day posts go on about how great this or that girlfriend, fiancee, husband is…. well…. my cats are doing just fine, thank you, and we will have a wonderful, normal Tuesday together.)
~~~~~~~~~~
THE CHOCOLATE GANACHE
Tip: You want to make the ganache first because it has to cool for a while!
Step One.
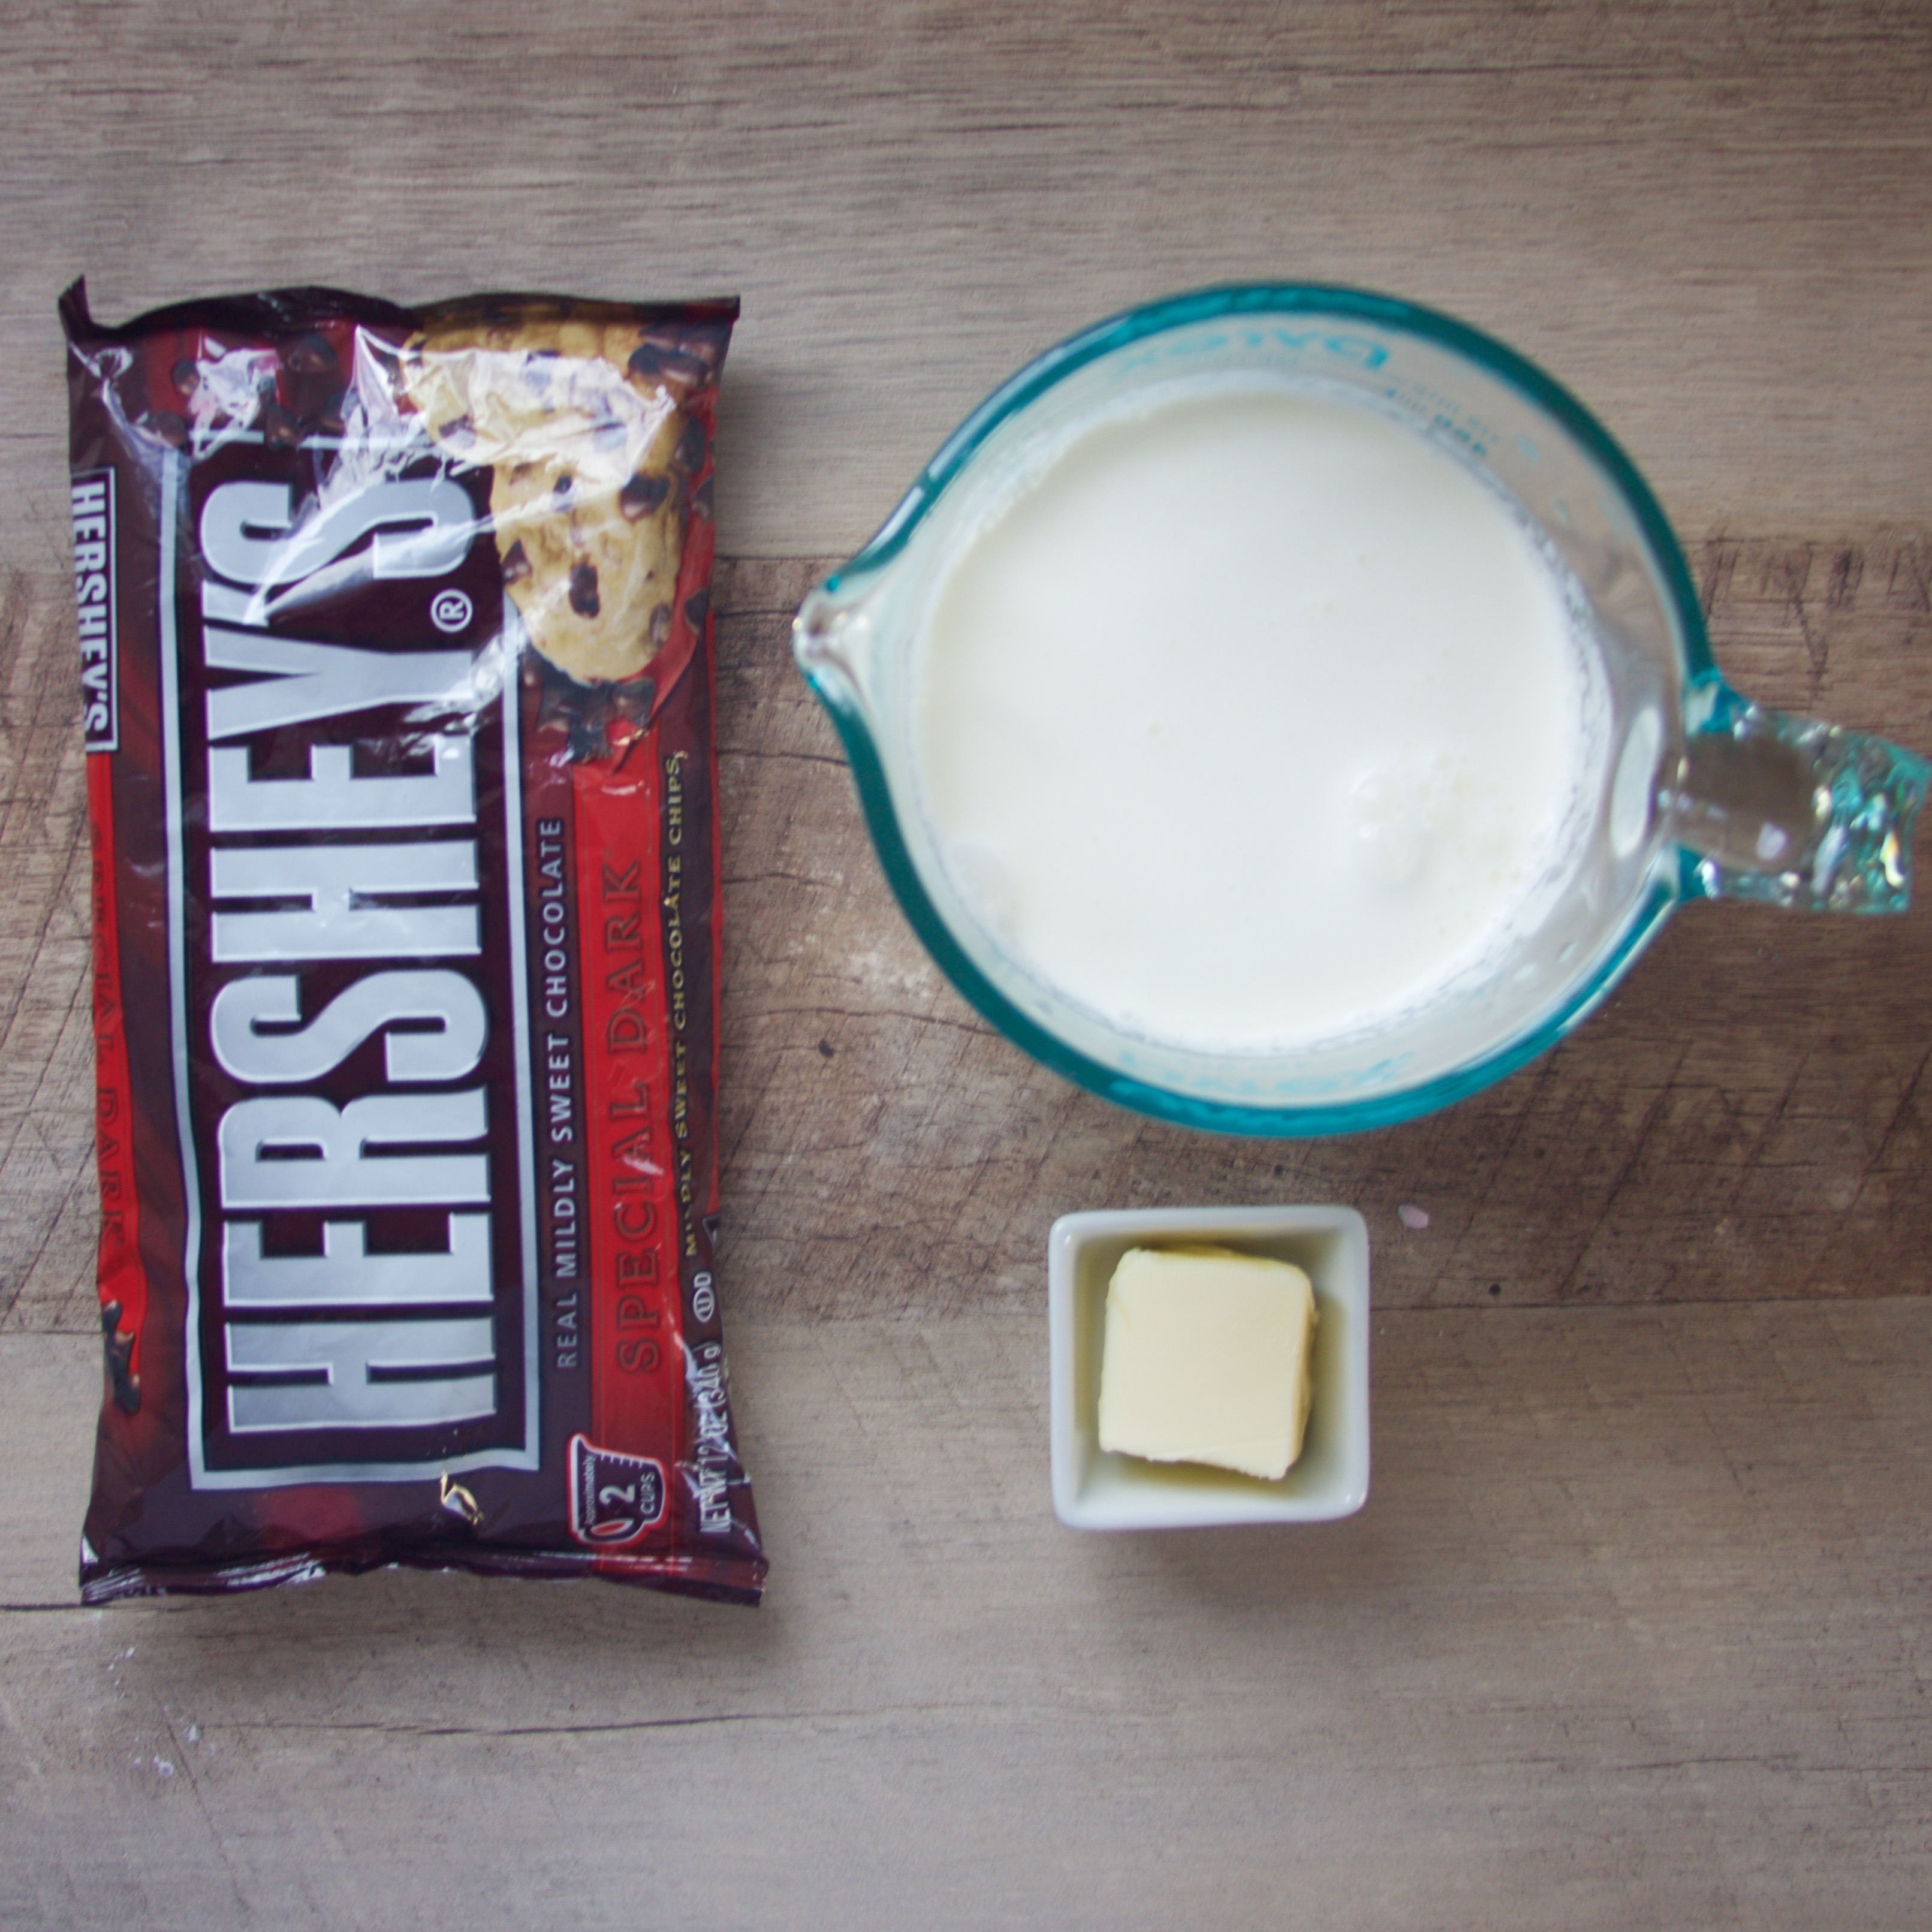
Measure out your ingredients. Heat the heavy whipping cream in a pan or in the microwave until it is hot enough to steam a little bit but not boil. Add the chocolate chips to a sturdy mixing bowl, and pour the hot cream over the chocolate chips. whisk them together until they are melted. Whisk in the butter and stir until it is completely melted. Let it cool at room temperature until it is cool; then, let it cool in the fridge until it is the consistency of frosting.
THE RED VELVET CAKE
Step One.
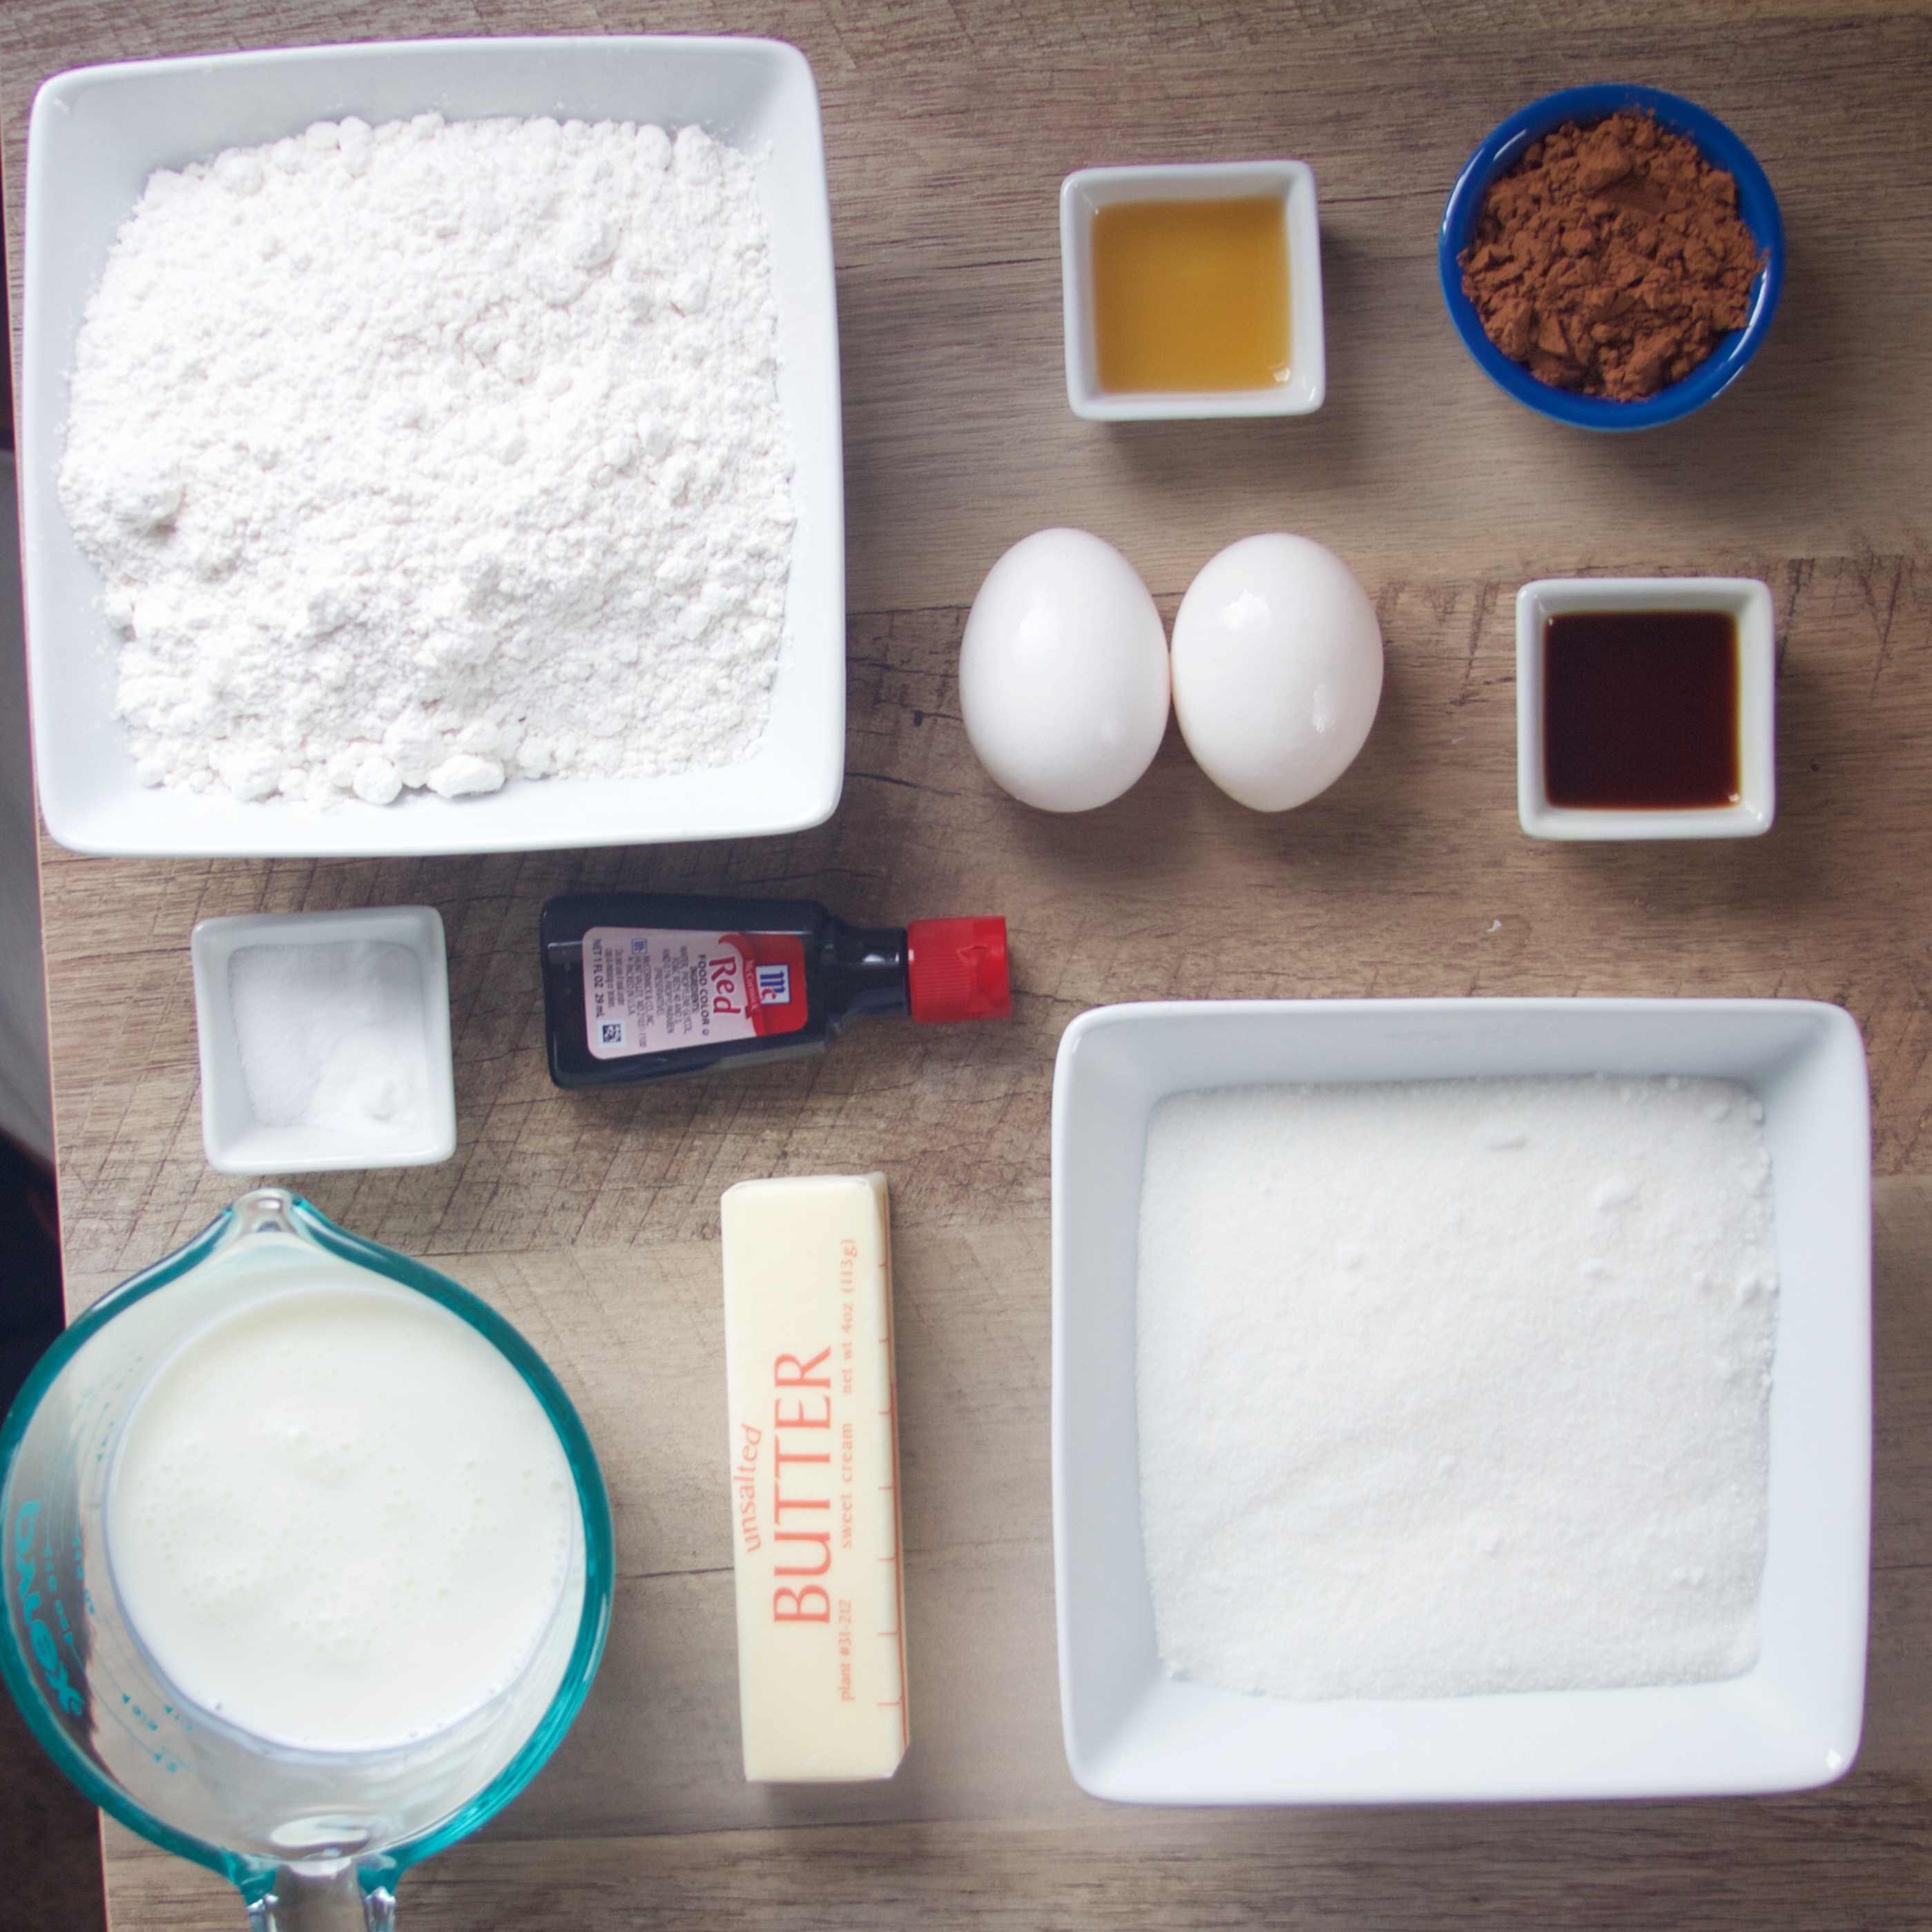
Measure out your ingredients. Cut out parchment to fit the bottoms of four cake pans. Preheat your oven to 350°F.
Step Two.
Mix the dry ingredients together in a bowl. In a mixing bowl, beat the butter on high speed for three minutes, until it is light-colored. Add the sugar to the bowl and beat on high for five minutes, until the mixture is light and fluffy. Scrape down the sides of the bowl.
Step Three.
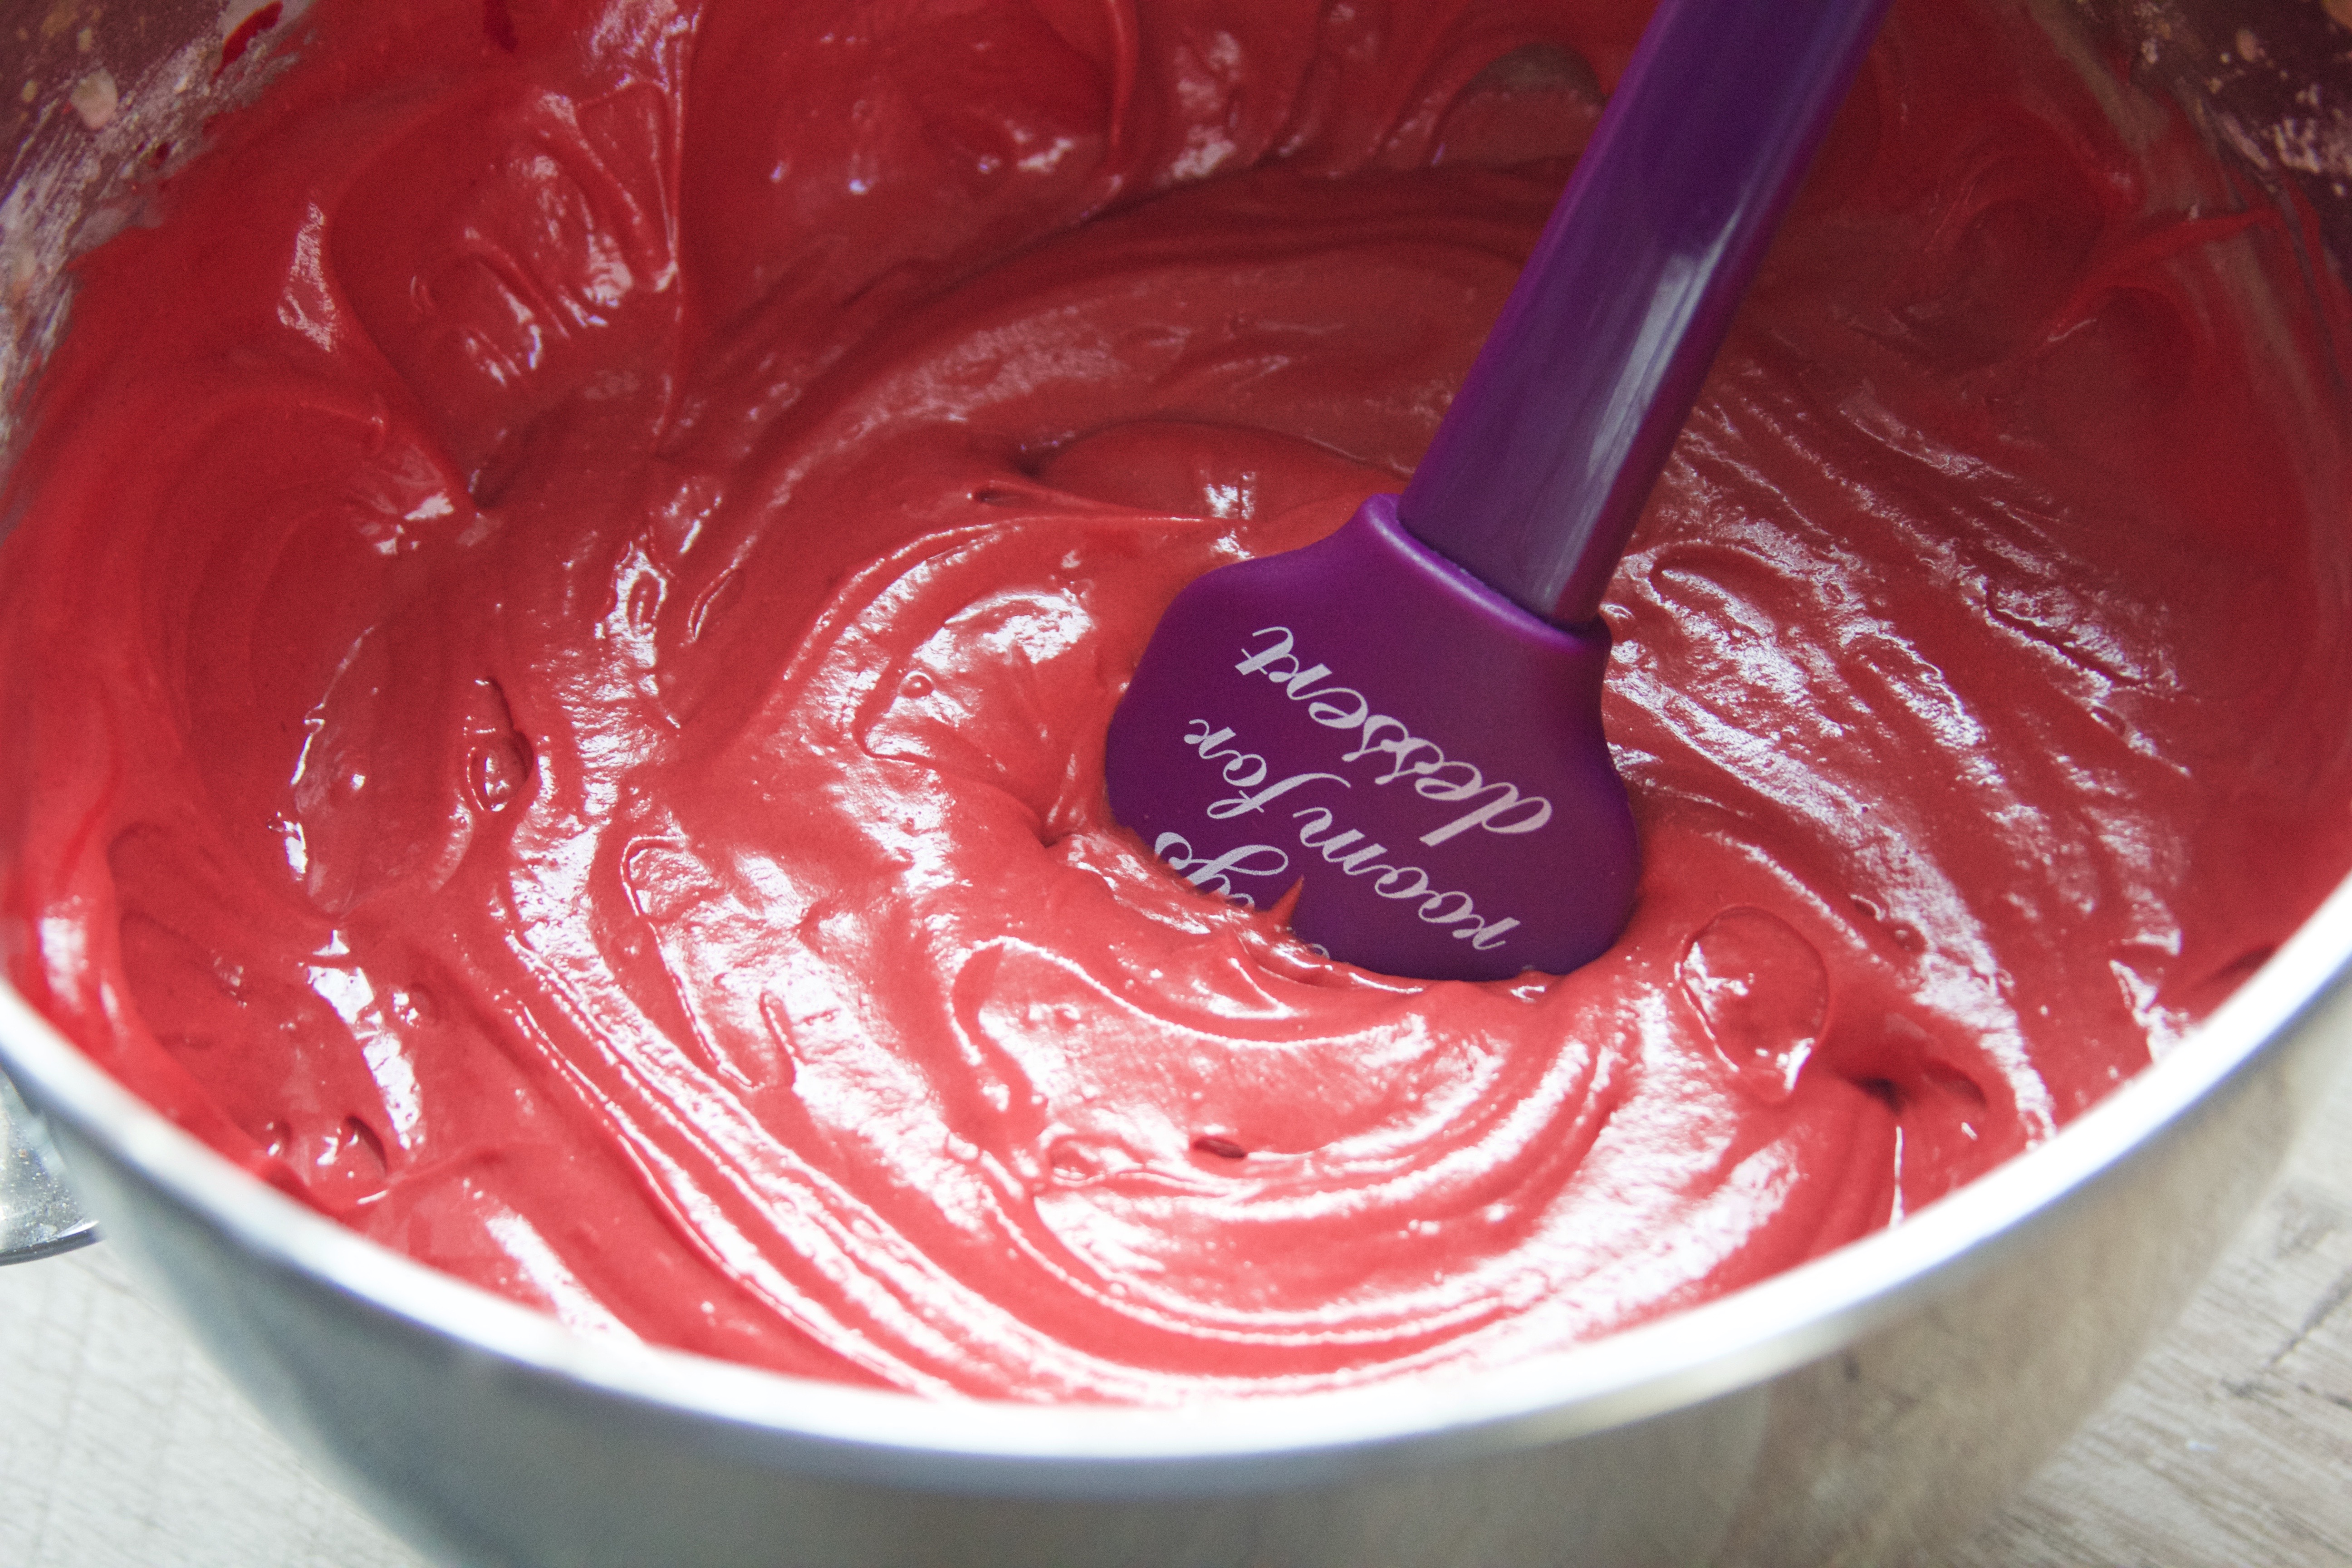
One by one, mix in the eggs on low speed. Add the vanilla and the vinegar and mix in on low speed. Now, working in batches, add the flour mixture and the buttermilk, alternating each. Mix in the red food coloring and beat on medium for one minute.
Step Four.
Add the batter evenly to the pans. Bake at 350°F for about 20 minutes, or until a toothpick inserted in the middle comes out clean. Let the cakes cool to room temperature.
THE WHITE CHOCOLATE MOUSSE
Step One.
Prep your ingredients. Melt the white chocolate in the microwave at 30 second intervals until it is smooth.
Step Two.
Add the heavy whipping cream to a bowl and beat on high for two minutes, until it starts to become fluffy. Add in the powdered sugar and beat until stiff peaks form.
Step Three.
Mix a little of the whipped cream into the chocolate. Next, add that to the bowl of whipped cream and stir in with a spatula. Set aside for assembly.
THE CREAM CHEESE FROSTING
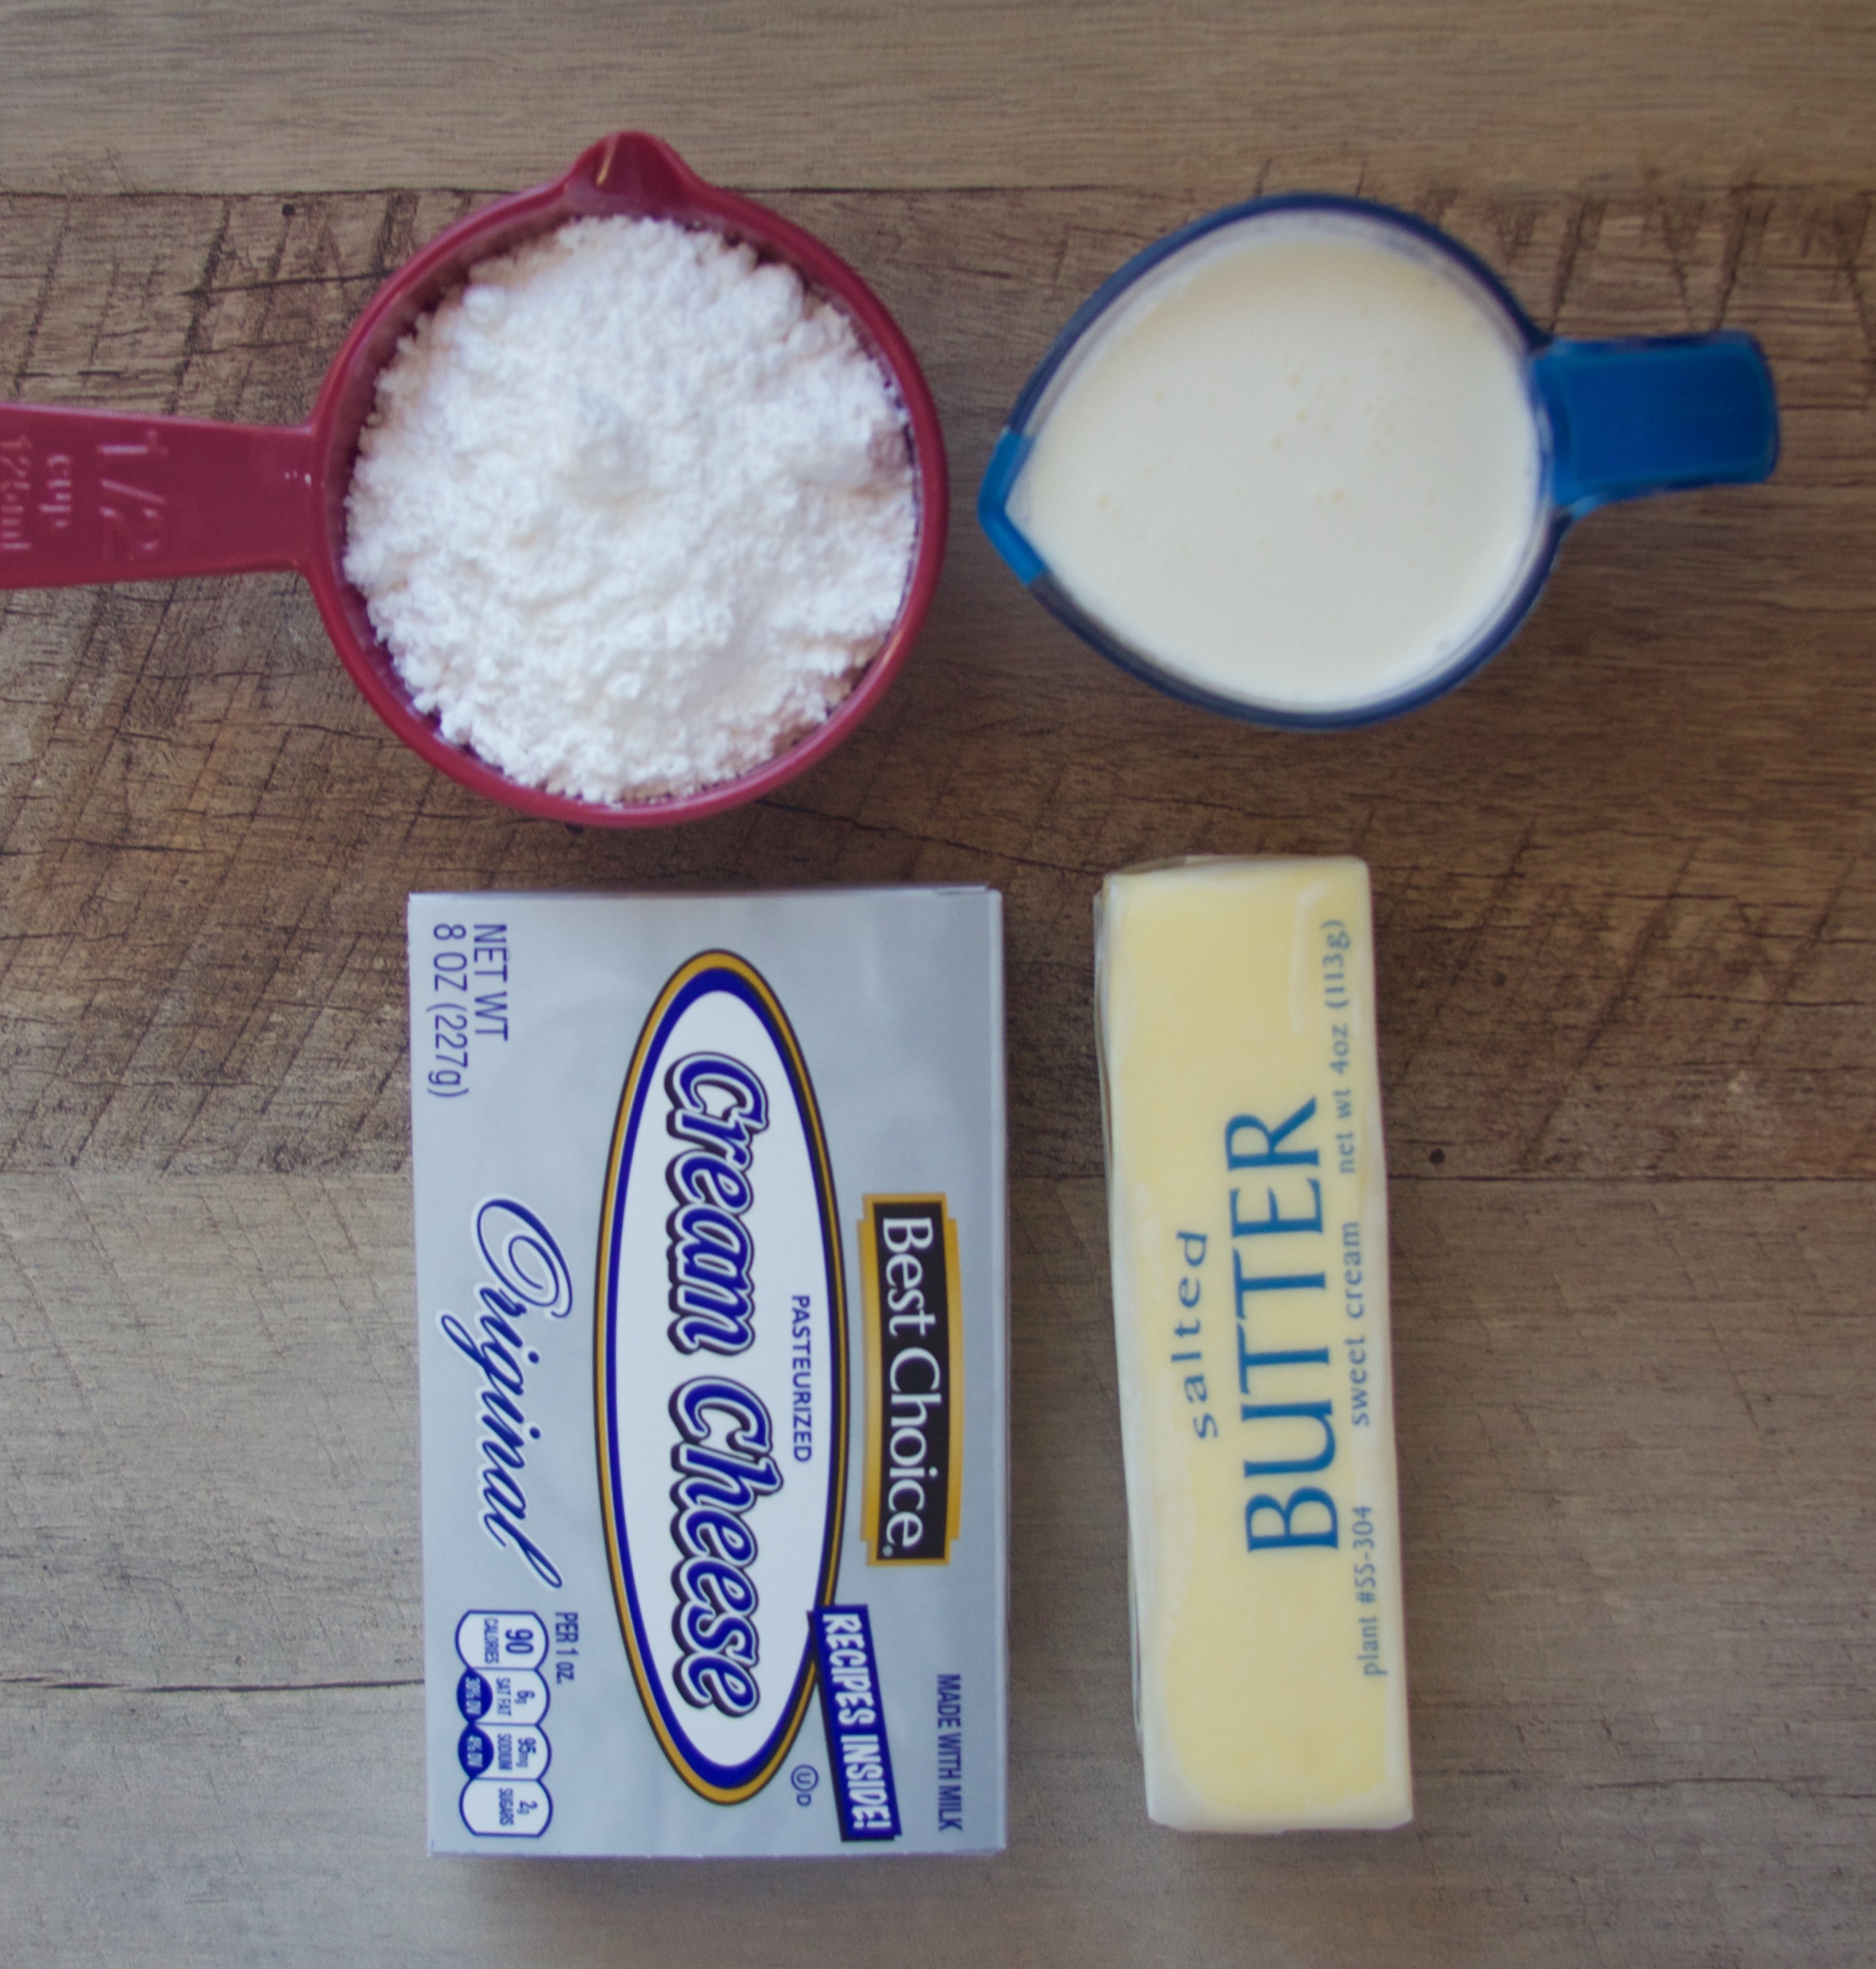
Step One.
Prep your ingredients. Beat the butter and the cream cheese in a mixer on high speed for two minutes.
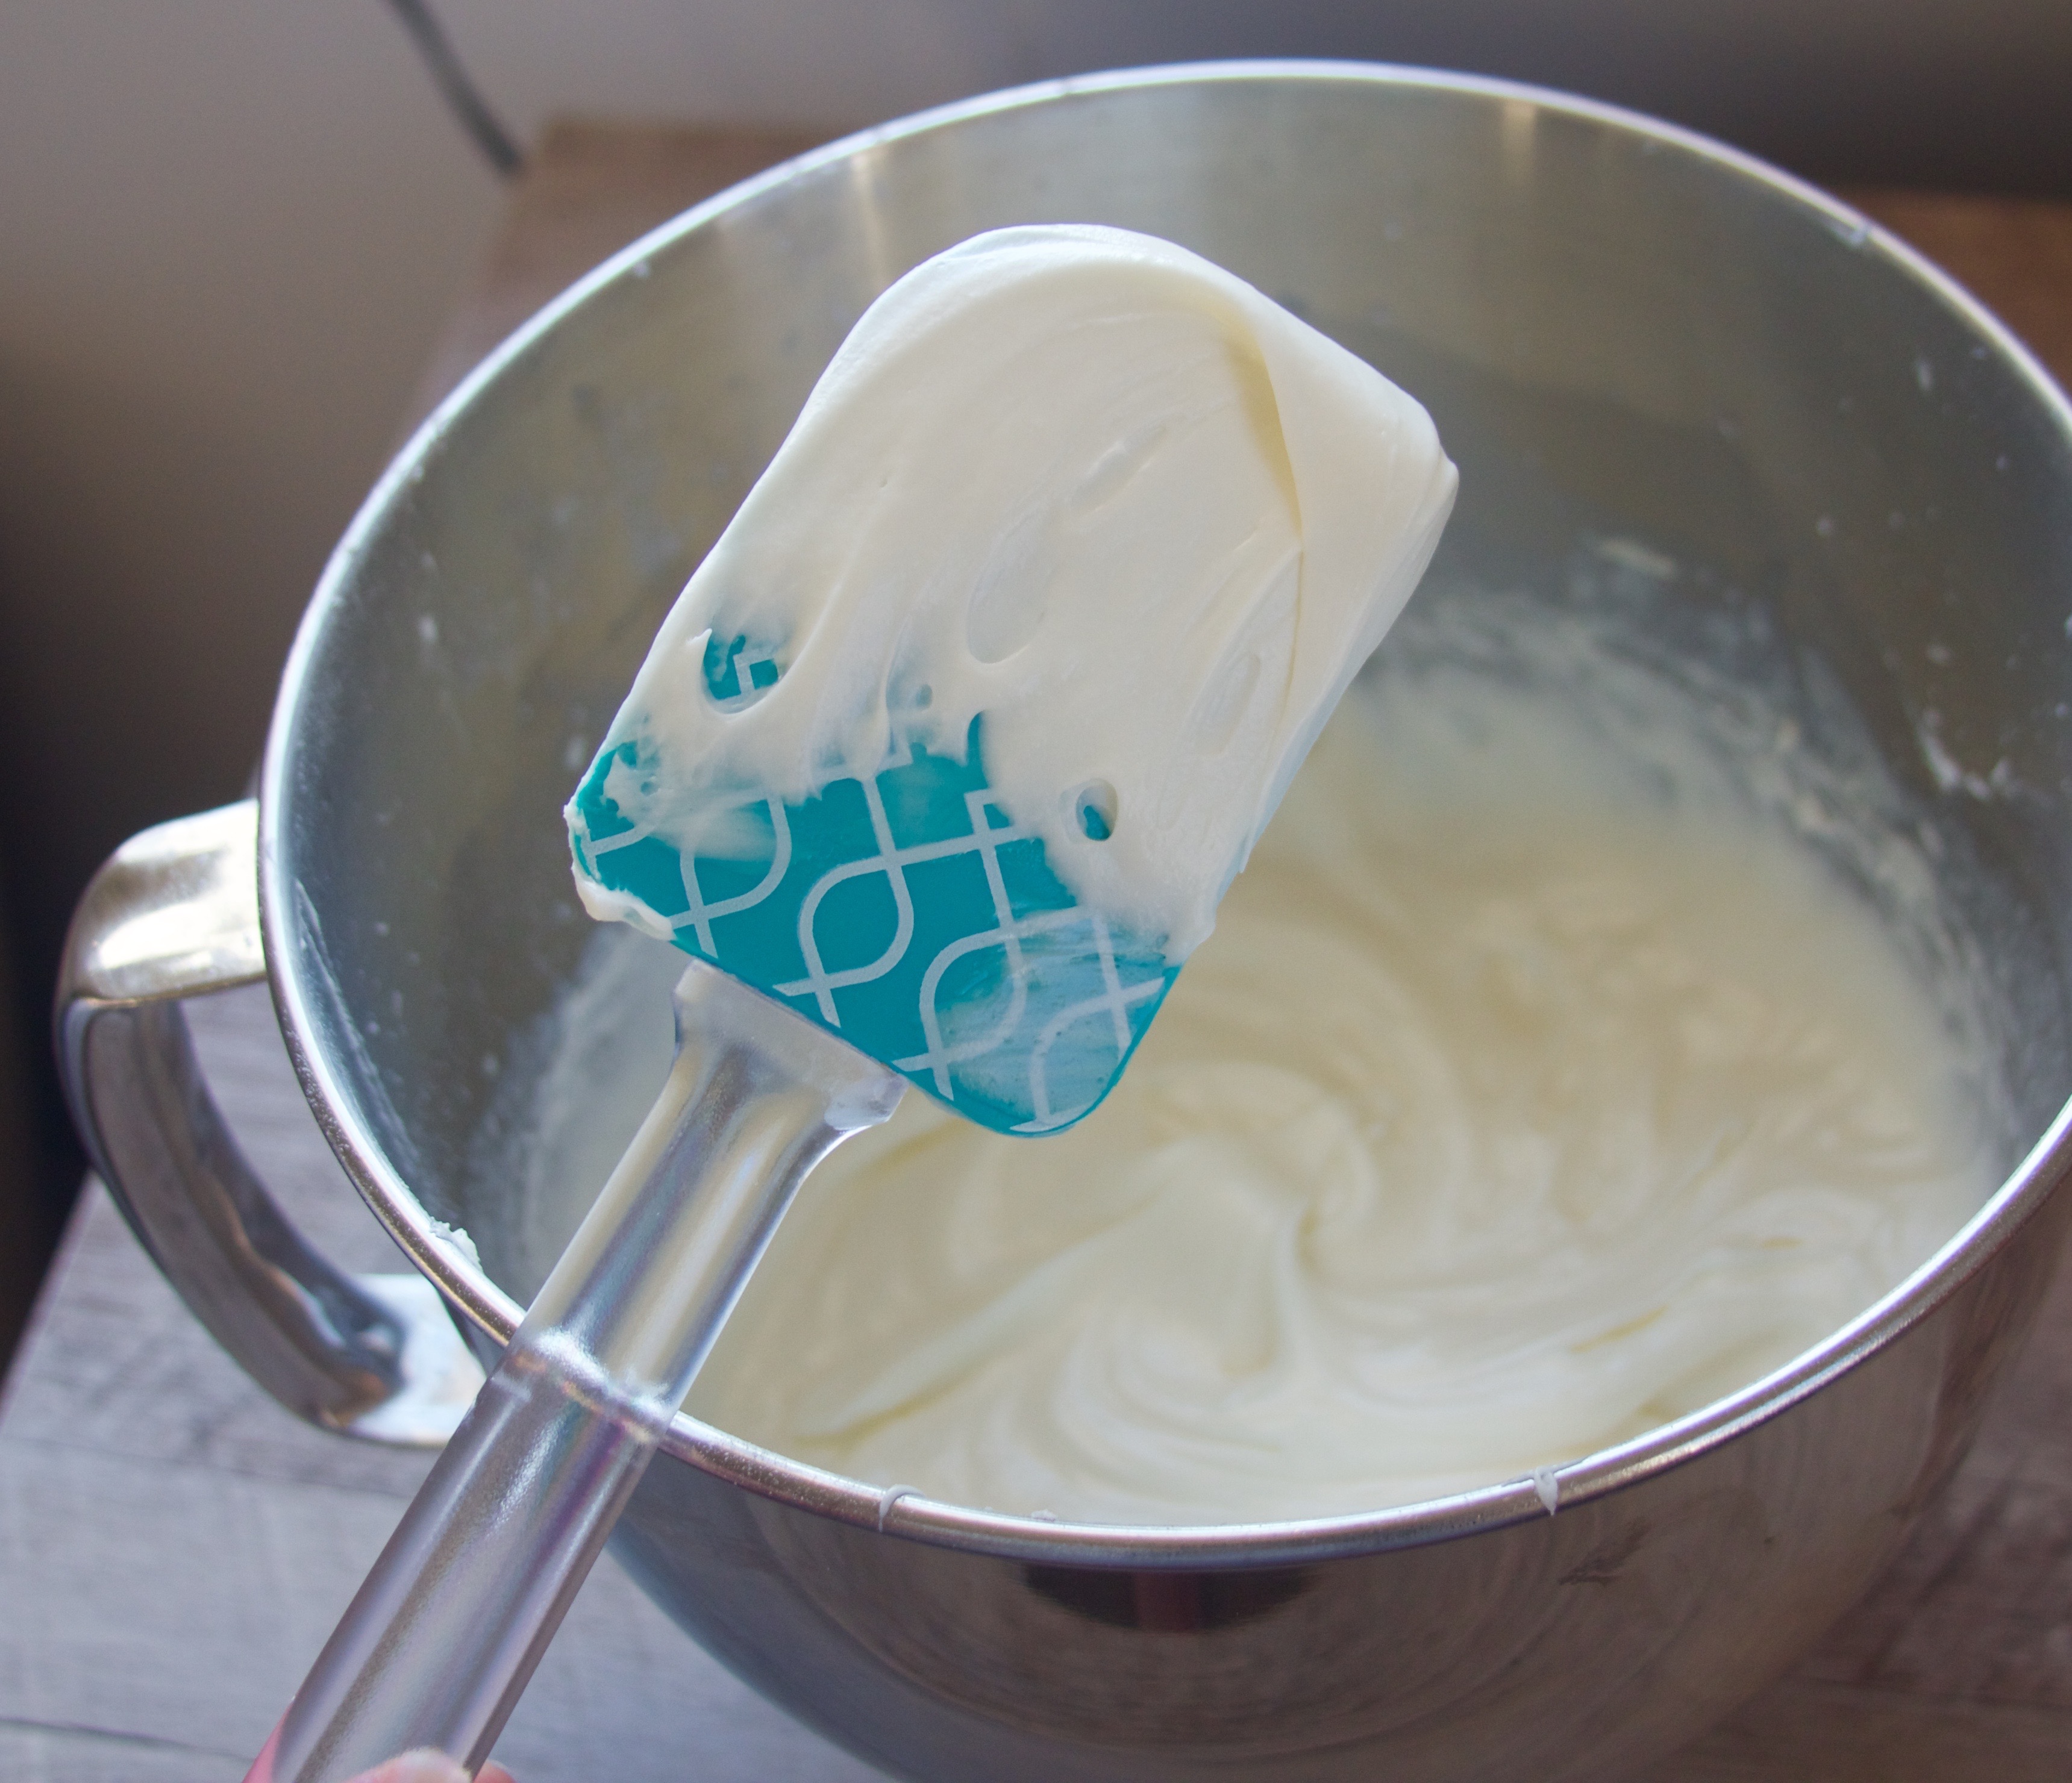
Step Two.
Slowly beat in the powdered sugar, 1 cup at a time, until it is all incorporated. Add the heavy whipping cream and beat on high for another five minutes, until it is thoroughly whipped.
ASSEMBLE THE CAKE
Step One.
Place the first layer of the cake on a decorating turntable (or another plate, if you don’t have one!). Add 1/3 of the mousse to the top. Repeat with the other layers until the cake is complete.
Step Two.
With a frosting spatula, coat the outside of the cake in a “crumb layer.” This is a thin layer of frosting that will seal in the mousse and any crumbs from the cake. Refrigerate the cake for about an hour; this will make it easier to spread the ganache.
Step Three.
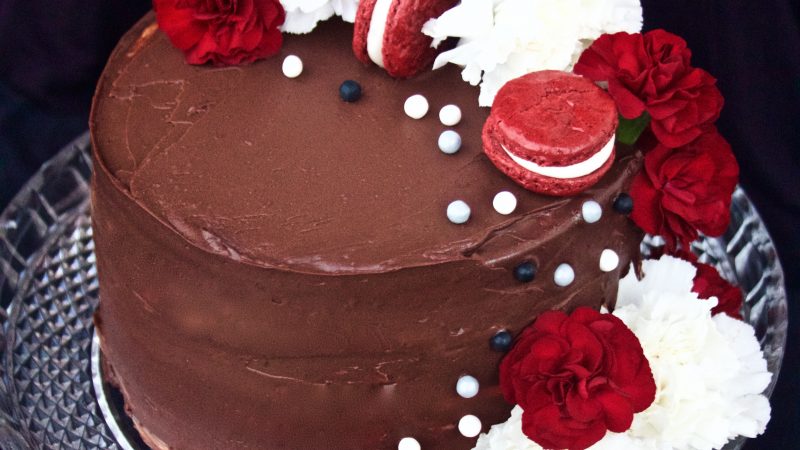
With a frosting spatula, carefully spread the ganache on. Decorate with flowers, sprinkles, whatever you want! Serve with a smile to your Valentine!

This over-the-top red velvet cake is the perfect way to say "I love you" to your special someone!
Ingredients
- THE CHOCOLATE GANACHE
- 12 oz special dark chocolate chips
- 1 3/4 cups heavy whipping cream
- 1 Tbsp unsalted butter
- THE RED VELVET CAKE
- 1/2 cup unsalted butter, softened
- 1 1/2 cups granulated sugar
- 2 eggs
- 1 Tablespoon apple cider vinegar
- 1 Tablespoon vanilla extract
- 2 1/2 cups cake flour
- 2 Tbsp cocoa powder
- 1 tsp salt
- 1 tsp baking powder
- 1 cup buttermilk
- 1 bottle red food coloring
- THE WHITE CHOCOLATE MOUSSE
- 12 oz white chocolate chips
- 2 cups heavy whipping cream
- 1/2 cup powdered sugar
- THE CREAM CHEESE FROSTING
- 8 oz cream cheese, softened
- 1/2 cup butter, softened
- 4 cups powdered sugar
- 1/4 cup heavy whipping cream
Instructions
- THE CHOCOLATE GANACHE
- Measure out your ingredients. Heat the heavy whipping cream in a pan or in the microwave until it is hot enough to steam a little bit but not boil. Add the chocolate chips to a sturdy mixing bowl, and pour the hot cream over the chocolate chips. whisk them together until they are melted. Whisk in the butter and stir until it is completely melted. Let it cool at room temperature until it is cool; then, let it cool in the fridge until it is the consistency of frosting.
- THE RED VELVET CAKE
- Measure out your ingredients. Cut out parchment to fit the bottoms of four cake pans. Preheat your oven to 350°F.
- Mix the dry ingredients together in a bowl. In a mixing bowl, beat the butter on high speed for three minutes, until it is light-colored. Add the sugar to the bowl and beat on high for five minutes, until the mixture is light and fluffy. Scrape down the sides of the bowl.
- One by one, mix in the eggs on low speed. Add the vanilla and the vinegar and mix in on low speed. Now, working in batches, add the flour mixture and the buttermilk, alternating each. Mix in the red food coloring and beat on medium for one minute.
- Add the batter evenly to the pans. Bake at 350°F for about 20 minutes, or until a toothpick inserted in the middle comes out clean. Let the cakes cool to room temperature.
- THE WHITE CHOCOLATE MOUSSE
- Prep your ingredients. Melt the white chocolate in the microwave at 30 second intervals until it is smooth.
- Add the heavy whipping cream to a bowl and beat on high for two minutes, until it starts to become fluffy. Add in the powdered sugar and beat until stiff peaks form.
- Mix a little of the whipped cream into the chocolate. Next, add that to the bowl of whipped cream and stir in with a spatula. Set aside for assembly.
- THE CREAM CHEESE FROSTING
- Prep your ingredients. Beat the butter and the cream cheese in a mixer on high speed for two minutes.
- Slowly beat in the powdered sugar, 1 cup at a time, until it is all incorporated. Add the heavy whipping cream and beat on high for another five minutes, until it is thoroughly whipped.
- ASSEMBLE THE CAKE
- Place the first layer of the cake on a decorating turntable (or another plate, if you don't have one!). Add 1/3 of the mousse to the top. Repeat with the other layers until the cake is complete.
- With a frosting spatula, coat the outside of the cake in a "crumb layer." This is a thin layer of frosting that will seal in the mousse and any crumbs from the cake. Refrigerate the cake for about an hour; this will make it easier to spread the ganache.
- With a frosting spatula, carefully spread the ganache on. Decorate with flowers, sprinkles, whatever you want! Serve with a smile to your Valentine!
Valentine’s Day is just around the corner! Granted, I don’t care for the holiday that much, but it’s a great excuse to bake delicious treats!
What baked good says “I love you” for you? I really enjoy red velvet, and that color is on point with the theme of the holiday.
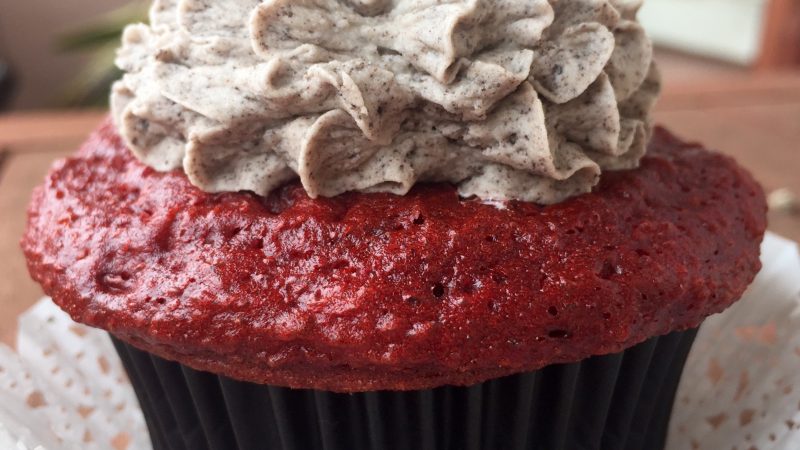
If you’re having a romantic dinner, you probably want something fancier than a cupcake for dessert. But if you’re celebrating with your friends or baking a treat to bring in to school for the kids or the adults at work, these are a great choice!
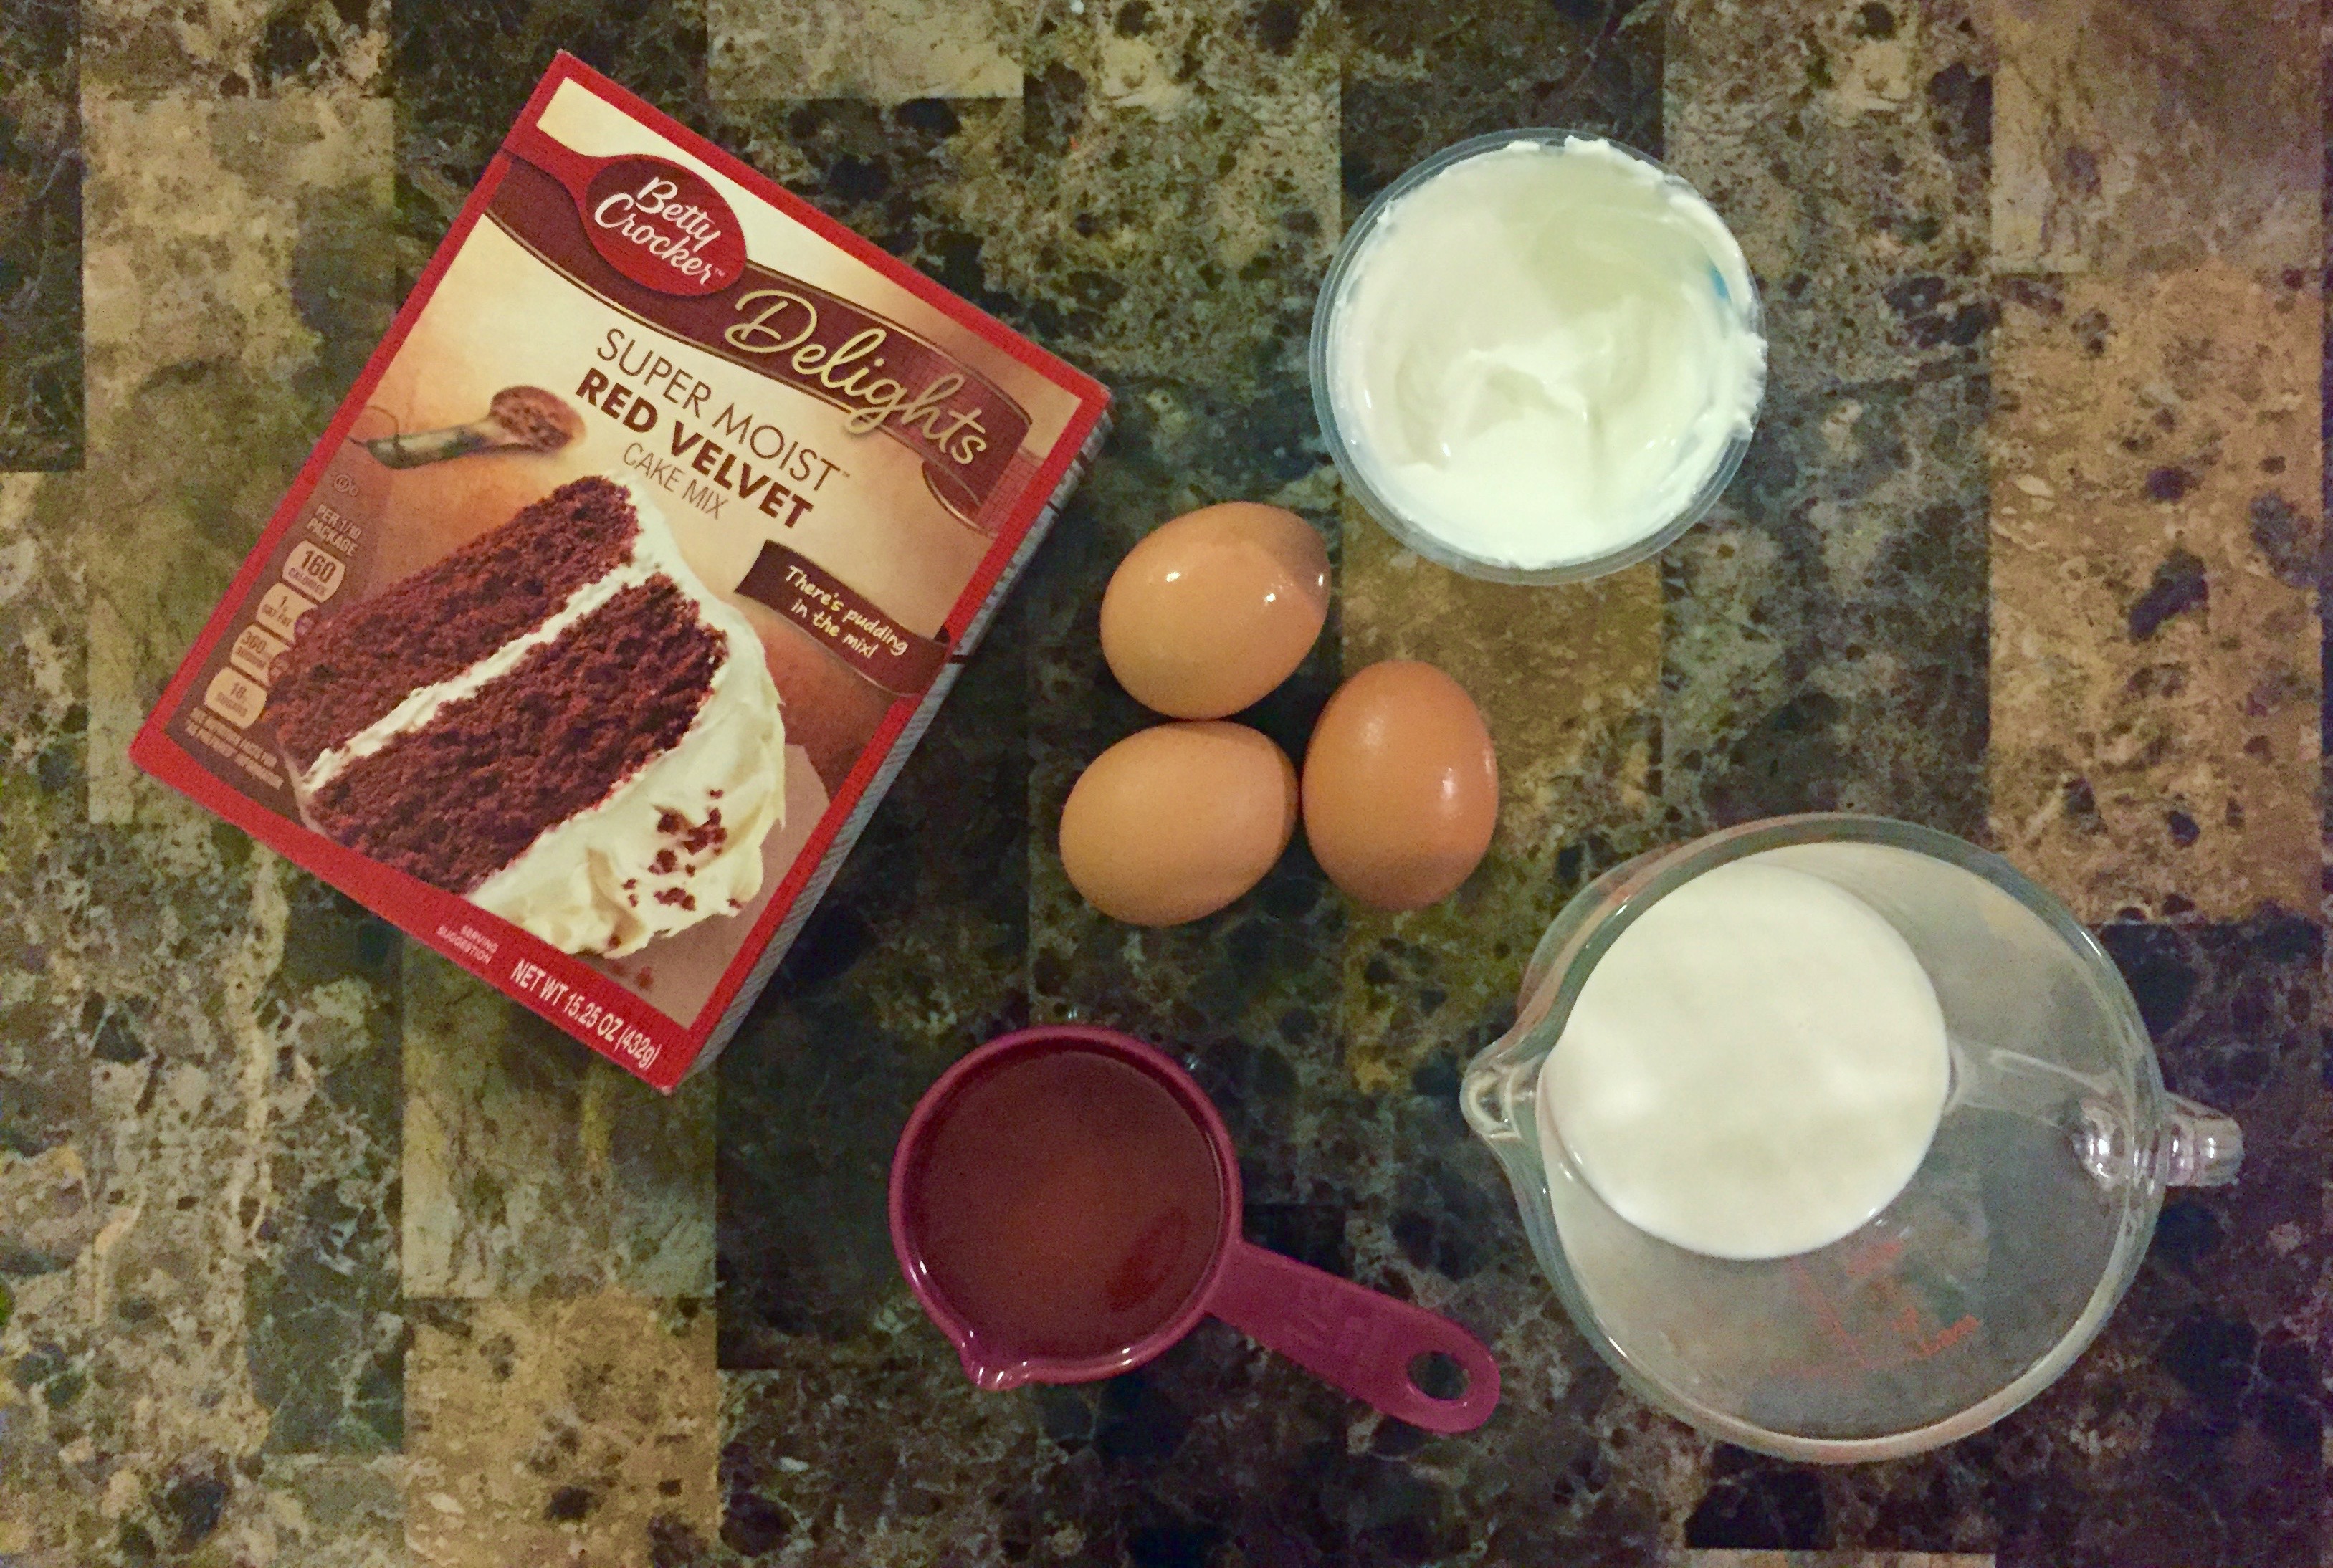
They CHEAT! Shhhhhh don’t tell anyone. The base of these cupcakes is a box mix, making the recipe super easy. But the add-ins are fancy enough to transform the cake into something that tastes like it’s just from scratch! Which gives you more time to make individualized & adorable cards!
~~~~~~~~~~
Step One.
Prep Step! Measure out your ingredients and preheat your over to 350°F. Line a cupcake tin with your favorite wrappers.
Step Two.
Add the cake mix to your mixer; mix in the oil on a low speed, until incorporated. Beat in the eggs, one at a time, on medium speed. Next, beat in the yogurt until the batter is smooth. Slowly mix in the milk.
Step Three.
Fill the cupcake wrapper with batter. Bake at 350°F for about 20 minutes, or until a toothpick inserted in the center comes out clean. Let the cupcakes cool.

Step Four.
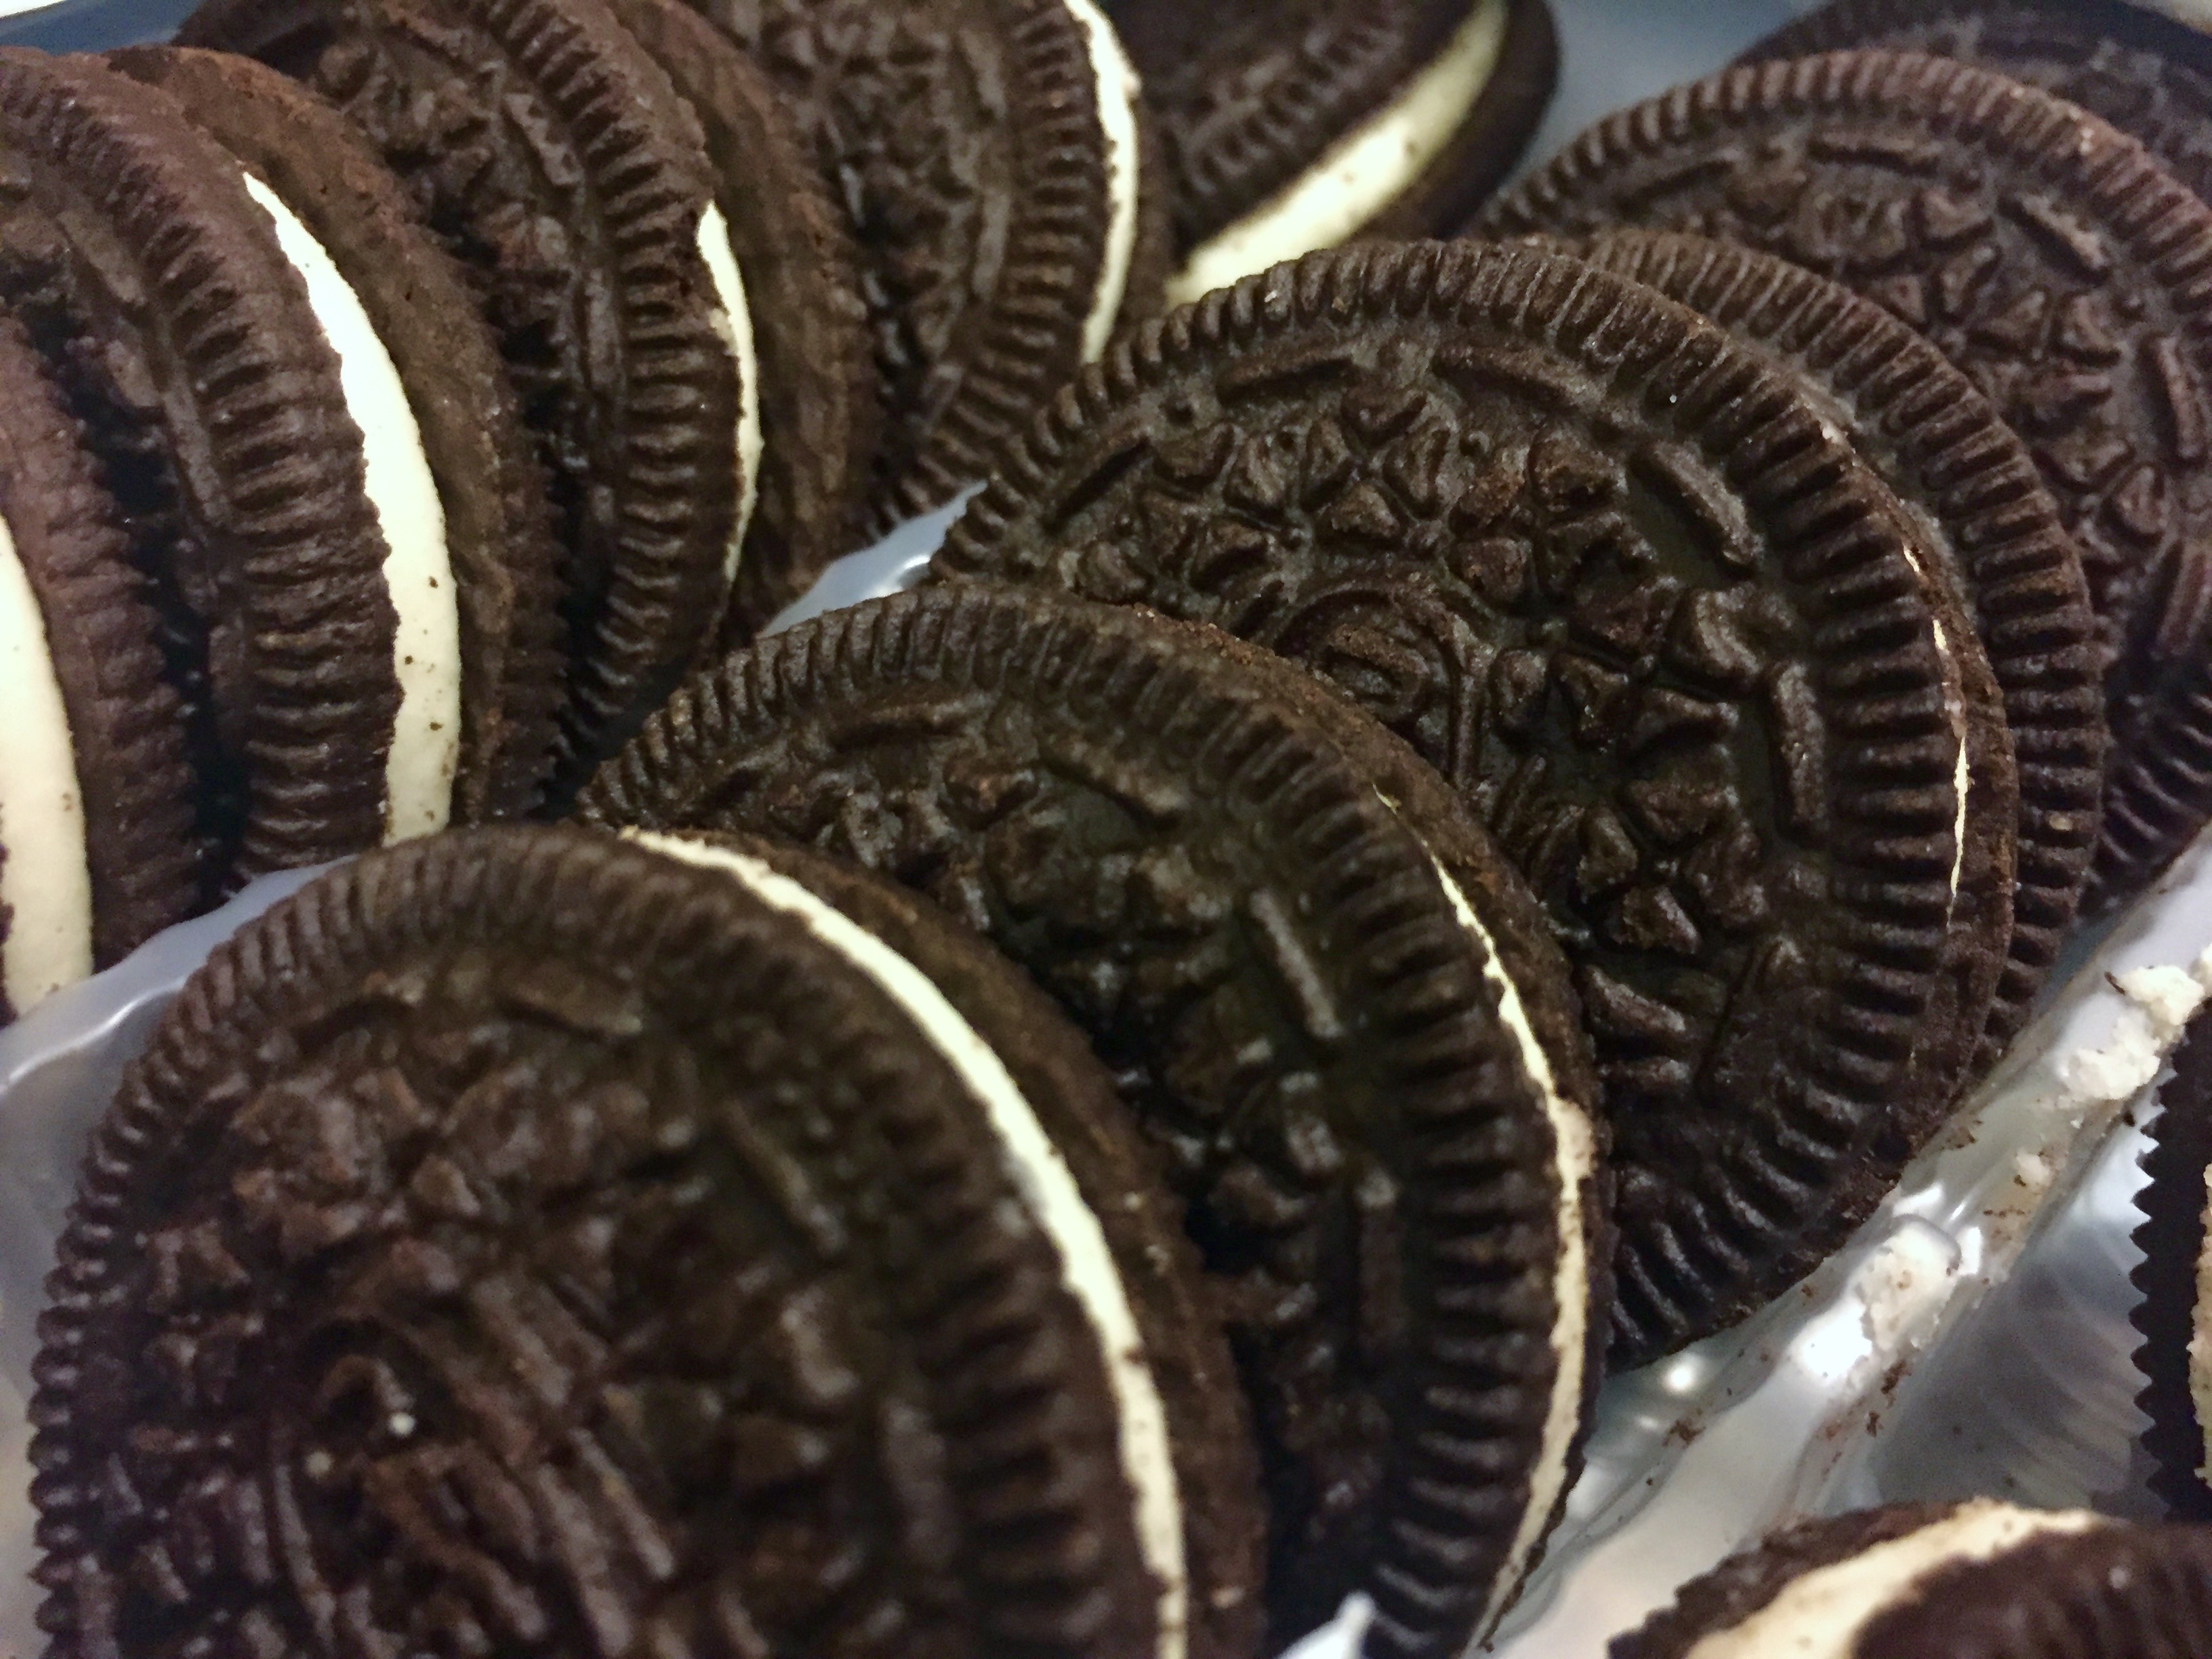
While the cupcakes cool, prepare the frosting. Process the Oreos in a food processor until they are completely crumbled. You may choose to keep bigger pieces in the frosting, but then you are going to have a hard time piping!
Step Five.
Beat the butter on high speed in a mixer fitted with the whisk attachment for about 2 minutes, until it is light. In small batches, beat in the powdered sugar. Next, beat in the heavy whipping cream. Mix in the Oreo crumbles and beat the frosting on high speed until light and fluffy. Add your frosting to a frosting bag fired with a wide star tip (in case there are still some larger pieces of cookie that could clog the tip!)
Step Six.
Now that the cupcakes are cool, core out the middle (either with a fancy-schmancy cupcake corer or a paring knife) and filling with marshmallow creme. Pipe frosting on top liberally. Decorate with leftover Oreos, if you want to, and enjoy your treat!

Nothing says "I Love You" like red velvet! Enjoy these treats for Valentine's Day or for year-round deliciousness!
Ingredients
- Red Velvet Cupcakes
- 1 box red velvet cake mix
- 1/3 cup canola oil (or vegetable oil)
- 3 eggs
- 1/2 cup (1 contained) nonfat Greek yogurt
- 2/3 cup whole milk
- Filling
- 1 tub marshmallow creme
- Cookies & Cream Frosting
- 1 cup unsalted butter
- 2 1/2 cups powdered sugar
- 1/4 cup heavy whelping cream
- 1 tray of Oreos (minus about four for decorating)
Instructions
- Pre Step! Measure out your ingredients and preheat your over to 350°F. Line a cupcake tin with your favorite wrappers.
- Add the cake mix to your mixer; mix in the oil on a low speed, until incorporated. Beat in the eggs, one at a time, on medium speed. Next, beat in the yogurt until the batter is smooth. Slowly mix in the milk.
- Fill the cupcake wrapper with batter. Bake at 350°F for about 20 minutes, or until a toothpick inserted in the center comes out clean. Let the cupcakes cool.
- While the cupcakes cool, prepare the frosting. Process the Oreos in a food processor until they are completely crumbled. You may choose to keep bigger pieces in the frosting, but then you are going to have a hard time piping!
- Beat the butter on high speed in a mixer fitted with the whisk attachment for about 2 minutes, until it is light. In small batches, beat in the powdered sugar. Next, beat in the heavy whipping cream. Mix in the Oreo crumbles and beat the frosting on high speed until light and fluffy. Add your frosting to a frosting bag fired with a wide star tip (in case there are still some larger pieces of cookie that could clog the tip!)
- Now that the cupcakes are cool, core out the middle (either with a fancy-schmancy cupcake corer or a paring knife) and filling with marshmallow creme. Pipe frosting on top liberally. Decorate with leftover Oreos, if you want to, and enjoy your treat!
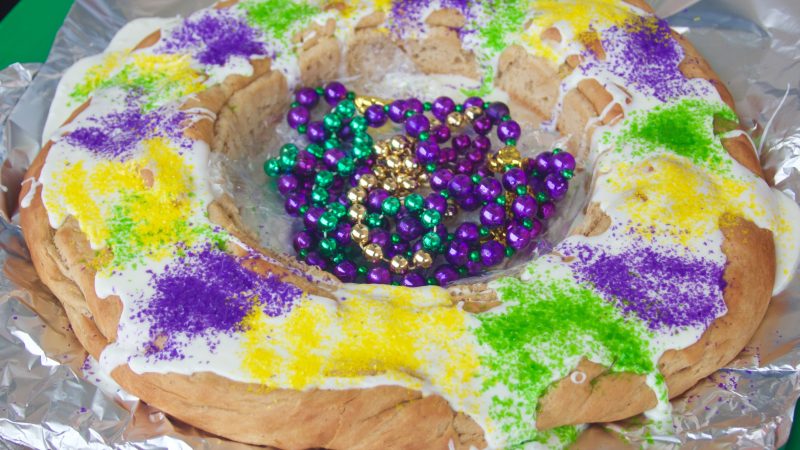
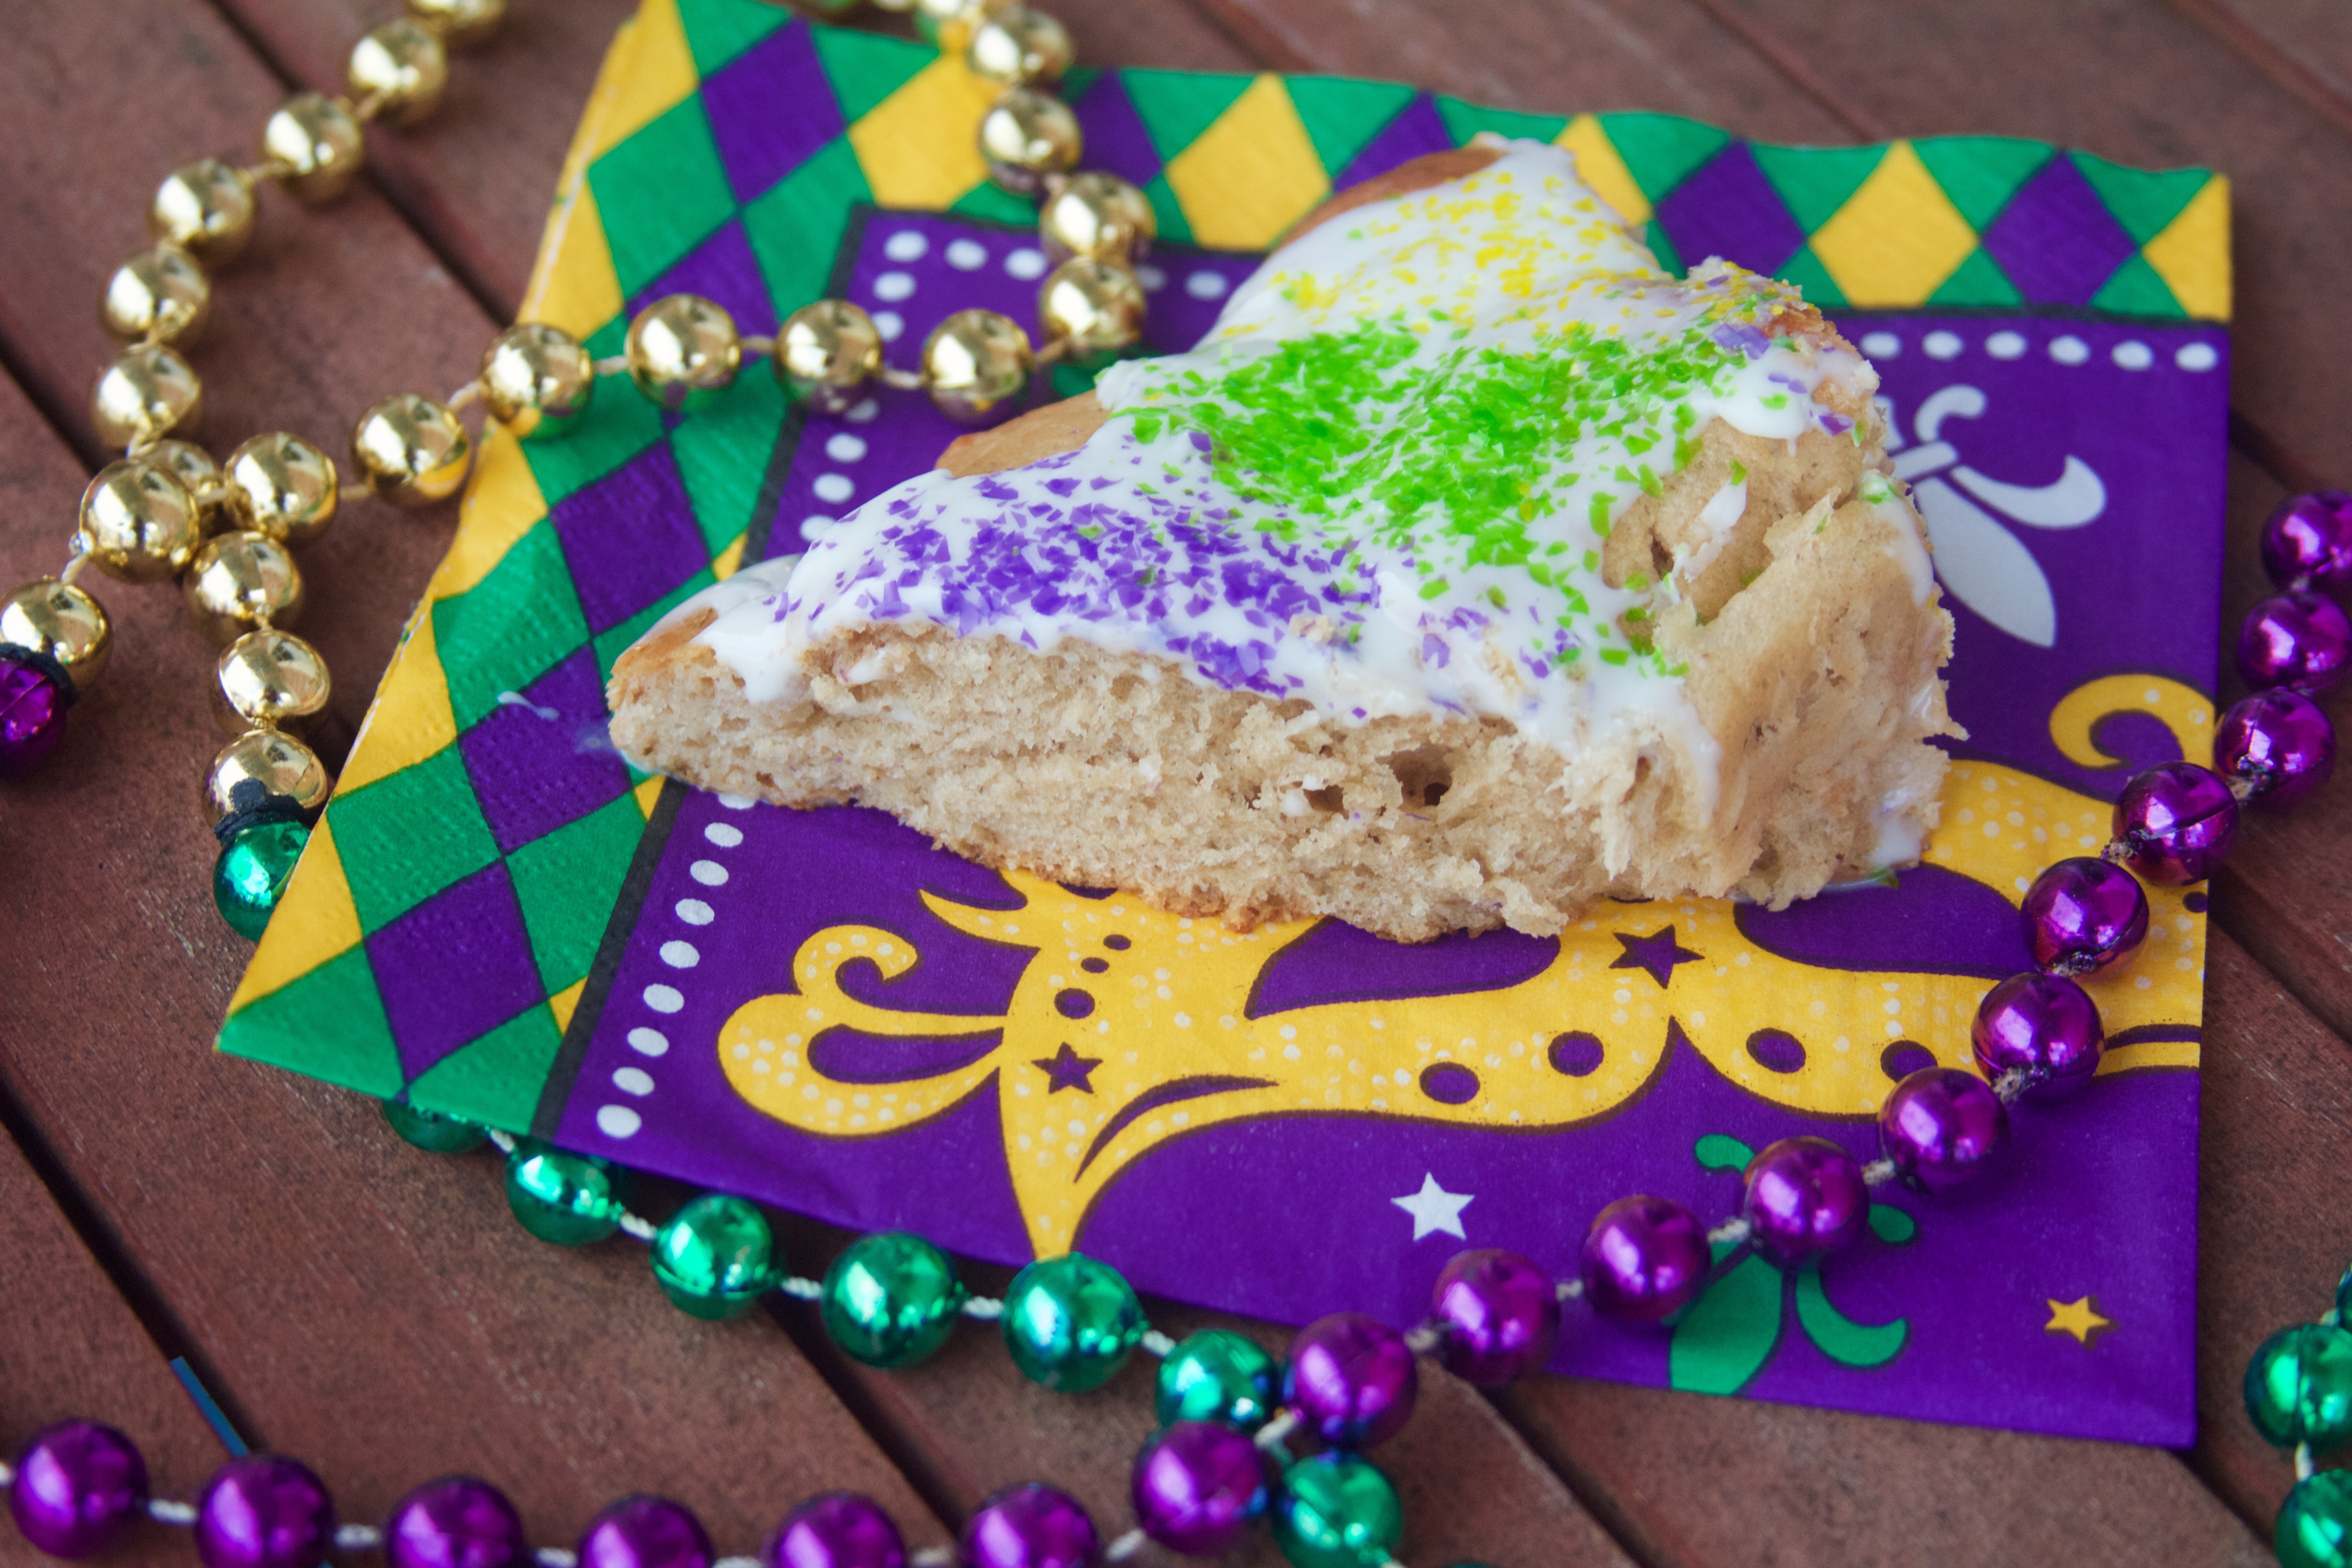
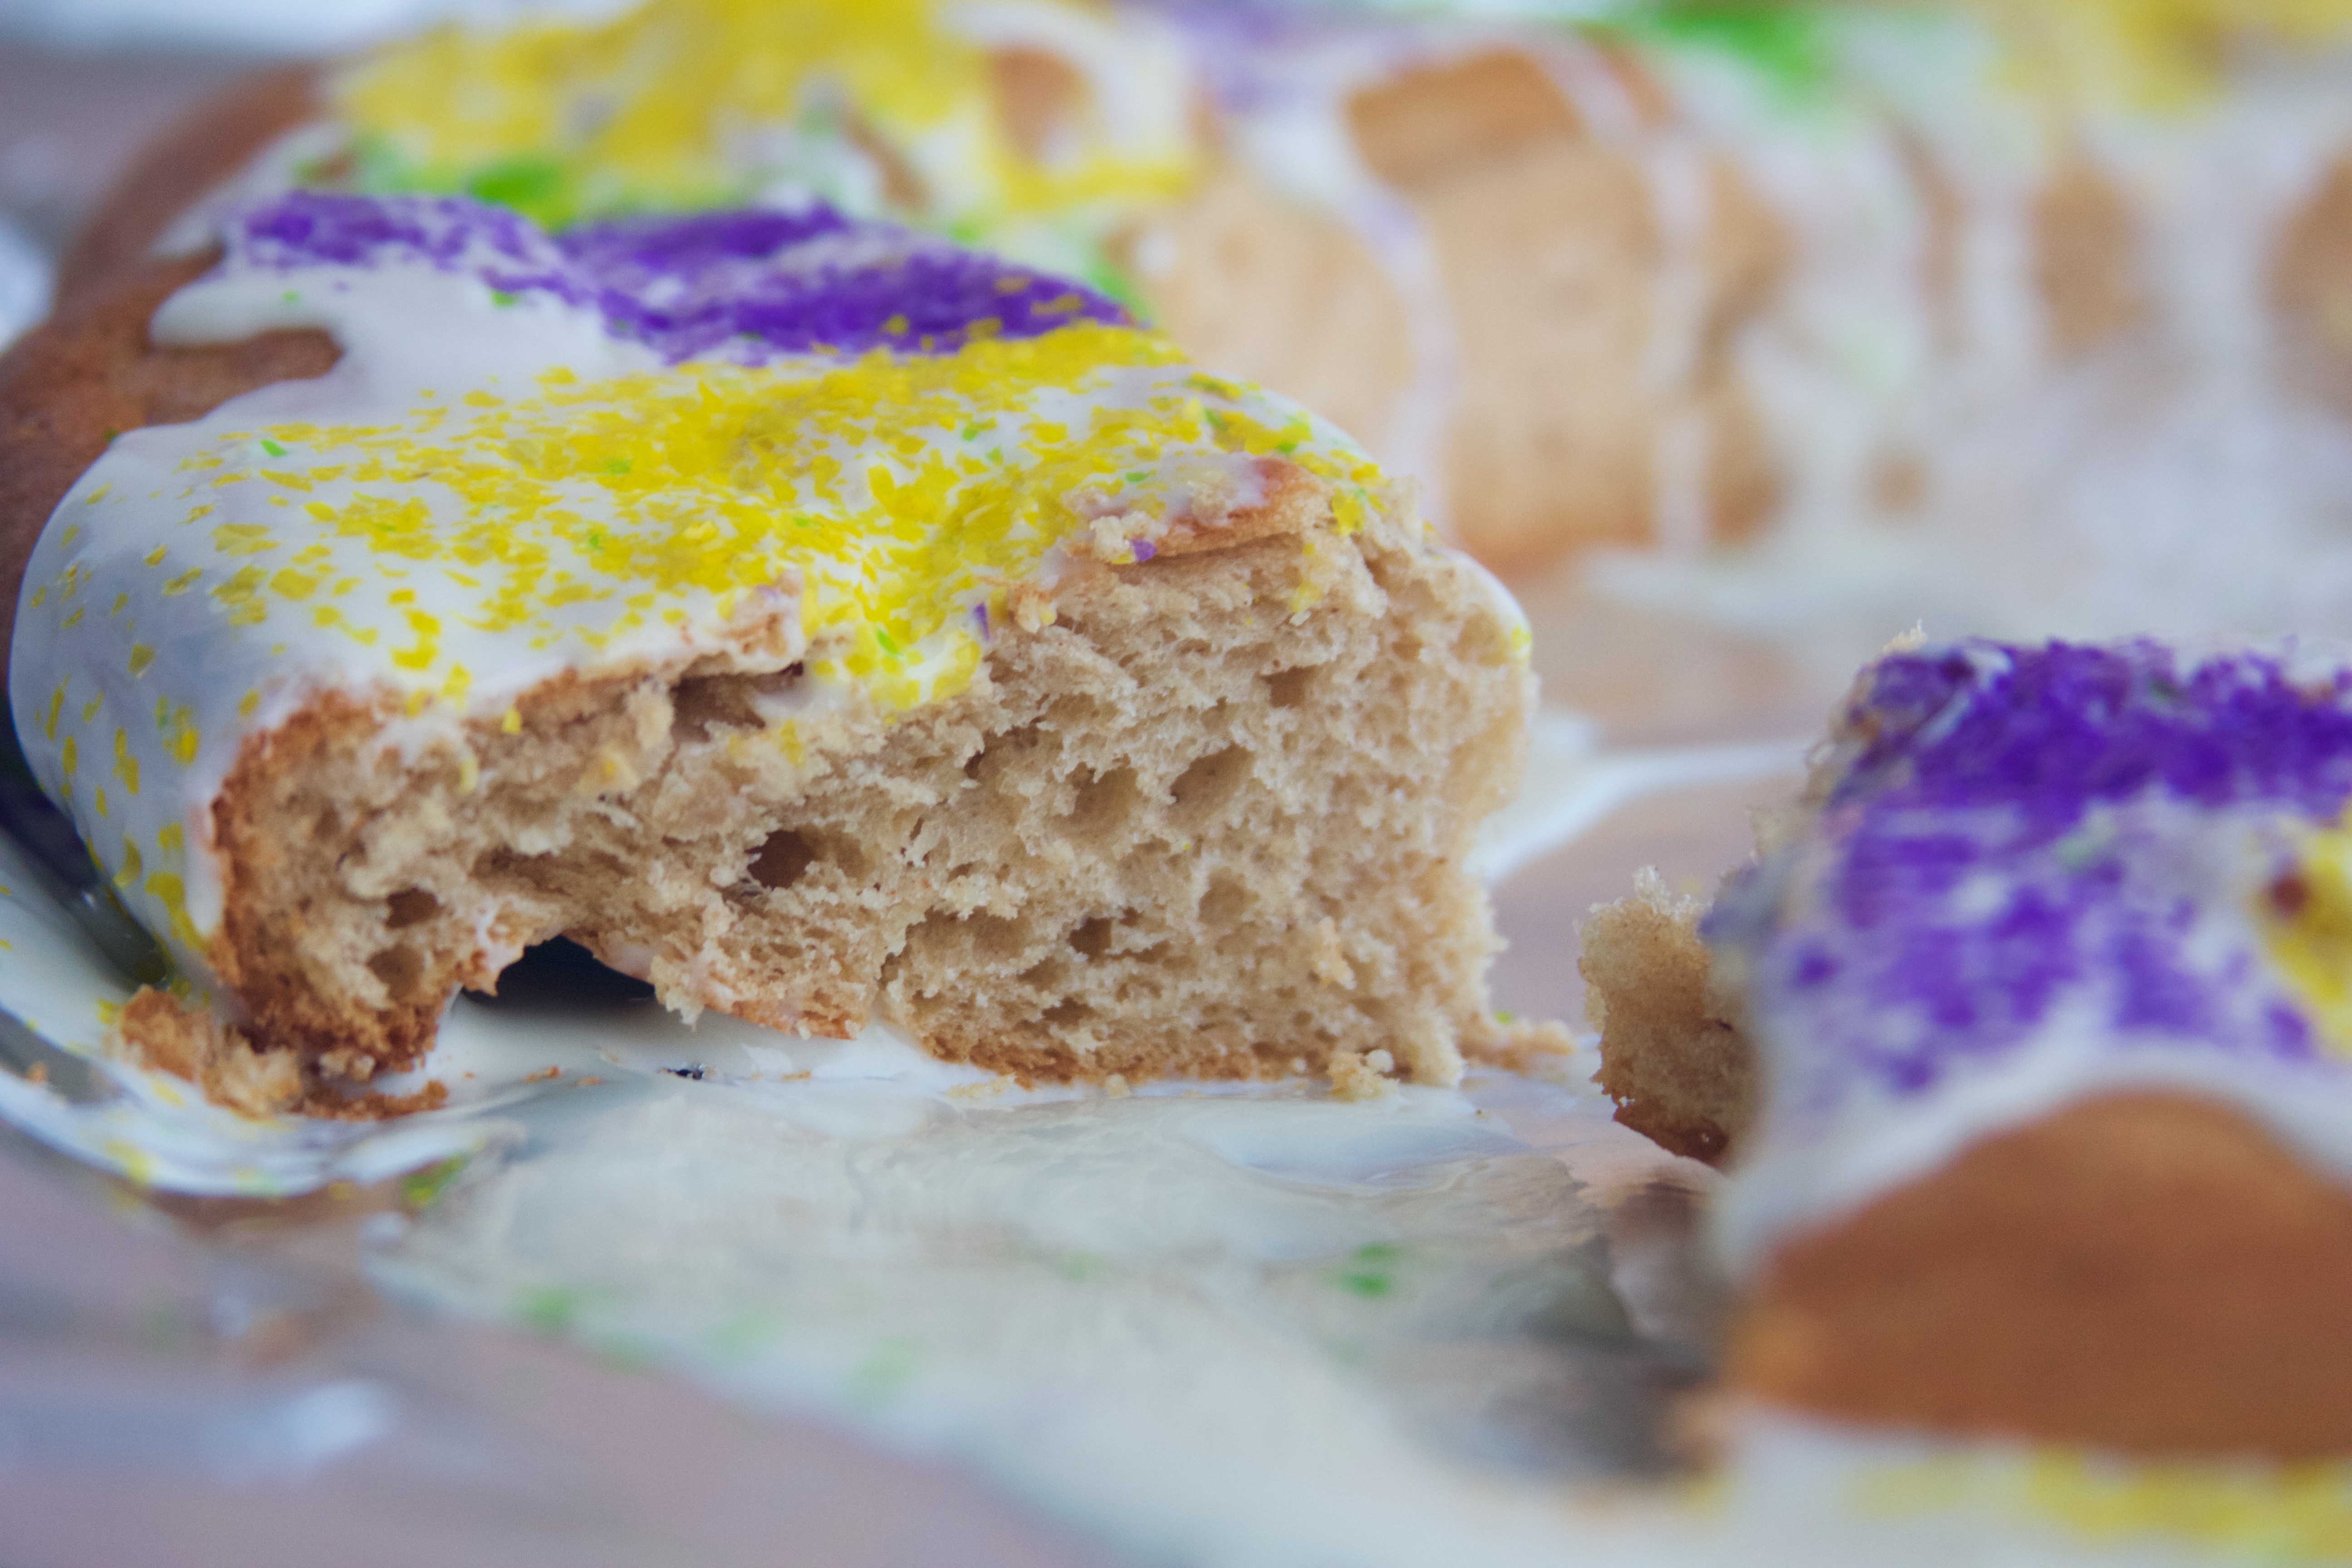
HAPPY MARDI GRAS SEASON!!! Today is the Epiphany, or the Three King’s Day, which means that Christmas is over, and it’s the start of Mardi Gras season! Years ago, that would have meant nothing to me. But after living in New Orleans for so long, it means that it’s time to decorate the Christmas tree with the colors of faith, power, and justice and pop a king cake in the oven.
King Cake is a Mardi Gras staple, and everyone has an opinion as to which one is the best. But have you ever tried it at home?
Throughout the course of Mardi Gras, I will be making king cakes for THREE levels of difficulty. So if you’re nervous about yeast, make the easy one! If this seems like a good fit, bake away! If you’re up to a challenge, wait a little, and the blog will deliver.
There is always a baby or a bean hidden inside a King Cake. Well, unless you work for a bakery that is worried about getting sued for choking… At any rate, someone will inevitably find the hidden baby Jesus, and then that person makes the next king cake! Happy Mardi Gras!
~~~~~~~~~~
Step One.
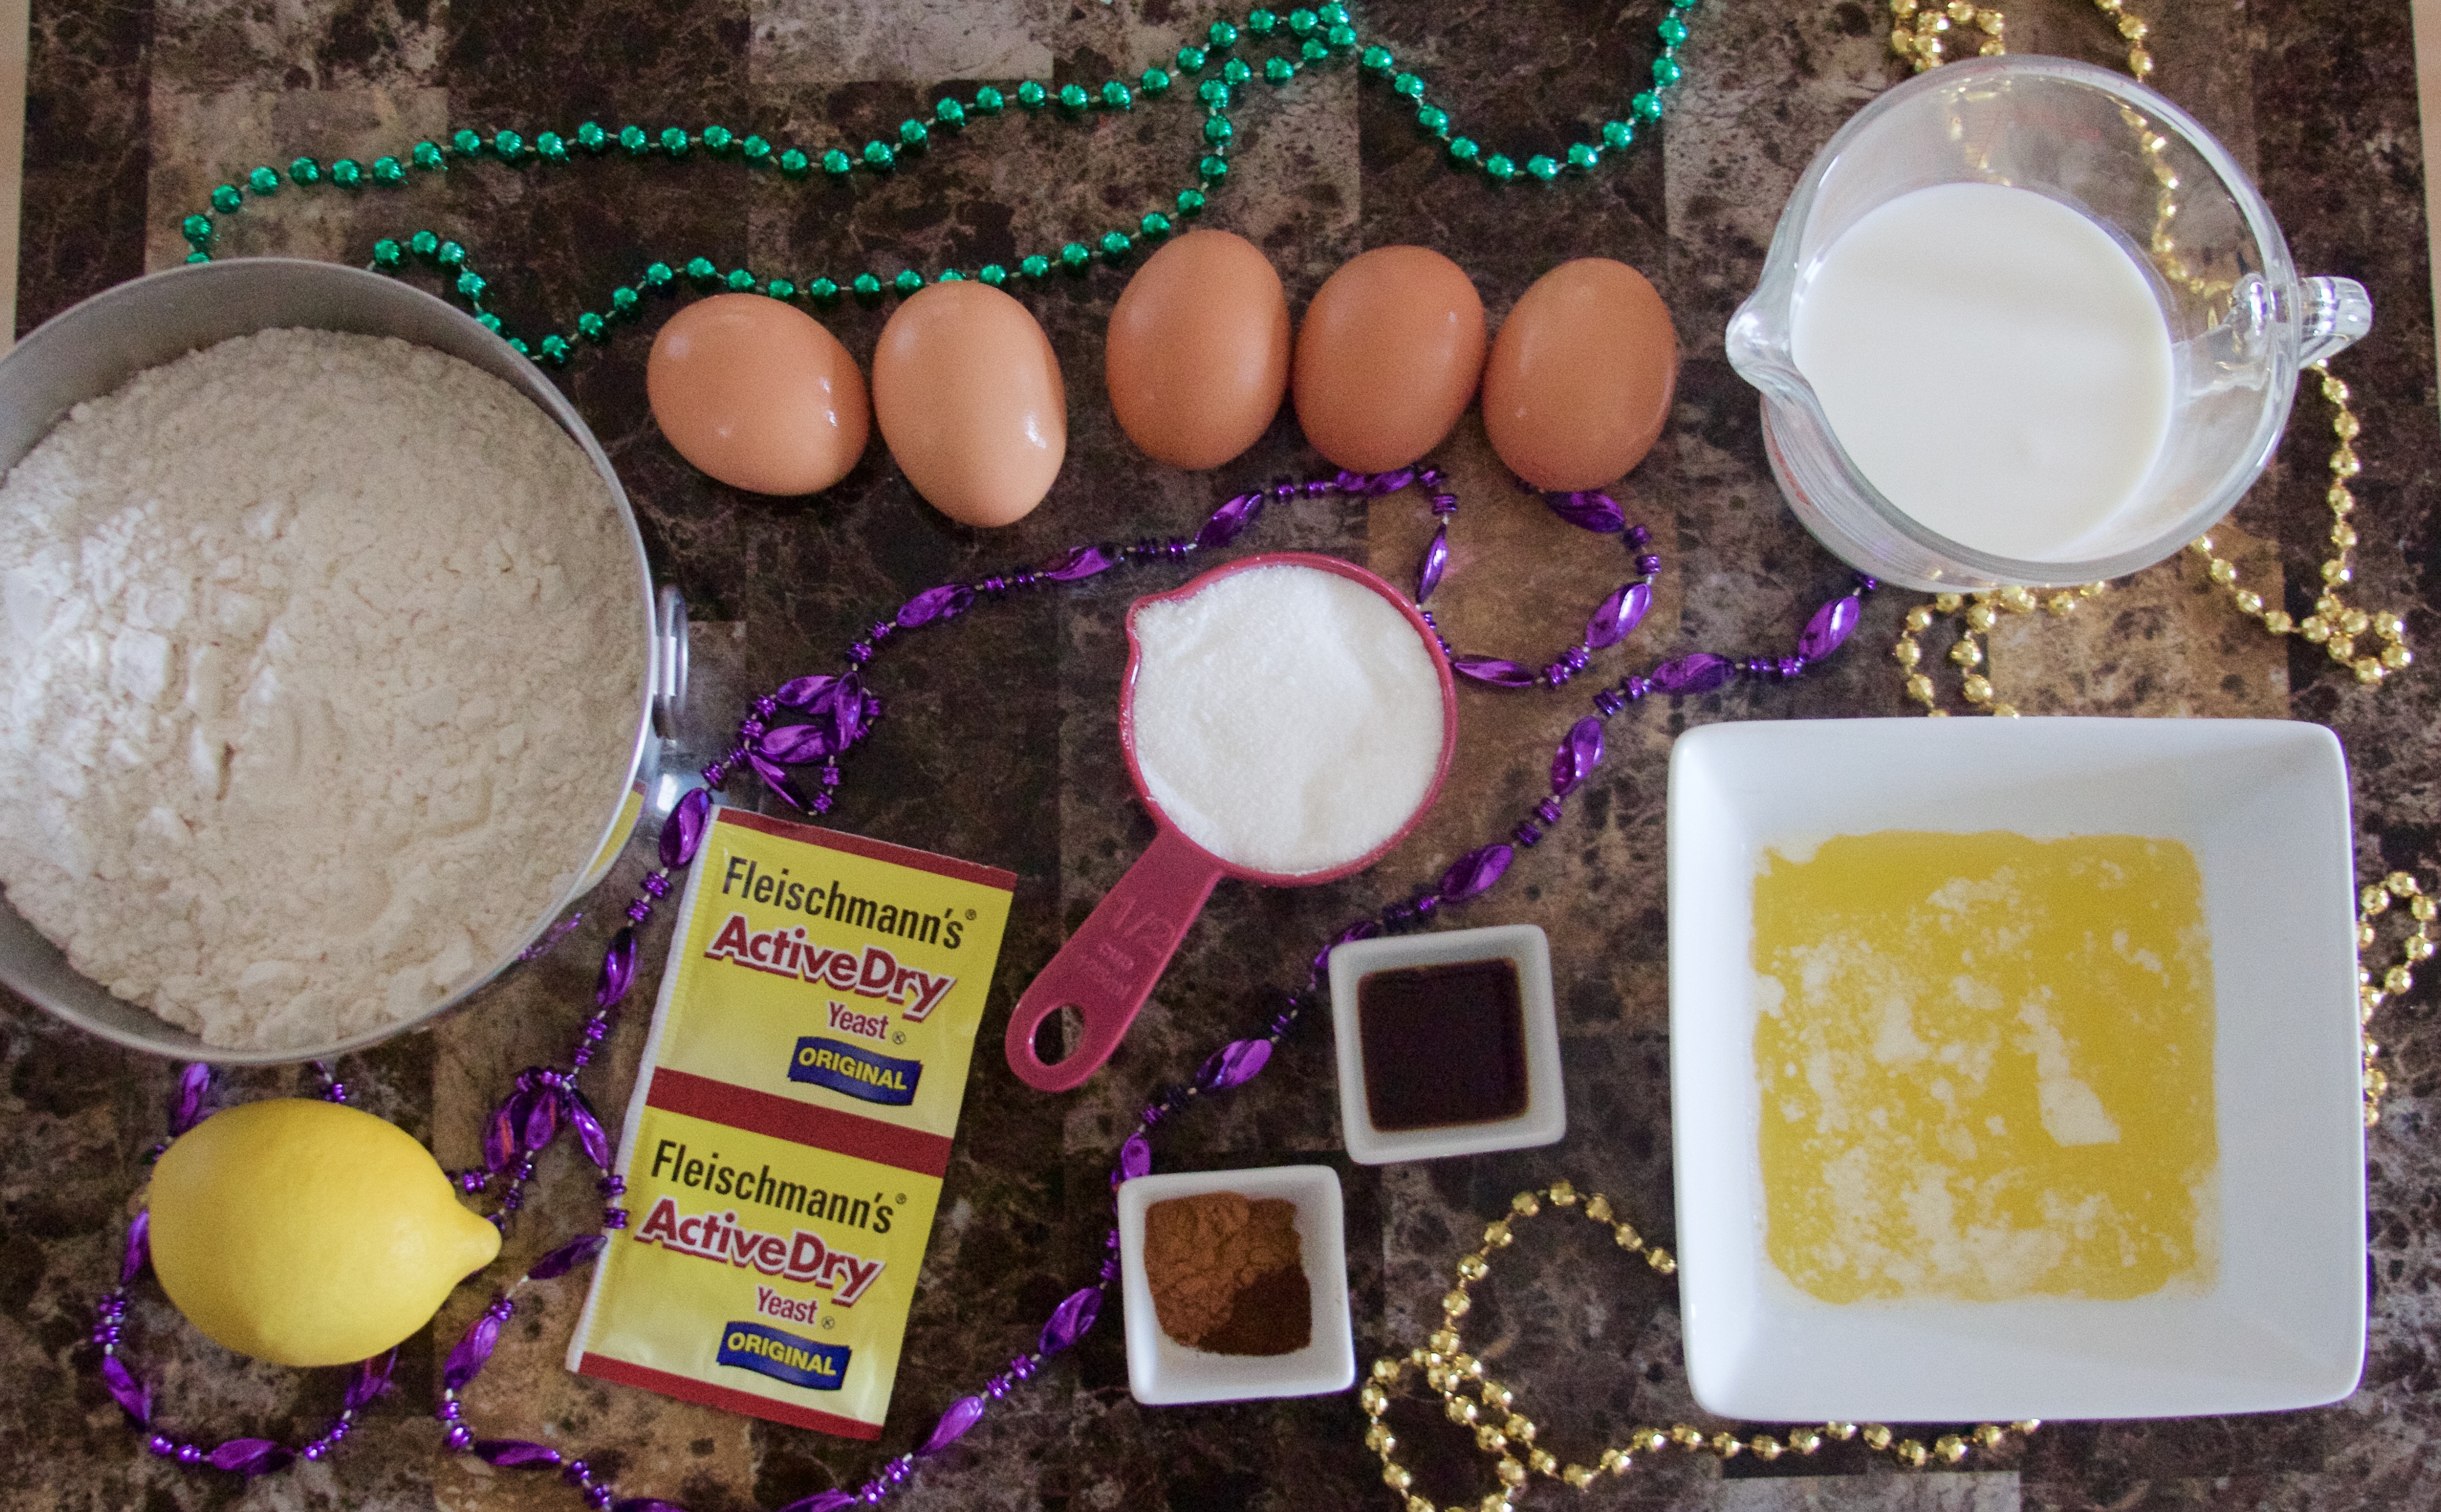
Prep Step! Measure out all of your ingredients. Mix the dry ingredients together.
Step Two.
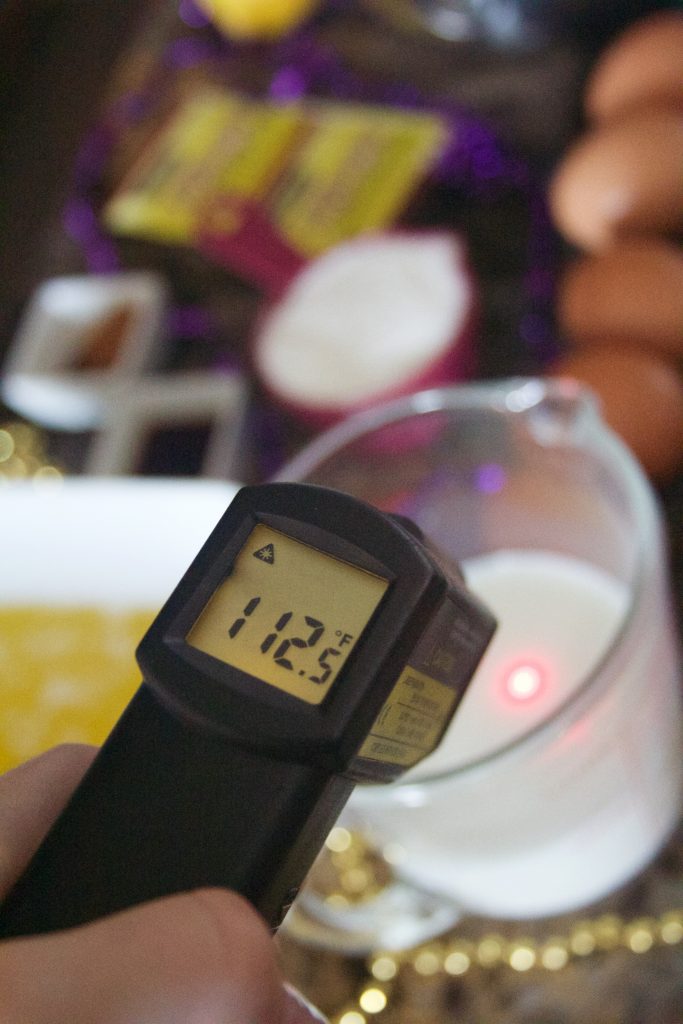
Heat the milk until it is lukewarm. That means that it needs to be between 110°F and 115°F. Sprinkle the yeast on top, and let it sit for about ten minutes, until it’s frothy.
Step Three.
Whisk the yolks in a separate bowl. Then, add the melted butter, egg yolks, vanilla, and lemon zest. Mix it all together. Slowly, beat in the dry ingredients.

Step Four.
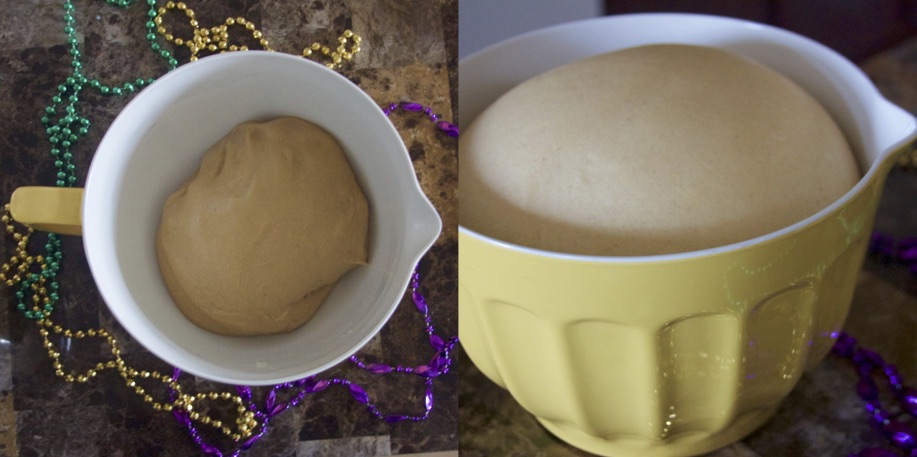
Time to knead! It’s more fun to do my hand, but you can let your mixer do it for you if you want. Make sure that i’s fitted with the dough hook. Knead for about ten minutes, until it stretches (kind of like taffy) when pulled. Place it in a greased bowl, and turn once so that the greased “bottom” is now on top. Cover the bowl with a towel, and set it in a warm place for an hour and a half. It will rise to about double of the volume!
Step Five.
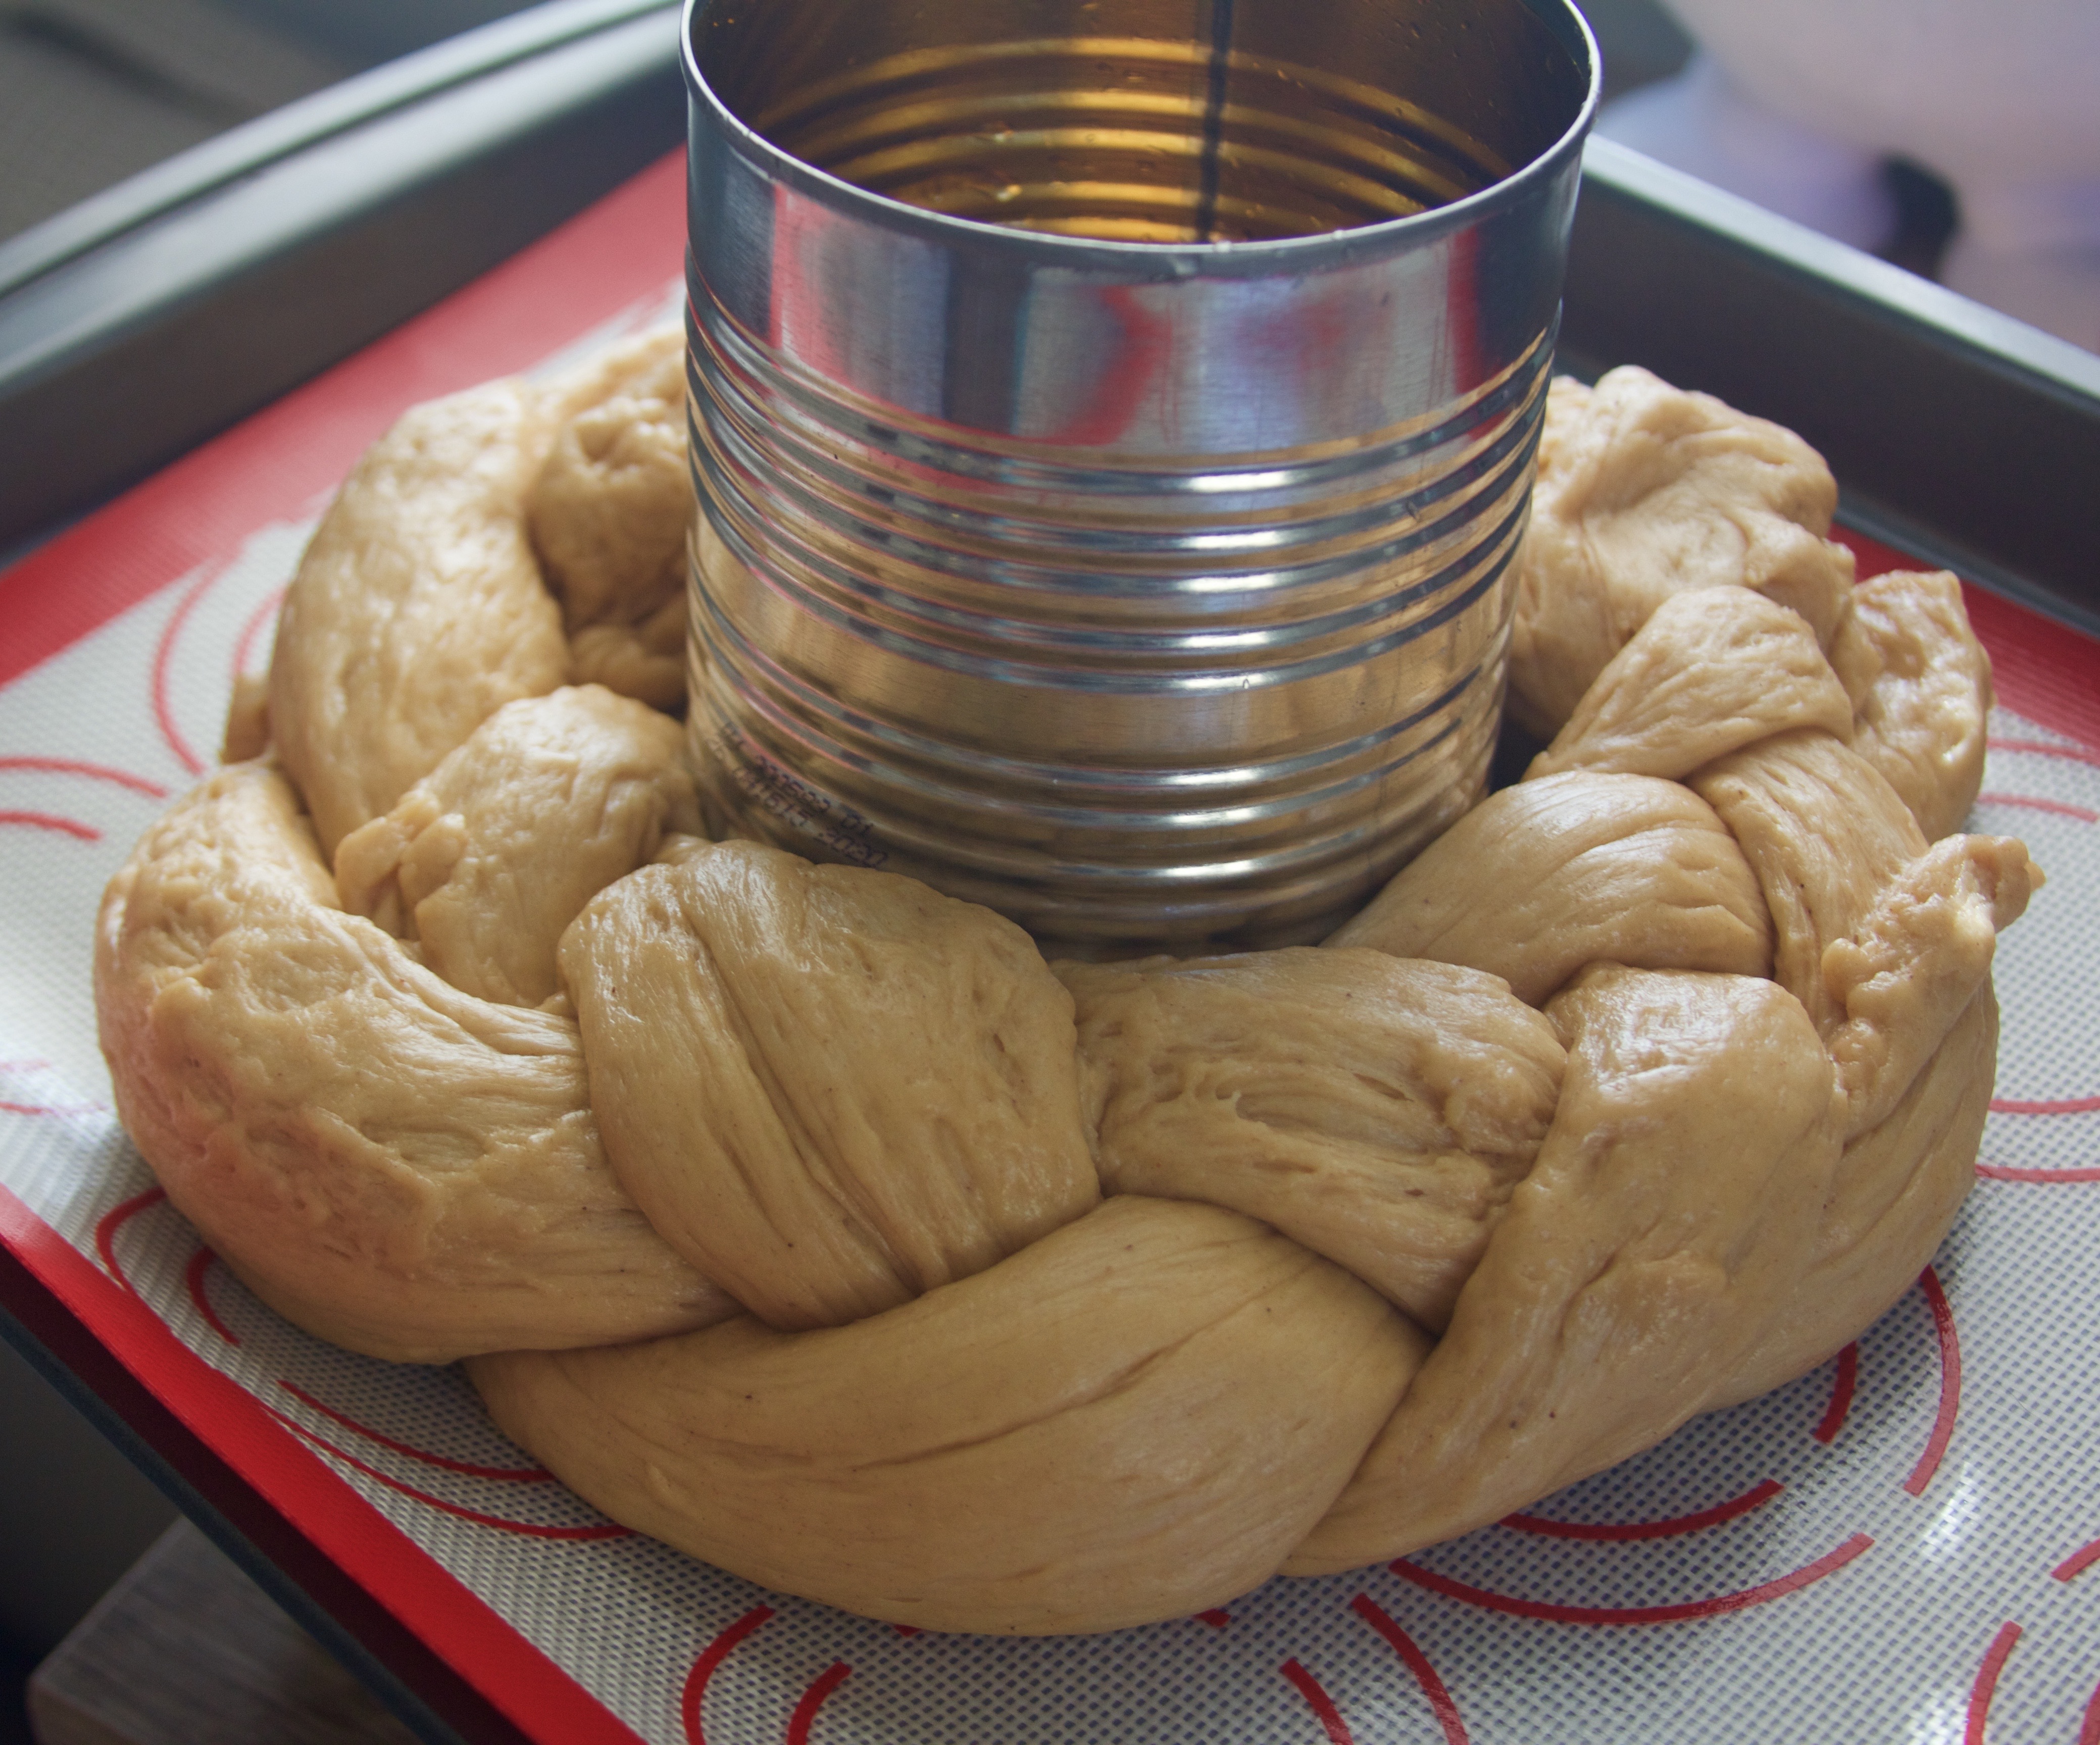
Punch down the dough. Then divide it into three balls. Roll each out until it is about two feet long. Braid the ropes of dough, and then shape it into a circle. You should put something in the middle so that it stays round while it bakes. Originally (in the picture) I used a 28oz tomato can, but I later switched it out with a round cake pan so that the ring would be larger. Cover the ring again with a towel, and let it rise for an additional 30 minutes. Preheat your oven to 350F.
Step Six.
Cover the ring loosely with aluminum foil and pop it in the oven. Bake for about 25 minutes. Then, take the foil off and continue to bake for about 5 to 10 minutes, until the outside is golden brown. Let cool for about 30 minutes, or until it is cool to the touch.
Step Seven.
Whisk the ingredients for the icing together. Drizzle along the ring; the icing will drip off of the edges. Sprinkle with the Mardi Gras colors: purple, gold, green. Don’t forget to hide the baby!
")
Ingredients
- King Cake
- 1 cup lukewarm milk
- 2 packages active dry yeast (not instant)
- 1/2 cup sugar
- 4 cups all-purpose flour
- 3/4 cup melted butter
- 5 egg yolks
- 1 teaspoon vanilla
- zest of one lemon
- 1 teaspoon cinnamon
- 1/2 teaspoon nutmeg
- Icing
- 1/3 - 1/2 cup sweetened condensed milk
- 2 cups powdered sugar
- gold, purple, and green sprinkles
- King Cake baby
Instructions
- Prep Step! Measure out all of your ingredients. Mix the dry ingredients together.
- Heat the milk until it is lukewarm. That means that it needs to be between 110°F and 115°F. Sprinkle the yeast on top, and let it sit for about ten minutes, until it's frothy.
- Whisk the yolks in a separate bowl. Then, add the melted butter, egg yolks, vanilla, and lemon zest. Mix it all together. Slowly, beat in the dry ingredients.
- Time to knead! It's more fun to do my hand, but you can let your mixer do it for you if you want. Make sure that i's fitted with the dough hook. Knead for about ten minutes, until it stretches (kind of like taffy) when pulled. Place it in a greased bowl, and turn once so that the greased "bottom" is now on top. Cover the bowl with a towel, and set it in a warm place for an hour and a half. It will rise to about double of the volume!
- Punch down the dough. Then divide it into three balls. Roll each out until it is about two feet long. Braid the ropes of dough, and then shape it into a circle. You should put something in the middle so that it stays round while it bakes. Originally (in the picture) I used a 28oz tomato can, but I later switched it out with a round cake pan so that the ring would be larger. Cover the ring again with a towel, and let it rise for an additional 30 minutes. Preheat your oven to 350F.
- Cover the ring loosely with aluminum foil and pop it in the oven. Bake for about 25 minutes. Then, take the foil off and continue to bake for about 5 to 10 minutes, until the outside is golden brown. Let cool for about 30 minutes, or until it is cool to the touch.
- Whisk the ingredients for the icing together. Drizzle along the ring; the icing will drip off of the edges. Sprinkle with the Mardi Gras colors: purple, gold, green. Don't forget to hide the baby!
3…2…1… HAPPY NEW YEAR! What does 2017 have in store for you? There is something enchanting about the new year, even though I don’t buy into the whole “new year, new you” mentality. If you want a resolution to stick, it needs to be an all-year, all the time resolution! But it’s never too late to start, so go for it if you’re ready for a life change this new year!
My new life resolution is to update this blog more! I can’t tell you how many photos of awesome, delicious meals I have that never made it to the posting stage. Laziness, maybe. I attribute it to my internet, which takes about 9 minutes to upload each picture. Ugh.
But I am especially exited this for this New Year’s Eve because I am going to a fancy swing dancing party! We have always had a chill night in with our best family friends – which is very nice! – but I’ve always wanted to experience New Year’s Eve at home in New Orleans and out on the town. The anticipation might just be better than the event!
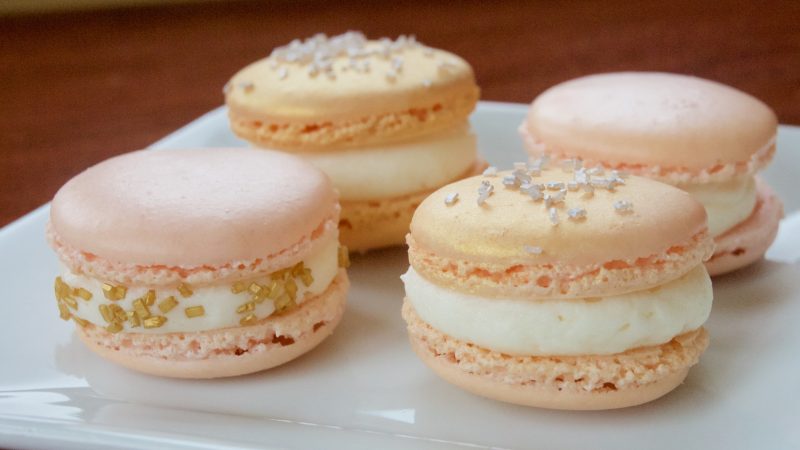
With visions of champagne bubbles dancing in my head, I dreamt up these delicate macaroons. They combine the drink of the evening with the class of the most sophisticated party. Here’s a toast to Auld Lang Syne!
~~~~~~~~~~

Step One.
Prep step! Measure out your ingredients. Have a stand mixer, large bowl, sifter, and spatula ready. Line two or three baking sheets with parchment paper.

Step Two.
Mix the dry ingredients. It is SO important that the sugar and almond aren’t clumpy at all. Clumpy macaroons are no fun. Sift the ingredients in small batches into the big mixing bowl.
Step Three.
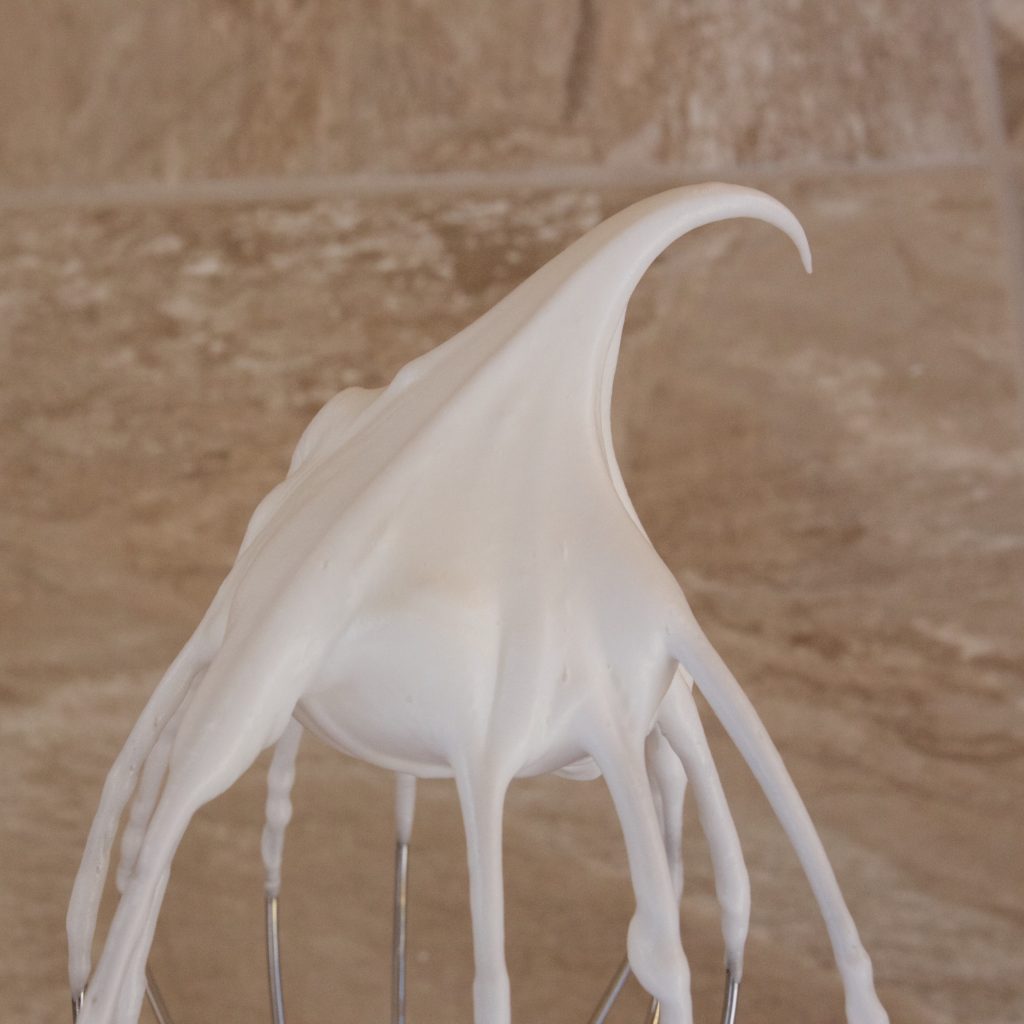
Add the egg whites to a mixing bowl. Begin to beat on medium speed. Add the cream of tartar and salt, and beat until soft peaks form. Scrape down the sides of the bowl. Now, increase the mixer to medium-high. Slowly, add the caster sugar in a fine stream. Increase the speed to high, and beat until stiff peaks form, about 3 more minutes.
Step Four.
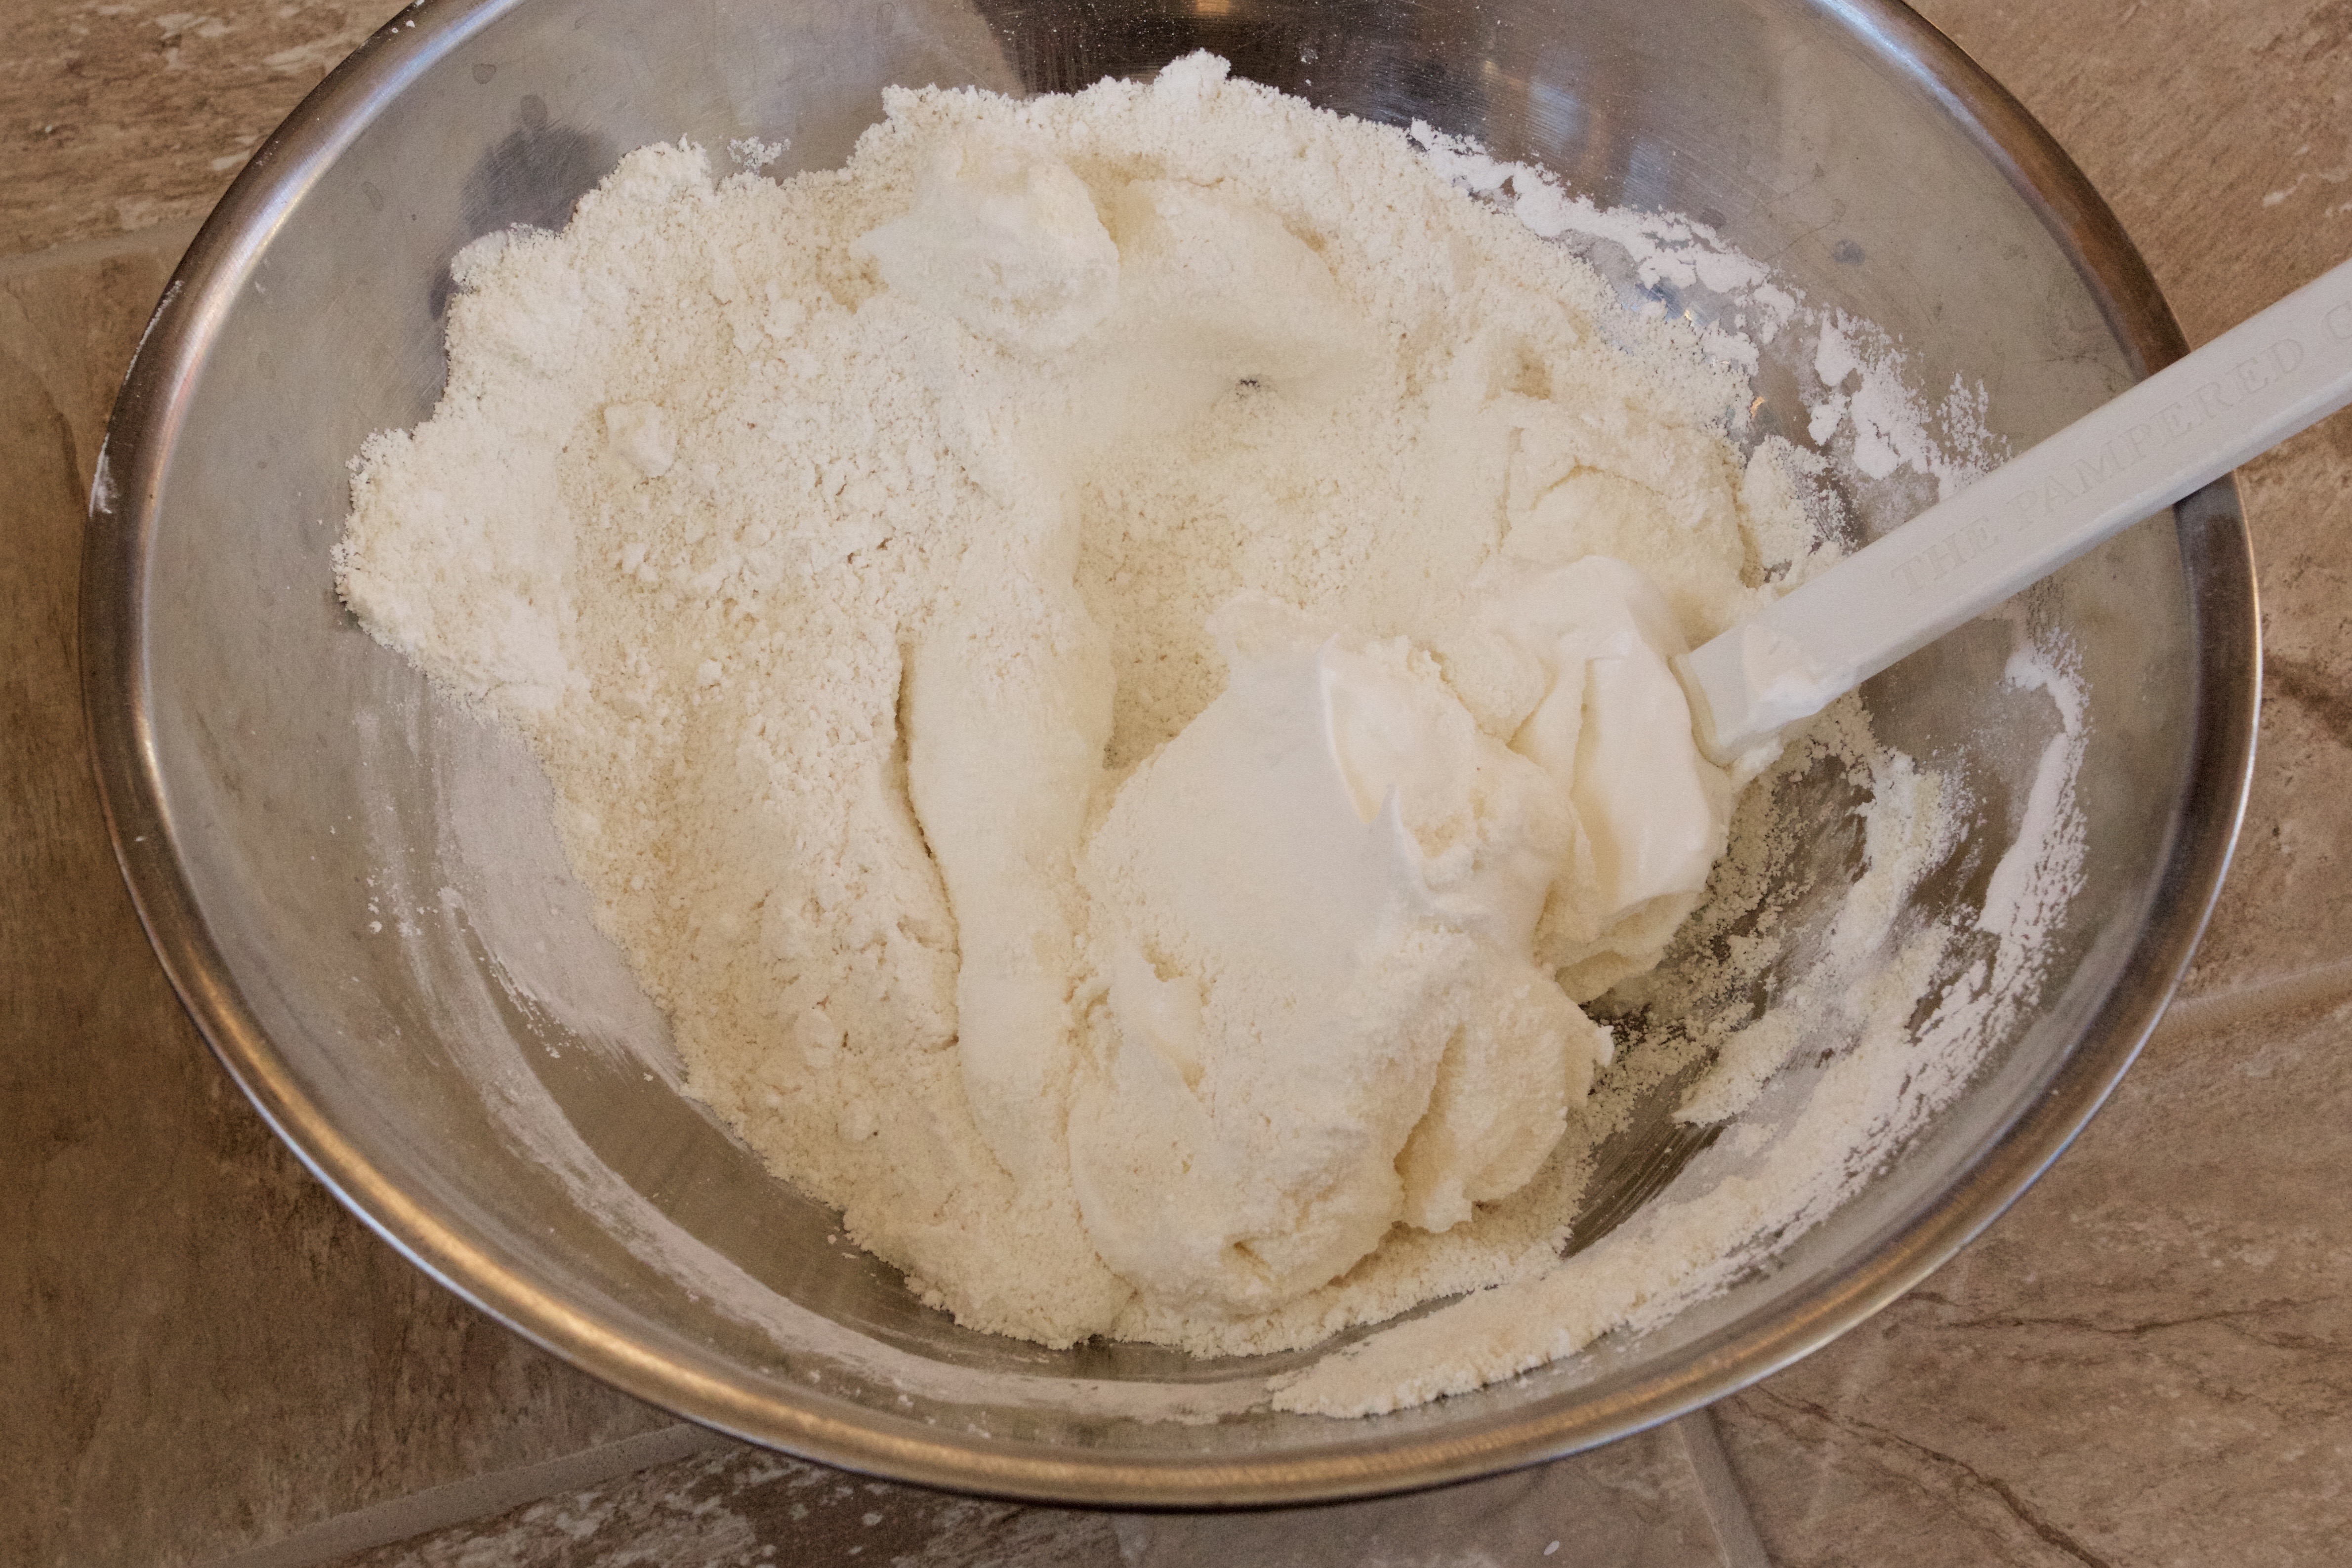
Mix the extracts and color into your egg whites, folding gently. Scoop the whipped egg whites into the big mixing bowl with the dry ingredients, and fold gently until it is completely incorporated. Let it sit for about ten minutes.
Step Five.
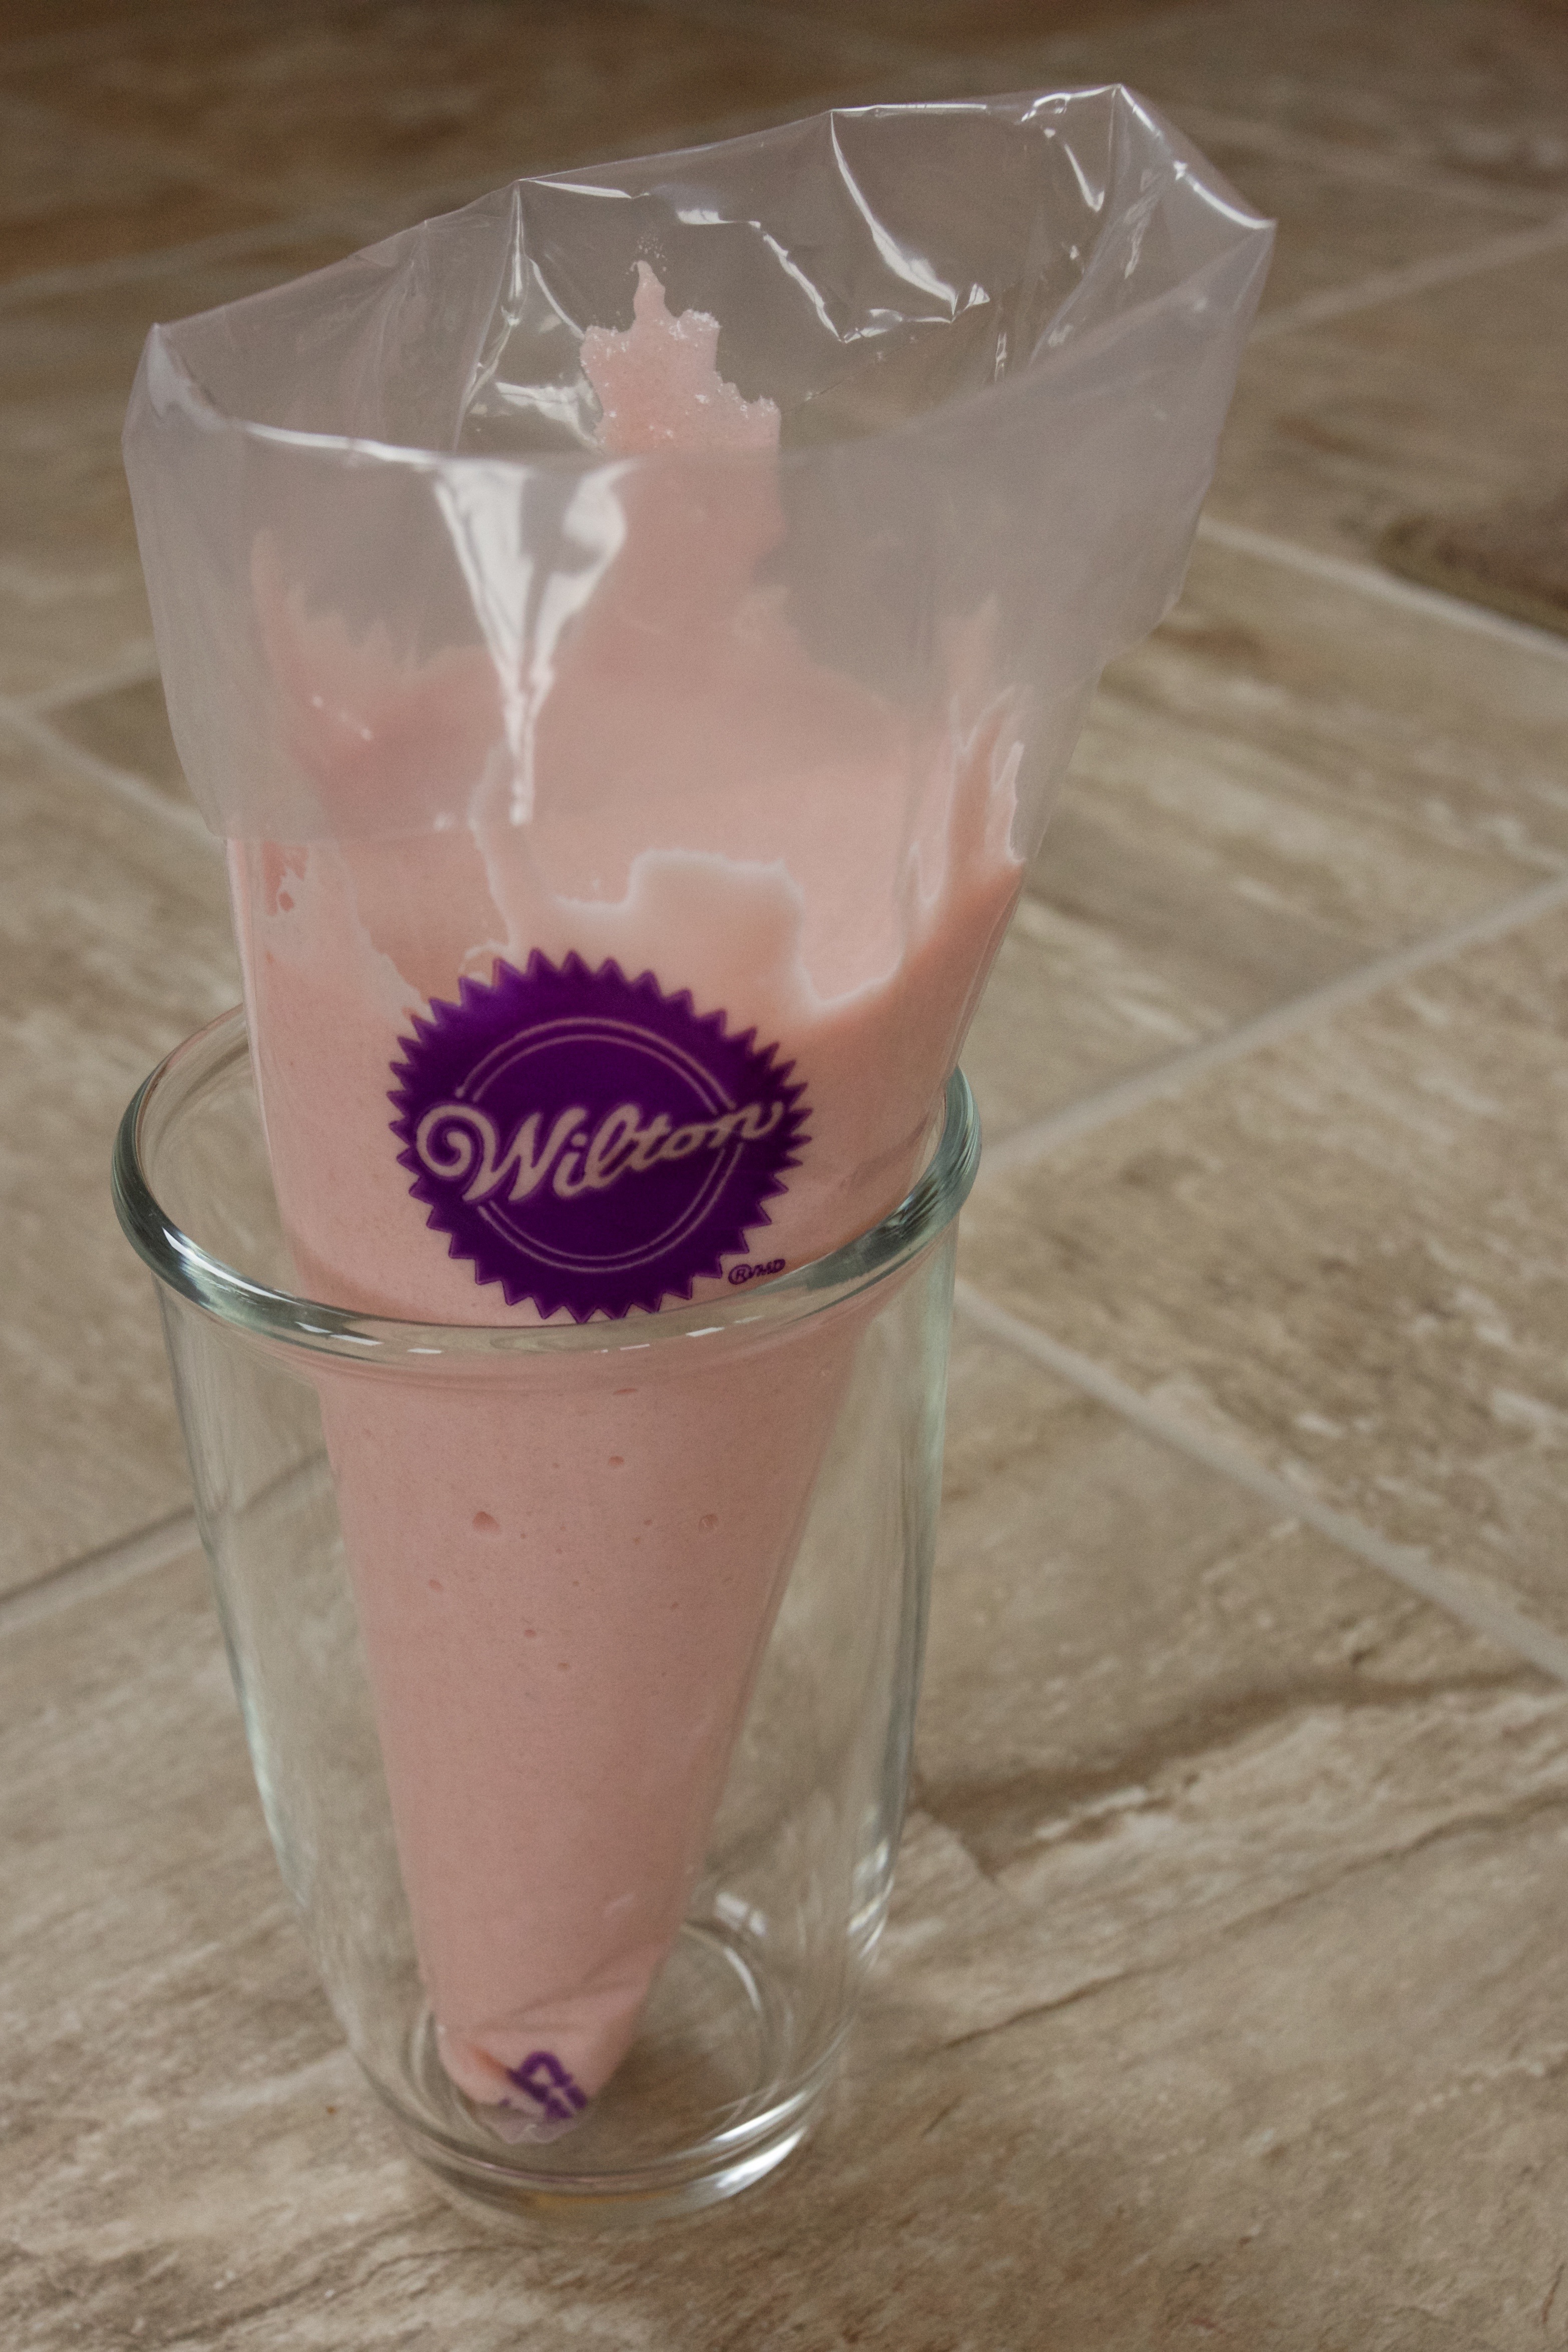
Add the mix into a piping bag. It works best if you first put the bag, opened, into a glass (see picture!) Cut off the tip about 3/4 of an inch up from the bottom, so that you have a small hole.
![]()
Step Six.
Pipe small rounds of batter, so that they spread out to be about an inch in diameter. Let the cookies dry on the sheet before baking. The required time varies depending on your local humidity levels. At home in New Orleans, I let them dry for about 45 minutes. In Wisconsin for the holidays, it only took about 20 minutes. Preheat your oven to 300°F.
Step Seven.
Bake the macaroons for about 12 to 15 minutes, or until they are hard and have developed that characteristic little edge on the bottom. Let them cool completely before your carefully remove them – don’t crack them! They are fragile.
Step Eight.
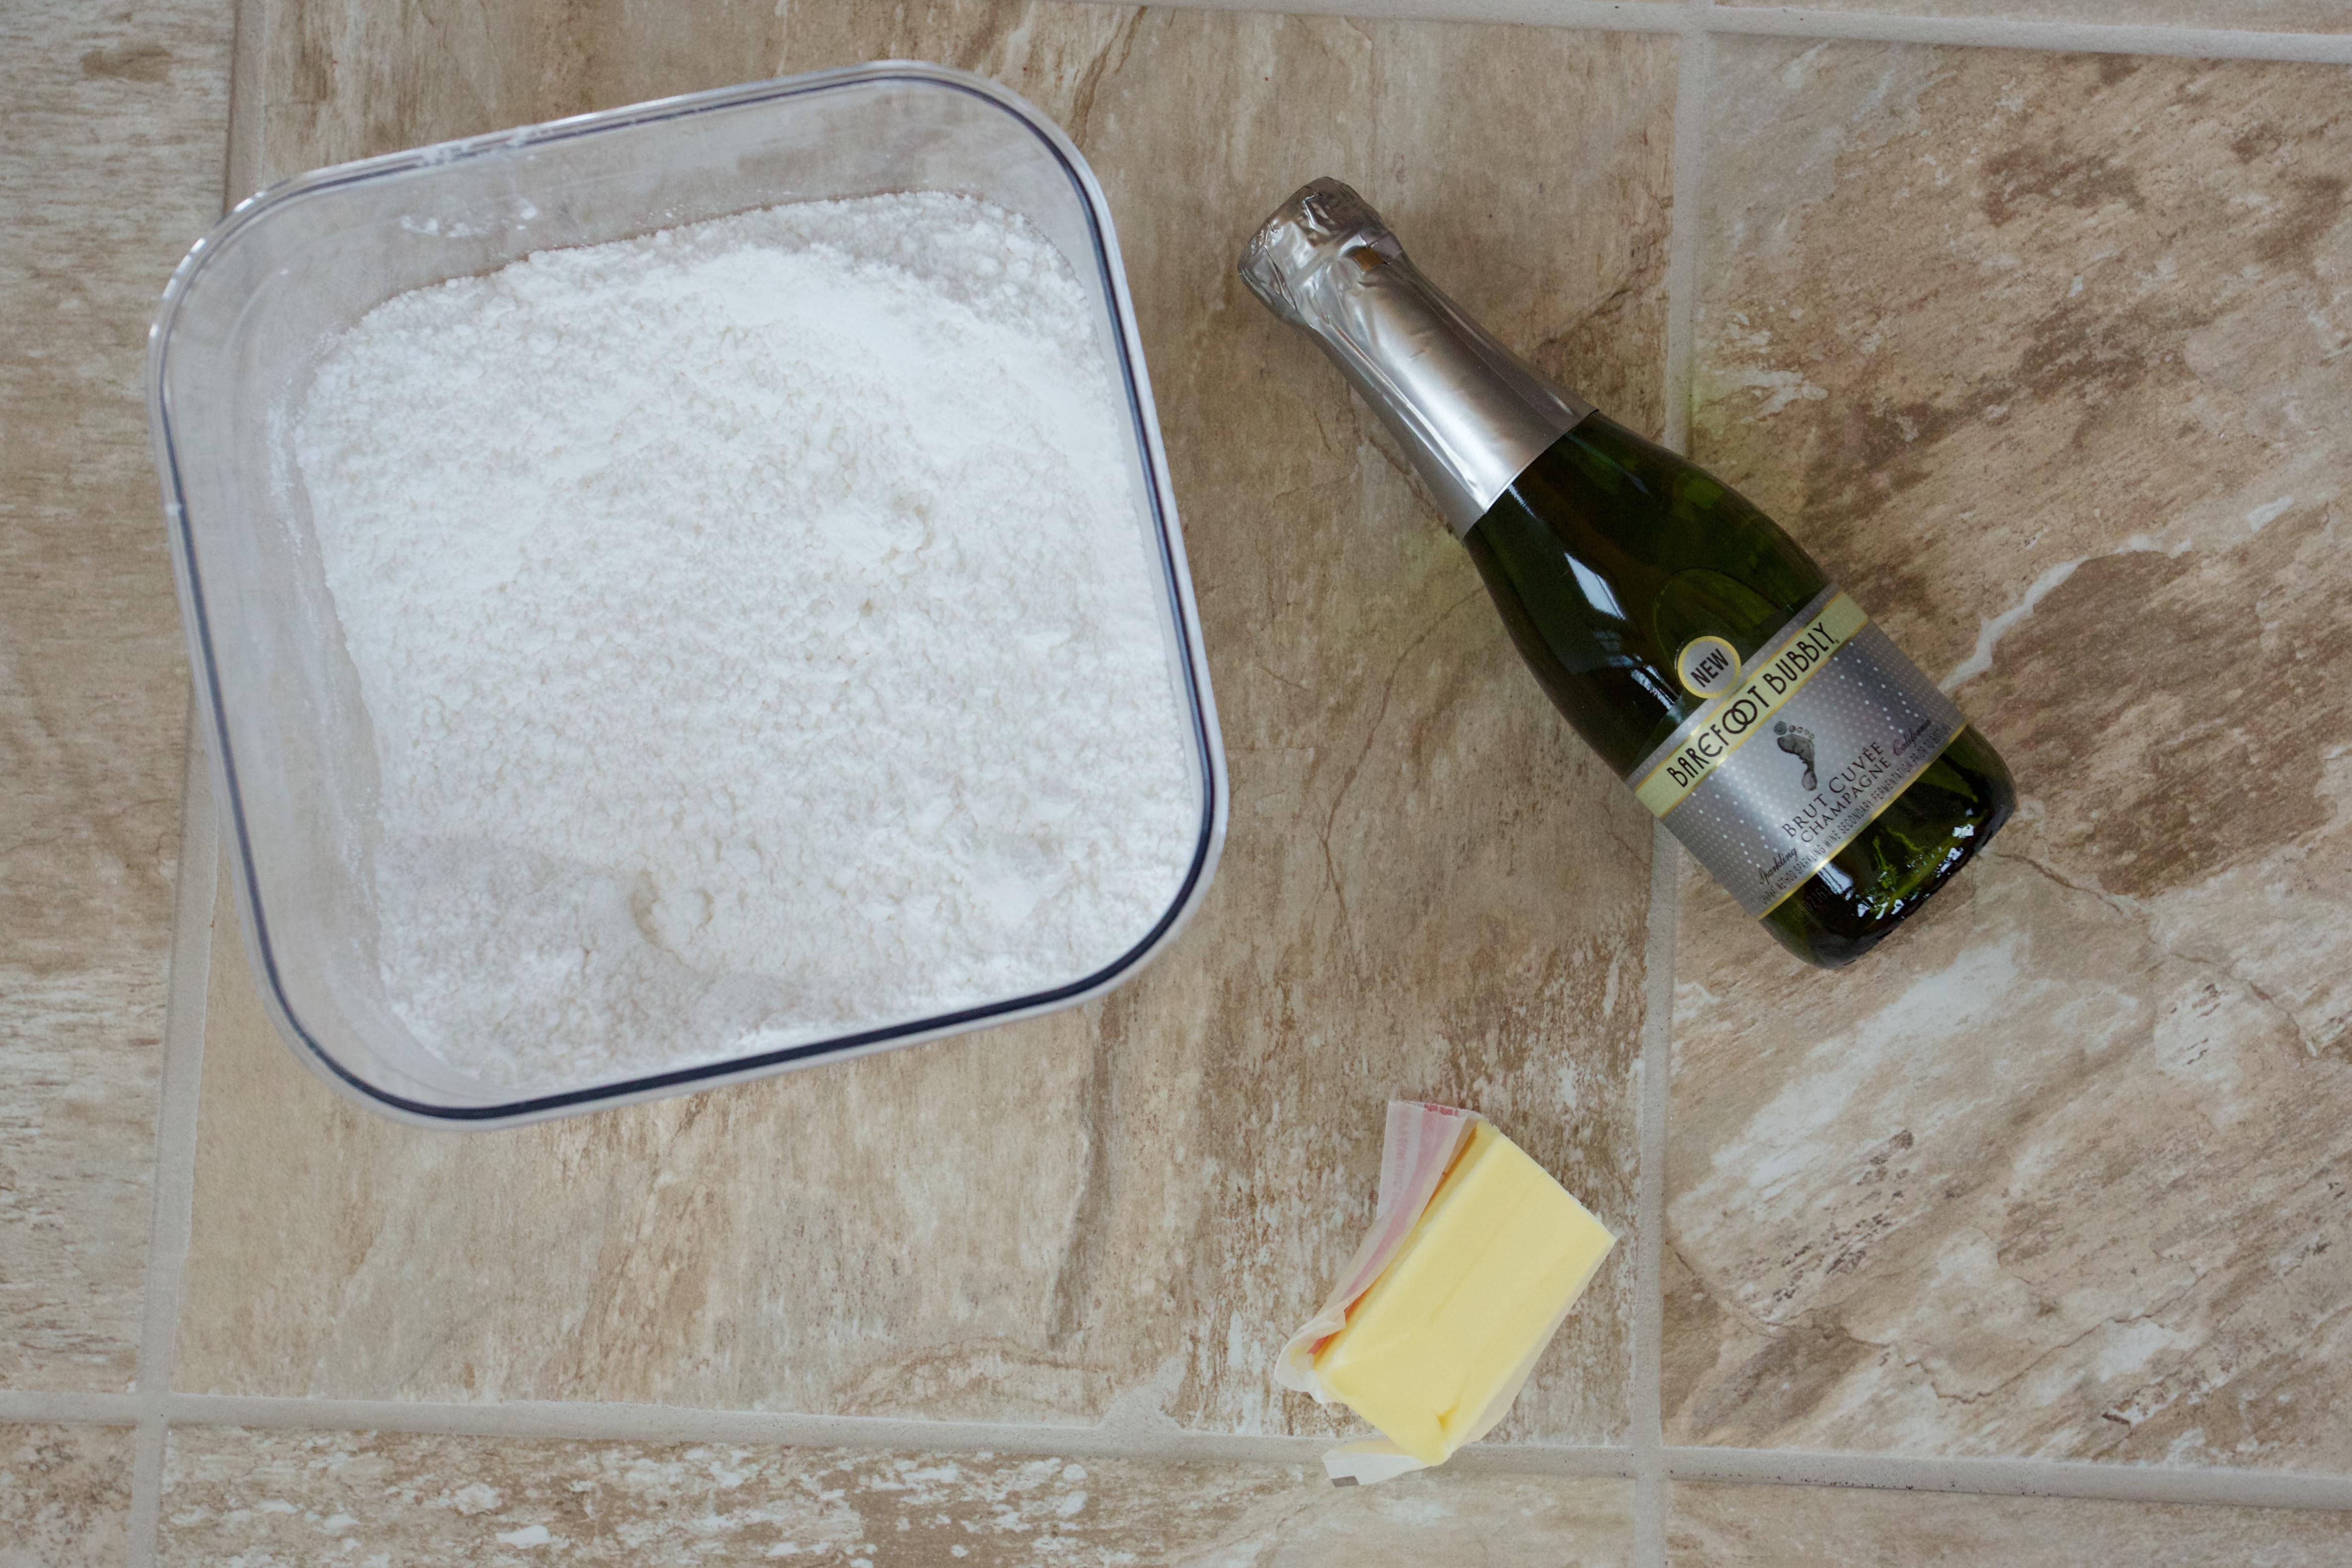
Frosting prep! Measure your ingredients.
Step Nine.
Reduce the champagne in a small pot over medium-high heat until it is reduced by about half. You can measure by pouring it into a measuring glass to see if it is 1/3 cup. Let it cool to room temperature.
Step Ten.
Beat the butter on medium-high speed until it is fluffier, for about five minutes. Slowly, add the powdered sugar and beat until incorporated. Add the champagne. If you like lighter frosting, add about 1 Tablespoon of heavy whipping cream. Beat until light and fluffy, about 3 more minutes.
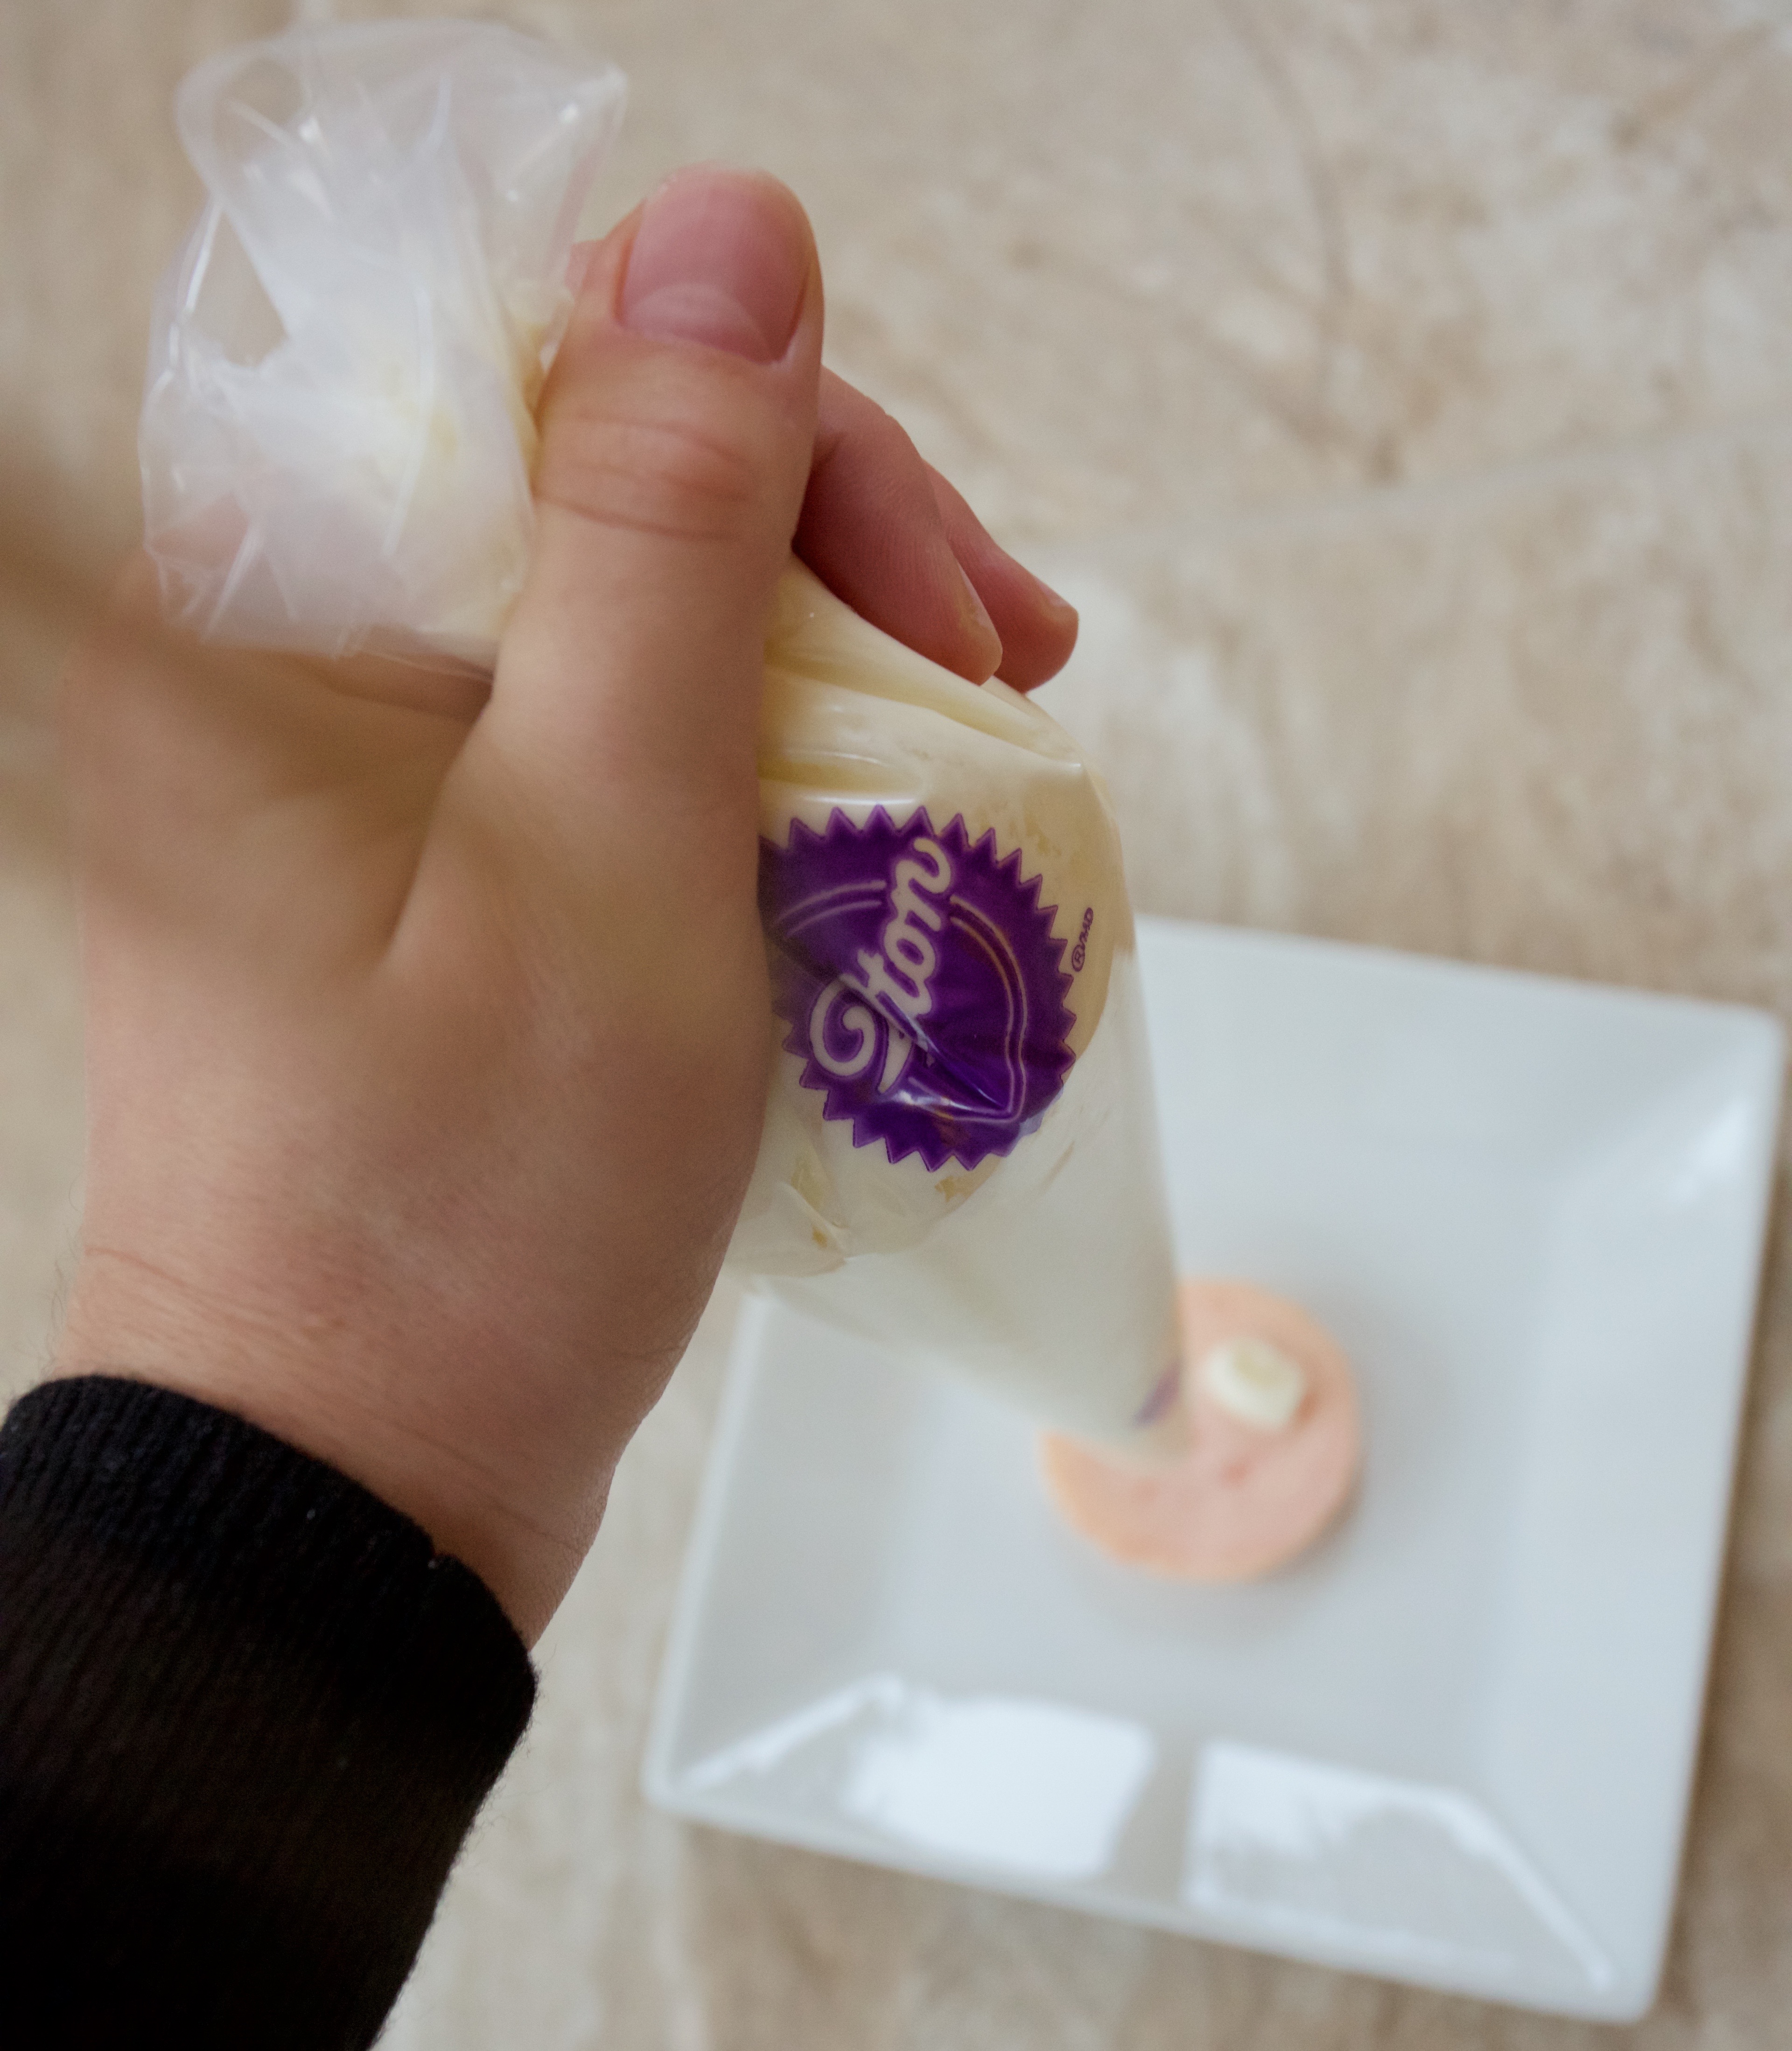
Step Eleven.
Time to put them together! Match the macaroons up by size. Add your frosting to another piping bag, and pipe the frosting into the center of one of the halves. Sandwich the two together, and press gently so that the frosting reaches out to the edges. Decorate as desired. I used edible gold spray paint and metallic sprinkles, all available at Michaels (best store ever!) Enjoy with a glass of champagne while you toast the New Year!

Ingredients
- Macaroons
- 1 3/4 cups powdered sugar
- 1 cup almond flour
- 3 egg whites
- 1/3 tsp cream of tartar
- 1/8 tsp salt
- 1/4 cup caster sugar (sometimes called baker’s sugar or superfine sugar)
- 1/2 tsp vanilla
- 1/4 tsp almond extract
- 1- 2 drops red food coloring
- Champagne Frosting
- 2/3 cup champagne
- 1/4 cup unsalted butter
- 2 cups powdered sugar
Instructions
- Prep step! Measure out your ingredients. Have a stand mixer, large bowl, sifter, and spatula ready. Line two or three baking sheets with parchment paper.
- Mix the dry ingredients. It is SO important that the sugar and almond aren't clumpy at all. Clumpy macaroons are no fun. Sift the ingredients in small batches into the big mixing bowl.
- Add the egg whites to a mixing bowl. Begin to beat on medium speed. Add the cream of tartar and salt, and beat until soft peaks form. Scrape down the sides of the bowl. Now, increase the mixer to medium-high. Slowly, add the caster sugar in a fine stream. Increase the speed to high, and beat until stiff peaks form, about 3 more minutes.
- Mix the extracts and color into your egg whites, folding gently. Scoop the whipped egg whites into the big mixing bowl with the dry ingredients, and fold gently until it is completely incorporated. Let it sit for about ten minutes.
- Add the mix into a piping bag. It works best if you first put the bag, opened, into a glass (see picture!) Cut off the tip about 3/4 of an inch up from the bottom, so that you have a small hole.
- Pipe small rounds of batter, so that they spread out to be about an inch in diameter. Let the cookies dry on the sheet before baking. The required time varies depending on your local humidity levels. At home in New Orleans, I let them dry for about 45 minutes. In Wisconsin for the holidays, it only took about 20 minutes. Preheat your oven to 300°F.
- Bake the macaroons for about 12 to 15 minutes, or until they are hard and have developed that characteristic little edge on the bottom. Let them cool completely before your carefully remove them - don't crack them! They are fragile.
- Frosting prep! Measure your ingredients.
- Reduce the champagne in a small pot over medium-high heat until it is reduced by about half. You can measure by pouring it into a measuring glass to see if it is 1/3 cup. Let it cool to room temperature.
- Beat the butter on medium-high speed until it is fluffier, for about five minutes. Slowly, add the powdered sugar and beat until incorporated. Add the champagne. If you like lighter frosting, add about 1 Tablespoon of heavy whipping cream. Beat until light and fluffy, about 3 more minutes.
- Time to put them together! Match the macaroons up by size. Add your frosting to another piping bag, and pipe the frosting into the center of one of the halves. Sandwich the two together, and press gently so that the frosting reaches out to the edges. Decorate as desired. I used edible gold spray paint and metallic sprinkles, all available at Michaels (best store ever!) Enjoy with a glass of champagne while you toast the New Year!

Peppermint bark is one of my favorite parts of the holidays. I enjoy white chocolate year round – a little too much, probably – but there is something special for me about white chocolate with crunchy peppermint on top.
I think my true obsession with it blossomed in high school. I fondly remember studying for exams with a cup of coffee and peppermint bark next to me and the Christmas tree. Add some fluffy, falling snow, and I am in nostalgia heaven. An added bonus was that my brother hated (and still does) peppermint bark. Something about the sticky candy in his teeth. More for me!
But I can understand that some people feel guilty about eating exorbitant amounts of pure sugar. These cookies try to make a compromise. Since the peppermint bark decorates a cookie, it is easier to coerce yourself into taking just one! And the brownie cookies that support this glorious peppermint bark are a chocolate dream. They are thick and gooey but not so overwhelming that you wish you had stuck with just an after-dinner mint.
Make sure that these cookies have a place on your holiday table or at your next cookie exchange party! Direct the fans to Adventures of a Frostaholic © so that they can share the deliciousness!

~~~~~~~~~~
Step One.
Prep Step! Measure out all of your ingredients.

Step Two.
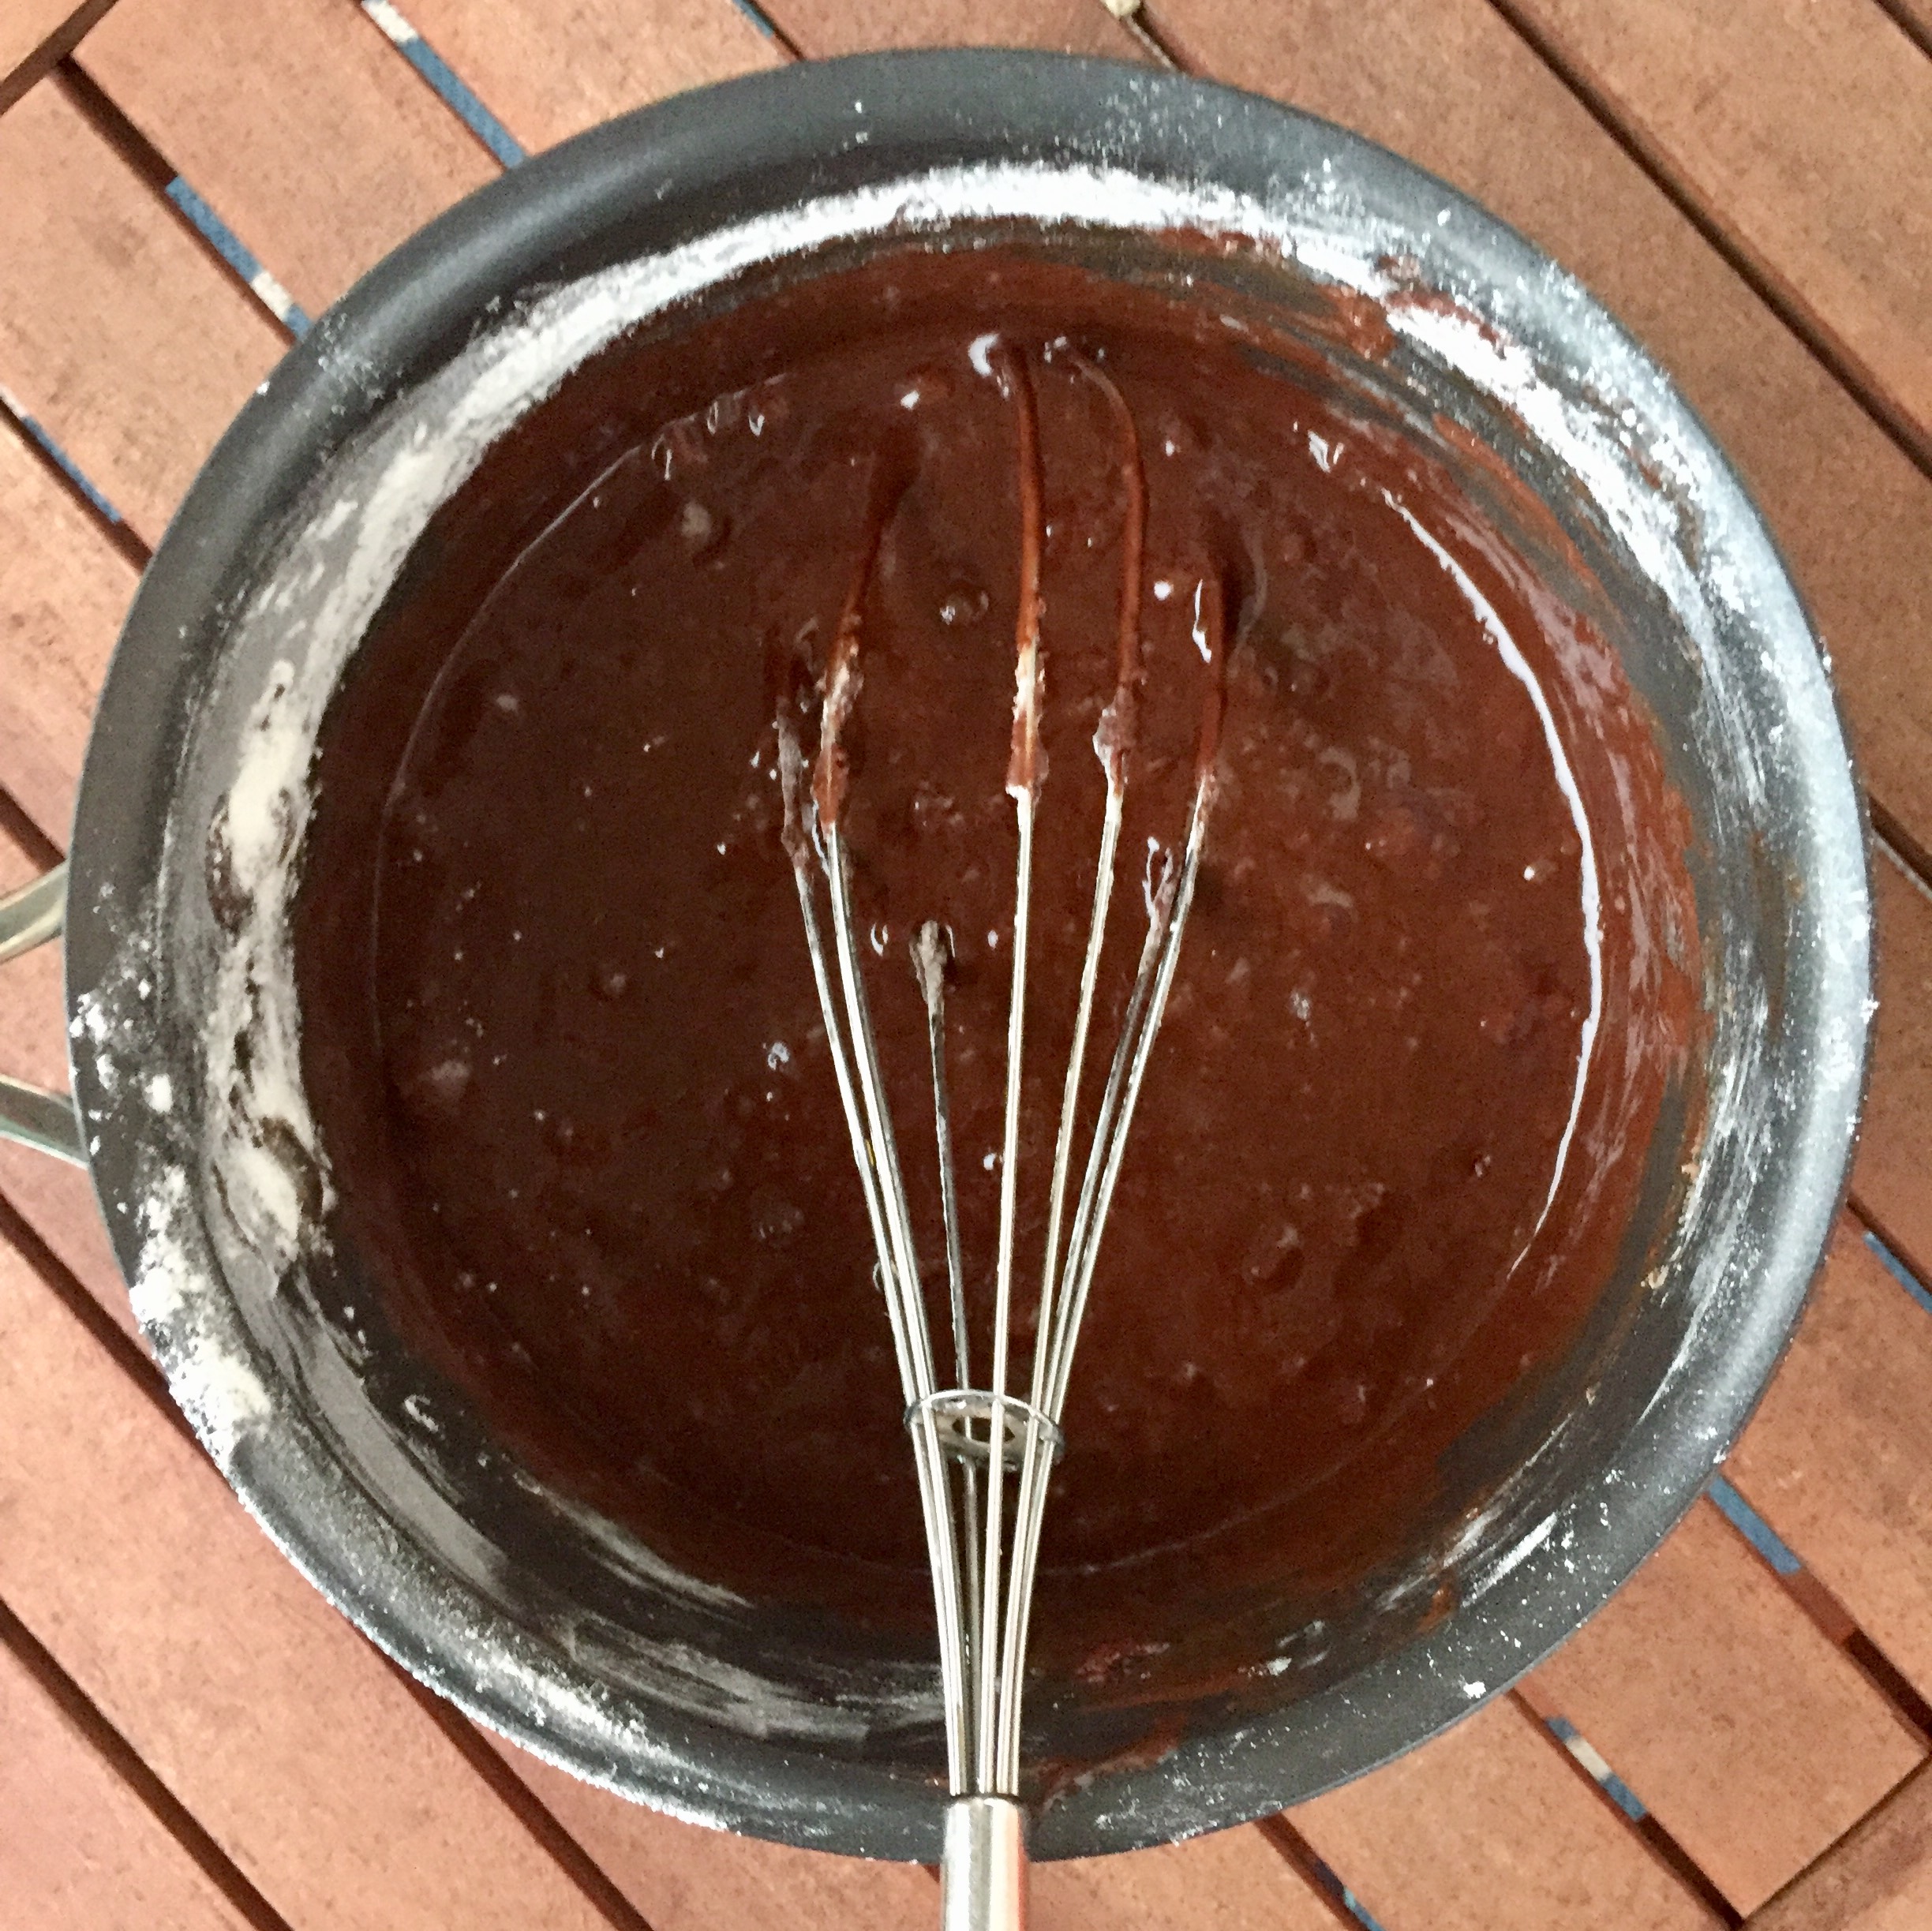
In a double-boiler (or a bowl over a pot of simmering water), melt the chocolate and the butter. Let the chocolate mixture cool.
Step Three.
In a small bowl, mix the dry ingredients (flour, baking powder, and salt).
In a stand mixer on medium-high speed, beat the eggs and sugar together until light in color. Mix in the vanilla. Slowly incorporate the cooled chocolate mixture. Finally, fold in the dry ingredients until incorporated.
Step Four.
Chill the batter for an hour or until firm. When the time is almost up, preheat your oven to 350°F and line a baking sheet with parchment paper.
Step Five.
Scoop dough with a Tablespoon and place balls of dough on the baking sheet. Bake at 350°F for about 10-12 minutes, or until the cookies resemble a crackled brownie. Set the cookies on a rack to cool.
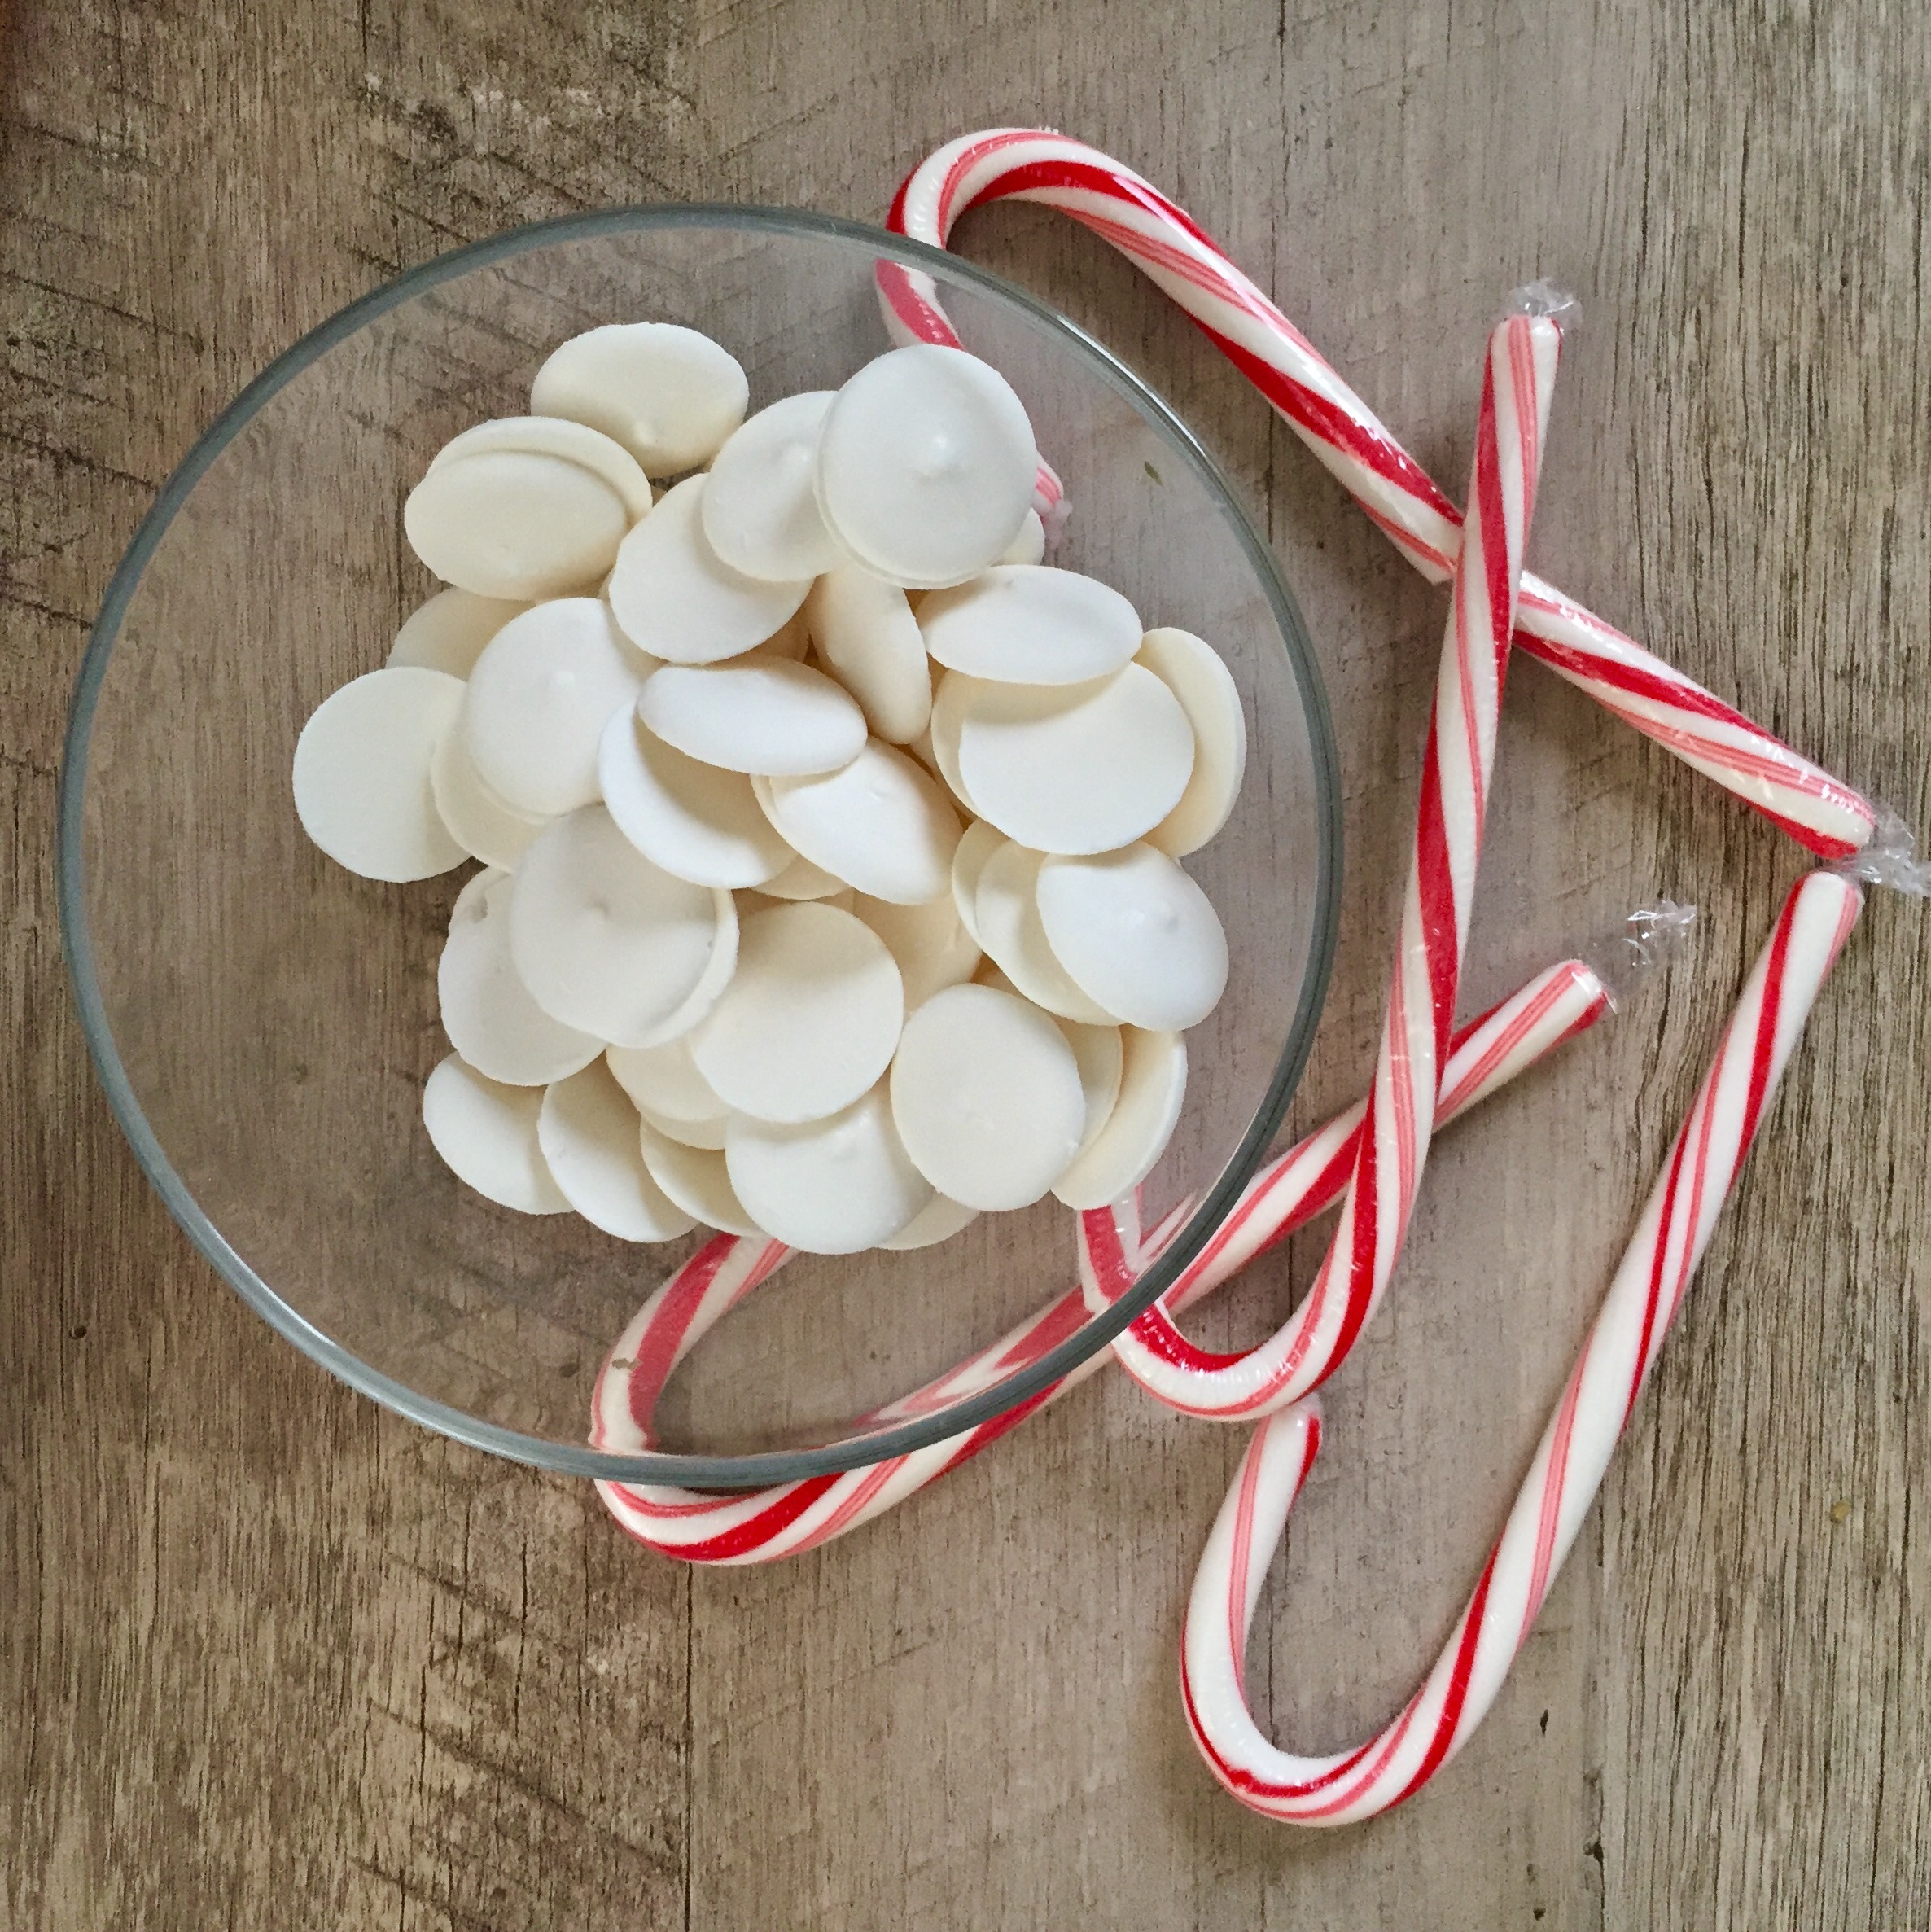
Step Six.
While the cookies cool, melt the chocolate and crush the candy canes. Dip the cookies into the chocolate, then sprinkle with crushed candy. These are best when dunked in hot chocolate! =]

The peppermint bark atop these chewy brownie cookies adds an extra touch for a tasty holiday treat!
Ingredients
- 16 ounces semisweet chocolate
- 6 Tablespoons unsalted butter
- ½ cup all-purpose flour
- ½ teaspoon baking powder
- 4 large eggs
- ½ cup light brown sugar (lightly packed)
- ½ cup sugar
- White chocolate melting chips
- Crushed candy canes
Instructions
- Prep Step! Measure out all of your ingredients.
- In a double-boiler (or a bowl over a pot of simmering water), melt the chocolate and the butter. Let the chocolate mixture cool.
- In a small bowl, mix the dry ingredients (flour, baking powder, and salt).
- In a stand mixer on medium-high speed, beat the eggs and sugar together until light in color. Mix in the vanilla. Slowly incorporate the cooled chocolate mixture. Finally, fold in the dry ingredients until incorporated.
- Chill the batter for an hour or until firm. When the time is almost up, preheat your oven to 350°F and line a baking sheet with parchment paper.
- Scoop dough with a Tablespoon and place balls of dough on the baking sheet. Bake at 350°F for about 10-12 minutes, or until the cookies resemble a crackled brownie. Set the cookies on a rack to cool.
- While the cookies cool, melt the chocolate and crush the candy canes. Dip the cookies into the chocolate, then sprinkle with crushed candy. These are best when dunked in hot chocolate!
It’s almost Thanksgiving! That means an abundance of good food, good wine, and, in the case of my family, slightly testy socio-political conversations. Usually started by yours truly! =]
Table-chatter aside, my favorite part of any holiday is the dessert spread. But I have a very small family – we fit around just one, normal-sizied dining room table! So it’s hard to make a variety of treats without having leftovers until Christmas.
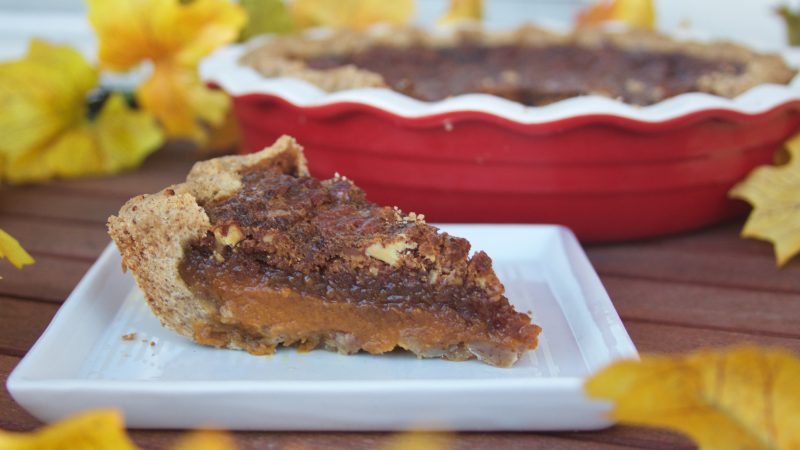
So… introducing a brandied pumpkin and pecan pie with a pecan shortbread crust. This is a Thanksgiving pie mash-up that will end all pie dilemmas. It has a bit of everything. Even throw in some chocolate if you like. And it is SO EASY!
~~~~~~~~~~
Step One.
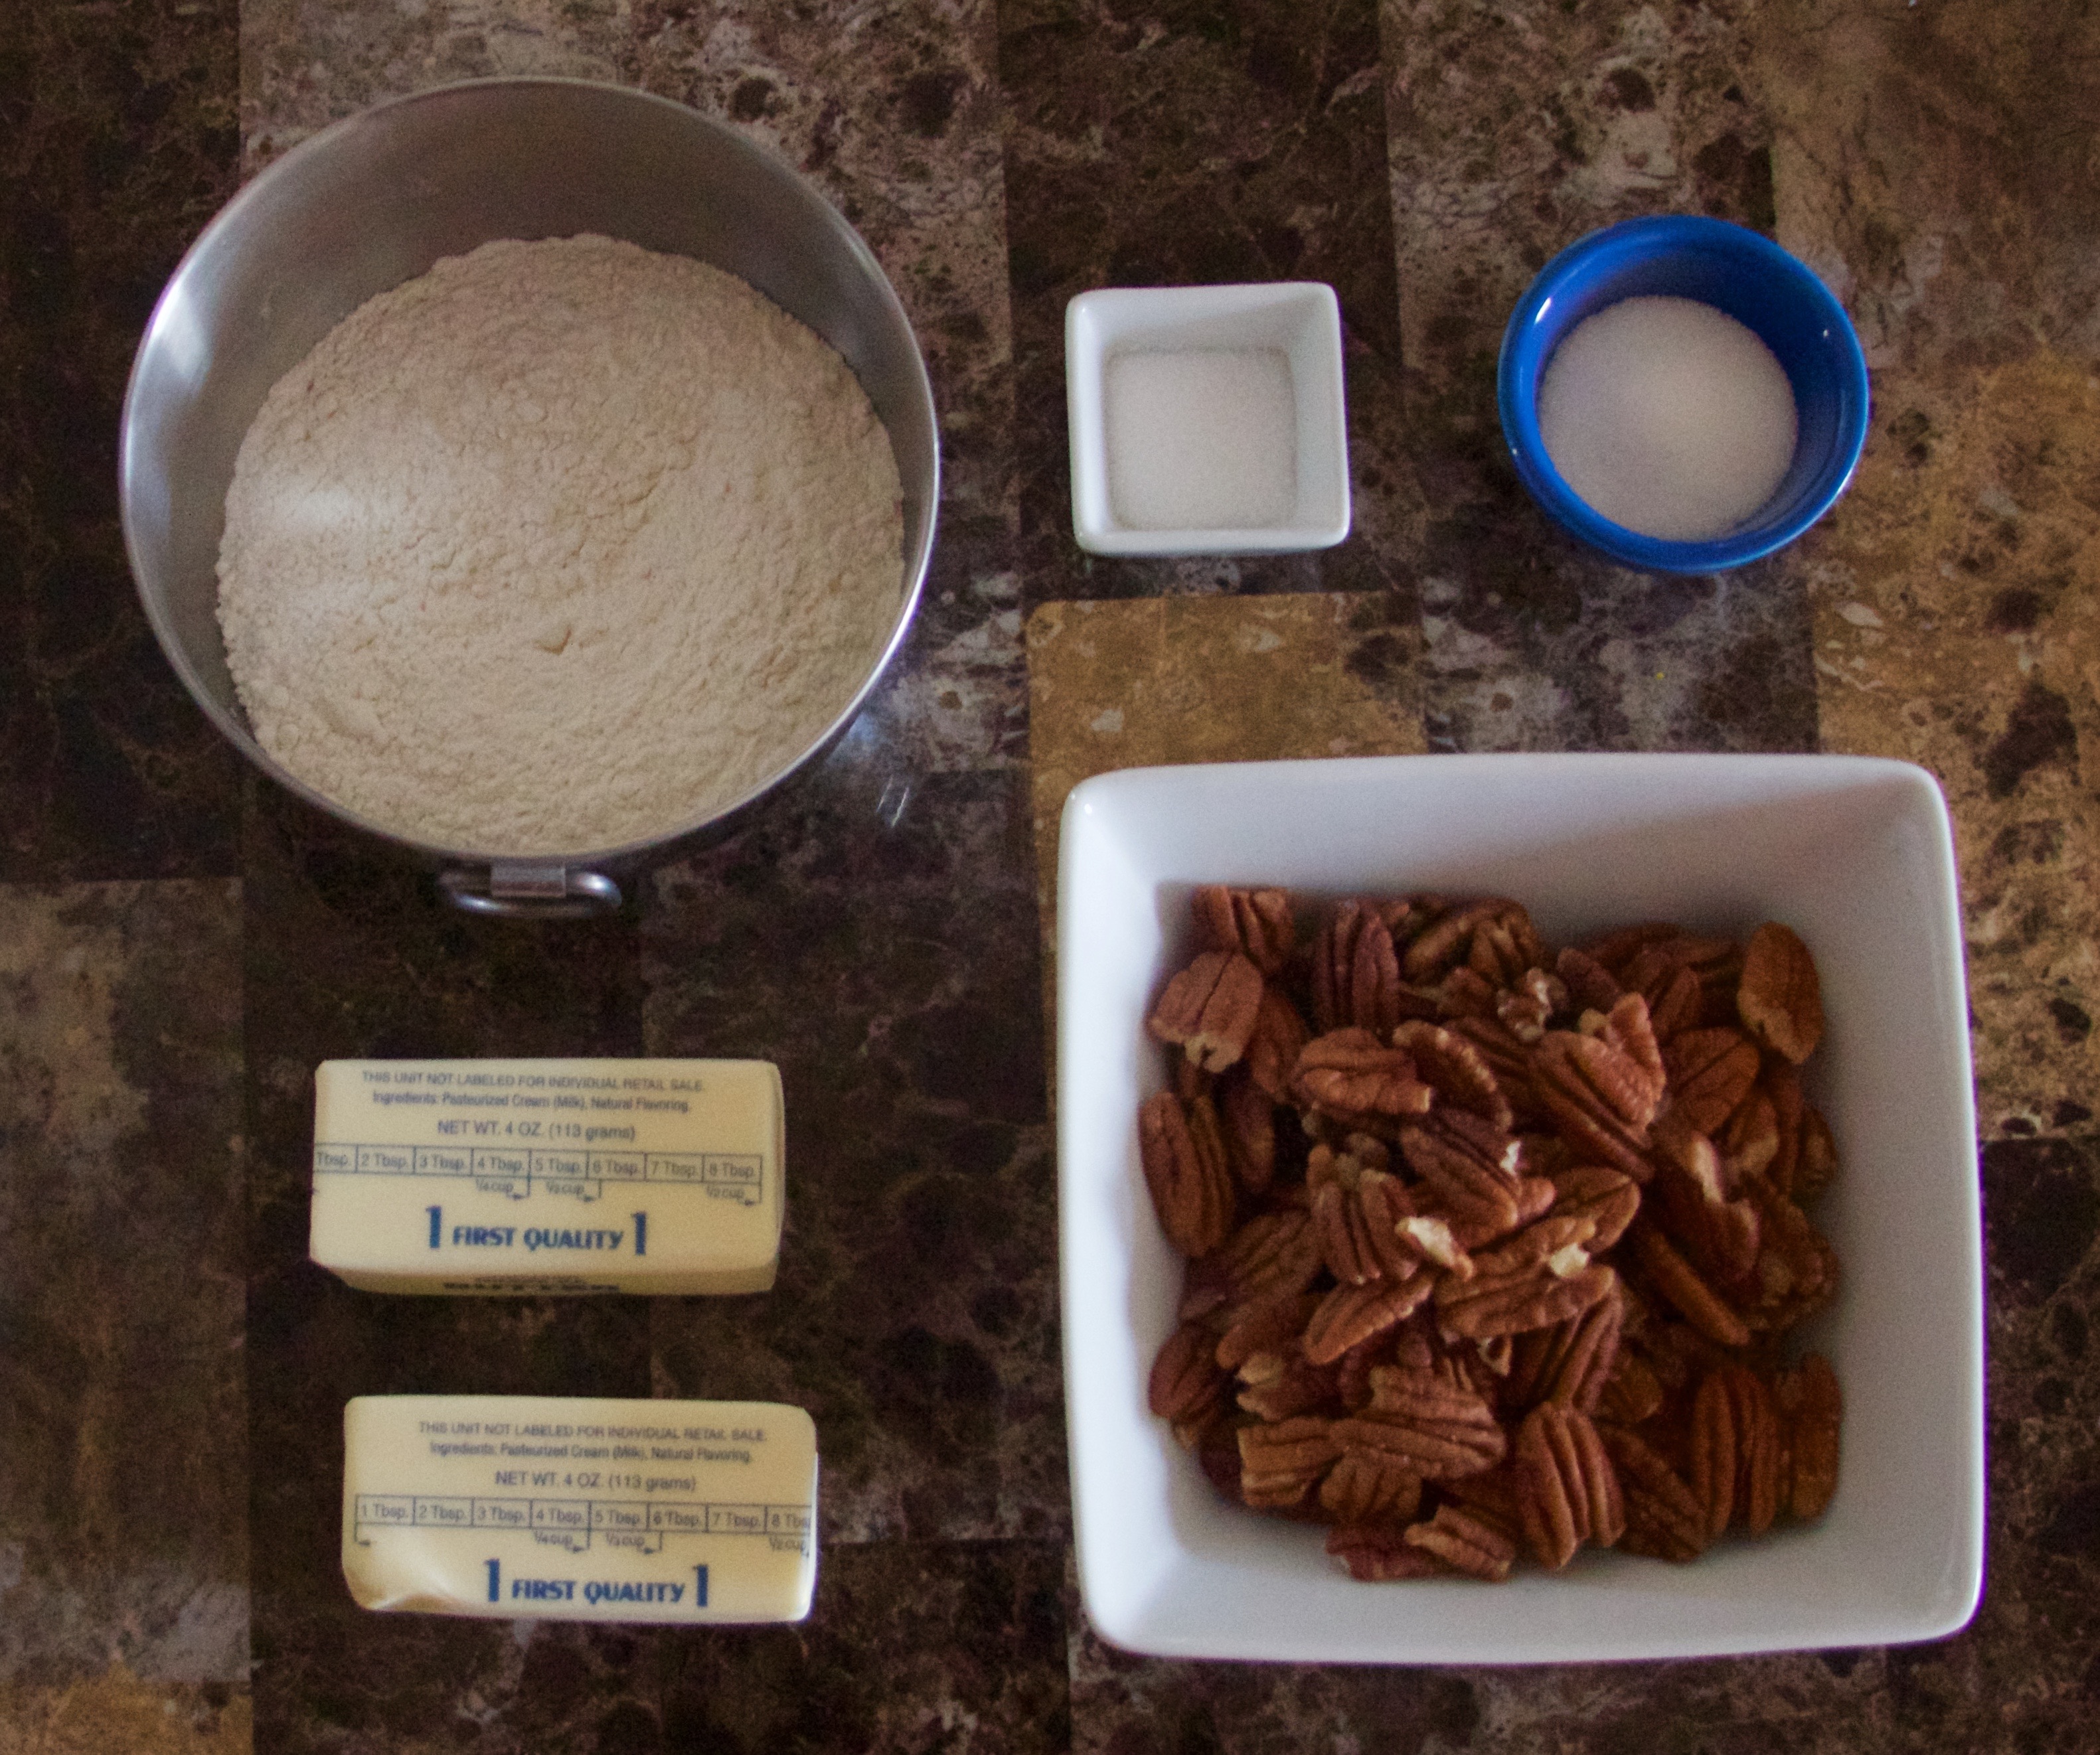
First, make the crust. Measure out your ingredients. In a food processor, pulse the pecans until they are completely ground up. Scoop out 1/2 cup of the ground pecans, and reserve them for later. Next, add your flour, sugar, and salt. Pulse to mix. Finally, cut up your chilled butter into small chunks and add to the processor. Mix until you have a dough. Wrap the dough in plastic wrap and chill for at least an hour.
Step Two.
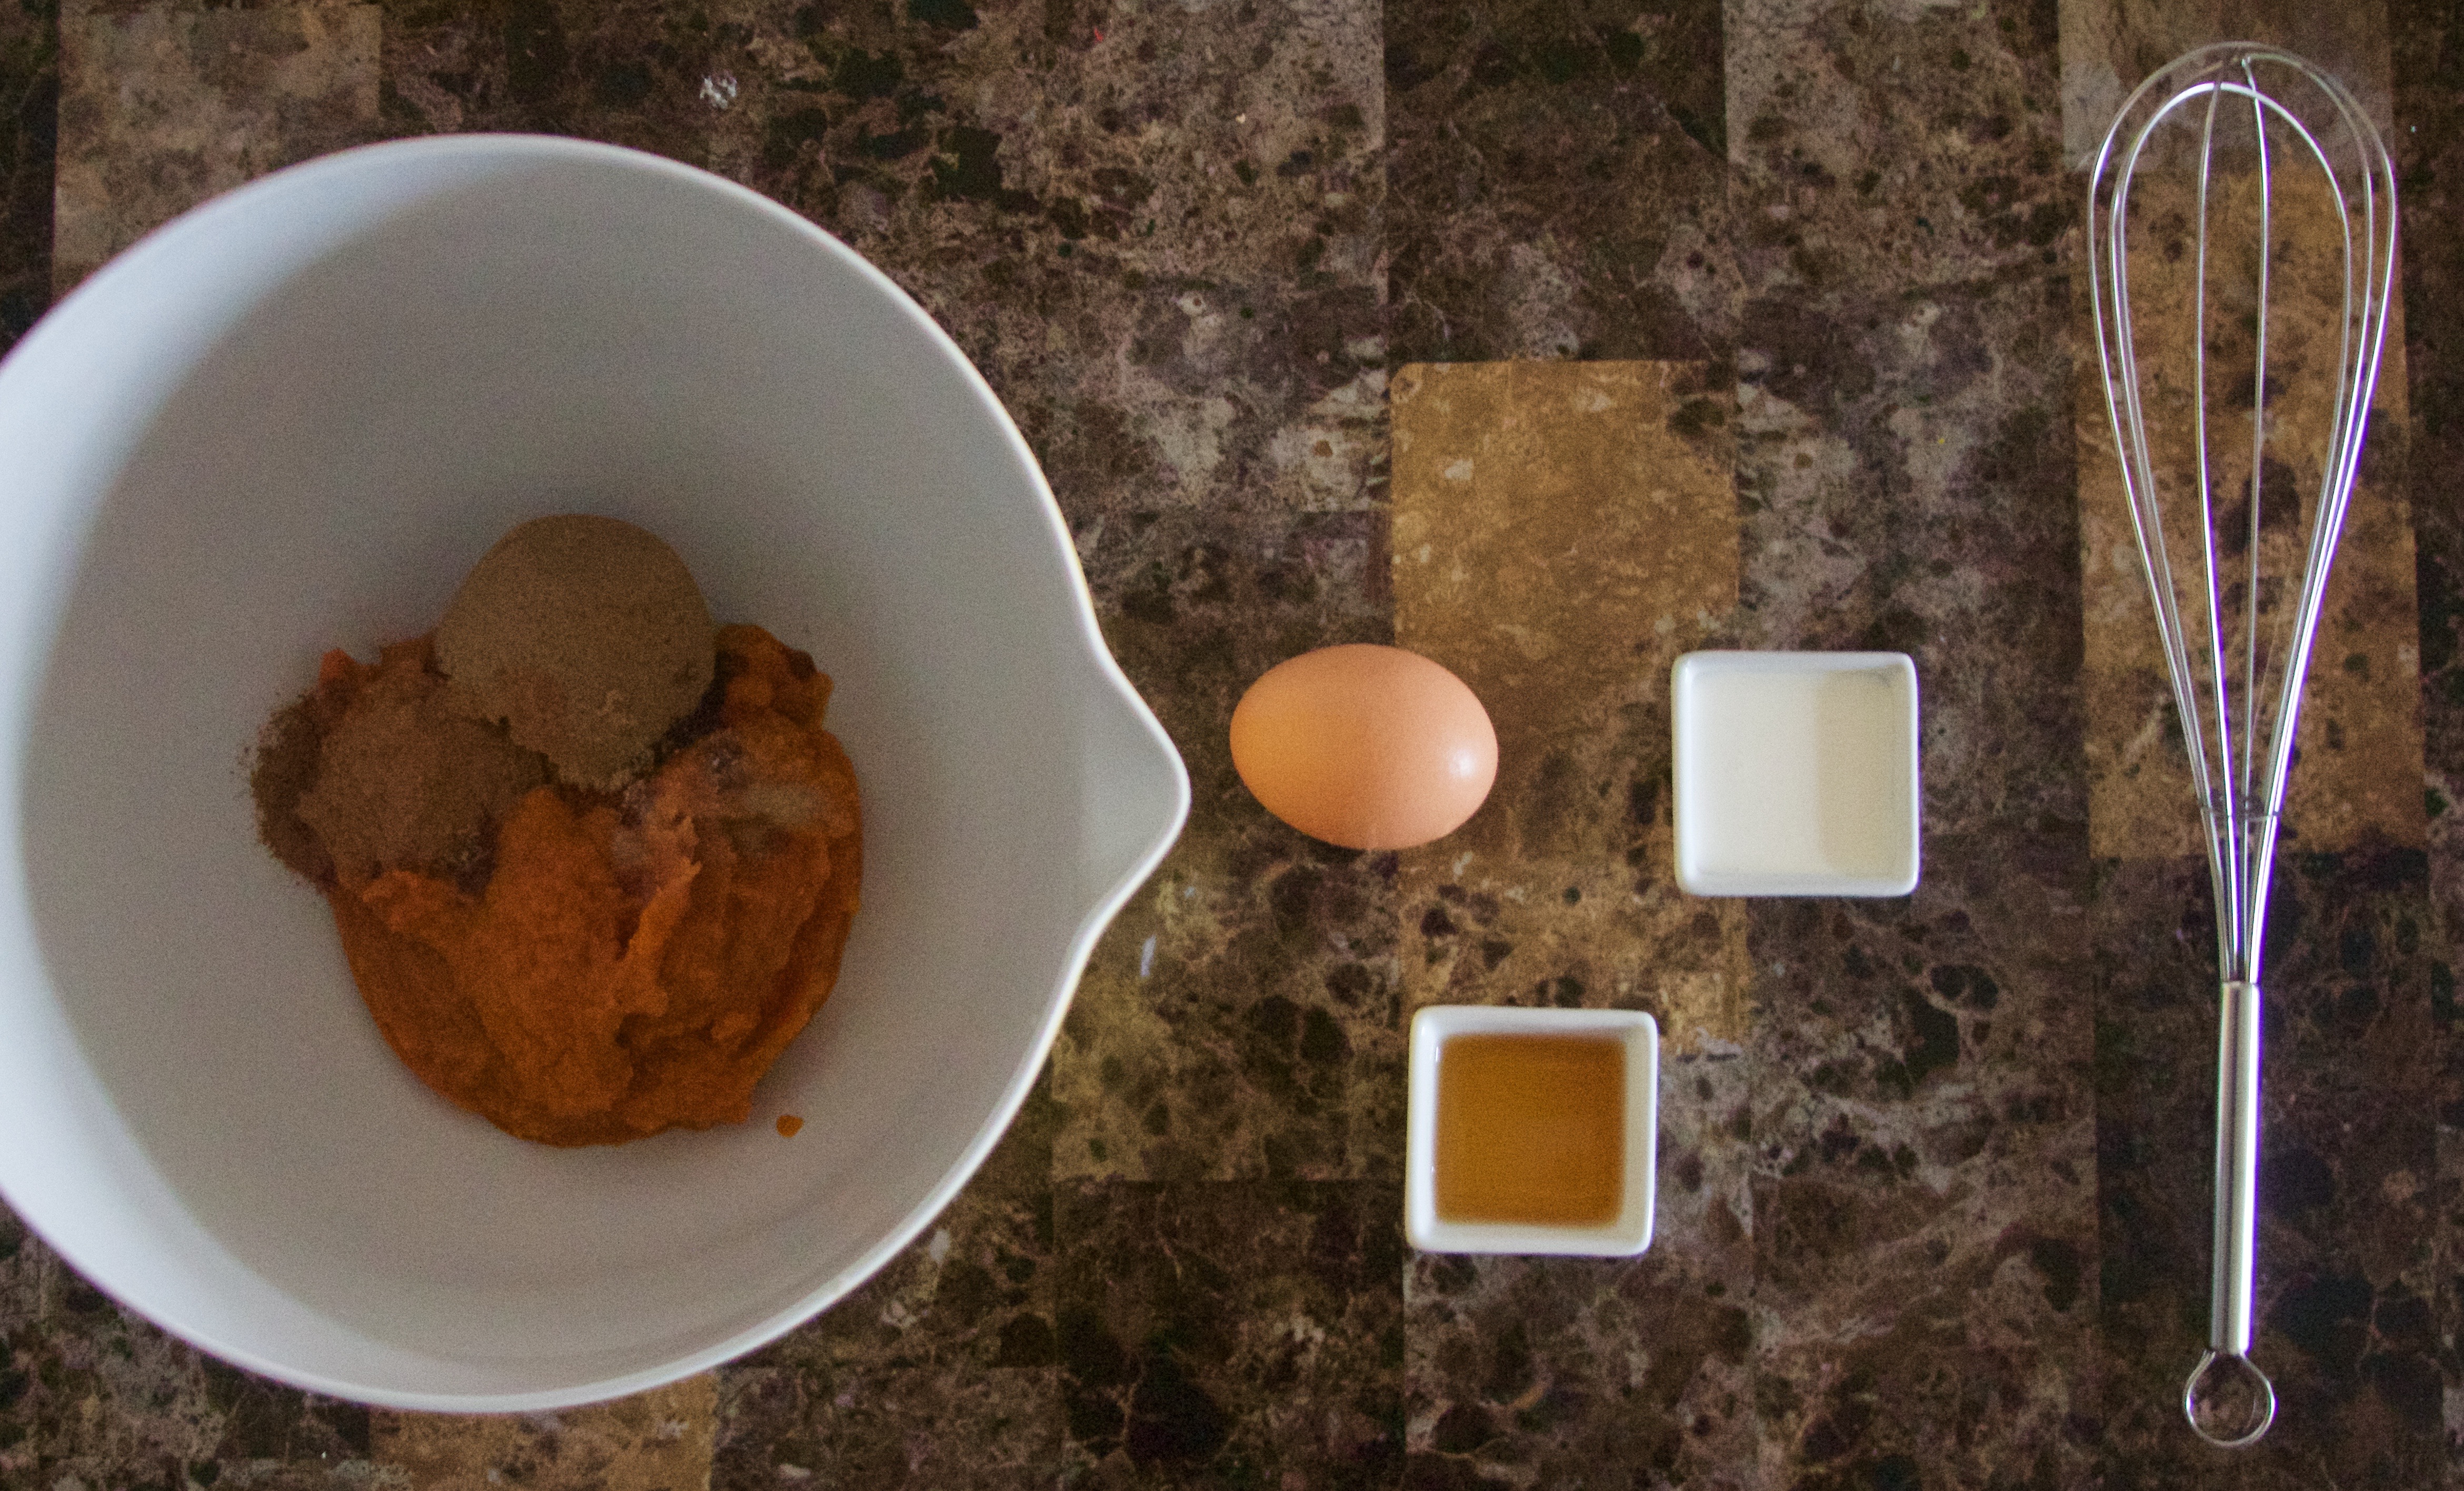
Take a break while the chilling happens – this is a good time to work on another part of the dinner! Or sample a Thanksgiving cocktail (check back soon for a recipe!) When the dough only has about ten minutes left, prepare the fillings (it really is that quick). Add all of the ingredients for the pumpkin filling into a large mixing bowl. Whisk until combined.
Step Three
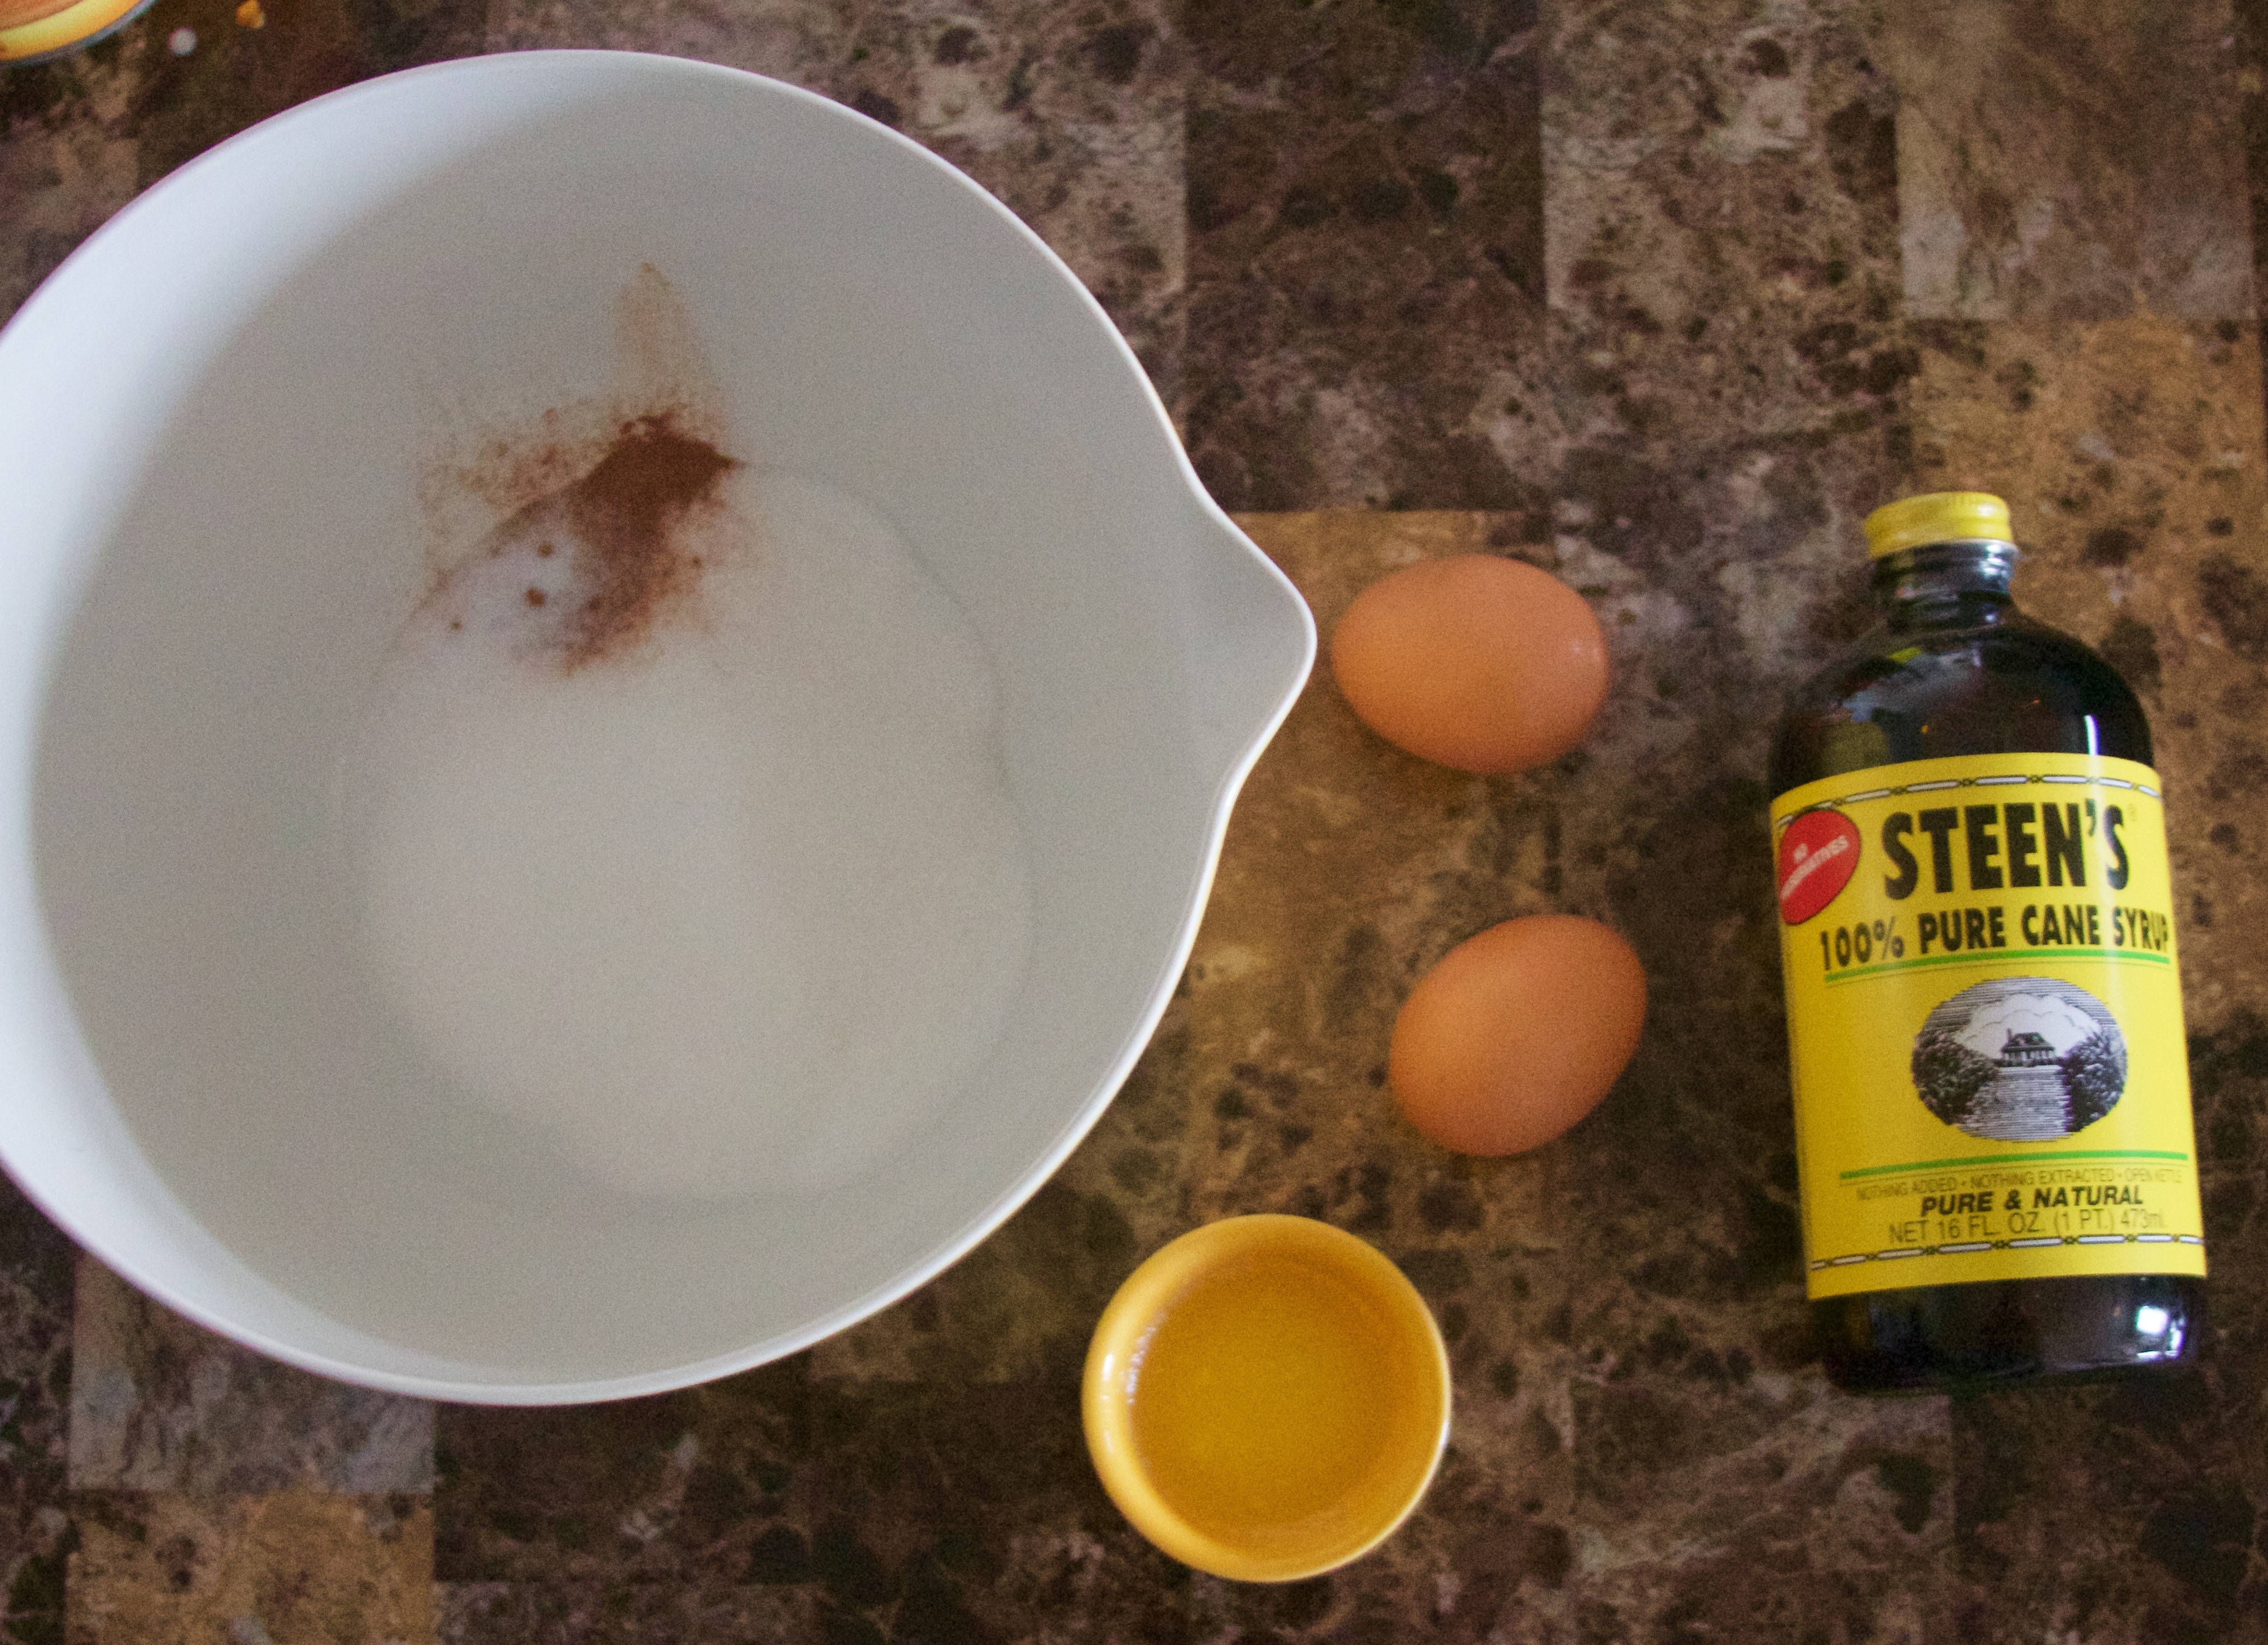
Now, add all of the ingredients for the pecan filling EXCEPT the pecans to a different large mixing bowl, and whisk until combined.
Step Four.
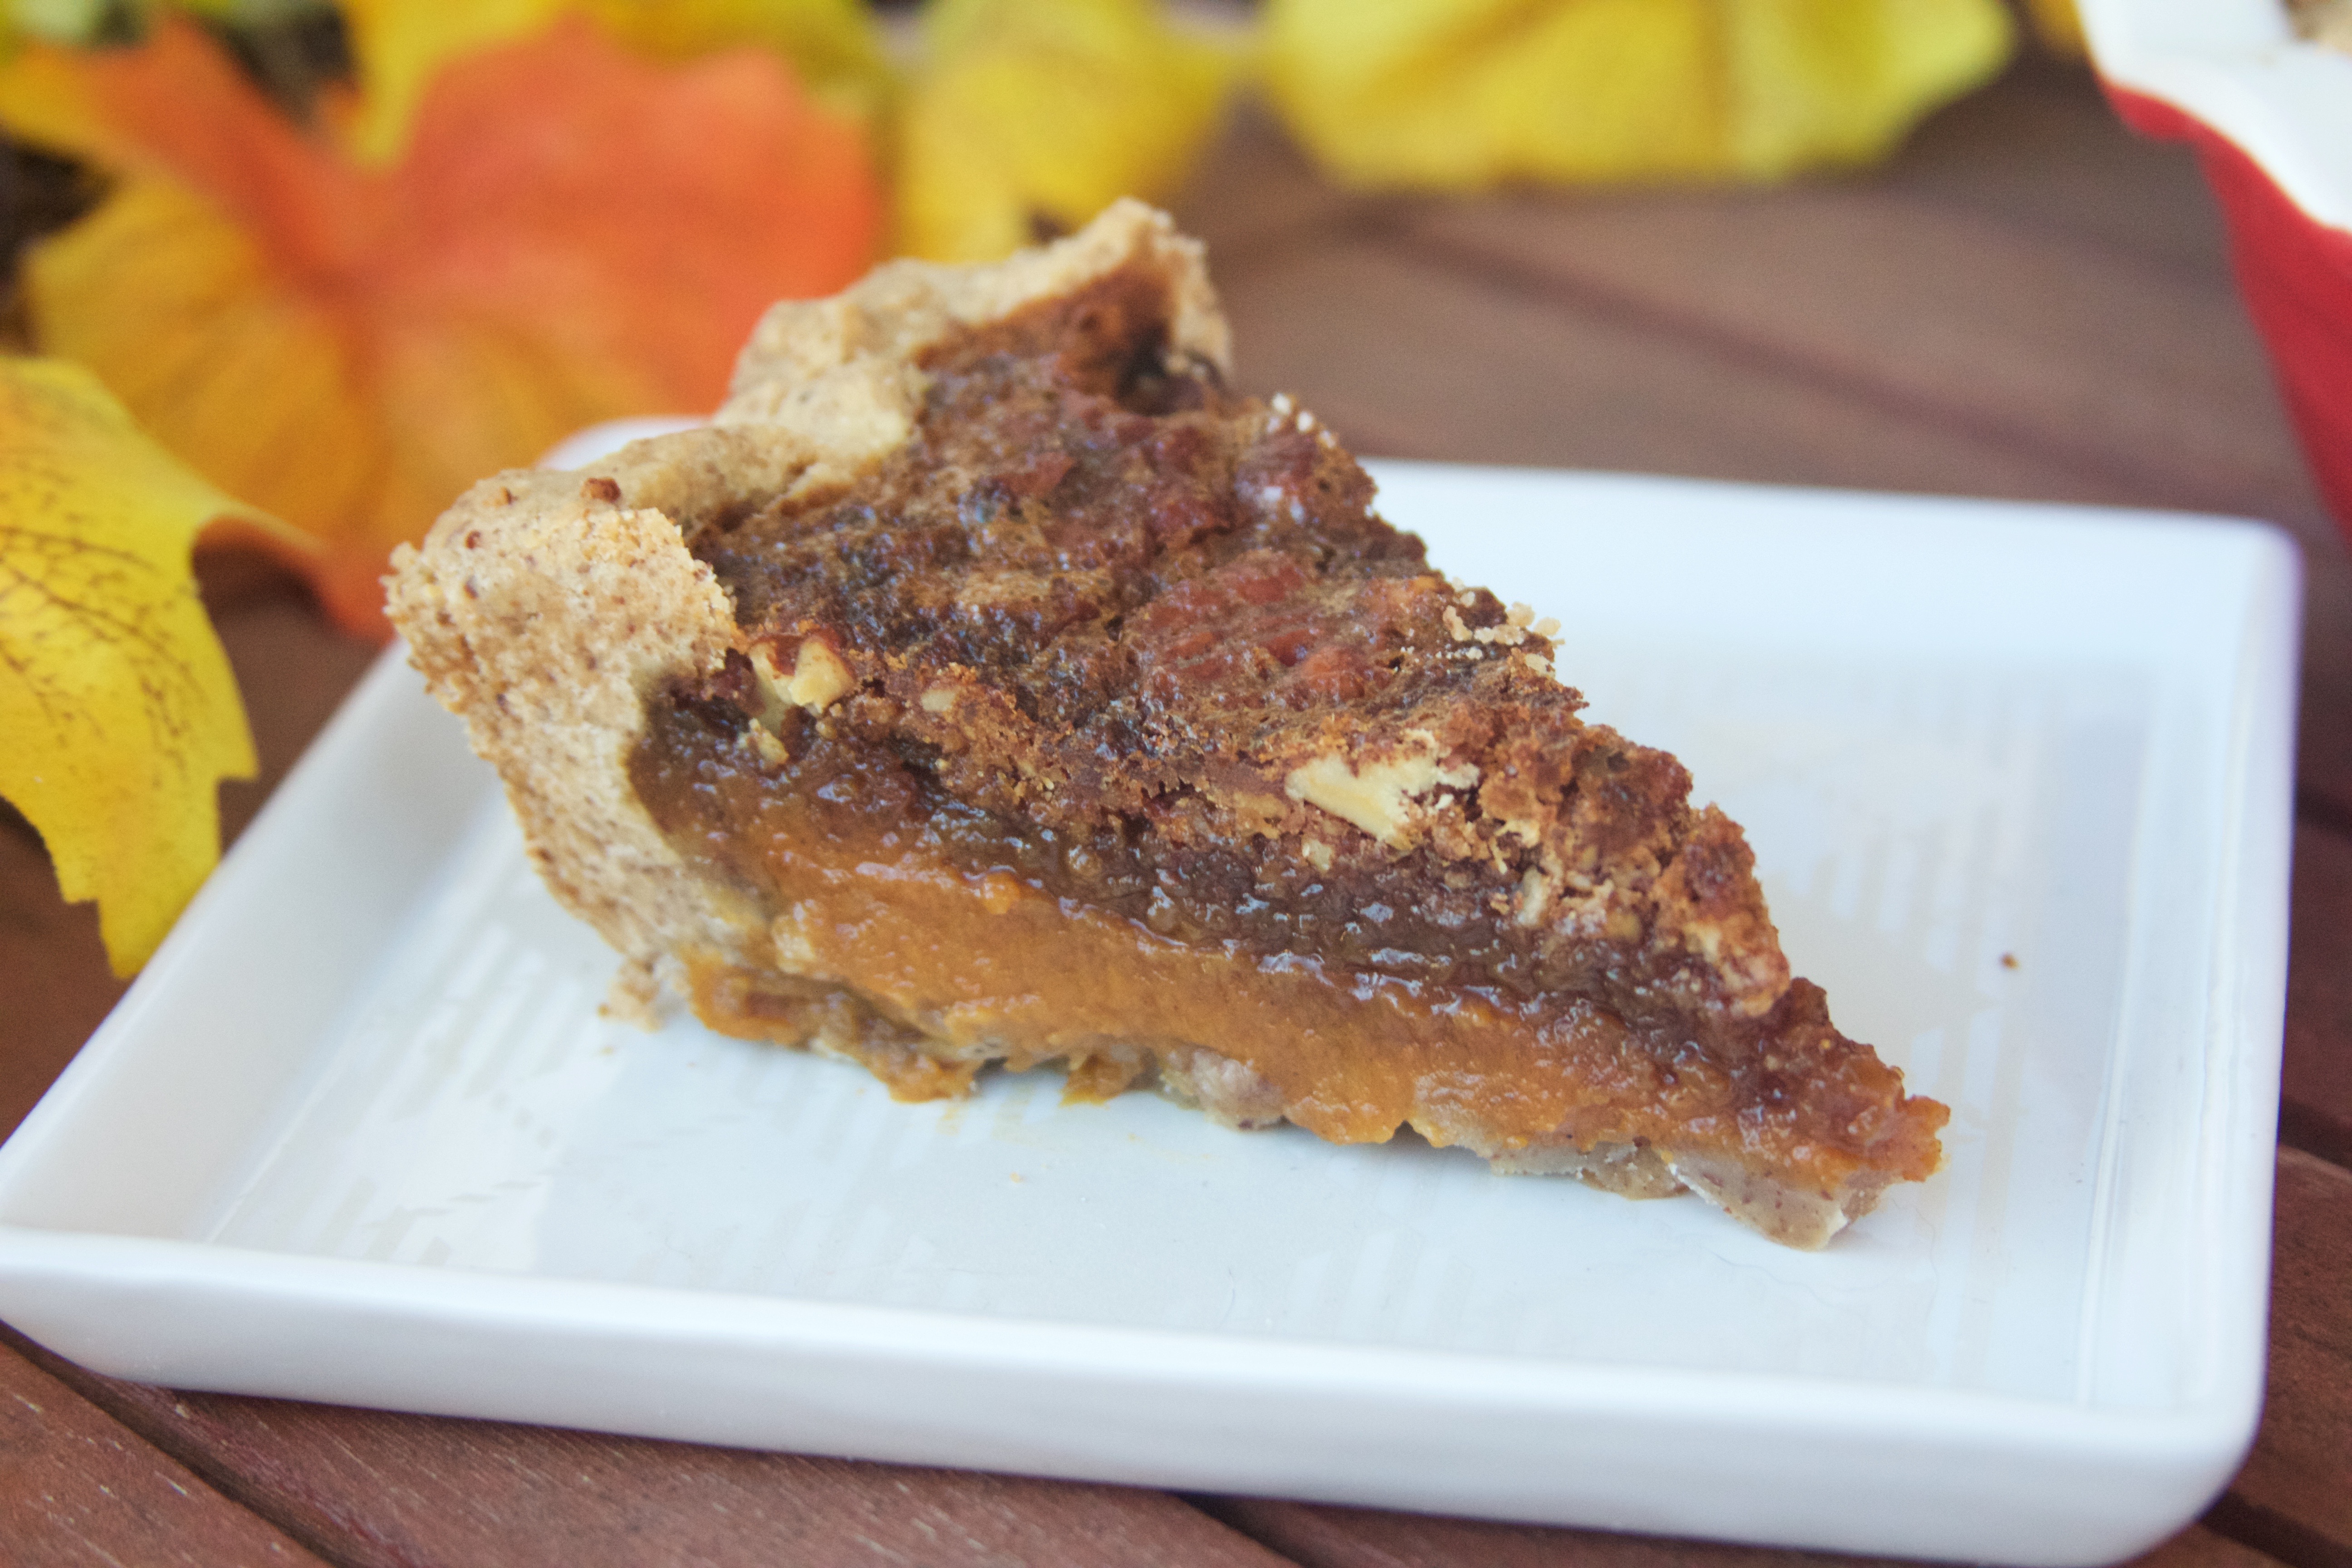
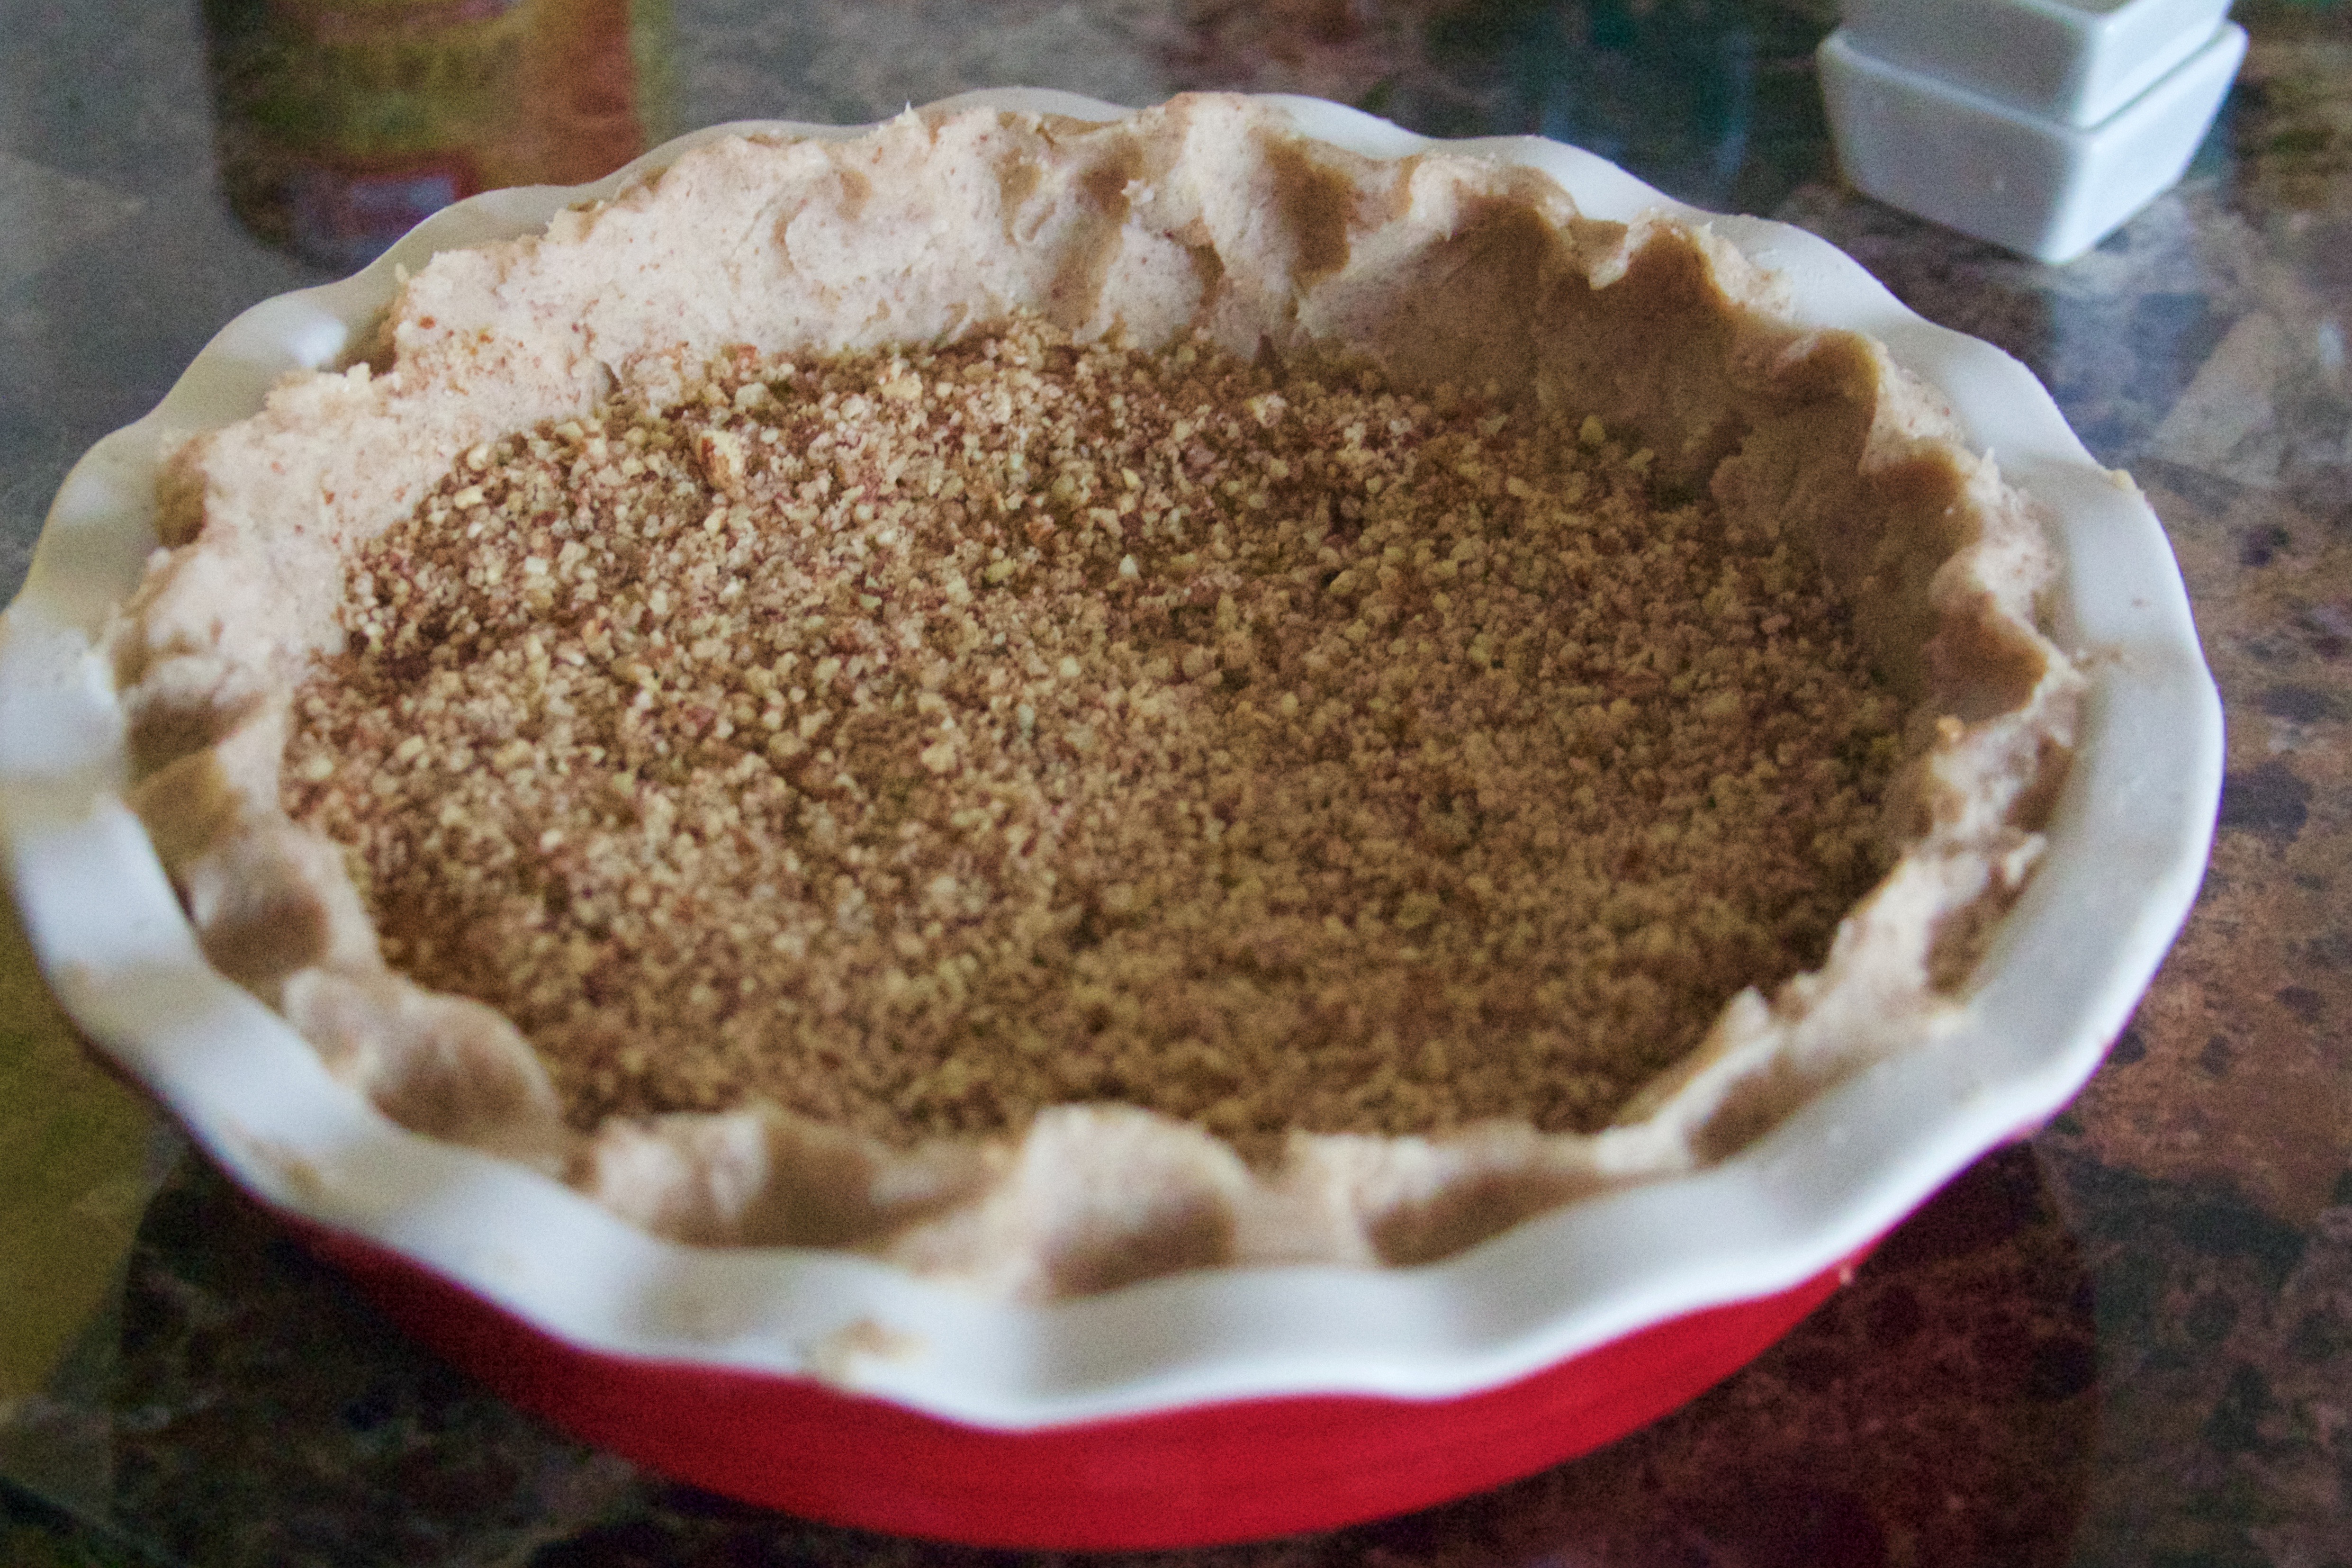
Time to preheat! Set your oven to 300°F. Once the crust is thoroughly chilled, roll it out and press it into the bottom of a deep-dish pie plate. Spread the pumpkin filling into the bottom. Dust the top with the crushed pecans that you reserved before.
Then, add the whole (or chopped, whatever you prefer) pecans to the top of the crushed ones. Carefully pour the pecan filling on top.
Ready to bake! Bake at 300°F for an hour and half, or until the middle appears set and jiggles only slightly.
Happy Thanksgiving!

This is a Thanksgiving pie mash-up that will end all pie dilemmas. It has a bit of everything. And it is simply delicious!
Ingredients
- 2 cups flour
- 1 1/2 cups pecans
- 1 Tablespoon sugar
- 1 teaspoon salt
- 1 cup unsalted butter, very cold
- 1 cup pumpkin puree
- 1/3 cup brown sugar
- 1 teaspoon cinnamon (or pumpkin pie spice)
- 1 egg
- 1 Tablespoon heavy cream
- 1 Tablespoon brandy
- 1 cup pecans
- 3/4 cup sugar
- 3/4 cup pure cane syrup
- 2 eggs
- 1 Tablespoon melted butter
- 1/2 teaspoon cinnamon
- 1/4 teaspoon salt
Instructions
- Measure out your ingredients for the pecan shortbread crust.
- In a food processor, pulse the pecans until they are completely ground up. Scoop out 1/2 cup of the ground pecans, and reserve them for later.
- Next, add your flour, sugar, and salt. Pulse to mix.
- Finally, cut up your chilled butter into small chunks and add to the processor. Mix until you have a dough. Wrap the dough in plastic wrap and chill for at least an hour.
- When the dough only has about ten minutes left, prepare the fillings.
- Add all of the ingredients for the pumpkin filling into a large mixing bowl. Whisk until combined.
- Next, add all of the ingredients for the pecan filling EXCEPT the pecans to a different large mixing bowl, and whisk until combined.
- Preheat your oven to 300°F. Once the crust is thoroughly chilled, roll it out and press it into the bottom of a deep-dish pie plate. Spread the pumpkin filling into the bottom. Dust the top with the crushed pecans that you reserved before.
- Then, add the whole (or chopped, whatever you prefer) pecans to the top of the crushed ones. Carefully pour the pecan filling on top.
- Bake the pie at 300°F for an hour and half, or until the middle appears set and jiggles only slightly.
- Happy Thanksgiving!
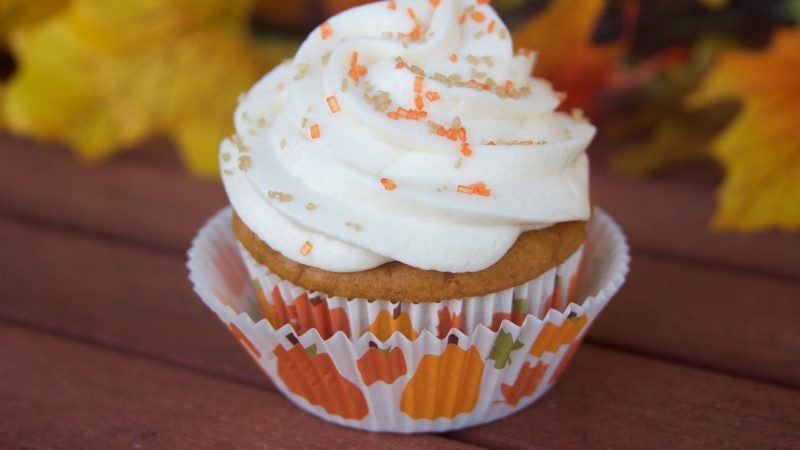
Even though we all love to make fun of the PSL craze, pumpkin spice flavoring is onto something. The comforting flavors always take me back to Thanksgiving and my grandma’s homemade pumpkin pie. Stereotypical, yes, but wonderful as well.
That being said, I am not a fan of the PSL. It is overly sweet and makes me want to skip the season all together. So I chase down the flavor through other food vessels. Nuts… yes! Cake… absolutely.
This cake is easy to make (it cheats with a box mix! Don’t tell!) and can be made quickly when you need a last-minute treat. Box mix is popular for a reason; it gets the job done and still tastes great! This recipe gussies the mix up a bit, so your tasters will never know the difference. Happy Fall, Y’all!
~~~~~~~~~~
Step One.
Prep Step! Measure out your ingredients. Preheat the oven to 350°F. Line your cupcake tins with a cute, fall cupcake paper.
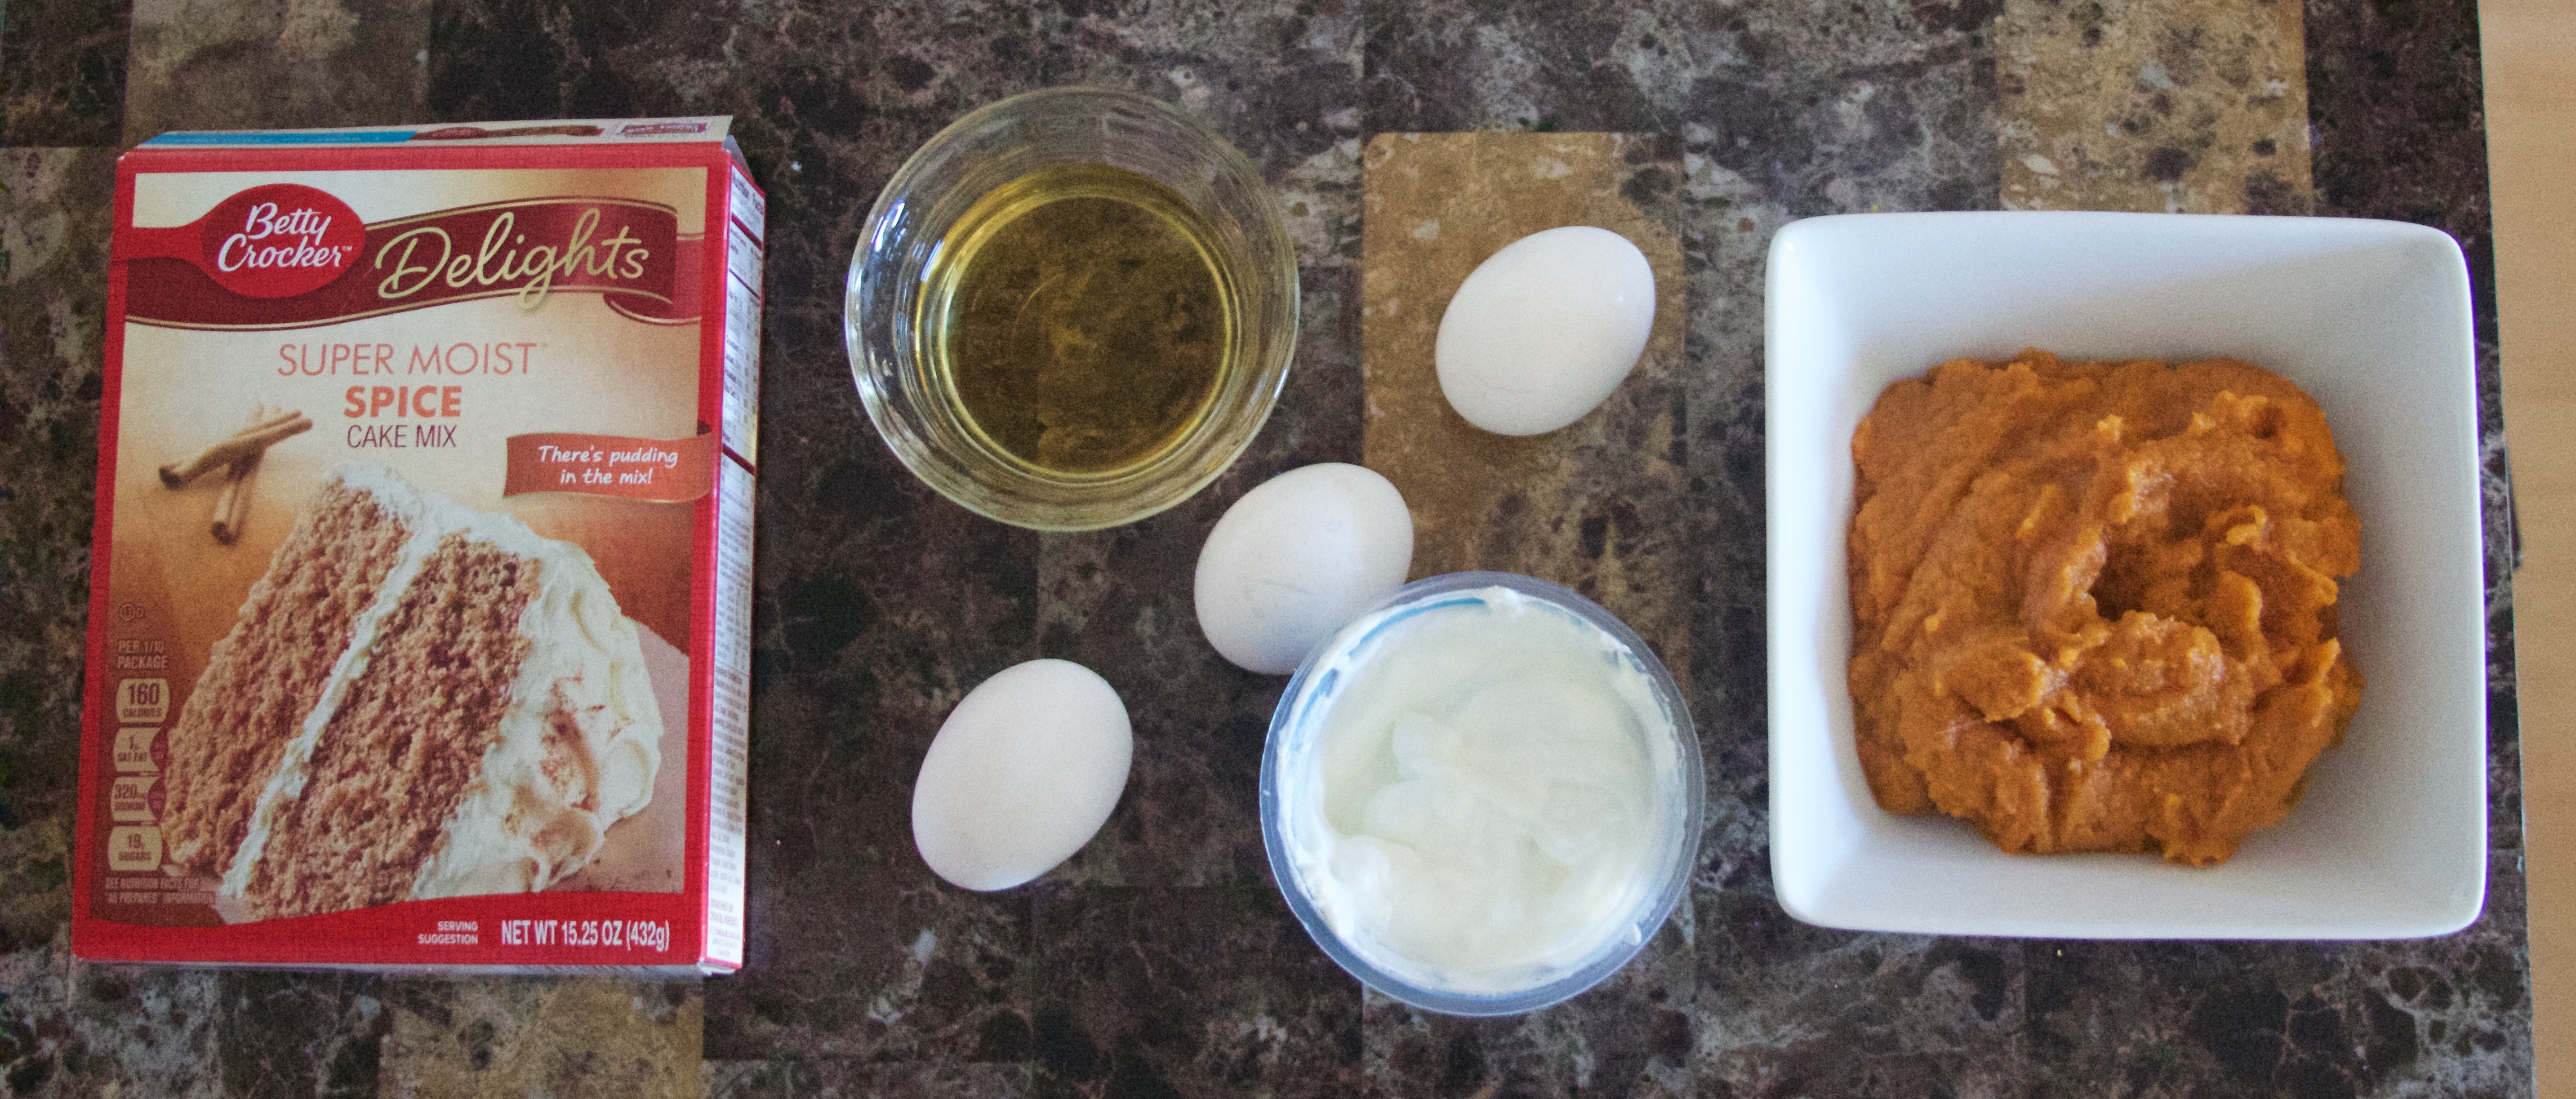
Step Two.
Combine the cake mix and the pumpkin puree in a stand mixer on high speed until the mixture is combined. This should take about 3 minutes.
Step Three.
Add the eggs, one at a time, and mix until incorporated.
Step Four.
Add the yogurt and mix until combined. Slowly, add the apple cider, and mix until combined.
Step Five.
Fill the cupcake liners, and bake for 18 – 22 minutes, or until a toothpick inserted in the center comes out smoothly. When they are done, let cool.
Step Six.
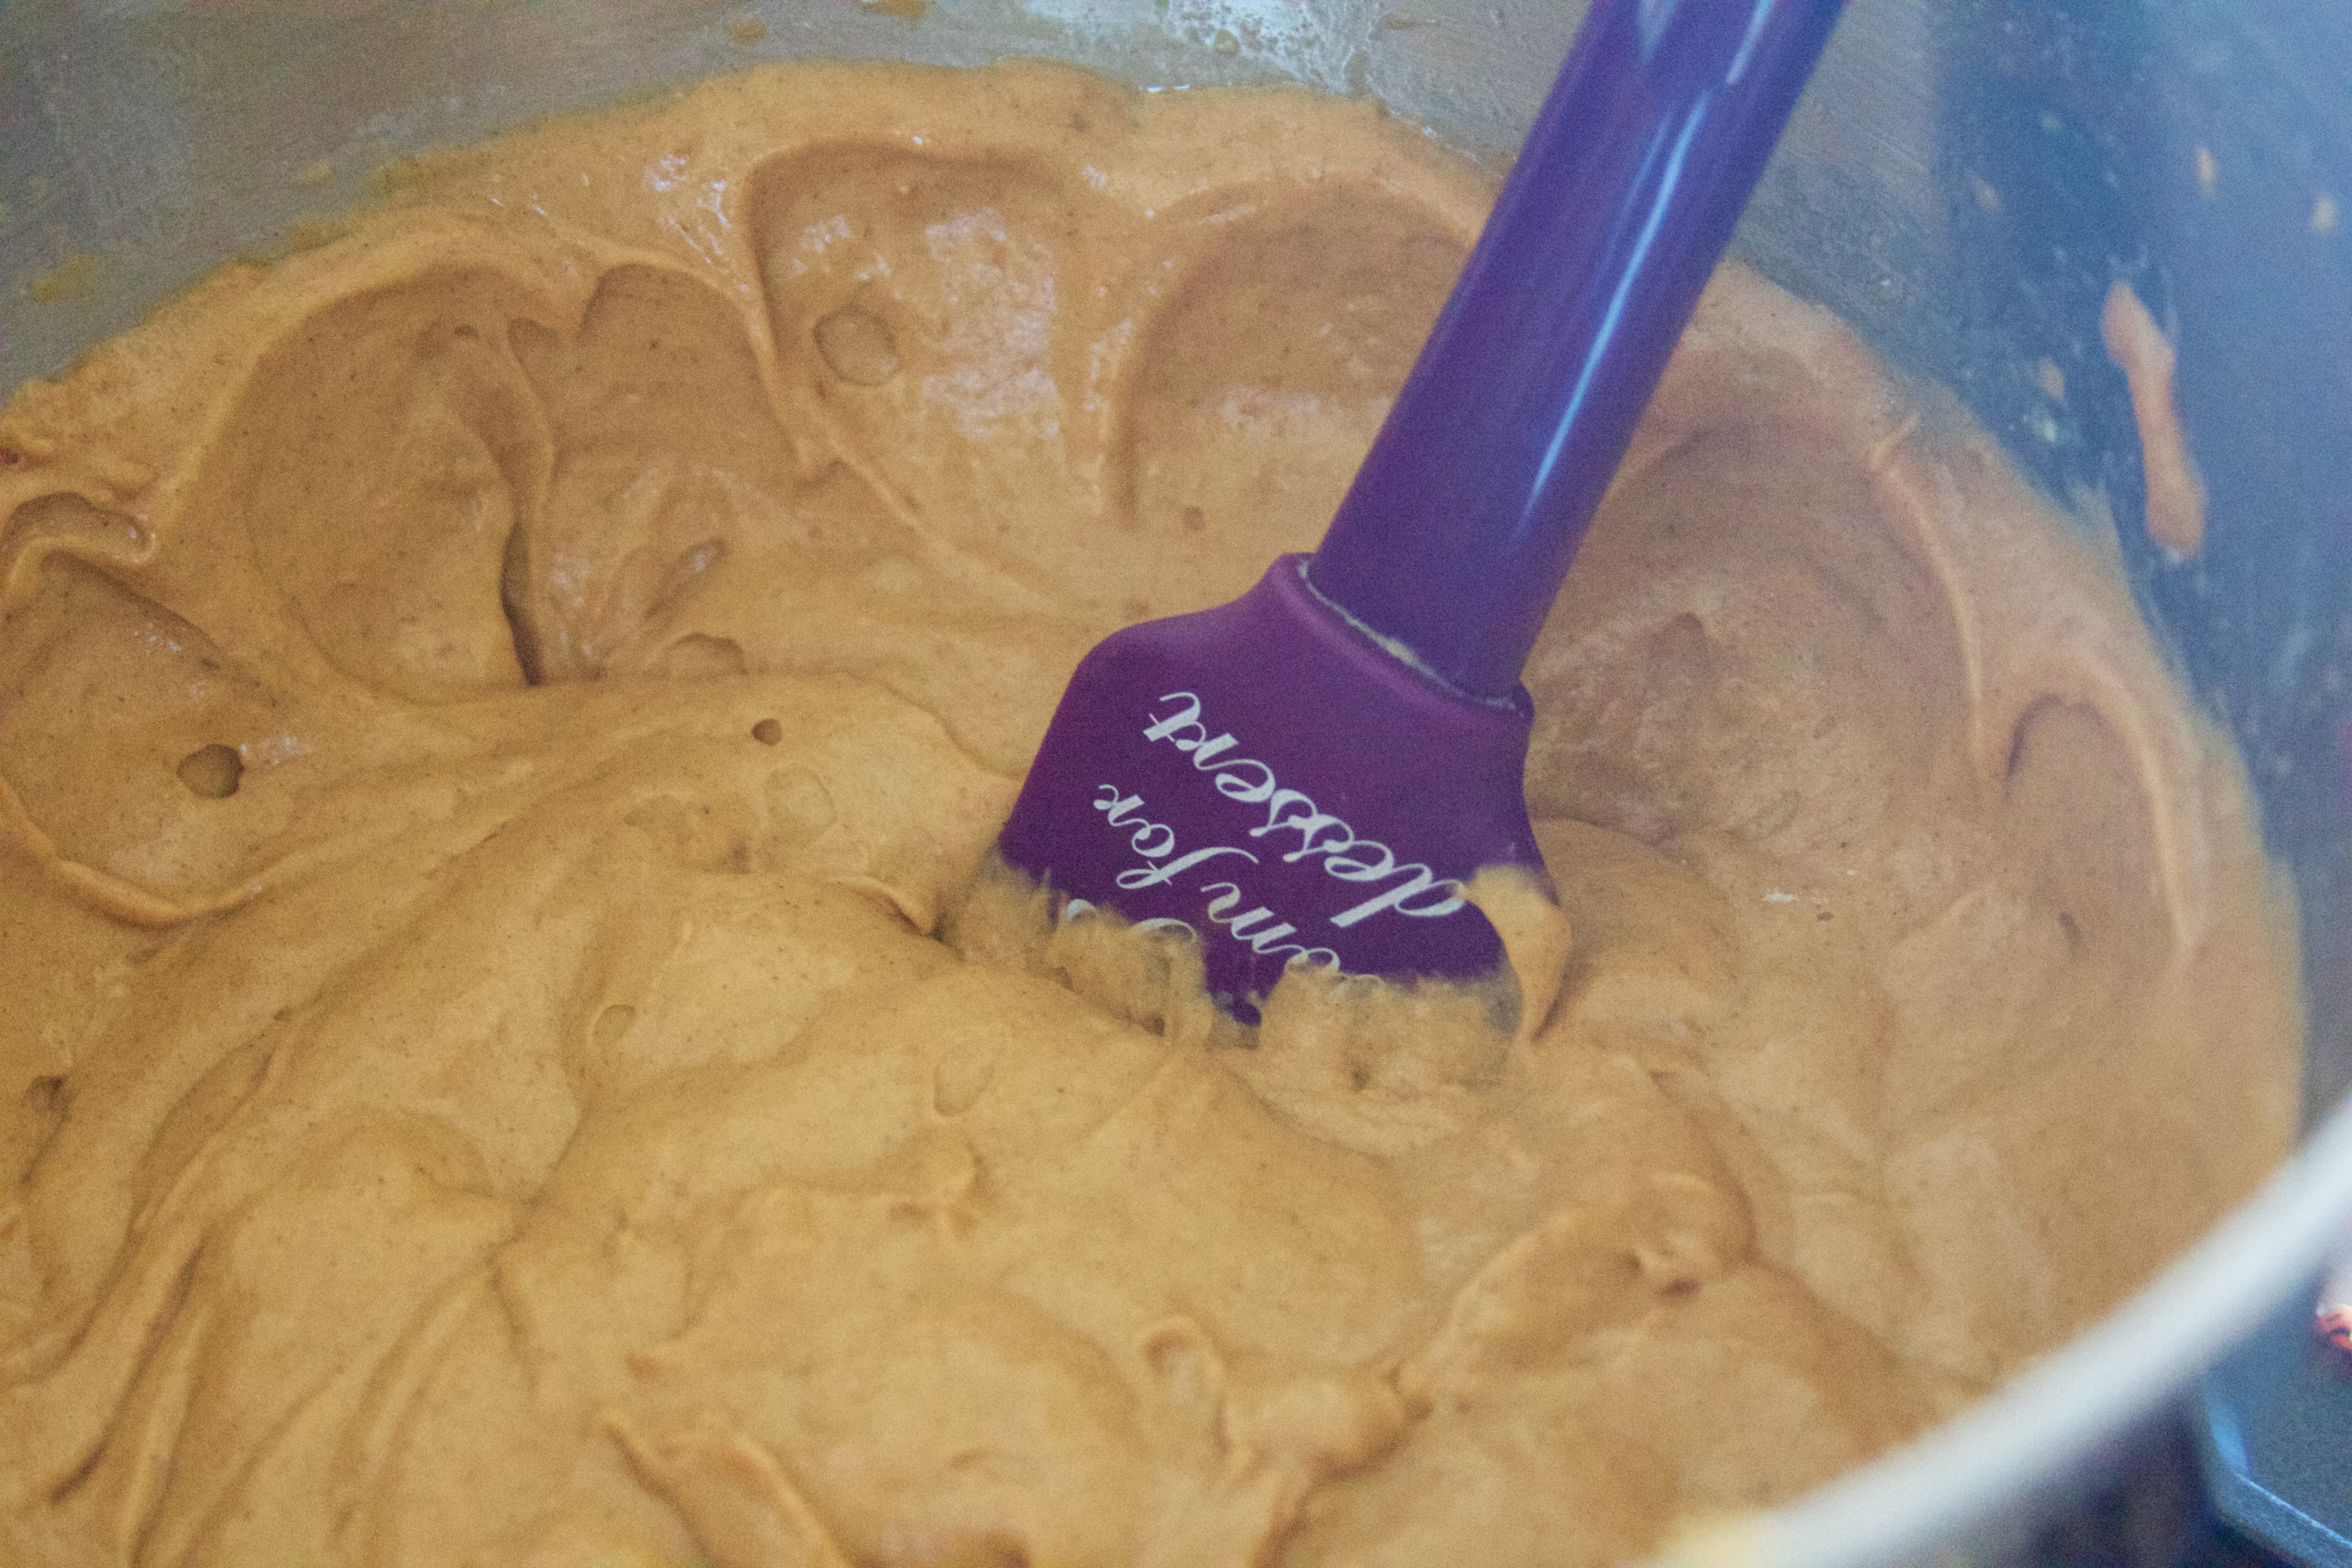
Make the frosting! In a medium pot, boil the apple cider to reduce to about 1/4 cup. When it is reduced, remove from the heat and let cool. Chill until ready to use.
Step Seven.
Beat the butter on high in a stand mixer for about 5 minutes, until it is light and fluffy. Add the vanilla and beat on high for 1 minutes. In increments of 1/2 cup, add the powdered sugar. Finally, slowly add the apple cider reduction. Beat on high for another 2-3 minutes, until the frosting is mixed thoroughly and is fluffy.
Step Eight.
Time to assemble!
Once the cupcakes are cool, you are ready to assemble them. Fir a piping bag with a star tip. Add the frosting to the piping bag. Pipe away!
Decorate with sprinkles, marshmallow pumpkin, or whatever else floats your boat!

Calling all PSL lovers! This cake uses a shortcut (shh!) to make a tasty fall treat in record time.
Ingredients
- 1 box spice cake mix
- 1 cup pumpkin puree
- 3 eggs
- 1/2 cup plain Greek yogurt
- 1/3 cup apple cider
- 1 cup butter
- 2 cups powdered sugar
- 1 Tbsp vanilla
- 1 cup apple cider
Instructions
- Prep step! Measure out your ingredients. Preheat the oven to 375°F. Line your cupcake tins with a cute, fall cupcake paper.
- Combine the cake mix and pumpkin puree in a stand mixer on high until fully incorporated, or for about 2 three minutes.
- Add the eggs, one at a time, and mix until combined.
- Add the yogurt and mix until combined.
- Slowly, add the apple cider, and mix until combined.
- Fill the cupcake tin, and bake for 18 - 22 minutes, or until a toothpick in the center comes out smoothly.
- In a medium pot, boil the apple cider to reduce to about 1/4 cup. When it is reduced, remove from the heat and let cool. Chill in the refrigerator until ready to use.
- Beat the butter on high in stand mixer for about 5 minutes, until it is light and fluffy.
- Add the vanilla and beat on high for 1 minute.
- In increments of 1/2 cup, add the powdered sugar.
- Finally, slowly add the apple cider reduction.
- Beat on high for another 2-3 minutes, until the frosting is mixed thoroughly and is fluffy.
- Once the cupcakes are cool, you are ready to decorate! Fit a piping bag with a star tip. Add the frosting to the piping bag. Pipe away!
- Garnish with sprinkles, marshmallow pumpkins, or whatever floats your boat!
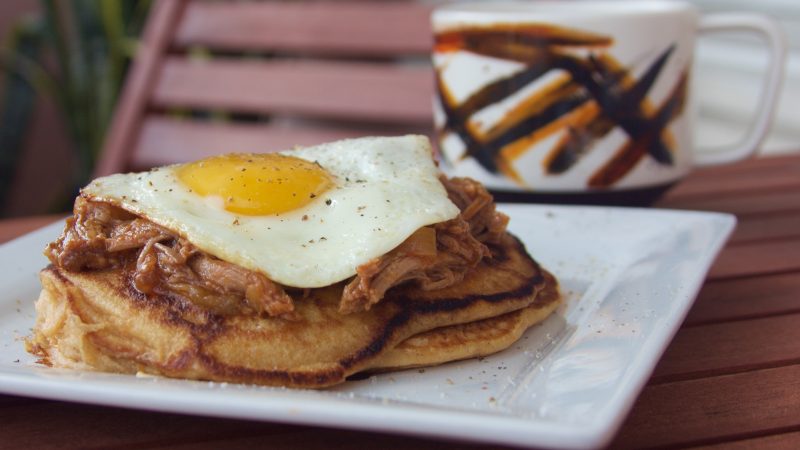
I have always loved barbecue pulled pork. It’s sweet, it’s tangy, and it’s a perfect comfort food. So when I can have it for brunch, my favorite meal, I am a very happy camper.
This recipe is a good transition to fall. It incorporates sweet potatoes, but it’s in in-your-face PSL ridiculousness either. It’s a good recipe for when the days first start to get chilly!
~~~~~~~~~~
Step One.
You’re going to want to prep the barbecue pulled pork the night before. Prep all of the ingredients for the sauce.
Add the sauce ingredients to a dutch oven and bring to a boil over medium heat.

Step Two.
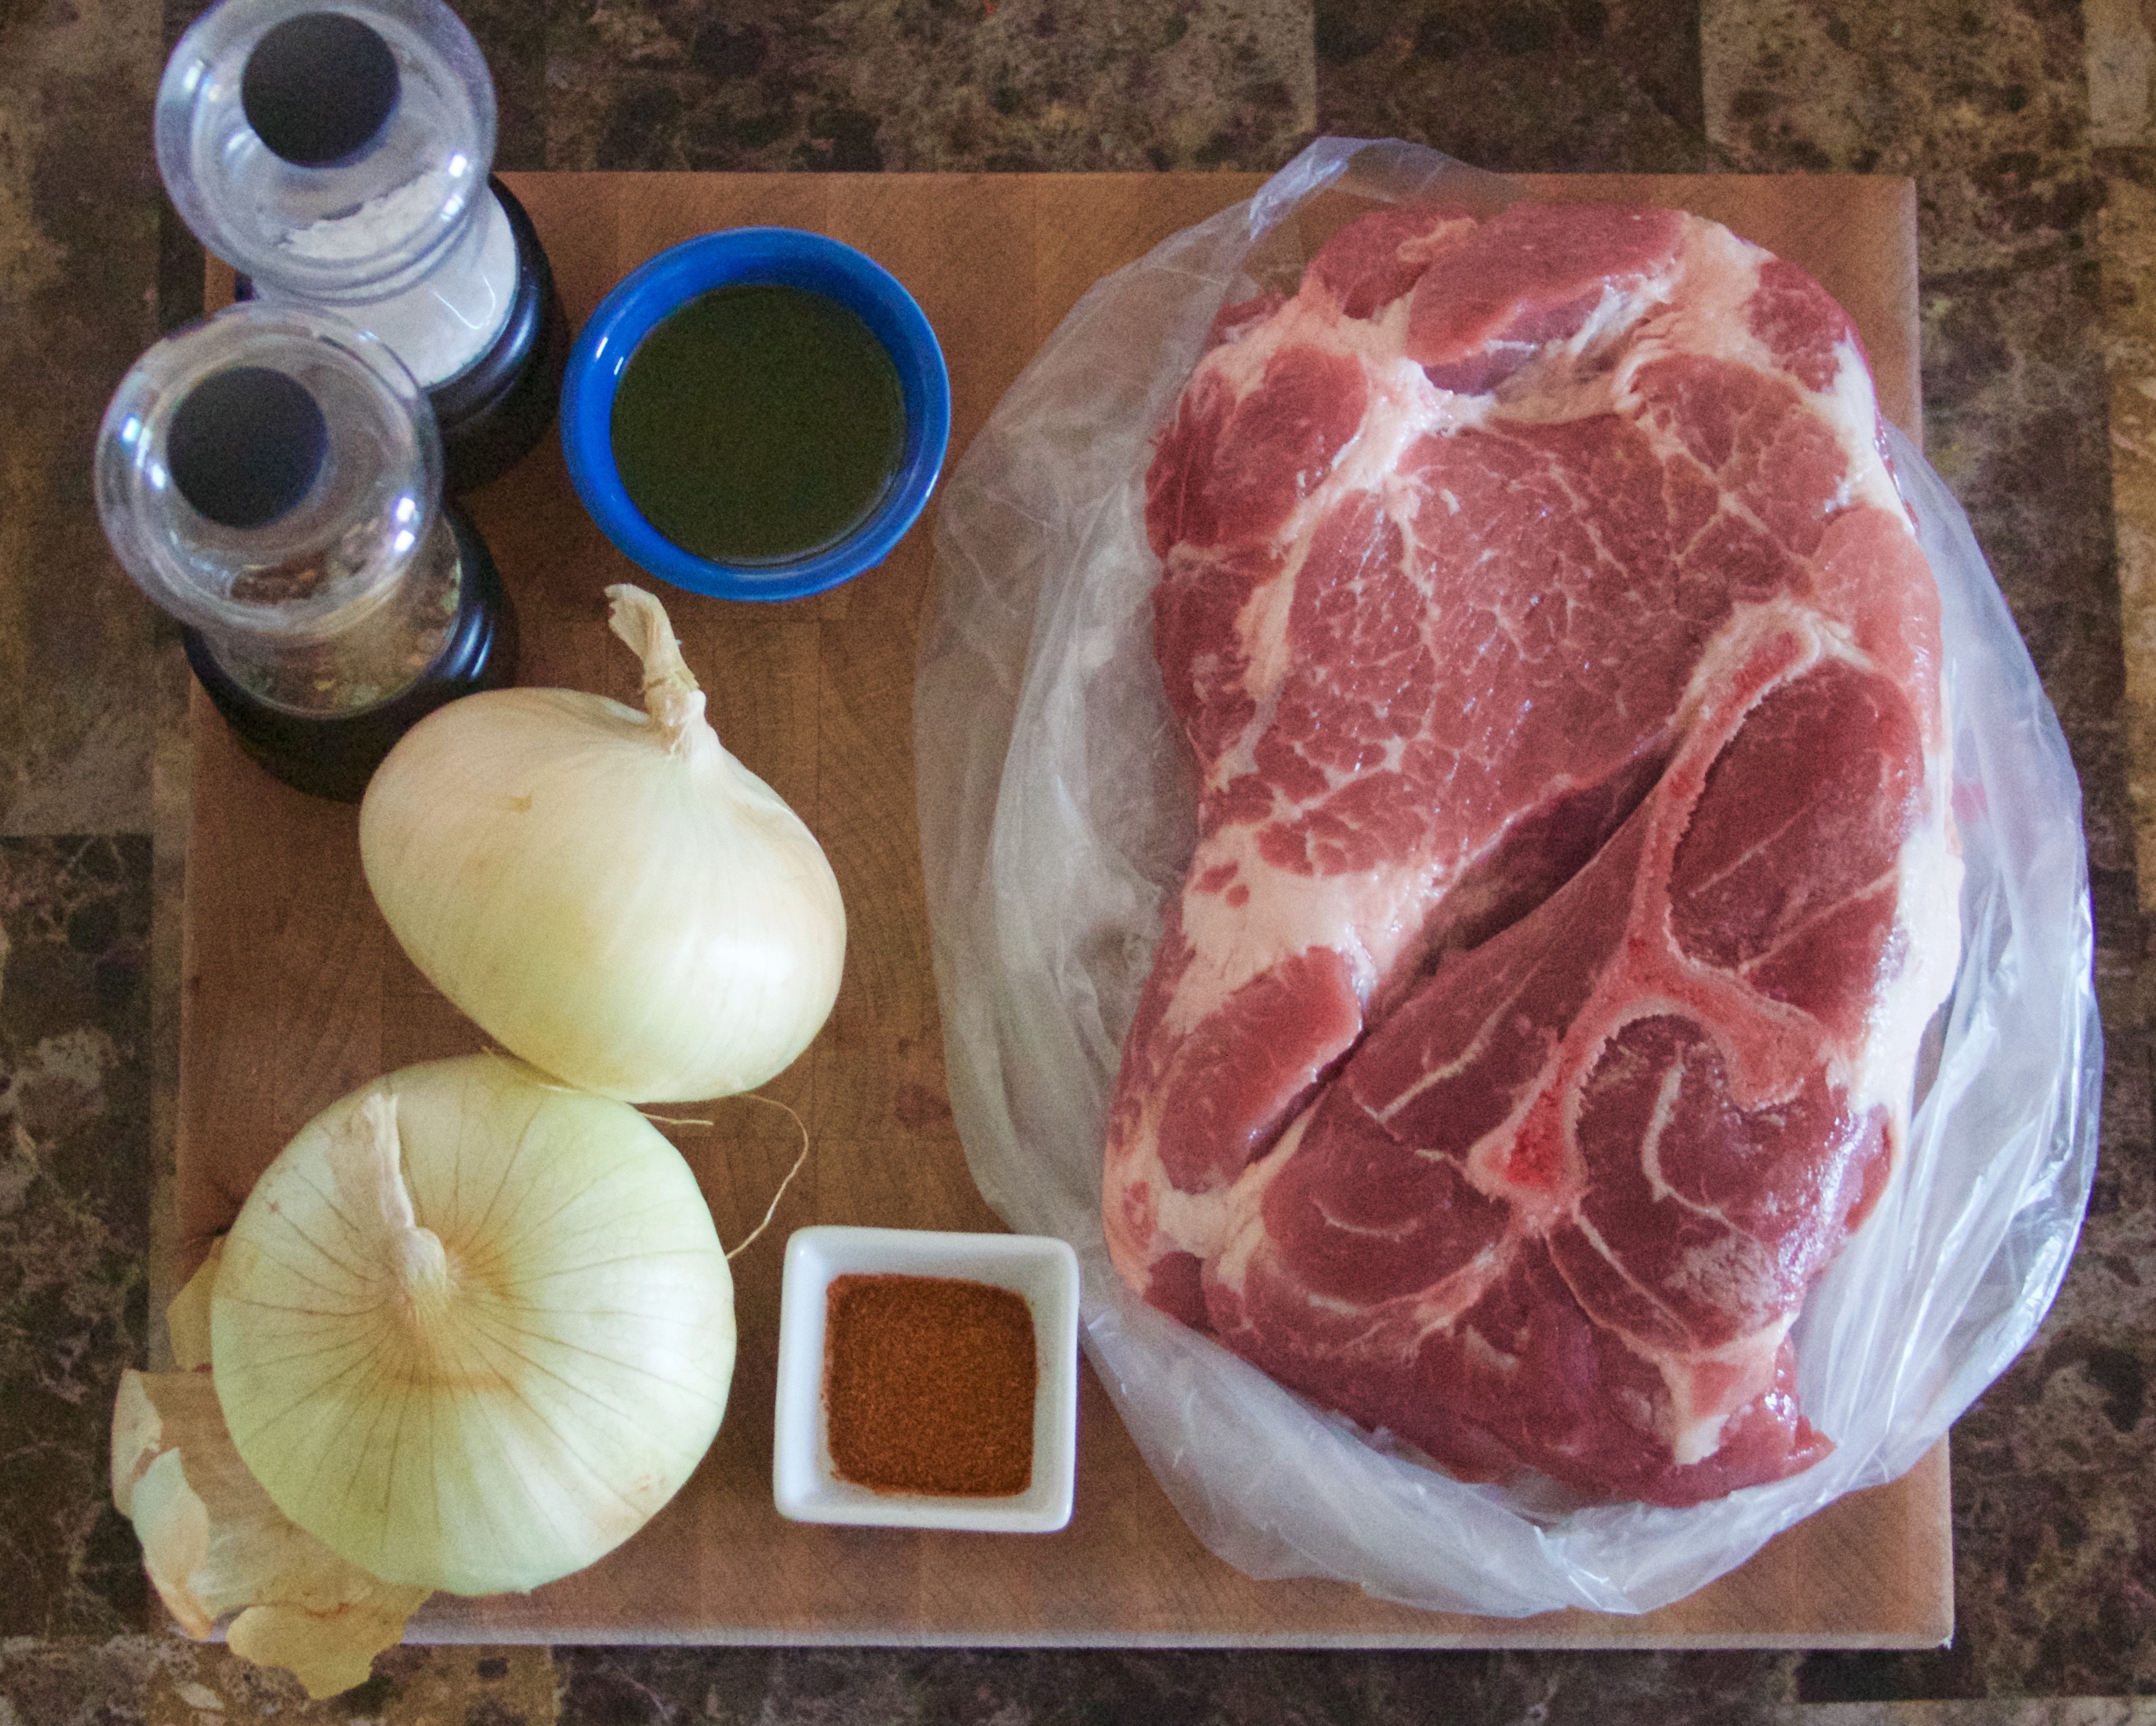
Prep your pork ingredients. Cut the onions into thin slices. Rub the roast down with the olive oil; rub in the spices.
Step Three.
When the sauce has come to a boil, add the onions to the pot. Place the roast on top. Bake at 325°F for about 3 hours, or until it is falling apart. If you try to pick it up with tongs, it should fall apart. If you need to cook it extra – no worries! It will not get overdone since it is submerged in the sauce.
Step Four.
Pull the pork (against the fibers) using two forks. Put the pulled pork AND the sauce in a sealed container and let it cool slightly. Refrigerate the entire container until morning!
Step Five.
Wake up the next morning, ready to have the best brunch of your life.
Step Six.
Bake the sweet potatoes (you can use canned if you’re impatient!). Prick the potato six times with a fork. Bake, uncovered, on a baking sheet lined with foil, for 45 min – 1 hour at 375 °F.
Step Seven.
While the sweet potato bakes, make the barbecue sauce. Remove 2 cups of the liquid from the sauce you baked the pork in. Measure out the other ingredients.
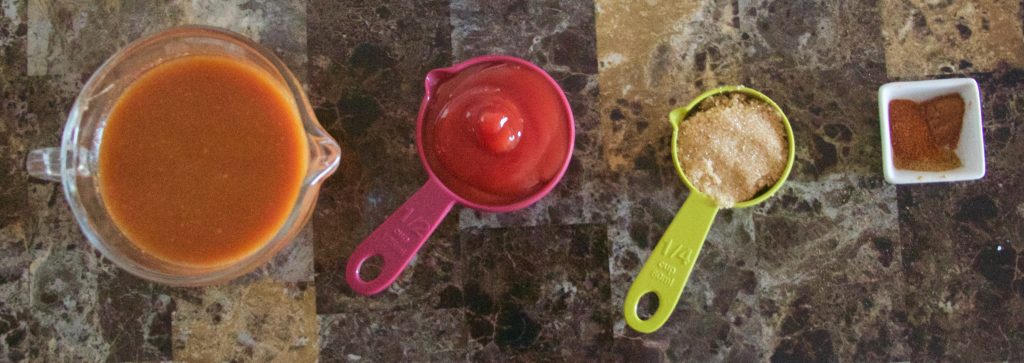
Combine all ingredients in a sauce pan and bring to a boil over medium heat. Cover to avoid splatter. Boil until it is thick and reduced by about 1/3. Drain the pork form the rest of the liquid and stir in the sauce. Set aside until later.
Step Eight.
Prepare the pancakes. Mash up the baked sweet potato and let cool. It does not have to be room temperature, but it shouldn’t be hot, either. Measure out the other ingredients.

Step Nine.
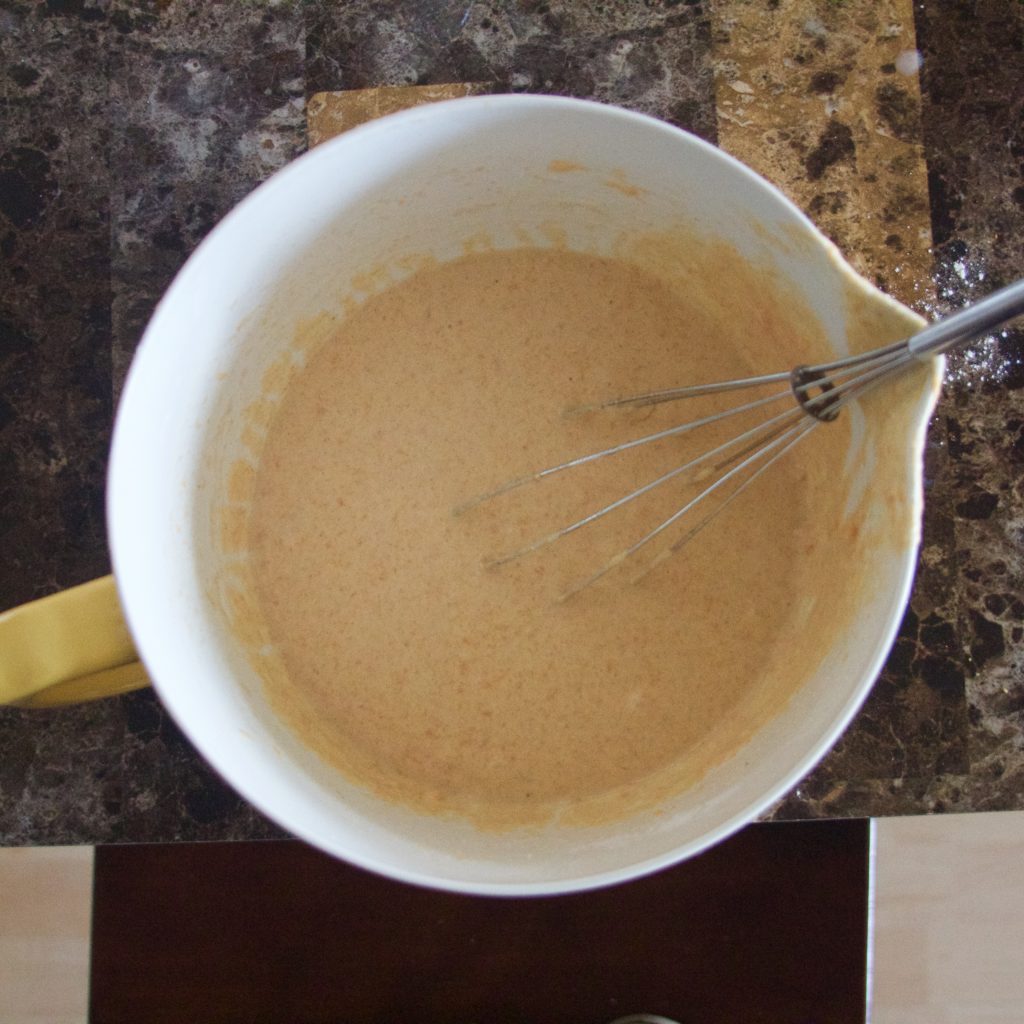
Mix the dry ingredients together with a fork. Add the milk and melted butter; stir slowly until combined. Add the eggs, one at a time, and mix until combines. Finally, mix in the sweet potato mash.
Heat butter over medium heat in a skillet. Pour the batter into the skillet to make the size of pancake that you want. Cook for about three minutes, until the bottom is golden brown. Flip and cook the other side for about two minutes, or until golden brown.
Step Ten.
While the pancakes are cooking, fry up those eggs! Add about a tablespoon of butter to a skillet. Crack the eggs directly into the pan and cook until done and slightly crispy on the edges.
Step Eleven.
Time to assemble! First, put a stack of pancakes on a plate. You may add a little maple syrup if that floats your boat. Scoop a generous helping of barbecue pulled pork on top. Slide a fried egg atop that to finish. Dig in! Make sure you plan enough time for a nap afterwards =]

This brunch recipe transitions from summer to fall. The pulled pork is sweet and tangy - a perfect addition to your next brunch!
Ingredients
- 2 cups apple juice (or cider)
- 1 cup ketchup
- 1 Tbsp dijon mustard
- 1 Tbsp crushed garlic
- 2 tsp molasses
- 2 tsp Worcestershire sauce
- Salt and Pepper
- 1.5 pounds pork roast
- 2 yellow onions
- 1 Tbsp olive oil
- 1 tsp cayenne pepper
- 1 tsp cumin
- 2 cups of the cooking sauce
- 1/2 cup ketchup
- 1/4 cup brown sugar
- 1 tsp cayenne pepper
- 1 tsp cinnamon
- 1/2 tsp cumin
- 1 sweet potato
- 1 1/2 cup all purpose flour
- 2 Tbsp sugar
- 1 Tbsp baking powder
- 1 tsp salt
- 2 tsp cinnamon
- 1 1/2 cup almond milk (use regular milk if you want to)
- 1/4 cup melted butter
- 2 eggs
- 4 Tbsp butter
- 4 eggs
Instructions
- You're going to want to prep the barbecue pulled pork the night before. Prep all of the ingredients for the sauce.
- Add the sauce ingredients to a dutch oven and bring to a boil over medium heat.
- Prep your pork ingredients. Cut the onions into thin slices. Rub the roast down with the olive oil; rub in the spices.
- When the sauce has come to a boil, add the onions to the pot. Place the roast on top. Bake at 325°F for about 3 hours, or until it is falling apart. If you try to pick it up with tongs, it should fall apart. If you need to cook it extra - no worries! It will not get overdone since it is submerged in the sauce.
- Pull the pork (against the fibers) using two forks. Put the pulled pork AND the sauce in a sealed container and let it cool slightly. Refrigerate the entire container until morning!
- The next morning, bake the sweet potatoes (you can use canned if you're impatient!). Prick the potato six times with a fork. Bake, uncovered, on a baking sheet lined with foil, for 45 min - 1 hour at 375 °F.
- While the sweet potato bakes, make the barbecue sauce. Remove 2 cups of the liquid from the sauce you baked the pork in. Measure out the other ingredients.
- Combine all ingredients in a sauce pan and bring to a boil over medium heat. Cover to avoid splatter. Boil until it is thick and reduced by about 1/3. Drain the pork form the rest of the liquid and stir in the sauce. Set aside until later.
- Prepare the pancakes. Mash up the baked sweet potato and let cool. It does not have to be room temperature, but it shouldn't be hot, either. Measure out the other ingredients.
- Mix the dry ingredients together with a fork. Add the milk and butter; stir slowly until combined. Add the eggs, one at a time, and mix until combines. Finally, mix in the sweet potato mash.
- Heat butter over medium heat in a skillet. Pour the batter into the skillet to make the size of pancake that you want. Cook for about three minutes, until the bottom is golden brown. Flip and cook the other side for about two minutes, or until golden brown.
- While the pancakes are cooking, fry up those eggs! Add about a tablespoon of butter to a skillet. Crack the eggs directly into the pan and cook until done and slightly crispy on the edges.
- Time to assemble! First, put a stack of pancakes on a plate. You may add a little maple syrup if that floats your boat. Scoop a generous helping of barbecue pulled pork on top. Slide a fried egg atop that to finish. Dig in!

I love living in New Orleans, but I always get homesick for Wisconsin during fall. The cool weather, the leaves, the crisp air… it’s as cliche as a Hallmark movie, but I love every minute of it.
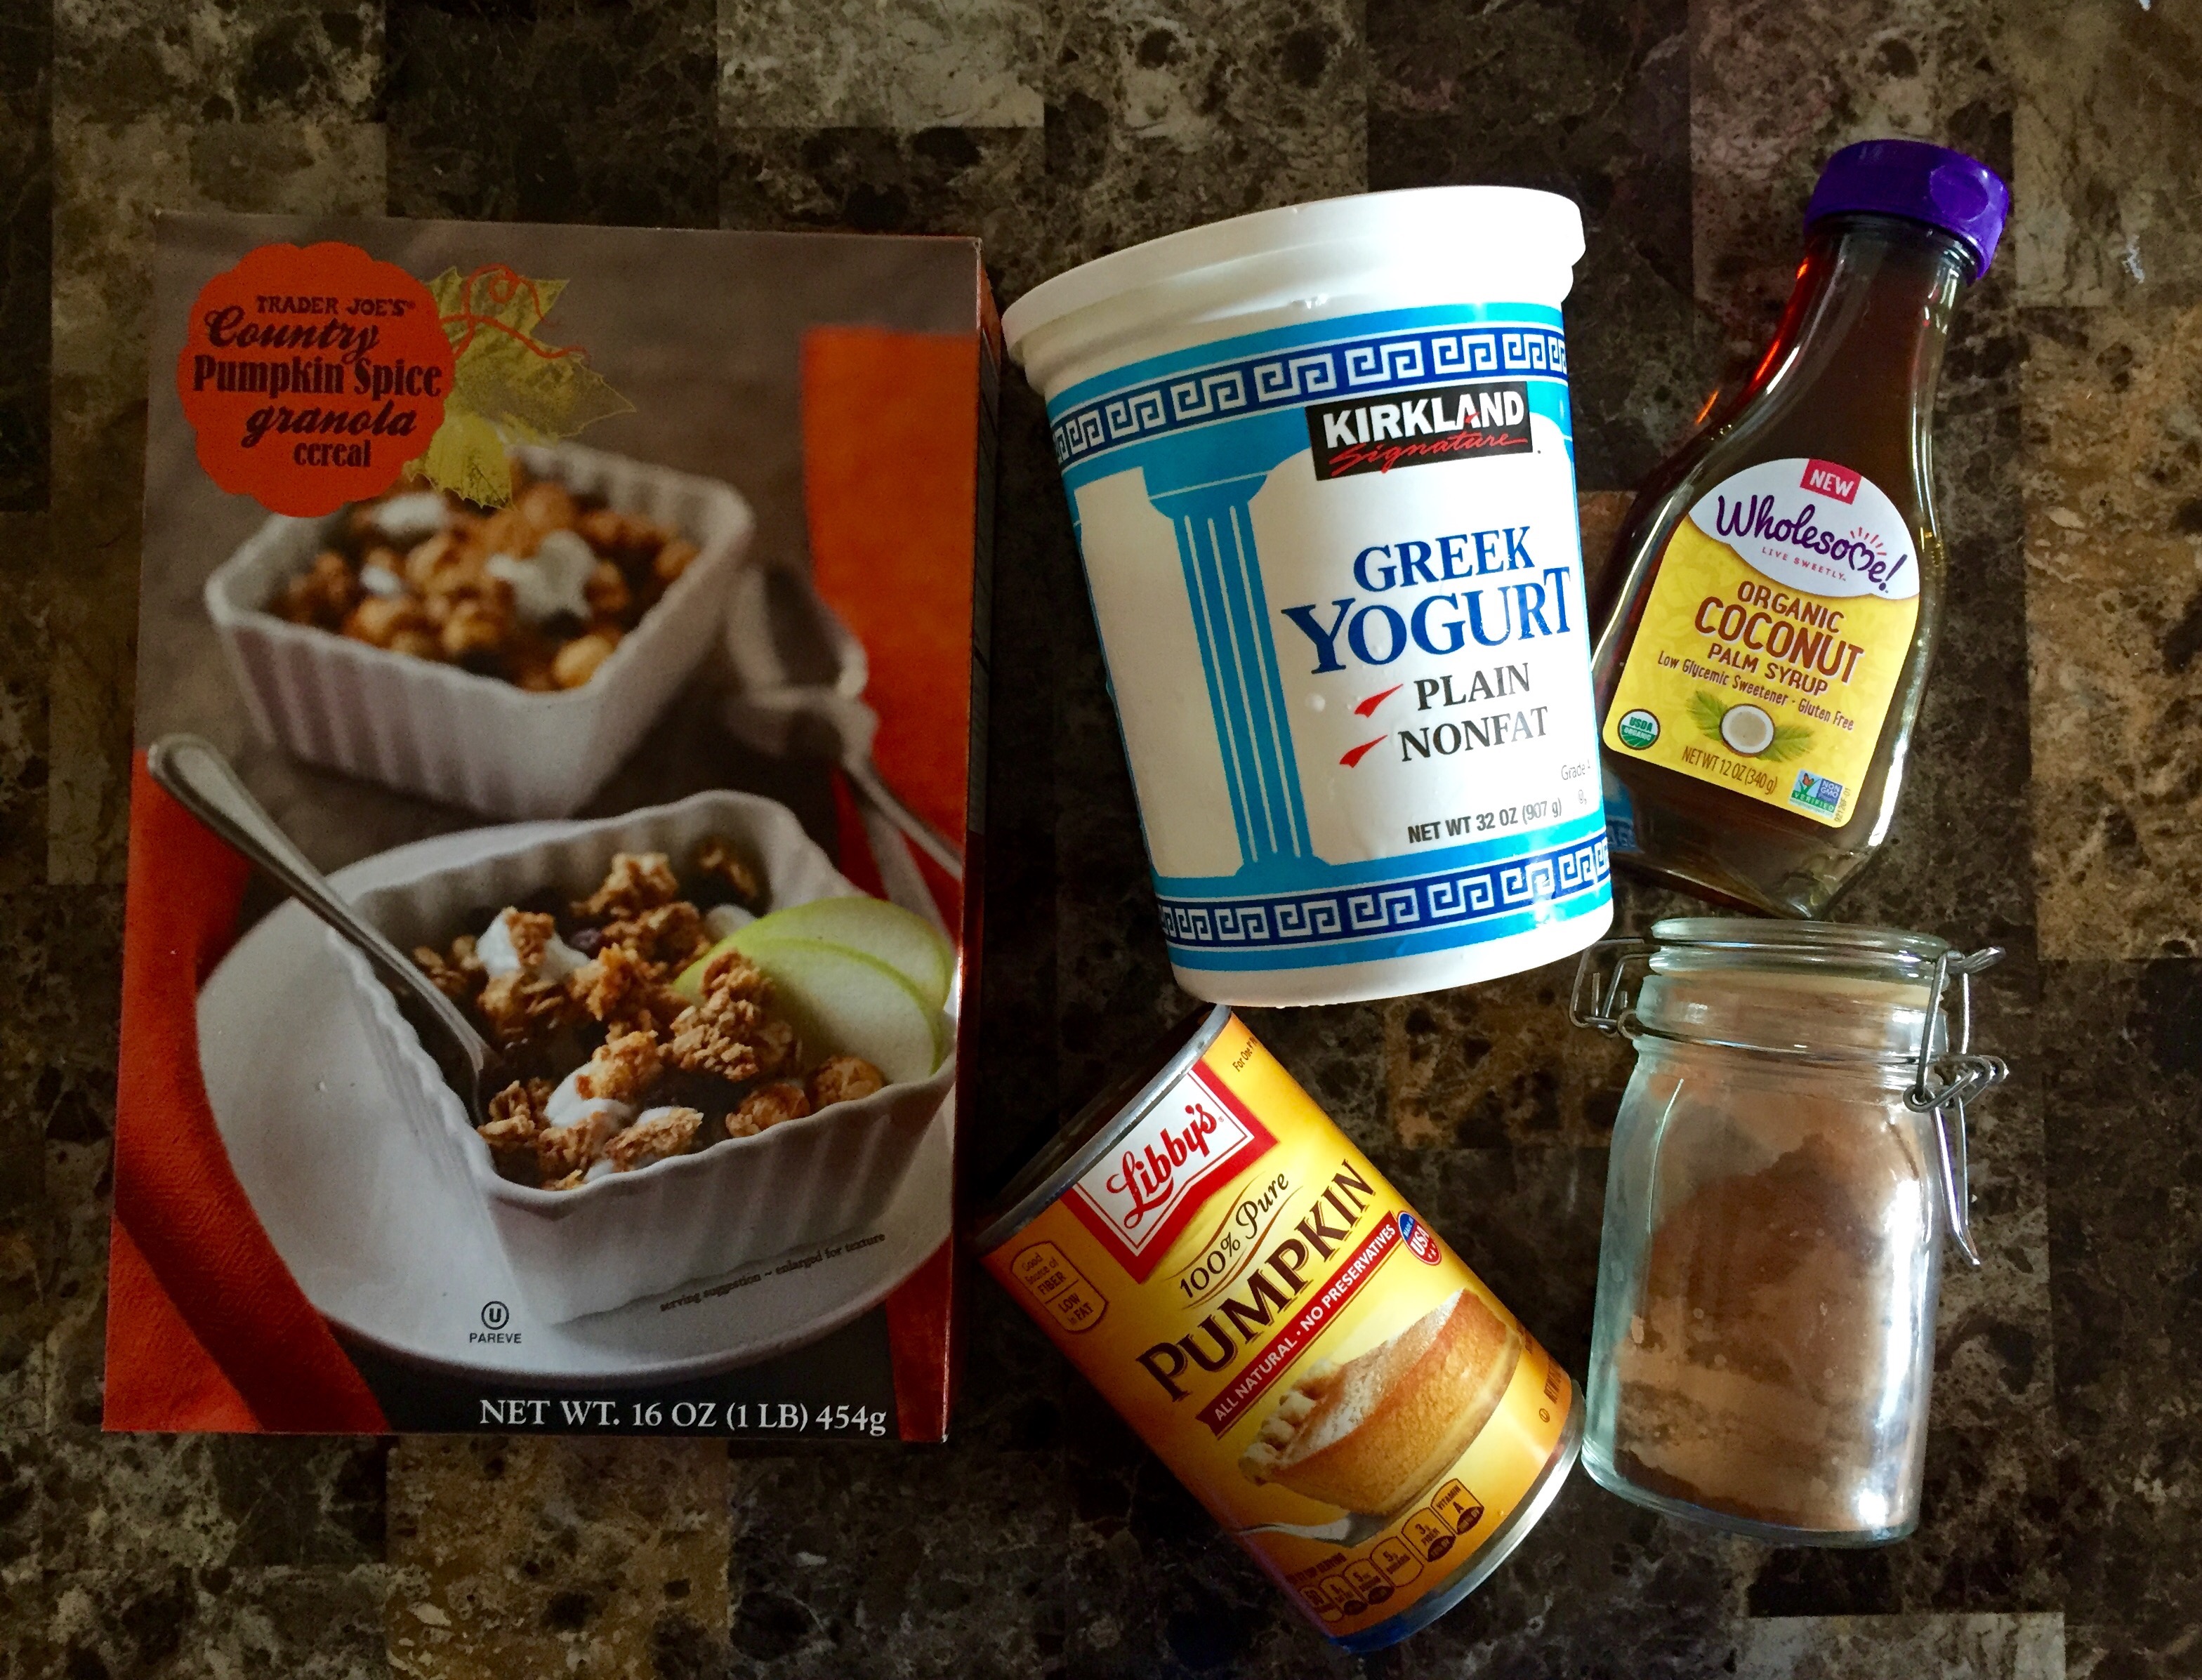
I’ve decided to start fall here anyway, even though my car registered at 110° yesterday when I got in after word. I stopped at Trader Joe’s (new to New Orleans! Finally!) and got a few fall staples. So I put a few to good use this morning for a simple fall breakfast!
Be sure to add this granola to your shopping list the next time you go to Trader Joe’s!
~~~~~~~~~~
Step One.
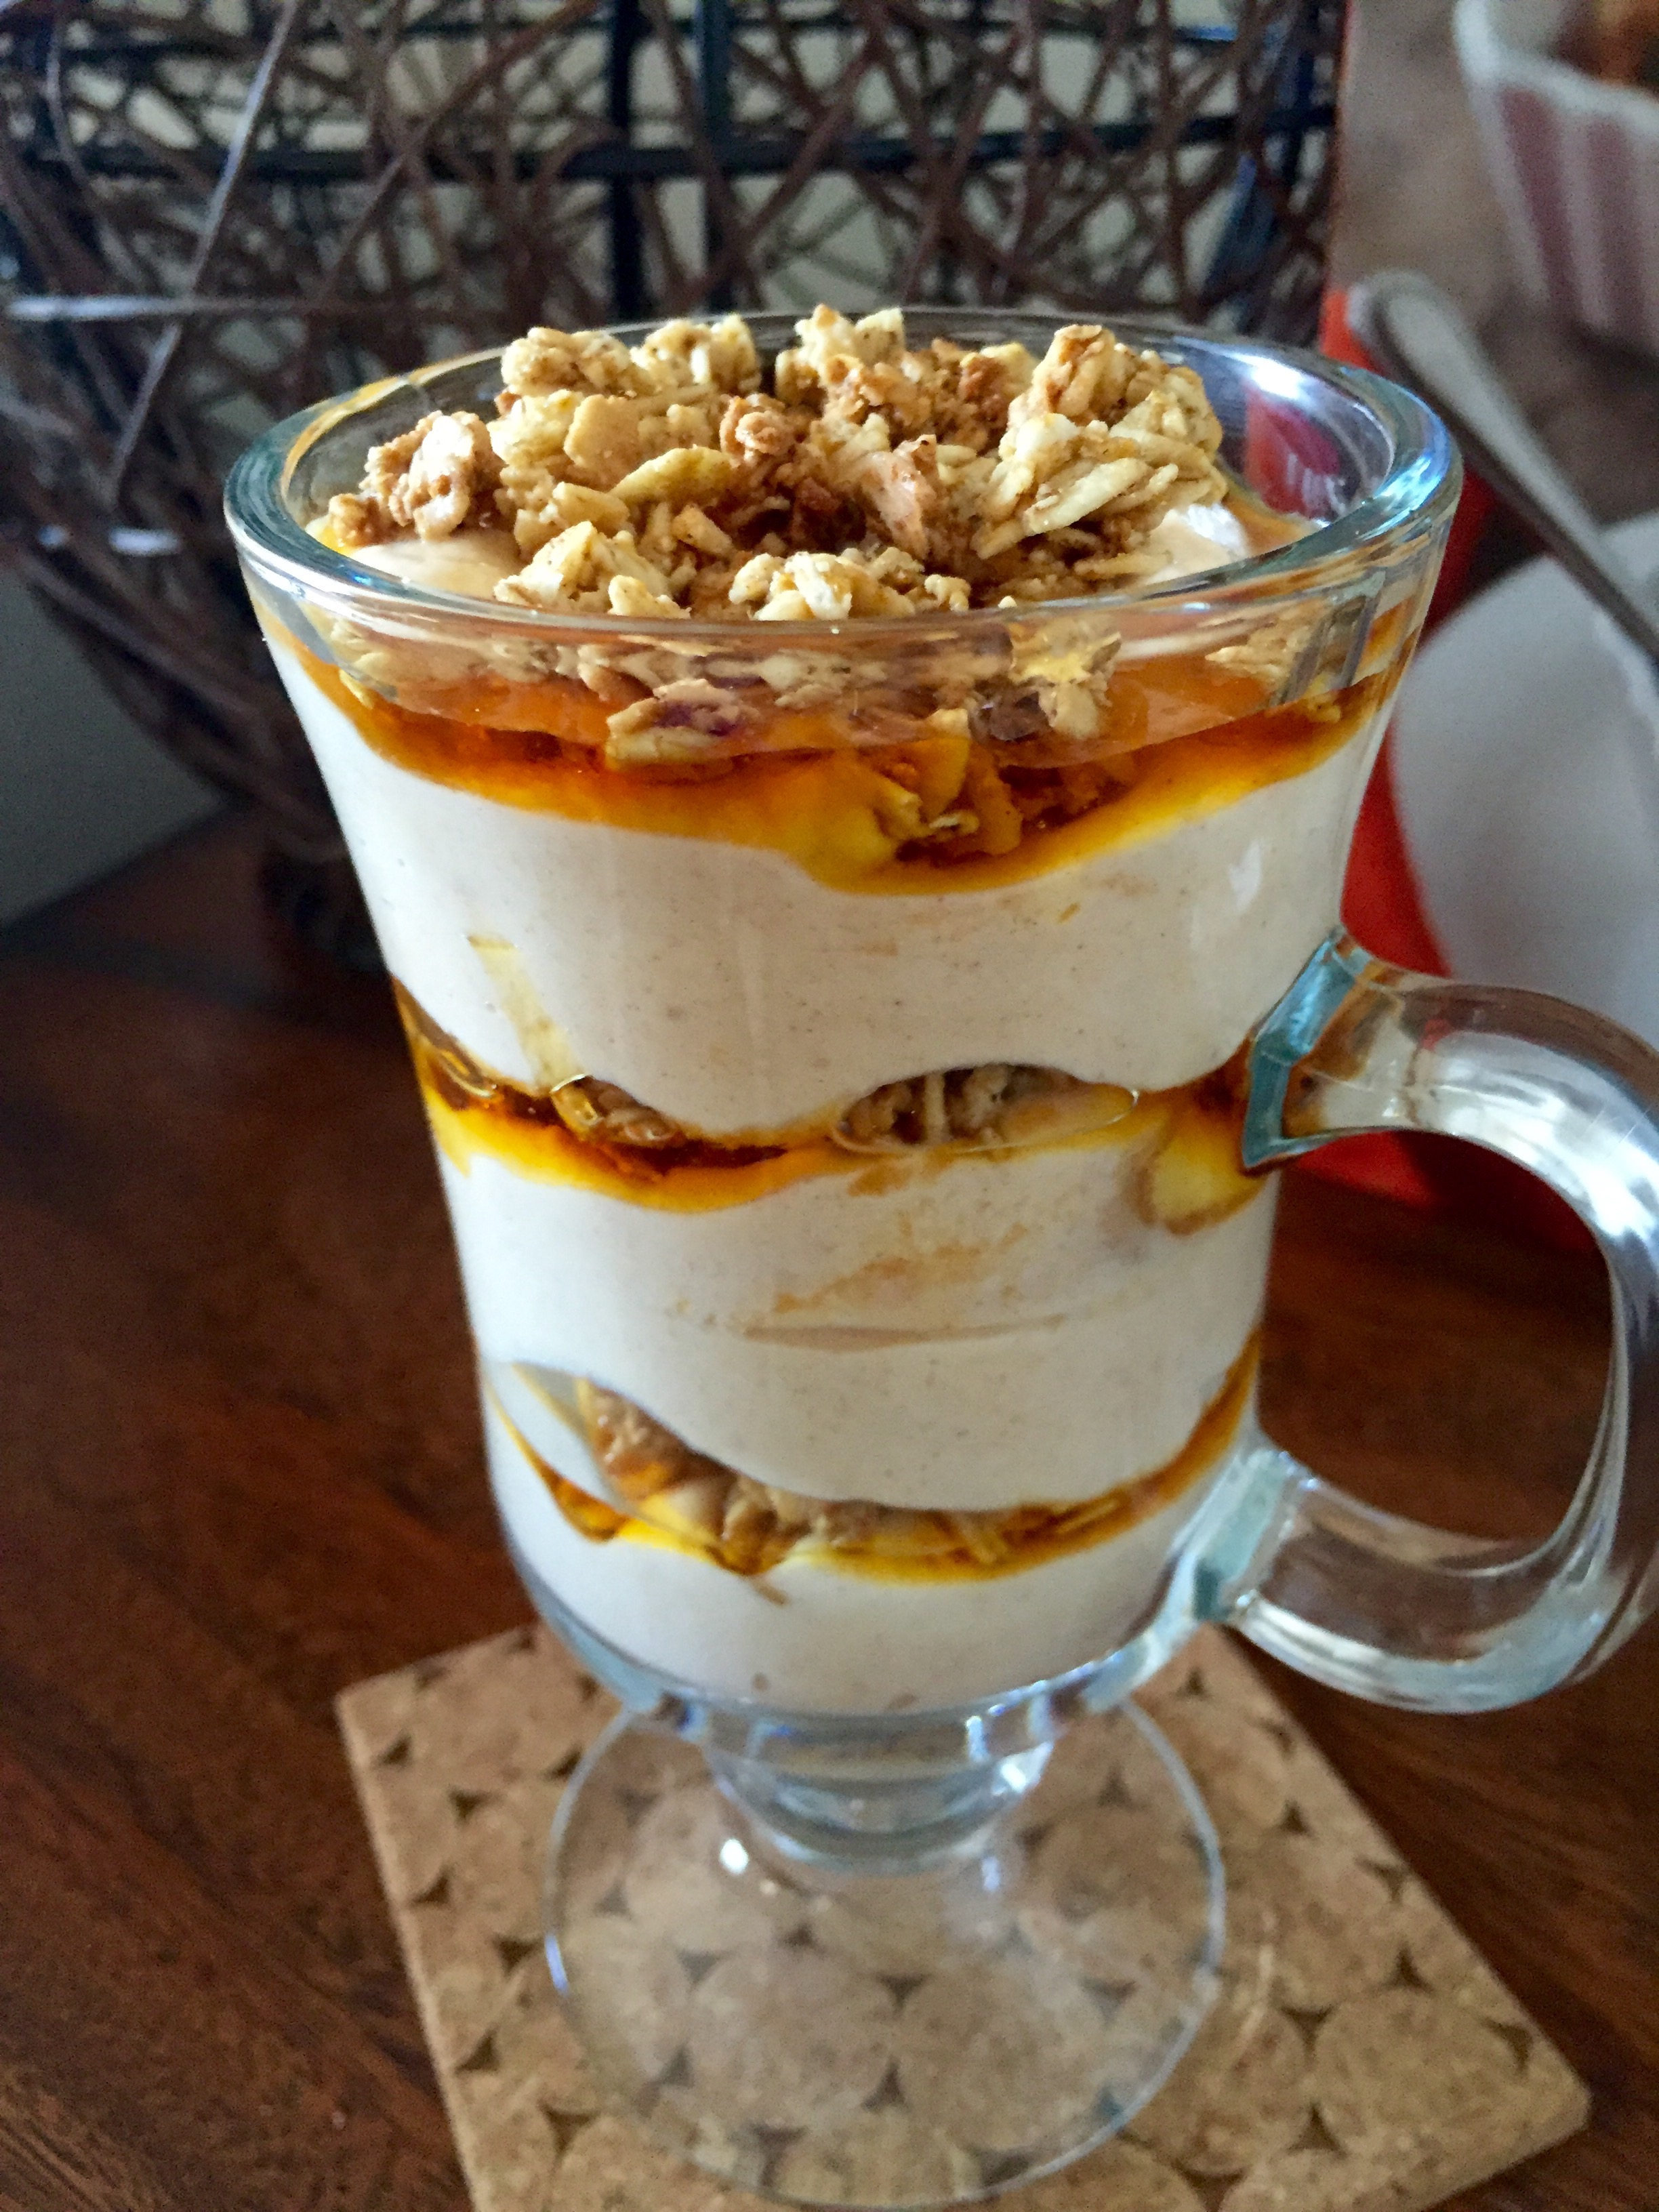
You want to use plain Greek yogurt for this parfait. It’s tangy and not-so-sweet flavor is exactly what you need to pair with syrup and sweet granola.
Prep your ingredients.
Step Two.
Mix the yogurt the with pumpkin and cinnamon in a bowl before you assemble the parfait.
Step Three.
Add a third of the mix to a cup or a bowl. Drizzle with one third of the syrup. Sprinkle 1/3 of the granola on top.
Step Four.
Continue layering like this until all of your ingredients are used!
Enjoy the first bite of fall!
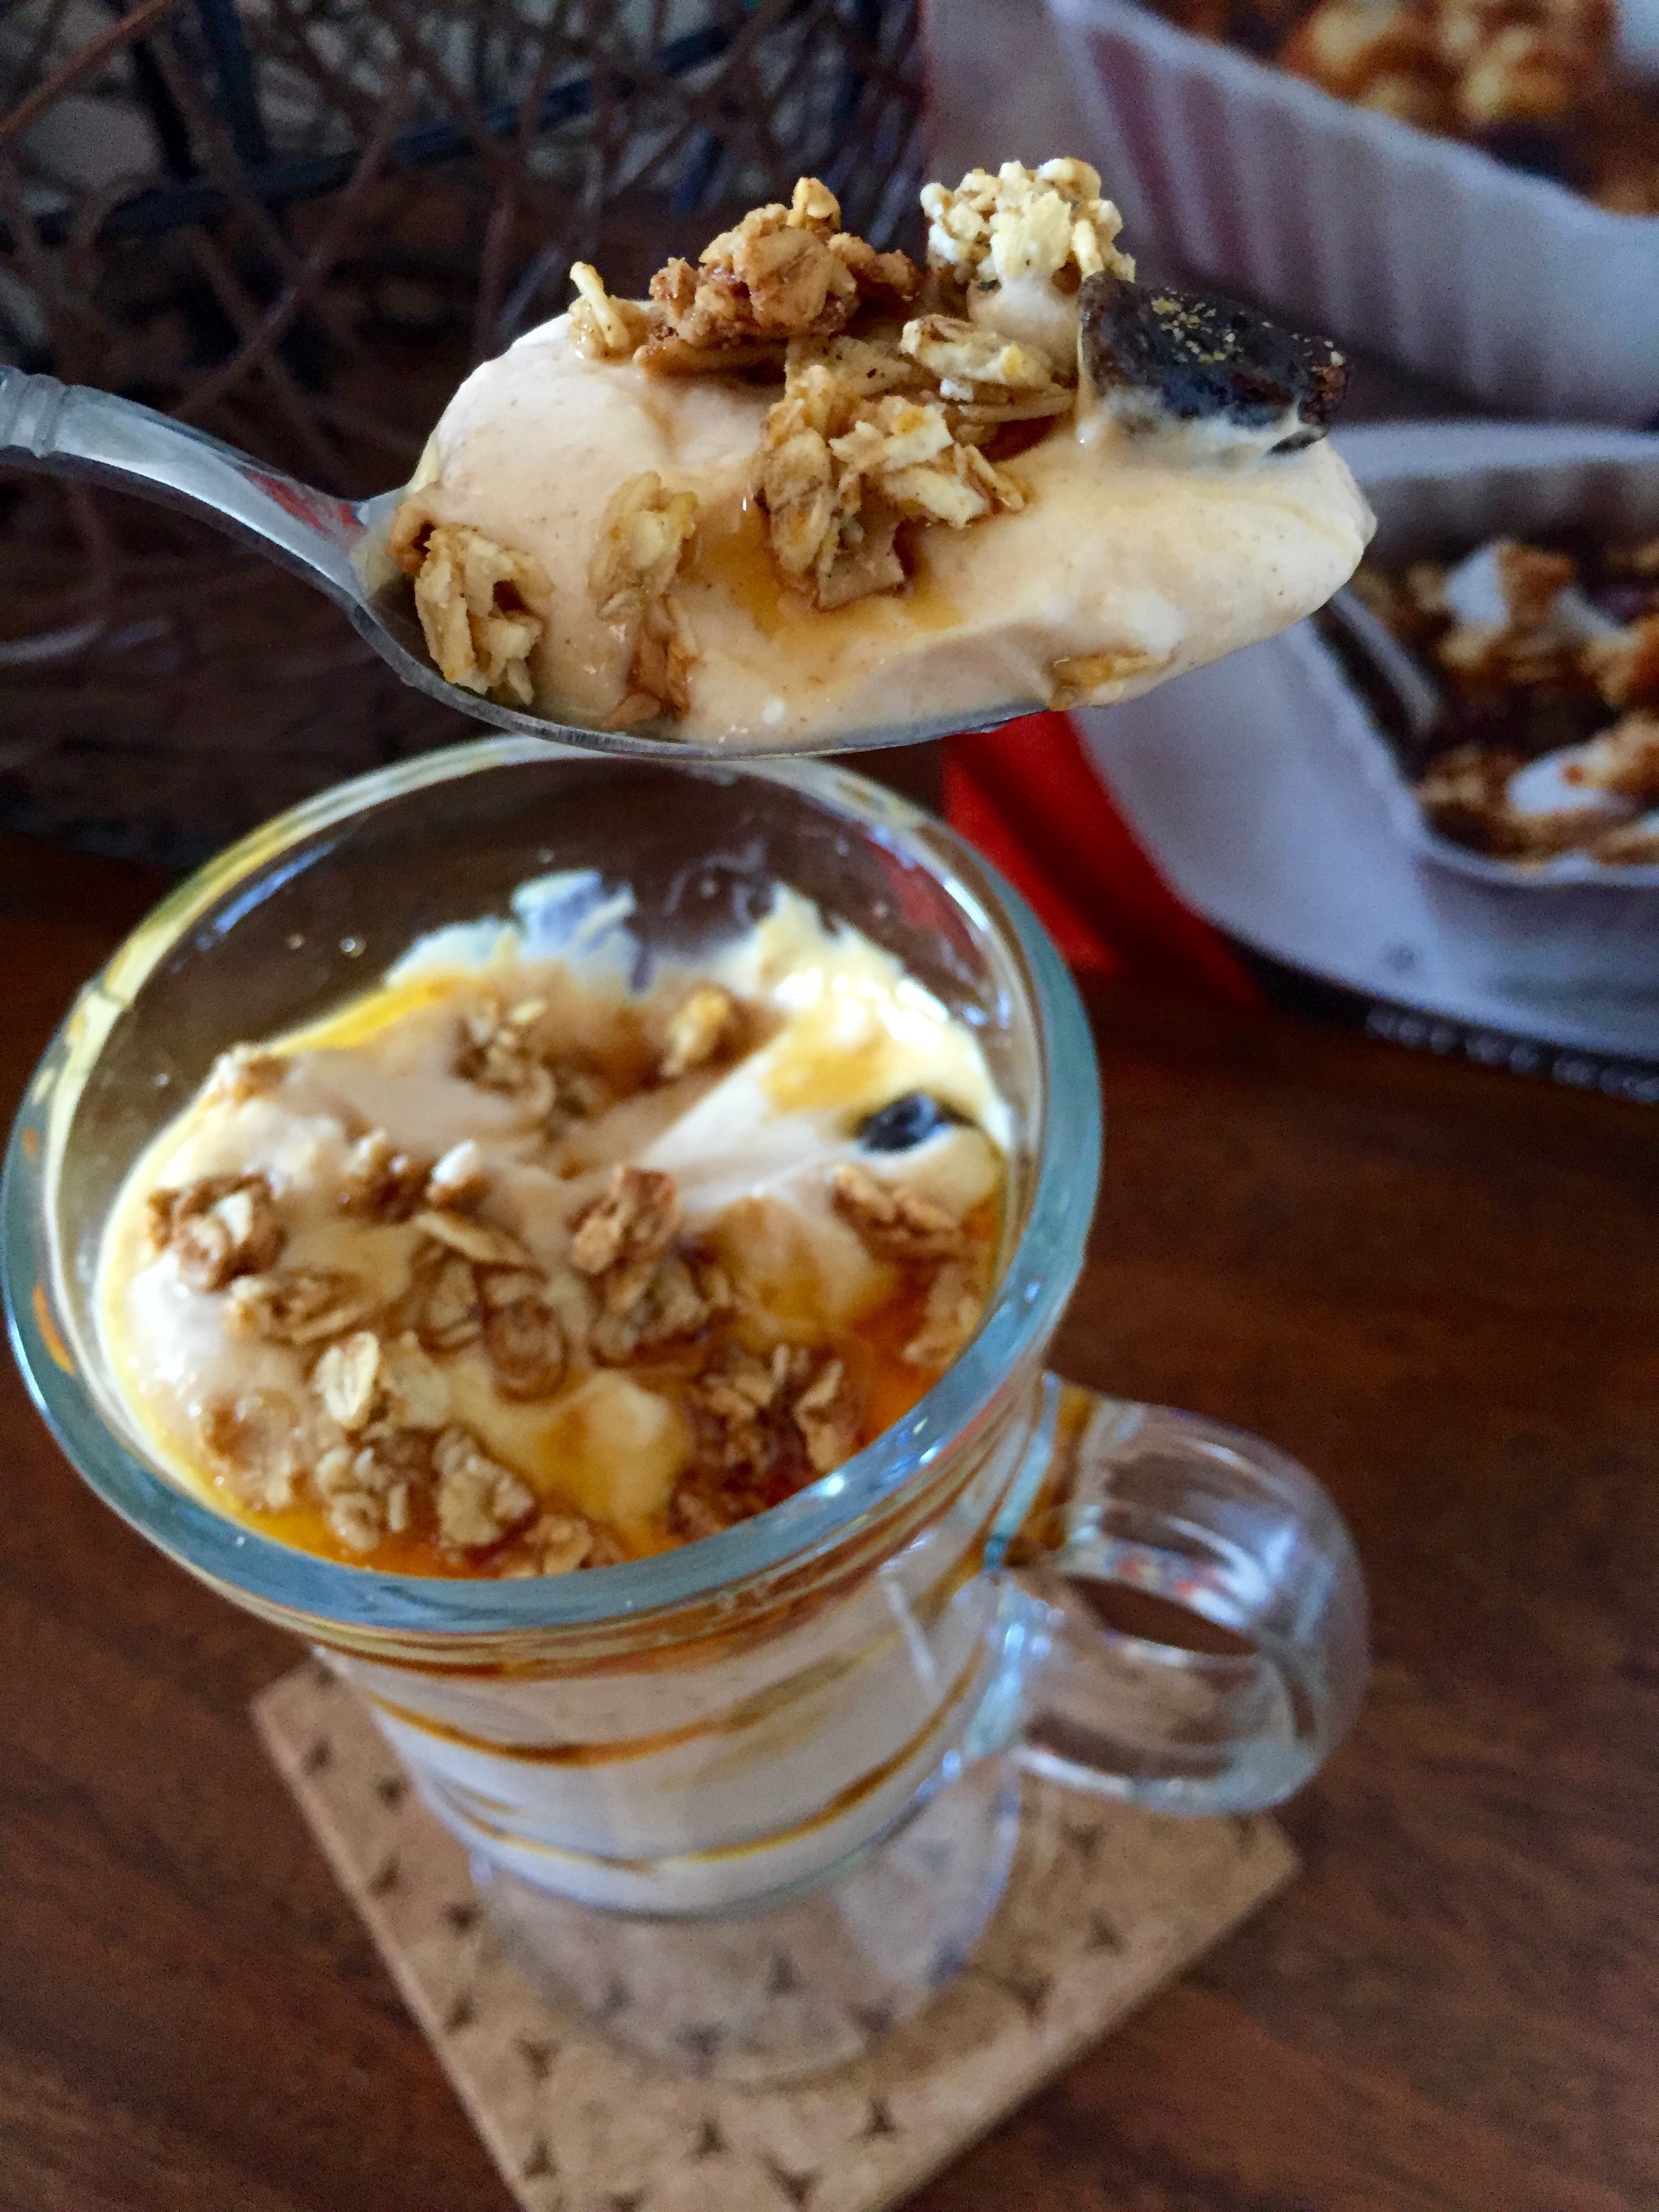

A sweet and tangy bite of fall that is perfect for a protein-filled, energizing breakfast!
Ingredients
- 1 cup plain Greek Yogurt
- 2 Tbsp pumpkin puree
- 1/4 tsp cinnamon
- 1 tsp organic coconut palm syrup
- 1/4 cup Trader Joe’s Country Pumpkin Spice Granola Cereal
Instructions
- In a bowl, mix the yogurt, pumpkin puree, and cinnamon.
- Add a third of the mix to a cup or bowl. Drizzle with one third of the syrup. Sprinkle 1/3 of the granola on top.
- Continue layering like this until all of your ingredients are used.
- Enjoy the first bite of fall!