read more posts by
Mara May
When I started my first year of college, my daddy flew down with me to help me move into my dorm room and provide a familiar buffer against all of the unknowns. Well, that and to get more free checked baggage…
The night before the big “move -in” day, we stayed in a nice downtown hotel. In the morning, we headed down to the continental breakfast to fuel up before lugging duffel bags and suitcases up 11 flights of stairs.
I remember several snapshots from that morning.
It’s silly how memory works: I know exactly what I wore – short jean shorts with an army green tank top and a short sleeve beige cardigan, with a wooden headband holding back my new haircut. I remember putting so much effort to pick the perfect outfit simply to sweat in… but joking aside, I didn’t want my new roommate to think I was lame.
I remember there being a lot of options for a hotel breakfast. Sure, they had cereal and yogurt and a waffle iron… in fact, no matter how good of a cook I ever will be, no waffle will top a hotel waffle. There is something about the beeping that made me so nervous when I was kid, the sheer joy of being able to have a waffle just because I wanted one, and the anticipation to go on to wherever the hotel was a detour from… the nostalgia is better than any recipe.
But again, I digress. Aside from what you might expect, they had eggs and bacon and sausage and…. lumpy grey stuff. The label said grits.
I had heard of these. Deep South grits that for some reason people seemed to enjoy even though the name was inherently unappetizing. But hey, if I was going to make it in the South, I was going to like grits. Here goes bite one as this new Southern Belle. Watch out, Scarlett.
I think I spit it into my napkin.
From that moment, I decided grits were nasty. My later experience in the university dining hall confirmed this conviction. But eventually, when I was talking to a nice Southern man, he told me that I only despised them so much because I never had them the right way. And boy, was he right.
Now I’m in love…
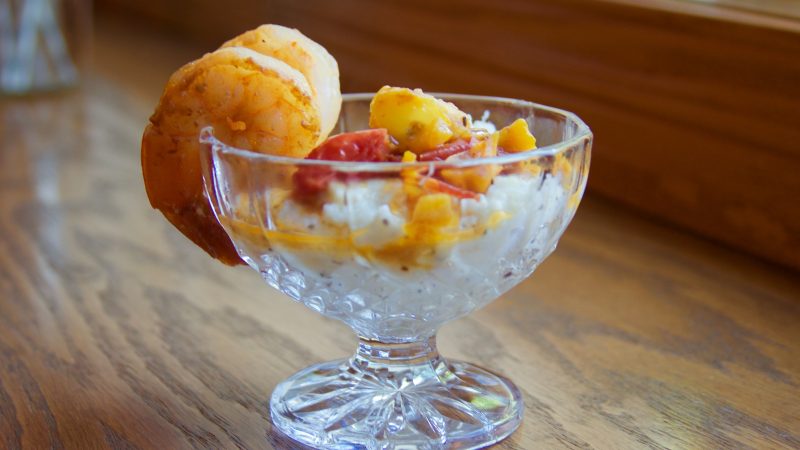
Cheese grits, plain grits, shrimp ’n grits. I love them all. So of course I had to learn to make them.
This is my favorite recipe for my Southern brunch. They are velvety and tangy; they go well with shrimp or just on their own.
I assure you, these won’t end up in a napkin.
~~~~~~~~~~

Step One.
Prep Step! Get your grits ingredients ready. No rush on the shrimp part – you have time while the grits cool. Preheat your oven to 350°F.
Step Two.
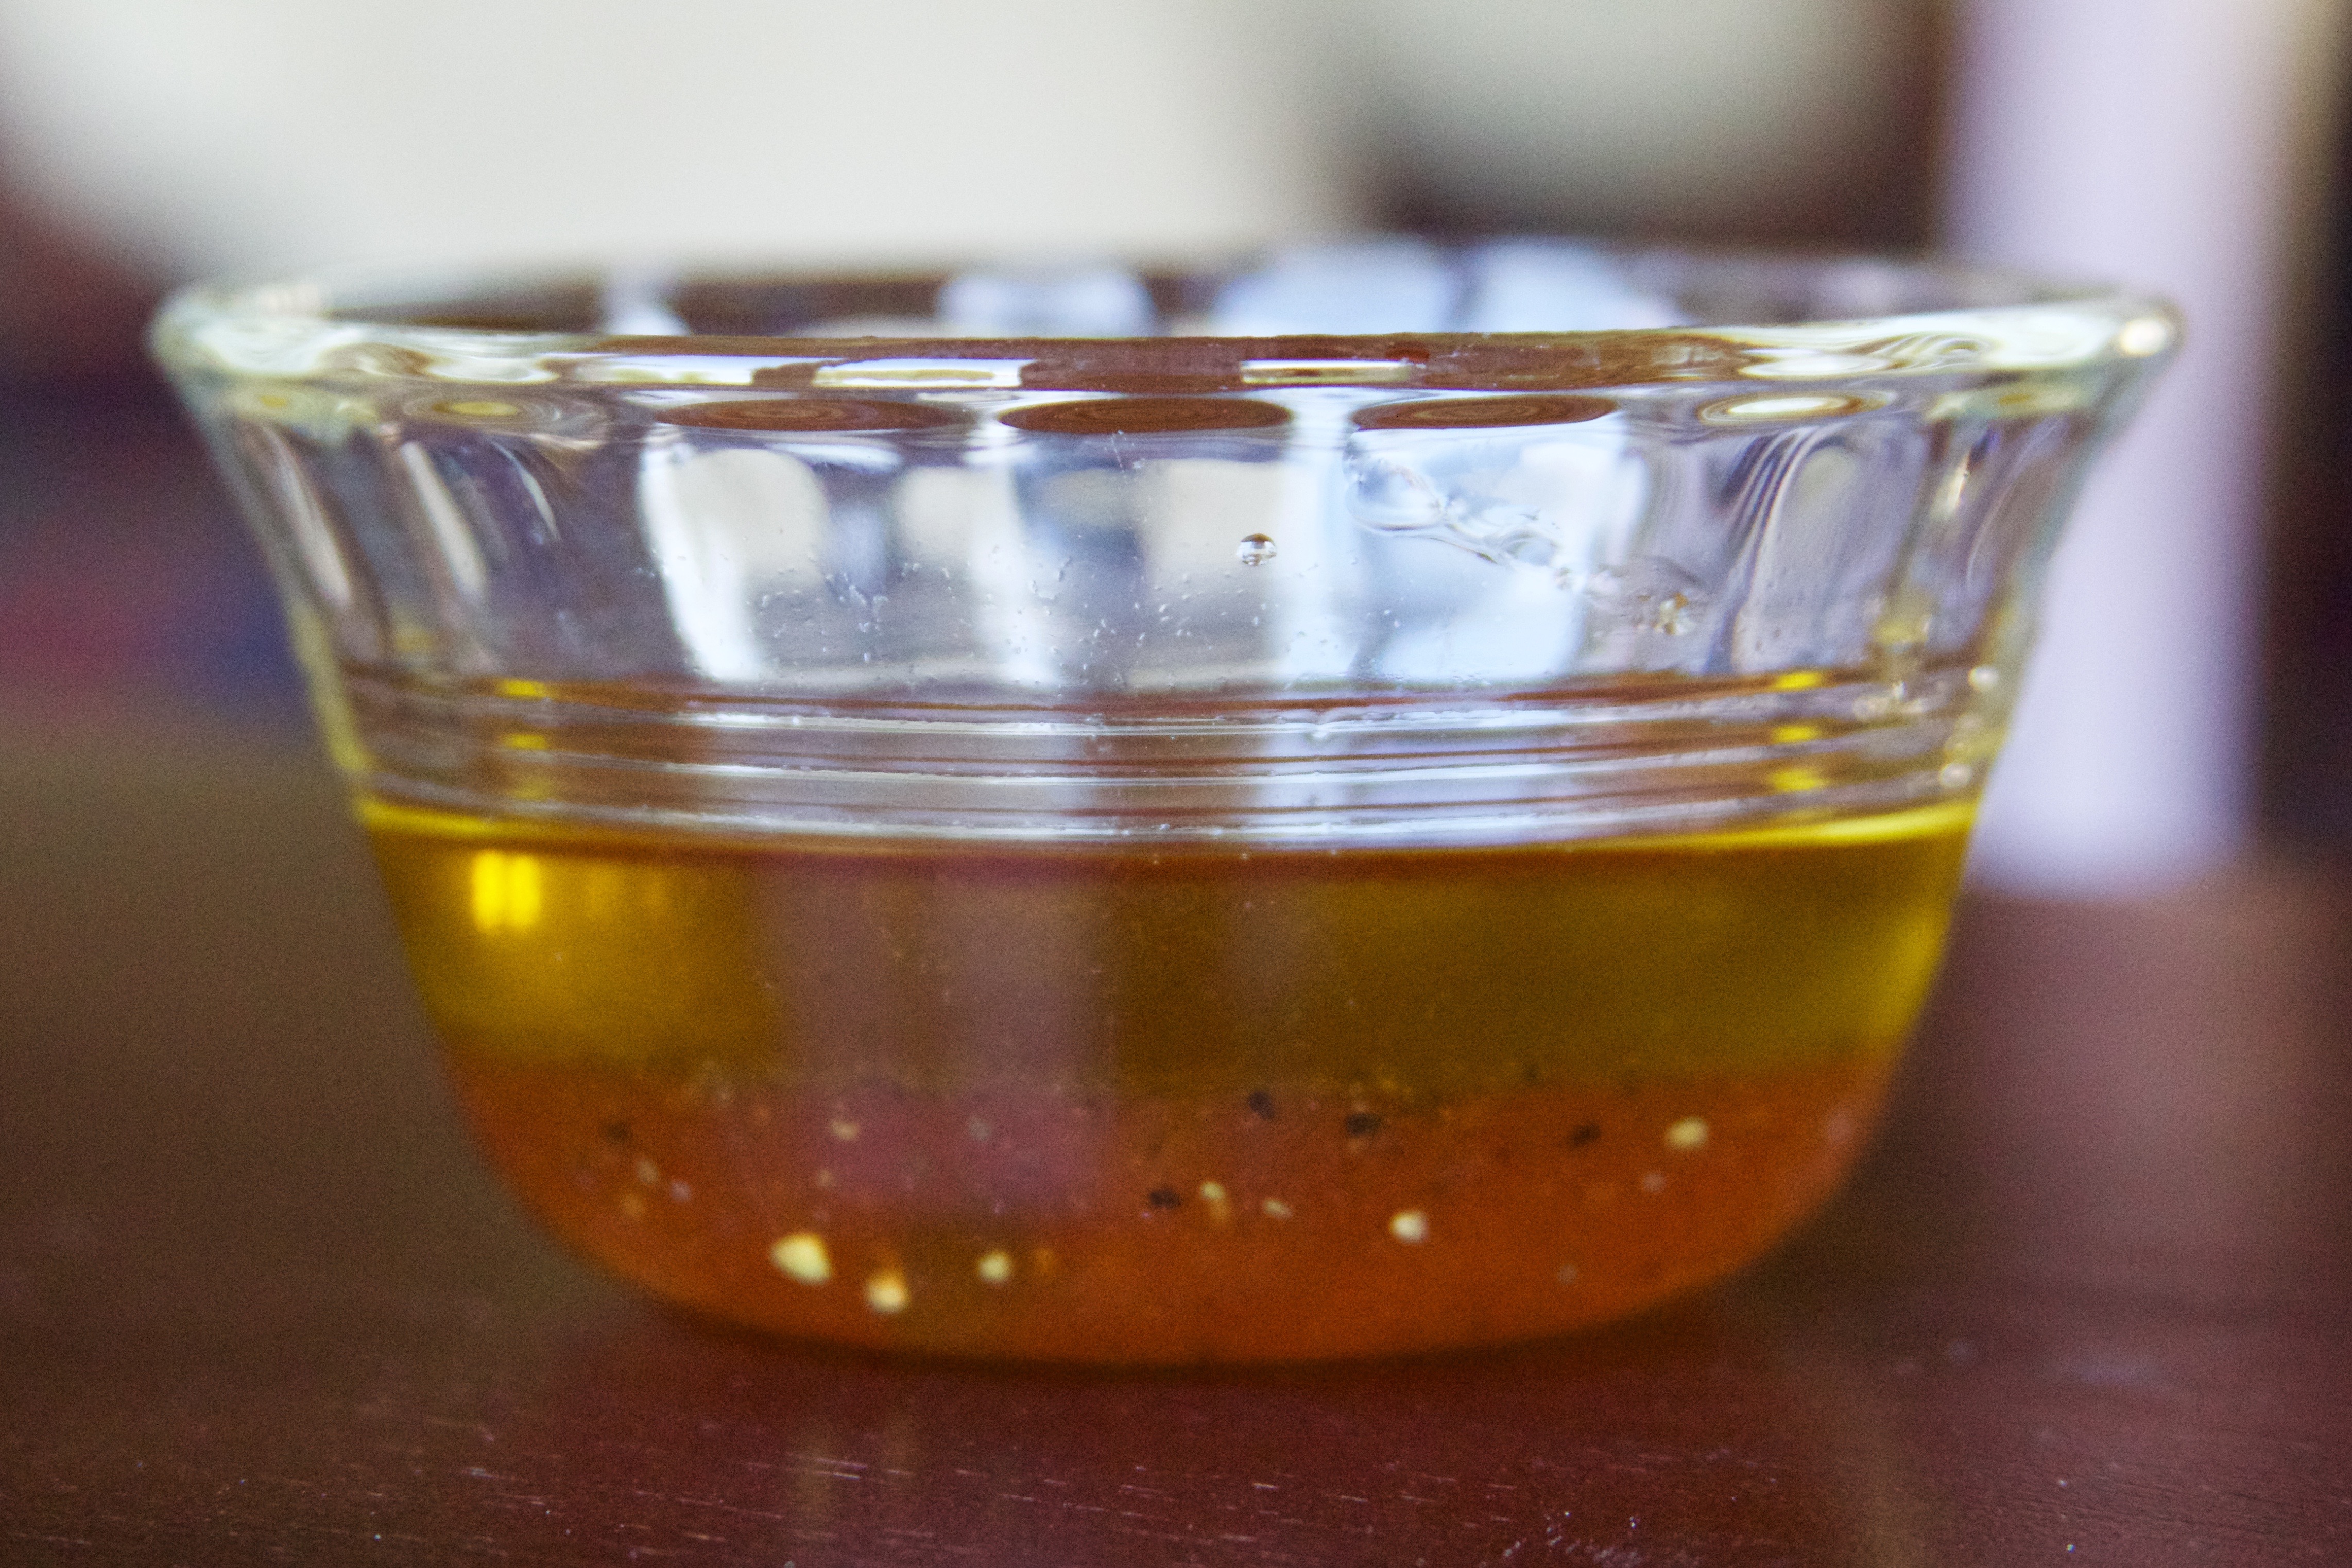
Bring the milk, butter, and water to boil over medium heat in a Dutch oven. Add the grits, whisking them in. For you northerners out there, don’t just dump the grits in. They will clump. Bad.
Step Three.
Cover it, stick it in the oven, and bake, bake, bake. They’ll stay in there about 20 – 30 minutes. But you have to take them out about halfway through to add some wine, so pay attention. Halfway through, stir in the wine, and return it to the oven.
Step Four.
More Prep! Get all that shrimp stuff ready. Chop, chop!
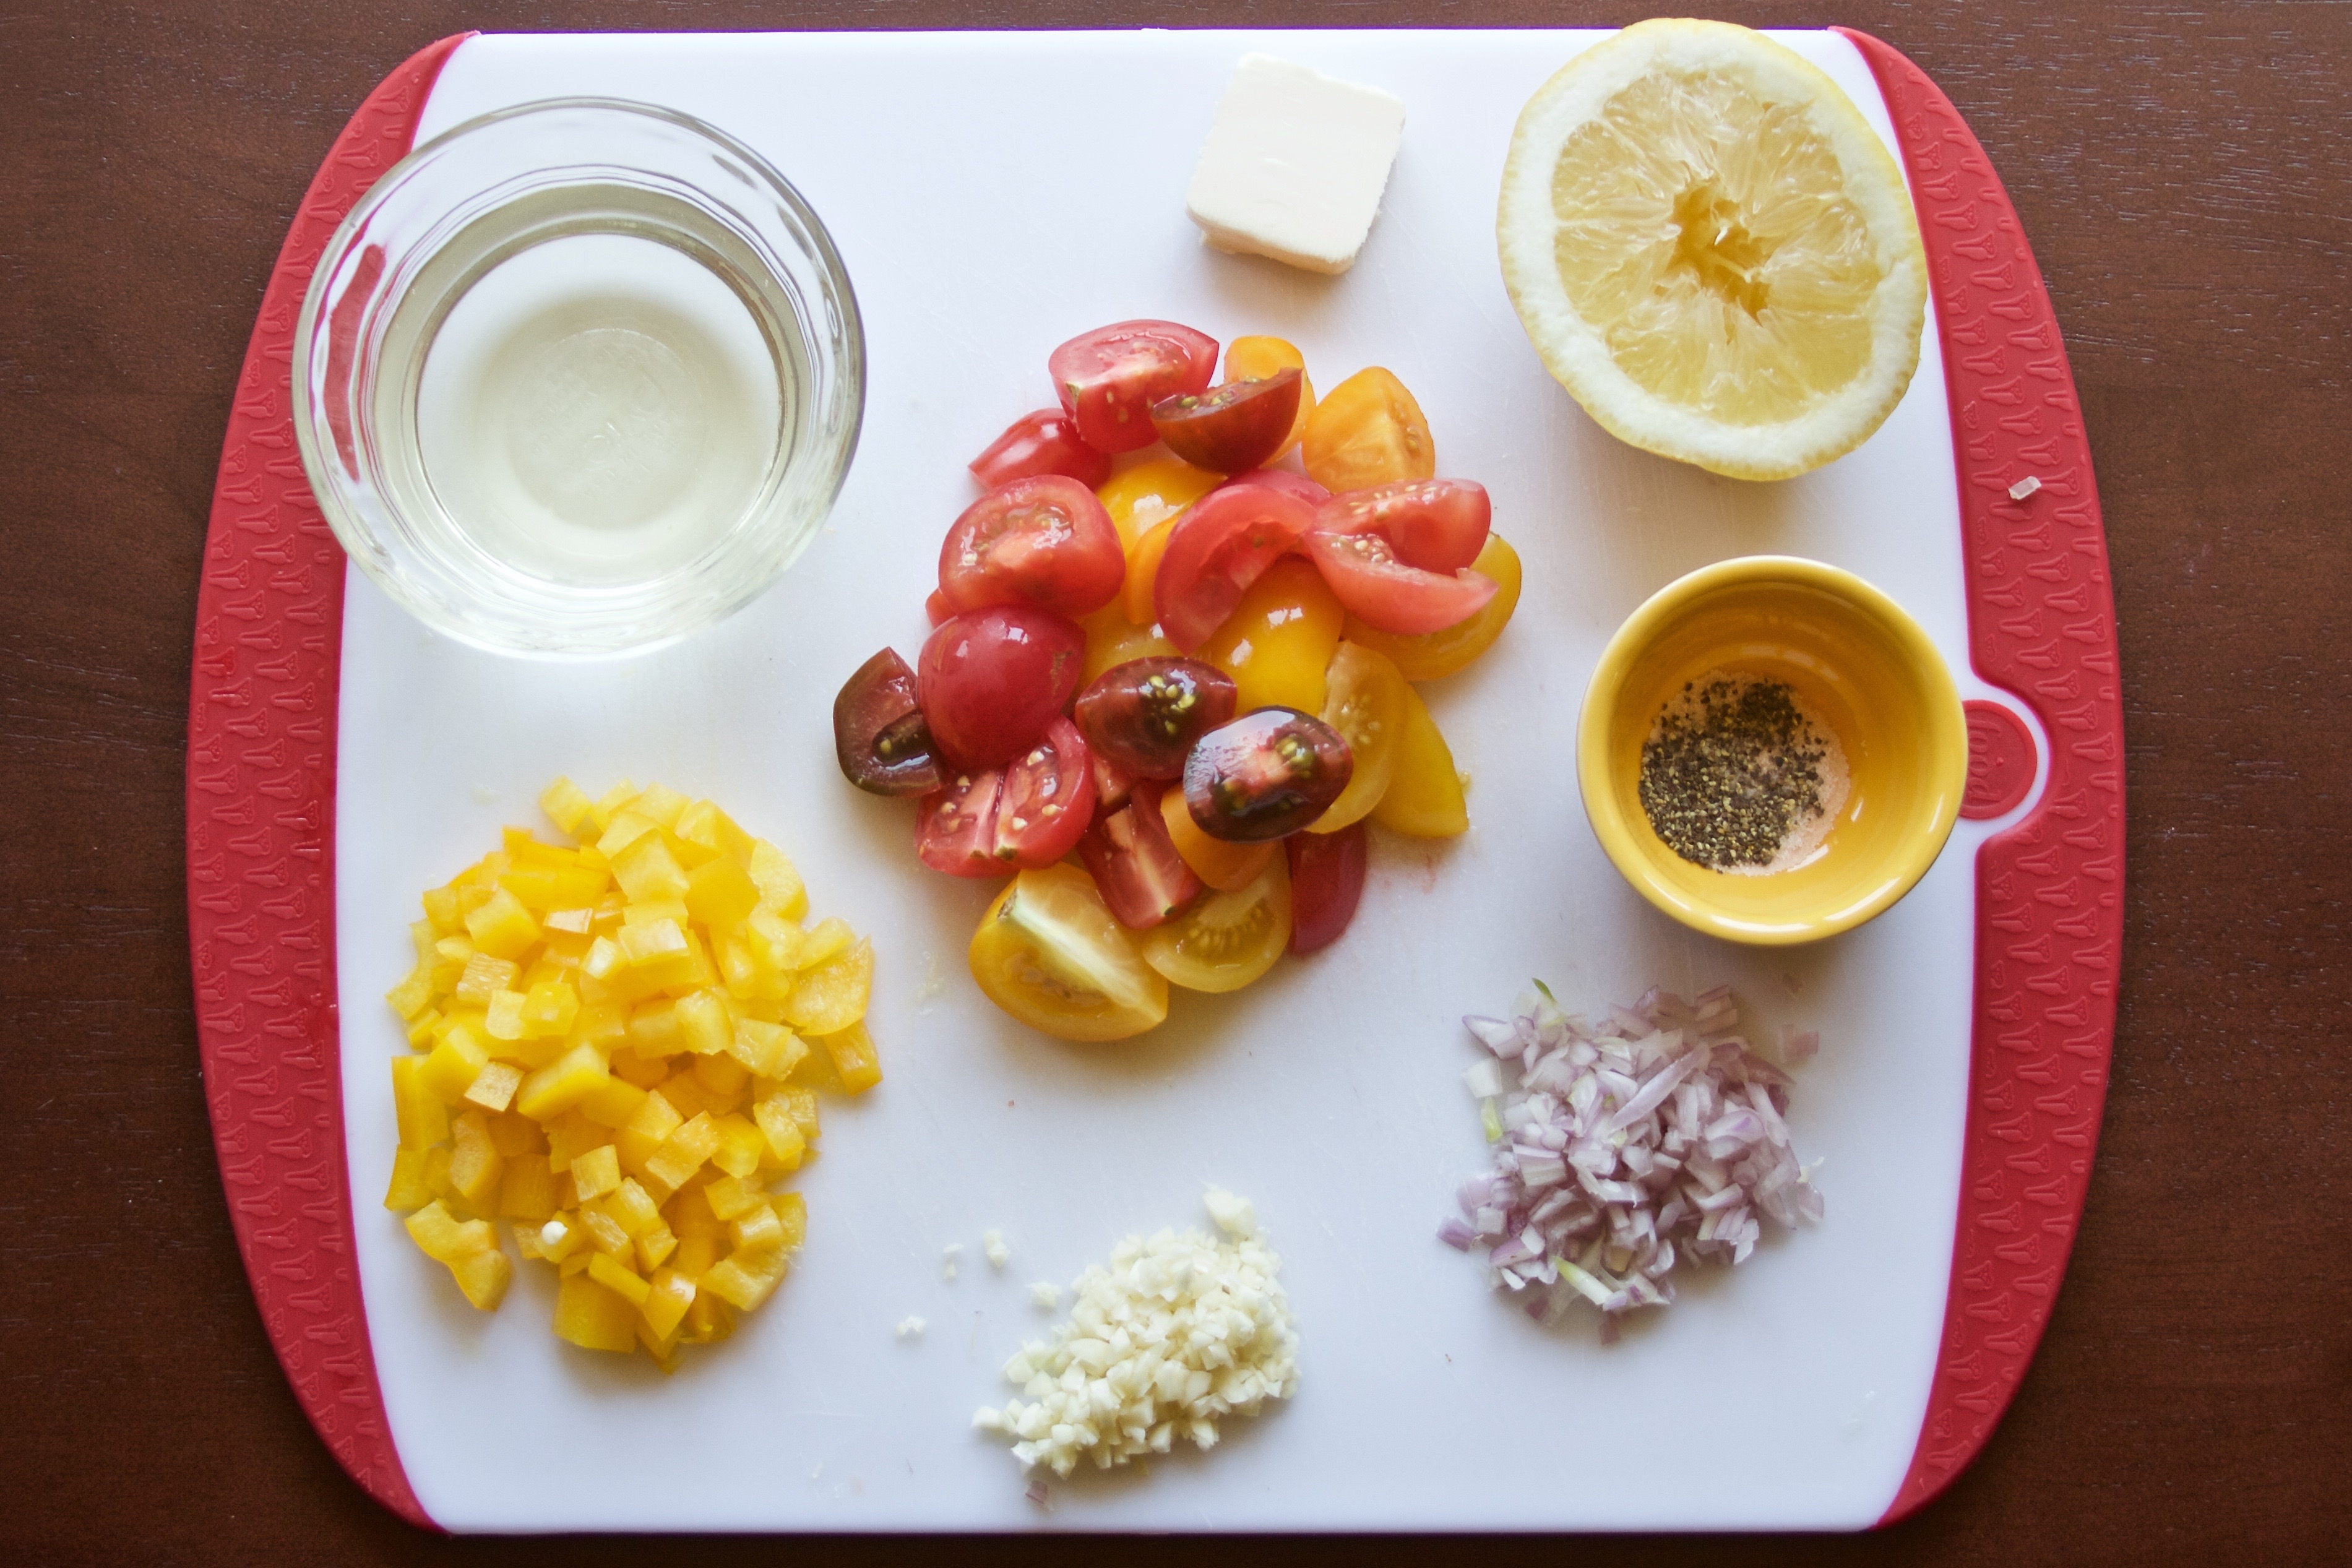
Step Five.
Melt the butter over medium heat. Add the garlic and shallots and sauté for two to three minutes. Dump in the peppers and tomatoes, and sauté for another four minutes. Now, deglaze the pan with the wine and lemon juice.
What is this “deglazing” business?
Deglazing happens when you add a cold liquid to a very hot pan or pot- it releases the little brown, tasty bits from the bottom of the pan and adds them to the sauce. Om nom.
Step Six.
Add those shrimp and continue to cook until the shrimp are just done – they should be pink.

Step Seven.
Take the grits out – add the cheeses. Plate and add the shrimp – serve!

Another Southern Classic! The cheeses and wine zest it up!
Ingredients
- 1 cup whole milk
- 2 Tbsp butter
- 2 1/2 cups water
- 1 cup quick- cooking grits
- longish pour white wine - about 1/3 cup
- 2 oz shredded parmesan
- 2 oz crumbled goat cheese
- 1 Tbsp butter
- 2 garlic cloves, minced
- 1 shallot, minced
- 1 cup cherry tomatoes, quartered
- 1/2 yellow bell pepper, chopped
- 1/2 lemon
- 1/4 cup white wine
- 14 shrimp, peeled and deveined
- salt and pepper to taste
Instructions
- Prep Step! Measure everything out for the grits and preheat the oven to 350°F.
- Bring the butter, milk, and water to a boil over medium heat in a cast iron pot. SLOWLY add the grits, and whisk so that there are no clumps.
- Put the grits in the oven - bake for 25 - 30 minutes. At 15 minutes, pull it out to stir in the white wine. ((The cheese step is at the end of the recipe))
- Melt the butter over medium heat. Add the garlic and shallots and sauté for two to three minutes.
- Add the peppers and tomatoes, and sauté for another four minutes. Now, deglaze the pan with the wine and lemon juice.
- Add the shrimp to the pan and continue to cook until the shrimp are just done - they should be pink.
- Season with salt and pepper to taste
- Remove the grits from the oven and stir in the cheeses. Plate, top with shrimp, and serve!
Don’t get me wrong – I LOVE Southern food. It’s comfort food; what’s not to like?!? But I also laugh a little bit when a nice Southern feast is served – brown, brown, tan, and brown.
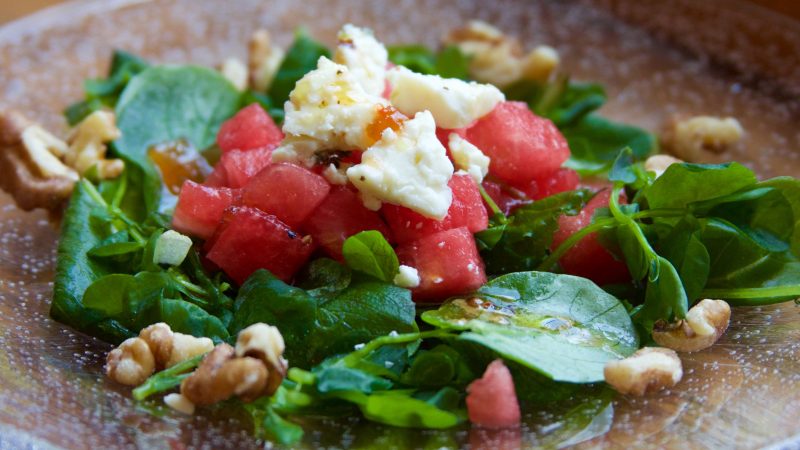
It’s easy to feel unhealthy while you feel oh-so-satisfied and full of gravy, grits, and biscuits. Adding this light and yummy salad will trick your stomach into thinking that you are being healthy, and your taste buds will appreciate it too!
~~~~~~~~~~
Step One.
Prep all of your ingredients – cut the melon, crumble the cheese, yada yada.
Step Two.
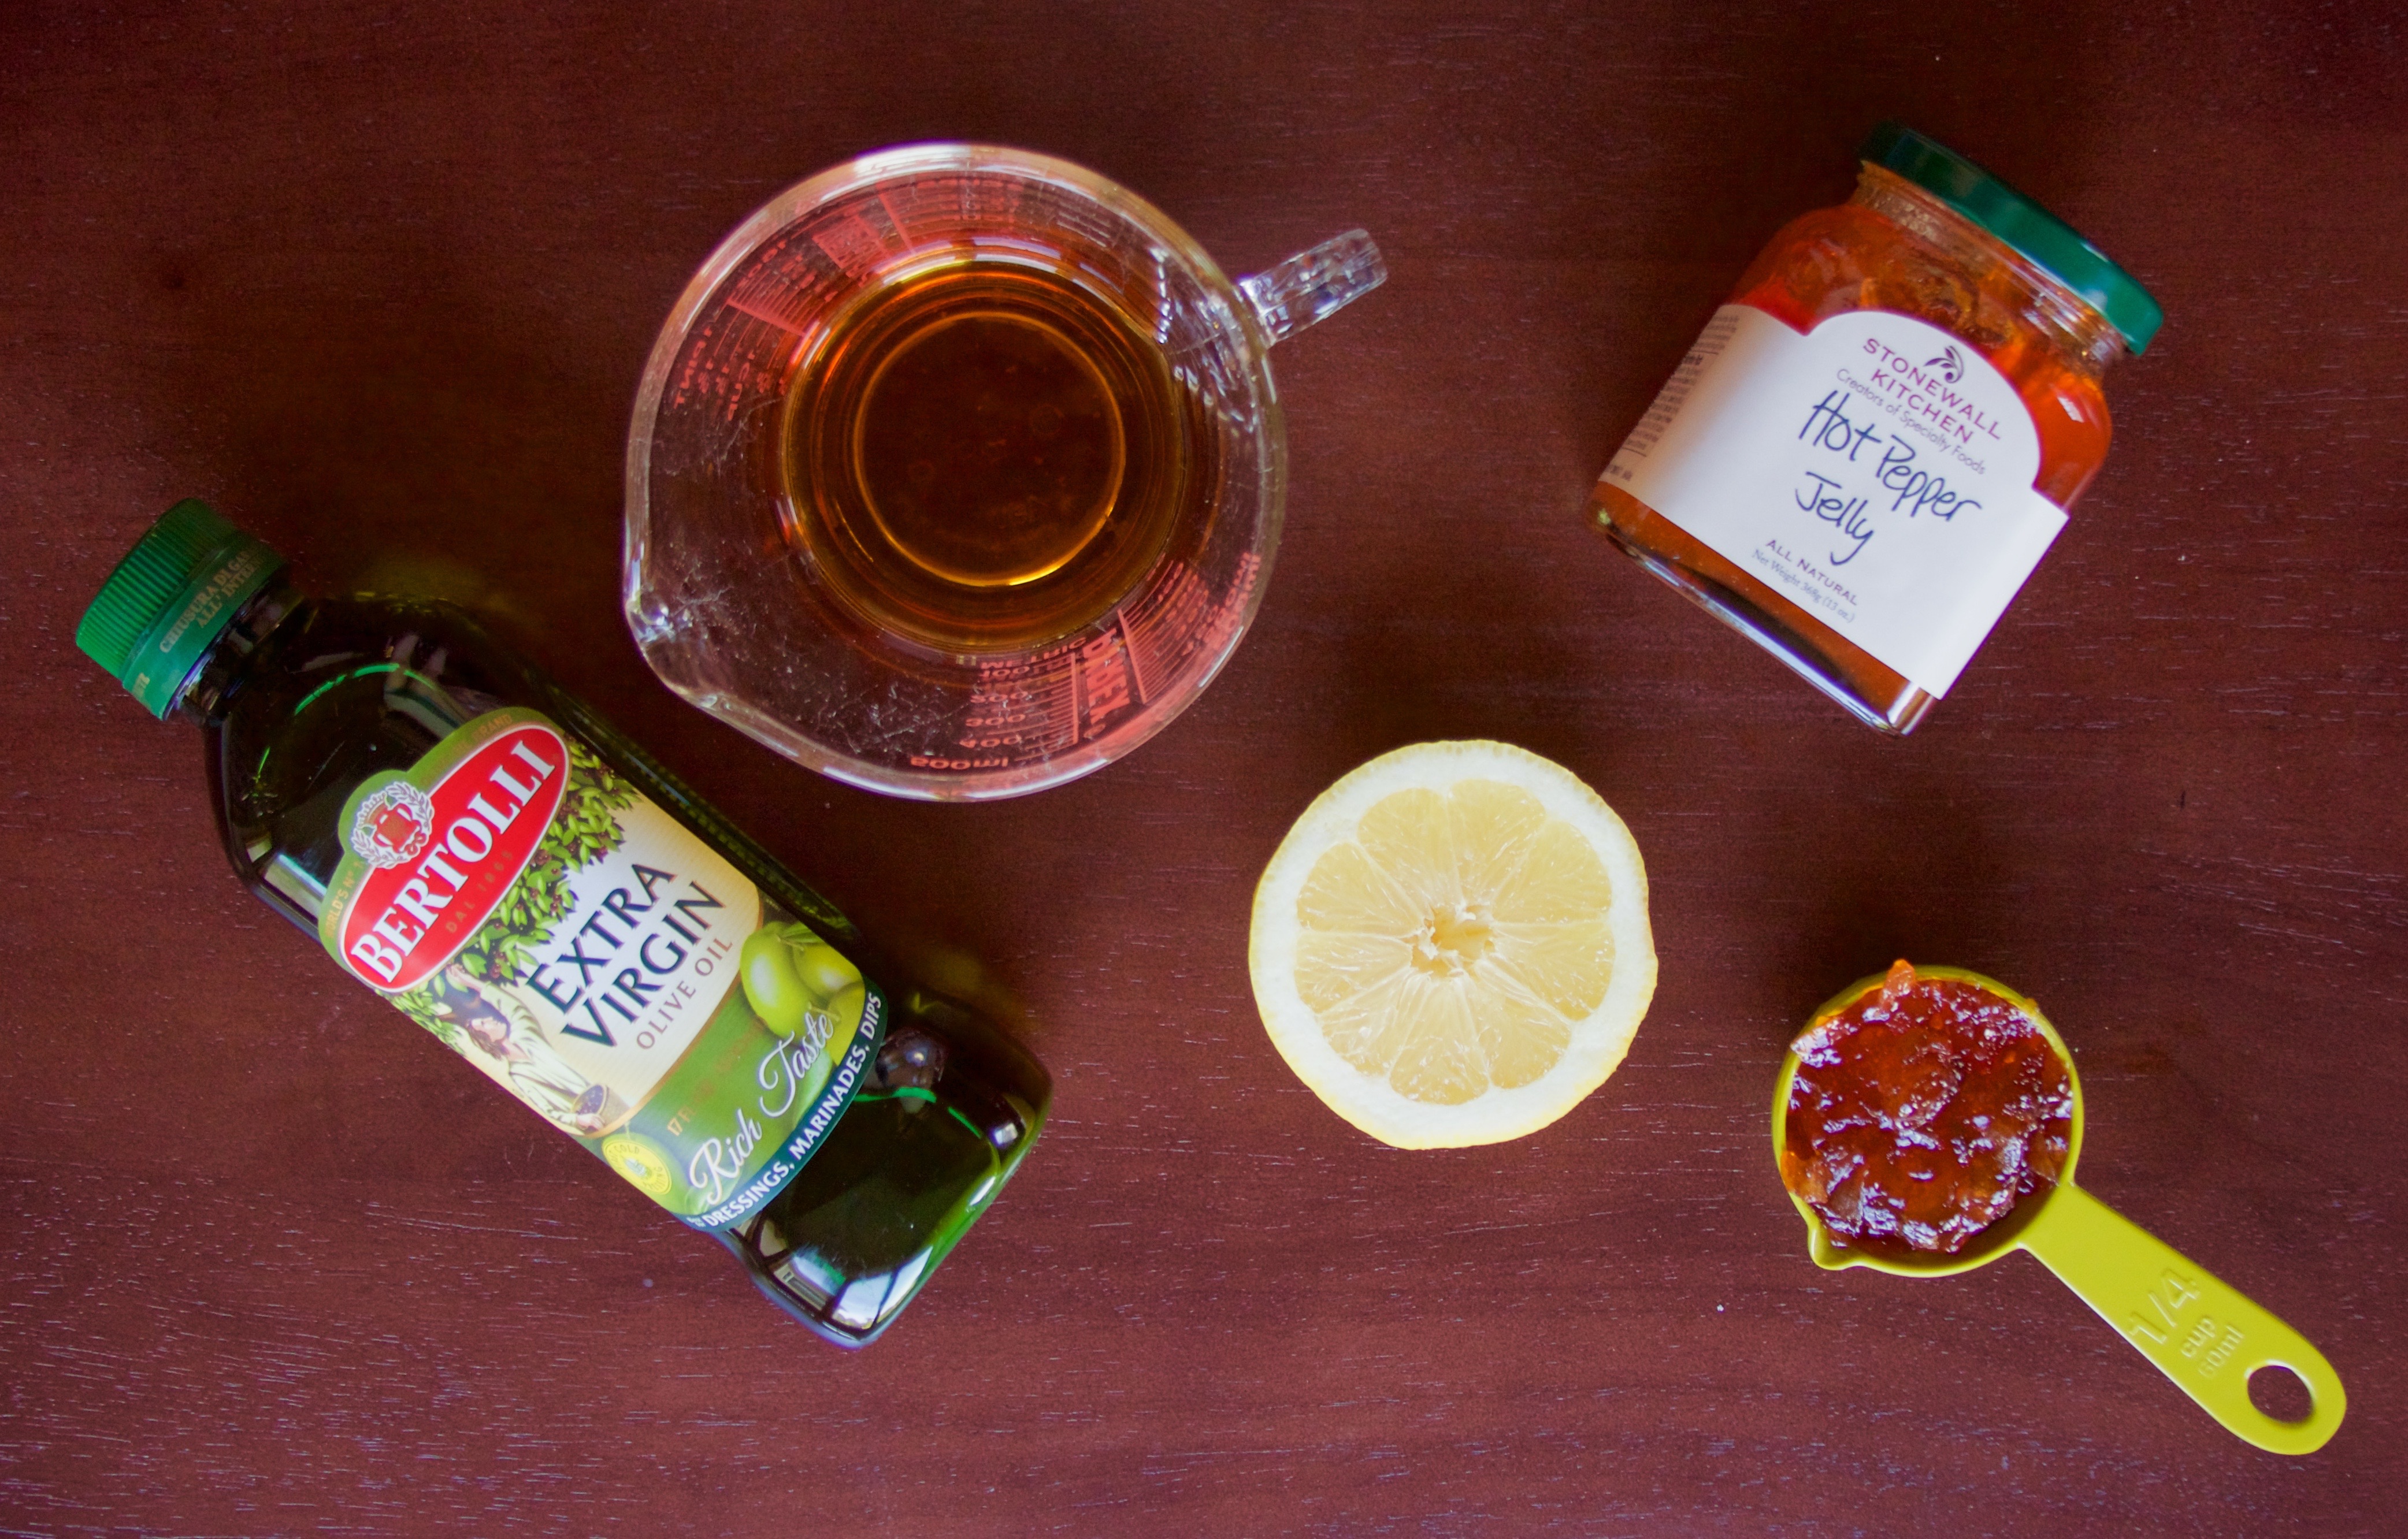
Make your vinaigrette. Make sure that you add the oil SLOWLY!
Is that really necessary? How come these ingredients are having family feuds?!
Oil and vinegar are not meant to mix. When you get all chemistry about it, vinegar is polar and and oil is non-polar. They are not friends. They are not soluble. So you have to confuse them into mingling. This is why dressings (like Italian) settle in the fridge and you have to shake them up before using. Not a sign of something bad, just a chemistry war going on.
Step Three.
Put all those salad ingredients together on a plate and drizzle with your homemade vinaigrette! Voila!
Simple. Tasty. Healthy.

This is a lovely green addition to your Southern Brunch!
Ingredients
- 1/4 cup white balsamic vinegar (2 oz) (59 mL)
- 1/4 cup hot pepper jelly (2.9 oz) (80 g)
- 1/2 lemon
- 1/4 cup olive oil (2 oz) (59 mL)
- salt and pepper to taste
- 1 tub Organic Girl pea shoot mix (has spinach too)
- watermelon - about 2 cups
- 4 oz gorgonzola cheese
- walnuts - about 1/4 cup
Instructions
- Prep Step! Measure your your ingredients. Cut a lemon in half.
- Whisk together hot pepper jelly, vinegar, and juice of the half lemon.
- While whisking, slowly add the olive oil. It is necessary to do this slowly! Vinegar and oil are not buddies; you need to be slow to create an emulsion.
- Add greens as desired to the plates. Top with cut watermelon, crumbled gorgonzola cheese, and crushed walnuts. Stir up vinaigrette if it has settled, and serve!
Notes
adapted from Southern Living: Watermelon, Mâche, and Pecan Salad
Brunch is the best meal of the day. Period.
You can go sweet, you can go savory. You can go both. You can have appetizers, you can have desserts. You can drink with no one judging you. What could be better?
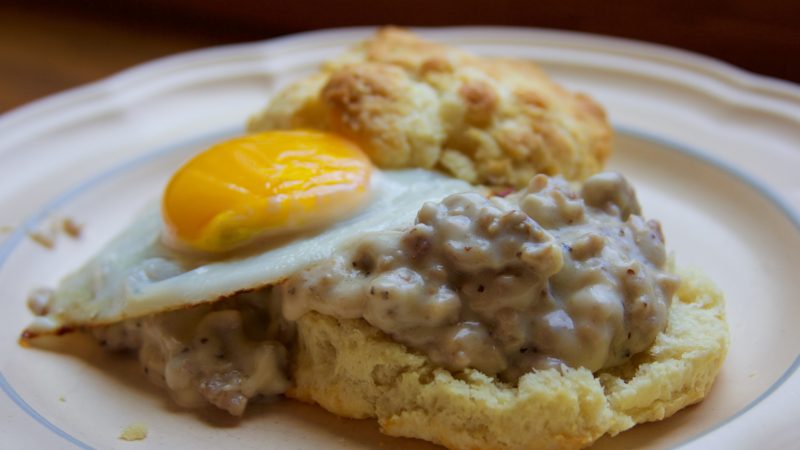
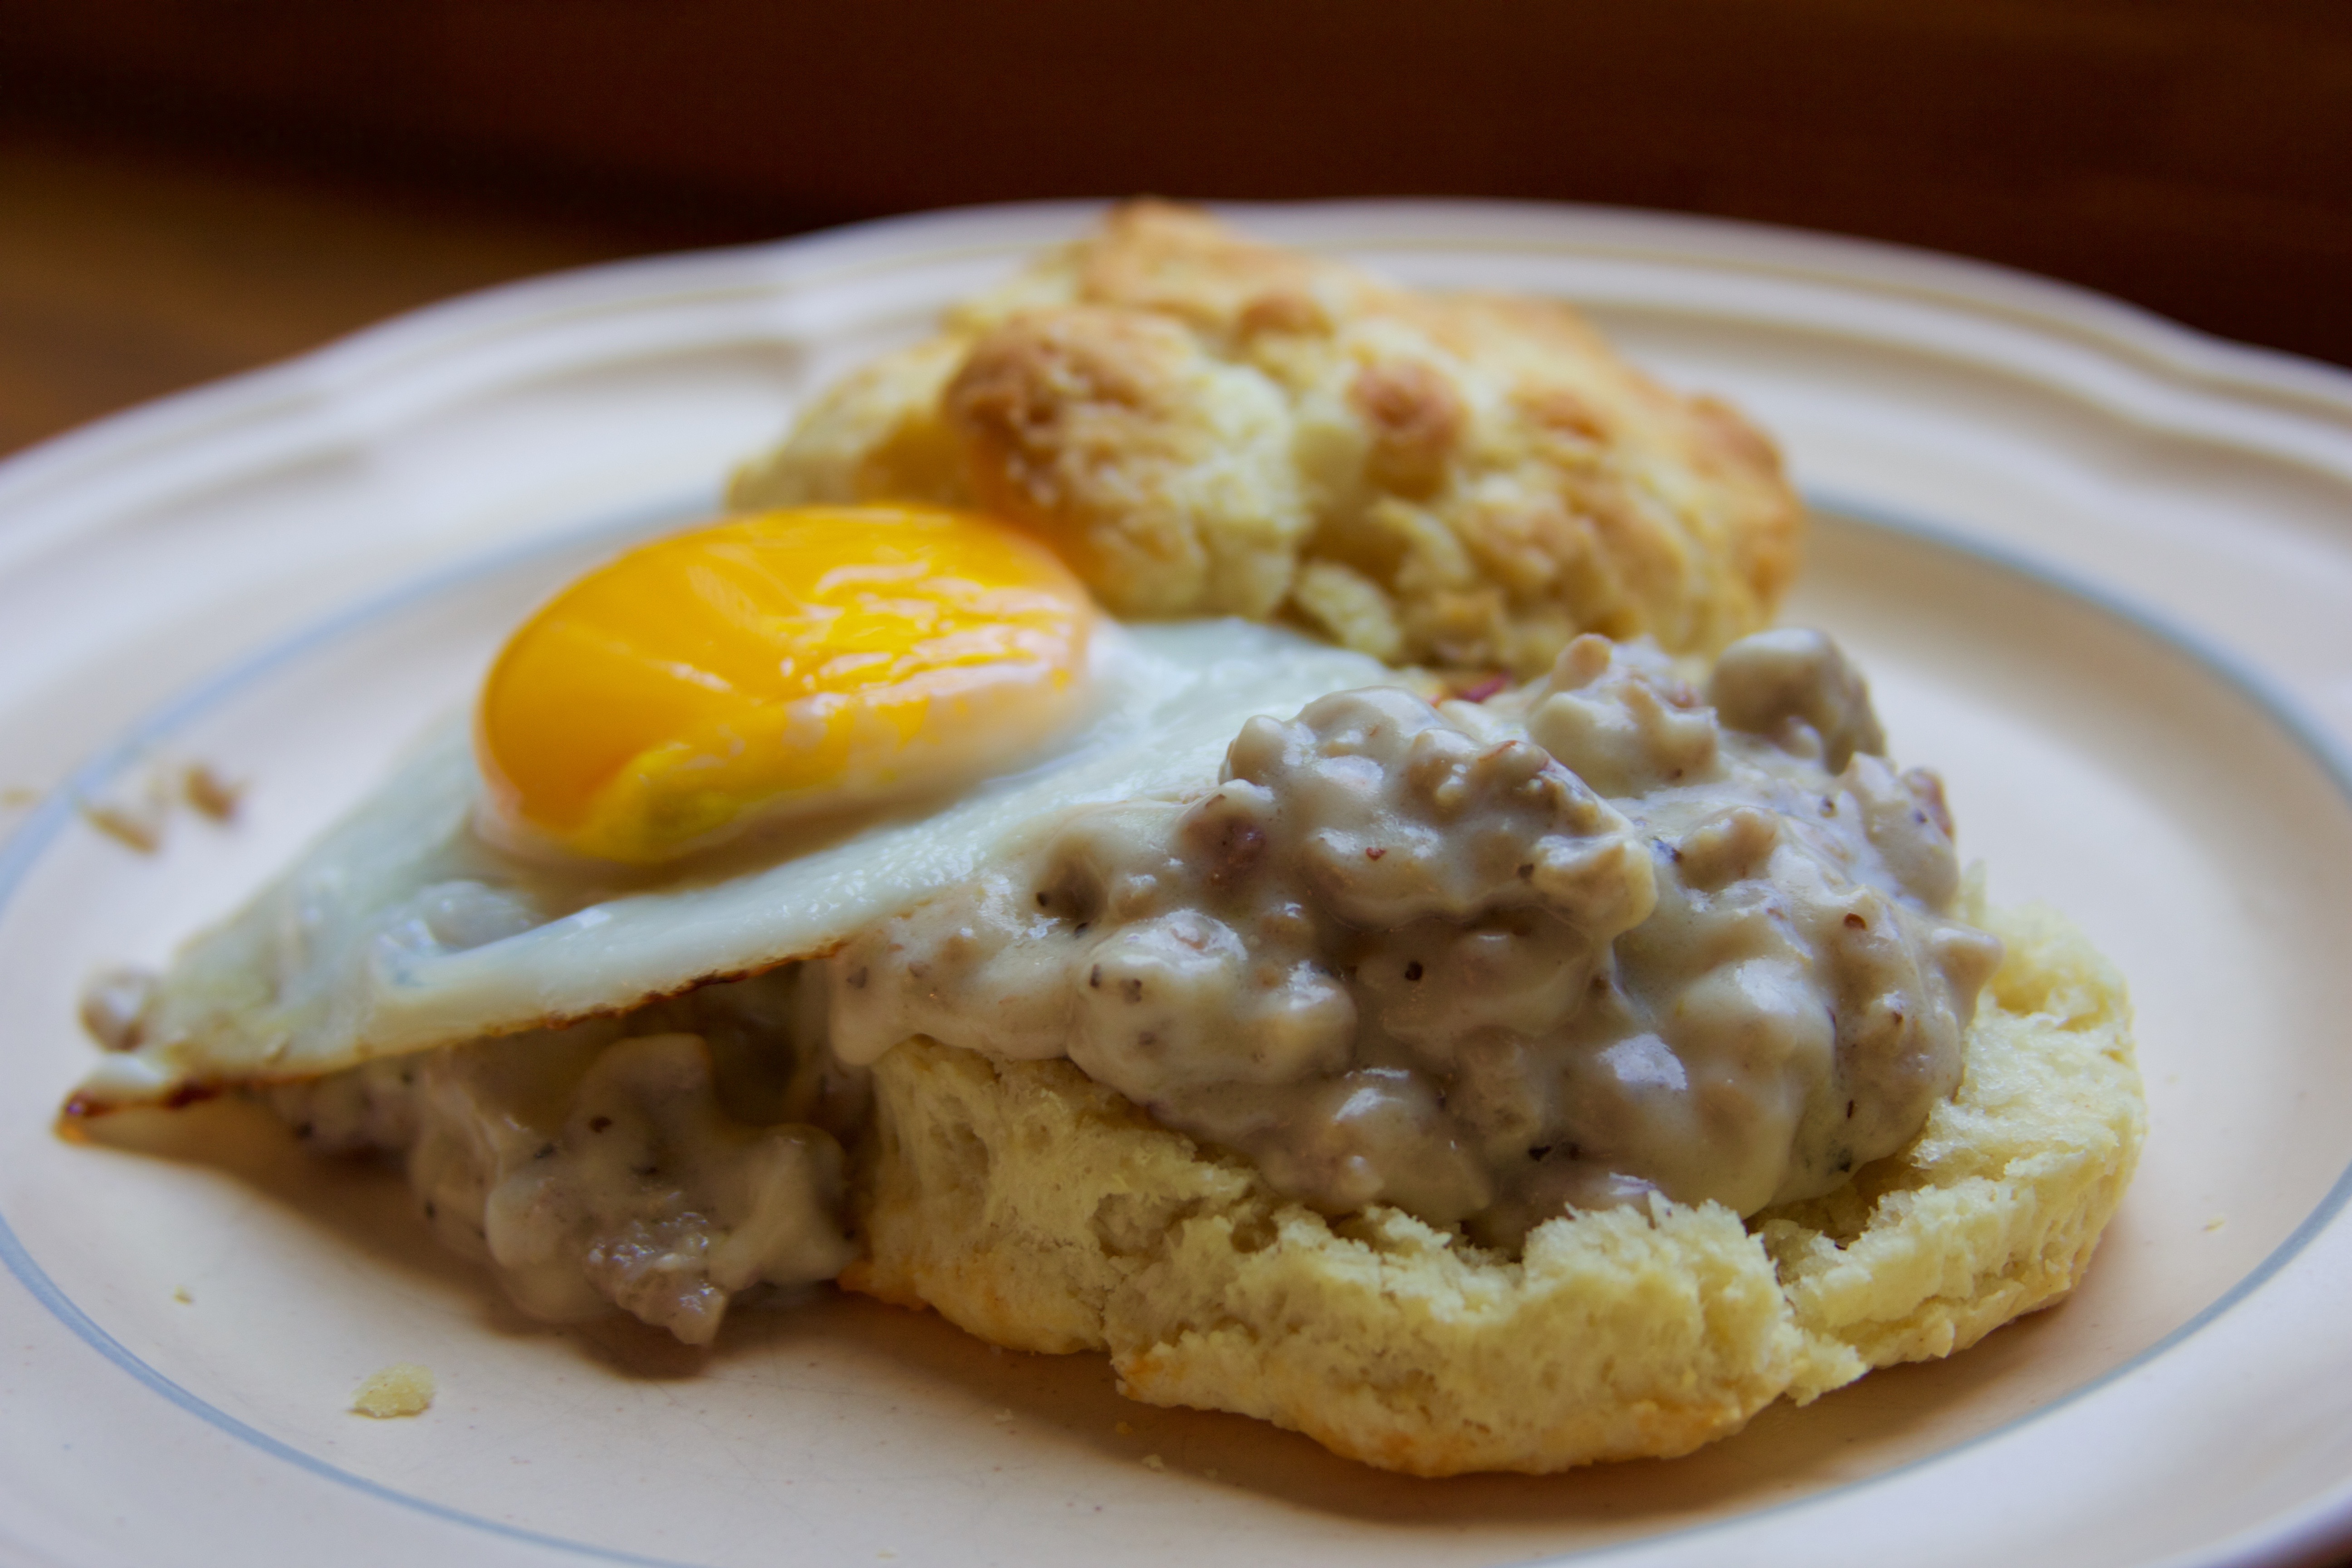
I first tried biscuits and gravy at one of my favorite brunch spots. But what could be better than homemade? Being from the north, I was very confused about the whole gravy thing. I mean, is it necessary to put carbs on your carbs? One bite of this and the answer is “hell, yea!”
The first time I made gravy, I missed the part about adding the milk slowly. Womp womp. Flop. I ended up with a milky mess. Take two was much better. And it was carby heaven that sent me off to nap time dreams of fluffy and creamy goodness.
Biscuits and gravy is a classic, and this is a simple yet tasty rendition. Be careful with the milk!
~~~~~~~~~~
First, make the biscuits.
Step One
Prep Step! Measure out all of your ingredients.
Step Two
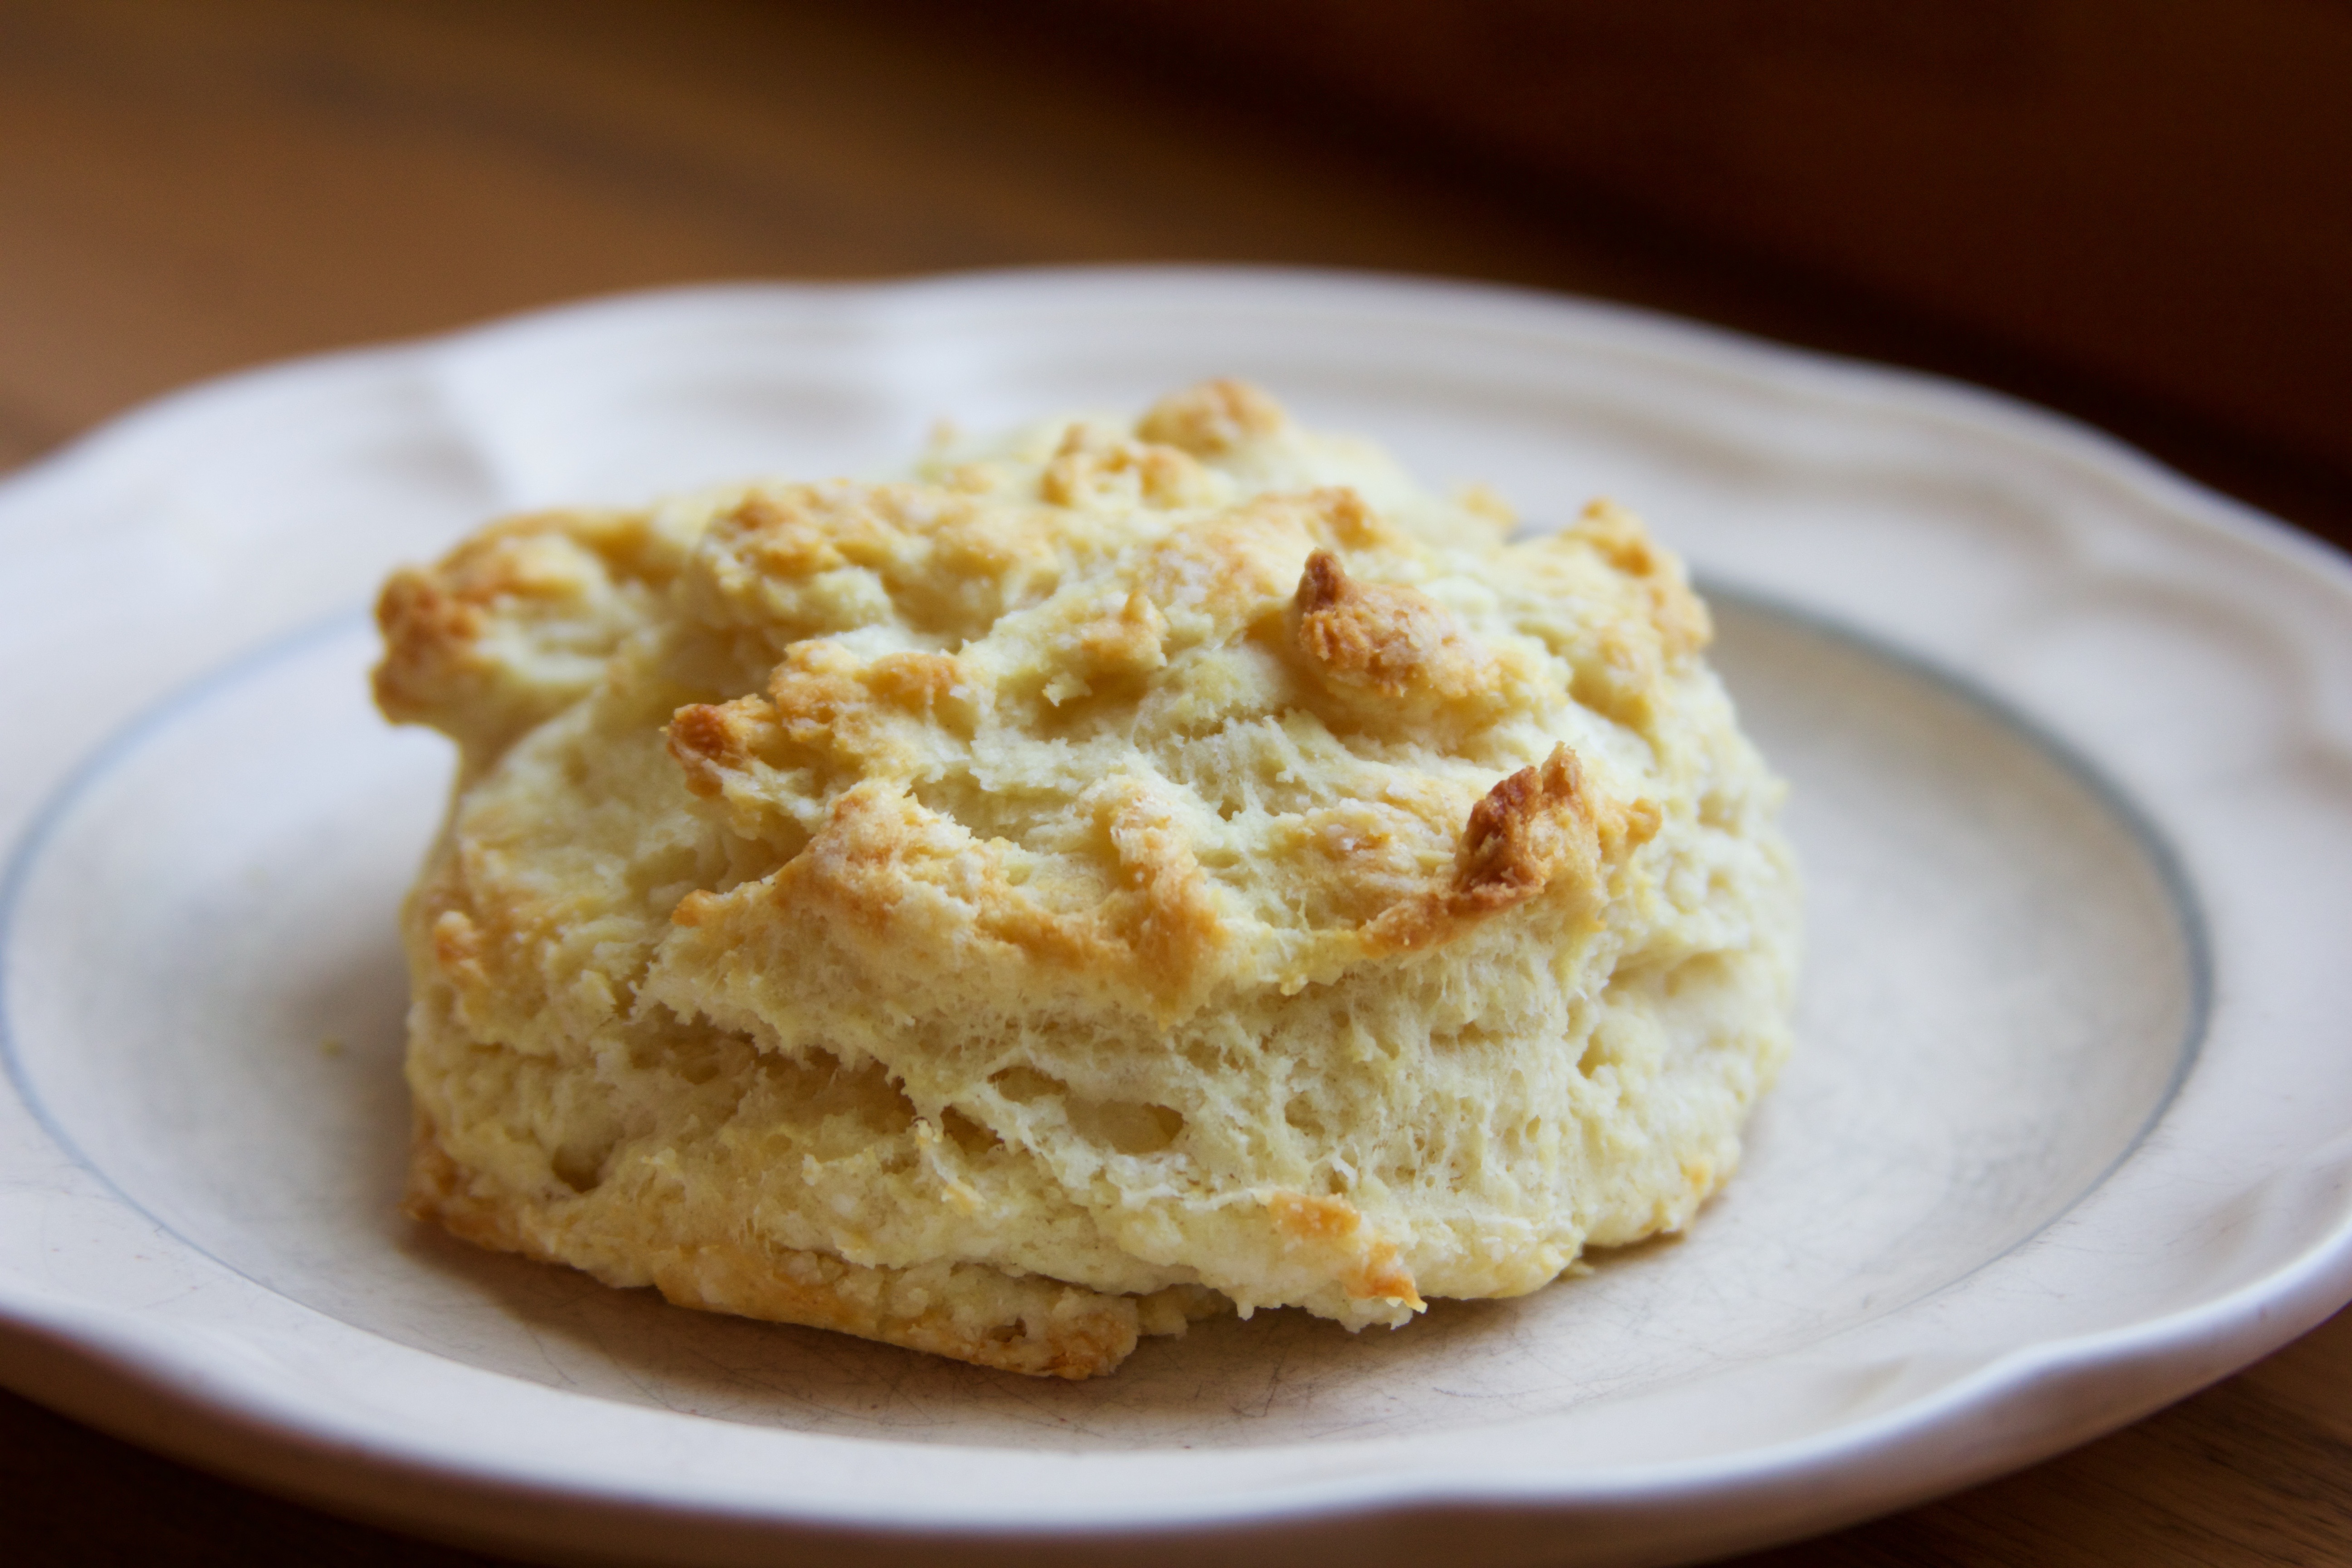
Mix your dry ingredients. Then, using SUPER cold butter, cut the butter into the flour mix with a pastry cutter (or use your fingers, but be careful because they’re warm).
Step Three
Mix in the buttermilk, form your biscuits, and pop ’em in the oven.
Now, make the gravy
Step One
Prep Step! Lay out all of your ingredients, and set a pan over medium heat.
Step Two
Add your sausage to the pan. I like to do it in one big lump and then break it up as I go. This ensures that I never get too small of pieces. As a serious sausage lover, the bigger the better!
Step Three
Now add your flour. Stir it around until the flour coats the sausage. You’re ready for the milk!
Step Four
Add you milk SLOWLY, whisking it in as you go. Once it’s all in, whisk it around a bit more and let it cook until it is a good consistency.
Step Five
Turn your heat down to low for the gravy and start your eggs. Serve it up!

Ingredients
- 2 cups all-purpose flour (280 g)
- 2 1/2 tsp baking powder
- 3/4 tsp salt
- 1/2 tsp baking soda
- 8 Tbsp unsalted butter (1 stick) COLD! (113 g) (4 oz)
- 1 cup buttermilk, COLD! (8 oz) (236 mL)
- 1 lb bulk pork sausage
- 1/3 cup all-purpose flour (47 g)
- 2 1/2 c whole milk (12 oz)
- salt
- pepper
- hot sauce
Instructions
- Prep Step! Measure out your dry ingredients, cut the butter into small cubes (cut a 3 x 3 grid in the stick, so that you get small cubes), and measure out the buttermilk. Preheat your oven to 400°F. Line a baking sheet with parchment paper.
- Mix the dry ingredients together with a fork in a large bowl.
- Cut in your butter (SUPER COLD!) with a pastry cutter, or work quickly with your fingers so that the butter does not heat up. Do this until the mixture is in fine crumbles.
- Slowly, add you milk as you stir with a fork until you have a dough.
- If you are making round biscuits, pat the dough out into a circle that is about 1/2 inch tall. Using a biscuit cutter or a glass dipped in water (to prevent sticking) cut those biscuits. Place them on a baking sheet lined with parchment paper.
- If you are making drop biscuits, pull off lumps that are about 1/3 cup in size, and place them on a baking sheet lined with parchment paper.
- Bake at 400°F for 14 - 16 minutes, depending on your oven. Get ready to make the gravy!
- Prep Step! Set a large pan (that you can whisk in) over medium heat. Measure out your flour and milk and set them by the stove. Have your salt, pepper, and hot sauce ready to go.
- Dump all that sausage in. I like to add it as a whole and break it up with a spoon once it's sizzling - this keeps the chunks of sausage nice a big!
- Once the sausage is cooked, dust the flour over and stir until it coats the sausage.
- SLOWLY add you milk, whisking well as you go. Drizzle a little, stop and whisk more,
- do this until it's all in!
- Add salt, pepper, and hot sauce to your liking.
- Once the biscuits are done, break open a biscuit on each plate. Top with gravy. Add a fried or poached egg if you like. Dig in!
Notes
© Adventures of a Frostaholic
I saw a picture on the internet recently that had replaced Mars’ solar ranking with Louisiana. If you’ve even been in the summer, you would agree that it can’t be too far off!
This cocktail is the perfect summer night (or morning, whatever) cool down. It combines sweet, ripe peaches with the earthy and robust taste of whiskey. You can sweeten it up or not all. You can choose a simple sparkling wine or a sweet champagne.
Cocktails technically have recipes, but I say go with whatever floats your boat – this is a suggestion that you can tweak to your heart’s content!
~~~~~~~~~~
Step One
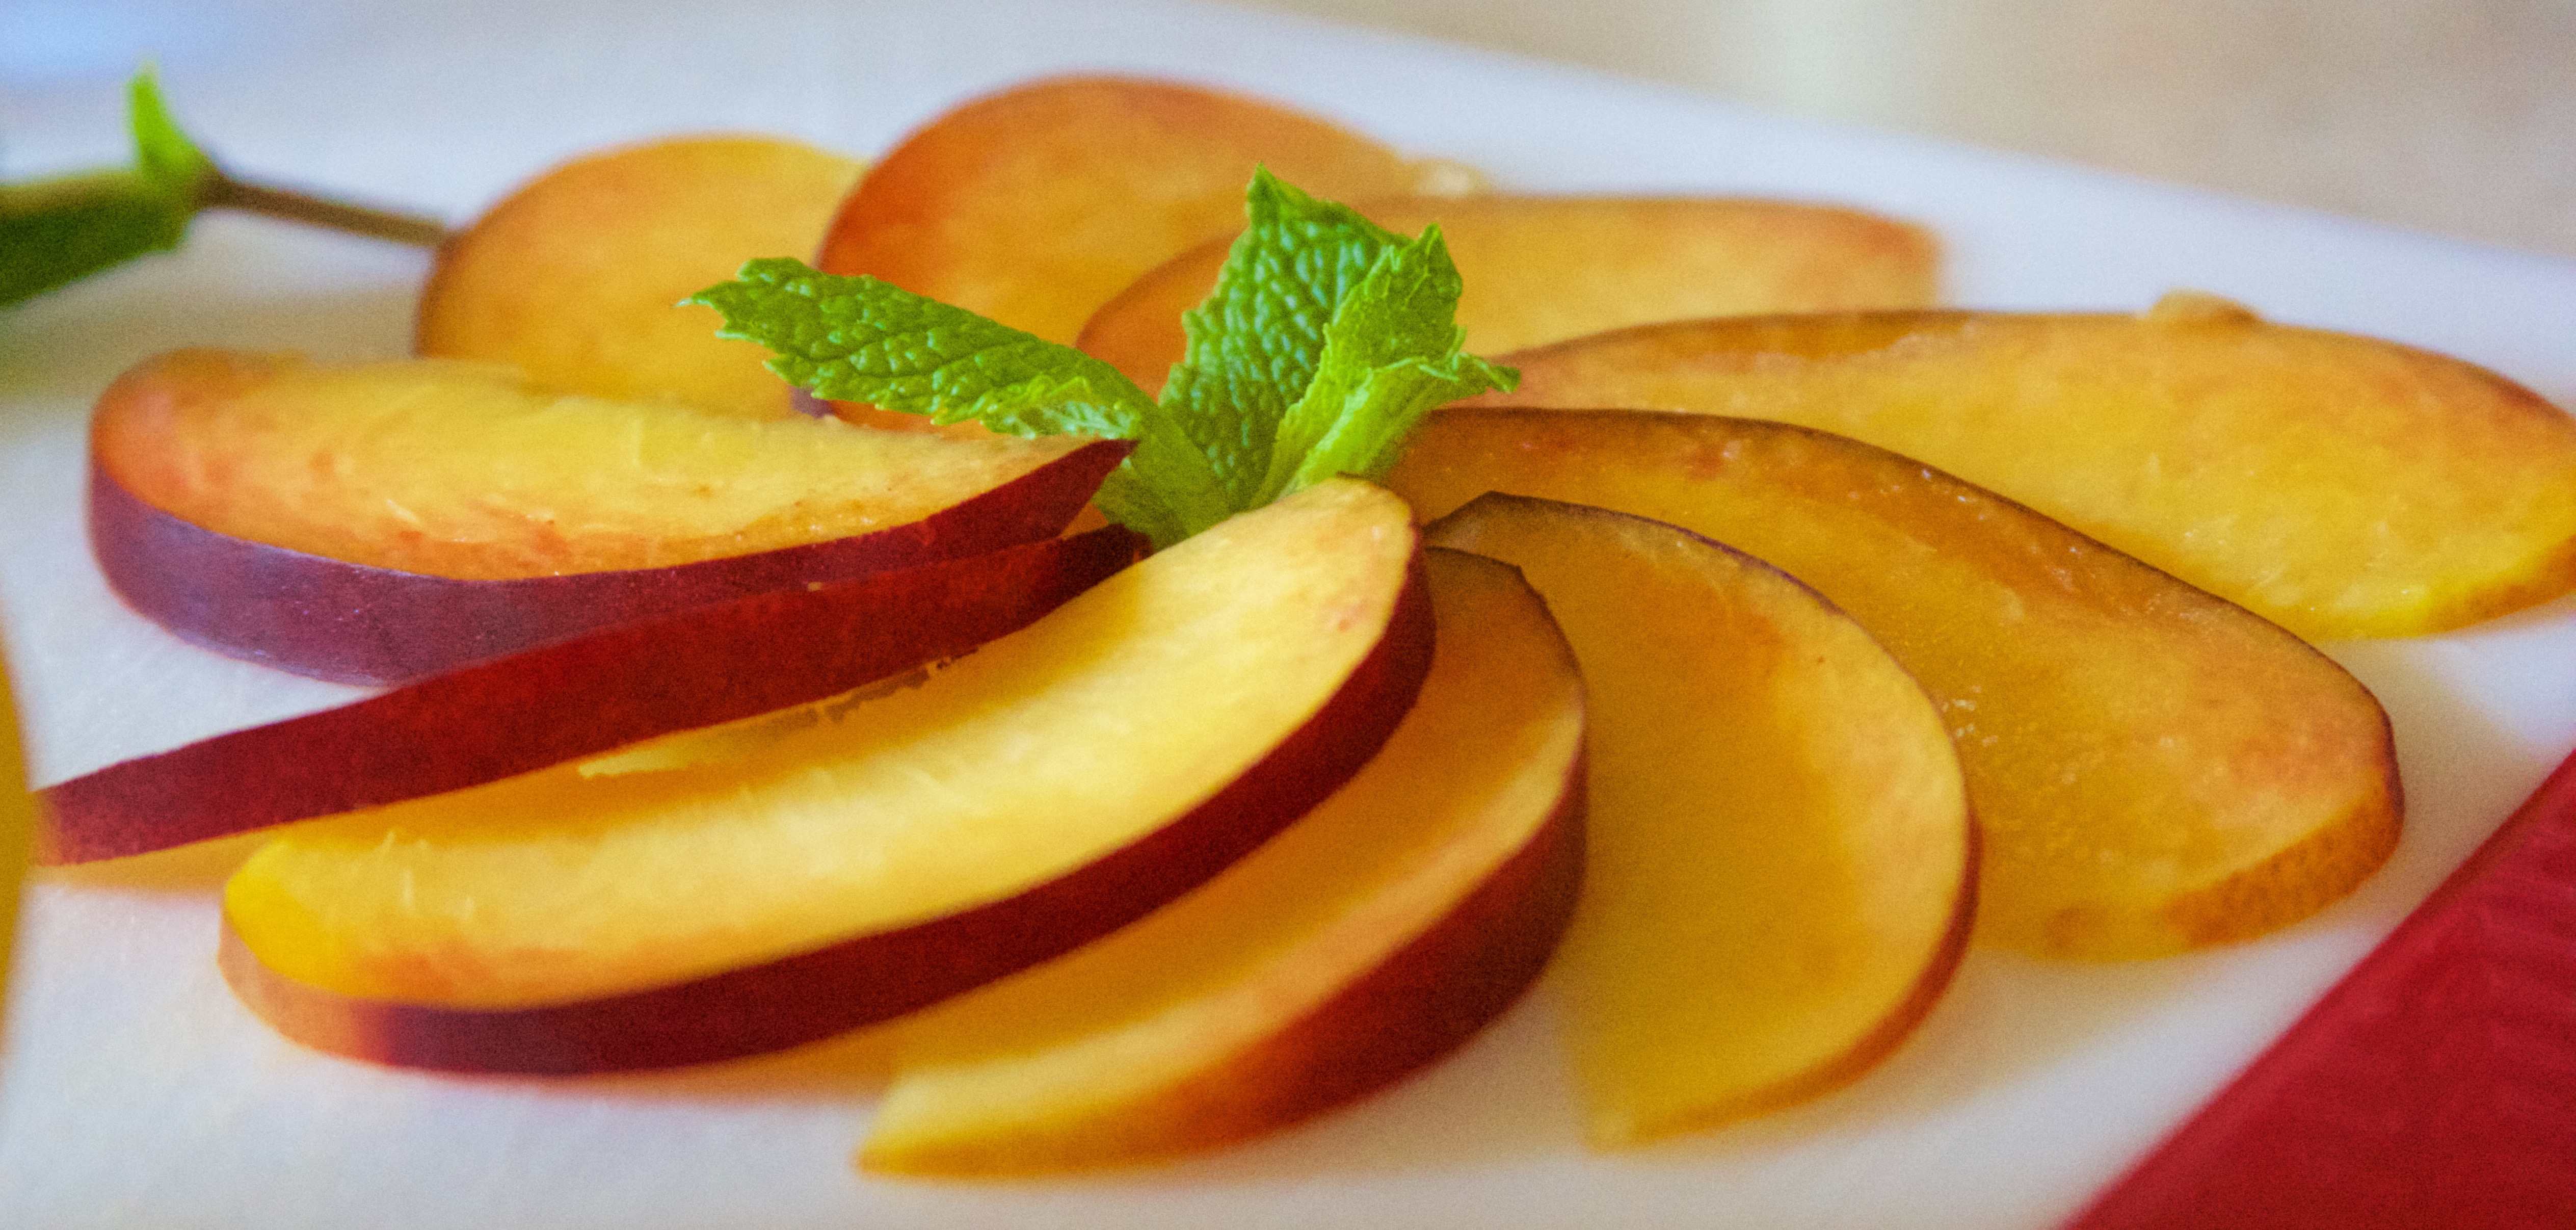
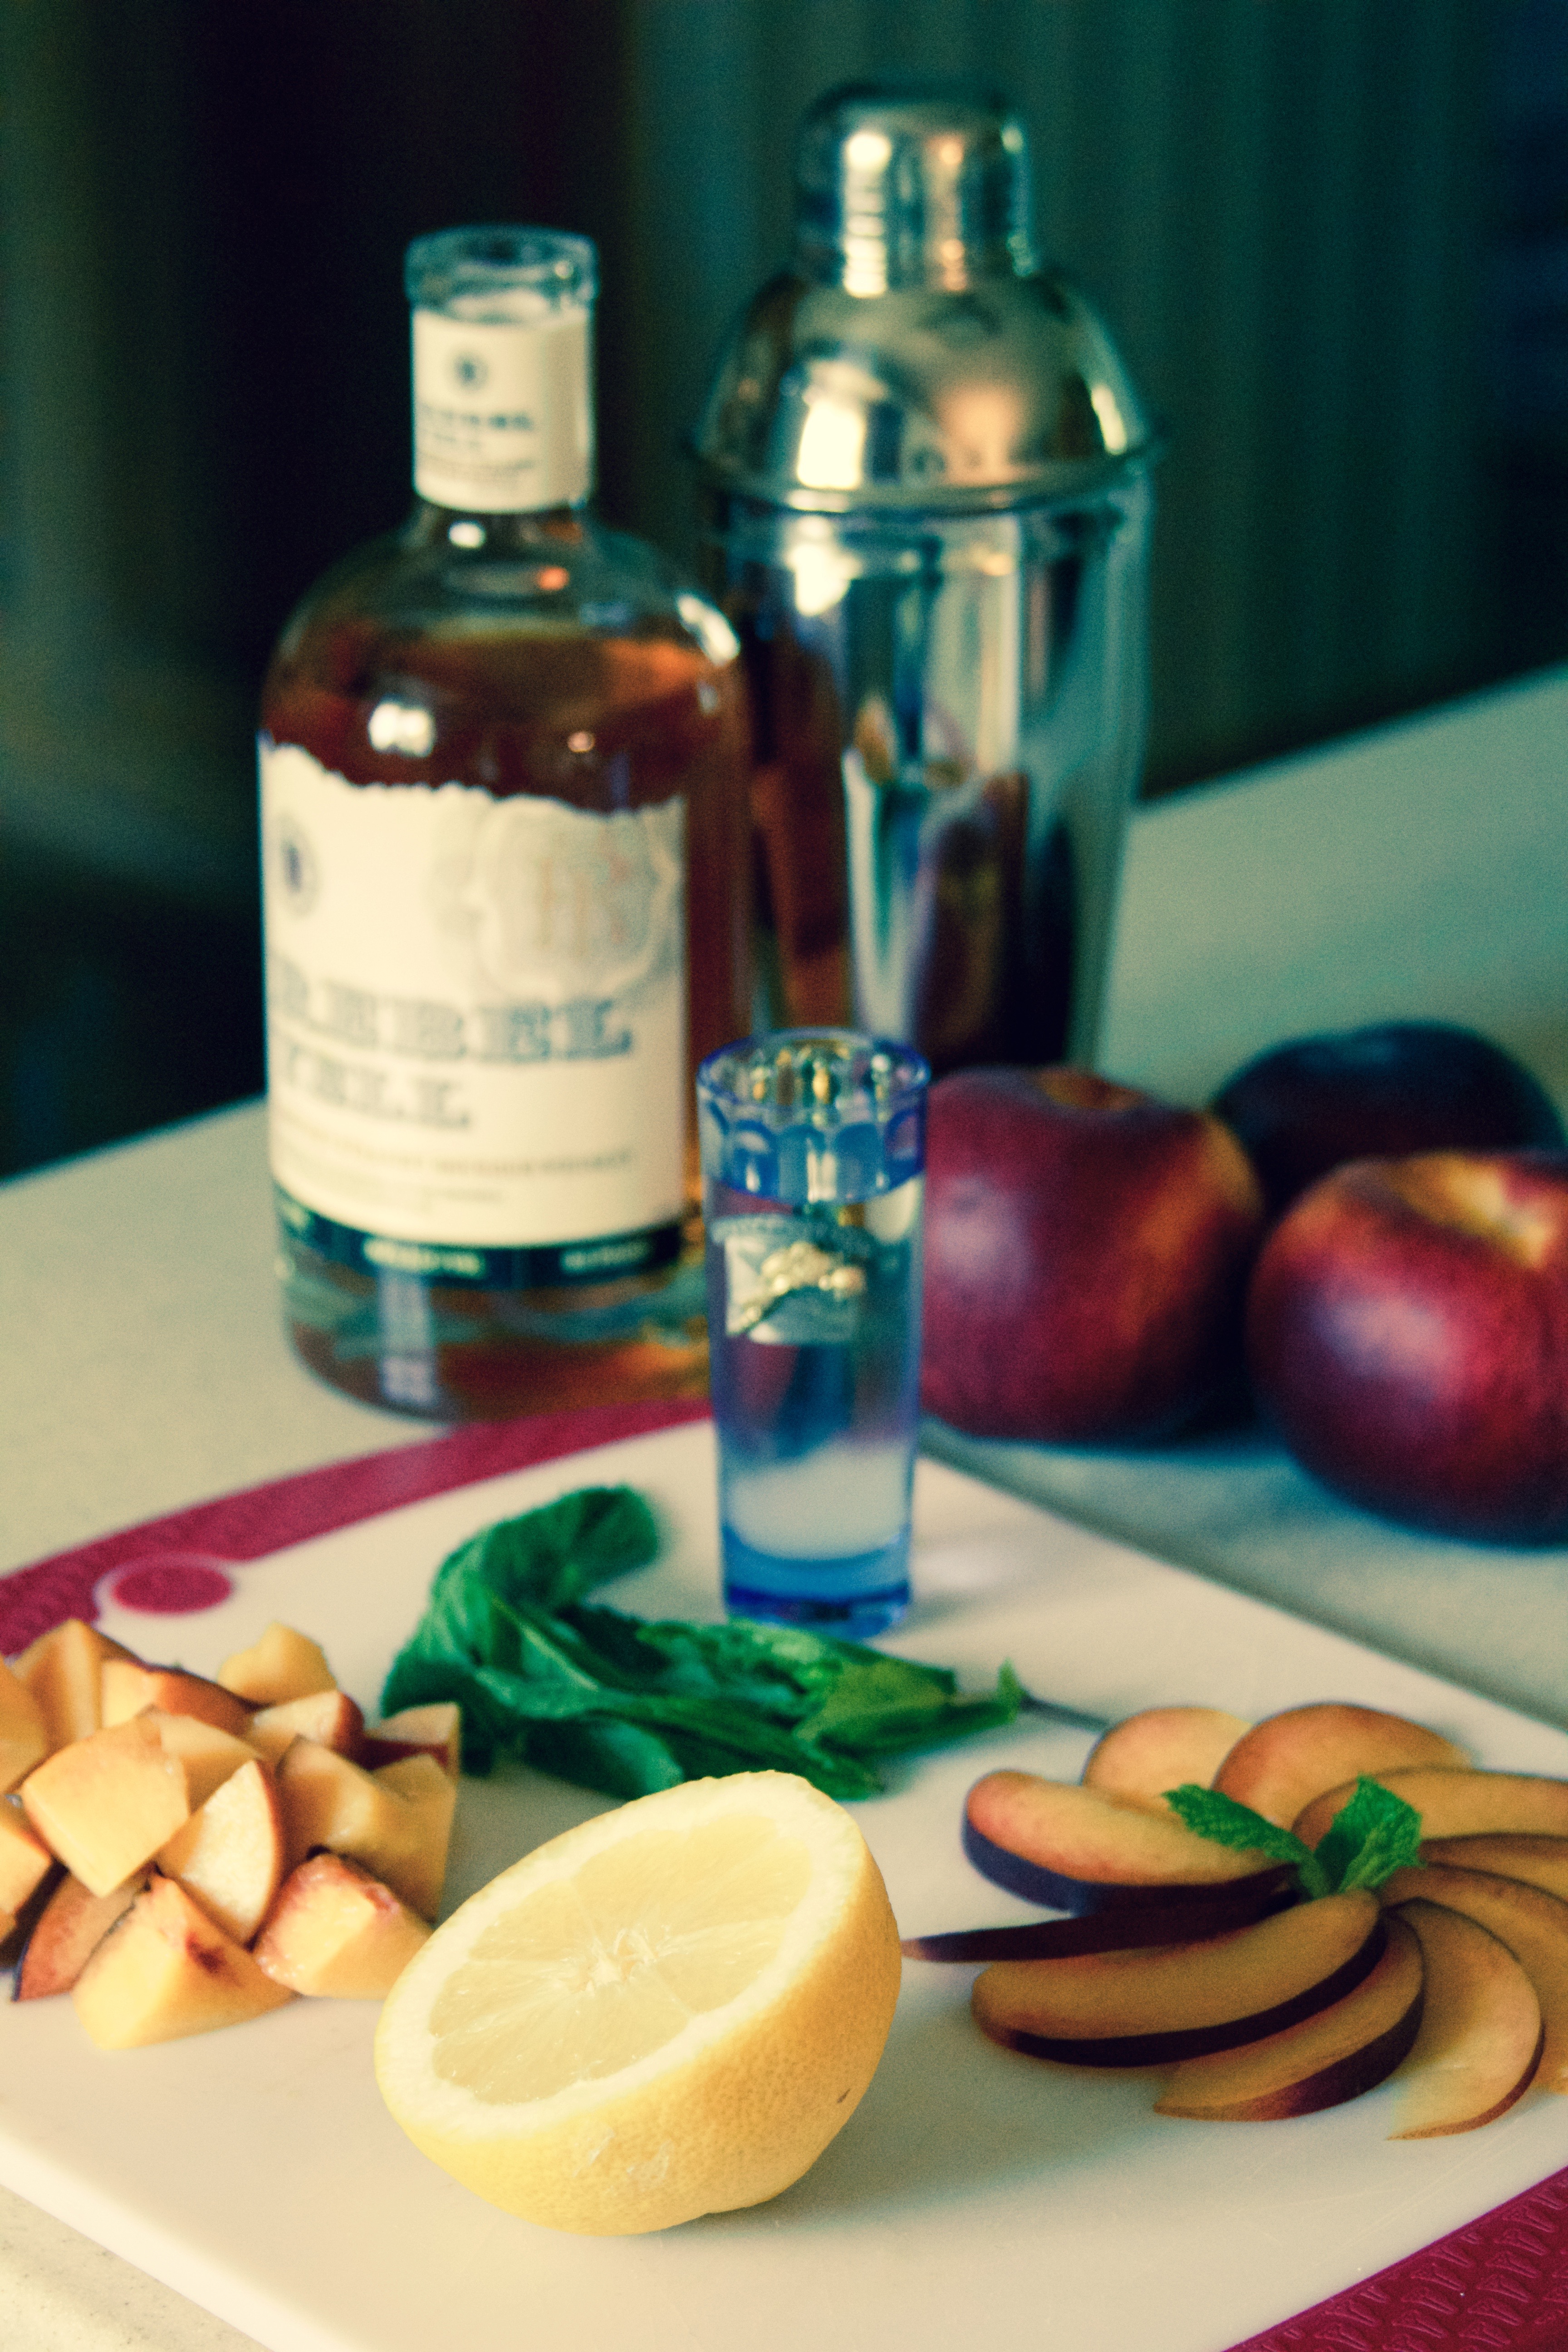
Prepare your ingredients! Separate the mint, chop the peaches, cut a lemon, slice one for garnish, and get your alcohol nearby
Step Two
Put a few ice cubes in the bottom of the shaker. Add the peaches, mint, and juice of the lemon. Pour the amount of whiskey that is desired, and add any simple syrup that you would like.
Note: You’ll see from my picture that I chose a pretty cheap whiskey. I have acquired a “whiskey snob” taste from my family, but it’s not worth the cost when you’re mixing with flavors that will mask what makes expensive booze good. Save your money on this cocktail.
Step Three
Shake, shake, shake! Pro Tip: Cocktails mix best when you come up with a dance. 😉
Step Four
Pour the whiskey mix into a glass of choice (I used a white wine glass – a champagne flute would be much more classy). Fill the glass with your desired bubbly. Add garnishes of mint and peach.
Sip on the porch under a fan and laugh at the weather – it can’t rain on your parade with this drink in hand!

Ingredients
- 3 oz whiskey
- 1 peach - half cubed, half sliced
- 4-5 sprigs of mint
- 1/2 lemon
- up to 1 oz simple syrup
- prosecco or brut champagne
Instructions
- Prep your ingredients! Slice your peach in half. Cube half and cut the other half into thin slices. Cover the bottom of a cocktail shaker with ice cubes (about 4-5)
- Add all of the ingredients except the champagne to the shaker.
- Shake, shake, shake!
- Strain the whiskey mix into a champagne or white wine glass. Top with champagne and enjoy!
Notes
© Adventures of a Frostaholic
3….2….1…….. LAUNCH THE BLOG!
I am beyond excited to finally share this project of mine with you! Trust me, it has been “in the making” for an embarrassingly long time…
I suppose it all started with the first time I baked a cake. Head over to my page titled “Hi, my name is Mara May…” to read about that er, interesting experiment.
But it really started with a well-tended rhubarb patch and a need for sugar. My dad, who didn’t cook much, made THE BEST rhubarb crunch when I was growing up. That recipe was genius. It was good warm or cold. It was crunchy yet soft and sweet yet tangy enough to make you pucker up. Add a scoop of plain ol’ vanilla ice cream, and you had a perfect summer night.
After learning how to make that a few times, I decided to venture from the familiar. My grandpa always came over for dinner on Sundays, and we would, like clockwork, make a stop at the pie shop to get a treat for dessert. The pies! Classic apple pie – or with custard or crumb top. Fruit pies, cream pies, inbetween pies. Special pies each month. I loved those pies. I was going to make a pie.
And it. was. delicious.
After rhubarb pie, I started throwing all kinds of fruits in there. I dreamed of having a pie shop of my own when I was grown up.
But instead I went to college. I left Wisconsin and entered into the different but exciting experience of New Orleans. I wanted to bake for all of my new friends…. except serving pie in a dorm is tough. I would have needed a whole cart of materials to serve perfect slices on plate to everyone I knew. Hm.
And then…. epiphany! Cupcakes. Mind you, this was before the cupcake craze, so it didn’t seem 100% obvious. This was a way that I could make everyone happy in a small, hand-held, no-forks-required way. Brilliant!
So that’s how it started. Never one to pass up the opportunity for creativity, I soon began writing my own recipes. If I could imagine it, I could make it. Now, I am ready to share these recipes with you! Hooray!
My interests and talent thankfully extend beyond cupcakes, or I would have to roll down the street rather than walk by now. I will share all kinds of recipes with you – please use the archived categories to easily navigate through them and find what you need!
If you ever would like a recipe for something or have a question about how to tweak one you love, ask away! I can’t wait for this to become an awesome collaboration.
~~~
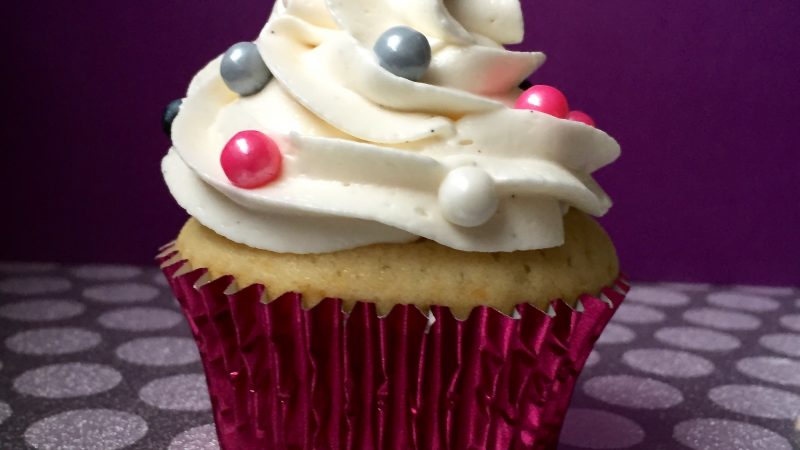
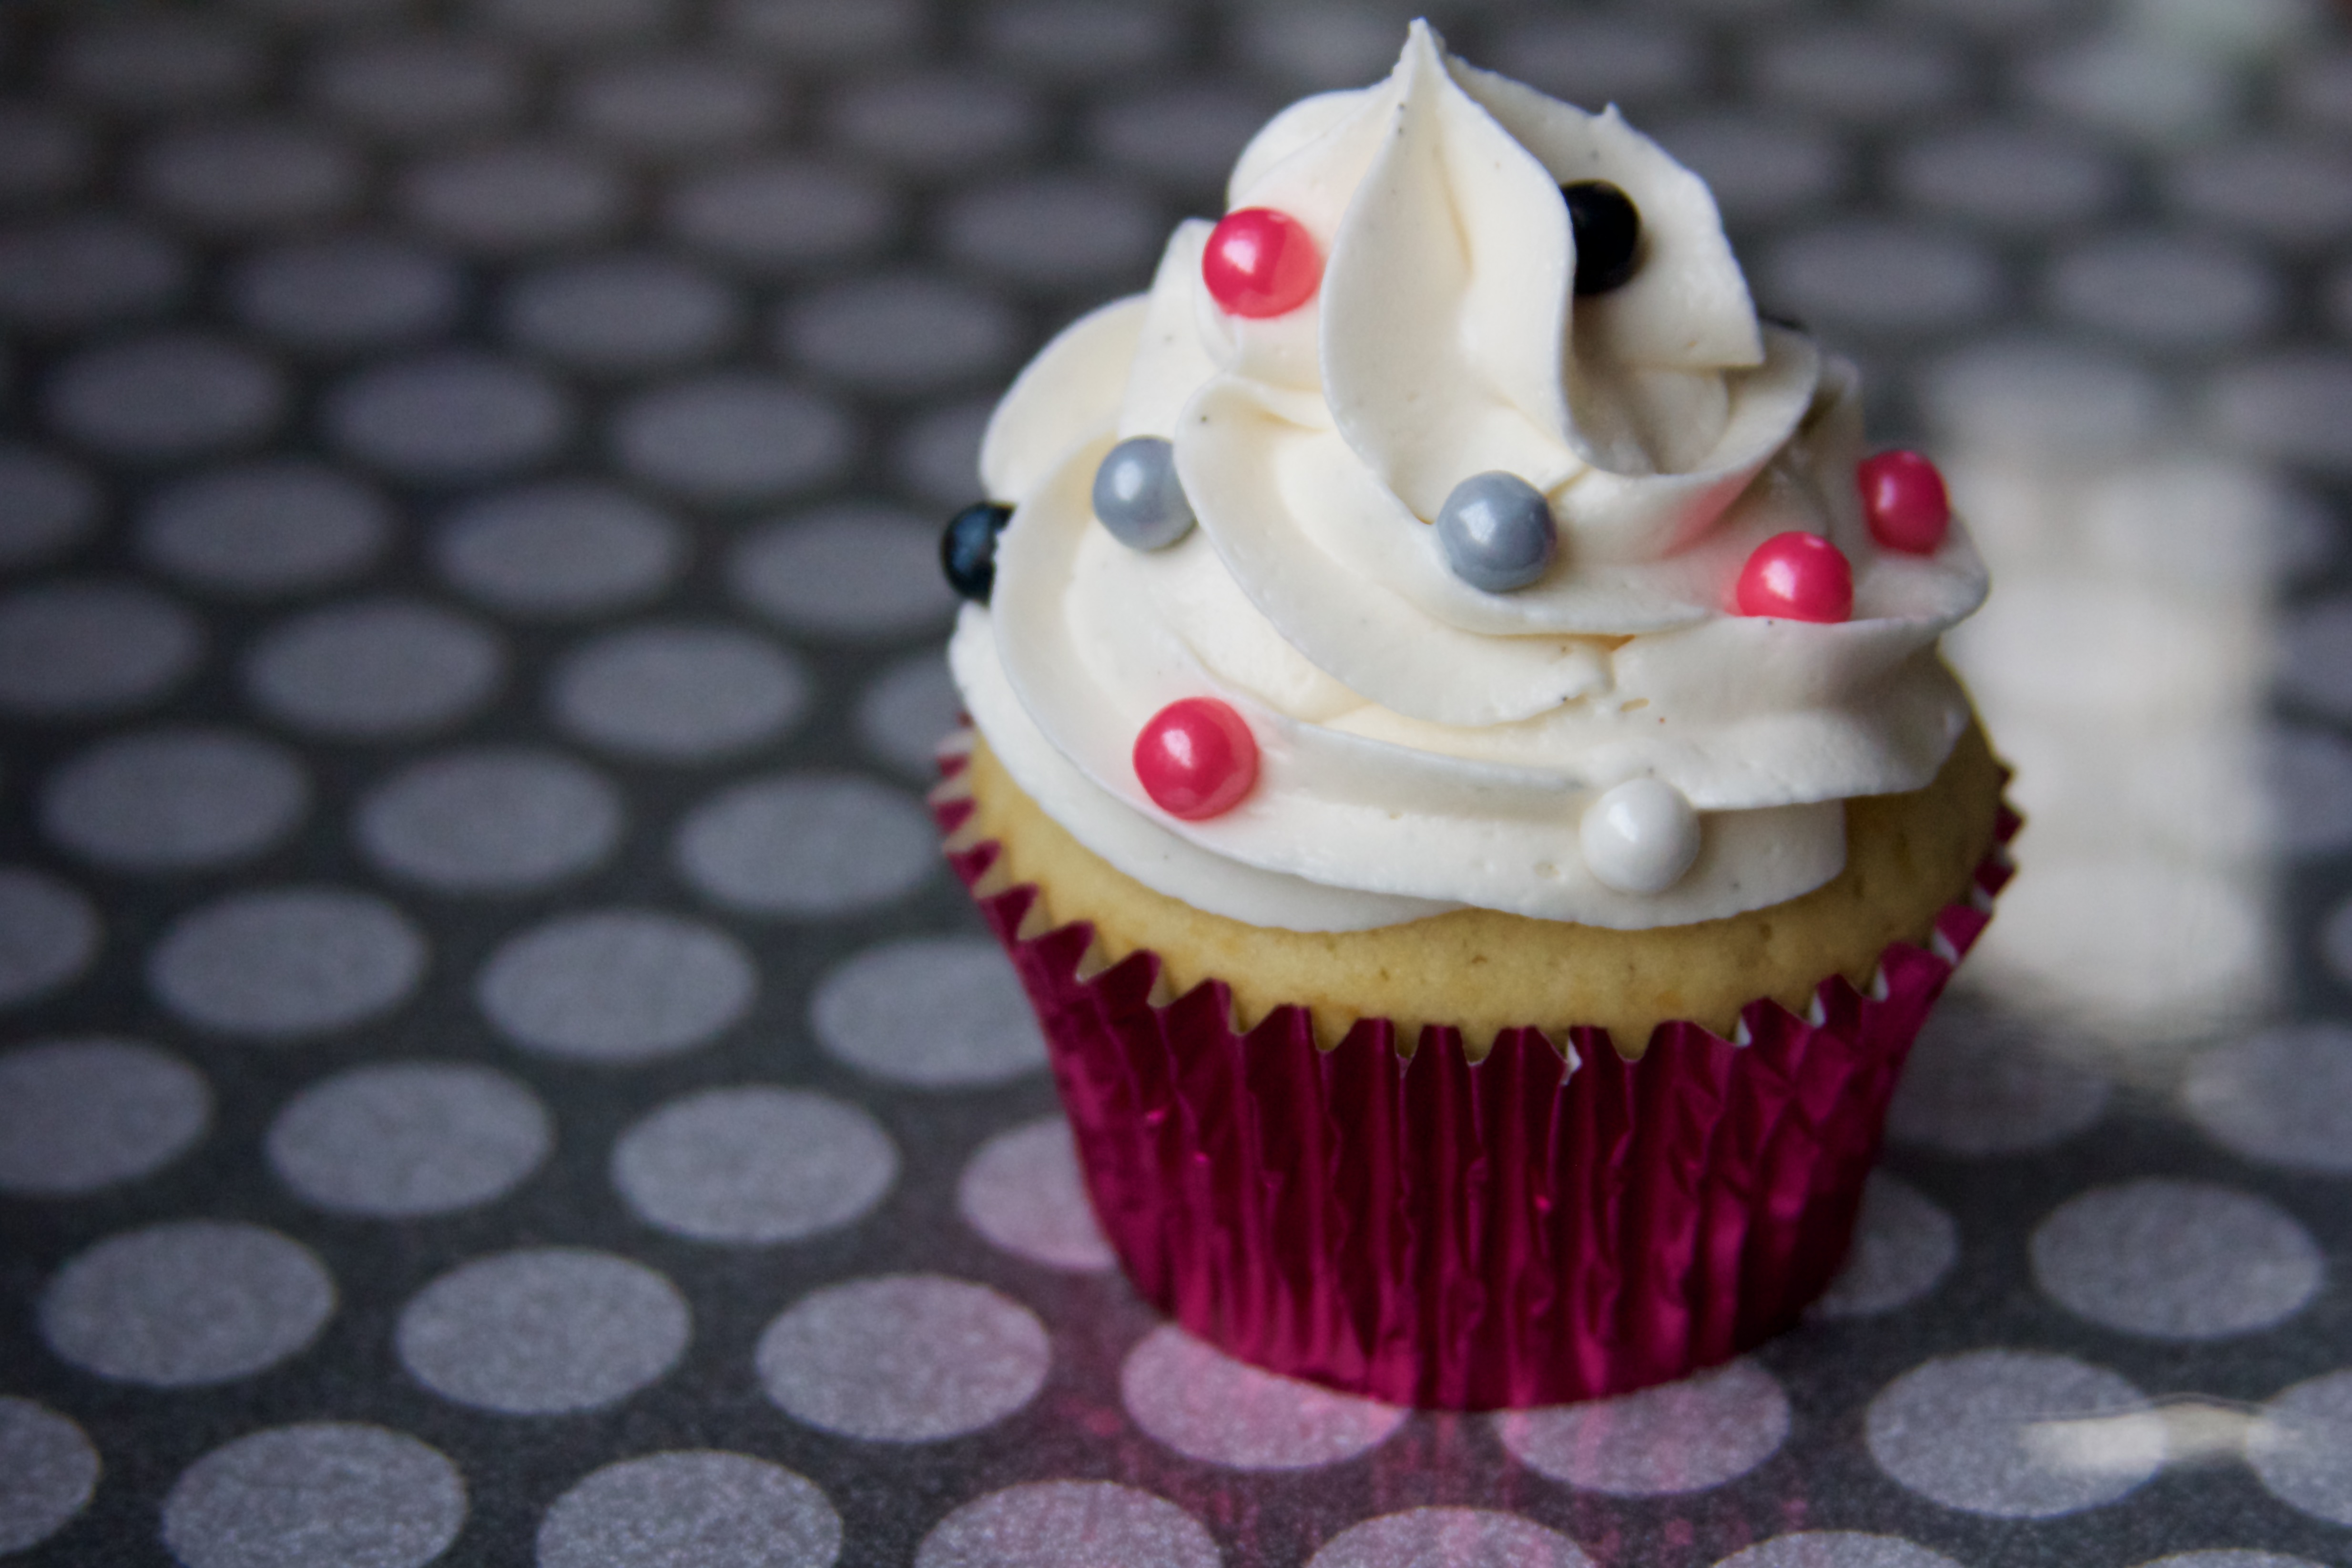
What could be better to celebrate the new chapter of cooking life than some simple celebration cupcakes? Whether you have a birthday, an office party, or just a bad day, these cupcakes will put a smile on everyone’s face. They taste familiar, like your childhood birthday parties, and you will love them! Whether you’re a novice baker or you have some tasty treats in your repertoire, these cakes are simple to prepare and disappear of the plate quickly.
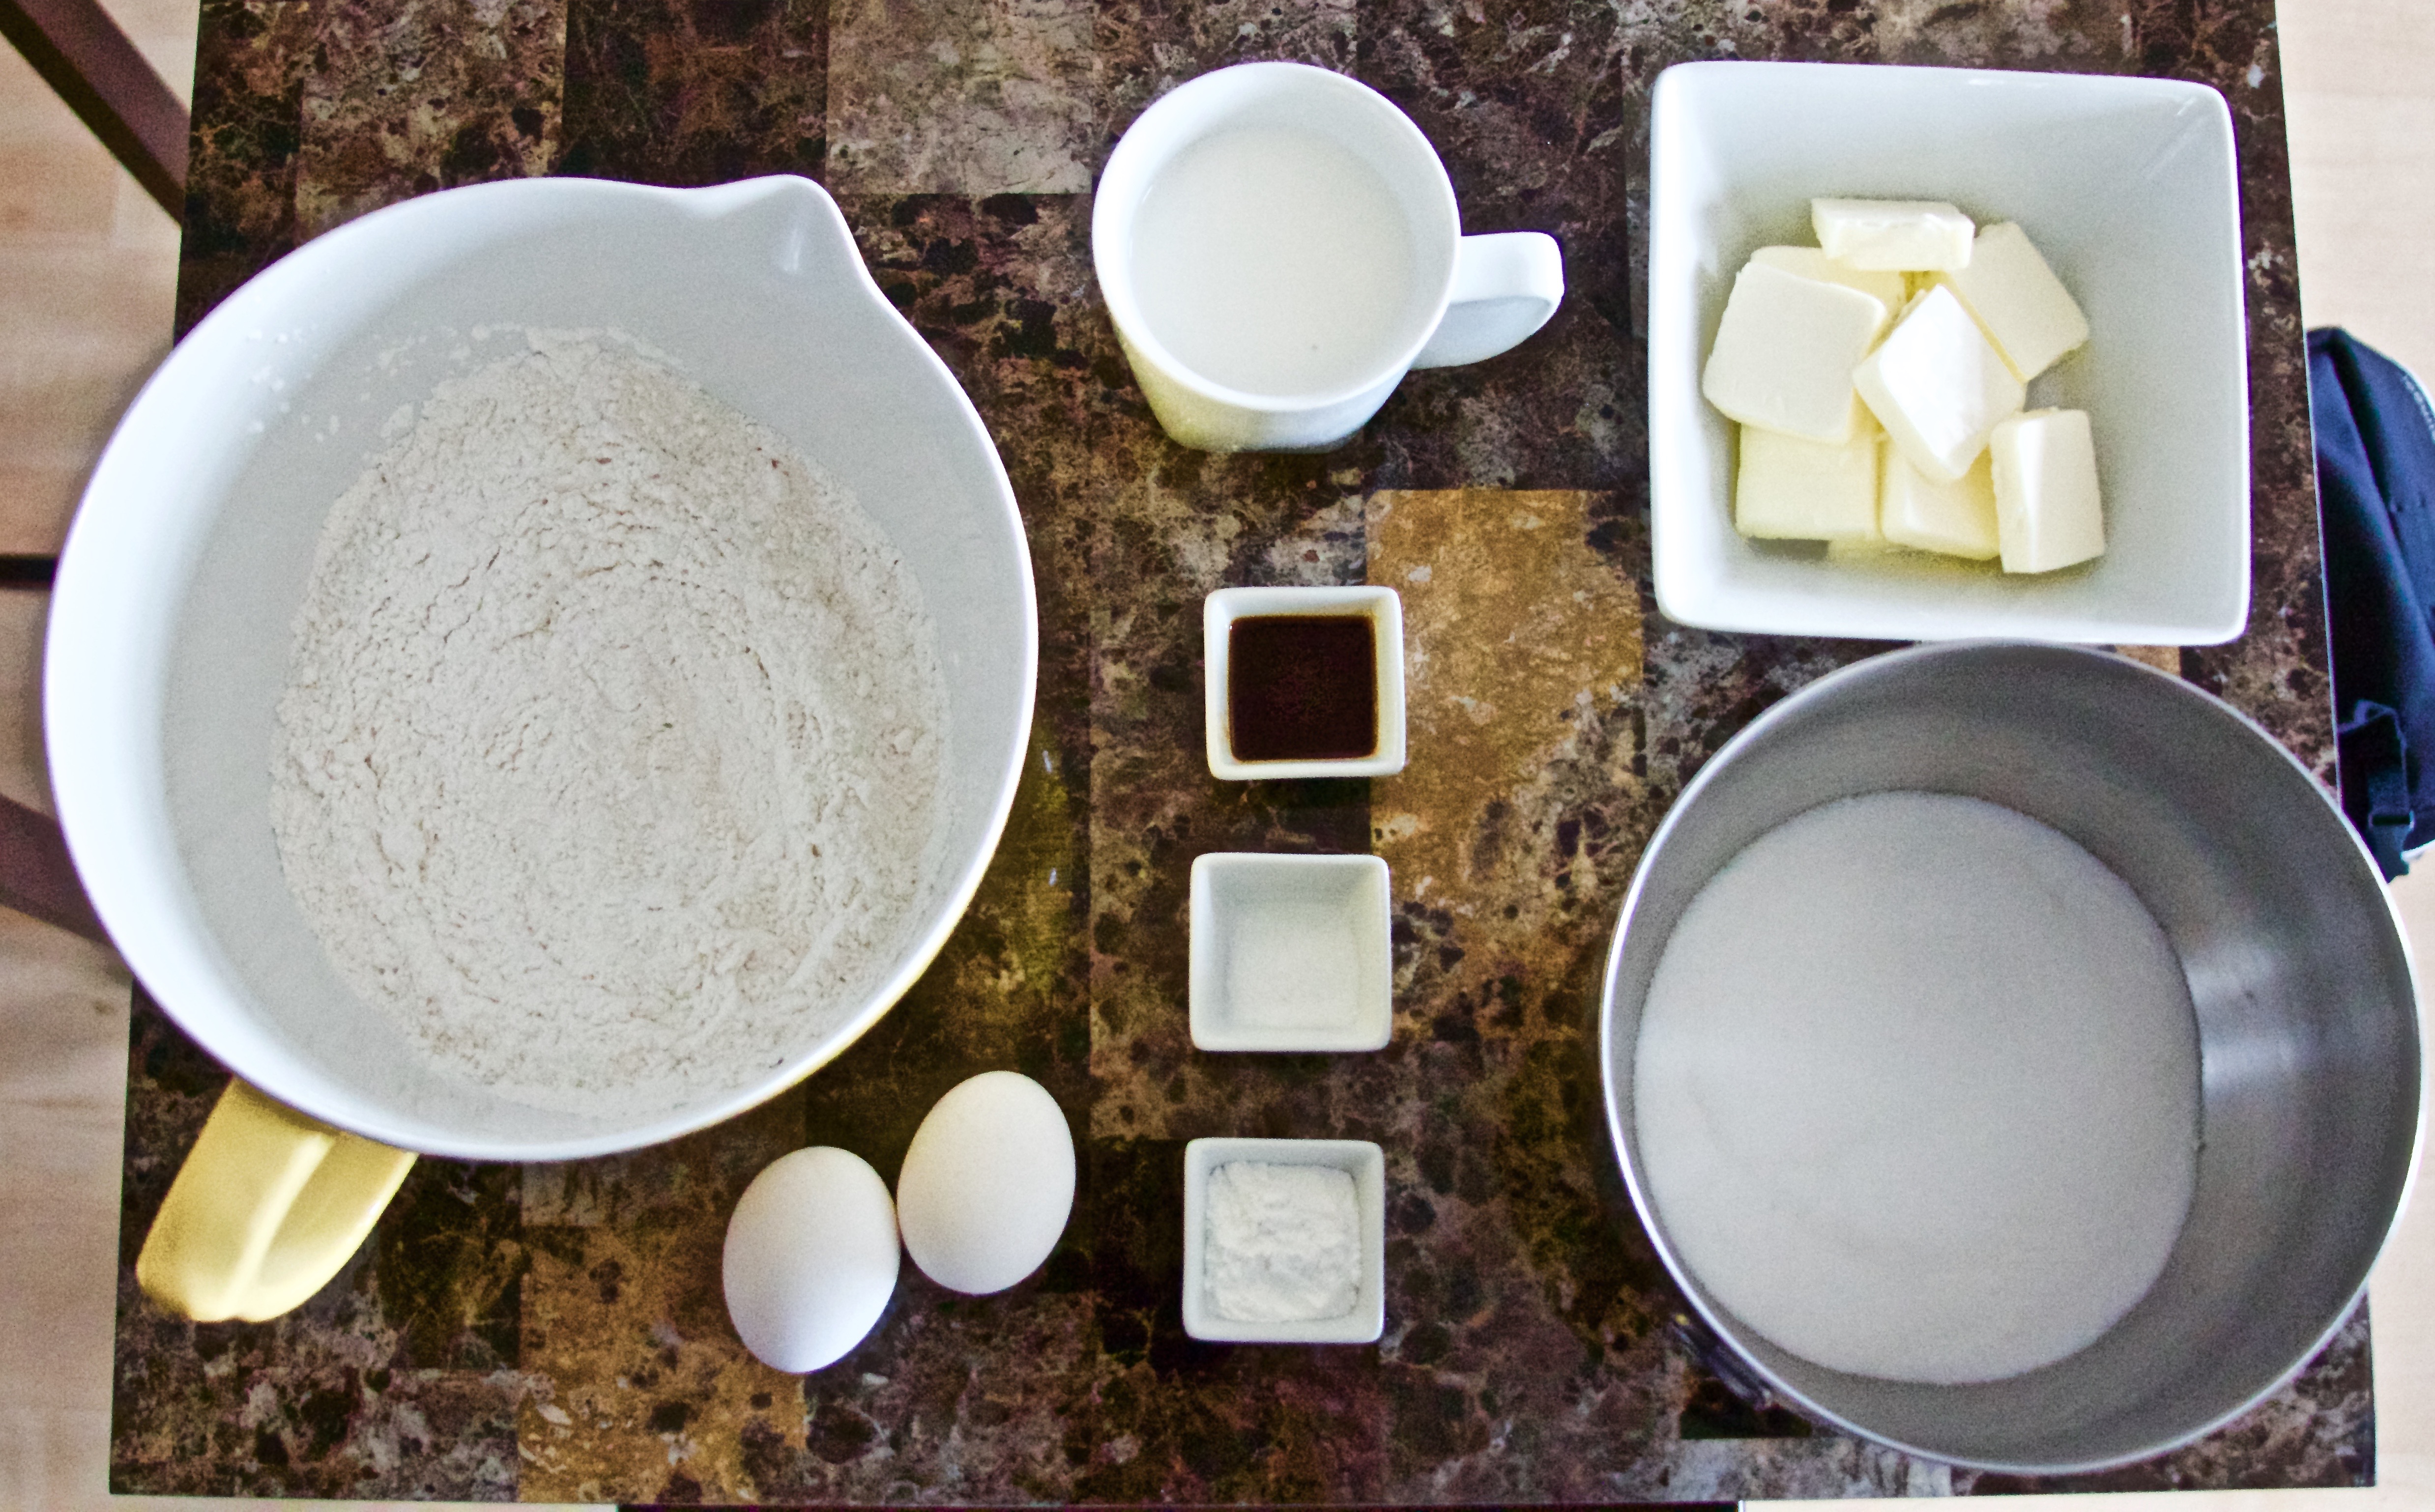
I always start off with my ingredients. Prepping ahead makes for easy baking. Now, that’s not to say I don’t ever get an idea and toss something else in. That happens quite a lot, actually. But you can always try to measure first!
A FEW THINGS BEFORE WE GET STARTED.
- One of my most prized possessions is my kitchen scale. When I cook, I eyeball it. When I bake, I like to be precise. This way, you know that the chemistry is working. Therefore, I will be offering measurements in a variety of ways – you pick what works for your kitchen style
- When I was getting into baking, I had a lot of questions about why certain things have to be a certain way. When I think that an explanation is needed, I will put the question that’s popping up in your head in pink and the reason/ answer in orange
- I will add tips and tricks here and there in purple
Step One.
Prepare all of your ingredients – measure them out and get them ready to go. Refer to the recipe at the bottom for the amounts.
You have probably read many recipes that tell you to let the eggs warm up ahead of time – what’s with that?
Room temperature eggs incorporate more evenly into your batter and whip to a much fluffier volume. So, while this is pretty important for a cheesecake or a meringue, I have not found any dire need to let my eggs hang out on the counter for a while before baking plain ole cake.
Step Two.
Mix those dry ingredients in a separate bowl. A fork is best because, well, that’s what everybody says. Joking aside, you want to keep your flour nice and airy.
Step Two.
Add your butter to the mixing bowl and beat on medium for a hot second. Then, add your sugar in there and mix it up. Mix mix mix.
Step Three.
Add your eggs one at a time, scraping down the sides in between each egg. Do not over mix at this point, but you do want the eggs incorporated all the way. Then add your vanilla and mix.
Do the eggs really hate each other that much? Why do they have to be alone?
It actually is an important step – mixing into your fat (butter) is not that easy for eggs to do, so adding them one at a time encourages an even dispersion of ingredients.
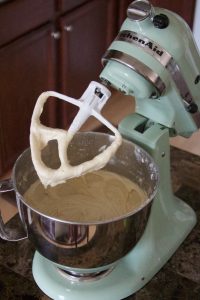 Step Four.
Now put it all together. Add about 1/3 of your dry ingredients and mix. Then add 1/2 of your liquid. Repeat until done!
Again, these ingreidents are for real picky! Who cares what goes in first?! It’s all getting mixed together anyway!
A cake is a crumb mixture. Which means you do not want those strong gluten bonds forming. The bonds form when flour gets friendly with your liquid. So they need their “room for Jesus,” as they always used to say at school dances, which is what the fat does. By added the dry ingredients first, you are protecting the flour with a layer of fat, which will give you a good crumb in the end.
Step Five.
In the oven it goes!
 Now you can start your frosting. It is important that the butter is at room temperature. I always beat the butter first before adding the sugar. Then whip it good! Add the cream to your desired consistency, and there you go.
I use Wilton frosting bags and tips for a special finish. If you just want to top the cakes off with a knife swirl of frosting, that’s totally ok!
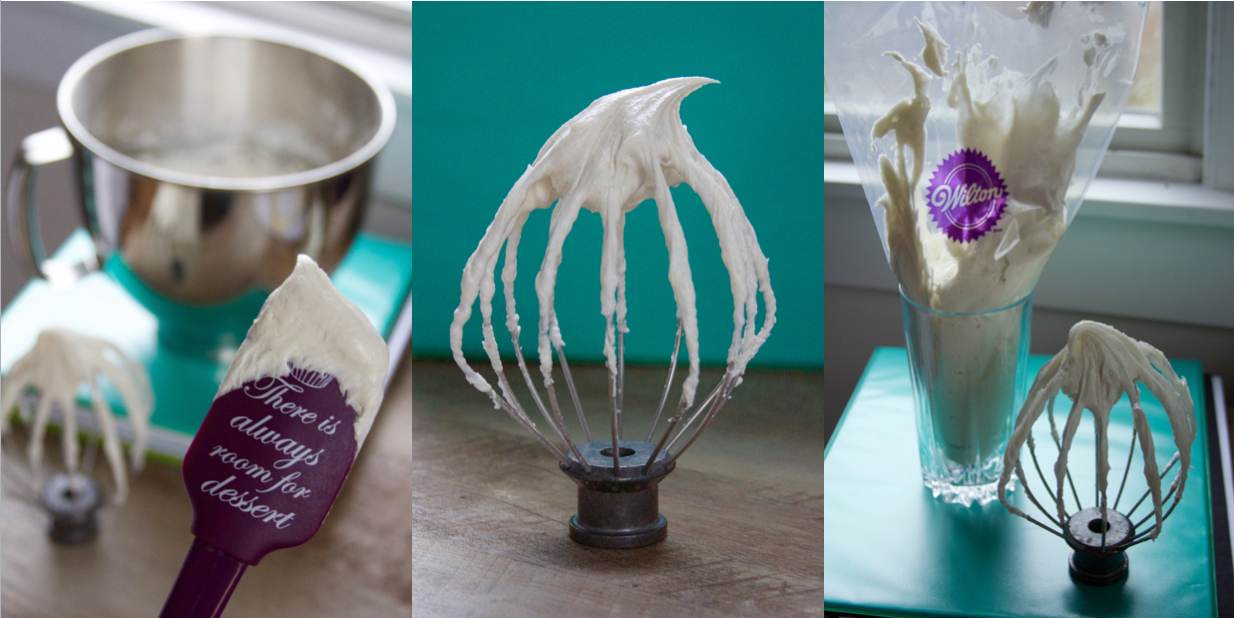
Once you cut the bottom of the bag and put the frosting tip in, rest the bag in a drinking glass – it supports the bag nicely so that you can use both hands to fill ‘er up!
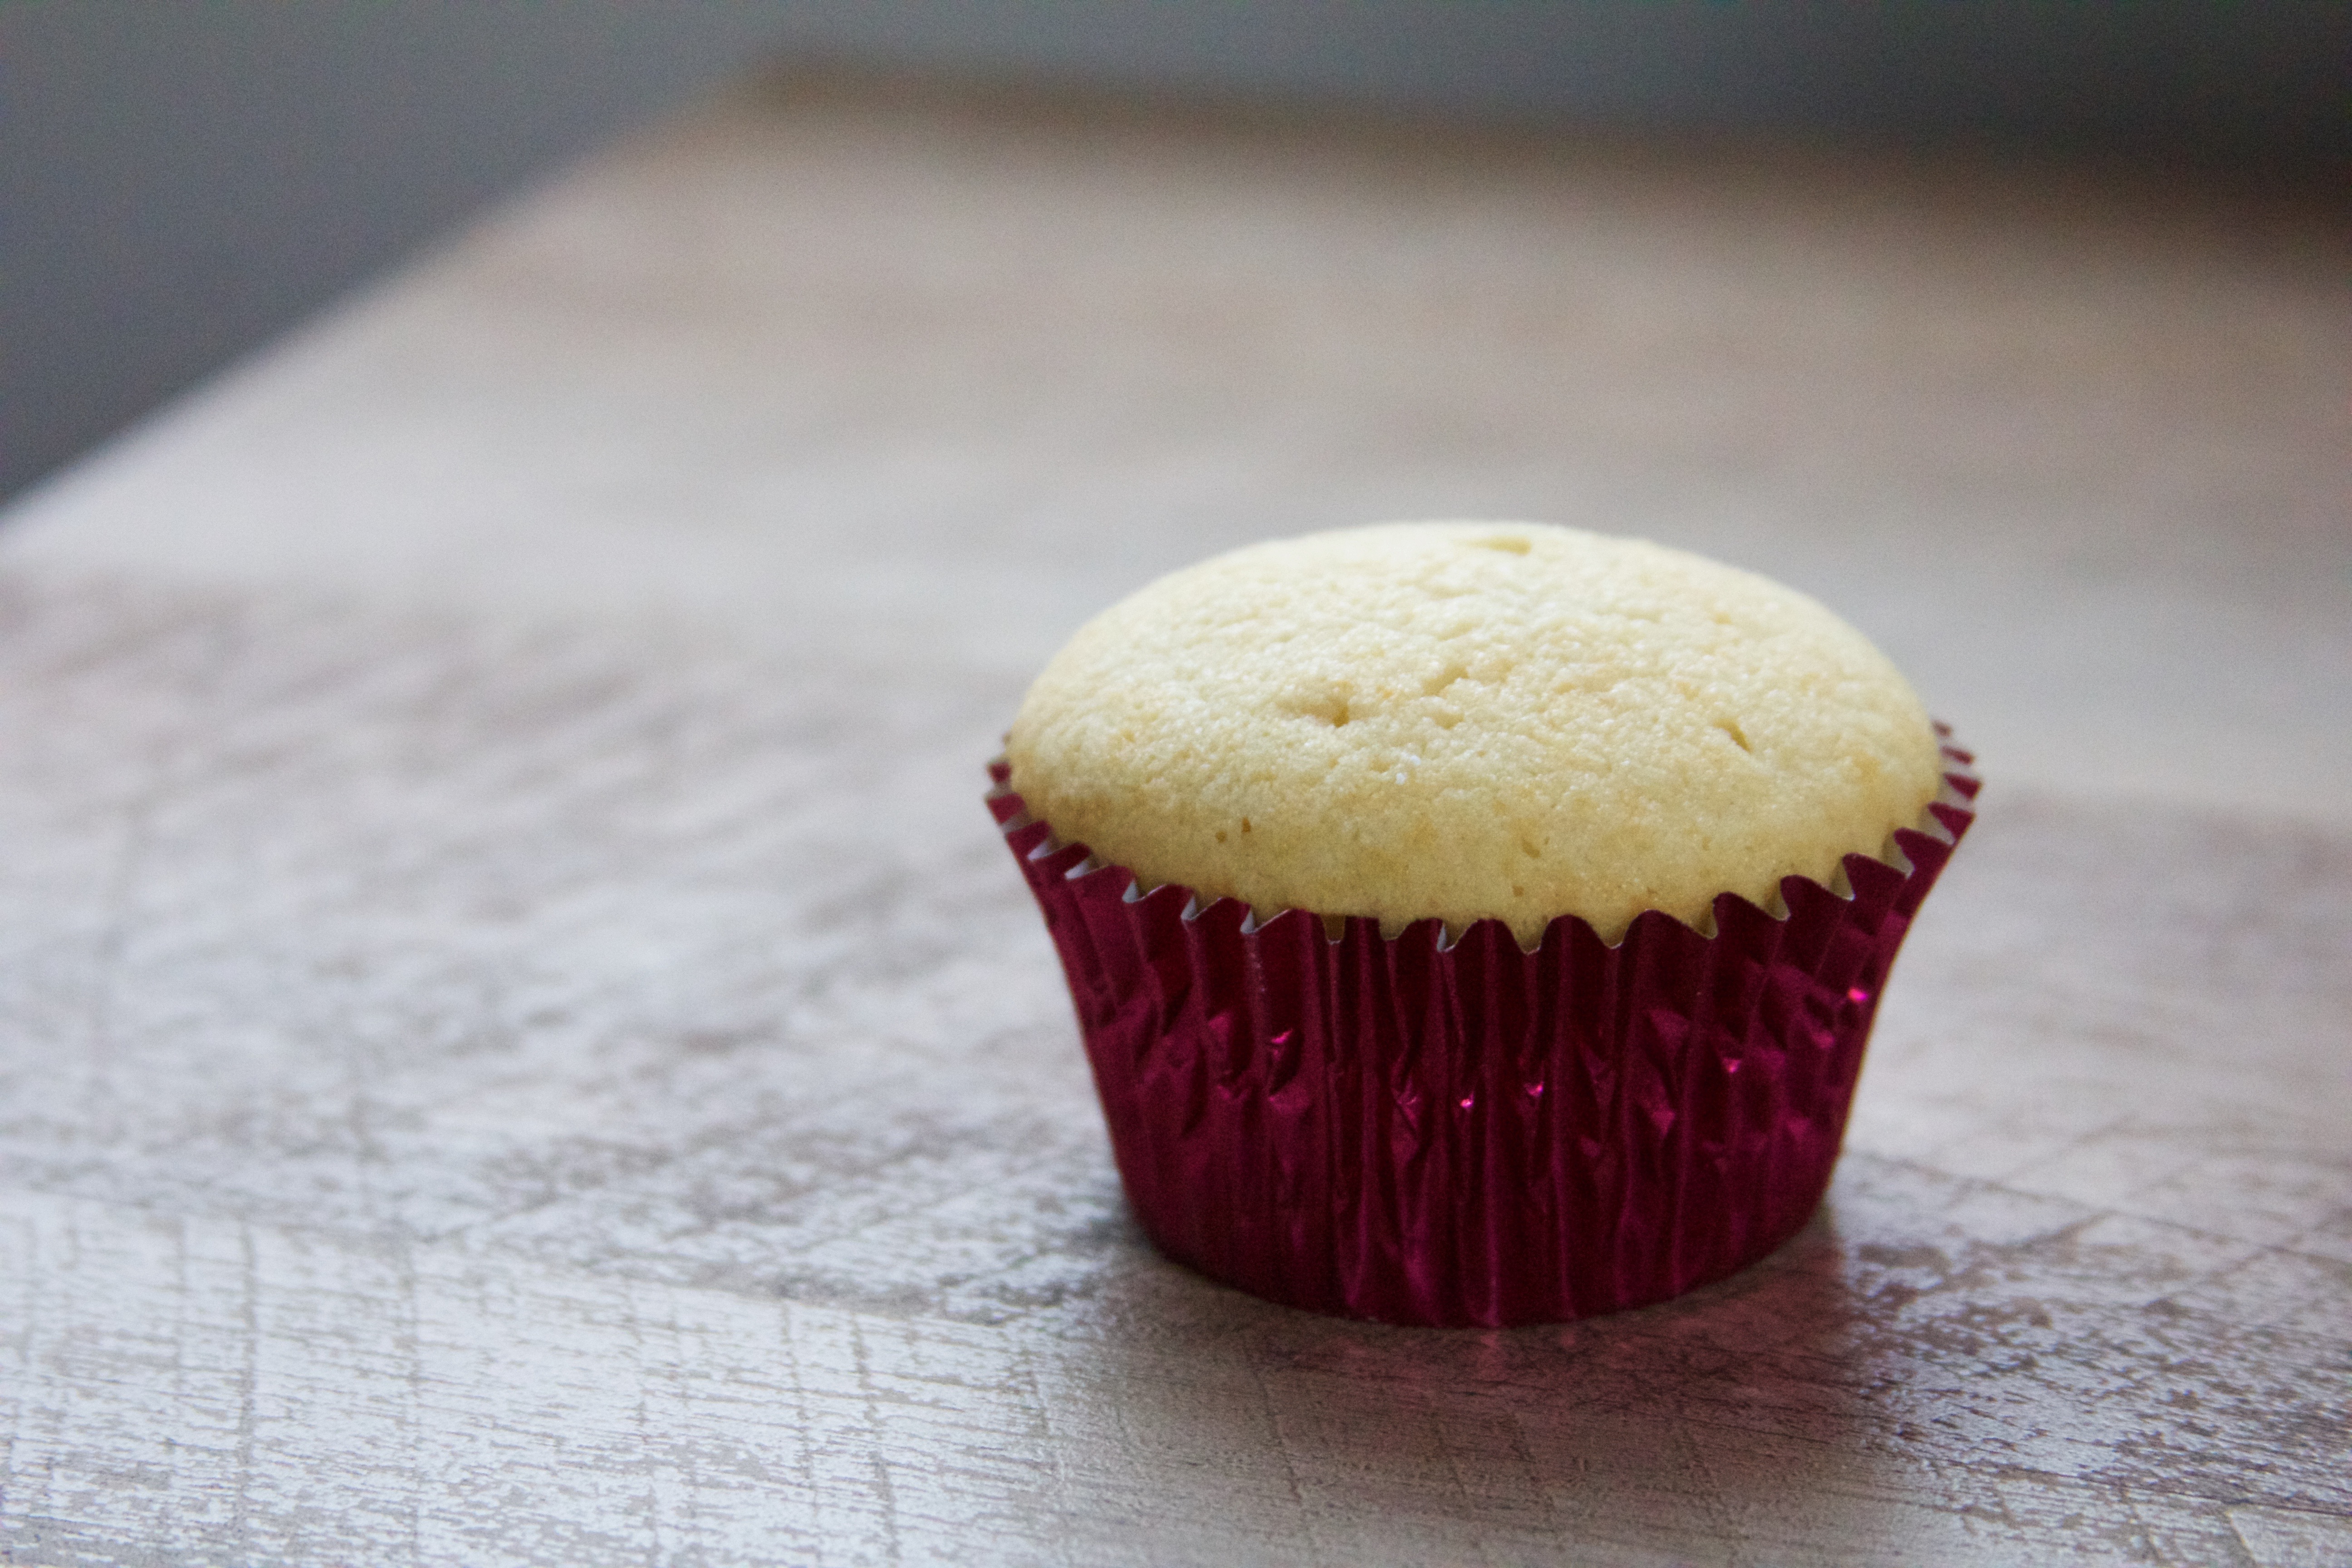
Step Six.
Pipe. Eat. Om nom nom.
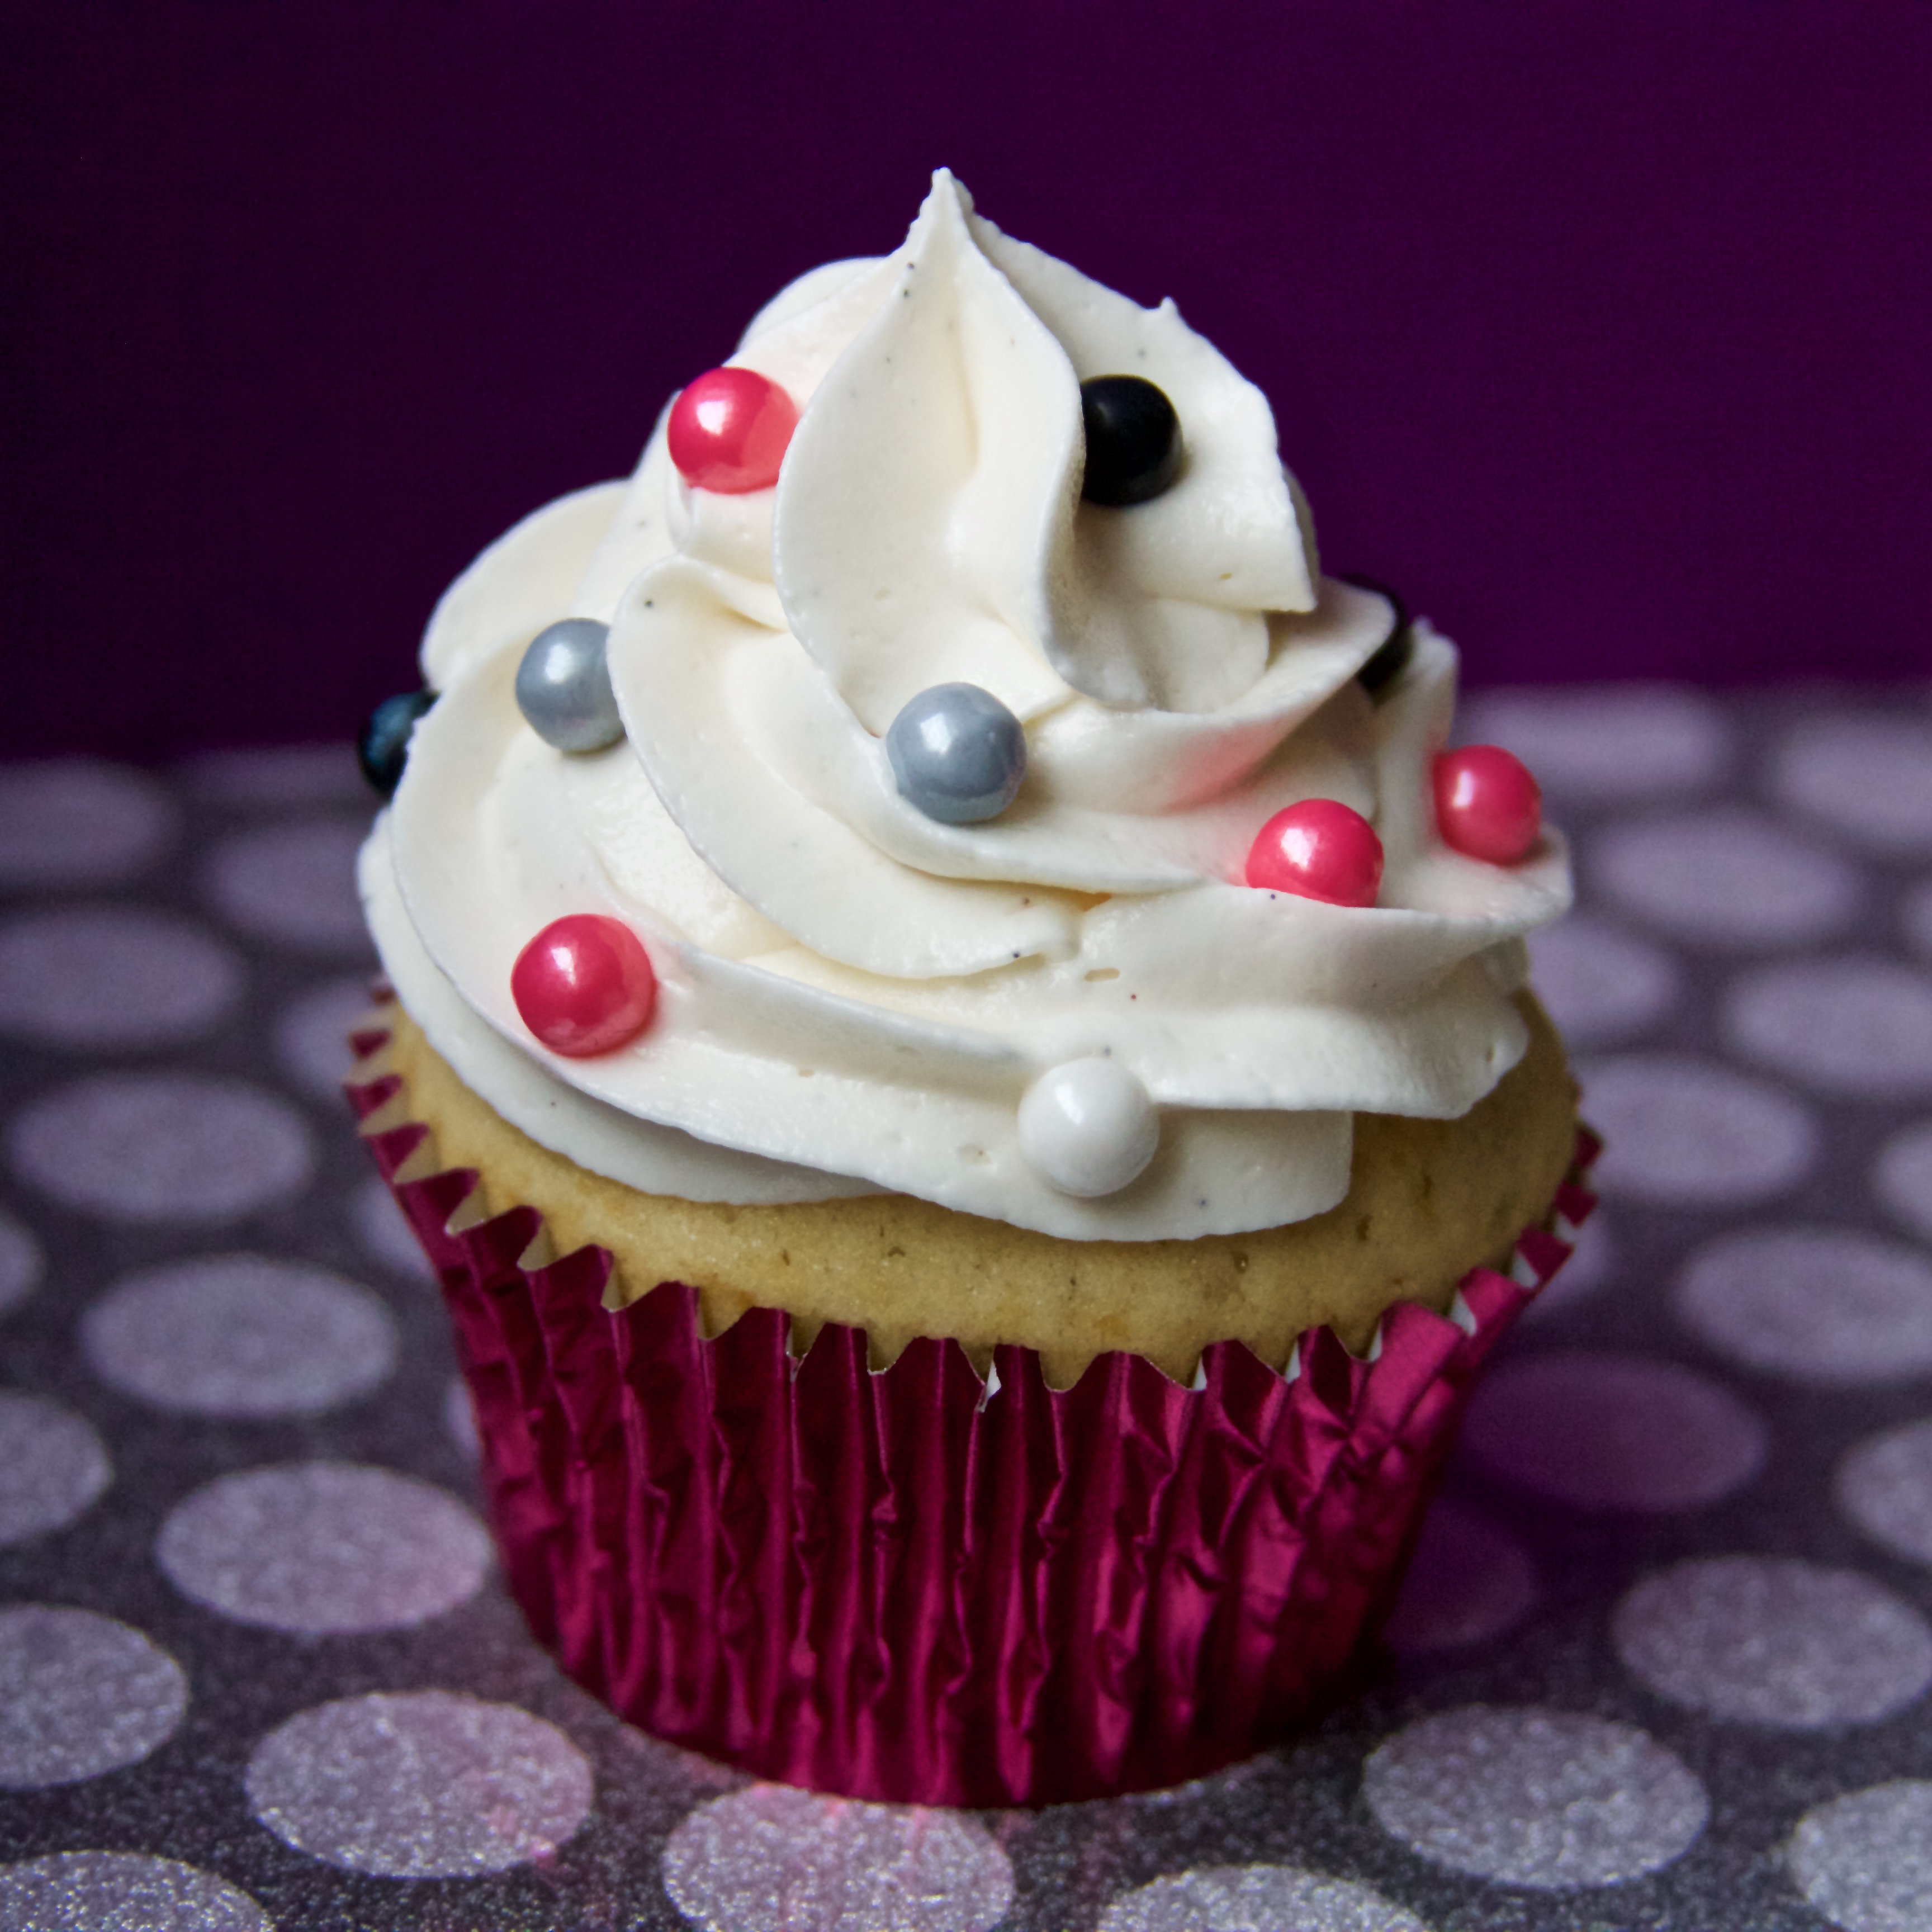

A tasty treat for any occasion! Simple to make but absolutely delicious.
Ingredients
- 2 cups all purpose flour (7 oz // 280 g)
- 2 tsp baking powder (8 g)
- 1/2 tsp salt (2.5 g)
- 1/2 cup (1 stick) unsalted butter, softened (4 oz // 113 g)
- 1 1/2 cups granulated sugar (12 oz // 330 g)
- 2 eggs (100 g)
- 1 1/2 tsp vanilla extract (7.5 mL)
- 3/4 cup whole milk (6 oz// 180 mL)
- 1 cup (2 sticks) butter, softened (8 oz // 226 g)
- 4 cups powdered sugar, sifted (16 oz // about 400 g)
- 2 tsp vanilla extract (10 mL)
- 2-4 Tbsp heavy whipping cream (1-2 oz // 28 - 56 mL)
Instructions
- PREP STEP. Preheat your oven to 350°F. Put your fancy liners of choice into your cupcake tin. Measure out the ingredients. You're all set!
- With a fork, mix together your dry ingredients (flour, baking powder, salt) in a bowl.
- Add your butter (it MUST be soft!) to a mixing bowl. With either your stand mixer or a hand mixer, beat the butter on high for about a minute so that it loosens up. Add your sugar to the bowl, and return to high speed for three minutes, until the mixture is light and airy.
- Add you eggs one at a time, beating on medium until incorporated after each addition. Next, add your vanilla and beat on medium until combined. Make sure to scrape down the bowl at this point, so that everything will be evenly mixed.
- Time for the dry! Add about 1/3 of your dry mix and incorporate with low speed. When that is mixed in, add 1/2 of your milk. Again, beat on low until incorporated. Repeat this process until all ingredients are added - make sure that you start and end with dry! (See why in the recipe intro). Do not overmix! Once everything is evenly distributed, it's good to go.
- Fill your cupcake liners 2/3 - 3/4 full. I like to use these scoops - they have awesome spatula edges to get all that tasty batter. Though I do not officially recommend eating raw egg, I usually do a taste test at this point =]
- Bake, bake, bake. Leave them in there for about 18 - 22 minutes, depending on your oven. Don't let them overbake! Check if they're done with a toothpick - if it's clean, they're ready!
- While the cupcakes cool, prepare your frosting. Add all of the butter to your mixing bowl. With a stand or hand mixer fitted with the whisk attachment, beat the butter on high for two minutes. Add your vanilla and beat for another minute.
- One cup at a time, add your sifted powdered sugar. Now, if you don't want to go to the trouble of sifting, that's ok, it just won't come out quite as fluffy. If you're skipping this step, at least fill the measuring cup with the sugar using a fork. This will keep it somewhat airy.
- Once all of the sugar is incorporated, beat the frosting on high for one minute. Add at least 1 Tbsp of the cream - I usually end up doing about 3, but it depends on what you want out of your frosting. See the note below for more tips on this.
- Continue to beat the frosting for 5 more minutes. Whip it good!
- Eat however much of that frosting your conscience/ tummy will allow.
- Once the cakes are cool, they are ready to frost! Either just spread it on with a knife or prepare your bag by snipping off the tip and inserting the frosting tip you want.
- Scoop the frosting into a piping bag (as mentioned before, a cup works well here to hold the bag). Pipe away!
- Decorate as desired - whatever you imagine, you can make!
Notes
Frosting Note - there are TONS of frosting recipes out there. Why? Because the ratios don't matter. Whatever you like, go for it. If you like less sugar, cut out up to 1 1/2 cups. If you like frosting super creamy, add more cream. As long as you like how it tastes and it will spread or pipe the way you need it to for what you're doing, go for it. Rules are for baking, not frosting.
© Adventures of a Frostaholic